Wanting to purchase a second-hand airless paint sprayer? It is crucial to thoroughly test the equipment to ensure it is in proper working condition before finalizing your purchase. This article will guide you through a detailed, step-by-step process on how to effectively test a pre-owned airless paint sprayer.
First, we’ll inspect the exterior for any damage that could affect its performance.
Then, we’ll test the power supply to ensure it’s delivering the necessary voltage.
Next, we’ll check the pressure settings and examine the spray nozzle for any clogs or defects.
After that, we’ll move on to testing the pump, verifying the trigger and safety features, and assessing the spray pattern and coverage.
We’ll also consider the cleanliness and maintenance of the sprayer, as well as the price and warranty offered by the seller.
By following these detailed steps, you can confidently evaluate a used airless paint sprayer and make an informed decision before making a purchase.
Key Takeaways
- Inspect the exterior for damage, including dents, scratches, and signs of wear.
- Test the power supply for functionality, checking for fraying or damage to the cord and ensuring the motor runs smoothly.
- Check the pressure settings and spray gun for consistent pressure and adjust as needed for desired spray pattern.
- Examine the spray nozzle for clogs, damage, and adjust the spray pattern using the nozzle adjustment knob if necessary.
Inspect the Exterior for Damage
Inspect the exterior of the airless paint sprayer for any dents or scratches that may indicate previous misuse or mishandling.
Check the motor for visible damage or signs of wear. Ensure that the motor runs smoothly and without any strange noises.
Inspect the filters for any signs of clogging or damage. Clogged filters can affect the sprayer’s performance and lead to uneven paint application. Make sure that both the intake and outlet filters are clean and free from debris.
After thoroughly inspecting the exterior and motor functionality, proceed to test the power supply. A successful paint spraying experience relies on a reliable power supply.
Test the Power Supply
Plug in the power cord and ensure that it’s securely connected to verify the functionality of your airless paint sprayer. Testing the power supply is crucial to determine if the motor is working properly and if the cord is in good condition. To test the motor, turn on the airless paint sprayer and listen for any unusual noises or vibrations. If the motor runs smoothly without any issues, it indicates that it is functioning correctly. Additionally, check the cord for any signs of fraying or damage. Ensure that there are no exposed wires or loose connections, as this can pose a safety hazard. Once you have tested the power supply and verified that everything is in working order, you can move on to the next step of checking the pressure settings.
Check the Pressure Settings
When testing the pressure settings on a used airless paint sprayer, it’s important to adjust the settings and carefully observe the gauge for any fluctuations. This will ensure that the pressure is consistent and suitable for the task at hand.
Additionally, it’s crucial to test the spray gun to ensure that the pressure remains consistent while in use. This will help identify any potential issues with the sprayer, such as leaks or irregularities, that may affect the quality of the paint application.
Adjust the pressure settings and observe the gauge
To get started, crank up the pressure settings on the airless paint sprayer and keep an eagle eye on the gauge. Adjusting the pressure settings is crucial to ensure optimal performance and achieve the desired spray pattern.
There are different adjustment techniques depending on the specific model, but most airless paint sprayers have a pressure control knob or dial that allows you to increase or decrease the pressure. While adjusting, it’s important to pay attention to the pressure gauge accuracy. Make sure the gauge is properly calibrated and functioning correctly to get an accurate reading.
Once you have adjusted the pressure settings, it’s time to test the spray gun to ensure consistent pressure throughout the entire spraying process. This will help achieve a uniform and professional-looking paint finish.
Test the spray gun to ensure consistent pressure
Let’s give the spray gun a whirl and make sure the pressure stays consistent throughout. Start by adjusting the pressure settings to the desired level, taking into account the type of paint and surface you’ll be working with.
Once the pressure is set, it’s important to check the accuracy of the gauge. Use a separate pressure gauge to compare readings and ensure they match. This will give you confidence that the airless paint sprayer is functioning properly.
Now, it’s time to test the spray gun itself. Hold the gun at a consistent distance from the surface and pull the trigger. Observe the spray pattern and make sure it remains consistent without any fluctuations. Look for any leaks or irregularities that may affect the pressure or the spray pattern, as these could indicate underlying issues with the airless paint sprayer.
Transitioning into the next section, it’s crucial to thoroughly inspect the equipment for any signs of leaks or irregularities.
Look for any leaks or irregularities
Check for any leaks or irregularities in the spray gun, as these could be potential red flags that need immediate attention. To evaluate the performance of a used airless paint sprayer, it is essential to thoroughly inspect the spray gun for any signs of leaks or irregularities. This can be done by visually examining the gun and ensuring that there are no visible cracks or loose fittings. Additionally, it is important to test the gun by attaching it to the sprayer and activating the trigger. Observe the spray pattern for any inconsistencies or interruptions, as these could indicate clogs or blockages in the gun. By identifying any leaks or irregularities in the spray gun, you can address them promptly and ensure optimal performance. Moving forward, we will examine the spray nozzle to further assess the condition of the airless paint sprayer.
Examine the Spray Nozzle
Before testing the used airless paint sprayer, it is important to examine the spray nozzle. This step is crucial because any problems with the nozzle can impact the quality of the paint job. Here are four things to check when inspecting the spray nozzle:
-
Look for any clogs or blockages: Check if there is any dried paint or debris blocking the nozzle. Use a small brush or needle to clear any obstructions.
-
Inspect for wear and tear: Look for any signs of damage or corrosion on the nozzle. If it is cracked or worn out, it may need to be replaced.
-
Check the spray pattern: Test the spray pattern by spraying water onto a test surface. Ensure that the pattern is even and consistent, without any unevenness or sputtering.
-
Adjust the spray pattern if necessary: If the spray pattern is uneven, use the nozzle adjustment knob to fine-tune it until you achieve the desired result.
By inspecting the spray nozzle and troubleshooting any spray pattern issues, you can ensure optimal performance when testing the pump of the used airless paint sprayer.
Test the Pump
To test the pump of a used airless paint sprayer, I first fill the paint container and prime the pump by following the manufacturer’s instructions.
Once the pump is primed, I activate it and carefully observe its operation for smoothness. I check for any unusual noises or vibrations, as these can indicate potential issues with the pump’s functioning.
Fill the paint container and prime the pump
First, adjust the pressure according to the manufacturer’s instructions. This prevents issues during operation.
Next, troubleshoot any leaks or loose connections. Tighten or replace damaged parts to avoid paint leakage.
Now, fill the paint container using a funnel. Be careful not to overfill it and follow the recommended paint-to-thinner ratio.
After filling, prime the pump by turning on the sprayer and engaging the prime mode. This removes air pockets and prepares the pump for efficient operation.
Once the pump is primed, check for smooth operation. Activate the pump and observe the flow of paint. Make sure the spray pattern is consistent and there are no unusual vibrations or clogs.
Now, let’s move on to the next step and activate the pump to check for smooth operation.
Activate the pump and check for smooth operation
After filling the paint container and priming the pump, it’s time to activate the pump and check for smooth operation. This step is crucial in ensuring that your used airless paint sprayer is in good working condition before you start your painting project.
To activate the pump, simply turn on the power switch and adjust the pressure setting according to the manufacturer’s instructions. It’s important to note that each paint sprayer may have different pressure settings, so be sure to consult the user manual.
Once the pump is activated, observe the operation closely. The pump should run smoothly without any hesitations or irregularities. If you notice any issues such as pulsations, uneven spray patterns, or paint clogs, it’s important to troubleshoot and address these problems before proceeding with your project.
Now, let’s move on to the next step and look for any unusual noises or vibrations that may indicate further issues with the paint sprayer.
Look for any unusual noises or vibrations
During the activation of the pump, it’s crucial to be vigilant for any unexpected noises or vibrations that could indicate underlying issues with the sprayer.
Start by inspecting for physical damage, such as cracks or dents, which may affect the smooth operation of the machine.
Check for loose or worn parts, such as bolts or gaskets, as these can cause vibrations or rattling noises during operation.
Pay close attention to the motor, as any unusual grinding or squeaking sounds may suggest a malfunction.
Additionally, observe the spray gun for any abnormal vibrations that could affect the quality of the paint application.
It’s important to address any of these issues before proceeding to evaluate the hose and connections, ensuring a reliable and efficient performance.
Evaluate the Hose and Connections
Examine the hose and connections on the used airless paint sprayer to assess their condition and ascertain if any repairs or replacements are needed. It is important to inspect the hose fittings and check for any leaks or damage in the connections. These components are crucial for the proper functioning of the sprayer and any issues could lead to inefficient paint application or even accidents. To help you evaluate the hose and connections, refer to the table below:
| Aspect to Evaluate | What to Look For |
|---|---|
| Hose Condition | Any cracks, splits, or wear |
| Fitting Condition | Tightness and proper sealing |
| Connection Leaks | Any signs of paint or air leakage |
| Overall Integrity | Any signs of damage or weakness |
By carefully examining the hose and connections using the information provided in the table, you can determine if any repairs or replacements are necessary. Once you have assessed these components, you can move on to verifying the trigger and safety features of the airless paint sprayer.
Verify the Trigger and Safety Features
When evaluating a used airless paint sprayer, it’s crucial to verify the trigger and safety features.
I always test the trigger for smooth operation, ensuring that it’s easy to pull and release.
Additionally, I check all the safety features to make sure they’re functional, such as the safety lock and pressure relief valve.
Lastly, it’s important to ensure that the sprayer shuts off properly when not in use, preventing any accidental paint spraying.
Test the trigger for smooth operation
To ensure a smooth trigger operation, follow these steps:
-
Check the trigger sensitivity by gently squeezing it. It should respond immediately and smoothly, without any delay or jerky movements. If you notice any issues, such as sticking or inconsistency, it may indicate a problem with the trigger mechanism that needs to be addressed.
-
Once you’ve tested the trigger, it’s time to move on and check that all safety features are functional. Remember, safety is paramount when using any paint sprayer, so make sure to thoroughly inspect the safety features before proceeding.
Check that all safety features are functional
After ensuring the trigger operates smoothly, the next step in testing a used airless paint sprayer is to check that all safety features are functional. This is crucial to ensure safe and efficient operation. Here’s what to do:
-
Check the safety lock: Inspect the sprayer’s safety lock mechanism to ensure it engages and disengages properly. This prevents accidental spraying and protects against injuries.
-
Inspect the pressure relief valve: Verify that the pressure relief valve is in good condition and releases pressure as intended. This feature prevents the sprayer from becoming overpressurized, reducing the risk of damage or injury.
-
Test the tip guard: Examine the tip guard for any defects or damage. The tip guard is designed to prevent accidental contact with the spraying tip, providing an extra layer of safety.
By checking these safety precautions and inspecting for any defects, you can ensure the sprayer shuts off properly when not in use.
Ensure the sprayer shuts off properly when not in use
Make sure the sprayer properly shuts off when not in use to ensure safety and prevent any potential accidents. One common issue with airless paint sprayers is that they may not shut off properly, which can lead to paint leakage or accidental spraying. To test this, follow these steps:
- Start by turning the sprayer on and letting it run for a few minutes to ensure it is working properly.
- Once you are done spraying, release the trigger and wait for the sprayer to shut off automatically. It should stop spraying and the motor should turn off.
- If the sprayer does not shut off or continues to spray after releasing the trigger, there may be a problem with the shut-off mechanism.
- Check the user manual for troubleshooting tips or contact the manufacturer for assistance.
- Proper maintenance is crucial for ensuring the sprayer shuts off properly. Regularly clean and inspect the shut-off mechanism for any debris or damage.
By addressing common issues with airless paint sprayers and following these tips for maintaining the sprayer’s shut-off mechanism, you can prevent accidents and ensure the safety of your painting projects. In the next section, we will discuss how to test the spray pattern and coverage of the used airless paint sprayer.
Test the Spray Pattern and Coverage
Once you’ve got the used airless paint sprayer in your hands, take a moment to unleash its artistic prowess by examining the beautiful dance of paint as it gracefully coats the surface with a mesmerizing spray pattern and flawless coverage.
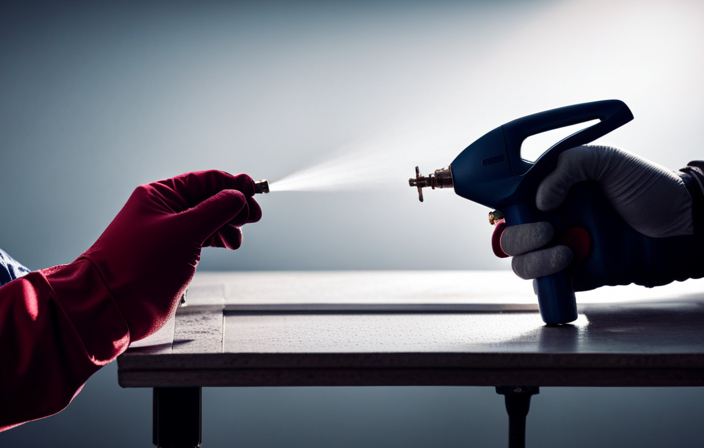
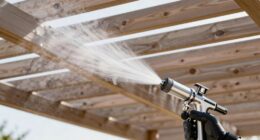
To test the spray pattern, fill the paint sprayer with water and adjust the pressure settings to your desired level. Hold the sprayer at a consistent distance from the surface and trigger the spray gun. Observe the pattern created by the spray, ensuring it is even and consistent throughout.
Next, evaluate the coverage by spraying the water onto a test surface and examining how well it covers the area. Look for any areas of uneven or patchy coverage.
Once you have assessed the spray pattern and coverage, you can move on to assessing the cleanliness and maintenance of the sprayer.
Assess the Cleanliness and Maintenance
To fully appreciate the artistry of the spray pattern and coverage, it’s important to take a moment to assess how clean and well-maintained the sprayer is. Proper cleaning and maintenance are crucial for the optimal performance of a used airless paint sprayer. Here are some cleaning and maintenance tips to ensure the sprayer is in top condition:
- Clean the sprayer after each use to prevent paint buildup and clogging.
- Regularly inspect and replace worn-out or damaged parts, such as filters, nozzles, and seals.
- Lubricate the moving parts to ensure smooth operation and prevent rusting.
Table: Common Maintenance Tasks
| Task | Frequency | Troubleshooting Tips |
|---|---|---|
| Clean sprayer | After each use | Use a cleaning solution and a brush to remove paint residue. |
| Inspect and replace | Regularly | Replace damaged parts promptly to avoid further issues. |
| Lubricate moving parts | As needed | Use a recommended lubricant to prevent friction. |
Considering the price and warranty of a used airless paint sprayer is the next step in making an informed decision.
Consider the Price and Warranty
When considering the price and warranty, it’s important to weigh the investment against the potential cost of repairs or replacements down the line.
It’s crucial to consider the brand reputation and compare different models to ensure you’re making an informed decision. Look for reputable brands that have a track record of producing high-quality airless paint sprayers. Research customer reviews and ratings to gauge their performance and reliability.
Additionally, comparing different models will help you determine which one offers the best features and value for your specific needs. Take into account factors such as motor power, spray pattern options, and ease of cleaning.
By carefully considering the price and warranty, as well as the brand reputation and model comparisons, you can make a confident decision when purchasing a used airless paint sprayer.
Frequently Asked Questions
How long does the warranty typically last for a used airless paint sprayer?
The warranty duration for a used airless paint sprayer varies depending on the manufacturer and model. Typically, the warranty coverage can range from 30 days to 1 year, providing protection against any defects or malfunctions.
Can the pressure settings be adjusted while the sprayer is in use?
While using an airless paint sprayer, pressure settings can be adjusted on the go to achieve the desired spray pattern. Troubleshooting common issues, such as clogging or uneven coverage, can often be resolved by adjusting the pressure settings.
What type of paint is recommended for use with an airless paint sprayer?
For optimal performance with an airless paint sprayer, it is recommended to use paint types such as acrylic, latex, or oil-based paints. These paints should have a viscosity that falls within the manufacturer’s guidelines for best results.
Are there any safety precautions that should be taken when using an airless paint sprayer?
When using an airless paint sprayer, it is crucial to take safety precautions. Proper cleaning techniques and regular maintenance ensure optimal performance and minimize risks. Always wear protective gear and follow manufacturer’s guidelines for safe operation.
How often should the pump be inspected and maintained for optimal performance?
To ensure optimal performance of your airless paint sprayer pump, it should be inspected and maintained regularly. Clean the pump after each use and look for signs of wear and tear, such as leaks or decreased pressure.
Conclusion
In conclusion, when testing a used airless paint sprayer, it’s crucial to be meticulous and thorough. Here are the steps to follow:
- Inspect the exterior for damage.
- Test the power supply to ensure it’s working properly.
- Check the pressure settings and make sure they can be adjusted.
- Examine the spray nozzle for any clogs or damage.
- Test the pump to see if it’s functioning correctly.
- Verify the trigger and safety features, ensuring they work smoothly.
- Test the spray pattern and coverage to ensure it’s even.
- Assess the cleanliness and maintenance of the paint sprayer.
- Consider the price and warranty before making a purchase.
Remember, paying attention to every detail will help you find a proficient paint sprayer.
