I have devoted many years to painting, and a game-changing tool for my art has been the airless paint sprayer. This equipment revolutionizes the way I work, improving efficiency and helping achieve a professional finish. It is crucial to test the sprayer before starting your next project to ensure it works perfectly.
In this article, I’ll guide you through the process of testing an airless paint sprayer step by step.
First, we’ll go over the components of the sprayer, so you have a clear understanding of how it works.
Then, we’ll gather the necessary testing equipment to ensure accurate results.
I’ll show you how to:
- Check for proper assembly and connections
- Prime the pump
- Test the pressure
- Evaluate the spray pattern
- Adjust the spray pattern as needed
- Assess the paint coverage and finish
By the end of this article, you’ll have the knowledge and confidence to test your airless paint sprayer effectively and achieve fantastic results on your painting projects.
Let’s get started!
Key Takeaways
- Disconnect the sprayer from the power source and relieve pressure after testing.
- Thoroughly clean and maintain the sprayer by disassembling the gun, nozzle, and filters.
- Inspect for any damage or wear and replace worn-out parts to ensure proper functioning.
- Practice and gain confidence with the airless paint sprayer by following recommended safety precautions and properly cleaning after each use.
Understand the Components of an Airless Paint Sprayer
Now that I have my hands on an airless paint sprayer, let’s dive right in and explore the various components that make up this powerful tool. Understanding the operation of an airless paint sprayer is essential before testing it.
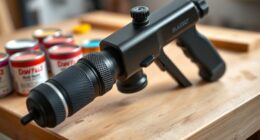
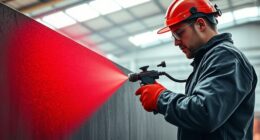
The main components include a motor, pump, hose, and spray gun. The motor powers the pump, which pressurizes the paint and pushes it through the hose. The spray gun, equipped with a nozzle, releases the paint in a fine mist for even coverage.
It’s important to explore different paint types that can be used with an airless paint sprayer, such as latex, oil-based, or lacquer paints. Each type may require specific adjustments in pressure or nozzle size.
Now, let’s move on to the next section about gathering the necessary testing equipment.
Gather the Necessary Testing Equipment
First, grab all the essential tools you’ll need to put your airless paint sprayer through its paces. To make sure you have everything you need, refer to the table below:
| Tools Needed | Purpose |
|---|---|
| Pressure gauge | Measure the pressure of the sprayer |
| Test fluid | Verify the spray pattern and flow |
| Wrenches | Tighten or loosen fittings |
| Safety glasses | Protect your eyes from overspray |
Now that you have the necessary equipment, you can proceed with testing your airless paint sprayer. Start by checking the pressure gauge to ensure it is within the recommended range. Then, fill the sprayer with the test fluid and spray it onto a test surface. Observe the spray pattern and flow, making sure there are no inconsistencies or blockages. If any issues arise, refer to the troubleshooting tips in the user manual. Once you have completed the testing techniques, you can move on to the next section to check for proper assembly and connections.
Check for Proper Assembly and Connections
Before proceeding with the testing process, it’s crucial to ensure that all components of the equipment have been properly assembled and the connections are secure.
Proper maintenance and regular checks are vital for the efficient functioning of an airless paint sprayer. To guarantee a successful test, follow these troubleshooting tips:
- Inspect the spray gun and hose for any signs of damage or wear.
- Check that the filters are clean and free from debris.
- Verify that the pump is securely attached to the motor and the hose is tightly connected.
- Examine the pressure control knob to ensure it is set at the desired level.
By adhering to these proper assembly and connection practices, you can avoid potential issues during testing.
Now, let’s move on to the next section where we will discuss how to prime the pump and test the pressure.
Prime the Pump and Test the Pressure
To get the pump ready and see the pressure in action, you’ll want to give it a good prime and feel the power surging through like a hurricane.
Start by ensuring that the paint sprayer is properly assembled and all connections are secure. Once that’s done, it’s time to prime the pump.
This involves filling the paint container with the desired paint and then turning on the sprayer. Allow the pump to build up pressure by spraying into a waste container until a consistent flow is achieved.
If you encounter any issues during this process, there are a few troubleshooting tips you can try. Check that the paint container is properly sealed, clean any clogs or obstructions in the sprayer, and make sure the pump is fully engaged.
Once you’ve successfully primed the pump and tested the pressure, you’re ready to move on to the next step of testing the spray pattern and making any necessary adjustments.
Test the Spray Pattern and Adjust as Needed
Once you’ve felt the power surge of the pump and seen the pressure in action, it’s time to witness the artistry of the spray pattern and make any necessary adjustments.
Testing the spray pattern is crucial to ensure an even and consistent application of paint. To begin, hold the sprayer about 12 inches away from a piece of cardboard or scrap material, and pull the trigger.
Observe the spray pattern and check for any irregularities, such as splotches, drips, or uneven coverage. If you notice any issues, it’s time to employ some adjustment techniques.
Adjust the nozzle or fan width to achieve the desired spray pattern. Common mistakes when adjusting the spray pattern include not holding the sprayer at the correct distance and not making small adjustments.
Once you’re satisfied with the spray pattern, it’s time to check for any leaks or clogs in the subsequent section.
Check for any Leaks or Clogs
Now, brace yourself for a potentially catastrophic disaster as you hunt down hidden leaks and treacherous clogs lurking within your trusty spraying companion. To ensure a smooth and efficient painting process, it is crucial to check for any leaks or clogs in your airless paint sprayer. Here are four steps to help you in this endeavor:
-
Inspect the hose connections: Check for any loose or damaged connections that may cause leaks. Tighten them if necessary.
-
Examine the spray gun: Inspect the gun for any signs of leakage or blockage. Ensure that the nozzle is clean and free from any debris.
-
Check the filter: Remove the filter and clean it thoroughly. A clogged filter can disrupt the paint flow and result in an uneven spray pattern.
-
Verify proper ventilation: Adequate ventilation is essential for a safe painting environment. Ensure that the ventilation system is working correctly to prevent any health hazards.
Now that you have checked for leaks and clogs, it’s time to evaluate the paint coverage and finish.
Evaluate the Paint Coverage and Finish
Assess how well the paint has covered the surface and observe the final finish for any imperfections. Evaluating the paint adhesion is crucial in determining the effectiveness of an airless paint sprayer. Look for any areas where the paint may have not adhered properly, such as patches where the paint appears thin or uneven. Additionally, assess the drying time of the paint. A good airless paint sprayer should provide quick drying times, allowing for efficient and timely completion of projects.
To help you visualize the evaluation process, here is a table that highlights the different aspects to consider:
| Aspect | Observation |
|---|---|
| Paint Coverage | Check for even and consistent coverage |
| Surface Smoothness | Look for any bumps, streaks, or drips |
| Color Uniformity | Ensure the paint color is consistent |
By meticulously evaluating the paint coverage and finish, you can identify any areas that require touch-ups or further adjustments. This assessment will also guide you in determining the overall performance of the airless paint sprayer. After completing the evaluation, it is essential to clean and maintain the sprayer to ensure its longevity and continued efficiency.
Clean and Maintain the Sprayer after Testing
To keep your sprayer in top-notch condition, it’s crucial to give it some TLC and ensure its longevity and peak performance. Cleaning techniques and recommended maintenance are essential for the airless paint sprayer.
After testing, the first step is to disconnect the sprayer from the power source and relieve any pressure.
Next, disassemble the gun, nozzle, and filters, and clean them thoroughly with warm soapy water. Use a brush or toothpick to remove any dried paint or debris.
Once everything is clean, inspect for any signs of damage or wear and replace any worn-out parts.
Finally, lubricate the moving parts and reassemble the sprayer.
By following these cleaning techniques and recommended maintenance, you can prevent clogs and ensure proper functioning.
In the next section, we will troubleshoot common issues that may arise with your airless paint sprayer.
Troubleshoot Common Issues
Experiencing some hiccups with your trusty painting companion? Let’s dive into troubleshooting common issues to keep your project on track!
When it comes to troubleshooting an airless paint sprayer, there are a few common techniques that can help resolve any problems you may encounter. Firstly, check the power source and make sure it’s properly connected. If the sprayer won’t start, it could be due to a clogged nozzle or a worn-out pump. Cleaning the nozzle and replacing any worn-out parts should fix this issue.
Additionally, if the sprayer is spraying unevenly or leaving streaks, it could be caused by a faulty pressure adjustment or an incorrect paint consistency. Adjusting the pressure and ensuring the paint is properly mixed should solve this problem.
By following these troubleshooting tips and tricks, you’ll be able to overcome any hurdles and achieve professional results with your airless paint sprayer. Now, let’s move on to the next section and practice and gain confidence with your airless paint sprayer.
Practice and Gain Confidence with Your Airless Paint Sprayer
Get ready to unleash your inner artist as you practice and gain the confidence to create stunning masterpieces with your trusty painting companion.
When it comes to using an airless paint sprayer, it’s important to be aware of common mistakes and take recommended safety precautions.
One common mistake is not properly cleaning the sprayer after each use, which can lead to clogs and uneven paint application. Make sure to thoroughly clean all the components and flush out any remaining paint with water or a cleaning solution.
Additionally, it’s crucial to wear protective gear such as goggles, gloves, and a respirator to avoid any potential health hazards from inhaling paint fumes or getting paint on your skin.
By practicing these safety precautions and avoiding common mistakes, you’ll feel confident and ready to tackle any painting project with your airless paint sprayer.
Frequently Asked Questions
Can I use any type of paint with an airless paint sprayer?
Yes, you can use different types of paint with an airless paint sprayer. However, it’s important to consider the paint viscosity requirements for airless paint sprayers to ensure optimal performance. Here are some tips for achieving a smooth finish: [remaining words].
How do I properly clean the spray gun after each use?
To properly clean the spray gun after each use, I recommend using a combination of warm soapy water and a soft brush. This will effectively remove any paint residue and ensure the gun is ready for the next use.
What safety precautions should I take when using an airless paint sprayer?
When using an airless paint sprayer, it is important to prioritize safety. Wear protective gear, such as goggles and a mask, to avoid inhalation and eye injuries. Additionally, follow proper paint thinning procedures and ensure regular paint sprayer maintenance.
Can I adjust the pressure on an airless paint sprayer?
Yes, you can adjust the pressure on an airless paint sprayer. It’s an important feature that allows you to customize the spray pattern and achieve desired results. If you’re experiencing issues, troubleshooting techniques can help identify and resolve the problem quickly.
How often should I replace the spray tip on an airless paint sprayer?
I replace the spray tip on my airless paint sprayer every 6-12 months, depending on usage. To choose the right spray tip, consider the type of paint, surface, and desired coverage. Proper maintenance ensures optimal performance.
Conclusion
In conclusion, testing an airless paint sprayer requires a thorough understanding of its components. It is important to properly assemble and check the connections before testing.
Another important step is priming the pump. This ensures that the paint flows smoothly through the sprayer.
After priming, it is necessary to test the pressure. Adjusting the pressure to the desired level is crucial for achieving the desired paint coverage and finish.
Next, it is important to adjust the spray pattern. This ensures that the paint is evenly distributed and covers the desired area.
Once the spray pattern is adjusted, it is time to evaluate the paint coverage and finish. This step helps to identify any areas that may require additional coats or touch-ups.
Lastly, cleaning and maintaining the sprayer is essential for its longevity and optimal performance. Regular cleaning and maintenance will prevent clogs and ensure that the sprayer is always ready for use.
By troubleshooting common issues and practicing with the sprayer, one can gain confidence and achieve professional-quality results. Remember, attention to detail and regular maintenance are key to a successful painting experience with an airless paint sprayer.


