
Imagine standing in front of a blank canvas, brimming with inspiration and creative energy, ready to bring your vision to life. But there’s a frustrating obstacle in your way – thick, stubborn acrylic paint that refuses to cooperate with your airless paint sprayer. Frustrating, isn’t it?
Well, fear not, because I’m here to show you the secret to thinning acrylic paint for your trusty sprayer. With just a few simple steps, you’ll be able to achieve the perfect consistency and unleash your artistic prowess upon the world.
So, grab your supplies, determine the desired consistency, and let’s get started.
-
Start with a small amount of paint. It’s always best to start with a small amount of paint and gradually add more if needed. This way, you can avoid over-thinning your paint and maintain control over the final result.
-
Gradually add water or medium. To thin your acrylic paint, you have two options – water or a specially formulated medium. Water is the most common choice, as it’s readily available and easy to use. However, if you’re looking for more control and a professional finish, a medium specifically designed for thinning acrylic paint is your best bet.
-
Mix thoroughly. Once you’ve added a small amount of water or medium to your paint, mix it thoroughly. Use a palette knife or a stir stick to ensure that the paint and thinning agent are well combined. This will help you achieve a consistent, smooth texture.
-
Test the consistency. After mixing, it’s important to test the consistency of your thinned paint. Dip a brush into the mixture and try painting on a scrap piece of paper or canvas. If the paint flows smoothly and evenly without clogging or splattering, you’ve achieved the desired consistency. If it’s too thin, add more paint. If it’s too thick, add more water or medium.
-
Adjust as needed. Thinning acrylic paint is a delicate process that requires patience and experimentation. Don’t be afraid to make adjustments along the way until you find that sweet spot that allows the paint to flow effortlessly through your sprayer.
And don’t worry, I’ll guide you through every step of the way, ensuring that your paint is ready to make its mark.
So, let’s dive in and turn that frustrating obstacle into a tool for artistic excellence.
Key Takeaways
- Gradually mix in small amounts of water or acrylic medium to achieve the desired consistency of the thinned paint for an airless paint sprayer.
- Add small amounts of undiluted paint if the thinned paint is too thin.
- Add more water or acrylic medium if the thinned paint is too thick.
- Regularly test the consistency of the thinned paint by spraying it on a scrap surface.

TICONN Anti-Fog Safety Glasses for Men and Women, ANSI Z87.1 Scratch Proof Eye Goggles with Adjustable Arms and UV Protection (Clear, 1PK)
- Durable Polycarbonate Construction: Impact-resistant and lightweight design
- Anti-Fog and UV Protection: Scratch-resistant, clear vision, blocks 99.9% UV
- Adjustable and Comfortable Fit: Rubber frame, nose pads, adjustable temples
As an affiliate, we earn on qualifying purchases.
Understand the Importance of Thinning Acrylic Paint
Thinning acrylic paint is crucial in order to achieve optimal results when using an airless paint sprayer. The importance of thinning acrylic paint lies in its ability to improve the spray pattern and flow of the paint, resulting in a smoother and more even application. By thinning the paint, you can also prevent clogging and ensure that the paint adheres properly to the surface.
When it comes to the best techniques for thinning acrylic paint, there are a few options to consider. You can use water to thin the paint, adding small amounts at a time until you reach the desired consistency. Another option is to use a commercial acrylic paint thinner, which can provide more control over the thinning process.
Now that we understand the importance of thinning acrylic paint, let’s move on to gathering the necessary supplies for this task.
Gather the Necessary Supplies
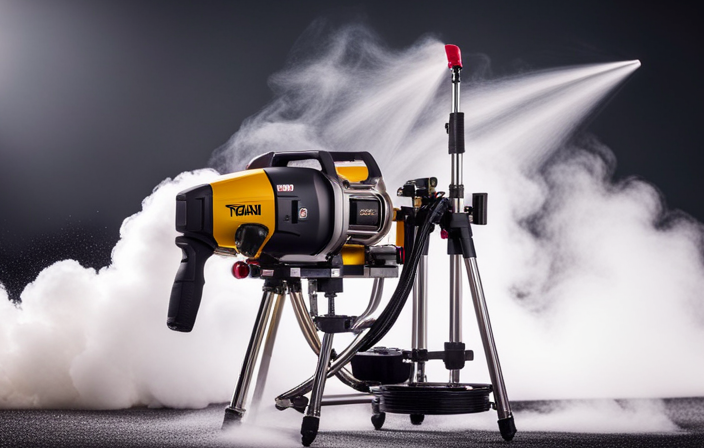
Before you can start getting your project done, make sure you have all the supplies you need. Choosing the right paint sprayer is crucial for achieving the desired results.
For thinning acrylic paint for an airless paint sprayer, it’s important to understand different paint thinning techniques. Acrylic paint can be thinned using water, acrylic medium, or a combination of both. Water is the most common thinning agent and can be used for minor thinning. However, if you need to thin the paint significantly, an acrylic medium should be used instead. It helps maintain the integrity of the paint while achieving the desired consistency.
Understanding these techniques and having the necessary supplies will ensure a smooth painting process.
Now, let’s move on to the next section and determine the desired consistency.
Determine the Desired Consistency
Imagine you’re a chef creating the perfect sauce, and just like in cooking, determining the desired consistency of your paint mixture is crucial for achieving a masterpiece.
When using an airless paint sprayer, it’s important to determine the optimal consistency of your acrylic paint to ensure smooth and even application. Start by pouring a small amount of paint into a container and evaluate its thickness. If the paint is too thick, it may clog the sprayer and result in an uneven finish. On the other hand, if the paint is too thin, it may not adhere properly to the surface.
Troubleshooting thinning issues involves adding small amounts of water or acrylic paint thinner until the desired consistency is achieved. Once you’ve determined the ideal consistency, you can move on to the next step of starting with a small amount of paint.
Start with a Small Amount of Paint
To ensure smooth and even application, it’s best to start with a small amount of paint when thinning acrylic paint for an airless paint sprayer. This allows for better control over the consistency of the paint.
When thinning acrylic paint for airbrushing, it’s important to achieve a consistency similar to milk. This helps prevent clogging and ensures a fine mist when spraying.
On the other hand, when thinning acrylic paint for roller application, aim for a slightly thicker consistency, similar to that of heavy cream. This allows for better coverage and minimizes drips.
By starting with a small amount of paint, you can easily adjust the consistency by gradually adding water or medium until you reach the desired thickness. This ensures that the paint will flow smoothly through the airless paint sprayer or roller.
Gradually Add Water or Medium
When thinning acrylic paint for an airless paint sprayer, you have two options: adding water or adding medium. Adding water is a common choice as it is readily available and inexpensive. However, it can dilute the paint’s pigment, resulting in a less vibrant color. On the other hand, adding medium, such as acrylic gel or flow improver, maintains the pigment intensity while thinning the paint. It also helps to improve the paint’s flow and adhesion.
It’s important to note that adding too much water or medium can cause the paint to lose its consistency and coverage. So, be cautious and add small amounts at a time, mixing thoroughly to achieve a smooth texture before proceeding to the next step about mixing the paint thoroughly.
Mix Thoroughly to Achieve a Smooth Texture
After gradually adding water or medium to thin the acrylic paint, it is important to mix the solution thoroughly to achieve a smooth texture. This step is crucial in ensuring the paint flows smoothly through the airless paint sprayer, achieving even coverage on the desired surface.
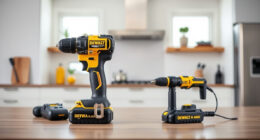
A well-mixed paint also helps to avoid clogs and splatters that can disrupt the painting process. To mix the thinned paint effectively, use a stirring stick or a paint mixer attachment for a power drill. Start at a slow speed and gradually increase while stirring the paint in a circular motion.
Continue mixing until the paint is completely smooth and free of any lumps or clumps. Once the paint is well-mixed, the next step is to test it on a scrap surface to ensure the desired consistency and coverage before proceeding with your painting project.
Test the Thinned Paint on a Scrap Surface
Before you start your painting project, it’s important to test the thinned paint on a scrap surface. This will give you an idea of how well the paint covers and ensure that it sprays evenly through the airless paint sprayer. When testing, try different techniques such as varying the distance from the surface, adjusting the spray pattern, and experimenting with different nozzle sizes. This will help you find the best settings for your specific project.
Pay attention to any issues that may arise during testing, such as clogging or uneven coverage. If the thinned paint seems too thick or thin, adjust the consistency as needed to achieve the desired results. Take note of any troubleshooting steps you may need to take.
Once you’ve finished testing the thinned paint, you can move on to the next step of adjusting the paint consistency for the airless paint sprayer.
Adjust the Consistency if Needed
To achieve optimal results, you may need to adjust the consistency of your paint if necessary, ensuring a smooth and flawless finish. Here are four steps to help you achieve the desired texture:
-
Start by adding a small amount of water or acrylic medium to the thinned paint. Gradually mix it in until you reach the desired consistency.
-
If the paint is too thin, add small amounts of undiluted paint to thicken it. Mix thoroughly after each addition until you achieve the desired texture.
-
Alternatively, if the paint is too thick, add more water or acrylic medium to thin it further. Remember to mix well to ensure an even consistency.
-
Regularly test the thinned paint’s consistency by spraying it onto a scrap surface. Adjust as needed until you achieve a smooth texture.
Now that you have adjusted the consistency, it’s time to load the thinned paint into the airless paint sprayer.
Load the Thinned Paint into the Airless Paint Sprayer
Once you’ve achieved the desired texture, you can now load the thinned paint into your airless paint sprayer. Follow these steps for optimal results:
-
Ensure that your airless paint sprayer is clean and properly maintained. Check for any clogs or blockages in the nozzle, as these can affect the spray pattern.
-
Pour the thinned paint into the paint container of the sprayer. Be careful not to overfill it.
-
Attach the container securely to the sprayer and ensure that all connections are tight.
-
Once everything is in place, you can start spraying.
-
If you encounter any issues such as inconsistent spray or drips, troubleshoot by adjusting the pressure or checking for any clogs.
Transition into the next section about cleaning up and properly storing the equipment for future use.
Clean Up and Properly Store the Equipment
After you’ve finished painting, it’s time to clean up and properly store your equipment to ensure its longevity and prevent any damage. Here are some proper cleaning techniques and storage methods to follow:
-
Clean the paint sprayer thoroughly. Start by disconnecting the sprayer from the power source and removing any remaining paint from the container. Use a brush or cloth to remove any excess paint from the sprayer’s components. Then, rinse the sprayer with warm water and a mild detergent to remove any residual paint.
-
Store the sprayer in a dry and secure location. Once the sprayer is clean and dry, make sure to store it in a safe and dry place to prevent any damage. Avoid exposing it to extreme temperatures or humidity, as this can affect its performance.
-
Protect the sprayer from dust and debris. Consider using a cover or a storage case to keep the sprayer protected from dust, dirt, and other debris that can clog the nozzle or damage the components.
By following these proper cleaning techniques and storage methods, you can ensure your airless paint sprayer remains in good condition for future use.
Frequently Asked Questions
Can I use any type of water or medium to thin acrylic paint for an airless paint sprayer?
I can use various mediums, such as water or specific acrylic mediums, to thin acrylic paint for an airless paint sprayer. The best consistency for thinning acrylic paint depends on the manufacturer’s recommendations and the desired coverage and finish.
Is it necessary to test the thinned paint on a scrap surface before applying it to the actual project?
Testing thinned paint on a scrap surface before applying it to the actual project is important. It helps ensure the desired consistency, coverage, and adhesion. It also allows for adjustments and avoids potential issues on the final project.
How long can thinned acrylic paint be stored before it becomes unusable?
The shelf life of thinned acrylic paint can vary depending on factors such as storage conditions and the type of thinning agent used. Generally, it can be stored for several months to a year if properly sealed and stored in a cool, dry place.
Can I thin acrylic paint too much, and if so, how can I fix it?
Thinning acrylic paint too much is like watering down a delicious soup until it becomes tasteless. To fix it, add more undiluted paint gradually. Over-thinned paint can affect the project quality by appearing watery and lacking vibrancy.
Are there any specific safety precautions I should take when using an airless paint sprayer with thinned acrylic paint?
When using an airless paint sprayer with thinned acrylic paint, it is important to wear proper safety gear and ensure adequate ventilation. To achieve a smooth and even finish, maintain a consistent spraying distance and overlap each pass.
Conclusion
In conclusion, thinning acrylic paint for an airless paint sprayer is a crucial step to achieve smooth and even coverage. By following the steps outlined above, you can ensure that your paint is properly thinned to the desired consistency for optimal spraying.
Remember, practice makes perfect, so don’t be afraid to experiment with different amounts of water or medium to find the perfect balance. With patience and attention to detail, you’ll be able to create stunning paint finishes that will leave a lasting impression.
So, go ahead and unleash your creativity with your airless paint sprayer!