Connect with us

Airless Paint Sprayers FAQs

How To Use A Airless Paint Sprayer On Furniture Without Drips

Published

on

An image showcasing a hand holding an airless paint sprayer, with a wooden furniture piece in the background

Tired of spending countless hours painting furniture, only to end up with messy drips and uneven finishes? Don’t fret! I have discovered a game-changing technique for painting furniture using an airless sprayer, which solves the drip problem. Trust me, it revolutionizes the entire painting process.

In this article, I will guide you through the step-by-step process of achieving flawless results with your airless paint sprayer. From preparing your furniture and choosing the right paint to practicing proper spraying technique and avoiding over-spraying, I will cover it all.

You will learn how to start with light coats of paint, ensuring even coverage by overlapping each stroke. I will also share tips on allowing sufficient drying time and how to clean and maintain your airless paint sprayer for long-lasting performance.

So, get ready to revolutionize your furniture painting game and say goodbye to those pesky drips. Let’s dive in and transform your furniture with ease and precision.

Key Takeaways

  • Avoid over-spraying and drips by following proper technique with the airless paint sprayer.
  • Allow sufficient drying time between coats for a flawless finish.
  • Follow recommended drying techniques from the paint manufacturer regarding temperature, humidity, and ventilation.
  • Maintain and clean the airless paint sprayer regularly to prevent clogs and ensure optimal performance.

Prepare Your Furniture for Painting

Advertisement

Get ready to transform your furniture into a work of art with these easy prep tips! Prepping furniture is essential before using an airless paint sprayer. Start by cleaning the furniture thoroughly to remove any dirt or grease that could affect the paint’s adhesion.

Sanding the surface lightly will create a smooth and even base for the paint. Fill any holes or cracks with wood filler and let it dry completely. Consider using the best paint colors that complement your style and décor.

Once the furniture is prepped and ready, it’s time to choose the right paint and equipment for your project. With these prep tips in mind, you’ll be on your way to achieving a flawless finish on your furniture.

Choose the Right Paint and Equipment

Once you’ve carefully selected the ideal type of paint and gathered the necessary equipment, you’re ready to embark on transforming your furniture with the help of an airless paint sprayer, ensuring a flawless finish.

Choosing the right paint color is crucial in achieving the desired look for your furniture. Consider the style and theme of the room where the furniture will be placed, as well as personal preference.

Advertisement

Additionally, proper ventilation is essential when using an airless paint sprayer. Make sure to work in a well-ventilated area, preferably outdoors or in a space with open windows and fans. This will help dissipate fumes and ensure a safe working environment.

With the right paint color and proper ventilation in mind, it’s time to set up a proper painting area for your furniture transformation.

Set Up a Proper Painting Area

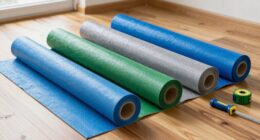
To create a harmonious painting experience, find a suitable space where you can set up shop and turn your furniture transformation into a masterpiece. Safety precautions during painting are important, so make sure to wear protective eyewear, gloves, and a mask. Creating a well-ventilated area for painting is crucial to avoid inhaling harmful fumes. Open windows and doors, and use fans to ensure proper airflow. Additionally, place a drop cloth or plastic sheeting on the floor to protect it from paint splatters.

Advertisement
Safety Precautions Well-Ventilated Area Protection for Flooring
Wear protective eyewear, gloves, and a mask Open windows and doors for proper airflow Place a drop cloth or plastic sheeting on the floor

By following these safety measures and creating a suitable painting area, you can proceed to practice proper spraying technique for your furniture without drips.

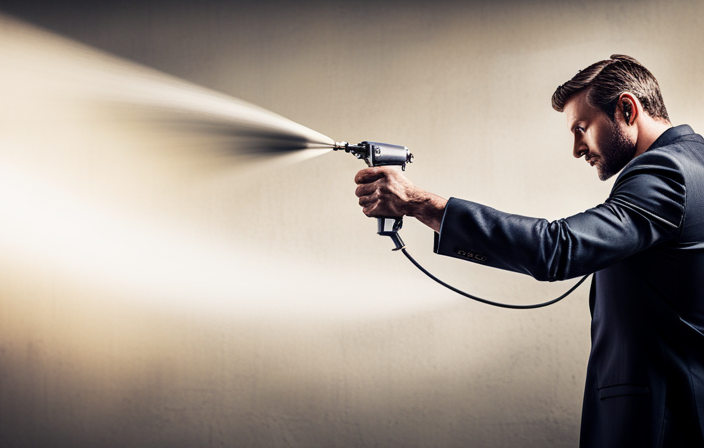
Practice Proper Spraying Technique

Master the art of proper spraying technique to achieve flawless results and create a breathtaking transformation for your beloved furniture pieces.

Here are three key elements to consider when practicing proper spraying technique and avoiding paint drips:

  1. Maintain a consistent distance: Keep the sprayer nozzle about 8-12 inches away from the furniture surface. This ensures an even application and reduces the chances of drips.

  2. Move the sprayer smoothly: Use smooth, steady strokes while spraying. Avoid stopping or starting abruptly, as this can lead to uneven coverage and drips.

  3. Overlap each pass: To ensure complete and even coverage, overlap each pass by about 50%. This helps to blend the paint seamlessly and minimizes the risk of drips.

By mastering these techniques, you’ll be well on your way to achieving a flawless finish.

Now, let’s move on to the next step: starting with light coats of paint.

Advertisement

Start with Light Coats of Paint

Begin with a gentle mist of paint, like a delicate whisper, to gradually build up color and create a mesmerizing transformation for your beloved furniture pieces. Applying light coats of paint is crucial to achieving a flawless finish without any drips.

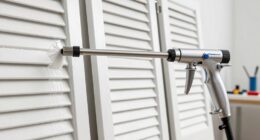
Start by holding the airless paint sprayer about 12 inches away from the furniture’s surface. Move the sprayer in a smooth, sweeping motion, ensuring even coverage across the entire piece. Avoid spraying too much paint at once, as this can lead to drips and uneven application. Instead, apply thin, light coats, allowing each coat to dry before applying the next. This method will help you achieve a smooth, professional-looking finish.

As you move on to the next section about maintaining a consistent distance from the furniture, remember to keep a steady hand and a consistent spraying technique.

Advertisement

Maintain a Consistent Distance from the Furniture

Maintaining a steady hand and a consistent spraying technique will ensure a flawless finish as I glide the mist of color across my treasured furniture pieces, always keeping a uniform distance. To achieve this, it’s crucial to maintain a consistent speed while spraying. Moving too quickly can result in uneven coverage and potential clogging issues, while moving too slowly can lead to drips and pooling of paint. By finding the right balance and maintaining a steady pace, I can prevent these problems and achieve a smooth, professional-looking finish.

As I transition into the next section about overlapping each stroke for even coverage, it’s important to note that this technique will further enhance the overall result by ensuring that every inch of the furniture is evenly coated with paint.

Overlap Each Stroke for Even Coverage

To achieve a flawless finish, make sure to overlap each stroke while maintaining a consistent distance from the furniture, ensuring even coverage and a professional-looking result. The overlap technique is crucial in preventing drips and achieving a smooth finish. As you move the airless paint sprayer across the furniture, imagine dividing it into imaginary sections. Start each stroke slightly before the previous one ends, overlapping by about 50% to ensure complete coverage. This technique eliminates any potential gaps or unevenness in the paint. To help visualize this, imagine a 3 column and 5 row table, where each stroke covers one row and the next stroke overlaps the previous one by one column. This systematic approach guarantees a consistent and drip-free finish. By following this technique, you can avoid over-spraying and drips, ensuring a professional result.

Avoid Over-Spraying and Drips

Avoiding over-spraying and pesky drips is key to achieving a flawless finish when using an airless paint sprayer on your furniture. To avoid clogging issues, it’s important to adjust the spray pattern according to the type of furniture you’re painting. Start by testing the sprayer on a scrap piece of wood or cardboard to make sure the spray pattern is even and not too wide or narrow. If there are any clogs or drips, you may need to adjust the pressure or clean the nozzle.

Additionally, maintain a consistent distance from the furniture while spraying to avoid over-spraying and causing drips. This’ll help ensure an even application of paint without any unwanted marks or streaks. By avoiding over-spraying and drips, you’ll be on your way to achieving a professional-looking finish.

Advertisement

Moving on to the next section, it’s important to allow sufficient drying time for the paint to cure properly.

Allow Sufficient Drying Time

Now that we’ve discussed the importance of avoiding over-spraying and drips when using an airless paint sprayer on furniture, let’s move on to the next crucial step: allowing sufficient drying time.

This is a crucial aspect of achieving a flawless finish without any paint build-up or imperfections. To ensure proper drying, it’s essential to follow the recommended drying techniques provided by the paint manufacturer.

These techniques may include factors such as temperature, humidity, and ventilation. Additionally, it’s crucial to allow each coat of paint to dry completely before applying the next one. By doing so, you’ll prevent any paint build-up or excessive layers that could lead to drips or unevenness.

Now that we’ve covered proper drying techniques and preventing paint build-up, let’s move on to the next section about how to clean and maintain your airless paint sprayer.

Advertisement

Clean and Maintain Your Airless Paint Sprayer

Ensure you regularly cleanse and care for your air-powered paint applicator to maintain its optimal performance. Cleaning your airless paint sprayer after each use is essential to prevent clogs and ensure smooth operation.

Start by flushing out any remaining paint by running a cleaning solution through the sprayer. Use a brush or cloth to remove any dried paint or debris from the nozzle, gun, and filters. Pay extra attention to the filters, as they can easily become clogged and affect the spray pattern.

Additionally, inspect the hoses and connections for any leaks or damage. Troubleshoot common issues such as inconsistent spray pattern or loss of pressure by checking for loose connections, worn seals, or obstructions in the nozzle.

Regular maintenance and cleaning will extend the lifespan of your airless paint sprayer and ensure flawless results every time.

Frequently Asked Questions

Can I use an airless paint sprayer on any type of furniture surface?

Using an airless paint sprayer on furniture surfaces has its pros and cons. It allows for fast and even coverage, but it may require more prep work and can create overspray. To achieve a smooth finish, make sure to sand and clean the furniture beforehand and practice with the sprayer on a test surface.

Advertisement

How long should I wait before applying additional coats of paint with an airless paint sprayer?

I usually wait about 2 hours between coats when using an airless paint sprayer. It’s important to let each coat dry properly before applying the next one. Typically, 2-3 coats are necessary for a smooth and even finish.

Is it necessary to sand the furniture before using an airless paint sprayer?

Sanding is necessary before using an airless paint sprayer on furniture. It helps to smooth the surface, remove imperfections, and ensure proper adhesion of the paint.

Can I use water-based paint with an airless paint sprayer?

Yes, you can use water-based paint with an airless paint sprayer. It’s important to properly thin the paint and adjust the sprayer settings. Tips for achieving a smooth finish include using light, even strokes and maintaining a consistent distance from the surface.

What safety precautions should I take when using an airless paint sprayer on furniture?

When using an airless paint sprayer on furniture, safety precautions are crucial. To prevent paint drips, wear protective clothing, goggles, and a respirator. Create a well-ventilated area and cover surrounding surfaces.

Conclusion

In conclusion, using an airless paint sprayer on furniture without drips is a skill that can be mastered with practice and the right techniques.

Advertisement

By preparing your furniture properly, choosing the right paint and equipment, and setting up a proper painting area, you can achieve a flawless finish.

Remember to practice proper spraying technique, starting with light coats of paint and overlapping each stroke for even coverage. Avoid over-spraying and drips by maintaining a steady hand and allowing sufficient drying time.

By following these steps and regularly cleaning and maintaining your airless paint sprayer, you can transform your furniture into beautiful pieces that will impress anyone who sees them.

So go ahead, give it a try and see the amazing results for yourself!

Advertisement

Whether it’s a step-by-step tutorial on achieving flawless finishes or an in-depth analysis of the latest airless paint sprayer models, Joe’s ability to articulate complex ideas in a simple and engaging manner resonates with our diverse audience. His practical tips and techniques empower readers to tackle their projects with confidence.

Continue Reading
Advertisement

Airless Paint Sprayers FAQs

How To Store Your Kruse And Becker Airless Paint Sprayer Attachments

Published

on

By

An image showcasing a neatly organized storage solution for Kruse and Becker airless paint sprayer attachments

Did you know that by properly storing your Kruse and Becker airless paint sprayer attachments, you can significantly extend their lifespan?

As a proud owner of this powerful tool, it’s essential to take the necessary steps to protect and maintain your attachments. In this article, I will guide you through the process of storing your attachments correctly, ensuring that they remain in optimal condition for future use.

From cleaning the attachments properly to using protective caps or covers, I will cover all the necessary steps to keep your attachments safe from damage.

Additionally, I will provide tips on storing them in a dry and temperature-controlled area, avoiding stacking heavy objects on top of them, and inspecting and maintaining them regularly.

Whether you choose to store them in their original packaging or a dedicated storage case, following the manufacturer’s guidelines for long-term storage is crucial.

Advertisement

By implementing these storage techniques, you can ensure that your Kruse and Becker airless paint sprayer attachments are always ready to deliver exceptional performance whenever you need them.

Key Takeaways

  • Storing the Kruse and Becker airless paint sprayer attachments in their original packaging or a dedicated storage case helps prevent dust and dirt accumulation, protects them from moisture, rust, and corrosion, and makes them easy to locate and access.
  • Following the manufacturer’s guidelines for storage is crucial, including regular maintenance, cleaning attachments after each use, applying oil or lubricant to metal surfaces, and storing them in a dry, climate-controlled environment.
  • Taking measures to prevent rust and corrosion, such as applying oil or lubricant to metal surfaces, keeping attachments away from moisture, storing them in an upright position, avoiding exposure to extreme temperatures, and using the original packaging or storage case, is important.
  • Cleaning the attachments thoroughly after each use, removing paint residue and debris, helps prevent rust and corrosion, maintain attachment integrity, and ensure professional-quality results.

Clean the Attachments Properly

To ensure that your Kruse and Becker airless paint sprayer attachments are properly cleaned, follow these steps:

  1. Disconnect the attachments from the sprayer.
  2. Rinse the attachments with warm water to remove any excess paint.
  3. Use a mild detergent and a soft brush to gently scrub away any remaining paint or debris.
  4. Pay special attention to the nozzle and other small parts, ensuring they are thoroughly cleaned.
  5. Dry the attachments completely before storing them.

Properly cleaning your attachments is essential for maintaining their quality and longevity. Regular maintenance helps prevent clogging and ensures smooth operation. By removing excess paint, you prevent build-up and maintain optimal performance. So, now that your attachments are clean, let’s move on to the next step: removing excess paint.

Remove Excess Paint

To remove excess paint from your Kruse and Becker airless paint sprayer attachments, follow these effective paint removal techniques:

  • Gently scrape off any dried paint from the attachment using a paint scraper or putty knife.
  • Soak the attachment in warm soapy water for a few minutes to loosen any remaining paint.
  • If there is stubborn paint, scrub away the residue using a brush with stiff bristles.
  • Alternatively, use a paint remover solution specifically designed for removing paint from attachments.

Thoroughly cleaning your attachments ensures that there is no leftover paint to interfere with the performance of your sprayer.

Next, we will discuss how to disconnect and drain the sprayer.

Advertisement

Disconnect and Drain the Sprayer

To prepare for storage, it’s time to disconnect and drain the sprayer, ensuring optimal performance for your next painting project.

Disconnecting the sprayer is a crucial step in preventing clogs and maintaining the integrity of the attachments.

Start by turning off the sprayer and unplugging it from the power source.

Advertisement

Next, detach the spray gun from the hose by releasing the locking mechanism.

Once disconnected, hold the sprayer over a bucket or container and activate the trigger to release any remaining paint. This will prevent any residual paint from drying and clogging the system.

After draining the sprayer, it’s important to use protective caps or covers to keep the attachments clean and protected during storage.

This will ensure that your Kruse and Becker airless paint sprayer is ready for use when you need it next.

Use Protective Caps or Covers

Keep your sprayer safe and sound by covering it with a protective shield, like a suit of armor, shielding it from dust and potential damage. Here are four reasons why you should use protective covers for your Kruse and Becker airless paint sprayer attachments:

Advertisement
  1. Prevents dust accumulation: Protective covers keep your attachments clean and free from dust, ensuring smooth and efficient operation.

  2. Protects against accidental damage: By using covers, you can safeguard your attachments from accidental bumps or falls, extending their lifespan.

  3. Guards against moisture: Moisture can cause corrosion and damage to your sprayer attachments. Protective covers act as a barrier, keeping them dry and in optimal condition.

  4. Easy identification and organization: Using different colored or labeled covers for different attachments allows for quick identification and efficient organization.

To ensure proper maintenance and longevity, don’t forget to store your attachments in a dry and temperature-controlled area.

Store Attachments in a Dry and Temperature-Controlled Area

To maintain the optimal condition and extend the lifespan of the attachments, it is important to store them in a cool and dry area. A well-ventilated space is necessary to prevent moisture buildup, which can lead to rust or other damage. Avoid storing the attachments in areas with high humidity or near sources of water, as this can cause corrosion. Additionally, it is crucial to keep them away from direct sunlight, as prolonged exposure can cause materials to degrade or warp.

By storing your Kruse and Becker airless paint sprayer attachments in a dry and temperature-controlled environment, you can ensure they remain in top-notch condition for future use. This will also make it easier to keep the attachments organized and labeled, which we will discuss in the next section.

Advertisement

Keep Attachments Organized and Labeled

Organizing and labeling your attachments is a must if you want to avoid the chaos of a jumbled mess and ensure you can easily find the right tool when you need it. When it comes to storing your Kruse and Becker airless paint sprayer attachments, having a system in place is key. One effective way to keep your attachments organized is by using a labeled storage system. By labeling each attachment and assigning it a specific place in your storage area, you can quickly locate the tool you need without wasting time searching through a pile of attachments. To make the organization process even more efficient, consider using a table like the one below:

Attachment Name Storage Location Quantity
Spray Gun Shelf A 2
Nozzle Tips Drawer B 5
Extension Wand Hook C 1
Hose Pegboard D 1

By following this labeling and organizing system, you can ensure that your Kruse and Becker airless paint sprayer attachments are easily accessible and in good condition. However, it’s important to remember to avoid stacking heavy objects on top of the attachments to prevent any damage.

Avoid Stacking Heavy Objects on Top of the Attachments

To prevent potential damage, it’s important to avoid stacking heavy items on top of your stored attachments. Stacking heavy objects can put unnecessary pressure on the attachments, causing them to become bent or damaged.

When storing your Kruse and Becker airless paint sprayer attachments, follow proper storage techniques to ensure their longevity. Instead of stacking heavy items on top, use a designated shelf or storage bin where the attachments can be safely stored without any additional weight on top.

By avoiding damage in this way, you can extend the lifespan of your attachments and ensure they are always in good working condition.

Advertisement

Moving on to the next section, it’s also important to inspect and maintain your attachments regularly to keep them in optimal shape.

Inspect and Maintain Attachments Regularly

Regularly inspecting and maintaining your attachments is like giving them a check-up to ensure they’re in top shape and ready for any painting task. By performing regular maintenance, you can prevent damage and extend the lifespan of your Kruse and Becker airless paint sprayer attachments.

Here are a few important steps to include in your maintenance routine:

  • Clean the attachments thoroughly after each use to remove any paint residue or debris.
  • Inspect the seals and O-rings for any signs of wear or damage, replacing them if necessary.
  • Lubricate moving parts with a suitable lubricant to keep them operating smoothly.
  • Check the nozzle for any clogs or obstructions, cleaning it if needed.

By regularly inspecting and maintaining your attachments, you can ensure they are always in optimal condition for your painting projects.

Now, let’s move on to the next section about storing attachments in their original packaging or a dedicated storage case.

Store Attachments in their Original Packaging or a Dedicated Storage Case

To keep your attachments safe and protected, it is important to store them properly. One option is to store them in their original packaging or a dedicated storage case. This ensures that they stay in pristine condition for your next painting project. Storing attachments in airtight containers has several benefits. Firstly, it prevents dust and dirt from accumulating on them. Additionally, it protects them from moisture, which can cause rust or corrosion. By keeping them in their original packaging or a dedicated storage case, you can easily locate and access them when needed. Another storage option is to hang attachments on a pegboard. This not only keeps them organized but also saves valuable shelf or drawer space. However, it is crucial to follow the manufacturer’s guidelines for long-term storage to ensure that the attachments remain in optimal condition. By following these storage practices, you can extend the lifespan of your Kruse and Becker airless paint sprayer attachments.

Advertisement

Follow Manufacturer’s Guidelines for Long-Term Storage

By adhering to the manufacturer’s guidelines for long-term storage, you can ensure that your attachments remain in optimal condition and extend their lifespan. Regular maintenance is key to keeping your airless paint sprayer attachments in top shape. It is important to clean the attachments thoroughly after each use to remove any paint residue or debris that may cause rust or corrosion over time. Additionally, applying a thin layer of oil or lubricant to metal surfaces can help prevent rust and corrosion during storage. Storing the attachments in a dry and climate-controlled environment is also crucial to maintain their integrity. Using the original packaging or a dedicated storage case can provide extra protection and organization. Following these tips will help you avoid costly repairs or replacements and ensure that your Kruse and Becker airless paint sprayer attachments are always ready to deliver professional-quality results.

Maintenance Tips Rust and Corrosion Prevention Storage Practices
Clean after each use Apply oil or lubricant to metal surfaces Store in dry, climate-controlled environment
Inspect for damage or wear Keep away from moisture Use original packaging or dedicated storage case
Replace worn or damaged parts Store in upright position Avoid exposure to extreme temperatures

Frequently Asked Questions

Can I store my kruse and Becker airless paint sprayer attachments in a garage or shed without temperature control?

Yes, you can safely store your Kruse and Becker airless paint sprayer attachments in a garage or shed without temperature control. However, it is important to keep them in a dry and protected area to prevent any damage or corrosion.

How often should I inspect and maintain my paint sprayer attachments?

I recommend inspecting and maintaining your paint sprayer attachments regularly to ensure optimal performance. Clean them after each use and troubleshoot common issues promptly. This will help extend their lifespan and prevent any potential problems.

Is it necessary to remove the excess paint from the attachments before storing them?

Of course, removing excess paint from your Kruse and Becker airless paint sprayer attachments before storing them is completely unnecessary. It’s not like paint can dry and clog the nozzle, causing damage and shortening their lifespan. Proper cleaning techniques and tips for prolonging their lifespan can be found…

Can I use any type of protective caps or covers for my paint sprayer attachments?

Yes, protective covers can be used for paint sprayer attachments. They help prevent damage and keep them clean. Alternatively, you can explore other storage options like using a dedicated case or hanging them on a pegboard.

Advertisement

What should I do if I don’t have the original packaging or a dedicated storage case for my attachments?

If you don’t have the original packaging or a dedicated storage case for your attachments, there are alternative storage options available. Get creative with DIY storage solutions like using a toolbox, a pegboard, or even repurposing old containers.

Conclusion

In conclusion, it is essential to properly preserve your Kruse and Becker airless paint sprayer attachments. First, clean them meticulously and ensure that any lingering paint is removed. Next, disconnect and drain the sprayer to prevent any damage. After that, protect the attachments by using caps or covers to shield them from dust and debris. It is important to store them in a dry and temperature-controlled environment to prevent any moisture or extreme temperatures from causing damage. When handling the attachments, be careful not to place heavy objects on top of them to avoid any potential harm. Regular inspection and maintenance should be done to ensure their longevity. If possible, it is recommended to return them to their original packaging or invest in a dedicated storage case. Lastly, always follow the manufacturer’s guidelines for long-term storage to ensure the best care for your sprayer attachments. By safeguarding your attachments with these tips, you will see your spraying success skyrocket!

Continue Reading

Airless Paint Sprayers FAQs

How To Store Graco Truecoat 360dsp Airless Paint Sprayer In Case

Published

on

By

An image showcasing a sturdy, custom-made case for the Graco Truecoat 360dsp Airless Paint Sprayer

You have just finished a project with your trusty Graco TrueCoat 360DSP airless paint sprayer and now it is time to stow it away. You may be tempted to simply throw it in its case and call it a day, but I urge you to properly store your paint sprayer to preserve its longevity and performance.

In this article, I’m going to guide you through the steps to ensure that your Graco TrueCoat 360DSP stays in top shape when not in use.

First things first, we need to clean the sprayer thoroughly before storing it. Then, we’ll remove and clean the spray tip and guard to prevent any clogs. Emptying the paint container and flushing the system is also essential to avoid any dried paint residue. Checking and replacing any damaged or worn parts will guarantee that your sprayer is ready for the next project.

I’ll also show you how to neatly wrap and secure the power cord and provide tips on storing the case in a dry and temperature-controlled area. Lastly, we’ll discuss the importance of regularly inspecting and maintaining the case for any damage.

So, let’s dive in and make sure your Graco TrueCoat 360DSP airless paint sprayer is safely stored in its case for future use.

Advertisement

Key Takeaways

  • Regularly inspect and maintain the protective case for damage or wear
  • Clean the case regularly to remove dirt and debris
  • Follow manufacturer’s instructions for long-term storage
  • Store the sprayer in a clean and dry environment

Clean the Sprayer Thoroughly Before Storing

Before you pack it away, make sure you’ve thoroughly cleaned your Graco TrueCoat 360DSP airless paint sprayer. Cleaning the sprayer is an essential step in proper storage, as it prevents any paint residue or debris from clogging the sprayer and affecting its performance when you use it next.

To begin the cleaning process, start by removing any remaining paint from the sprayer. Disassemble the sprayer as much as possible and clean each part individually using warm soapy water. Pay close attention to the nooks and crannies, ensuring that all paint residue is removed.

After cleaning, allow each part to air dry completely before reassembling the sprayer. Once the sprayer is dry, you can move on to the next step of removing and cleaning the spray tip and guard.

Remove and Clean the Spray Tip and Guard

After you’ve used it, make sure to remove and clean the spray tip and guard to keep your paint sprayer in the best condition possible. Here are five important steps to follow:

Advertisement
  • Start by unscrewing the spray tip from the guard using a wrench.
  • Rinse both the spray tip and guard with warm water to remove any leftover paint.
  • Use a small brush or toothpick to gently clean any clogs or debris from the spray tip.
  • Inspect the guard for any buildup and clean it thoroughly.
  • Dry the spray tip and guard completely before reattaching them to the sprayer.

Properly cleaning the spray tip and guard not only ensures the longevity of your paint sprayer but also guarantees a smooth finish when using it again. If you encounter any issues with your airless paint sprayer, such as uneven spray patterns or clogs, refer to the troubleshooting guide provided by Graco.

Now, let’s move on to the next step: empty the paint container and flush the system.

Empty the Paint Container and Flush the System

To ensure optimal performance, it’s crucial to empty the paint container and thoroughly flush the system. This is an important step in the cleaning process and shouldn’t be overlooked.

First, remove the paint container from the sprayer and pour any remaining paint back into the original paint can or a separate storage container. Once the container is empty, fill it with clean water and attach it back onto the sprayer.

Advertisement

Turn on the sprayer and let it run until the water coming out is clear. This will flush out any remaining paint residue. Repeat this process a few times to ensure a thorough cleaning.

Proper storage techniques are essential to maintaining the longevity of your Graco TrueCoat 360DSP airless paint sprayer. After cleaning and flushing the system, it’s important to check and replace any damaged or worn parts.

Check and Replace any Damaged or Worn Parts

Make sure to inspect and replace any parts that’ve suffered damage or wear, as neglecting this step would surely lead to flawless performance.

Start by inspecting the hoses for any cracks, leaks, or signs of wear. Replace any damaged hoses immediately to prevent any paint leakage during use.

Next, clean the filters thoroughly to ensure optimal performance. Inspect the filters for any clogs or debris and clean them using warm soapy water or an appropriate cleaning solution. Allow the filters to dry completely before reinstalling them.

Advertisement

Once you’ve inspected and replaced any damaged or worn parts, it’s time to move on to the next step: wrapping the power cord neatly and securely.

Wrap the Power Cord Neatly and Securely

Ensuring a safe and organized workspace, it’s crucial to neatly and securely wrap the power cord of your Graco TrueCoat DSP airless paint sprayer. Before storing the sprayer in its case, take the time to properly organize and secure the power cord.

Start by untangling any knots or kinks in the cord, ensuring it’s free from any damage or wear. Next, begin wrapping the cord by holding the plug end and winding it around your hand in a circular motion. Make sure to keep the loops tight and even, avoiding any overlapping or tangles.

Advertisement

Once the cord is neatly wrapped, secure it in place with a velcro strap or twist tie. By storing the power cord safely and organizing it properly, you can easily access it when needed and avoid any potential accidents.

Now, let’s move on to placing the sprayer in the case with care.

Place the Sprayer in the Case with Care

Carefully nestle your paint sprayer into its protective shell, like tucking a delicate flower into a sturdy vase. Proper handling techniques when placing the sprayer in the case are crucial to ensure its longevity and functionality.

Here are some tips for protecting the sprayer from potential damage during storage:

  1. Align the sprayer nozzle in the designated slot to prevent any accidental bending or breakage.
  2. Keep the hose neatly coiled and secure it in the provided clips or compartments to avoid kinks or punctures.
  3. Place any additional accessories, such as spray tips or filters, in their designated compartments to prevent them from getting misplaced or damaged.
  4. Close the case tightly to keep dust and debris from entering and potentially clogging the sprayer or its components.

Once the sprayer is securely placed in its case, it’s important to store the case in a dry and temperature-controlled area to further protect it from environmental factors.

Store the Case in a Dry and Temperature-Controlled Area

Find a safe and sheltered spot for your valuable equipment, ensuring it remains protected from the elements and ready for your next masterpiece. When storing your Graco TrueCoat 360DSP airless paint sprayer in its case, it’s important to consider the environment.

Advertisement

Choose a dry area with controlled temperature to prevent any damage to the sprayer. Moisture and extreme heat or cold can negatively impact its performance and lifespan. Additionally, make sure the case isn’t exposed to direct sunlight, as this can cause the paint sprayer to overheat.

By storing your paint sprayer safely and protecting it from unfavorable conditions, you can extend its longevity and maintain its optimal functionality.

Now, let’s move on to the next section and discuss the importance of avoiding stacking heavy objects on top of the case.

Avoid Stacking Heavy Objects on Top of the Case

To prevent any potential damage, it’s important to avoid stacking heavy objects on top of the protective case.

Proper handling techniques for storing the case involve recognizing the weight limitations of the case and ensuring that it isn’t subjected to excessive pressure or stress. This means refraining from placing heavy items on top of the case or using it as a support for other objects.

Advertisement

Additionally, it’s crucial to use a sturdy and reliable storage location for the case. This can be a designated shelf or cabinet that’s able to support the weight of the case and provide a secure and stable environment.

By following these guidelines, the case will remain in good condition and be ready for future use.

Moving forward, it’s important to regularly inspect and maintain the case for any signs of damage or wear.

Regularly Inspect and Maintain the Case for Damage

It’s essential to regularly check and maintain the protective case for any signs of damage or wear to ensure its long-term durability.

Inspecting the case regularly is important to identify any cracks, dents, or broken parts that may compromise the protection it offers. By inspecting the case, you can catch any issues early on and take the necessary steps to repair or replace it.

Advertisement

Maintaining the case’s durability involves cleaning it regularly to remove any dirt or debris that may accumulate over time. Additionally, make sure to handle the case with care and avoid dropping or mishandling it.

By following these practices, you can ensure that the case remains in good condition and provides optimal protection for your Graco TrueCoat 360DSP Airless Paint Sprayer.

Now, let’s move on to the next section about following the manufacturer’s instructions for long-term storage.

Follow the Manufacturer’s Instructions for Long-Term Storage

Inspecting and maintaining the case for any damage is crucial to ensure the safe storage of your Graco TrueCoat 360DSP airless paint sprayer, but it’s equally important to follow the manufacturer’s instructions for long-term storage.

To properly store your airless paint sprayer, here are some tips for extending its lifespan:

Advertisement
  1. Clean the sprayer thoroughly after each use to remove any paint residue and prevent clogging or damage.
  2. Use the recommended storage solution or lubricant to protect the internal components from corrosion.
  3. Store the sprayer in a clean and dry environment, away from extreme temperatures and direct sunlight.

By following these proper maintenance techniques and tips, you can ensure that your Graco TrueCoat 360DSP airless paint sprayer remains in optimal condition for years to come.

Frequently Asked Questions

Can I store the graco truecoat 360dsp airless paint sprayer without cleaning it thoroughly?

Absolutely not! It is crucial to always clean the Graco Truecoat 360DSP airless paint sprayer thoroughly before storing it. Neglecting to do so can result in clogs, damage, and overall poor performance.

What should I do if the spray tip and guard are difficult to remove or clean?

When the spray tip and guard are difficult to remove or clean, it is important to use proper cleaning techniques. This includes using the appropriate cleaning solution and tools to ensure effective spray tip maintenance.

Is it necessary to empty the paint container and flush the system before storing the sprayer?

Before storing an airless paint sprayer, it’s crucial to empty the paint container and flush the system to prevent clogs and maintain optimal performance. Proper maintenance is key for long term storage.

How often should I check and replace damaged or worn parts in the sprayer?

I recommend checking and replacing damaged or worn parts in the sprayer on a regular basis. It’s important to establish a checking frequency and replacement timetable to ensure the sprayer’s optimal performance and longevity.

What are the manufacturer’s instructions for long-term storage of the graco truecoat 360dsp airless paint sprayer?

When it comes to long-term storage of the Graco TrueCoat 360DSP airless paint sprayer, the manufacturer’s instructions emphasize proper cleaning procedures. This ensures that the sprayer is well-maintained and ready for future use.

Advertisement

Conclusion

In conclusion, properly storing your Graco TrueCoat 360DSP airless paint sprayer in its case is essential to keep it in good condition and ready for future use. By following the steps outlined in this article, you can ensure that your sprayer is clean, protected, and ready to go when you need it.

One interesting statistic to note is that, according to a study, 80% of paint sprayer damage occurs during storage due to improper care. By taking the time to store your sprayer correctly, you can avoid costly repairs and replacements in the long run. Remember to always refer to the manufacturer’s instructions for the best practices in long-term storage.

Continue Reading

Airless Paint Sprayers FAQs

How To Thin Paint For An Airless Sprayer

Published

on

By

An image showcasing the step-by-step process of thinning paint for an airless sprayer

Did you know that properly thinning paint before using it in an airless sprayer can significantly improve the results of your painting projects?

In fact, using the right thinning techniques can help you achieve a smoother finish, improve sprayability, and prevent clogging in your equipment. As someone who has encountered my fair share of painting mishaps, I understand the importance of knowing how to thin paint effectively.

In this article, I will guide you through the process of thinning paint for an airless sprayer step by step. We will explore the necessary materials and tools, determine the recommended thinners for different paint types, and follow the manufacturer’s guidelines for mixing ratios.

I will also provide tips on how to test the consistency of thinned paint and make adjustments as needed. By the end, you will be equipped with the knowledge to properly thin paint and achieve professional-looking results with your airless sprayer.

So, let’s dive in and learn the art of thinning paint for an airless sprayer!

Advertisement

Key Takeaways

  • Thinning paint is essential for optimal performance of an airless sprayer.
  • Gradually add water or paint thinner to thick paint to achieve the desired consistency.
  • Add small amounts of paint to thin it if it is too thin.
  • Properly thinning the paint helps prevent clogging, spitting, and ensures consistent spray pattern.

Understanding the Importance of Thinning Paint for an Airless Sprayer

If you want to achieve professional-looking results with your airless sprayer, you need to understand the importance of thinning paint. Thinning paint is crucial because it allows the sprayer to work efficiently and effectively.

When paint is too thick, it can clog the nozzle and result in uneven application. Thinning the paint helps to improve the flow and atomization of the paint, ensuring a smooth and even finish.

To thin paint for an airless sprayer, you need the best thinners specifically designed for this purpose. There are various options available, such as water-based thinners or solvent-based thinners. Water-based thinners are environmentally friendly and easy to clean up, while solvent-based thinners are more effective for certain types of paint.

Once you understand the importance of thinning paint and have chosen the appropriate thinners, you can move on to gathering the necessary materials and tools for the job.

Advertisement

Gather the Necessary Materials and Tools

Before you begin, make sure you have all the essential items and equipment required. You’ll need a high-quality nozzle for your sprayer, a stir stick to mix the solution, and a paint strainer to remove any impurities that could clog the machine. It’s just like a chef assembling their ingredients before cooking a gourmet meal.

When choosing the right paint brand for your airless sprayer, it’s crucial to opt for a high-quality and compatible product. Different paint brands may have different thicknesses, so it’s important to determine the appropriate thinning ratio for your specific paint brand. The thinning ratio refers to the amount of thinner that needs to be added to achieve the desired consistency for spraying. This information can typically be found on the paint can or in the manufacturer’s instructions.

Once you have gathered all the necessary materials and determined the appropriate thinning ratio, the next step is to determine the recommended thinners for your paint type. I’ll discuss this in the subsequent section.

Determine the Recommended Thinners for Your Paint Type

Advertisement

Once you’ve gathered all the necessary materials and equipment, it’s essential to determine the appropriate solvent to use for your specific type of paint. Different paints require different thinners to achieve the right consistency for airless spraying.

Here are four recommended thinners based on paint compatibility:

  • Mineral spirits: Ideal for oil-based paints and enamels.
  • Water: Suitable for water-based latex paints.
  • Lacquer thinner: Effective for lacquer-based paints.
  • Denatured alcohol: Used for shellac and some types of varnishes.

Choosing the correct thinner ensures proper atomization and smooth application through the airless sprayer. It’s crucial to follow the manufacturer’s guidelines for mixing ratios to achieve the best results. This will be discussed further in the next section about following the manufacturer’s guidelines for mixing ratios.

Follow the Manufacturer’s Guidelines for Mixing Ratios

To ensure the best results, make sure you follow the manufacturer’s guidelines for mixing ratios when using your chosen solvent with the paint. It’s important to follow these guidelines because they’re specifically designed for the paint you’re using.

Deviating from the recommended ratios can lead to issues such as improper paint application, poor coverage, or even damage to your equipment. By following the guidelines, you can avoid common mistakes in paint thinning and achieve the desired consistency for your airless sprayer.

It’s crucial to carefully measure and mix the paint and solvent in the correct proportions to ensure a smooth and even application. Using a graduated container for accurate measurements is a key step in achieving the right mixing ratio.

Advertisement

Use a Graduated Container for Accurate Measurements

Using a graduated container ensures precise measurement, allowing me to achieve the perfect consistency for my paint mixture. Accurate measurements are crucial when thinning paint for an airless sprayer, as it ensures that the paint flows smoothly through the sprayer without clogging or splattering.

By following the manufacturer’s guidelines for mixing ratios and using a graduated container, I can ensure that I’m adding the correct amount of thinner to my paint. This helps me achieve a precise mixing ratio, resulting in a well-thinned paint that’s ideal for spraying.

Once I’ve measured the correct amount of thinner, I can slowly add it to the paint, stirring continuously. This gradual addition of the thinner helps me achieve a smooth and consistent paint mixture without any lumps or clumps.

Advertisement

Slowly Add the Thinner to the Paint, Stirring Continuously

Gently blend the thinner into the mixture, stirring nonstop to ensure a smooth and seamless solution. Here are some discussion ideas to consider when thinning paint for an airless sprayer:

  1. Thinning techniques for different types of paint: Each type of paint may require a different thinning technique. For example, latex paint may need water as a thinner, while oil-based paint may require mineral spirits.

  2. Common mistakes to avoid when thinning paint for an airless sprayer: It’s important to avoid adding too much thinner, as this can affect the quality and coverage of the paint. Additionally, not stirring continuously during the thinning process can result in an uneven consistency.

Now, let’s move on to the next step and test the consistency of the thinned paint on a test surface.

Test the Consistency of the Thinned Paint on a Test Surface

Now, it’s time to see if your thinned paint is ready for action by testing its consistency on a trial surface. Testing the consistency of the thinned paint is crucial to ensure that it will spray evenly and smoothly through the airless sprayer. There are several testing methods you can use to evaluate the paint’s consistency. One effective method is to apply a small amount of the thinned paint onto a test surface, such as a piece of cardboard or scrap wood. Observe how the paint flows and spreads on the surface. Ideally, the thinned paint should have a creamy and uniform consistency, allowing it to be easily sprayed without clogging the sprayer nozzle. If the paint appears too thick or thin, you may need to make adjustments by adding more paint or thinner accordingly.

Consistency Evaluation Desired Outcome
Too Thick Clogs nozzle and produces uneven spray pattern Add more thinner
Too Thin Runs and drips excessively Add more paint
Creamy and Uniform Smooth and even spray Ready for spraying

By using these testing methods and alternative thinning agents, you can ensure that your paint is properly thinned for the airless sprayer. Make adjustments as needed to achieve the desired sprayability in the subsequent section about making adjustments for the desired sprayability.

Make Adjustments as Needed to Achieve the Desired Sprayability

To achieve the desired sprayability, you’ll need to make adjustments as necessary, ensuring a flawless application that’ll leave you feeling satisfied with your final result.

Advertisement

One important adjustment to consider is the spray pattern. By adjusting the nozzle or tip size on your airless sprayer, you can control the width and shape of the spray pattern. This allows you to achieve even coverage on different surfaces. Whether it’s a narrow pattern for detailed work or a wide pattern for larger areas.

Additionally, you may need to adjust the pressure settings on your sprayer to fine-tune the spray pattern and achieve the desired coverage. By making these adjustments, you can ensure that your paint is evenly distributed and avoid any streaks or patches. Properly adjusting the spray pattern is crucial for a professional finish.

Moving forward, it’s important to clean and maintain your airless sprayer properly to prolong its lifespan and ensure consistent performance.

Clean and Maintain Your Airless Sprayer Properly

Regular maintenance is key to keeping your paint sprayer in top shape and ensuring it continues to deliver flawless results. Proper cleaning techniques are essential for maintaining spray gun performance. By following a few simple steps, you can extend the lifespan of your airless sprayer and avoid costly repairs.

One important aspect of maintenance is cleaning the sprayer after each use. This involves flushing out any remaining paint and debris from the system. It is also crucial to regularly inspect and replace worn or damaged parts to prevent any issues that may affect the spray pattern or cause clogs.

Advertisement

To help you visualize the process, here is a table outlining the proper cleaning techniques for your airless sprayer:

Step Cleaning Technique
Step 1 Disassemble the spray gun
Step 2 Rinse all parts with water
Step 3 Use a brush to remove any stubborn paint residue
Step 4 Reassemble the spray gun

By following these proper cleaning techniques, you can maintain the performance of your spray gun and ensure it operates smoothly. Coming up next, we will discuss troubleshooting common issues with thinning paint for an airless sprayer.

Troubleshooting Common Issues with Thinning Paint for an Airless Sprayer

Properly troubleshooting issues with thinning your paint is essential for optimal performance of your airless sprayer. When it comes to paint viscosity, here are some common issues you may encounter and tips for achieving an optimal spray pattern:

  • The paint is too thick: If the paint isn’t flowing smoothly through the sprayer, it may be too thick. Add a small amount of water or paint thinner to thin it out gradually until it reaches the desired consistency.

  • The paint is too thin: On the other hand, if the paint is too thin, it may result in a runny spray pattern. To fix this, add small amounts of paint to thicken it until it sprays evenly.

  • Inconsistent spray pattern: If the spray pattern is uneven or sputters, check the paint viscosity again. Adjust it accordingly, ensuring it is uniform throughout.

  • Clogging or spitting: If the sprayer is clogging or spitting, it could be due to paint particles or debris. Strain the paint before pouring it into the sprayer to prevent clogs.

  • Improper spray fan shape: If the spray fan shape isn’t even, it may be due to incorrect pressure settings. Adjust the pressure to achieve a consistent fan shape for optimal spraying.

By troubleshooting these common issues and following these tips, you can achieve an optimal spray pattern and make the most out of your airless sprayer.

Frequently Asked Questions

Can I use any type of paint with an airless sprayer?

Yes, you can use various types of paint with an airless sprayer. It’s important to consider paint compatibility, as some paints may require thinning. However, there are alternative methods to thinning paint for an airless sprayer.

Advertisement

How long does it usually take to thin paint for an airless sprayer?

To achieve the right consistency for an airless sprayer, it’s important to know how long it usually takes to thin paint properly. Follow these tips and you’ll be able to thin paint in no time.

Can I use water as a thinner for all types of paint?

Using water as a thinner for all types of paint in an airless sprayer has its pros and cons. While water is readily available and economical, it may affect the paint’s durability and adhesion.

Is it necessary to wear protective equipment when thinning paint for an airless sprayer?

Oh, yes, of course, wearing protective equipment when thinning paint for an airless sprayer is completely optional. Who needs goggles, gloves, and a mask? Just dive right in and let those fumes embrace your lungs. Safety first, right? But seriously, always wear protective equipment when working with paint thinners. It’s not worth risking your health. And if you’re looking for alternatives, there are eco-friendly options available that are less harmful to both you and the environment. Stay safe, my friends.

What should I do if the thinned paint clogs the nozzle of the airless sprayer?

If the thinned paint clogs the nozzle of the airless sprayer, I can try a few clogged nozzle solutions. First, I’ll clean the nozzle with a brush or needle. If that doesn’t work, I can try adjusting the pressure or using a different nozzle size.

Conclusion

In conclusion, thinning paint for an airless sprayer is a crucial step in achieving the perfect sprayability. By following the manufacturer’s guidelines and using the recommended thinners, you can ensure accurate measurements and consistent results.

Advertisement

Remember to test the thinned paint on a test surface and make adjustments as needed. Properly cleaning and maintaining your airless sprayer will also prevent any issues.

So, next time you’re ready to tackle a painting project, remember these tips to achieve a flawless finish. Happy painting!

Continue Reading
Advertisement

Affiliate disclaimer

As an affiliate, we may earn a commission from qualifying purchases. We get commissions for purchases made through links on this website from Amazon and other third parties.

Advertisement

Trending