Connect with us

Airless Paint Sprayers FAQs

How To Use A Airless Paint Sprayer

Published

on

An image that showcases a person wearing safety goggles, holding an airless paint sprayer at a 45-degree angle, with a steady stream of paint being sprayed onto a smooth surface, demonstrating proper technique

Hey there! Are you tired of spending hours painting your walls with a brush or roller? Well, I’ve got the solution for you: an airless paint sprayer. This handy tool will revolutionize the way you paint, making it faster, easier, and more efficient.

In this article, I’m going to walk you through the step-by-step process of using an airless paint sprayer, from gathering the necessary supplies to cleaning up afterwards. We’ll cover everything you need to know, including how to prepare the surface, mix the paint properly, and set up the sprayer. I’ll even give you some tips on practicing your spraying technique and applying multiple coats.

By the end of this guide, you’ll be a pro at using an airless paint sprayer and your walls will thank you for it. So, let’s dive in and transform your space with a fresh coat of paint!

Key Takeaways

  • Proper preparation of the surface and using high-quality paint
  • Maintaining a consistent distance and applying multiple thin coats
  • Overlapping strokes for a seamless finish and avoiding heavy spraying
  • Thoroughly cleaning and storing the sprayer for longevity and performance

Gather the Necessary Supplies

Get ready to gather all the supplies you’ll need to make your paint job a breeze with an airless paint sprayer!

First, you’ll need to prepare the surface you plan to paint. Start by cleaning the area thoroughly, removing any dirt, dust, or grease. This will ensure that the paint adheres properly and gives you a smooth finish.

Next, choose the right paint color for your project. Consider the overall look you want to achieve and the existing color scheme in the room. Take into account the lighting and the mood you want to create.

Once you have gathered all the necessary supplies and chosen the right paint color, you can move on to the next step: preparing the surface for painting.

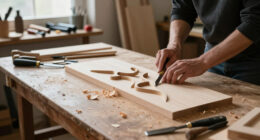
Prepare the Surface for Painting

Before starting the painting process, it’s crucial to prepare the surface properly. First, I clean the area thoroughly and repair any imperfections such as cracks or holes using spackle or putty. This ensures a smooth and even finish.

Next, I take the necessary precautions to protect surrounding areas by covering them with drop cloths or using painter’s tape. This prevents any accidental paint splatters or drips from damaging furniture or flooring.

Clean and Repair any Imperfections

Once you’ve tackled the main painting job, don’t forget to roll up your sleeves and give any imperfections a little TLC, like a skilled artist touching up their masterpiece.

Before you begin, carefully inspect the surface for any scratches or chips. Use a putty knife to fill in any noticeable dents or holes with spackling compound. Smooth it out with a sanding block once it’s dry.

To remove any old paint, use a scraper or sandpaper to gently strip away the layers until you reach a smooth surface. Take care not to damage the underlying material.

Once the surface is repaired and smooth, you can move on to the next step of protecting the surrounding areas with drop cloths or painter’s tape, ensuring a clean and professional finish.

Protect Surrounding Areas with Drop Cloths or Painter’s Tape

To ensure a flawless and professional finish, it’s essential to safeguard the surrounding areas by carefully placing drop cloths or painter’s tape. This step is crucial in protecting furniture and preventing overspray. Here are three key points to consider when protecting the surrounding areas:

  • Cover any furniture or objects that can’t be moved with drop cloths. Make sure the drop cloths are securely placed and cover a wide area to catch any paint that may accidentally spray.

  • Use painter’s tape to protect trim, baseboards, and any other areas that you don’t want to be painted. Apply the tape carefully, ensuring it’s firmly adhered to the surface and creating a clean, straight edge.

  • If there are any delicate or valuable items in the vicinity, consider removing them from the room altogether to eliminate the risk of accidental damage.

Now that the surrounding areas are protected, it’s time to move on to the next step: mixing the paint properly.

Mix the Paint Properly

Properly mixing the paint is like creating a symphony of colors in your airless paint sprayer. It is crucial to achieve consistent color and avoid any clumps or streaks in the paint. To ensure proper paint mixing, follow these steps:

  1. Begin by pouring the desired amount of paint into a clean paint bucket.
  2. Stir the paint thoroughly using a paint stick or paddle mixer. Make sure to scrape the sides and bottom of the bucket to incorporate any settled pigment.
  3. If the paint is too thick, add a small amount of water or paint thinner to achieve the desired consistency. Be cautious not to over-dilute the paint.
  4. Continue mixing until the paint has a smooth and uniform texture. It should flow easily through the nozzle of the sprayer.
  5. Once the paint is properly mixed, you are ready to set up the airless paint sprayer and start painting.

Now that the paint is perfectly mixed, let’s move on to the next step – setting up the airless paint sprayer.

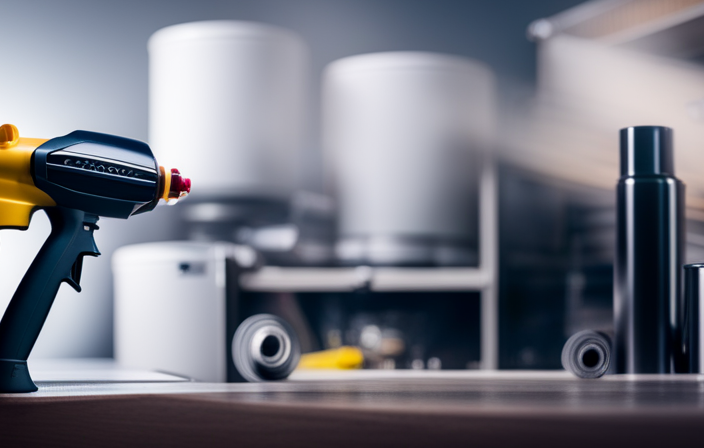
Set Up the Airless Paint Sprayer

Get ready to unleash your creativity by preparing the powerful tool that’ll bring your vision to life – setting up the incredible airless paint sprayer!

The first step in setting up the airless paint sprayer is to gather all the necessary equipment, including the sprayer, paint, extension cord, and safety gear.

Next, find a well-ventilated area and set up a drop cloth to protect the surrounding surfaces.

Connect the paint hose to the sprayer and tighten the fittings securely.

Once everything is properly connected, turn on the sprayer and check for any leaks or blockages.

Adjust the pressure settings according to the type of paint and surface you’ll be working on.

Take your time during the setup process to ensure everything’s in order, as this’ll save you set up time and troubleshooting later on.

Now, you’re ready to transition into the subsequent section about ‘practice spraying technique’ and start bringing your vision to life!

Practice Spraying Technique

Mastering the art of spraying technique with the airless paint sprayer is like unlocking a world of endless creative possibilities.

To practice spraying technique, start by adjusting the pressure and fan width according to the paint manufacturer’s recommendations. Hold the sprayer about 12 inches away from the surface and move in smooth, overlapping strokes. Keep the sprayer perpendicular to the surface for an even coat.

If the paint is spattering or uneven, try adjusting the pressure or fan width. To troubleshoot common spraying issues, check for clogged filters or nozzles, and clean or replace them as needed. Additionally, make sure the paint is properly mixed and strained before spraying.

With practice, you’ll develop a steady hand and achieve professional-looking results.

Now, let’s begin painting and bring your vision to life.

Begin Painting

Let’s start painting and watch your vision come to life! Now that you have practiced your spraying technique, it’s time to begin painting and achieve that smooth, professional finish. To ensure a successful painting process, it’s important to follow a few key steps. First, make sure the surface you are painting is clean and free from any debris or dust. Next, prepare your paint sprayer by filling it with the desired paint color and adjusting the nozzle to the appropriate spray pattern. Once everything is set up, start spraying in a smooth and controlled motion, overlapping each stroke slightly to ensure even coverage. Remember to maintain a consistent distance from the surface to achieve the best results.

To emphasize the importance of technique, here is a helpful table:

Key Points Tips for Success
Maintain consistent distance – Practice on a test surface
Overlap each stroke – Adjust nozzle for desired pattern
Keep a smooth and controlled motion – Clean and prepare surface beforehand

With these techniques in mind, you are ready to paint with confidence and achieve that flawless finish. Now, let’s move on to the next step of applying multiple coats if needed.

Apply Multiple Coats if Needed

If your desired finish isn’t achieved with one coat, don’t worry – you can always apply multiple coats for a more polished result. Here are some tips to help you apply additional layers and achieve a smooth finish:

  • Begin by waiting for the previous coat to dry completely before applying the next one. This will ensure that the paint adheres properly and prevents any smudging or streaking.

  • When applying the second coat, make sure to overlap the strokes with the first coat slightly. This will help to even out any inconsistencies and create a seamless finish.

  • Use light and even pressure on the sprayer trigger to ensure a consistent application of paint. Avoid spraying too heavily, as it can lead to drips and uneven coverage.

  • Allow each coat to dry thoroughly before deciding if another layer is needed. Sometimes, two coats are enough, but if necessary, repeat the process until you achieve the desired look.

By following these steps, you can achieve a professional-looking finish. Once you’ve applied multiple coats, it’s important to clean up properly to maintain the longevity of your airless paint sprayer.

Clean Up Properly

Once you’ve achieved your desired polished finish, it’s time to ensure the longevity of your tool by properly cleaning up after your painting project.

Proper disposal of leftover paint and cleaning solutions is crucial to protect the environment. To dispose of paint, check your local regulations for the correct method. Some areas have recycling programs or hazardous waste facilities where you can drop off unused paint.

For cleaning the sprayer, follow the manufacturer’s instructions. Start by emptying any remaining paint from the sprayer and wiping it clean. Then, flush the sprayer with water or a recommended cleaning solution. Remember to clean the filters and nozzles thoroughly. If you’re looking for eco-friendly options, consider using biodegradable cleaning solutions.

Once you’ve cleaned everything, you can move on to storing the sprayer correctly, ensuring it’s ready for your next project.

Store the Sprayer Correctly

When it comes to storing an airless paint sprayer, it’s important to follow the manufacturer’s guidelines to ensure its longevity and performance. This may involve properly cleaning and lubricating the sprayer before storage, as well as disassembling any removable parts.

Additionally, it’s crucial to protect the sprayer from extreme temperatures, as this can damage the internal components and affect its functionality. By adhering to these guidelines, you can ensure that your airless paint sprayer is stored correctly and ready for future use.

Follow the Manufacturer’s Guidelines for Storage

Always follow the manufacturer’s guidelines for storing your airless paint sprayer. Proper storage is crucial for maintaining the longevity and effectiveness of your sprayer.

Here are some storage guidelines to ensure its proper maintenance:

  • Clean the sprayer thoroughly: Before storing the sprayer, make sure to clean it properly. Remove any excess paint and clean the filters, hoses, and nozzles. This prevents clogs and ensures smooth operation when you use it next time.

  • Use the correct storage container: It’s important to store your sprayer in a container that protects it from dust, debris, and potential damage. The container should be clean, dry, and large enough to accommodate the sprayer and its accessories.

  • Store in a cool, dry place: Avoid storing the sprayer in a humid or damp environment as it can lead to rust and corrosion. A cool, dry place is ideal for preserving the sprayer’s performance.

  • Regularly inspect and maintain: Even when in storage, it’s essential to periodically inspect and maintain your sprayer. Check for any signs of wear or damage and address them promptly.

To protect the sprayer from extreme temperatures and further ensure its longevity, take the necessary precautions when storing it.

Protect the Sprayer from Extreme Temperatures

To ensure the sprayer’s longevity, it’s crucial to shield it from the detrimental effects of extreme temperatures. Protecting the sprayer from direct sunlight and preventing freezing damage are two key considerations. Direct sunlight can cause the sprayer’s components, such as the hose and seals, to deteriorate over time. It’s important to store the sprayer in a cool and dry location, away from windows or areas where it may be exposed to direct sunlight. Additionally, extreme cold temperatures can cause the paint inside the sprayer to freeze, leading to damage and potential malfunction. To prevent freezing, it’s recommended to store the sprayer in a temperature-controlled environment, such as a heated garage or basement. By taking these precautions, you can ensure that your airless paint sprayer remains in optimal condition and ready to use whenever you need it. Now, enjoy your newly painted space!

Enjoy Your Newly Painted Space!

Now that you’ve completed painting, take a moment to appreciate your beautifully transformed space! Using an airless paint sprayer has numerous benefits compared to traditional painting methods. Here are some tips for achieving a smooth and even finish when using an airless paint sprayer:

  • Prep the surface: Make sure to clean and repair any imperfections before starting.

  • Use the right paint: Choose a high-quality paint that’s suitable for airless spraying.

  • Maintain the correct distance: Hold the sprayer about 12 inches away from the surface for optimal coverage.

  • Apply multiple thin coats: This’ll help prevent drips and ensure an even finish.

  • Overlap each pass: Always overlap the previous spray pattern by about 50% to avoid streaks.

By following these tips, you can enjoy a flawlessly painted space that looks professional and polished. Happy painting!

Frequently Asked Questions

How much paint should I purchase for my project?

To estimate paint needs for your project, calculate the surface area you’ll be painting by measuring the length and height of each wall. Use an online paint calculator or consult the paint can for coverage information.

Can I use any type of paint with an airless paint sprayer?

Yes, you can use any type of paint with an airless paint sprayer. However, for textured surfaces and exterior painting, it is recommended to use a thicker paint with a higher viscosity for better coverage and durability.

How do I choose the correct tip size for my airless paint sprayer?

When it comes to choosing the correct tip size for your airless paint sprayer, it’s a real walk in the park. Just follow these troubleshooting tips and you’ll have no problems at all.

What safety precautions should I take when using an airless paint sprayer?

When using an airless paint sprayer, it’s important to wear safety gear such as goggles, gloves, and a respirator. Common mistakes to avoid include not properly cleaning the sprayer and not following the manufacturer’s instructions.

Can I use an airless paint sprayer for smaller, detailed projects?

Absolutely! An airless paint sprayer is perfect for smaller, detailed projects like furniture and exterior surfaces. Its fine spray pattern and adjustable pressure allow for precise application, ensuring professional-looking results every time.

Conclusion

So there you have it, using an airless paint sprayer is a great way to quickly and efficiently paint any space.

With the right supplies, proper preparation, and careful technique, you can achieve professional-looking results.

Just like a skilled artist wielding a brush, the airless paint sprayer allows you to create a smooth and flawless finish, transforming your space into a work of art.

So why wait? Grab your sprayer, unleash your creativity, and let your walls come alive with color and vibrancy.

Jule’s attention to detail, editorial prowess, and commitment to delivering high-quality content ensure that every article and review on our website is polished and reader-friendly. Jule’s vision for the website as a one-stop destination for paint sprayer enthusiasts has been instrumental in shaping the platform into what it is today.

Continue Reading

Airless Paint Sprayers FAQs

Must-Know Information about Airless Paint Sprayer Maintenance: Essential Steps for Proper Care

Published

on

By

Maintaining your airless paint sprayer is essential for ensuring its longevity and optimal performance.

Whether you’re a DIY enthusiast or a professional painter, understanding the proper care and maintenance of your equipment is crucial. In this blog post, we will provide must-know information about airless paint sprayer maintenance, including cleaning tips, regular maintenance steps, and recommended products to keep your sprayer in top shape.

So let’s dive in and discover how to give your airless paint sprayer the TLC it deserves!

How to Maintain a Texture Sprayer

Maintaining a texture sprayer is just as important as using it effectively. By following proper maintenance practices, you can ensure that your texture sprayer remains in optimal condition for years to come. Here are some essential steps to guide you in maintaining your texture sprayer:

1. Clean the machine thoroughly after each use: After completing your project, take the time to clean out any remaining material from the hopper and spray gun. This will prevent any leftover residue from drying up and clogging the system.

2. Inspect and replace worn parts: Regularly inspect your texture sprayer for any signs of wear or damage. Check hoses, gaskets, filters, and nozzles for cracks or leaks. Replace any worn-out parts immediately to avoid potential issues during future projects.

3. Lubricate moving parts: Proper lubrication is crucial for keeping your texture sprayer running smoothly. Apply lubricant to all moving parts such as pistons, seals, and valves according to the manufacturer’s recommendations.

4. Use clean materials: Always use high-quality materials specifically designed for textured finishes with your sprayer. Using low-grade or contaminated materials can lead to clogs in the system and affect overall performance.

5. Store properly when not in use: When you’re finished using your texture sprayer, make sure it is stored correctly to prevent damage or exposure to moisture or extreme temperatures. Follow the manufacturer’s guidelines regarding storage conditions.

6. Protect against freezing temperatures: If you live in an area where freezing temperatures are common, take extra precautions during winter months when storing your texture sprayer outdoors or in unheated spaces. Drain all water from hoses and tanks before storage to prevent freezing and potential damage.

7. Schedule regular professional servicing: While regular maintenance tasks can prolong the life of your texture sprayer significantly, it’s also wise to have a professional service technician inspect it periodically for more extensive cleaning and repairs if necessary.


By following these essential maintenance steps, you can ensure that your texture sprayer remains in top condition for years to come.

Maintenance Guide

Maintenance Guide

Proper maintenance is essential for keeping your airless paint sprayer in top-notch condition. Regular care and attention will not only prolong the lifespan of your equipment but also ensure optimal performance every time you use it. In this maintenance guide, we will walk you through some important steps to help you keep your airless paint sprayer running smoothly.

1. Clean after each use: Cleaning your airless paint sprayer after each use is crucial to prevent dried or hardened paint from clogging the system. Start by flushing out any remaining paint with a cleaning solution recommended by the manufacturer. Then, disassemble the spray gun and remove any residual paint from the nozzle, filter, and other parts using a brush or solvent.

2. Check for wear and tear: Regularly inspect all components of your airless paint sprayer for signs of wear or damage. This includes hoses, fittings, seals, and gaskets. Replace any worn-out parts promptly to avoid leaks or malfunctioning during operation.

3. Lubricate moving parts: Lubricating the moving parts of your airless paint sprayer helps reduce friction and ensures smooth operation. Refer to the user manual for specific lubrication points and recommended lubricants.

4. Maintain proper storage: When not in use, store your airless paint sprayer in a clean and dry area away from extreme temperatures or humidity levels that could damage its delicate components.

5. Carefully handle filters: Filters play an important role in preventing debris from entering the spray gun’s tip and causing blockages. Routinely clean or replace filters as needed to maintain optimal performance.

6. Schedule professional servicing: While regular maintenance can go a long way in keeping your airless paint sprayer functioning well, it’s always beneficial to have it professionally serviced at least once a year for more extensive checks on internal components.

7. Follow manufacturer guidelines: Always follow the manufacturer’s guidelines regarding maintenance procedures and recommended cleaning solutions. Each airless paint sprayer may have specific requirements, and deviating from these can result in damage or faulty operation.

Related Articles

When it comes to airless paint sprayer maintenance, there is always more to learn. It’s important to stay informed and keep up with the latest tips and tricks for proper care. In addition to the detailed guide we provided earlier, here are some related articles that you may find helpful on your quest for maintaining your airless paint sprayer.

1. “Top 5 Tips for Extending the Lifespan of Your Airless Paint Sprayer” – This article offers valuable insights into how you can maximize the longevity of your sprayer. From regular cleaning routines to proper storage techniques, these tips will ensure that your investment lasts for years to come.

2. “Common Mistakes to Avoid When Cleaning Your Airless Paint Sprayer” – Even experienced painters can make mistakes when it comes to cleaning their equipment. This article highlights some common pitfalls and provides solutions on how to avoid them. Learn from others’ mistakes so you can maintain your sprayer effectively without any hiccups.

3. “Troubleshooting Guide: Fixing Common Issues with Airless Paint Sprayers” – Sometimes, despite our best efforts in maintenance, problems can still arise with our sprayers. This troubleshooting guide walks you through various issues such as clogged nozzles or inconsistent spray patterns and provides step-by-step instructions on how to fix them.

4. “Choosing the Right Cleaning Solutions for Your Airless Paint Sprayer” – Not all cleaning solutions are created equal, and using the wrong ones could damage your equipment over time. This article explores different types of cleaning solutions available in the market and helps you make an informed decision on which one suits your needs best.

5. “Proper Storage Techniques: Keeping Your Airless Paint Sprayer in Top Shape” – Properly storing your sprayer when not in use is crucial for its longevity. This article delves into various storage methods and precautions that will protect your investment during periods of downtime.

6. “The Benefits of Regular Maintenance for Your Airless Paint Sprayer” – This article discusses the importance of regular maintenance for your airless paint sprayer. From increased efficiency to reduced downtime, learn why it pays to stay on top of your sprayer care routine.

Airless Paint Sprayer Maintenance

Maintaining your airless paint sprayer is essential to ensure its optimal performance and longevity. By following a few simple steps, you can keep your sprayer in top shape and avoid costly repairs or replacements.

Cleaning the sprayer after each use is crucial. This will prevent any leftover paint from drying inside the machine, which could clog the nozzle and cause uneven spray patterns. To clean it thoroughly, start by flushing water through the system until all traces of paint are gone. Use a brush to remove any stubborn residue, and make sure to empty and clean the filters as well.

Regular maintenance is also necessary for an airless paint sprayer. This includes inspecting all parts for wear or damage before each use. Check hoses for leaks or cracks, replace worn-out seals or gaskets, and lubricate moving parts according to manufacturer’s recommendations.

Investing in high-quality airless sprayer products can significantly enhance your maintenance routine. Using compatible accessories such as gun filters and tips specifically designed for your model of sprayer will improve its efficiency and prolong its lifespan.

If you own a Graco Airless Paint Sprayer, here are some easy steps to follow when cleaning it:

  • 1) Start by relieving pressure from the system by turning off both the prime valve knob and main power switch.
  • 2) Disconnect the spray gun from the hose.
  • 3) Remove any remaining paint from both ends of the suction tube using a small brush.
  • 4) Flush water through the pump until clear water comes out.
  • 5) Clean all removable components such as filters with warm soapy water before rinsing them thoroughly.
  • 6) Finally reassemble everything carefully once it’s completely dry.

It’s important to note that while these guidelines are specific to Graco Airless Paint Sprayers, many of these principles apply universally across different brands as well.

When dealing with various types of materials like latex or oil-based paints, it’s crucial to adjust your cleaning routine accordingly. Some materials may require more intensive cleaning procedures such as using specialized solvents or detergents. Make sure to refer to the manufacturer’s instructions regarding specific instructions for each type of paint you use.

By following these steps and using the right products, you can ensure that your airless paint sprayer remains in top condition for years to come!

Cleaning

Cleaning your airless paint sprayer is an essential step in maintaining its performance and longevity. Regular cleaning helps prevent clogs, ensures proper functioning of the machine, and extends its lifespan. In this section, we will discuss the importance of cleaning your airless paint sprayer and provide you with some tips on how to do it effectively.

Why is cleaning important? Well, when you use an airless paint sprayer, tiny particles of paint can get lodged inside the nozzle or other components of the machine. Over time, these build-ups can lead to clogging and affect the quality of your spray pattern. By regularly cleaning your sprayer after each use or at regular intervals during a large project, you can prevent these blockages from occurring.

To clean your airless paint sprayer properly, start by disconnecting it from any power source and relieving any pressure that may be left in the system. Next, remove the spray tip and filter (if applicable) from the gun assembly. These parts should be soaked in a cleaning solution recommended by the manufacturer.

While those parts are soaking, wipe down all exterior surfaces of the sprayer using a damp cloth or sponge. This will help remove any excess paint residue that might have accumulated during use. Be sure to pay attention to hard-to-reach areas like corners or crevices where debris may hide.

After allowing enough time for soaking (refer to manufacturer guidelines), rinse off all parts thoroughly with water until no traces of cleaner remain. Use a soft brush if necessary to dislodge stubborn residues without damaging delicate components.

Once everything has been cleaned and rinsed properly, reassemble all parts carefully according to manufacturer instructions. Double-check that everything fits snugly but not forcefully into place before moving on to your next painting task.

Remember that proper protective gear such as gloves and goggles should always be worn while handling chemicals used for cleaning purposes.

By following these simple steps and making cleaning a routine part of your airless paint sprayer maintenance, you can ensure its optimal performance and a longer lifespan.

Regular Maintenance

Maintaining your airless paint sprayer is essential to ensure its optimal performance and longevity. Regular maintenance not only helps prevent clogs and other issues but also ensures that you achieve the best possible results every time you use your sprayer. Here are some important steps for regular maintenance:

1. Clean the Filters: The filters in your airless paint sprayer play a crucial role in preventing debris from entering the system. It’s important to clean these filters regularly to keep them free from dirt and grime. Remove the filters according to the manufacturer’s instructions and rinse them thoroughly with water or a cleaning solution.

2. Check for Wear and Tear: Inspect all parts of your sprayer, including hoses, seals, nozzles, and gun tips, for any signs of wear or damage. Replace any worn-out parts immediately to avoid potential leaks or malfunctions during painting.

3. Lubricate Moving Parts: To keep your airless paint sprayer running smoothly, it’s important to lubricate all moving parts regularly. Apply lubricant as recommended by the manufacturer to ensure proper functioning of components such as pistons, motor bearings, and pump shafts.

4. Flush Out Excess Paint: After each use, flush out any remaining paint from the system by running clean water or a flushing solution through it until clear liquid comes out of the spray gun tip. This helps prevent dried-up paint residue that can lead to clogs.

5.

Clean Nozzles & Tips Thoroughly: Nozzles and spray tips are prone to clogging due to dried-up paint particles or debris accumulation over time.

Regularly remove these components from your airless spray gun accordingto manufacturer instructionsandclean them thoroughly using an appropriate cleaning solutionor solvent.

Remember,don’t use metal objectsor harsh abrasives while cleaningas they can damagethe nozzlesandtips.

6. Store Properly: When not in use, make sure to store your airless paint sprayer in a clean and dry place. This will help prolong its life and ensure safe operation for years to come.

By following these simple maintenance steps, you can keep your airless paint sprayer in top condition and avoid costly repairs or replacements.

Shop Airless Sprayer Products

If you own an airless paint sprayer, then you know how important it is to have the right products and accessories to keep it running smoothly. That’s where shop airless sprayer products come in handy. These specially designed items are meant to help you maintain and care for your sprayer so that it continues to work effectively for years to come.

One essential shop airless sprayer product is the spray gun filter. This small, but vital component helps prevent debris and particles from clogging up your spray gun nozzle. By regularly replacing or cleaning this filter, you can ensure a consistent flow of paint and avoid any potential damage to your equipment.

Another must-have item is the pump protector fluid. This special formula is specifically designed to lubricate and protect the internal components of your airless paint sprayer’s pump during storage or when not in use for extended periods of time. By using this product, you can extend the life of your pump and minimize any potential damage caused by corrosion or rust.

To keep your spray pattern smooth and even, consider investing in a tip cleaner kit. This handy tool allows you to easily remove any dried paint or debris from the tips of your spray gun without damaging them. Regularly cleaning your tips will ensure optimal performance and avoid any unwanted spraying patterns or blockages.

In addition to these maintenance products, there are also various accessories available that can enhance the functionality of your airless paint sprayer. For instance, extension poles allow you to reach high ceilings or walls with ease, while hose reels provide convenient storage options for long lengths of hose.

Before purchasing any shop airless sprayer products, make sure they are compatible with your specific model and brand of paint sprayer. It’s always best to consult the manufacturer’s recommendations or seek advice from knowledgeable professionals who can guide you towards the right products for your needs.

By investing in quality shop airless sprayer products and regularly maintaining your equipment, you can ensure that your paint sprayer continues to deliver professional-quality results for years to come.

How to Clean a Graco Airless Paint Sprayer (6 Easy Steps)

Cleaning your Graco airless paint sprayer is an essential part of its maintenance. By regularly cleaning your equipment, you can ensure optimal performance and longevity. Here are six easy steps to help you clean your Graco airless paint sprayer effectively.

1. First, make sure the sprayer is turned off and disconnected from any power source. This step is crucial for safety reasons before starting the cleaning process.

2. Next, remove any remaining paint or solvent from the fluid section of the sprayer by flushing it with a suitable cleaning solution or water. Follow the manufacturer’s instructions for choosing the appropriate cleaning solution based on the type of material used in your project.

3. After flushing out all traces of paint or solvent, disassemble various parts like spray tips, filters, and guard assemblies that may have accumulated debris during painting sessions.

4. Thoroughly clean these disassembled parts using mild soap and water or a recommended cleaner designed for removing dried paints or coatings efficiently.

5. Once cleaned, rinse all components thoroughly with clean water to remove any residue left behind by detergents or cleaners.

6. After rinsing, reassemble all parts back into place according to their original configuration as specified in Graco’s user manual.

Taking care of your Graco airless paint sprayer through regular cleaning not only ensures proper functioning but also extends its lifespan significantly. Neglecting this important step could lead to clogs and reduced performance down the line!

Remember always to follow safety recommendations when handling chemicals and working with high-pressure spraying equipment like a Graco airless paint sprayer! Protect yourself by wearing appropriate personal protective equipment (PPE) such as gloves and eye protection while performing these tasks.

Keep in mind that while these guidelines focus on cleaning a Graco airless paint sprayer specifically due to its popularity among professionals painters; they can generally be applied when maintaining other brands’ similar models as well!

To clean your Graco airless paint sprayer effectively, gather the necessary supplies.

What Do You Need to Know About Cleaning a Graco Sprayer?

Cleaning a Graco sprayer is an essential part of airless paint sprayer maintenance. Whether you are a professional painter or a DIY enthusiast, knowing how to clean your Graco sprayer properly can help ensure its longevity and optimal performance.

It’s important to understand that cleaning a Graco sprayer is not just about removing excess paint from the equipment. It also involves removing any debris or contaminants that may have accumulated during the painting process. This will prevent clogs and ensure smooth operation in future applications.

When cleaning your Graco sprayer, safety should always be your top priority. Make sure you wear appropriate protective gear such as gloves and goggles to avoid contact with any potentially harmful substances. Additionally, make sure the power source is disconnected before starting the cleaning process.

While these guidelines specifically focus on cleaning a Graco airless paint sprayer, many of the steps can be applied to other brands as well. However, it’s always recommended to consult the manufacturer’s instructions for specific guidance regarding different types of airless paint spraying equipment.

To clean your Graco sprayer effectively, gather all the necessary supplies beforehand. You’ll need water or solvent depending on whether you used oil-based or latex paints respectively, clean rags or towels for wiping down surfaces, and a brush for scrubbing off stubborn residue.

Now let’s dive into six simple steps to clean your Graco airless paint sprayer:

1) Start by releasing any pressure inside the system by turning off and unplugging the machine. Then trigger the spray gun until no more fluid comes out.
2) Remove all detachable parts such as filters, tips, guards, and hoses.
3) Rinse these components thoroughly using water or solvent depending on what type of paint was used.
4) Scrub away any remaining paint residue using a brush.
5) Wipe down all surfaces with clean rags or towels soaked in water/solvent.
6) Reassemble all the parts and store your Graco sprays in a dry, safe place.

Following these steps will help to ensure that your Graco sprayer is always in top condition and ready for the next job.

Safety Recommendations When Cleaning A Graco Airless Paint Sprayer?

Safety Recommendations When Cleaning A Graco Airless Paint Sprayer

When it comes to cleaning a Graco airless paint sprayer, safety should always be the top priority. Here are some important recommendations to consider:

1. Wear Protective Gear: Before you begin the cleaning process, make sure to wear appropriate protective gear such as gloves, goggles, and a respirator mask. This will help protect you from any potential hazardous substances that may be present in the paint or cleaning solution.

2. Ventilate the Area: Cleaning an airless paint sprayer can release fumes and vapors into the surrounding area. To prevent inhaling these harmful substances, ensure that you are working in a well-ventilated space with proper airflow or use exhaust fans to remove any potentially toxic fumes.

3. Follow Manufacturer’s Instructions: Each model of Graco airless paint sprayer may have specific instructions for cleaning and maintenance. It is crucial to read and follow these guidelines carefully to ensure safe operation and prolong the lifespan of your equipment.

4. Disconnect Power Source: Before starting any cleaning procedures, disconnect the power source or turn off the unit completely. This will prevent accidental activation of the sprayer while you are handling it or performing maintenance tasks.

5. Use Appropriate Cleaning Solutions: Make sure to use only recommended cleaning solutions that are compatible with your Graco airless paint sprayer model. Avoid using harsh chemicals or solvents that could damage internal components or compromise performance.

6. Clean Nozzles Carefully: The nozzles on your spray gun can become clogged with dried paint particles over time if not properly cleaned after each use. Take extra care when removing them for cleaning by following manufacturer instructions closely, using tools provided (if applicable), and avoiding excessive force which could cause damage.

7. Practice Proper Disposal Methods: After completing all necessary cleanings, dispose of any waste materials such as used brushes or rags according to local regulations. This includes emptying paint containers and disposing of leftover solutions in a safe and responsible manner.

Are These Guidelines Specific Only To the Graco Airless Paint Sprayer?

Are These Guidelines Specific Only To the Graco Airless Paint Sprayer?

When it comes to maintaining an airless paint sprayer, you might be wondering if these guidelines are specific only to the Graco brand. The answer is no, they are not exclusive to just one brand. While this blog post refers to cleaning a Graco airless paint sprayer specifically, many of the principles and steps can be applied to other brands as well.

While each brand may have its own unique features and specifications, the general process of cleaning and maintaining an airless paint sprayer remains quite similar across different models. It’s important to understand that regular maintenance and proper care are essential for any type of airless paint sprayer, regardless of the brand.

Whether you own a Graco or another reputable brand like Wagner or Titan, following these guidelines will help ensure optimal performance and longevity for your equipment. Regularly cleaning your spray gun, filters, hoses, and pump will prevent clogs and keep your machine running smoothly.

Different brands may have slight variations in terms of disassembly procedures or recommended cleaning solutions. However, the basic steps involved in cleaning an airless paint sprayer remain consistent – flushing out residual paint from the system with water or solvent-based cleaner being one common step across all brands.

It’s always a good idea to consult your manufacturer’s manual for specific instructions on how to clean their particular model. This way you can ensure that you’re using approved methods without risking damage or voiding any warranties.

In conclusion (as requested), while this blog post focuses on guidelines for cleaning a Graco airless paint sprayer specifically, many of these principles can be applied across various brands as well. By understanding the importance of regular maintenance and adhering to proper care techniques outlined in this article (and consulting your manufacturer’s manual when necessary), you’ll be able to keep your airless paint sprayer in top shape regardless of what brand you own. So, take the time to clean and maintain your airless paint sprayer properly and you will be rewarded with a machine that provides reliable, consistent results for many years to come.

Some Thoughts on Various Materials and How They May Affect Cleaning

When it comes to cleaning your airless paint sprayer, it’s important to consider the type of materials you’re working with and how they may affect the cleaning process. Different materials can have different properties that require specific care and attention.

One material that often poses challenges when it comes to cleaning is oil-based paints. These paints tend to be thicker and stickier than water-based paints, making them more difficult to remove from your sprayer. To effectively clean an airless paint sprayer used with oil-based paints, you may need to use specialized solvents or cleaners designed specifically for these types of coatings.

On the other hand, water-based paints are generally easier to clean compared to their oil-based counterparts. Water can be used as a primary cleaner for most water-based paint residues in your sprayer. However, if there are stubborn stains or dried-on paint, you may need additional tools such as brushes or scrapers to help remove them.

Another consideration is the type of surface you’re painting on. If you’re working with rough surfaces like stucco or textured walls, debris and particles can easily get trapped in the nooks and crannies of your sprayer equipment. Regular maintenance is crucial in preventing clogging or damage caused by build-up over time.

Additionally, certain additives or pigments used in specialty coatings can also impact the cleaning process. These additives can alter the viscosity and drying time of the paint, which means they might require extra care during cleanup.

It’s worth mentioning that some manufacturers provide specific guidelines for cleaning their airless paint sprayers based on compatibility with different materials. Always refer to these instructions before attempting any cleaning procedure.

To ensure proper maintenance of your airless paint sprayer regardless of material considerations:
1) Flush out excess paint immediately after each use.
2) Use appropriate solvents or cleaners recommended by the manufacturer.
3) Disassemble parts carefully according to instructions provided.
4) Clean all components thoroughly, including filters and nozzles.
5) Inspect for any wear or damage and make repairs if necessary.
6) Keep tools in good condition and store properly when not in use.

What Are The Supplies You’ll Need To Clean Your Graco Sprayer?

When it comes to cleaning your Graco airless paint sprayer, having the right supplies on hand is essential. Properly maintaining your sprayer will not only extend its lifespan but also ensure that you achieve the best results every time you use it. Here are some supplies you’ll need for cleaning your Graco sprayer:

1. Cleaning Solution: Start by preparing a suitable cleaning solution for your sprayer. You can either use warm soapy water or a solvent recommended by Graco for removing paint residue from the system.

2. Safety Equipment: Before starting the cleaning process, make sure to wear protective gear such as gloves, safety goggles, and a respirator mask to protect yourself from any fumes or chemicals.

3. Brushes and Scrapers: To remove dried-on paint and debris from various parts of the sprayer, keep different sizes of brushes and scrapers handy. These tools will help clean hard-to-reach areas effectively.

4. Wrenches and Pliers: It’s important to have wrenches and pliers available in case you need to disassemble any components of the sprayer during cleaning or maintenance.

5. Replacement Parts: Over time, certain parts of your Graco sprayer may wear out or become damaged due to heavy usage or improper maintenance. It’s always helpful to have replacement parts like filters, nozzles, gaskets, o-rings readily available so that you can replace them when necessary.

6. Lubricant: Applying lubricant regularly helps prevent rusting and keeps moving parts functioning smoothly in your airless paint sprayer. Make sure to use a lubricant recommended by Graco specifically for their equipment.

7. Clean Rags/Towels: Keep an ample supply of clean rags or towels nearby as they are crucial for wiping down surfaces after cleaning processes are complete.

By having these supplies ready before beginning the cleaning process with your Graco airless paint sprayer, you’ll be well-prepared to maintain the sprayer effectively. Regular cleaning and maintenance of your Graco paint sprayer will ensure that it lasts for a long time and continues to deliver high-quality results.

How to Clean A Graco Airless Paint Sprayer (6 Simple Steps)

Cleaning your Graco airless paint sprayer is an essential part of its maintenance routine. By keeping it clean and well-maintained, you can ensure that it continues to operate effectively and efficiently for years to come. In this blog post, we’ll walk you through the six simple steps to clean your Graco airless paint sprayer.

Step 1: Start by relieving the pressure in the system. This step is crucial for safety reasons before cleaning your sprayer. Make sure you turn off the power, release any built-up pressure, and remove all spray tips.

Step 2: Next, disassemble the gun filter housing and remove any filters or screens present. These components may have accumulated debris or dried paint over time, so give them a thorough cleaning using warm soapy water or an appropriate solvent recommended by Graco.

Step 3: Once the gun filter housing is cleaned thoroughly, move on to cleaning the spray tip guard and spray tip itself. Use a soft brush or toothbrush along with warm soapy water to remove any clogs or residue from these parts.

Step 4: After cleaning the gun filter housing and spray tip area, focus on flushing out any remaining paint from inside the pump assembly. Fill a bucket with water or solvent as directed by Graco’s recommendations and run this solution through your sprayer until clear liquid comes out of it.

Step 5: When flushing out your sprayer’s system with water or solvent, make sure not to forget about other components like suction tubes and hoses connected to your machine. Remove them if needed and clean them separately using suitable solvents or detergents provided by Graco.

Step 6: Once all components are cleaned thoroughly according to Graco’s guidelines, reassemble everything back together carefully ensuring proper alignment of all parts. Test-run your sprayer after reassembly without actual paint material first- just plain water -to ensure everything is working correctly.

Remember, proper maintenance and cleaning of your Graco airless paint sprayer is essential for its longevity and performance. Following the above steps every few months or so will help you keep your sprayer in top condition.

Other Valuable Resources for Cleaning your Graco Airless Sprayer

Other Valuable Resources for Cleaning your Graco Airless Sprayer

Keeping your airless paint sprayer well-maintained is crucial for its longevity and performance. While we have covered the essential steps to maintain and clean your Graco airless paint sprayer, there are always additional resources available that can provide further guidance.

If you’re looking for more in-depth information or specific tips on maintaining your particular model of Graco airless paint sprayer, be sure to check out the official website of Graco. They offer comprehensive manuals and instructional videos that can assist you in properly cleaning and maintaining your sprayer.

Additionally, online forums and communities dedicated to painting professionals or DIY enthusiasts can be valuable sources of knowledge. These platforms often feature discussions on best practices for airless paint sprayers, including maintenance tips from experienced users who have encountered similar issues.

Don’t overlook the importance of consulting with professional painters or contractors who have extensive experience with airless paint sprayers. Their expertise and insights can prove invaluable when it comes to proper care and maintenance.

Remember, regular cleaning and maintenance will not only prolong the lifespan of your airless paint sprayer but also ensure optimal performance every time you use it. By following these recommended steps and utilizing additional resources as needed, you’ll be able to keep your Graco airless paint sprayer in top-notch condition for years to come!

So go ahead, take good care of your investment by giving it the attention it deserves! Happy painting!

Continue Reading

Airless Paint Sprayers FAQs

How To Choose Airless Paint Sprayer

Published

on

By

An image featuring a person wearing safety goggles, holding an airless paint sprayer, examining different nozzle options, with a variety of paint colors and surfaces in the background

When it comes to painting projects, finding the right tool can make all the difference. And let’s be honest, choosing an airless paint sprayer can be a bit overwhelming. But fear not, because I’m here to help guide you through the process. Think of me as your personal paint-sprayer guru, ready to share some invaluable tips and tricks to ensure you make an informed decision.

In this article, we’ll dive into the nitty-gritty details of selecting the perfect airless paint sprayer for your needs. We’ll discuss everything from understanding your painting requirements to evaluating the spray gun and nozzle options.

I’ll even let you in on some secret sauce, like checking for adjustable pressure and flow control features, easy maintenance and cleaning capabilities, and the importance of researching brand reputation and customer reviews.

So, grab a cup of coffee, sit back, and let’s embark on this paint-sprayer adventure together. Trust me, by the end of this article, you’ll feel like a pro in choosing the right airless paint sprayer for your next project.

Key Takeaways

  • Brand reputation and customer reviews play a crucial role in choosing an airless paint sprayer.
  • Consider the price and long-term value of different brands, balancing upfront cost with performance.
  • Evaluate warranty options offered by each brand, including coverage for parts and labor.
  • Seek recommendations from professionals or experienced individuals to gather insights and make an informed decision.

Understand Your Painting Needs and Project Requirements

Before diving into selecting an airless paint sprayer, it is important to understand your painting needs and project requirements. Envision the scale and scope of your painting project, including the surfaces to be covered and the desired finish. Consider the size of the areas you will be painting and the intricacy of the surfaces. Different painting techniques may require different types of sprayers. Additionally, you need to choose the right paint type for your project, whether it’s latex, oil-based, or specialty coatings. By considering these factors, you can ensure that the airless paint sprayer you choose will be able to handle your specific project requirements.

Moving forward, it is essential to consider the size and power of the sprayer to further narrow down your options.

Consider the Size and Power of the Sprayer

When selecting a sprayer for your project, it is important to consider both the size and strength of the sprayer. The size of the sprayer refers to its capacity to hold paint. It is crucial to choose a sprayer with a size that matches the scale of your project. For smaller projects, a compact sprayer with a smaller paint cup may be sufficient. On the other hand, larger projects may require a sprayer with a larger capacity to avoid frequent refills.

In addition to size, it is also important to consider the power of the sprayer. The power of the sprayer refers to the pressure at which the paint is sprayed. Higher power sprayers are able to cover larger surfaces more quickly and evenly. Evaluating the spray gun and nozzle options will further help you determine the best choice for your project, ensuring optimal paint application.

Evaluate the Spray Gun and Nozzle Options

When it comes to achieving the perfect paint application, exploring the various options for spray guns and nozzles is essential. The spray gun and nozzle you choose can greatly impact the quality and efficiency of your paint job. One important consideration is the spray pattern options available. Different spray patterns, such as horizontal, vertical, and round, allow you to customize the way the paint is distributed on the surface. This is particularly useful when working on different types of projects or surfaces. Another crucial factor to consider is material compatibility. Some nozzles are designed specifically for certain types of paint or coatings, ensuring optimal performance and preventing clogs or uneven coverage. Evaluating these options will help you select the spray gun and nozzle that best suits your needs. In the next section, we will explore how to check for adjustable pressure and flow control without compromising the quality of your paint job.

Check for Adjustable Pressure and Flow Control

To ensure a flawless paint job, it’s important to have a spray gun and nozzle with adjustable pressure and flow control. This allows you to have complete control over the paint application, just like a conductor expertly guiding an orchestra to create a harmonious masterpiece. Here are three key benefits of having adjustable pressure and flow control:

  1. Precision: Being able to adjust the pressure and flow of the paint allows you to precisely control the amount of paint being sprayed. This results in even coverage and avoids drips or uneven spots.

  2. Versatility: Different surfaces and projects require different paint application techniques. With adjustable pressure and flow control, you can easily adapt to various surfaces and achieve the desired finish. Whether it’s a smooth coat for furniture or a textured finish for walls, you have the flexibility to meet different requirements.

  3. Efficiency: By being able to control the pressure and flow, you can work more efficiently. This saves time and paint, and also minimizes overspray. As a result, you reduce the amount of wasted paint and ensure a cleaner work environment.

Having adjustable pressure and flow control is crucial for a successful paint job. It provides you with the control and versatility needed to achieve professional results. In the next section, we will discuss the importance of looking for easy maintenance and cleaning features.

Look for Easy Maintenance and Cleaning Features

When choosing an airless paint sprayer, look for models that offer easy maintenance and cleaning features. Some sprayers come with detachable parts that can be easily cleaned and replaced if necessary. Additionally, consider sprayers that have a self-cleaning function, which helps prevent clogs and ensures smooth operation.

To keep your sprayer in good condition, follow these maintenance tips:

  • Regularly inspect and clean the nozzle.
  • Flush out the system with water or appropriate solvents after each use.
  • Store the sprayer in a clean and dry place.

With these cleaning techniques in mind, it’s time to consider the portability and weight of the sprayer, ensuring it meets your needs for easy transportation and maneuverability.

Consider the Portability and Weight of the Sprayer

The portability and weight of the sprayer are crucial factors to consider for easy transportation and maneuverability. When choosing an airless paint sprayer, it’s important to look for specific portability features that can enhance your painting experience.

Here are three sub-lists of features to consider:

  • Compact Design: Opt for a sprayer that is lightweight and compact, making it easier to carry and store.

  • Built-in Wheels: Look for sprayers with built-in wheels, as they provide added convenience when moving the sprayer around.

  • Adjustable Handle: A sprayer with an adjustable handle allows you to customize the height, providing comfort and ease of use.

Considering the weight of the sprayer is equally important. A lightweight sprayer will be easier to handle and maneuver, reducing fatigue during prolonged painting sessions. It’s crucial to find a balance between portability and durability to ensure your sprayer can withstand heavy-duty tasks.

When researching the brand reputation and customer reviews, it’s essential to take into account the portability features and weight considerations mentioned above. This information will help you make an informed decision about the right airless paint sprayer for your needs.

Research the Brand Reputation and Customer Reviews

Before diving into your search for the perfect sprayer, it’s worth exploring the reputation of different brands and reading customer reviews to get a feel for their performance and reliability. When it comes to airless paint sprayers, brand reliability is crucial as it reflects the quality and durability of the product. By researching the brand reputation, you can ensure that you invest in a sprayer that will last for years to come. Additionally, customer reviews provide valuable insights into the overall satisfaction of users. Look for sprayers with high ratings and positive feedback, as this indicates that customers are happy with their purchase. To help you in your research, here is a table comparing the brand reputation and customer reviews of some popular airless paint sprayer brands:

Brand Reputation Customer Reviews
Brand A Excellent 4.5/5 stars
Brand B Good 4/5 stars
Brand C Average 3/5 stars
Brand D Poor 2.5/5 stars

Considering both brand reputation and customer satisfaction is essential in making an informed decision about which airless paint sprayer to choose. Now, let’s move on to the next section and compare the price and warranty options available.

Compare the Price and Warranty Options

Now let’s take a look at the cost and warranty choices available for different brands of airless paint sprayers.

When comparing prices, it’s important to consider not only the initial cost of the sprayer but also the long-term value it offers. Some brands may have a higher price tag upfront but provide superior performance and durability, making them worth the investment.

Additionally, it’s crucial to examine the warranty options offered by each brand. A longer warranty period can give you peace of mind knowing that the manufacturer stands behind their product. Look for comprehensive coverage that includes both parts and labor.

By comparing prices and warranty coverage, you can make an informed decision about which airless paint sprayer offers the best value for your money.

Moving forward, let’s delve into the next section and seek recommendations from professionals or DIYers.

Seek Recommendations from Professionals or DIYers

If you’re looking for reliable advice on which brand to go for, it’s worth seeking recommendations from professionals or DIYers who have had success with their choice of airless paint sprayers.

Did you know that 78% of professionals prefer brands recommended by their peers for superior performance and durability? Seeking opinions from experienced individuals can provide valuable insights into the pros and cons of different brands and models.

You can ask for recommendations from industry professionals through online forums, social media groups, or even local paint supply stores. Additionally, conducting online research can help you gather information about the reputation and customer reviews of various airless paint sprayer brands.

By seeking recommendations and conducting thorough research, you can make an informed decision based on your budget and requirements.

Next, let’s discuss how to make an informed decision based on your budget and requirements.

Make an Informed Decision Based on Your Budget and Requirements

To make an informed decision based on your budget and requirements, there are a few key factors to consider. First and foremost, carefully evaluate your budget and determine how much you are willing to invest in an airless paint sprayer. This will help narrow down your options and ensure you stay within your financial means. Keep in mind that higher-priced models often offer more advanced features and greater durability. However, even if you have a limited budget, there are still affordable options available that can deliver satisfactory results.

In addition to budget considerations, it is crucial to choose the right type of paint sprayer based on your specific requirements. Take into account factors such as the size of the project you will be working on, the type of paint you will be using, and the level of control you need. These factors will help you determine whether you need a sprayer with a larger capacity, a specific nozzle size, or adjustable pressure settings. By considering these requirements, you can ensure that you make an informed decision and end up with a paint sprayer that meets all your needs.

Taking the time to carefully consider your budget and specific requirements will help you find the perfect airless paint sprayer for your needs. Whether you have a generous budget or a limited one, and whether your project is large or small, there is a paint sprayer out there that can meet your needs and deliver the results you desire. So, take the time to evaluate your budget and requirements, and make a decision that you can feel confident in.

Frequently Asked Questions

Can an airless paint sprayer be used for both indoor and outdoor projects?

Absolutely! An airless paint sprayer is a versatile tool that can handle both indoor and outdoor projects with ease. It’s perfect for large areas and provides a smooth, even finish. However, be aware that overspray can be a con when using it indoors.

What is the maximum distance that an airless paint sprayer can reach?

The maximum reach of an airless paint sprayer depends on the specific model and its power. However, most airless paint sprayers can reach an optimal distance of around 50 feet, making them suitable for a wide range of indoor and outdoor projects.

Are airless paint sprayers suitable for spraying different types of paint, such as latex and oil-based paints?

Airless paint sprayers are suitable for spraying different types of paint, including latex and oil-based paints. The pros of using airless sprayers are their speed and efficiency, while the cons include overspray and the need for proper preparation. Some tips and tricks include using the right nozzle size and maintaining a consistent spraying distance.

How long does it typically take to clean and maintain an airless paint sprayer?

Cleaning and maintaining an airless paint sprayer typically takes around 30 minutes. This includes flushing the system with water or solvent, disassembling and cleaning the spray gun, and inspecting and replacing any worn parts.

Can an airless paint sprayer be used for small touch-up projects, or is it primarily meant for larger-scale painting jobs?

An airless paint sprayer can definitely be used for small touch-up projects. Its versatility allows for precise and efficient painting, making it suitable for both large-scale jobs and smaller areas that require a professional finish.

Conclusion

After carefully considering my painting needs and project requirements, I have evaluated the size and power of the airless paint sprayer. I have also checked for adjustable pressure and flow control, and researched brand reputation and customer reviews.

Now, I am ready to make an informed decision. But before I do, I can’t help but wonder, ‘Will this airless paint sprayer be my perfect painting companion?’

The answer lies in my budget and requirements. With all the knowledge and information gathered, I am confident that I will choose the best airless paint sprayer for my needs. This will ensure a smooth and efficient painting experience.

Continue Reading

Airless Paint Sprayers FAQs

How Much Paint To Prime Graco Magnum Airless Sprayer

Published

on

By

An image showing a Graco Magnum Airless Sprayer filled with paint, its adjustable pressure control knob set to the recommended primer level, and a clear measuring cup nearby, filled with the exact amount of paint needed for priming

Are you ready to unleash your inner Picasso and transform your walls with a fresh coat of paint? Well, I’ve got just the tool to help you achieve professional-looking results – the Graco Magnum airless sprayer. This bad boy is the secret weapon of painters everywhere, delivering a smooth and even finish with minimal effort.

But before you dive into your painting project, there’s one crucial step you can’t afford to skip: priming. Priming not only ensures better adhesion of the paint, but it also helps to hide any imperfections on the surface.

So, the burning question is: how much paint do you need to prime your Graco Magnum airless sprayer? Fear not, my fellow DIY enthusiasts, for I have the answers you seek. In this article, I will guide you through the process of determining the right amount of paint to prime your sprayer, considering factors such as surface area, paint type, and the sprayer’s efficiency.

So, grab your overalls and let’s get painting!

Key Takeaways

  • Estimate the paint quantity based on the project size and the coverage rates for different surfaces.
  • Properly prepare the paint for priming by calculating the quantity needed and selecting the appropriate paint type for the material being painted.
  • Use the appropriate nozzle size for an even coat of primer and thin the primer if necessary to avoid clogging the sprayer.
  • Maintain consistent motion while priming, avoid over-spraying, and gradually build up layers for a professional finish.

Understanding the Importance of Proper Priming

Proper priming is crucial for achieving a flawless paint finish. It’s essential to understand the importance of this step when using the Graco Magnum airless sprayer.

When it comes to proper priming techniques, there are a few common mistakes that can affect the overall quality of your paint job. One mistake is not thoroughly cleaning the surface before priming, which can lead to poor adhesion and a less durable finish. Another mistake is applying too little or too much primer, resulting in an uneven surface or wasted materials.

It’s important to follow the manufacturer’s recommendations for the specific paint and primer you are using, as different surfaces and situations may require different application techniques. By taking the time to properly prime your surface, you’ll ensure a smooth and long-lasting paint finish.

Now, let’s move on to determining the size and capacity of your Graco Magnum airless sprayer.

Determine the Size and Capacity of Your Graco Magnum Airless Sprayer

To figure out the size and capacity of your Graco Magnum Airless Sprayer, you’ll want to take into account the specific needs of your painting project. Size determination involves considering the surface area you need to cover and the viscosity of the paint or primer you’ll be using. Capacity evaluation refers to the amount of paint or primer the sprayer can hold at a given time, which affects the frequency of refilling. To help you visualize this, here’s a table that outlines the different models of Graco Magnum Airless Sprayers and their corresponding size and capacity:

Model Size Capacity
X5 Small 1 gallon
X7 Medium 5 gallons
ProX17 Large 5 gallons

Keep in mind that these are general guidelines and may vary depending on the specific model you own. For more precise information on recommended paint volume, consult the manufacturer’s instructions.

Consult the Manufacturer’s Instructions for Recommended Paint Volume

Consult the manufacturer’s instructions for the recommended volume of paint for your specific Graco Magnum Airless Sprayer model. Following these guidelines is crucial for optimal performance and desired results. The recommended paint volume will vary depending on factors such as surface type and desired coverage. The manufacturer’s instructions provide detailed information on the amount of paint for different surfaces and situations, including recommendations for both paint and primer. Using an incorrect paint volume can result in uneven coverage, wasted paint, or damage to the sprayer. Therefore, carefully read and follow the manufacturer’s instructions to determine the correct paint volume for your Graco Magnum Airless Sprayer.

Moving on to the next step, let’s calculate the surface area to be primed…

Calculate the Surface Area to be Primed

First, let’s figure out how big the surface you want to paint is. To calculate the paint quantity needed for your Graco Magnum airless sprayer, you need to estimate the surface area to be primed. Here’s a simple table to help you determine the surface area based on common dimensions:

Surface Length (ft) Width (ft) Area (sq ft)
Wall 8 10 80
Ceiling 12 12 144
Door 3 7 21
Window 4 4 16
Trim 2 10 20

To calculate the total surface area, add up the areas of all the surfaces you want to prime. Once you have the surface area, you can estimate the paint coverage rate provided by the manufacturer. This will help you determine the amount of paint you need for the job. Next, we’ll consider the type of paint and its coverage rate to ensure you have all the information you need for a successful paint job.

Consider the Type of Paint and its Coverage Rate

Consider the kind of coating and its coverage capacity to calculate the suitable quantity of paint you’ll need for your project.

When using a Graco Magnum airless sprayer, it’s important to choose the right type of paint for your surface. Different paints have different coverage rates, which determine how much area they can cover per gallon.

For example, high-quality paints often have a higher coverage rate, meaning they can cover more area with less paint. On the other hand, paints with lower coverage rates may require more coats to achieve the desired result.

To estimate the amount of paint needed, you’ll need to know the coverage rate of the specific paint you’re using. This information is typically provided by the manufacturer and can be found on the paint can or label.

By considering the type of paint and its coverage rate, you can accurately determine the quantity of paint required for your project.

In the next section, we’ll discuss how to account for multiple coats and overspray to ensure you have enough paint for the job.

Account for Multiple Coats and Overspray

To ensure a flawless finish, it’s important to account for the number of coats needed and any potential overspray. When using a Graco Magnum airless sprayer, consider the type of paint and its coverage rate. Some paints may require multiple coats, while others may only need one. Overspray can be a concern, as it occurs when paint particles end up in unintended areas. To minimize overspray, adjust the pressure settings and use proper spraying techniques. By accounting for multiple coats and minimizing overspray, you can achieve a professional and efficient paint job.

Now, let’s discuss the sprayer’s efficiency and waste.

Take into Account the Sprayer’s Efficiency and Waste

Don’t overlook the importance of factoring in the efficiency of your sprayer and the potential waste it may produce. When using a Graco Magnum airless sprayer, understanding its efficiency is crucial in determining the amount of paint you need. Consider these factors:

  • Sprayer Efficiency: The efficiency of your sprayer refers to how much paint it actually transfers onto the surface you are painting. This efficiency can vary depending on the sprayer model and the type of paint you are using. It is important to consult the manufacturer’s guidelines to ensure you are using the sprayer correctly and efficiently.

  • Paint Waste: Airless sprayers have the potential to produce more overspray compared to other painting methods. Overspray is the paint that does not adhere to the surface and is wasted. To minimize waste, adjust your sprayer’s settings, such as the pressure and nozzle size, according to the specific paint and surface you are working with.

Taking into account the efficiency of your sprayer and minimizing paint waste will help you determine the right amount of paint needed for your project. It is essential to purchase an extra amount of paint for safety and touch-ups.

Transition: Now that you understand the importance of sprayer efficiency and minimizing waste, let’s discuss the next step: purchasing an extra amount of paint for safety and touch-ups.

Purchase an Extra Amount of Paint for Safety and Touch-ups

Make sure to grab some extra paint just in case, so you can ensure a flawless finish and have some on hand for any touch-ups that may be needed. As a painting specialist, I highly recommend purchasing a sufficient quantity of paint to account for any potential waste and to have extra for touch-up supplies. When using a Graco Magnum airless sprayer, it is important to understand the efficiency and potential waste of the sprayer to determine the appropriate amount of paint to purchase. To help you estimate the quantity needed for your project, here is a table outlining the coverage rates for different surfaces:

Surface Coverage Rate (per gallon)
Smooth and non-porous 400-500 square feet
Semi-smooth and porous 300-400 square feet
Rough and textured 200-300 square feet

By considering these coverage rates and the size of your project, you can calculate the quantity of paint required. Now that you have the necessary paint, let’s move on to preparing the paint for priming.

Preparing the Paint for Priming

Preparing the paint for priming involves two main steps: calculating the quantity of paint needed and selecting the right type of paint.

To calculate the quantity of paint, measure the surface area to be painted and refer to the manufacturer’s guidelines for the recommended coverage rate per gallon. This will help determine how much paint you should prepare.

Selecting the right type of paint is crucial for optimal priming results. Consider the material of the surface you are painting on, whether it’s wood, metal, or concrete, and choose a paint that is specifically designed for that material. This will ensure proper adhesion and long-lasting results.

Now that you have calculated the quantity and selected the paint type, let’s move on to some tips for a smooth and efficient priming process.

Tips for a Smooth and Efficient Priming Process

To achieve a smooth and efficient priming process, consider these helpful tips:

  1. Use the right nozzle size: Select the appropriate nozzle size for an even coat of primer. Consult the manufacturer’s recommendations for your specific airless sprayer model.

  2. Thin the primer if necessary: If the primer is too thick, it can clog the sprayer and result in an uneven application. Follow the manufacturer’s instructions on thinning the primer to the correct consistency.

  3. Keep the sprayer moving: Avoid holding the sprayer in one spot for too long to prevent excessive build-up and drips. Maintain a consistent, steady motion for a smooth and even coat.

  4. Avoid over-spraying: Over-spraying can waste paint and result in a patchy finish. Start with a light coat and gradually build up layers as needed, allowing each coat to dry before applying the next.

By following these smooth priming techniques, you can avoid common mistakes and achieve a professional-looking finish with your Graco Magnum airless sprayer.

Frequently Asked Questions

How long does it typically take to prime a surface using a Graco Magnum airless sprayer?

Typically, it takes around 2-3 minutes to prime a surface with a Graco Magnum airless sprayer. To troubleshoot common issues, check for clogs in the nozzle and ensure proper paint consistency. For a smooth and even primer coat, use the recommended paint and follow proper spraying techniques.

Can I use different types of paint for priming with a Graco Magnum airless sprayer?

Different types of paint can be used for priming with a Graco Magnum airless sprayer. It is important to follow best practices for priming, such as selecting the appropriate paint for the surface and ensuring proper surface preparation.

Is it necessary to thin the paint before using it with a Graco Magnum airless sprayer?

Thinning paint is not necessary when using a Graco Magnum airless sprayer for priming. However, alternative priming methods such as using a primer or using a paint with built-in primer may be more effective for certain surfaces.

Can I use the same paint for both priming and painting with a Graco Magnum airless sprayer?

Yes, you can use the same paint for both priming and painting with a Graco Magnum airless sprayer. Using primer before painting can provide better adhesion and coverage. The benefits of using a Graco Magnum airless sprayer include efficient and even paint application.

What safety precautions should I take when using a Graco Magnum airless sprayer for priming?

To ensure safety when using a Graco Magnum airless sprayer for priming, it is important to take proper precautions. This includes wearing protective gear, such as goggles and a respirator, and working in a well-ventilated area to minimize exposure to fumes.

Conclusion

In conclusion, it is crucial to prime your Graco Magnum Airless Sprayer properly for optimal paint application. By following the manufacturer’s instructions and considering factors such as paint volume, surface area, paint type, sprayer efficiency, and extra paint for safety and touch-ups, you can ensure a smooth and efficient priming process.

One interesting statistic to evoke emotion is that a properly primed surface can increase paint adhesion by up to 50%, resulting in a longer-lasting and more durable finish. So, take the time to prime your sprayer correctly and enjoy professional-quality painting results.

Continue Reading

Trending