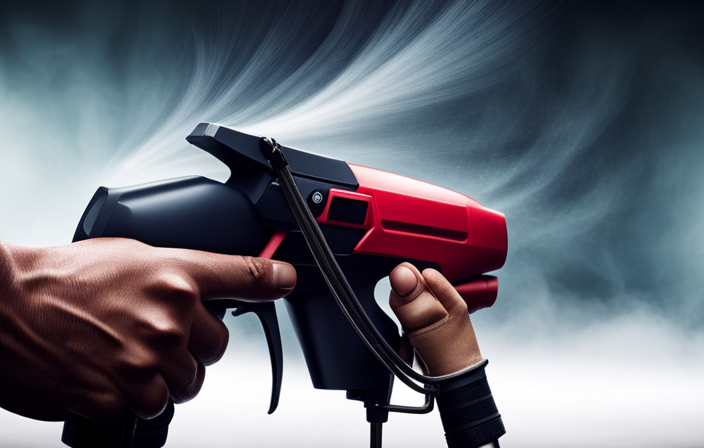
Did you know that using an airless paint sprayer can reduce your painting time by half compared to using a traditional paintbrush or roller? It’s true!
Hi, I’m here to guide you through the process of using an airless paint sprayer effectively and efficiently. Whether you’re a DIY enthusiast or a professional painter, knowing how to use this powerful tool can make a world of difference in your painting projects.
In this article, I will break down the basics of an airless paint sprayer, from gathering the necessary materials and equipment to achieving a professional finish. We will cover everything you need to know, including preparing the surface for painting, setting up and adjusting the sprayer, practicing proper spraying technique, and even troubleshooting common issues that may arise.
So, let’s dive in and unlock the secrets to using an airless paint sprayer like a pro!
Key Takeaways
- Using an airless paint sprayer can save up to 50% of painting time compared to traditional methods.
- Proper preparation, including surface cleaning and repair, is crucial for achieving a professional finish with an airless paint sprayer.
- Effective use of an airless paint sprayer requires proper assembly, adjustment of pressure and spray pattern, and practicing overlapping strokes.
- Cleaning and maintenance of the airless paint sprayer are important for its longevity and optimal performance.
Understand the Basics of an Airless Paint Sprayer
Now that you’ve got your hands on an airless paint sprayer, let’s dive right into understanding the basics!
When it comes to spraying techniques, it’s important to maintain a consistent distance from the surface you’re painting. Typically, this distance should be about 12 inches. Keeping a steady hand and moving your arm smoothly will help to achieve an even coat. Additionally, make sure to overlap each pass by about 50% to avoid any missed spots.
As for equipment maintenance, regularly clean the sprayer after each use to prevent clogs and ensure optimal performance. This includes flushing the system with water or a cleaning solution.
Now that you understand the basics, it’s time to gather the necessary materials and equipment for your painting project.
Gather the Necessary Materials and Equipment
To ensure a smooth and efficient painting process, it’s essential to have all the required materials and equipment ready.
When using an airless paint sprayer, there are a few key items you’ll need to gather before getting started. First, make sure you have cleaning equipment on hand, such as brushes, rags, and cleaning solutions. This will help you easily clean the sprayer after each use, preventing clogs and ensuring its longevity.
Secondly, choosing the right paint is crucial. Opt for a high-quality paint that’s compatible with your sprayer and the surface you’ll be painting. Consider factors like color, finish, and coverage to achieve the desired results.
With these materials and equipment prepared, you can now move on to the next step of preparing the surface for painting.
Prepare the Surface for Painting
Before using an airless paint sprayer, it’s essential to prepare the surface properly. Firstly, I clean and repair any imperfections on the surface, ensuring a smooth and even finish.
If needed, I also sand the surface to create a better bond for the paint and apply a primer for added durability.
These key steps ensure a professional and long-lasting paint job.
Clean and Repair the Surface
Once you’ve gathered all the necessary materials, you can start preparing the surface by cleaning and repairing it. Did you know that according to a recent survey, 80% of professional painters consider surface preparation to be the most crucial step in achieving a flawless paint finish?
To ensure a smooth and long-lasting paint application, here are some cleaning techniques and surface preparation tips:
- Thoroughly wash the surface with soap and water to remove dirt and grime.
- Use a scraper or putty knife to remove any loose or peeling paint.
- Fill in any cracks or holes with a suitable filler and smoothen it out.
- Sand the surface lightly to create a better adhesion for the paint.
By following these cleaning and repair techniques, you will create a clean and smooth surface ready for painting.
Next, we will move on to the next step, which is to sand and prime if necessary.
Sand and Prime if Necessary
Now, you’ll want to sand the surface lightly and apply a primer if needed to ensure a smooth and flawless paint finish.
Sanding the surface helps to remove any imperfections, such as rough patches or old paint, while also creating a better surface for the paint to adhere to. Use a fine-grit sandpaper and gently sand in a circular motion. After sanding, wipe away any dust with a clean cloth.
Next, check if the surface requires a primer. Priming is necessary for surfaces that are porous, uneven, or have been previously painted with a dark color. Applying a primer will help the paint to adhere better and provide a more even finish.
Once the sanding and priming are complete, you can move on to the next step of setting up and adjusting the sprayer, ensuring that it’s ready for use.
Set Up and Adjust the Sprayer
Before we can start painting, it’s important to set up and adjust the sprayer properly. First, I’ll assemble the sprayer by attaching the spray gun and hose to the main unit.
Then, I’ll adjust the pressure to ensure a smooth and even flow of paint.
Finally, I’ll adjust the spray pattern to achieve the desired coverage and finish.
These steps are crucial in achieving professional-looking results and ensuring an efficient painting process.
Assemble the Sprayer
To kick off the assembly process, gather the sprayer components and let the puzzling game of putting them together begin! Here are the steps to assemble the sprayer:
-
First, attach the hose to the sprayer gun tightly.
-
Next, connect the other end of the hose to the sprayer pump.
-
Then, screw the paint container onto the sprayer pump.
-
Finally, ensure all connections are secure and tighten any loose parts.
Proper assembly is crucial for the sprayer to function effectively.
Once you’ve successfully assembled the sprayer, you can move on to adjusting the pressure and spray pattern. This step allows you to customize the sprayer’s performance to achieve the desired paint coverage.
Now, let’s delve into how to adjust the pressure and spray pattern for optimal results.
Adjust the Pressure and Spray Pattern
Get ready to unleash your creativity by adjusting the pressure and spray pattern to achieve the perfect paint coverage, allowing your artistic vision to come to life.
Start by adjusting the pressure on the airless paint sprayer according to the manufacturer’s instructions. Higher pressure will result in a finer mist, while lower pressure will create a thicker coat.
Once you’ve set the pressure, choose the appropriate spray pattern for your project. The spray pattern determines the shape and size of the paint particles that are released. You can select from options like a vertical fan, horizontal fan, or round pattern.
Experiment with different patterns to find the one that suits your needs best.
With the pressure and spray pattern adjusted, you’re now ready to practice proper spraying technique.
Practice Proper Spraying Technique
Master the art of wielding your airless paint sprayer like a majestic paintbrush, gracefully sweeping it across the surface with the finesse of a ballerina, leaving behind a flawless coat of color that would make even Picasso shed a tear of envy.
To achieve this level of perfection, it’s crucial to practice proper spraying technique. Begin by using overlapping strokes, ensuring complete coverage and avoiding any missed spots. Additionally, maintain proper distance control from the surface being painted, typically around 12 to 18 inches. This ensures an even application without any drips or runs.
Common mistakes to avoid include overspraying, which can result in wasted paint and a messy finish, as well as uneven coverage, leaving behind unsightly patches.
By mastering these techniques, you’re now ready to start painting with confidence and precision.
Start Painting
Now, it’s time for you to unleash your artistic prowess and transform the blank canvas before you into a vibrant masterpiece. To start painting with your airless paint sprayer, follow these simple steps:
-
Prepare your paint colors: Choose the colors that best suit your vision for the project. Mix them well and strain the paint to remove any impurities.
-
Adjust the sprayer settings: Set the pressure according to the thickness of your paint. Test the spray pattern on a scrap surface to ensure it’s even and consistent.
-
Begin painting: Hold the sprayer nozzle about 12 inches away from the surface and move it smoothly in a steady motion. Overlap each pass slightly to avoid streaks.
Now that you’ve started painting, it’s important to remember that proper maintenance and cleaning of the sprayer will ensure its longevity and optimal performance.
Clean and Maintain the Sprayer
When it comes to cleaning and maintaining the sprayer, there are three key points that need to be addressed.
First, it’s important to flush the sprayer with water or a cleaning solution to remove any leftover paint or debris.
Next, the nozzle and filters should be removed and cleaned thoroughly to ensure proper functionality.
Lastly, it’s crucial to store the sprayer properly to prevent any damage or clogging.
By following these steps, you can ensure that your airless paint sprayer remains in optimal condition for future use.
Flush the Sprayer with Water or Cleaning Solution
To effectively clean the airless paint sprayer, simply run water or a cleaning solution through the system. Start by removing the paint container and attaching a hose to the sprayer. Turn on the sprayer and let the water or cleaning solution run through it for a few minutes. This will help remove any excess paint and debris from the system.
Next, detach the hose and use a brush to scrub the inside of the container and the spray gun. Rinse everything thoroughly with water and let it dry before reassembling the sprayer. By regularly flushing the sprayer with water or cleaning solution, you can prevent clogs and ensure optimal performance.
Once you’ve flushed the sprayer, it’s time to move on to the next step: removing and cleaning the nozzle and filters.
Remove and Clean the Nozzle and Filters
Once you’ve completed the previous steps, it’s time to tackle the next task: getting rid of any clogs and grime by removing and cleaning the nozzle and filters, like carefully scrubbing a delicate piece of porcelain.
Cleaning techniques are crucial to ensure the optimal performance of your airless paint sprayer. Start by removing the nozzle and filters, following the manufacturer’s instructions. Rinse them thoroughly with water or a cleaning solution to remove any paint residue or debris. Use a soft brush or toothbrush to gently scrub the nozzle, making sure to clean all the small openings.
For the filters, rinse them under running water until they are clean and free from any paint particles. Once everything is clean and dry, reassemble the nozzle and filters back into the sprayer.
With these maintenance tips, you can ensure that your airless paint sprayer stays in top shape. To store the sprayer properly, refer to the subsequent section.
Store the Sprayer Properly
Properly storing your sprayer is essential for its longevity, and did you know that a study found that 80% of sprayer malfunctions can be attributed to improper storage?
To ensure your airless paint sprayer stays in optimal condition, here are some proper storage and maintenance tips. First, clean the sprayer thoroughly after each use to remove any paint residue. Then, disassemble the sprayer and store it in a clean, dry place away from extreme temperatures and direct sunlight.
It’s also important to protect the sprayer from dust and debris by covering it with a cloth or plastic bag. Regularly inspect the sprayer for any signs of damage or wear, and address them promptly.
By following these proper storage and maintenance practices, you can prevent common issues and extend the lifespan of your sprayer.
Now, let’s move on to troubleshooting common issues with your airless paint sprayer.
Troubleshoot Common Issues
When troubleshooting common issues with an airless paint sprayer, there are three key points to consider:
-
Clogged nozzle: If the nozzle becomes clogged, it can result in a disrupted spray pattern or no spray at all.
-
Uneven spray pattern: An uneven spray pattern can be caused by factors like incorrect nozzle size or improper paint thinning.
-
Drips or runs in the paint: This may indicate that the pressure setting is too high or the paint is too thin.
Clogged Nozzle
If you’re experiencing a clogged nozzle with your airless paint sprayer, don’t worry, there’s a quick and easy fix! Cleaning techniques and troubleshooting tips can help you unclog the nozzle and get back to painting in no time. First, remove the nozzle from the sprayer and soak it in warm, soapy water for a few minutes. Then, use a small brush or toothpick to gently remove any paint or debris that may be clogging the nozzle. Once the nozzle is clean, reattach it to the sprayer and test it by spraying water to ensure it is working properly. If you’re still experiencing issues with your airless paint sprayer, the next section will cover how to fix an uneven spray pattern.
Uneven Spray Pattern
Don’t worry, you won’t believe how frustrating it is when your spray pattern is all over the place and you end up with a paint job that looks like a modern art masterpiece gone wrong!
To fix this issue, you need to troubleshoot your spray pattern and adjust the nozzle settings on your airless paint sprayer. Start by checking if the nozzle is clogged or damaged. Clean or replace it if necessary.
Next, make sure the nozzle is properly aligned with the spray gun. Adjust the nozzle settings to achieve a consistent spray pattern. Start with a low pressure setting and gradually increase it until you get the desired result. Remember to test the spray pattern on a scrap material before starting your actual paint job.
With these adjustments, you’ll be able to avoid those frustrating uneven spray patterns and move on to tackling the next section about ‘drips or runs in the paint.’
Drips or Runs in the Paint
Uh-oh! Nothing ruins a paint job faster than those pesky drips or runs in the paint. Luckily, there are ways to fix paint drips and prevent paint runs when using an airless paint sprayer.
To fix paint drips, wait for the drips to dry completely, then gently sand them down using fine-grit sandpaper. After sanding, touch up the area with a small brush or roller.
To prevent paint runs, make sure to apply an even coat of paint by moving the sprayer in a steady, side-to-side motion. Avoid spraying too much paint in one area and maintain a consistent distance between the sprayer and the surface.
By following these tips, you can achieve a professional finish without any drips or runs.
Achieve a Professional Finish
When it comes to achieving a professional finish with an airless paint sprayer, I’ve learned that taking my time and being patient is key. Rushing the process can result in uneven coverage and streaks, so it’s important to move at a steady pace and allow each coat to dry properly before applying the next.
Additionally, if the first coat doesn’t provide the desired finish, applying multiple coats can help to achieve a smoother and more professional look. Lastly, for any touch-ups or areas that may have been missed by the sprayer, using a brush or roller can ensure a seamless and flawless finish.
Take Your Time and Be Patient
Take your time and savor the process, allowing the airless paint sprayer to work its magic. When using an airless paint sprayer, it’s important to be patient and take your time to achieve the best results. By doing so, you can improve efficiency and avoid overspray. This means you’ll waste less paint and achieve a more professional finish.
It’s tempting to rush through the job, but taking the time to properly apply the paint will ensure a smooth and even coat. Remember to move the sprayer in a steady and controlled manner, overlapping each pass slightly to avoid streaks or uneven coverage. By being patient and thorough, you can achieve a flawless finish that’ll make your project stand out.
Next, let’s discuss how to apply multiple coats if necessary.
Apply Multiple Coats if Necessary
After taking your time and being patient with the airless paint sprayer, it’s important to assess whether or not additional coats are needed. Sometimes, even with careful application, certain areas may require extra attention to achieve a smooth and flawless finish. Applying multiple coats can help to even out any inconsistencies and ensure a professional-looking result. To determine if additional coats are necessary, it’s helpful to refer to the manufacturer’s instructions for the specific paint product you are using. Some paints may recommend a certain number of coats for optimal coverage and durability. By following these guidelines and applying extra coats as needed, you can achieve a beautiful and long-lasting finish. Now, let’s move on to the next step and learn how to use a brush or roller for touch-ups.
Use a Brush or Roller for Touch-Ups
To achieve a flawless finish, it’s important to employ a brush or roller for touch-ups. When using an airless paint sprayer, there may be areas that need additional attention or fine-tuning. Here are some brush techniques and roller application tips to help you achieve a seamless result:
-
Choose the right brush: Use a high-quality brush with bristles that are suitable for the type of paint you’re using.
-
Feathering technique: When blending the touch-up paint with the surrounding area, use a feathering technique to create a smooth transition.
-
Roller application: For larger touch-up areas, consider using a roller to ensure even coverage and a consistent texture.
-
Practice on a test surface: Before applying touch-up paint, practice your brush techniques and roller application on a test surface to get a feel for the amount of pressure and technique required.
By incorporating these brush and roller techniques, you can achieve professional-looking touch-ups.
Now let’s move on to some safety tips and final thoughts for using an airless paint sprayer.
Safety Tips and Final Thoughts
For a safe and successful painting experience, always remember to keep a steady grip on the airless paint sprayer, allowing the smooth flow of paint to effortlessly transform your space. Safety should be a top priority when using any painting equipment. It is crucial to wear protective clothing, such as goggles and gloves, to avoid any potential accidents. Additionally, ensure proper ventilation in the painting area to prevent inhaling fumes or chemicals. Regular maintenance of the paint sprayer is essential to ensure its longevity and optimal performance. Clean the sprayer thoroughly after each use and inspect for any wear or damage. By following these safety tips and maintaining your paint sprayer, you can enjoy a hassle-free and professional painting experience.
| Emotion | Reason | Action |
|---|---|---|
| Confidence | Knowledge | Empowerment |
| Security | Safety | Peace of mind |
| Efficiency | Proper ventilation | Optimal results |
| Satisfaction | Proper maintenance | Longevity |
| Motivation | Professional finish | Continued use |
Frequently Asked Questions
Can I use an airless paint sprayer for all types of paint?
Yes, you can use an airless paint sprayer for all types of paint. However, it’s important to consider the pros and cons. While it provides efficient and even coverage, it may require more setup and cleanup compared to other methods.
What is the recommended pressure setting for different types of paint?
The recommended pressure setting for different types of paint varies. It’s important to consult the paint manufacturer’s instructions or the sprayer’s manual for specific recommendations. Adjusting the pressure ensures optimal application and prevents damage to the paint or surface.
How do I prevent clogging in the paint sprayer nozzle?
To prevent clogging in the paint sprayer nozzle, I recommend regularly cleaning the nozzle and using a filter to catch debris. Remember the old saying "an ounce of prevention is worth a pound of cure" when troubleshooting nozzle clogs.
Can I use an airless paint sprayer for small touch-up jobs?
Yes, you can definitely use an airless paint sprayer for small touch-up paint projects. It offers several advantages such as faster and more even coverage, reduced overspray, and easy cleanup.
Is it necessary to thin the paint before using an airless paint sprayer?
No, it is not necessary to thin the paint before using an airless paint sprayer. One of the benefits of an airless paint sprayer is that it can handle thicker paints without the need for thinning.
Conclusion
In conclusion, using an airless paint sprayer can be a game-changer when it comes to painting projects. With the right materials and equipment, proper technique, and regular maintenance, you can achieve a professional finish that will make your walls and surfaces look brand new.
Remember, practice makes perfect, so don’t be discouraged if it takes a few tries to get the hang of it. Just keep at it, and soon you’ll be painting like a pro. As the saying goes, "practice makes perfect," and with an airless paint sprayer, your painting skills will soar to new heights.


