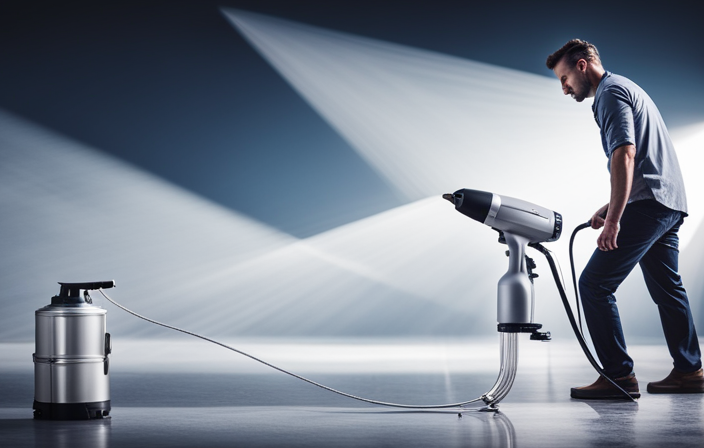
I still remember the first time I tried to paint the inside of my house. It was a daunting task, with brushes, rollers, and a mess everywhere. But then I discovered the magic of an airless paint sprayer. Painting became easier, faster, and more enjoyable. If you’re feeling worn out from spending hours painting your walls, this article is perfect for you.
In this guide, I’ll show you step-by-step how to use an airless paint sprayer to transform your interior space. We’ll cover everything from preparing your workspace to choosing the right paint and equipment. I’ll even share some safety tips to ensure a smooth and accident-free painting experience.
So, let’s dive in and discover the wonders of using an airless paint sprayer for your interior painting projects.
Key Takeaways
- Maintain a consistent distance between the sprayer and the surface
- Use overlapping strokes in a steady, controlled motion
- Work in sections and divide the wall into manageable areas
- Clean the sprayer thoroughly after each use to prevent clogs or malfunctions
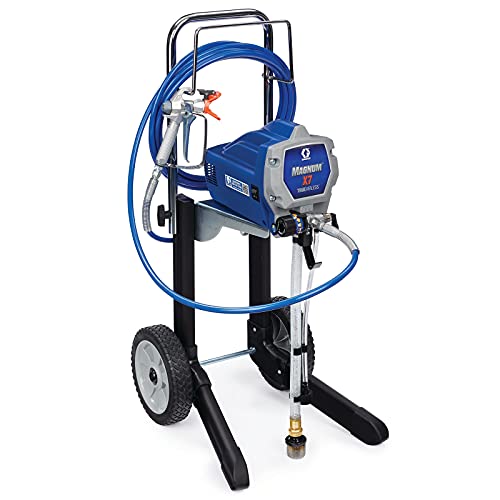
Graco Magnum 262805 X7 Cart Airless Paint Sprayer, Gray
CONTROL PAINT FLOW: Fully adjustable pressure to give you ultimate control of paint flow for any project size;...
As an affiliate, we earn on qualifying purchases.
Prepare Your Workspace
Before you begin using an airless paint sprayer on the interior of a space, it’s important to take the time to properly prepare your workspace. Start by organizing your workspace and clearing out any clutter or furniture that could get in the way.
Cover any surfaces that you don’t want to be painted, such as floors, furniture, or fixtures, with drop cloths or plastic sheeting. Make sure to remove any outlet covers or light switch plates to avoid getting paint on them.
Gather all the necessary tools and materials, including the paint sprayer, paint, paint filters, extension cords, and safety equipment such as goggles and gloves.
Once your workspace is organized and your tools are ready, you can move on to choosing the right paint and equipment for the job.

Wagner Spraytech 2435698 Control Pro 130 Paint Sprayer with T2 Gun, High Efficiency Airless Sprayer with Low Overspray, Yellow
WAGNER AIRLESS PAINT SPRAYER: The Control Pro 130 Power Tank applies coatings 3X faster than a roller with...
As an affiliate, we earn on qualifying purchases.
Choose the Right Paint and Equipment
When it comes to choosing the right paint type for your airless paint sprayer, there are a few key points to consider. First, you’ll want to make sure the paint you choose is compatible with your sprayer and the surface you’ll be painting.
Additionally, consider factors such as the desired finish, durability, and ease of application. Once you’ve selected the right paint type, it’s important to properly set up your airless paint sprayer, ensuring it’s clean, calibrated, and ready to deliver a smooth, even coat of paint.
Select the Right Paint Type
To achieve a flawless interior paint job, it’s crucial to choose the right type of paint for your airless paint sprayer. Here are three key considerations to keep in mind:
-
Choose the right color: The color you select can greatly impact the overall look and feel of your space. Consider the mood you want to create and the existing decor when choosing a color. A well-chosen color can transform a room and enhance its atmosphere.
-
Consider the paint finish: Different paint finishes offer various benefits. Matte finishes are great for hiding imperfections, while satin or semi-gloss finishes are more durable and easier to clean. Think about the level of sheen you desire and the practicality of the finish for the specific room you’re painting.
-
Opt for high-quality paint: Investing in high-quality paint can make a significant difference in the final result. Premium paints tend to have better coverage, durability, and color retention. They’re also less likely to splatter or leave streaks during application.
Now that you’ve chosen the right paint, let’s move on to setting up your airless paint sprayer.
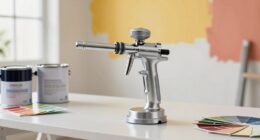
Set Up Your Airless Paint Sprayer
Get ready to transform your space with the perfect paint job by setting up your airless paint sprayer. Before you begin, it’s important to troubleshoot common issues that may arise during the setup process.
Ensure that all parts of the sprayer are clean and properly assembled. Check for any clogs or leaks that could affect the performance. Next, familiarize yourself with the different settings and controls of the sprayer. Adjust the pressure accordingly for optimal results.
Additionally, here are some tips for achieving a smooth finish: start with a clean and prepped surface, maintain a consistent spraying distance, and apply multiple thin coats rather than one thick coat. Practice proper safety measures by wearing protective clothing, goggles, and a respirator.
Transitioning into the next section about practicing safety, it’s crucial to prioritize your well-being throughout the painting process.

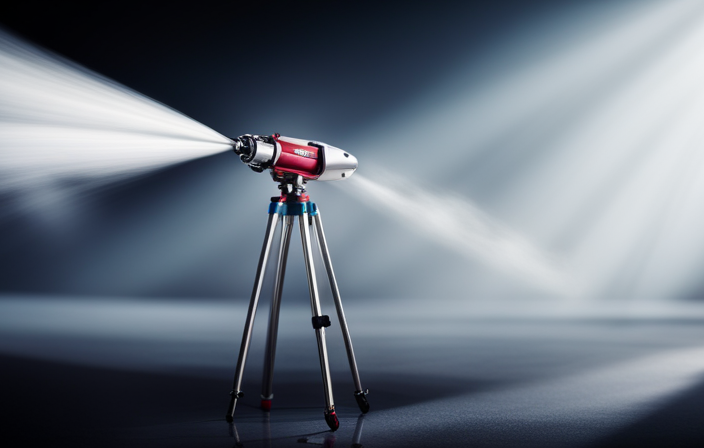
VEVOR 750W Stand Airless Paint Sprayer, 3000PSI High Efficiency Electric Airless Sprayer, Fine and Even Painting Effect, Handheld Paint Sprayers for Home Interior and Exterior Furniture and Fences
Efficient Painting: Our stand airless paint sprayer is equipped with a powerful 750W motor, capable of delivering up...
As an affiliate, we earn on qualifying purchases.
Practice Proper Safety Measures
Before using an airless paint sprayer indoors, it’s crucial to ensure that you adhere to all necessary safety precautions. To practice proper safety measures, make sure you have the appropriate safety equipment required.
This includes wearing goggles to protect your eyes from paint splatters, a respirator or mask to avoid inhaling fumes, and gloves to keep your hands clean and protected. It’s also important to work in a well-ventilated area to minimize the risk of breathing in harmful vapors.
Additionally, cover any nearby furniture or objects with drop cloths to prevent accidental paint splatters. By following these safety precautions, you can protect yourself and others from potential harm while using the airless paint sprayer.
Now, let’s move on to preparing the paint.

Baotree Airless Paint Sprayer, High-Pressure Electric Paint Spray Gun with Extension Rod, Thinning-Free Professional Painting Tool for Interior/Exterior Walls, Fences, Ceilings, Cabinets
1. High efficiency and time saving, the spraying speed is 5 times faster than traditional brushing ✅ High...
As an affiliate, we earn on qualifying purchases.
Prepare the Paint
Make sure you have the right paint consistency for smooth and even application. Here are some tips for mixing paint and common mistakes to avoid when preparing paint:
-
Read the paint can instructions carefully to determine the recommended paint-to-thinner ratio.
-
Use a measuring cup or scale to ensure accurate measurements.
-
Slowly add the thinner to the paint, stirring continuously until you achieve the desired consistency.
-
Avoid adding too much thinner at once, as this can make the paint too thin and result in drips or runs.
By following these tips, you can ensure that your paint is properly prepared for an airless paint sprayer.
Once the paint is mixed to the right consistency, you can move on to adjusting the sprayer settings for optimal results.
Adjust the Sprayer Settings
When using an airless paint sprayer for interior painting, it’s important to adjust the sprayer settings correctly.
The first key point is to adjust the pressure of the sprayer according to the type of paint and the surface being painted. This will ensure a smooth and even application of paint.
The second key point is to test the spray pattern before starting to paint. This will help to ensure that the sprayer is set up correctly and will result in a consistent and professional finish.
Adjust the Pressure
To achieve flawless results with your airless paint sprayer interior, crank up the pressure and unleash your inner Picasso! Adjusting the pressure on your airless paint sprayer is crucial for achieving optimal paint flow and coverage.
Start by adjusting the nozzle to a narrow spray pattern, which’ll require higher pressure. If you’re experiencing any issues like uneven spray or clogging, adjusting the pressure can help troubleshoot these common problems.
Increase the pressure gradually while testing the spray pattern on a scrap piece of cardboard or a small area of the wall. This’ll allow you to find the ideal pressure that provides a smooth and even application.
So, let’s move on to the next step and test the spray pattern to ensure a professional finish.
Test the Spray Pattern
Let’s see how the spray pattern turns out and make sure we achieve that flawless finish! Testing the spray pattern is an important step in using an airless paint sprayer for interior projects. It allows us to troubleshoot any issues and ensure even coverage on the surface.
To test the spray pattern, I’ll start by adjusting the pressure to the recommended setting. Then, I’ll hold the sprayer about 12 inches away from a test surface, such as cardboard or scrap wood, and spray in a sweeping motion. By observing the spray pattern, I can identify any irregularities, such as uneven coverage or excessive overspray.
If needed, I can make further adjustments to the pressure or nozzle to achieve a consistent and smooth spray pattern. Once the spray pattern looks good, we can move on to the next step of starting the painting process smoothly.
Start Painting
As you embark on your painting journey with an airless paint sprayer, envision yourself as an artist holding a magic wand, ready to transform your interior space with a single stroke. To ensure a smooth finish and avoid paint drips, here are some tips to keep in mind:
- Maintain a consistent distance between the sprayer and the surface.
- Use overlapping strokes, moving the sprayer in a steady, controlled motion.
- Keep the sprayer perpendicular to the surface for an even application.
By following these tips, you’ll achieve a professional-looking paint job without any unsightly drips.
Now that you have a good understanding of how to use the airless paint sprayer, let’s move on to the next section about working in sections to ensure thorough coverage.
Work in Sections
Imagine yourself as a skilled artist, dividing your canvas into sections to ensure thorough coverage and create a stunning masterpiece. When using an airless paint sprayer for interior painting, working in sections is key to achieving professional results. Not only does it help with workplace organization, but it also allows for better control over paint application. To work in sections, divide your wall into manageable areas, typically 3×3 feet. Start at the top and work your way down, applying the paint in smooth, overlapping strokes. This technique ensures an even coat and minimizes streaks or drips. Remember to maintain a consistent distance from the wall and keep your sprayer moving to avoid pooling or overspray. With this method, you can achieve a flawless finish. Now, let’s move on to cleaning the sprayer.
Clean the Sprayer
Make sure you clean the sprayer thoroughly to maintain its efficiency and avoid any potential clogs or malfunctions. Sprayer maintenance is crucial for the proper functioning of your airless paint sprayer.
After each use, it’s important to clean the sprayer to remove any leftover paint and prevent it from drying inside the machine. Start by disconnecting the sprayer from the power source and removing the paint container.
Rinse the container and the spray gun with water until all the paint residue is gone. Use a brush or a cloth to clean the nozzle and other small parts. Additionally, check for any clogs and use a needle or a small wire to clear them.
Proper cleaning ensures that your sprayer will be ready for the next use.
Now, let’s move on to the next step of allowing the paint to dry and inspecting the results.
Allow the Paint to Dry and Inspect
After cleaning the sprayer, it’s important to allow the paint to dry completely before inspecting the results.
Once the paint is dry, take a close look at the painted surface and evaluate the overall coverage. Look for any imperfections such as missed spots or uneven paint application. If you notice any areas that need touch-ups, use a brush or roller to carefully fix them.
Additionally, check for any drips or streaks that may have occurred during the painting process. If you find any, gently sand them down and touch up with additional paint if necessary.
Once you’re satisfied with the results, you can move on to enjoying your newly painted interior without any worries about imperfections.
Enjoy Your Newly Painted Interior
Now that the paint has dried and I’ve inspected the results, it’s time to remove any protective coverings I had in place.
It’s always satisfying to see the finished product and admire the professional-looking results of my hard work.
I can’t help but feel a sense of accomplishment and pride as I take in the fresh, newly painted interior of my home.
Remove Protective Coverings
To easily remove the protective coverings, simply peel them off using your hands or a gentle scraping tool. Before doing so, make sure that the paint has fully dried to avoid any smudges or marks.
Once the coverings are removed, take a moment to inspect the surfaces and ensure that they’re ready for the next step. This is also a good time to touch up any areas that may need a little extra attention.
After preparing the surfaces, it’s time to move on to choosing paint colors that’ll complement your interior. Consider the overall theme and style of your space, as well as any existing furniture or decor.
Once the paint’s dry and you’ve admired the professional-looking results, you can start putting your room back together and enjoy your newly painted interior.
Admire the Professional-Looking Results
Take a moment to appreciate the professional-looking results and let yourself feel proud of the beautiful transformation you have accomplished. Using a professional paint sprayer, such as an airless sprayer, has numerous benefits that contribute to these impressive results.
The first advantage of using an airless sprayer is the ability to achieve a smooth and even coat of paint. The high-pressure system ensures that the paint is evenly distributed, eliminating any streaks or uneven patches. This professional finish gives your interior walls a polished and flawless appearance.
Additionally, airless sprayers provide excellent coverage and save time compared to traditional painting methods. The powerful spray allows you to cover larger areas in a shorter amount of time, making the painting process more efficient.
Furthermore, using an airless sprayer reduces overspray, minimizing the mess and waste associated with other painting techniques. The paint is directed precisely onto the surface, resulting in minimal overspray and less cleanup.
In conclusion, using a professional paint sprayer like an airless sprayer offers numerous benefits, including achieving a professional-looking finish, saving time, and reducing mess. Invest in this efficient tool to transform your interior with ease and enjoy the beautiful results.
| Advantage 1 | Advantage 2 | Advantage 3 | Advantage 4 | Advantage 5 |
|---|---|---|---|---|
| Smooth and even | Excellent coverage | Time-saving | Reduced overspray | Professional finish |
Frequently Asked Questions
Can I use an airless paint sprayer for exterior painting as well?
Yes, you can definitely use an airless paint sprayer for exterior painting. It offers numerous benefits such as faster application, even coverage, and the ability to handle different types of coatings.
How long does it typically take for the paint to dry after using an airless paint sprayer?
To speed up drying after using an airless paint sprayer, there are a few tips. Make sure the room is well-ventilated, use thin coats of paint, and consider using a fan or dehumidifier. For a smooth finish, use even strokes and maintain a consistent distance from the surface.
What type of paint is best suited for use with an airless paint sprayer?
The best paint types for an airless paint sprayer depend on the surface and project. Consider factors like paint compatibility, viscosity, and finish. It’s important to choose the right paint for optimal results.
Is it necessary to thin the paint before using it with an airless paint sprayer?
It is necessary to thin the paint before using it with an airless paint sprayer. Proper paint thinning techniques are crucial for achieving optimal spray patterns and preventing clogs in the sprayer.
Can I use an airless paint sprayer to paint textured surfaces?
Yes, you can use an airless paint sprayer to paint textured surfaces. It provides an efficient and even coverage. However, if you prefer alternative painting techniques, such as using a roller or brush, those are also viable options.
Conclusion
In conclusion, using an airless paint sprayer for interior painting is a game-changer. It allows for quick and efficient coverage, saving both time and effort.
By preparing the workspace, choosing the right equipment and paint, and practicing safety measures, you can ensure a successful painting project. Remember to adjust the sprayer settings, work in sections, and clean the sprayer thoroughly afterwards.
Once the paint has dried, take a moment to admire your beautifully painted interior. Enjoy the transformation!