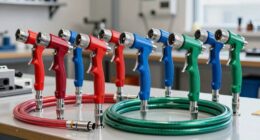
I’ve discovered the secret to flawless paint applications using an airless paint sprayer: the use of shields. These small yet significant accessories have the power to elevate your painting projects to the next level. By incorporating shields into your work with an airless paint sprayer, you can say goodbye to messy overspray and embrace finishes that appear as though they were completed by a professional.
In this article, I will guide you through the ins and outs of using airless paint sprayer shields. From understanding their purpose to choosing the right type for your project, I will leave no stone unturned.
I will also provide you with step-by-step instructions on how to properly attach and adjust the shield for optimal coverage and protection. Furthermore, I will share tips on troubleshooting common issues and experimenting with different techniques.
So, get ready to elevate your painting game to a whole new level. Let’s dive in and discover the wonders of airless paint sprayer shields together.
Key Takeaways
- Airless paint sprayer shields are essential tools for achieving a clean and efficient painting process.
- Properly attaching and adjusting the shield ensures optimal coverage and protection.
- Consistent distance from the surface and smooth strokes are key to achieving a professional-looking finish.
- Regular maintenance and cleaning of the shield are crucial for longevity and effectiveness.
Understand the Purpose of Airless Paint Sprayer Shields
To fully enjoy the benefits of using airless paint sprayer shields, it is important to understand their purpose. These shields are designed to protect you and your surroundings from overspray, ensuring a clean and efficient painting process.
But the benefits of airless paint sprayer shields go beyond just protection. Proper maintenance is essential for their longevity and optimal performance. Regular cleaning and inspection will help identify any issues and prevent clogs or blockages that could affect the spray pattern.
Troubleshooting techniques are also important to know. These include adjusting the shield position or checking for any leaks. By understanding the purpose of airless paint sprayer shields and implementing proper maintenance and troubleshooting techniques, you can ensure a smooth painting experience.
Now, let’s move on to the next section and learn how to choose the right type of shield for your project.
Choose the Right Type of Shield for Your Project
When choosing the right type of shield for your airless paint sprayer, it’s important to consider the size and shape of the shield. A shield that is too small may not provide adequate coverage, while one that is too large may be difficult to maneuver.
Look for adjustable features such as adjustable spray widths or height settings to ensure versatility and adaptability to different projects.
Consider the Size and Shape of the Shield
When considering the size and shape of the shield, it is important to take into account how it will impact the efficiency of your airless paint sprayer.
Choosing the right materials for the shield is crucial. Consider the type of paint you will be using and the surface you will be working on. If you are working with a highly corrosive paint, it is important to choose a shield that is made of a material resistant to corrosion.
Finding the best shield size for different projects is also crucial. A shield that is too small may not provide adequate coverage, while a shield that is too large may be cumbersome to maneuver.
Look for adjustable features for versatility, such as adjustable height or angle. These features will allow you to adapt the shield to different painting tasks seamlessly.
Taking the size and shape of the shield into account will ensure that you have the most efficient and effective airless paint sprayer setup for your specific needs.
Look for Adjustable Features for Versatility
Maximize your painting possibilities with adjustable features that offer unmatched versatility. An airless paint sprayer shield with adjustable spray patterns allows you to customize the width and direction of the paint spray, giving you more control and precision when painting different surfaces. This feature is especially useful when working on intricate designs or hard-to-reach areas.
Proper shield maintenance is crucial to ensure its longevity and effectiveness. Here are three important tips:
- Clean the shield after each use to remove any dried paint or debris that could affect the spray pattern.
- Inspect the shield regularly for any signs of wear or damage, such as cracks or loose parts, and replace if necessary.
- Adjust the shield according to the specific painting project to achieve the desired coverage and minimize overspray.
Now that you have mastered the adjustable features and learned the importance of proper shield maintenance, it’s time to prepare your work area for a seamless painting experience.
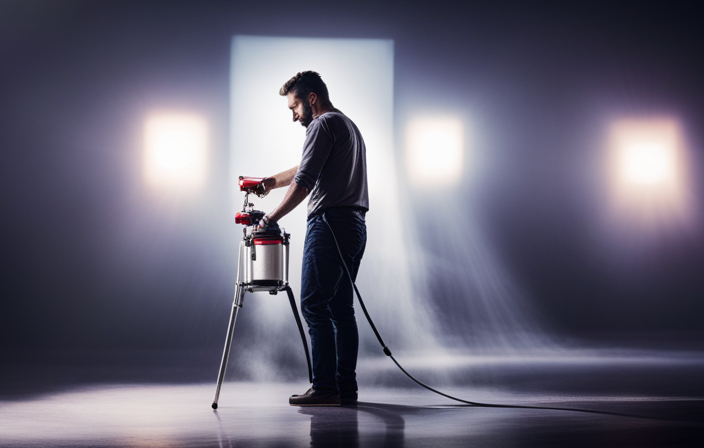
Prepare Your Work Area
Prepare your work area by clearing any furniture or obstacles out of the way. This will create a spacious and safe environment for you to use your airless paint sprayer shields. It is crucial to maximize efficiency and minimize mess.
Remove any delicate items or cover them with plastic sheets to protect them from paint splatters. Make sure to cover the floor with drop cloths or plastic sheets as well.
Ensure good ventilation in the room by opening windows or using fans. This will help to dissipate any paint fumes.
Once your work area is properly prepared, you can proceed to the next step of properly attaching the shield to your airless paint sprayer. This will ensure a secure and effective fit.
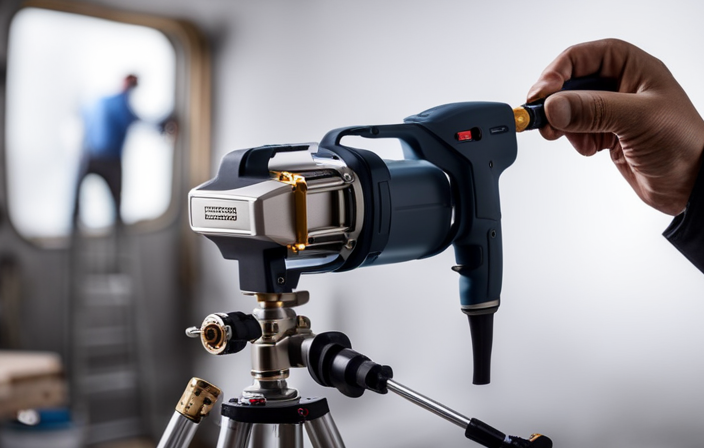
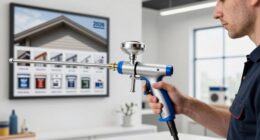
Properly Attach the Shield to Your Airless Paint Sprayer
Properly attaching the shield to your airless paint sprayer is crucial for a secure and effective fit. This ensures a seamless and hassle-free painting experience. It not only provides optimal coverage and protection but also prevents any paint from splattering or leaking onto your work area.
To avoid common mistakes, make sure to tighten the attachment screws properly. Neglecting this step could result in the shield coming loose during painting. Additionally, it’s important to align the shield correctly with the sprayer nozzle. Failing to do so can lead to uneven coverage and potential paint overspray.
Don’t overlook the importance of checking the shield’s compatibility with your specific airless sprayer model. Using an incompatible shield can compromise its effectiveness.
By avoiding these errors and properly attaching the shield, you can confidently move on to the next step of adjusting it for optimal coverage and protection.
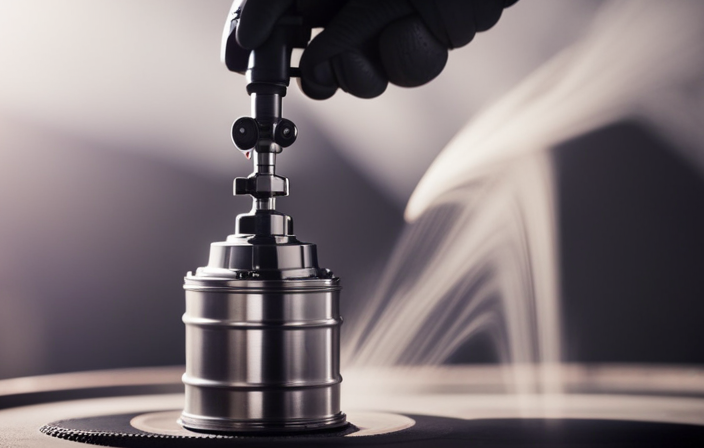
Adjust the Shield for Optimal Coverage and Protection
Once the shield is properly attached, ensuring optimal coverage and protection involves adjusting the shield position. Start by positioning the shield 12-18 inches away from the surface being painted. This distance allows for maximum coverage and adequate protection. If you notice uneven spray patterns or areas not being covered, try adjusting the shield angle slightly. It may take a few adjustments to find the optimal position for your project.
Troubleshooting shield malfunctions is also crucial. If the shield doesn’t stay in place or obstructs visibility, check for loose screws or faulty parts that may need replacement. Remember, proper adjustment and maintenance of the shield are essential for achieving the best results.
Transitioning into the subsequent section about ‘practice proper technique when using the shield,’ it’s important to understand the importance of mastering the right movements and angles to ensure a flawless paint job.
Practice Proper Technique When Using the Shield
When using the shield on an airless paint sprayer, it is important to practice proper technique. This includes maintaining a consistent distance from the surface to ensure even application and prevent drips or uneven coverage. I find that keeping a distance of about 10-12 inches works best for me.
In addition to distance, it is crucial to move the sprayer in smooth and even strokes. This helps to avoid streaks or lines in the paint and ensures a professional-looking finish. I like to start at one end of the surface and work my way across, overlapping each stroke slightly for a seamless result.
Maintain a Consistent Distance from the Surface
When using airless paint sprayer shields, it is crucial to always maintain a consistent distance from the surface. This is important for achieving consistent spray patterns and avoiding uneven coverage. Here are four important things to keep in mind:
-
Measure the distance: Use a measuring tape to determine the exact distance between the shield and the surface. This will help you maintain a consistent distance throughout the painting process.
-
Practice with a test board: Before painting a large area, practice on a test board to ensure you have a good understanding of the appropriate distance to maintain. This will help you achieve a uniform and professional finish.
-
Adjust as needed: Depending on the type of surface and the thickness of the paint, you may need to adjust the distance slightly. Pay close attention to the spray pattern and make adjustments accordingly.
-
Keep a steady hand: As you move the sprayer, make sure to maintain a steady hand and move in smooth and even strokes. This will help prevent uneven coverage and ensure a flawless finish.
By maintaining a consistent distance from the surface, you can achieve professional results and avoid any unwanted streaks or blotches.
Moving on to the next section, it’s important to also focus on moving the sprayer in smooth and even strokes.
Move the Sprayer in Smooth and Even Strokes
To achieve a professional finish, smoothly and evenly move the sprayer in strokes that flow seamlessly across the surface. This will ensure that the paint is distributed evenly and provides a smooth, flawless coat.
Start by holding the sprayer at a consistent distance from the surface, as mentioned in the previous subtopic. Then, begin moving the sprayer in smooth strokes from one side to the other, making sure to maintain a steady pace. Keep your movements fluid and avoid stopping or hesitating in one spot, as this can result in uneven coverage.
By moving the sprayer in smooth and even strokes, you’ll be able to achieve a consistent and professional-looking finish.
Now, let’s move on to the next step of clean and maintain the shield after each use.
Clean and Maintain the Shield After Each Use
When it comes to cleaning and maintaining the shield after each use, there are a couple of key points to keep in mind.
First, it’s important to remove any excess paint and residue from the shield. This can be done by wiping it down with a damp cloth or rinsing it off with water.
Once the shield is clean, it’s crucial to store it in a clean and dry place to prevent any damage or contamination.
By following these steps, you can ensure that your shield is ready for the next use and will continue to provide optimal protection.
Remove Excess Paint and Residue
To remove any excess paint or residue from your airless paint sprayer shield for a flawless finish, follow these steps:
-
Start by using a damp cloth or sponge to gently wipe away any paint that may have accumulated on the shield’s surface. Be careful not to scrub too hard, as this could scratch or damage delicate surfaces.
-
Pay special attention to protecting delicate surfaces while removing excess paint. This will prevent any accidental damage.
-
Once you have successfully removed all the paint and residue, it is time to store the shield in a clean and dry place. This will ensure its longevity and keep it ready for future use.
Remember, removing paint stains is crucial to maintain the effectiveness of your shield. By taking the time to remove any excess paint or residue, you can achieve a flawless finish and prolong the life of your airless paint sprayer shield.
Store the Shield in a Clean and Dry Place
After removing excess paint and residue, make sure to store the shield in a clean and dry place. Proper storage is essential for maintaining the functionality and longevity of your airless paint sprayer shield.
To ensure the shield remains in good condition, there are a few storing precautions to keep in mind. Firstly, avoid storing the shield in an area with extreme temperatures or high humidity, as this can cause damage or warping.
Secondly, store the shield in a place where it won’t be exposed to direct sunlight, as UV rays can deteriorate the materials over time.
Lastly, it’s important to maintain cleanliness by wiping down the shield before storing it to remove any residual paint or debris.
By following these storage guidelines, you’ll be ready to tackle your next painting project with ease.
Now, let’s move on to troubleshooting common issues with airless paint sprayer shields.
Troubleshoot Common Issues with Airless Paint Sprayer Shields
To overcome any frustrations, you can quickly troubleshoot common issues with your airless paint sprayer shields and get back to achieving flawless results.
One common problem is clogging, which can occur when the paint or debris builds up in the shield. To fix this, you can remove the shield and clean it thoroughly with warm water and a mild detergent.
Another issue is uneven spray patterns, which can be caused by a worn-out or damaged shield tip. In this case, you should replace the tip with a new one.
Additionally, if you notice paint leaking from the shield, it may be due to a loose or damaged seal. Tightening or replacing the seal should solve the problem.
By troubleshooting these common problems, you can ensure that your airless paint sprayer shields work effectively.
Now, let’s move on to the next section and discuss how to experiment with different techniques and shield positions.
Experiment with Different Techniques and Shield Positions
When experimenting with different techniques and shield positions while using an airless paint sprayer, I’ve found that trying different angles can produce unique effects on the painted surface.
By adjusting the angle of the shield, I can create different textures and patterns that add depth and interest to the final result.
Additionally, for complex surfaces, using multiple shields can help me achieve a more precise and even application of paint, ensuring that every nook and cranny is covered.
Trying Different Angles for Unique Effects
From various perspectives, you can experiment with different angles while using airless paint sprayer shields to achieve stunning and one-of-a-kind effects. Angled spraying allows you to create unique patterns and textures on your surfaces. By adjusting the angle of the sprayer and the position of the shield, you can control the direction and coverage of the paint. Let me illustrate this with a table:
| Angle | Effect |
|---|---|
| 45° | Diagonal stripes |
| 90° | Vertical lines |
| 135° | Zigzag pattern |
| 180° | Horizontal strokes |
| 225° | Crisscross design |
By experimenting with these angles, you can unleash your creativity and transform ordinary surfaces into works of art. Now, let’s move on to the next section about using multiple shields for complex surfaces.
Using Multiple Shields for Complex Surfaces
Let’s explore the technique of using multiple shields for intricate surfaces to take your painting skills to the next level.
When it comes to using shield attachments with your airless paint sprayer, there are a few things to keep in mind.
-
First, make sure the shields are properly attached and aligned with the surface you’re painting. This will help prevent any accidental overspray and ensure a clean finish.
-
If you encounter any troubleshooting issues with the shields, such as paint clogging or uneven coverage, try adjusting the angle or distance between the shields and the surface.
-
Experimenting with different combinations of shields can also create unique effects and textures.
By using multiple shields and mastering their placement, you can achieve professional-looking results on even the most complex surfaces.
Now, let’s move on to the next section and learn about the benefits of using airless paint sprayer shields.
Enjoy the Benefits of Using Airless Paint Sprayer Shields
I’ve found that using airless paint sprayer shields can greatly reduce overspray and clean-up time. These shields create a barrier between the sprayer and the surrounding surfaces, preventing paint from drifting and settling on unwanted areas.
Additionally, the use of shields allows for a more precise and professional finish. They help to control the direction and coverage of the paint.
Reduced Overspray and Clean-Up Time
To achieve reduced overspray and minimize clean-up time, it’s essential to properly position and adjust the airless paint sprayer shields. These shields act as a protective barrier, preventing paint from spraying onto areas that you don’t want to be painted.
By reducing overspray, you can save both time and money, as you won’t have to spend extra hours cleaning up paint splatters. To ensure optimal results, it’s important to position the shields close to the surface being painted and adjust them according to the desired spray pattern.
Additionally, make sure the shields are securely attached to the sprayer to prevent any paint leakage. By mastering the art of using airless paint sprayer shields, you can achieve a professional and precise finish without any hassle.
Achieving a Professional and Precise Finish
Get ready to achieve that flawless, high-quality finish you’ve always dreamed of with the right techniques and adjustments. When it comes to achieving a smooth finish with an airless paint sprayer, there are a few key strategies to keep in mind.
-
Adjusting the spray pattern: By manipulating the nozzle and pressure settings, you can control the width and intensity of the spray pattern. This allows for precise coverage and helps prevent paint splatter.
-
Maintaining a consistent distance: Keeping a consistent distance between the sprayer and the surface being painted is crucial. This ensures an even application and minimizes the risk of overspray.
-
Using a shield: Airless paint sprayer shields are essential tools for achieving a professional finish. They provide a physical barrier between the sprayer and the surrounding area, preventing paint splatter and protecting nearby objects.
By implementing these techniques and using the right equipment, you can achieve a flawless finish with your airless paint sprayer while minimizing clean-up time and avoiding costly mistakes.
Frequently Asked Questions
How do I determine the correct size of airless paint sprayer shield for my project?
To choose the right airless paint sprayer shield size for your project, consider the width and height of the surface you are painting. Tips for using airless paint sprayer shields effectively include maintaining a consistent spraying distance and overlapping each pass for even coverage.
Can I use an airless paint sprayer shield with any type of paint?
Yes, you can use an airless paint sprayer shield with any type of paint. However, it’s important to check the compatibility of the paint sprayer with the specific type of paint you are using. If it’s not compatible, consider alternative paint application methods.
Are there any safety precautions to consider when using an airless paint sprayer shield?
Safety measures and proper handling are crucial when using an airless paint sprayer shield. It’s ironic how such a simple tool can pose risks if not used correctly. Follow instructions, wear protective gear, and maintain a safe distance from the spraying area.
How often should I clean and maintain my airless paint sprayer shield?
I clean and maintain my airless paint sprayer shield regularly to ensure optimal performance. I recommend cleaning it after each use and inspecting for any damage. Additionally, lubricating the parts and storing it properly can extend its lifespan.
Is there a specific technique for adjusting the shield for optimal coverage and protection?
To achieve optimal coverage and protection with an airless paint sprayer shield, it is important to use the proper adjusting technique. This ensures that the shield is positioned correctly and covers the desired area effectively.
Conclusion
In conclusion, using airless paint sprayer shields can greatly enhance your painting experience. They provide optimal coverage and protection.
One interesting statistic to note is that according to a study conducted by the Paint Quality Institute, using paint sprayer shields can reduce overspray by up to 75%. This means you can achieve a more precise and efficient paint job while minimizing wasted paint.
So, don’t hesitate to incorporate airless paint sprayer shields into your painting projects for professional-looking results.