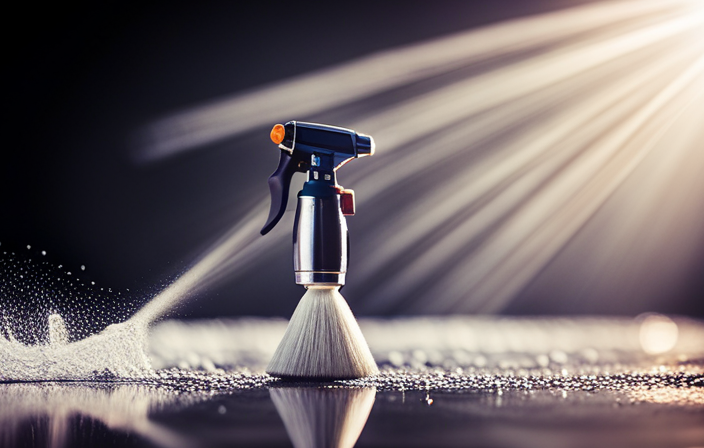
Did you know that using an airless paint sprayer can make painting ceilings easier and faster? It can actually cut your painting time by up to 50% compared to using rollers or brushes.
Hi, I’m here to guide you through the process of using an airless paint sprayer on your ceiling. Whether you’re a DIY enthusiast or a professional painter, this article will provide you with step-by-step instructions to achieve a smooth and flawless finish. We’ll cover everything from preparing the room and choosing the right paint, to practicing safety measures and dealing with difficult areas.
I’ll also share tips on how to clean and maintain your sprayer for long-lasting performance.
So, let’s grab our airless paint sprayer and get ready to transform your ceiling with ease!
Key Takeaways
- Maintain a steady pace and hold the sprayer at a consistent distance from the ceiling.
- Work in a systematic pattern, avoiding overlapping strokes and adjusting the pressure for uneven surfaces.
- Use a brush or roller for touch-ups and assess coverage and color after the first coat.
- Allow each coat to dry thoroughly and give the paint 24 hours to fully cure, avoiding rushing the drying process.

NoCry Clear Safety Glasses for Men and Women with Anti-Fog and Scratch Resistant Wrap Around Lenses, Adjustable Temples and Nose Pads — ANSI Z87 Certified Protective Eyewear with 100% UV Shielding
- Durable Polycarbonate Frame: Wraparound design for full protection
- Lightweight & Comfortable Fit: Adjustable arms and soft nose pads
- Anti-Fog & Scratch Resistant Lenses: Ultrashield coating for clarity and durability
As an affiliate, we earn on qualifying purchases.
Prepare the Room and Ceiling
Now that you’ve gathered all your materials and you’re ready to tackle that ceiling, it’s time to prepare the room and get it ready for a flawless paint job.
Start by clearing the room of any furniture or objects that could get in the way. Cover the floor and any remaining items with drop cloths or plastic sheets to protect them from paint splatters. Use painter’s tape to mask off any areas that you don’t want to be painted, such as trim or light fixtures.
Before you start spraying, make sure to clean the ceiling thoroughly to remove any dirt or dust that could affect the paint’s adhesion. Avoid common mistakes like not properly preparing the room or not cleaning the surface, as these can lead to an uneven finish.
Now that the room is prepped, let’s move on to choosing the right paint and equipment.
Choose the Right Paint and Equipment
First, you’ll need to select the appropriate type of paint and gather the necessary equipment. Here are some paint selection tips to help you make the right choice:
-
Consider the surface: If your ceiling is textured, opt for a thicker paint that’ll adhere well to the surface.
-
Choose the right finish: A flat or matte finish is ideal for ceilings as it helps to hide imperfections.
-
Pick the right color: Lighter colors can make a room feel more spacious, while darker colors can add depth and coziness.
-
Test the paint: Before applying it to the entire ceiling, test a small area to ensure you’re happy with the color and finish.
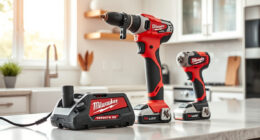
When it comes to choosing the right sprayer for your project, consider the size of the room and the type of paint you’ll be using. A high-volume, low-pressure (HVLP) sprayer is often recommended for ceilings. It provides a fine, even spray and reduces overspray.
Now that you have your paint and equipment, it’s time to practice proper safety measures when using an airless paint sprayer on the ceiling.
Practice Proper Safety Measures
To ensure your safety and prevent any potential accidents, it is crucial to follow proper safety measures while working with the equipment and materials for your ceiling painting project. Taking the time to practice proper safety precautions is essential to avoid any potential hazards that may arise during the painting process. Here are some important safety measures to keep in mind:
| Safety Measure | Description |
|---|---|
| Wear protective gear | Always wear safety goggles, a respirator mask, and gloves to protect yourself from paint fumes, particles, and any potential chemical exposure. |
| Ventilate the area | Ensure proper ventilation by opening windows or using fans to prevent the accumulation of paint fumes, which can be harmful to your health. |
| Secure the ladder | Use a sturdy ladder and ensure it is properly secured to prevent any falls or accidents while painting. |
By following these proper safety measures, you can minimize the risk of accidents and ensure a safe working environment. Now, let’s move on to the next section about preparing and priming the sprayer.
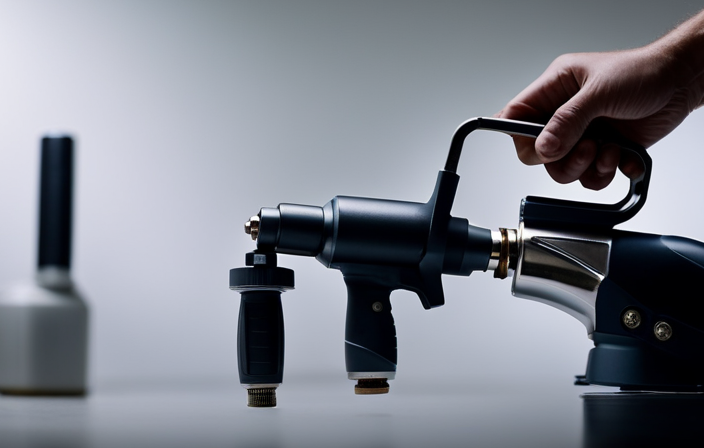
Prepare and Prime the Sprayer
Let’s get ready to prime the sprayer for a smooth and efficient painting process! Before starting, it’s essential to clean the sprayer thoroughly to avoid any clogging issues. Here are some cleaning tips to ensure optimal performance:
- Disassemble the sprayer and clean each part with warm, soapy water.
- Use a brush or toothpick to remove any dried paint or debris from the nozzle.
- Rinse all parts thoroughly and dry them completely before reassembling.
- Check the filters and replace them if necessary to prevent paint blockage.
- Test the sprayer with water before priming to ensure it’s working correctly.
In case you encounter common issues like uneven spraying or paint drips, here are some troubleshooting tips:
- Adjust the pressure settings to achieve a consistent spray pattern.
- Check for any loose connections or damaged seals that may cause paint leakage.
- Ensure the paint viscosity is suitable for the sprayer by following the manufacturer’s recommendations.
Now that our sprayer is primed and ready, let’s move on to the next section and start spraying the ceiling for a professional finish.
Start Spraying the Ceiling
When you begin spraying, remember to maintain a steady hand and move in smooth, overlapping strokes for an even application. To achieve the best results, it is important to use the correct technique and make any necessary adjustments along the way. Here are some technique improvement and troubleshooting tips to help you out:
- Hold the sprayer at a consistent distance from the ceiling, usually around 12 inches.
- Keep the sprayer perpendicular to the surface to ensure an even coat.
- Move the sprayer at a steady pace, neither too fast nor too slow.
By following these tips, you can avoid common issues such as uneven coverage or drips. It may take some practice to perfect your technique, but with time, you will become more comfortable and efficient. Maintaining a consistent technique is crucial for a professional-looking finish.
Maintain a Consistent Technique
When using an airless paint sprayer on the ceiling, it’s important to maintain a consistent technique. To achieve a smooth and even finish, keep the sprayer moving in a continuous motion without stopping or pausing.
Additionally, make sure to overlap each stroke to ensure even coverage. Avoid overlapping areas that have already been painted to prevent drips or unevenness.
Keep the Sprayer Moving in a Continuous Motion
As I glide the sprayer smoothly across the ceiling, I effortlessly achieve an even coat of paint. Keeping the sprayer moving in a continuous motion is crucial for achieving optimal results.
By maintaining a consistent pace and avoiding sudden stops or starts, I can ensure a seamless application. Troubleshooting spray patterns may be necessary at times, but with practice, I’ve learned to adjust the sprayer’s settings or nozzle position to achieve the desired coverage.
It’s important to pay attention to the paint flow and make any necessary adjustments to avoid uneven or blotchy areas. By mastering continuous motion techniques and troubleshooting spray patterns, I can confidently move on to the next step of the process: overlapping each stroke for even coverage.
Overlap Each Stroke for Even Coverage
To achieve a flawlessly smooth finish, it’s crucial to master the art of overlapping each stroke, ensuring every inch of the surface receives even coverage. When using an airless paint sprayer on a ceiling, maintaining even pressure and employing the proper technique is key.
Begin each stroke slightly before the previous one ends, allowing the paint to blend seamlessly. This overlapping technique eliminates any potential streaks or unevenness, resulting in a professional-looking finish. By consistently moving the sprayer in a continuous motion and overlapping each stroke, you can ensure that no area is left untouched.
However, it’s important to avoid overlapping areas that have already been painted to prevent excess buildup of paint. This will help maintain an even and consistent thickness throughout the ceiling.
Avoid Overlapping Areas That Have Already Been Painted
Make sure you don’t go over areas you’ve already painted, or else you’ll end up with a messy and uneven finish. To avoid overlapping, follow these tips:
-
Maintain a steady pace: Move the sprayer smoothly and consistently across the ceiling, ensuring each stroke ends before the previously painted area.
-
Use proper technique: Hold the sprayer at a consistent distance from the ceiling, usually around 12 inches, to achieve an even coat.
-
Pay attention to coverage: Check for any missed spots or areas that appear lighter than others, and go back over them if necessary.
-
Plan your path: Work in a systematic pattern, such as painting in rows or sections, to ensure you cover the entire ceiling without missing any areas.
By following these guidelines, you can avoid streaks, minimize paint wastage, and achieve a professional-looking finish.
Now, let’s move on to how to deal with difficult areas.
Deal with Difficult Areas
Tackle those tricky spots on the ceiling with your airless paint sprayer. When dealing with difficult corners or uneven surfaces, it’s important to adjust your technique.
Start by angling the sprayer nozzle to reach into tight corners, ensuring even coverage. For uneven surfaces, adjust the pressure on the sprayer to create a consistent spray pattern. Move the sprayer in a slow, steady motion to avoid overspray and ensure an even coat.
If you encounter areas that are particularly challenging, consider using a brush or roller to touch them up after spraying. Remember, the goal is to achieve a smooth and uniform finish.
Now, let’s move on to the next step and discuss how to apply multiple coats if needed.
Apply Multiple Coats if Needed
After applying the first coat of paint, I assess the coverage and color to determine if additional coats are needed.
It’s important to allow sufficient drying time between coats to ensure proper adhesion and avoid any streaks or smudges.
If necessary, I apply additional coats to achieve a smooth and uniform finish. I make sure to follow the manufacturer’s instructions for drying time between each coat.
Assess the Coverage and Color after the First Coat
Once you’ve applied the first coat, you’ll be amazed at the flawless coverage and vibrant color achieved with the airless paint sprayer on the ceiling. The airless sprayer evenly distributes the paint, leaving no streaks or brush marks behind. It effortlessly covers large areas, saving you time and effort.
To assess the coverage, take a step back and look at the entire ceiling. Check for any thin spots or areas where the paint may have pooled. Adjust your technique accordingly, making sure to hold the sprayer at the correct distance and move in a smooth, even motion.
Here are a few things to keep in mind as you assess the coverage and color:
- Look for consistent color throughout the ceiling.
- Check for any missed spots or areas that need touch-ups.
- Pay attention to any drips or runs that may have occurred during application.
- Ensure that the paint has not pooled or created uneven patches.
- Take note of any areas that may require additional coats for optimal coverage.
Once you’ve assessed the coverage and color, you can move on to the next step: allowing sufficient drying time between coats. This will ensure a smooth and professional finish.
Allow Sufficient Drying Time between Coats
To ensure a flawless and professional finish, it’s essential to give each coat of paint enough time to dry thoroughly between applications, allowing the colors to deepen and blend seamlessly. Proper drying techniques and time management are crucial in achieving the best results with an airless paint sprayer on the ceiling.
After applying the first coat, it’s important to allow sufficient drying time, typically around 24 hours, before applying the next coat. This will ensure that the paint has fully cured and any potential moisture has evaporated. Rushing the process can result in a subpar finish, with visible streaks or uneven texture.
By allowing ample drying time between coats, you will create a strong foundation for subsequent layers and achieve a smooth and uniform finish.
Apply Additional Coats for a Smooth and Uniform Finish
After allowing sufficient drying time between coats, it is important to apply additional coats for a smooth and uniform finish when using an airless paint sprayer on the ceiling. By applying thinner coats, you can prevent drips and achieve better coverage. To ensure an even application, I recommend using a paint roller for any touch-ups or hard-to-reach areas that the sprayer may have missed.
To help you visualize the process, here is a table outlining the steps involved:
| Step | Description |
|---|---|
| 1 | Apply the first coat using the airless paint sprayer, making sure to cover the entire ceiling evenly. |
| 2 | Allow the first coat to dry completely before applying the second coat. |
| 3 | Apply a second coat using the sprayer, again ensuring even coverage. |
| 4 | Use a paint roller for any necessary touch-ups or areas that need extra attention. |
In the next section, we will discuss how to clean and maintain the sprayer to ensure its longevity and optimal performance.
Clean and Maintain the Sprayer
Make sure you regularly clean and maintain your airless paint sprayer to ensure its optimal performance.
Cleaning tips for your sprayer include flushing it with water or solvent after each use to prevent any leftover paint from drying and clogging the system. It’s also important to clean the filters and nozzle regularly to remove any debris that may affect the spray pattern.
Troubleshooting tips include checking for leaks and ensuring all connections are secure. Additionally, inspect the sprayer for any signs of wear or damage and touch up any areas that may need it.
By following these cleaning and maintenance tips, you can prolong the lifespan of your airless paint sprayer and ensure consistent and high-quality results.
Inspect and Touch Up
Now that we’ve cleaned and maintained the sprayer, we can move on to the next step: inspecting and touching up. This is an important part of the process to ensure a smooth and flawless finish on your ceiling.
Start by carefully inspecting the painted surface for any imperfections such as streaks, drips, or missed spots. Use a bright light source to help you identify these areas.
Once you’ve identified any problem areas, it’s time to touch them up. Grab a small brush or a roller and apply a small amount of paint to the affected areas. Make sure to blend the touch-up paint seamlessly with the rest of the ceiling.
Remember, thorough inspection and touch-up are crucial in achieving a professional-looking result.
Frequently Asked Questions
How do I prevent overspray when using an airless paint sprayer on the ceiling?
To prevent overspray when using an airless paint sprayer on the ceiling, I’ll share two crucial tips. First, adjust the spray pattern to a narrower setting. Second, apply thin coats to prevent paint buildup.
Can I use an airless paint sprayer on textured ceilings?
Yes, an airless paint sprayer can be used on textured ceilings. It is important to choose the right paint color and finish that will help in hiding imperfections.
What should I do if the paint starts to clog the spray tip?
If the paint starts to clog the spray tip, I will troubleshoot my airless paint sprayer by following these steps: 1) Turn off the sprayer and relieve pressure. 2) Remove the tip and clean it thoroughly with a brush or tip cleaner. 3) Reattach and continue painting.
How long should I wait between applying multiple coats of paint on the ceiling?
To achieve smooth finishes on a ceiling, it is important to wait for the paint to dry completely between coats. This ensures the paint adheres properly and prevents any streaks or unevenness. Additionally, choosing the right paint for a ceiling is crucial for a professional-looking result.
What are some common mistakes to avoid when using an airless paint sprayer on the ceiling?
Common mistakes to avoid when using an airless paint sprayer on the ceiling include not properly preparing the surface, using too much pressure, and not maintaining a consistent distance from the surface. Troubleshooting tips can help resolve these issues.
Conclusion
In conclusion, using an airless paint sprayer on the ceiling can be a breeze with the right preparation and equipment. By following safety measures and properly priming the sprayer, you can achieve a smooth and even coat of paint.
Don’t forget to address difficult areas with care and apply multiple coats if necessary for optimal results. And remember, regular cleaning and maintenance of the sprayer will ensure its longevity.
So go ahead and transform your ceiling with ease and efficiency!