
Did you know that using an airless paint sprayer can greatly reduce the time spent painting the exterior of your home? With its powerful and efficient spraying capabilities, an airless paint sprayer allows for quick and even coverage over large surfaces.
In this article, I will guide you through the step-by-step process of using an airless paint sprayer on the exterior of your home, ensuring a professional-looking finish that will make your neighbors envious. From preparing the surface to choosing the right paint and equipment, to practicing proper safety measures, I will share my knowledge and experience to help you achieve excellent results.
Whether you’re a seasoned DIY enthusiast or a beginner, this article will provide you with the necessary information to confidently tackle your exterior painting project with an airless paint sprayer.
So, let’s get started and transform your home’s exterior into a masterpiece.
Key Takeaways
- Using an airless paint sprayer on the exterior saves time and provides powerful and efficient spraying.
- Thoroughly clean and prepare the surface by removing loose paint and debris, washing with mild detergent and water, and filling cracks and imperfections.
- Choose high-quality exterior paint that complements your home’s style and landscape, and consider using primer coats for improved adhesion and a smooth finish.
- Practice regular maintenance and troubleshooting of the sprayer, including cleaning filters, lubricating moving parts, and checking for air leaks or worn-out components.

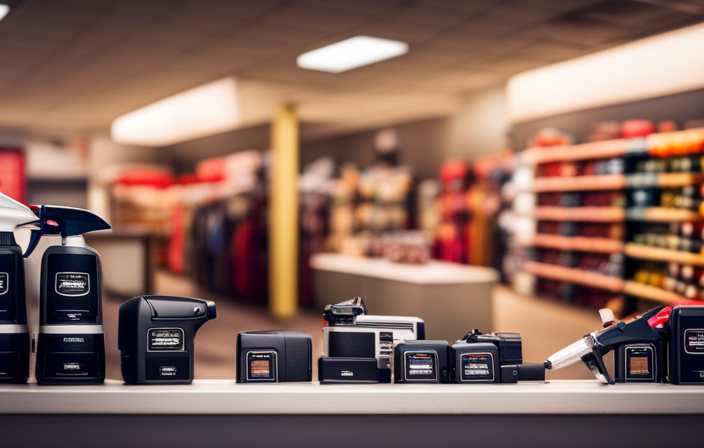
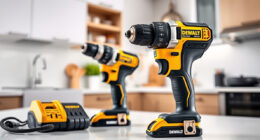
VEVOR 750W Stand Airless Paint Sprayer, 3000PSI High Efficiency Electric Airless Sprayer, Fine and Even Painting Effect, Handheld Paint Sprayers for Home Interior and Exterior Furniture and Fences
- Powerful Motor: 750W motor with 3000 PSI pressure
- Fast Coverage: Up to 5x faster than rolling
- Smooth Painting: Flow rate of 1.2 LPM for continuous work
As an affiliate, we earn on qualifying purchases.
As an affiliate, we earn on qualifying purchases.
Prepare the Surface
Before you start spraying, make sure to thoroughly clean and prepare the surface to ensure a flawless finish that will last.
Surface preparation is key in achieving professional-looking results. Begin by removing any loose paint or debris using a scraper or wire brush.
Next, wash the surface with a mild detergent and water to remove dirt, grease, and grime.
If there are any cracks or imperfections, fill them with a suitable filler and allow it to dry completely.
Once the surface is clean and smooth, it’s time to focus on sanding techniques. Use a medium-grit sandpaper to lightly sand the surface, creating a rough texture for the paint to adhere to. Take care not to oversand and damage the surface.
Transitioning into the next section, choosing the right paint and equipment is crucial for a successful paint job.
Choose the Right Paint and Equipment
When it comes to choosing the right paint for an exterior project, I always recommend selecting a high-quality exterior paint. This ensures a long-lasting finish and protection against the elements.
Additionally, before starting any painting job with an airless paint sprayer, it’s crucial to ensure that the equipment is in good working condition. Regular maintenance and inspection will help avoid any issues during the painting process and ensure a smooth application.
Select High-Quality Exterior Paint
To achieve optimal results, it’s crucial to pick top-notch exterior paint for your airless paint sprayer. When selecting color schemes, consider the architectural style of your home and the surrounding landscape. Choose colors that will complement the overall aesthetic and enhance the curb appeal.
Additionally, applying primer coats before painting can help improve the adhesion of the paint and provide a more even finish. Look for a high-quality exterior paint that is specifically designed for use with airless paint sprayers. These paints are formulated to flow smoothly through the sprayer and provide excellent coverage. It’s important to follow the manufacturer’s recommendations for application, including proper thinning if necessary.
By selecting the right paint, you can ensure a professional-looking finish that will last for years to come.
Now, let’s move on to the next section and make sure your airless paint sprayer is in good working condition.
Ensure Your Airless Paint Sprayer is in Good Working Condition
Make sure your airless paint sprayer is in excellent working condition to achieve flawless results and experience the satisfaction of a job well done. To ensure your sprayer is ready to go, it’s important to troubleshoot common issues and follow proper maintenance tips. Refer to the table below for a quick reference guide on troubleshooting and maintenance:
| Common Issues | Troubleshooting Tips | Maintenance Tips |
|---|---|---|
| Clogging | Check nozzle for debris | Clean filters regularly |
| Uneven spray pattern | Adjust pressure settings | Lubricate moving parts |
| Leaking | Tighten connections | Replace worn-out seals and gaskets |
| Inconsistent pressure | Check for air leaks | Inspect and replace worn-out parts |
By taking the time to address these common issues and properly maintain your sprayer, you’ll be able to achieve professional-looking results. Now, let’s move on to the next section where we’ll discuss how to practice proper safety measures.
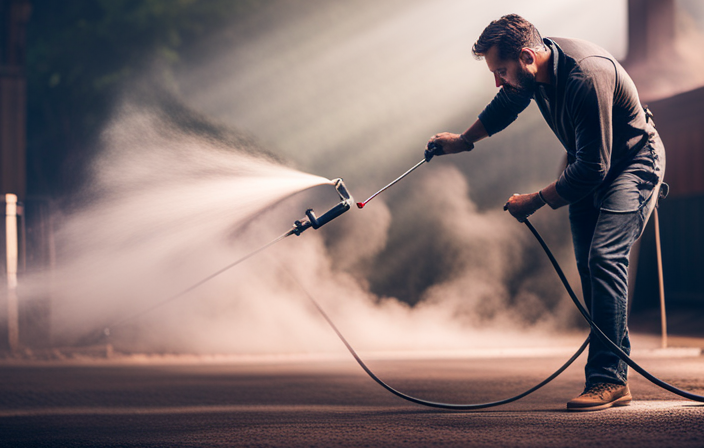
Practice Proper Safety Measures
When using an airless paint sprayer on the exterior, it’s crucial to practice proper safety measures. This includes wearing protective clothing and equipment to protect yourself from any potential hazards.
Additionally, it’s important to work in a well-ventilated area to minimize exposure to paint fumes and ensure a safe working environment.
As someone experienced in using an airless paint sprayer, I know the importance of following these safety guidelines to ensure a successful and safe painting project.
Wear Protective Clothing and Equipment
Before you fire up the airless paint sprayer, it’s crucial to gear up in the appropriate protective clothing and equipment to ensure your safety. Here are three essential items you should have:
-
Safety goggles: Protect your eyes from paint particles and potential splatters.
-
Respirator mask: Guard your lungs against harmful fumes and paint mist.
-
Coveralls or long-sleeved clothing: Shield your skin from paint overspray and spills.
When using an airless paint sprayer, wearing protective gear and taking safety precautions is paramount. It’s important to prioritize your well-being by donning safety goggles, a respirator mask, and coveralls or long-sleeved clothing. These measures will safeguard you from potential hazards and ensure a safer painting experience.
As you prepare to move on to the next section about working in a well-ventilated area, remember that protecting yourself is the first step towards a successful exterior painting project.
Work in a Well-Ventilated Area
After ensuring that I’m properly dressed and equipped for the task of using an airless paint sprayer on the exterior, the next crucial step is to work in a well-ventilated area. Proper ventilation is essential for health and safety precautions when working with paint sprayers.
The fumes emitted by the paint can be harmful if inhaled in high concentrations, so it’s important to have fresh air circulating in the work area. This can be achieved by opening windows and doors, or by using fans to create a steady airflow. Additionally, wearing a respirator is highly recommended to further protect against any potential inhalation of paint particles.
By working in a well-ventilated area and taking these health and safety precautions, I can ensure a safe and comfortable painting experience.
Now, let’s move on to setting up the airless paint sprayer.
Set Up Your Airless Paint Sprayer
To properly utilize your airless paint sprayer for exterior use, you should begin by setting it up in a meticulous manner. This involves carefully setting up the sprayer and adjusting the spray settings to ensure optimal performance.
First, make sure you have a clean and well-maintained sprayer. Check for any clogs or debris that may affect the paint flow.
Next, adjust the spray settings according to the type of paint and surface you’ll be working on. This’ll help you achieve the desired coverage and finish.
Once you’ve set up your airless paint sprayer, you’re ready to start painting. It’s important to transition smoothly into the next section, so you can begin applying the paint with confidence.
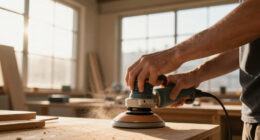
Start Painting
Now it’s time to grab your brush and get those walls transformed with a fresh coat of color! Here are some tips for achieving a smooth finish and troubleshooting common painting issues:
-
Start by using a primer to ensure proper adhesion and a more even finish.
-
Hold the sprayer about 12 inches away from the surface and apply the paint in long, even strokes. This helps to prevent drips and streaks.
-
Keep the sprayer moving at a steady pace to avoid oversaturating certain areas and creating uneven coverage.
-
If you encounter any clogs or uneven spray patterns, stop painting and clean the sprayer according to the manufacturer’s instructions.
By following these tips, you can achieve a professional-looking finish with your airless paint sprayer. Remember, if necessary, apply multiple coats to ensure full coverage and a flawless result.
Apply Multiple Coats if Needed
If you want to achieve a flawless finish on your walls, don’t be afraid to apply multiple coats of paint if needed. Just like a chef who layers flavors to create a delicious dish, applying additional layers can ensure optimal coverage and a professional-looking result.
When using an airless paint sprayer, it’s important to remember that each coat should be applied evenly and with proper technique. Start by overlapping each pass by about 50%, ensuring that the sprayer is held at a consistent distance from the surface. Allow each coat to dry thoroughly before applying the next one. This will help prevent drips and ensure a smooth, uniform finish.
Once you have achieved the desired coverage, you can move on to the next step of clean and maintain your airless paint sprayer by following these simple guidelines.
Clean and Maintain Your Airless Paint Sprayer
Properly maintaining your airless paint sprayer is essential for keeping it in top shape and ensuring it continues to deliver flawless results. Here are some maintenance tips and troubleshooting techniques to help you keep your sprayer in excellent condition:
-
Regularly clean the sprayer after each use to prevent paint buildup and clogs.
-
Check and clean the filters regularly to ensure proper paint flow and prevent blockages.
-
Lubricate the moving parts of the sprayer, such as the piston, regularly to keep them running smoothly.
By following these maintenance tips and troubleshooting techniques, you can prolong the lifespan of your airless paint sprayer and maintain its optimal performance.
Once your sprayer is well-maintained, you can move on to the next step of the project, which is touching up and finishing the exterior paint job.
Touch Up and Finish the Project
After completing the painting project, it’s crucial to inspect the painted surface for any imperfections.
As an experienced painter, I know that even the smallest flaws can be noticeable and affect the overall appearance of the project. Therefore, I take the time to carefully examine the surface and make any necessary touch-ups or corrections to ensure a flawless finish.
Inspect the Painted Surface for Any Imperfections
Before firing up the airless paint sprayer, take a moment to scan the painted surface for any imperfections – like tiny battle scars on a weathered warrior. This is a crucial step to ensure a flawless finish.
Check for surface damage such as drips, runs, or areas where the paint may not have adhered properly. Prepare for surface repairs by gathering the necessary tools and materials.
Once you’ve identified any imperfections, make any necessary touch-ups or corrections. This may involve smoothing out drips or runs with a sanding block, filling in small gaps or cracks with caulk, or applying an additional coat of paint to areas that appear uneven.
By addressing these imperfections before moving on, you’ll be able to achieve a professional-looking exterior paint job.
Make Any Necessary Touch-Ups or Corrections
Once you’ve identified any imperfections on the painted surface, it’s time to tackle those touch-ups or corrections to ensure a flawless finish. Here are three touch-up techniques that can help you correct any paint mistakes effectively:
-
Feathering: Use a small brush to blend the new paint with the existing one by feathering the edges. This technique helps create a seamless transition and avoids any noticeable lines or patches.
-
Spot Sanding: If there are rough areas or drips on the surface, lightly sand them with fine-grit sandpaper. This will smooth out the imperfections and provide a smooth surface for the touch-up paint to adhere to.
-
Color Matching: To achieve a seamless finish, make sure to match the touch-up paint color with the existing color. Purchase a small amount of the same paint or consult a professional to ensure an accurate color match.
Once you’ve applied the necessary touch-ups and corrections, it’s time to clean up the work area and prepare for the next step of the process without interrupting the flow.
Clean Up the Work Area
When it comes to cleaning up the work area after using an airless paint sprayer on the exterior, there are a few key points to keep in mind. First and foremost, it’s crucial to dispose of paint and paint-related materials properly. This means following all local regulations and guidelines for hazardous waste disposal.
Additionally, it’s important to thoroughly clean brushes, rollers, and other tools used during the painting process to ensure they can be used again in the future. Regular maintenance and cleaning of these tools will help prolong their lifespan and ensure optimal performance for future projects.
Dispose of Paint and Paint-Related Materials Properly
To properly dispose of paint and paint-related materials, make sure you envision a vibrant green recycling bin eagerly awaiting its colorful contents. Proper paint disposal is crucial for minimizing our environmental impact.
When it comes to leftover paint, check if it can be reused or donated to local organizations before resorting to disposal. If disposal is necessary, remember to never pour paint down the drain or throw it in the trash. Instead, let the leftover paint dry out completely, and then dispose of it in your regular trash.
For paint cans, remove any excess paint, let them dry, and then recycle the empty cans.
Now that we’ve taken care of proper paint disposal, let’s move on to how we can clean brushes, rollers, and other tools without wasting any time.
Clean Brushes, Rollers, and Other Tools
Cleaning brushes, rollers, and other tools is a breeze when you follow these simple steps. First, remove as much excess paint as possible by scraping or wiping it off. Then, fill a bucket with warm soapy water and soak the tools for a few minutes to loosen any remaining paint. Use a wire brush or comb to remove any stubborn paint particles. Rinse the tools thoroughly and pat them dry with a clean cloth. To ensure proper drying, hang brushes and rollers upside down or lay them flat on a clean surface. Avoid storing them in a damp or humid area as this can lead to mold or mildew growth. By following these cleaning techniques and drying methods, your brushes, rollers, and other tools will stay in great condition for future use. Now, you can enjoy your newly painted exterior with confidence.
Enjoy Your Newly Painted Exterior
Transform the look of your home with a freshly painted exterior, and savor the satisfaction of a job well done! Here are four essential tips to help you maintain your newly painted exterior and ensure its longevity:
-
Regularly inspect your painted surfaces: Take the time to examine your exterior for any signs of wear or damage. Addressing these issues promptly will prevent further deterioration and extend the lifespan of your paint job.
-
Clean your painted surfaces: Dirt, dust, and grime can accumulate on your home’s exterior, dulling the paint’s appearance. Regularly clean your painted surfaces using a mild detergent and a soft brush or sponge to keep them looking fresh and vibrant.
-
Protect against the elements: Weatherproofing techniques such as applying a clear protective coating or using weather-resistant paint can help shield your exterior from harsh weather conditions, including rain, UV rays, and temperature fluctuations.
-
Maintain landscaping: Trim back trees and shrubs that may brush against your painted surfaces, as they can cause scratches or damage the paint. Additionally, ensure proper drainage around your home to prevent water from pooling near the foundation, which can lead to paint peeling or cracking.
By following these maintenance and weatherproofing techniques, you can enjoy your newly painted exterior for years to come.
Frequently Asked Questions
What type of paint is best for exterior surfaces?
When it comes to painting exterior surfaces, the best paint brands vary depending on the specific needs and conditions. However, some top choices include Sherwin-Williams, Behr, and Benjamin Moore. Here are some tips for achieving a professional finish.
How do I properly clean and maintain my airless paint sprayer?
To properly clean and maintain my airless paint sprayer, I follow a few troubleshooting tips. Regularly clean the filters, flush out the system with water or solvent, and ensure all parts are properly lubricated.
Can an airless paint sprayer be used on other surfaces besides exteriors?
Yes, an airless paint sprayer can be used on interior walls and furniture. It provides a smooth and even finish, saving time and effort. Just adjust the pressure and nozzle size for different surfaces.
What safety precautions should I take when using an airless paint sprayer?
When using an airless paint sprayer, it is crucial to prioritize safety. Wearing appropriate safety equipment, such as goggles, gloves, and a respirator, is essential. Additionally, ensuring proper ventilation in the workspace is necessary to prevent the inhalation of fumes.
How do I achieve a smooth finish when using an airless paint sprayer?
To achieve a smooth finish with an airless paint sprayer, I focus on achieving even coverage by using overlapping strokes and maintaining a consistent distance from the surface. I troubleshoot common issues such as clogged nozzles and adjusting the pressure for optimal results.
Conclusion
In conclusion, using an airless paint sprayer on the exterior of your home is a game-changer. It allows for a fast and efficient painting process, ensuring a smooth and professional finish.
With the right preparation, equipment, and safety measures in place, you can transform your home’s exterior with ease. Trust me, this tool is a lifesaver! It’ll make you feel like you have superpowers, effortlessly covering large areas in a single swipe.
So go ahead, give it a try and unleash your inner painting pro!