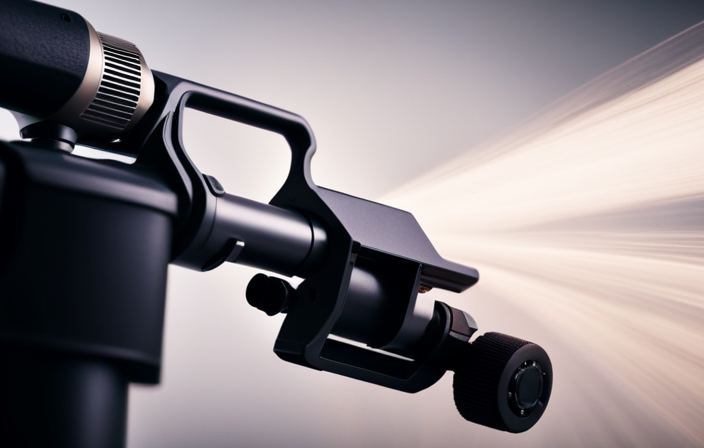

As I unpack the Graco X5 Airless Paint Sprayer, a wave of excitement washes over me. Its sleek design and powerful performance revolutionize the world of painting. With its ability to deliver a consistent and perfect coat of paint, it’s no wonder that it’s acclaimed by professional painters and DIY enthusiasts alike.
In this article, I will guide you through the step-by-step process of using the Graco X5 to achieve professional results. From setting up the sprayer to adjusting the pressure and flow rate, I will provide you with detailed instructions to ensure your painting experience is seamless.
We will also explore tips and tricks for painting large surfaces and tackling tricky areas with precision. And of course, I will share essential cleaning and maintenance tips to keep your Graco X5 in top-notch condition.
Get ready to unleash your inner artist as we dive into the world of the Graco X5 Airless Paint Sprayer. Let’s transform your painting projects from ordinary to extraordinary.
Key Takeaways
- The Graco X5 airless paint sprayer reduces paint overspray by 50% for even coverage.
- It achieves professional-looking results on large surfaces easily.
- Troubleshooting tips include adjusting paint viscosity, cleaning the filter, and adjusting pressure settings for clogging and uneven spray issues.
- Techniques for painting tricky areas involve mastering proper technique for corners with smaller brush or precision tip attachment, and applying paint in thin, even coats for professional-looking results.

VEVOR 750W Stand Airless Paint Sprayer, 3000PSI High Efficiency Electric Airless Sprayer, Fine and Even Painting Effect, Handheld Paint Sprayers for Home Interior and Exterior Furniture and Fences
Efficient Painting: Our stand airless paint sprayer is equipped with a powerful 750W motor, capable of delivering up...
As an affiliate, we earn on qualifying purchases.
Unboxing and Setting Up the Graco X5 Airless Paint Sprayer
Now that you’ve got your hands on the Graco X5 Airless Paint Sprayer, it’s time to unbox it and get it all set up for a seamless painting experience.
The first step is to carefully unpack the sprayer and all its components. Make sure to read the instruction manual thoroughly to familiarize yourself with the different parts and their functions.
Once everything is laid out, you can begin assembling the sprayer. Connect the hose to the sprayer and the gun to the hose. It’s important to ensure that all connections are tight to prevent any leaks.
After setting up the sprayer, take a moment to understand the factors that can affect paint adhesion, such as surface preparation and temperature. This knowledge will help you achieve the best results.
Additionally, familiarize yourself with common paint sprayer issues and troubleshooting techniques. This will save you time and frustration in case any problems arise during your painting project.
Now that you’re all set up, let’s move on to the next section about familiarizing yourself with the different spray patterns.

HomeRight Super Finish Max HVLP Paint Sprayer - 450 Watts, Model# C800971.M
PAINT SPRAYER FOR COUNTLESS DIY PROJECTS: The HomeRight Super Finish Max paint sprayer offers the ultimate DIYing experience....
As an affiliate, we earn on qualifying purchases.
Familiarizing Yourself with the Different Spray Patterns
First, get to know the various spray patterns available to you when using the Graco X5. These different spray patterns allow you to customize the way you apply paint, giving you greater control and precision over your project.
Here are four spray patterns to consider:
-
Narrow Pattern: This pattern is ideal for detailed work and smaller surfaces, providing a concentrated stream of paint for precise application.
-
Wide Pattern: Perfect for larger surfaces, the wide pattern covers a broader area in a shorter amount of time, making it efficient for painting walls or fences.
-
Vertical Pattern: When painting tall surfaces like doors or cabinets, the vertical pattern ensures even coverage from top to bottom.
-
Horizontal Pattern: Great for painting wide surfaces like ceilings or floors, the horizontal pattern allows for consistent application across the surface.
To choose the right spray pattern for your project, consider the size and shape of the surface, as well as the type of paint you’re using. Once you’ve familiarized yourself with the different spray patterns, it’s time to prepare your workspace and surface for painting.

Graco Magnum 257025 Project Painter Plus Paint Sprayer
Ideal for projects up to 5 gallons in size, allowing you to tackle a range of projects every...
As an affiliate, we earn on qualifying purchases.
Preparing Your Workspace and Surface for Painting
Before diving into the painting process, it’s crucial to ensure that your workspace and surface are properly prepared, as this can significantly impact the final result and overall efficiency of the project.
Did you know that studies have shown that spending just a few extra minutes preparing your workspace can save you up to 30% of your overall painting time?
To effectively organize your workspace, start by clearing the area of any furniture, decorations, or other items that could obstruct your movement or accidentally get paint on them.
Cover the floor, nearby walls, and any other surfaces you want to protect from overspray with drop cloths or plastic sheeting.
Additionally, make sure to thoroughly clean the surface you will be painting, removing any dirt, dust, or loose paint. This will ensure proper adhesion and a smooth finish.
Now that your workspace and surface are ready, let’s move on to mixing and diluting paint for optimal results.

Graco Magnum 262800 X5 Stand Airless Paint Sprayer, Blue
Just right for DIY Homeowners and Remodelers looking for more power and mobility when tackling larger projects
As an affiliate, we earn on qualifying purchases.
Mixing and Diluting Paint for Optimal Results
To achieve the best possible results, you’ll want to mix and dilute your paint properly. When it comes to mixing techniques, there are a few options to consider. One method is to use a paint stirrer attachment on a power drill, which ensures a thorough and even mix. Another technique is to pour the paint back and forth between two containers several times, which helps to mix the pigment evenly.
In terms of diluting the paint, it’s important to use the right type of paint for your project. Some paints may require thinning with water or a specific type of thinner, while others are ready to use straight from the can. It’s crucial to follow the manufacturer’s instructions to ensure you achieve the proper consistency for optimal spraying results.
Next, we’ll move on to adjusting the pressure and flow rate of the paint sprayer. This step is essential for achieving professional-looking results.
Adjusting the Pressure and Flow Rate of the Paint Sprayer
Achieve a flawless masterpiece by unleashing the power within your paint sprayer, adjusting its pressure and flow rate to create a symphony of color and precision. To optimize your painting experience, follow these steps:
-
Adjusting the nozzle: Start by selecting the appropriate size nozzle for your project. A smaller nozzle will provide more control and detail, while a larger nozzle is ideal for covering larger surfaces quickly.
-
Troubleshooting common issues: If you notice uneven spray patterns or clogging, try adjusting the pressure. Increase or decrease the pressure until you achieve an even, consistent spray. Additionally, check for any obstructions in the nozzle and clean it thoroughly if necessary.
-
Controlling the flow rate: Adjust the flow rate knob to regulate the amount of paint being sprayed. Turning it clockwise will increase the flow, while turning it counterclockwise will decrease it. Experiment with different settings to find the perfect balance for your project.
-
Proper technique for holding and maneuvering the sprayer: Now that you’ve mastered adjusting the pressure and flow rate, it’s time to learn the proper technique for holding and maneuvering the sprayer.
Transition: With the pressure and flow rate dialed in, let’s explore the proper technique for holding and maneuvering the sprayer to ensure maximum control and efficiency.
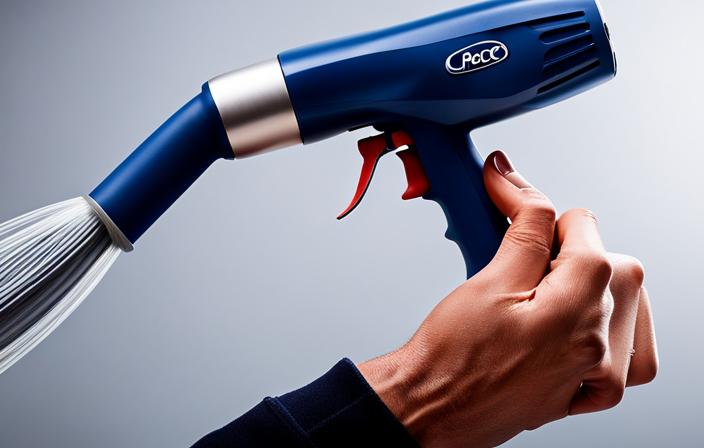
Proper Technique for Holding and Maneuvering the Sprayer
Now that you’ve mastered the art of adjusting the pressure and flow rate, let’s dive into the joyful technique of holding and maneuvering your sprayer like a seasoned pro.
Proper grip is essential for maintaining control and achieving smooth, even coverage. Start by firmly gripping the handle with your dominant hand, ensuring that your fingers are wrapped around it comfortably. Your other hand should be positioned near the front of the sprayer, ready to provide additional support and stability.
As you begin spraying, keep your wrist straight and move the sprayer in smooth, overlapping strokes. This will help prevent streaks and ensure an even application of paint. Remember to maintain a consistent distance from the surface, usually around 12 inches.
With the right grip and sprayer maneuverability, you’ll be ready to tackle painting large surfaces with the Graco X5 in no time.
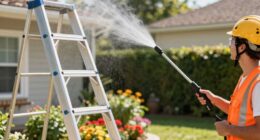
Painting Large Surfaces with the Graco X5
Master the art of effortlessly painting large surfaces with the Graco X5 by learning the proper technique for holding and maneuvering the sprayer like a seasoned pro.
When painting ceilings with the Graco X5, it’s important to start from one corner and work your way across, maintaining a consistent distance and speed. Be sure to overlap each pass by about 50% to ensure even coverage.
If you encounter any issues, such as clogging or uneven spray, troubleshoot by checking the paint viscosity, cleaning the filter, and adjusting the pressure settings accordingly.
With the Graco X5, you can achieve professional-looking results on large surfaces with ease.
Transitioning into the next section about painting tricky areas and corners with precision, it’s important to master the proper technique for tackling these challenging spots.
Painting Tricky Areas and Corners with Precision
When tackling tricky areas and corners, it’s essential to perfect your technique for achieving precise and flawless results.
Painting textured surfaces can be challenging, but with the right approach, it can be done smoothly. To start, make sure to choose the right paint for these areas. Opt for a paint that’s specifically designed for textured surfaces, as it’ll provide better coverage and adhere properly.
When painting corners, use a smaller brush or a precision tip attachment to ensure accuracy and avoid any accidental smudges. Take your time and apply the paint in thin, even coats. By being patient and meticulous, you can achieve professional-looking results even in the trickiest of areas.
As you move on to the next section about cleaning and maintaining your Graco X5 Airless Paint Sprayer, it’s important to ensure that your equipment is in top condition for future projects.
Cleaning and Maintaining Your Graco X5 Airless Paint Sprayer
To keep your Graco X5 running smoothly, make sure you regularly clean and maintain it. Proper cleaning and maintenance can extend the lifespan of your paint sprayer and ensure optimal performance.
Here are some cleaning tips to help you maintain your Graco X5:
- Flush the system with water after each use to remove any remaining paint residue.
- Use a cleaning solution specifically designed for airless sprayers to deep clean the pump and hoses.
- Inspect the spray tip regularly and replace it if it becomes worn or clogged.
- Check the filters and replace them if they’re dirty or damaged.
- Lubricate the pump periodically to keep it running smoothly.
Troubleshooting common issues:
- If the spray pattern is uneven, check the tip for clogs and ensure proper pressure settings.
- If the pump isn’t priming, check for air leaks and ensure the suction tube is properly submerged.
By following these cleaning tips and troubleshooting common issues, you can ensure that your Graco X5 operates at its best.
In the next section, we’ll discuss tips and tricks for achieving a professional finish.
Tips and Tricks for Achieving a Professional Finish
Now that we’ve covered the importance of cleaning and maintaining your Graco X5 Airless Paint Sprayer, let’s dive into some tips and tricks for achieving a professional finish.
When it comes to painting, nothing is more satisfying than achieving a smooth and flawless result. To achieve this, start by selecting the right paint and thinning it properly if needed. It’s also crucial to practice proper spraying techniques, such as maintaining a consistent distance from the surface and using even and overlapping strokes.
Another key tip is to adjust the pressure on your sprayer to avoid overspray, which can lead to wasted paint and an uneven finish. By following these tips and tricks, you’ll be well on your way to achieving a professional-looking paint job with your Graco X5 Airless Paint Sprayer.
Frequently Asked Questions
How long does it take for the paint to dry when using the Graco X5 Airless Paint Sprayer?
On average, paint applied with the Graco X5 airless paint sprayer can take anywhere from 2 to 24 hours to dry completely. Factors such as humidity, temperature, and the type of paint used can affect drying time. To speed up drying, ensure proper ventilation and use fast-drying paint.
Can the Graco X5 Airless Paint Sprayer be used with different types of paint, such as latex and oil-based paints?
Yes, the Graco X5 airless paint sprayer can be used with different types of paint, including latex and oil-based paints. It is recommended to follow the paint manufacturer’s instructions for thinning techniques to ensure proper application.
Is it necessary to wear protective gear, such as a mask or goggles, when using the Graco X5 Airless Paint Sprayer?
When using the Graco X5 airless paint sprayer, it is crucial to protect yourself by wearing a mask and goggles. These safety measures are like a shield, guarding your lungs and eyes from harmful fumes and splatters.
Can the Graco X5 Airless Paint Sprayer be used for outdoor painting projects?
Yes, the Graco X5 airless paint sprayer can be used for outdoor painting projects. The advantages are that it provides fast and even coverage, while the disadvantage is that it requires more cleanup compared to traditional paint methods.
What is the maximum distance the Graco X5 Airless Paint Sprayer can spray paint?
The graco x5 airless paint sprayer boasts a maximum spraying distance of 75 feet. To achieve optimal results, it is recommended to use a nozzle size of 0.015 inches.
Conclusion
After following these steps and mastering the use of the Graco X5 Airless Paint Sprayer, I can confidently say that achieving a professional finish is within reach.
By unboxing and setting up the sprayer, familiarizing myself with the spray patterns, and preparing the workspace and surface properly, I was able to create a smooth and even coat of paint.
Adjusting the pressure and flow rate, as well as utilizing the tips and tricks mentioned, helped me paint large surfaces and tricky areas with precision.
Finally, cleaning and maintaining the sprayer ensured its longevity and continued performance. With the Graco X5, painting has become a breeze and the results speak for themselves.