
I have always been captivated by the excitement of giving a space new life with a fresh coat of paint. However, my traditional method of using rollers and brushes was time-consuming and often left behind uneven lines.
That all changed when I discovered the Wagner ProCoat Airless Paint Sprayer. This game-changing tool has revolutionized my painting process, allowing me to achieve professional results in a fraction of the time.
In this article, I’ll guide you through the step-by-step process of using the Wagner ProCoat Airless Paint Sprayer, from setting it up to troubleshooting common issues.
Whether you’re a seasoned DIY enthusiast or a beginner looking to tackle your first paint project, this comprehensive guide will provide you with the knowledge and confidence to achieve flawless, smooth finishes every time.
Get ready to take your painting skills to the next level with the Wagner ProCoat Airless Paint Sprayer.
Key Takeaways
- Maintain a consistent distance from the surface being painted to ensure even distribution and prevent an uneven finish.
- Adjust nozzle pressure and use smooth and steady motions to manage overspray and prevent drips.
- Thoroughly clean and maintain the Wagner ProCoat Airless Paint Sprayer after each use to ensure proper functioning.
- Store the sprayer in a safe and dry place, away from extreme temperatures and direct sunlight, to prolong its lifespan.
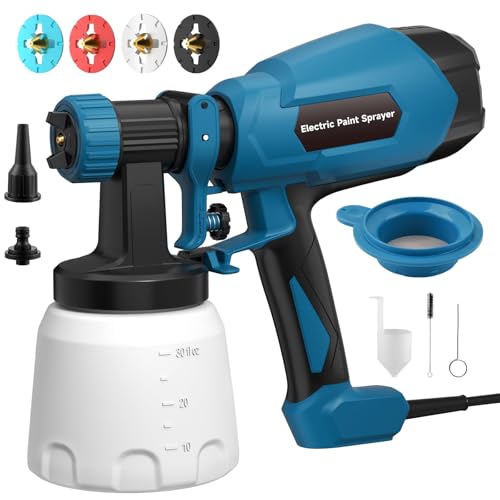
WIBENTL Paint Sprayer, Electric Spray Paint Gun, 3 Modes & 4 Brass Nozzles, with Cleaning & Blowing Joints, Variable Flow Control, for Doors, Fences, Walls, Cabinets, Garden Chairs, Furniture, Blue
- Multiple Spray Patterns: Horizontal, vertical, circular modes
- Versatile Brass Nozzles: Four sizes for different projects
- Easy Assembly & Cleaning: Tool-free setup, quick cleanup
As an affiliate, we earn on qualifying purchases.
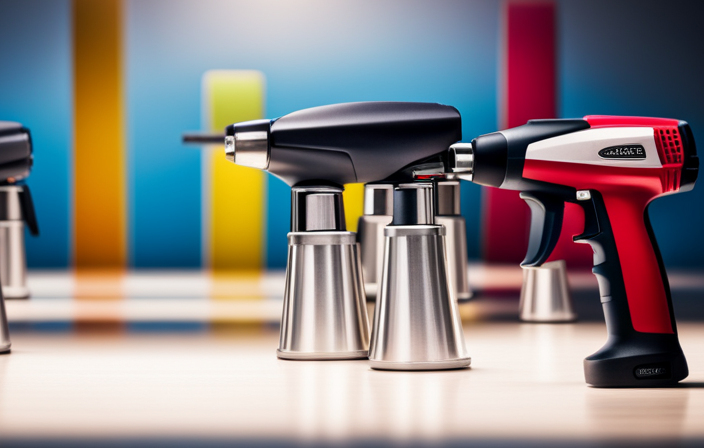
Familiarize Yourself with the Wagner ProCoat Airless Paint Sprayer
Get ready to dive into the world of painting with the Wagner ProCoat Airless Paint Sprayer and familiarize yourself with its incredible features!
The Wagner ProCoat Airless Paint Sprayer is a powerful tool that allows you to quickly and efficiently paint large surfaces.
To operate the sprayer effectively, start by filling the paint container with your desired paint or stain.
Connect the sprayer to a power source and adjust the pressure control knob to the desired level.
Hold the sprayer nozzle approximately 12 inches away from the surface you are painting and move it in a steady back-and-forth motion.
Always keep the sprayer moving to avoid uneven coverage.
Once you are comfortable operating the sprayer, you can prepare your painting area for a flawless finish.
Prepare Your Painting Area
To prepare your painting area, start by clearing the area of any furniture or obstacles. This is important because a staggering 80% of painting accidents occur due to tripping over objects in the room.
Next, take the time to mask off areas before painting. Use painter’s tape to protect edges and corners of walls, ceilings, and trim. This will help you achieve clean and crisp lines.
Cover furniture and flooring with drop cloths or plastic sheets to prevent paint splatters or spills. This will save you from the hassle of cleaning up afterwards.
Don’t forget to seal off air vents and electrical outlets with plastic or tape. This will prevent any damage or paint infiltration.
Proper ventilation is crucial during painting. Open windows and doors to improve airflow and minimize fumes. Consider using fans or air purifiers to further enhance ventilation.
Once the area is cleared and prepped, it’s time to gather your materials and tools for a successful painting project.
Gather Your Materials and Tools
To ensure a smooth and successful painting project, it is important to gather all the necessary materials and tools. Here is a checklist to help you gather everything you need:
- Paint sprayer
- Paint
- Paint strainer
- Drop cloths
- Painter’s tape
- Paintbrushes
- Paint roller
- Paint tray
- Extension cord
- Safety goggles
These items are essential for achieving professional-looking results. It is also important to have a clean and well-ventilated area to work in. Once you have gathered all the materials and tools, you are ready to move on to the next step: setting up the Wagner ProCoat airless paint sprayer. This will allow you to start painting efficiently and effectively.
Set Up the Wagner ProCoat Airless Paint Sprayer
To set up the Wagner ProCoat airless paint sprayer, follow these steps:
- Ensure the sprayer is unplugged and the pressure control knob is turned counterclockwise to the lowest setting.
- Attach the spray gun to the hose using the quick connect feature, ensuring it is secure.
- Connect the other end of the hose to the sprayer unit, making sure all connections are tight to prevent leaks.
- Review safety precautions such as wearing safety goggles and gloves, as well as working in a well-ventilated area.
- Practice and test the spray pattern before starting your project.
Remember to take your time and familiarize yourself with the equipment before beginning your painting project.
Practice and Test Spray
To ensure the best results with the Wagner ProCoat Airless Paint Sprayer, it is crucial to practice and test spray before starting your actual project.
Begin by selecting a test surface, such as a scrap piece of wood or cardboard, to get a feel for the sprayer’s settings and spray pattern.
Adjust the spray technique and pattern as needed to achieve the desired coverage and consistency.
By taking the time to practice and test spray, you can avoid potential mistakes and achieve a professional finish with your Wagner ProCoat Airless Paint Sprayer.
Start with a Test Surface
Before you begin, it’s best to start with a test surface when using the Wagner ProCoat airless paint sprayer. This step is crucial to ensure proper functionality and desired results. Here are four key reasons why starting with a test surface is important:
-
Test Surface Preparation:
Assess the surface condition and determine if any preparation work is needed, such as sanding or priming, for optimal paint adhesion. -
Spray Technique Adjustment:
Adjust the spray technique, including speed and distance, on a small surface to achieve the desired coverage and finish. -
Paint Consistency Check:
Evaluate the viscosity and consistency of the paint on a test surface. Make adjustments to the paint mixture if necessary for better results. -
Equipment Familiarization:
Get comfortable and confident in using the Wagner ProCoat airless paint sprayer by starting with a test surface. This allows you to familiarize yourself with the equipment before tackling the entire project.
Now, let’s move on to the next section where we will discuss how to adjust the spray technique and pattern for optimal paint application.
Adjust the Spray Technique and Pattern
Now that we have tested the surface, it’s time to focus on improving our spray technique and adjusting the spray pattern for optimal results.
To achieve a professional finish with the Wagner ProCoat Airless Paint Sprayer, it is crucial to master these aspects.
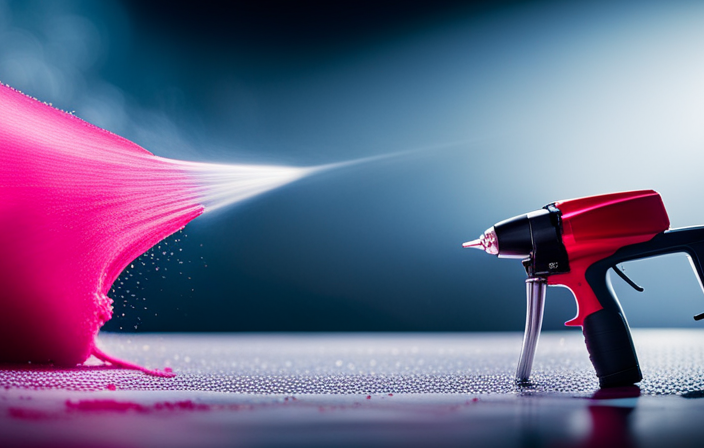
Start by adjusting the spray pattern according to your specific needs. This can be done by rotating the nozzle until you achieve the desired pattern, whether it’s vertical, horizontal, or diagonal.
Additionally, make sure to hold the sprayer at the correct distance from the surface, typically around 12 inches. By doing so, you will ensure an even and consistent application of paint.
Remember to maintain a steady and smooth motion while spraying, overlapping each stroke slightly for a seamless finish.
These spray technique improvements will set the foundation for flawless painting.
Transitioning into the next section, it’s now time to begin painting.
Begin Painting
When beginning to paint with the Wagner Procoat airless paint sprayer, it’s important to start with even strokes and overlap. This ensures a smooth and uniform coverage on the surface being painted.
Additionally, it’s crucial to maintain a consistent distance from the surface, typically around 12 inches, to achieve optimal results.
By following these guidelines, I can efficiently and effectively paint using the Wagner Procoat airless paint sprayer.
Start with Even Strokes and Overlap
To achieve a professional finish with the Wagner Procoat airless paint sprayer, it is important to start with even strokes and overlap. This technique helps distribute the paint evenly and prevents streaks or uneven coverage.
When starting a new stroke, make sure to slightly overlap the previous stroke. This creates a seamless finish and ensures that the paint is applied evenly. It is also important to maintain a consistent distance from the surface to achieve an even application of paint.
To achieve even strokes, hold the sprayer perpendicular to the surface and move your arm in a smooth, steady motion. Avoid jerky movements or stopping in the middle of a stroke, as this can result in an uneven application.
In addition, be mindful of the speed at which you move the sprayer. Moving too quickly can cause thin or spotty coverage, while moving too slowly can result in a buildup of paint and drips.
By following these paint sprayer techniques, you can ensure a professional-looking finish on your project. Remember to maintain a consistent distance from the surface to achieve optimal results.
Maintain a Consistent Distance from the Surface
To maintain a consistent distance from the surface while using the Wagner Procoat airless paint sprayer, follow these steps:
-
Hold the sprayer approximately 12 inches away from the surface being painted.
This distance allows the paint to atomize properly and ensures an even distribution.
-
Avoid holding the sprayer too close to the surface.
Holding the sprayer too close can result in the paint being applied too thickly, leading to drips and an uneven finish.
-
Similarly, avoid holding the sprayer too far away from the surface.
Holding the sprayer too far away can cause the paint to dry before reaching the surface, resulting in a patchy appearance.
By maintaining a consistent distance, you can avoid these issues and achieve professional-looking results.
Now, let’s move on to how to manage overspray and drips.
Manage Overspray and Drips
To manage overspray and drips, there are a few key tips you should keep in mind:
-
Adjust the nozzle pressure: By adjusting the pressure on the nozzle, you can control the amount of paint being sprayed, reducing the chances of overspray and drips.
-
Maintain a consistent distance: Keep the sprayer at a consistent distance from the surface being painted. This helps ensure an even application and prevents excess paint from pooling or dripping.
-
Use a drop cloth: Lay down a drop cloth or plastic sheeting to catch any potential drips or overspray. This will protect your floors or furniture from getting messy.
-
Practice good technique: Move the sprayer in smooth and steady motions, overlapping each pass slightly. This will help avoid paint runs and drips.
By following these tips, you can achieve a professional-looking paint job without the hassle of drips and overspray.
Now, let’s move on to how to clean and maintain the Wagner ProCoat airless paint sprayer.
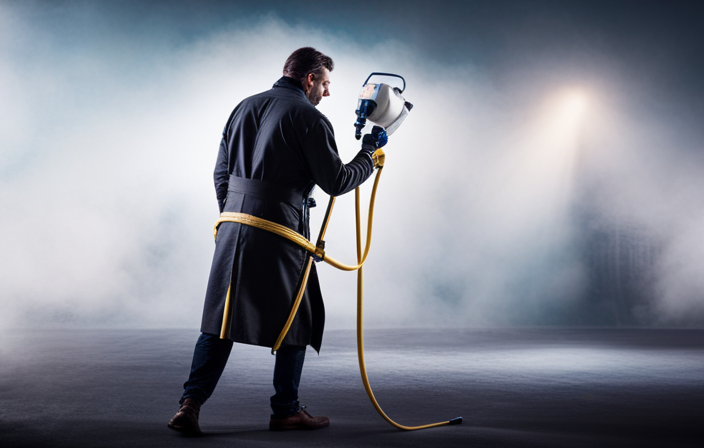
Clean and Maintain the Wagner ProCoat Airless Paint Sprayer
When it comes to cleaning and maintaining the Wagner ProCoat Airless Paint Sprayer, it is crucial to follow proper cleaning procedures. This ensures that the sprayer remains in optimal condition and ready for future use.
After each use, it is important to thoroughly clean the sprayer. Start by removing the paint container and emptying any remaining paint. Then, flush the system with clean water or a cleaning solution recommended by Wagner. This will help remove any paint residue or clogs from the sprayer.
Next, disassemble the sprayer and clean each individual part. Use a soft brush or cloth to remove any paint or debris. Pay close attention to the nozzle and filters, as these are often the areas that get clogged the most.
Once all the parts are clean, reassemble the sprayer and run clean water or cleaning solution through the system again to ensure all the parts are properly rinsed.
After cleaning, it is important to store the sprayer in a safe and dry place to prevent any damage or corrosion. Make sure to remove any excess water or cleaning solution from the sprayer before storing it.
By following these cleaning and maintenance procedures, you can prolong the life of your Wagner ProCoat Airless Paint Sprayer and ensure it continues to work effectively for all your painting needs.
Follow Proper Cleaning Procedures
To properly clean the Wagner ProCoat airless paint sprayer, follow these steps:
-
Disconnect the spray gun from the unit and remove the nozzle guard to access the inner workings of the machine.
-
Clean the nozzle and filter using a brush or cloth to remove any paint residue or debris. Pay attention to small openings and crevices for thorough cleaning.
-
Clean the suction tube and spray tip to prevent clogs and maintain a consistent spray pattern.
-
After completing the cleaning process, store the sprayer in a safe and dry place to protect it from damage and ensure its readiness for future use.
Store the Sprayer in a Safe and Dry Place
After properly cleaning the Wagner ProCoat airless paint sprayer, it’s essential to store it in a secure and moisture-free location to safeguard its condition and ensure it remains in optimal working order for future use. When storing the sprayer, there are a few precautions to keep in mind.
Firstly, make sure to remove any leftover paint from the sprayer and clean it thoroughly to prevent clogs and damage. Additionally, store the sprayer in a place where it is protected from extreme temperatures, as this can affect its performance.
It is also important to keep the sprayer away from direct sunlight, as this can cause the paint to dry inside the sprayer and lead to further issues. By following these storage precautions and regular maintenance tips, you can ensure that your Wagner ProCoat airless paint sprayer is always ready for use.
Transitioning into the next section, troubleshooting common issues, let’s address some common problems that may arise.
Troubleshooting Common Issues
One common issue with the Wagner Procoat airless paint sprayer is clogged spray tips. But have you ever wondered what causes the paint to get stuck? There are a few possible reasons for this problem.
First, the paint may be too thick or contain particles that clog the nozzle. To troubleshoot a clogged nozzle, you can try cleaning it with water or a suitable solvent.
Another common issue is an uneven spray pattern. This can occur if the sprayer’s pressure is too low, or if the spray tip is worn out or damaged. To troubleshoot an uneven spray pattern, you can adjust the pressure settings or replace the spray tip if necessary.
By addressing these common issues, you can ensure a smooth and even paint application. Now, enjoy your newly painted space.
Enjoy Your Newly Painted Space
After successfully using the Wagner Procoat airless paint sprayer to create professional-quality results, I couldn’t help but admire the flawless finish. The sprayer’s precision and even application made the entire painting process effortless and efficient.
Now, I’m excited to share my experience and tips with others, helping them achieve the same stunning results in their own painting projects. Enjoy your newly painted space!
Admire Your Professional-Quality Results
Once you’ve finished using the Wagner ProCoat airless paint sprayer, you’ll be amazed by the professional-quality results you achieve. This powerful tool allows you to apply paint evenly and smoothly, giving your walls a flawless finish.
To achieve the best results, it is crucial to master professional paint sprayer techniques. Maintain a consistent distance from the surface, usually around 12 inches, and move the sprayer in a steady, overlapping motion. Adjust the pressure settings according to the type of paint and surface you’re working on.
Take your time and apply multiple thin coats rather than one thick coat to avoid drips and runs. Clean the sprayer thoroughly after each use to ensure its longevity.
With these techniques, you’ll be able to transform your space into a professional-looking masterpiece.
Now, share your experience and tips with others, helping them achieve exceptional results as well.
Share Your Experience and Tips with Others
Share your expert tips and personal success stories with others, helping them achieve professional-quality results in their painting projects. Sharing your experience can be a great way to learn from each other and improve our painting skills. Here are some tips and tricks that I have found helpful when using the Wagner ProCoat airless paint sprayer:
| Tip | Description |
|---|---|
| Use the right nozzle | Choosing the correct nozzle size is crucial for achieving the desired finish and minimizing overspray. |
| Thin the paint | If the paint is too thick, it can clog the sprayer. Thin it with the recommended amount of water or paint thinner. |
| Practice makes perfect | Before starting a big project, practice on a small surface to get familiar with the sprayer and adjust the settings. |
By sharing our experiences and tips, we can all become better painters and achieve professional-quality results.
Frequently Asked Questions
Can the Wagner ProCoat Airless Paint Sprayer be used for both indoor and outdoor painting projects?
Yes, the Wagner ProCoat airless paint sprayer is perfect for both indoor and outdoor painting projects. Its versatility and high-performance capabilities make it an ideal choice. Regular sprayer maintenance ensures optimal functionality.
What type of paint can be used with the Wagner ProCoat Airless Paint Sprayer?
Different types of paint compatible with the Wagner ProCoat airless paint sprayer include latex, oil-based, and acrylic paints. To properly clean the sprayer, follow the manufacturer’s instructions, which typically involve flushing it with water or a cleaning solution.
How long does it take for the paint to dry when using the Wagner ProCoat Airless Paint Sprayer?
The drying time of paint when using the Wagner Procoat airless paint sprayer can vary depending on factors such as humidity and temperature. However, on average, it takes around 2-4 hours for the paint to dry.
Is it necessary to thin the paint before using the Wagner ProCoat Airless Paint Sprayer?
No, it is not necessary to thin the paint when using the Wagner ProCoat airless paint sprayer. This is one of the benefits of using an airless sprayer as it can handle thicker paints without the need for thinning.
Can the Wagner ProCoat Airless Paint Sprayer be used to paint textured surfaces?
Yes, the Wagner ProCoat airless paint sprayer can be used to paint textured surfaces. It is important to use proper painting techniques, such as adjusting the spray pattern and pressure, to ensure even coverage. However, there are alternative paint sprayers specifically designed for textured surfaces.
Conclusion
Using the Wagner ProCoat Airless Paint Sprayer is an adventure in itself. Familiarizing yourself with the sprayer is the first step. Make sure to read the instruction manual thoroughly before getting started.
One important aspect to consider is managing overspray and drips. To minimize overspray, adjust the spray pattern and pressure settings according to the surface you’re painting. Start with a low pressure setting and gradually increase if needed.
To prevent drips, maintain a consistent distance from the surface and keep the sprayer moving at a steady pace. Avoid holding the sprayer too close or staying in one spot for too long.
Troubleshooting common issues is also part of the process. If you encounter clogs or uneven spray patterns, check the nozzle and filter for any blockages. Clean or replace them if necessary.
Once you’ve mastered the technique, enjoy the satisfaction of a beautifully painted space. Step back and admire your work, knowing that you’ve accomplished something great.
So, don’t be afraid to take on the challenge. Grab your Wagner ProCoat Airless Paint Sprayer and embark on your own thrilling painting journey!