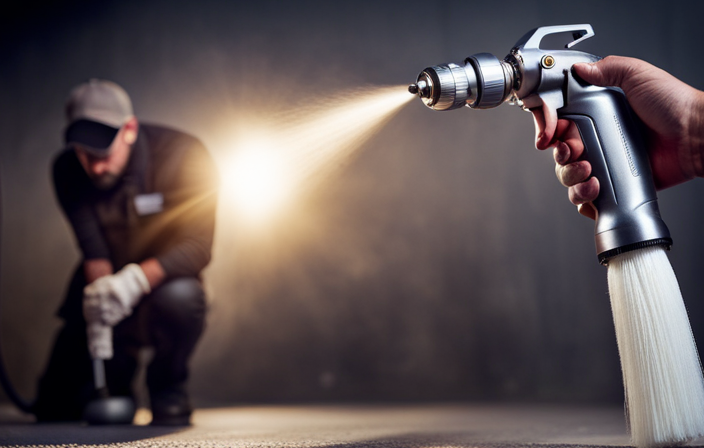
As winter approaches and temperatures drop, it is crucial to prepare our tools for the upcoming colder months. One important piece of equipment that requires special attention during this season is the airless paint sprayer.
Picture this: the frosty air nips at your fingers as you meticulously clean and protect your trusted sprayer. With each step, you ensure that it will be ready and waiting for you when spring arrives. In this article, I will guide you through the process of winterizing your airless paint sprayer, ensuring its longevity and peak performance.
From gathering your supplies to properly storing it, I will provide you with detailed instructions, using my technical expertise to ensure you understand each step. Don’t let the winter weather damage your equipment; take the necessary precautions to keep your airless paint sprayer in optimal condition all year round.
Key Takeaways
- Cleaning and maintenance steps are crucial for winterizing an airless paint sprayer, including cleaning the hose and gun with warm soapy water, removing excess paint and debris, and inspecting for damage.
- Proper storage and organization techniques should be followed, such as storing accessories separately, using hooks or hangers to keep them off the ground, and storing the sprayer in a dry and temperature-controlled area.
- Preventing leaks and damage is important for optimal sprayer performance, including checking for leaks or damage, tightening loose parts, and replacing worn gaskets or damaged components.
- Winterization offers several benefits, such as ensuring optimal performance in the next painting season, protecting accessories from tangling and damage with dust-proof covers or plastic bags, and labeling the sprayer and its parts for easy identification.

Baotree Airless Paint Sprayer, High-Pressure Electric Paint Spray Gun with Extension Rod, Thinning-Free Professional Painting Tool for Interior/Exterior Walls, Fences, Ceilings, Cabinets
1. High efficiency and time saving, the spraying speed is 5 times faster than traditional brushing ✅ High...
As an affiliate, we earn on qualifying purchases.
Gather Your Supplies
Now, you’re going to want to gather all your supplies so you can properly winterize your airless paint sprayer. Before starting, make sure you have all the necessary cleaning supplies on hand. This includes a bucket, clean rags, a cleaning solution specifically designed for airless sprayers, and a wrench for removing the spray tip. Additionally, you’ll need some plastic wrap or a plastic bag to cover the sprayer during winter storage. These supplies are essential for ensuring that your paint sprayer remains in good condition throughout the winter months.
Once you have everything gathered, you can proceed to the next step of cleaning the sprayer thoroughly, which is crucial for preventing any paint residue from drying and clogging the system.

MaXpray M1 Airless Paint Sprayer, Highly Efficient Thinning-Free Minimal Overspray for Up to 10 Gallon DIY Painting Projects Home Interior & House Exterior, Comes with Sprayer Accessories
Your DIY Partner - All DIY Homeowners, upgrade your DIY game with the MaXpray M1 airless paint sprayer—far...
As an affiliate, we earn on qualifying purchases.
Clean the Sprayer Thoroughly
To ensure the optimal performance of your airless paint sprayer, it’s crucial to clean it thoroughly.
First, flush out any remaining paint from the system by running a cleaning solution through it.
Next, remove and clean the filters to prevent clogs and maintain a smooth spray pattern.
Finally, clean the nozzle and spray tip meticulously to remove any dried paint or debris that could affect the quality of your work.
By following these steps, you can keep your sprayer in top condition for future projects.
Flush out any remaining paint
First, make sure to completely empty out any leftover paint from the airless paint sprayer to ensure it’s properly winterized. This step is crucial in ensuring that the sprayer functions optimally when you need it again.
To flush out any remaining paint, start by removing the paint container and draining any paint into a suitable container for disposal or storage. Next, attach a clean water supply to the sprayer and turn it on, allowing water to flow through the system. This will help to remove any residual paint from the pump, hoses, and spray gun. Continue flushing until the water runs clear.
Properly cleaning the airless paint sprayer is essential for its longevity and effectiveness. Once the flushing process is complete, it’s time to move on to the next step of removing and cleaning the filters, ensuring the sprayer is ready for storage.
Remove and clean the filters
Once the filters are removed and cleaned, you’ll be amazed at how much better your painting results will be. Cleaning the filters is an essential step in the winterization process of an airless paint sprayer. To ensure optimal performance, it’s crucial to use proper cleaning methods and maintain the filters regularly.
Here are two key sub-lists to guide you through the filter maintenance process:
-
Cleaning methods:
- Use warm soapy water to remove any paint residue from the filters.
- For stubborn stains, soak the filters in a mixture of water and paint thinner before rinsing thoroughly.
-
Filter maintenance:
- Inspect the filters for any signs of wear or damage and replace them if necessary.
- Ensure the filters are completely dry before reassembling them back into the sprayer.
By following these cleaning methods and maintaining the filters, you can prolong the lifespan of your airless paint sprayer and achieve flawless painting results.
Next, we’ll discuss how to clean the nozzle and spray tip.
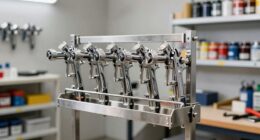
Clean the nozzle and spray tip
Make sure you clean the nozzle and spray tip thoroughly for a flawless painting experience that’ll leave you feeling accomplished and satisfied.
To clean the nozzle and spray tip, start by removing them from the sprayer. Then, soak them in a cleaning solution specifically designed for paint sprayers. This’ll help break down any dried paint or debris that may have accumulated.
After soaking, use a small brush or toothbrush to scrub away any remaining residue. Be sure to clean both the inside and outside of the nozzle and spray tip.
Once clean, rinse them with water to remove any cleaning solution. Finally, dry them thoroughly before reattaching them to the sprayer.
By properly maintaining your nozzle and spray tip, you can ensure a smooth and even paint application.
Now, let’s move on to lubricating the moving parts for optimal performance.

VEVOR 750W Stand Airless Paint Sprayer, 3000PSI High Efficiency Electric Airless Sprayer, Fine and Even Painting Effect, Handheld Paint Sprayers for Home Interior and Exterior Furniture and Fences
Efficient Painting: Our stand airless paint sprayer is equipped with a powerful 750W motor, capable of delivering up...
As an affiliate, we earn on qualifying purchases.
Lubricate Moving Parts
To ensure the longevity and optimal performance of your airless paint sprayer, it’s crucial to properly lubricate its moving parts. By applying a high-quality lubricant, you can effectively prevent rust and corrosion from forming on the various components.
It’s also recommended to regularly check and lubricate the piston rod and packings to ensure smooth operation and prevent any potential damage. Taking these steps will help maintain the efficiency and functionality of your paint sprayer, ultimately saving you time and money in the long run.
Apply lubricant to prevent rust and corrosion
Applying a lubricant to your airless paint sprayer not only prevents rust and corrosion but also keeps it running smoothly throughout the winter season. Regular maintenance is crucial for the longevity and optimal performance of your sprayer. By using a specialized lubricant designed for airless paint sprayers, you can ensure that all moving parts are well protected.
This type of lubricant is specifically formulated to withstand the high pressures and harsh conditions that paint sprayers endure. It provides a thin, protective film that prevents moisture from penetrating the metal surfaces, thus preventing rust and corrosion. Additionally, the lubricant reduces friction between the moving parts, allowing for smoother operation.
It is recommended to check and lubricate the piston rod and packings to ensure their proper functioning. This will be discussed in detail in the subsequent section.
Check and lubricate the piston rod and packings
Ensure the longevity and smooth operation of your equipment by regularly checking and lubricating the piston rod and packings. This crucial maintenance step helps prevent unnecessary wear and tear, ensuring optimal performance during your next painting project.
Here are three important things to keep in mind when performing piston rod maintenance and packing replacement:
-
Inspect the piston rod for any signs of damage or excessive wear. Look for scratches, dents, or corrosion that may affect its functionality.
-
Apply a generous amount of lubricant to the piston rod, ensuring it’s evenly distributed. This’ll help reduce friction and extend the lifespan of the rod.
-
Check the packings for any leaks or cracks. Replace them if necessary to maintain a tight seal and prevent paint from leaking out.
By following these steps, you can keep your airless paint sprayer running smoothly and efficiently. Now, let’s move on to the next section and learn how to protect the pump.

AEROPRO Tools Airless Paint Sprayer for House Painting, 3000PSI High Pressure, Thinning-Free, with Tip Sets & Tip Extension, Indoor Paint Sprayer for 5 Gallon DIY Painting Projects
Make Your DIY Painting Simple - Start your painting projects right away with this easy airless sprayer. Perfect...
As an affiliate, we earn on qualifying purchases.
Protect the Pump
First things first, let’s make sure the pump stays protected while winterizing the airless paint sprayer. Proper pump maintenance is crucial to preventing pump damage during the winter months. To protect the pump, start by removing any remaining paint from the system and flushing it with a cleaning solution. Once the pump is cleaned, apply a pump protector or antifreeze solution to prevent freezing. Here is a table that highlights the steps to protect the pump:
| Step | Action |
|---|---|
| 1 | Remove paint from system |
| 2 | Flush with cleaning solution |
| 3 | Apply pump protector or antifreeze solution |
By following these steps, you can ensure that the pump remains in good condition during the winter. Now, let’s move on to preparing the hose and gun for winter storage.
Prepare the Hose and Gun
Now, let’s get your hose and gun ready for winter storage, so they’ll be in top shape when you need them again.
Before cleaning the hose, make sure to release any pressure by turning off the sprayer and triggering the gun until it stops spraying. Next, detach the hose from the gun and the pump, and use warm soapy water to clean the inside and outside of the hose. Rinse it thoroughly and allow it to dry completely before reconnecting it.
As for the gun, disassemble it by removing the nozzle, filter, and any other removable parts. Clean each component with a brush and warm soapy water, ensuring all paint residue is removed. Rinse and dry the gun before reassembling it. Remember to follow safety precautions, such as wearing gloves and safety goggles, during the cleaning process.
With the hose and gun cleaned and ready, we can now move on to storing the accessories.
Store the Accessories
To keep your accessories in top condition for future use, it’s essential to properly store them during the winter months. Here are three steps to ensure your accessories are cleaned and organized:
-
Clean the accessories: Start by removing any paint residue from the gun and hose. Use a cleaning solution recommended by the manufacturer and follow the instructions carefully. Pay attention to any small parts that may require extra attention.
-
Organize the accessories: Once cleaned, carefully organize the accessories in a designated storage area. Keep the gun and hose separate from each other to prevent tangling or damage. Consider using hooks or hangers to keep them off the ground and avoid any potential damage.
-
Protect from dust and moisture: Cover the accessories with a dust-proof cloth or plastic bag to protect them from dust and moisture. This will help prolong their lifespan and prevent any potential damage.
By properly cleaning and organizing your accessories, you can ensure they’ll be in excellent condition when you need them again.
Now, let’s move on to the next section and check for leaks or damage.
Check for Leaks or Damage
Now that the accessories are safely stored, it’s time to move on to the next step in winterizing your airless paint sprayer. Checking for leaks or damage is crucial to ensure the sprayer’s optimal performance in the next painting season.
Start by inspecting the entire system for any signs of leaks, such as drips or puddles. Thoroughly examine the hoses, fittings, and connections, tightening any loose parts as necessary.
Next, check for clogs by running clean water through the sprayer. If water doesn’t flow freely or the pressure is weak, there may be a clog that needs to be cleared.
Finally, inspect the gaskets for any signs of wear or damage. Replace any worn gaskets to prevent leaks and ensure a tight seal.
With these checks complete, we can now move on to the next section: labeling and proper storage.
Label and Store Properly
Before putting away my airless paint sprayer for the winter, I always make sure to clearly label the sprayer and its parts. This helps me easily identify everything when I need to use it again.
Additionally, I store the sprayer in a designated area that’s away from extreme temperatures, as this can potentially damage the sprayer and its components. It’s crucial to take these steps to ensure the sprayer remains in good condition and ready for use when needed.
Clearly label the sprayer and its parts
Make sure to clearly mark and tag all the components of the airless paint sprayer, so you won’t be left scratching your head trying to figure out which part goes where when you’re in the middle of the winterizing process. To help you better understand, here is a table detailing the different parts of the sprayer and their corresponding labels:
| Component | Label |
|---|---|
| Spray gun | Gun |
| Hose | Hose |
| Pump | Pump |
Following the cleaning instructions and safety precautions, clean each part thoroughly before labeling. This will ensure that when it’s time to use the sprayer again, you won’t have any confusion or difficulties assembling it. Once you have labeled all the parts, store the sprayer and its components in a designated area away from extreme temperatures. This will help prevent any damage that may occur due to freezing or overheating.
Now, let’s move on to the next step of winterizing an airless paint sprayer, which is storing it in a designated area away from extreme temperatures.
Store in a designated area away from extreme temperatures
Find a safe spot away from extreme temperatures to store your sprayer and its components, ensuring that it’ll be in optimal condition when you’re ready to use it again. Proper winter storage is crucial for maintaining the longevity and performance of your airless paint sprayer. Extreme temperatures can cause damage to the sprayer’s internal components, such as freezing or overheating.
It’s recommended to store the sprayer in a designated area that’s dry and temperature-controlled, ideally between 50°F and 70°F. Avoid areas that are subject to direct sunlight, excessive humidity, or freezing temperatures. Additionally, make sure to clean and dry the sprayer thoroughly before storage to prevent any residual paint from causing clogs or corrosion.
By following these winter storage practices, you can ensure that your sprayer will be ready for regular maintenance and future use.
Regular Maintenance
To keep your airless paint sprayer in top shape during the winter months, it’s essential to regularly maintain it.
Regular cleaning and maintenance are key to ensuring that your sprayer functions optimally when you need it. Start by thoroughly cleaning the sprayer after each use, removing any excess paint and debris. This will prevent clogs and buildup that can affect the sprayer’s performance.
Additionally, inspect the spray gun, hose, and filters for any signs of damage or wear. Replace any worn or damaged parts to prevent leaks or malfunctions.
Lubricate the moving parts of the sprayer to keep them running smoothly.
Lastly, store the sprayer in a clean and dry area to protect it from moisture and freezing temperatures.
By following these maintenance tips, you’ll be ready for a smooth spring startup without any issues.
Spring Startup
After a long winter hibernation, it’s time to get your trusty paint sprayer back in action for the spring season. To ensure optimal performance and longevity, follow these spring cleaning maintenance tips:
-
Thoroughly clean the sprayer: Start by disassembling the sprayer and cleaning all its components with warm, soapy water. Pay special attention to the nozzle, filters, and hoses to remove any built-up paint or debris.
-
Inspect for damage: Carefully examine the sprayer for any signs of wear, such as cracks or leaks. Replace any damaged parts before using the sprayer again.
-
Lubricate moving parts: Apply a few drops of lubricating oil to moving parts, such as the piston rod and pump rod. This will help ensure smooth operation and prevent rusting.
-
Test the sprayer: Before starting your painting project, perform a test run to ensure the sprayer is working properly. Check for even spray patterns and adjust the settings if needed.
By following these maintenance tips, you can ensure your paint sprayer is ready to tackle your spring painting projects with ease.
Frequently Asked Questions
How often should I winterize my airless paint sprayer?
I recommend winterizing your airless paint sprayer annually to ensure its optimal performance. Regular winterization is crucial for preventing freezing and damage to the system, extending its lifespan, and saving you from costly repairs.
Can I use any type of lubricant on the moving parts of my airless paint sprayer?
Yes, you can use specific types of lubricants on the moving parts of your airless paint sprayer. It is important to use lubricants that are specifically designed for airless paint sprayers to prevent common issues with lubrication.
What should I do if I notice a leak or damage to my airless paint sprayer during the winter?
If I notice a leak or damage to my airless paint sprayer during the winter, I would immediately stop using it and inspect the affected area. If the damage is minor, I can attempt to repair the sprayer myself by finding replacement parts.
Is it necessary to label and store the accessories separately from the airless paint sprayer?
Yes, it is necessary to label and store the accessories separately from the airless paint sprayer. This ensures that they remain clean and in good condition, and it makes it easier to find and use them when needed.
Are there any specific safety precautions I should take when performing regular maintenance on my airless paint sprayer?
When performing regular maintenance on an airless paint sprayer, it is important to follow proper safety precautions. This includes wearing protective gear, such as gloves and goggles, and ensuring the sprayer is turned off and depressurized before starting any maintenance tasks.
Conclusion
In conclusion, properly winterizing your airless paint sprayer is essential to ensuring its longevity and optimal performance. While some may argue that winterizing is a time-consuming process, the benefits far outweigh the inconvenience. By taking the time to clean, lubricate, and protect your sprayer, you’re safeguarding your investment and avoiding costly repairs in the future.
Don’t let the cold weather deter you from proper maintenance – take the necessary steps to winterize your airless paint sprayer and enjoy a worry-free winter season.