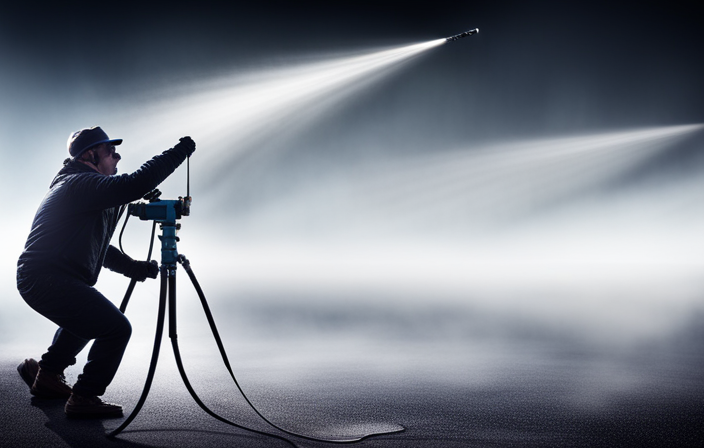
Hello! I’m thrilled to demonstrate how to excel in using an airless paint sprayer. This amazing tool can revolutionize your painting projects, making them faster, more efficient, and ultimately more satisfying.
In this article, we will cover everything you need to know, from familiarizing yourself with the equipment to troubleshooting common issues.
We’ll discuss the importance of preparing the paint, setting up the sprayer correctly, and choosing the right nozzle for the job.
I’ll also share tips on maintaining a consistent spraying distance and overlapping each stroke for a smooth finish.
By the end, you’ll be a pro at using an airless paint sprayer, ready to tackle any painting project with confidence and precision.
So, let’s dive in and unleash the full potential of this remarkable tool!
Key Takeaways
- Adjusting settings for a smoother finish: Modify pressure settings, adjust paint viscosity, check nozzle condition, and make necessary adjustments to achieve a smoother finish.
- Cleaning and maintaining the sprayer: Ensure longevity and optimal performance by flushing out remaining paint, disassembling and cleaning the nozzle, removing clogs or debris, and storing the sprayer properly to prevent damage.
- Troubleshooting clogging issues: Flush the system with water or cleaning solution, use a small brush to remove debris, prevent clogging in the sprayer, maintain a clean nozzle, and ensure smooth paint flow.
- Resolving uneven spray pattern: Check for blockages or wear in the nozzle, adjust pressure and fan control settings to achieve a consistent spray pattern, improve overall paint application, and maintain a smooth and even finish.
Familiarize Yourself with the Equipment
To familiarize yourself with the equipment, take the following steps:
- Acquaint yourself with the various components of the equipment.
- Understand the functions of each component.
When using an airless paint sprayer, prioritize safety. Take the following precautions:
- Familiarize yourself with the safety features of the sprayer, such as the pressure control knob and the trigger lock.
- Wear appropriate protective gear, including goggles and a respirator.
To achieve a professional finish with an airless paint sprayer, consider the following tips:
- Practice controlling the spray pattern.
- Adjust the pressure to avoid overspray and achieve even coverage.
Learn how to properly clean and maintain the sprayer to ensure its longevity.
Now that you are familiar with the equipment, let’s move on to preparing the paint for spraying.
Prepare the Paint for Spraying
Before diving into the painting process, it’s crucial to make sure the paint is properly mixed to ensure a smooth and even application. Here are some tips for preparing the paint for spraying:
-
Choose the right paint color: Consider the room’s lighting, existing decor, and personal preferences. Test a small area before committing to a large-scale paint job.
-
Avoid thinning the paint too much: While it may seem tempting to thin the paint for easier spraying, excessive thinning can lead to drips and an uneven finish. Follow the manufacturer’s guidelines for thinning ratios.
-
Strain the paint: Straining the paint helps remove any impurities that can clog the sprayer nozzle, resulting in a smoother spray pattern.
-
Maintain the right paint consistency: Adjust the paint’s viscosity to ensure proper atomization and coverage. Add small amounts of water or paint thinner as needed.
By following these tips, you can ensure a successful paint job.
Now, let’s move on to the next section and learn how to set up the sprayer correctly.
Set Up the Sprayer Correctly
Get ready to properly prepare the sprayer for a flawless painting experience. To ensure the correct sprayer setup, follow these steps:
| Step | Action |
|---|---|
| 1 | Connect the hose to the sprayer and tighten it securely. |
| 2 | Fill the paint container with the desired paint, making sure not to overfill it. |
| 3 | Prime the sprayer by turning on the power and allowing the paint to flow through the system until it comes out smoothly. |
Troubleshooting tips for sprayer setup include checking for any clogs in the hose or nozzle, ensuring the sprayer is properly lubricated, and adjusting the pressure settings if needed. With the sprayer set up correctly, you can now move on to the next step of practice on a test surface, honing your skills before tackling your painting project.
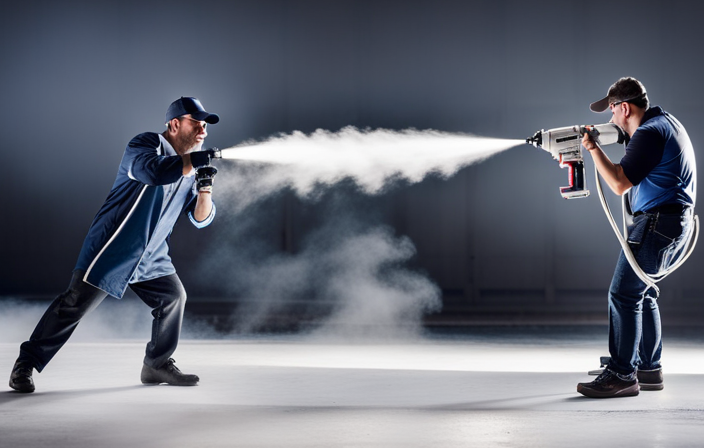
Practice on a Test Surface
After setting up the sprayer correctly, it’s time to practice on a test surface to improve your painting skills and gain confidence.
Did you know that 90% of professional painters believe that practicing on a test surface before starting a project leads to better results?
Practicing techniques on a test surface allows you to familiarize yourself with the sprayer’s settings, such as the spray pattern and pressure, ensuring you achieve the desired outcome.
It also helps you identify and correct any common mistakes, like overspraying or uneven coverage, before tackling your actual project.
By practicing, you can refine your technique, adjust the speed and distance at which you move the sprayer, and gain a better understanding of how different surfaces may require different approaches.
This preparation will ultimately save you time and frustration.
Now, let’s move on to choosing the right nozzle for the job.
Choose the Right Nozzle for the Job
Now, let’s dive into picking the perfect nozzle for the task at hand!
Nozzle selection is crucial for achieving the desired results with your airless paint sprayer. Before starting, it’s important to check the condition of your nozzle. Make sure it’s clean and free from any debris or clogs, as this can affect the spray pattern. Regular nozzle maintenance is essential for optimal performance.
When choosing a nozzle, consider the type of paint you’ll be using and the desired coverage. Different nozzle sizes and spray angles will produce different patterns and widths. A wider spray angle is ideal for larger surfaces, while a narrower angle is better for precision work.
Now that you’ve selected the right nozzle, let’s move on to the next step, which is starting with even strokes.
Start with Even Strokes
To achieve a smooth and consistent application of paint, it is important to start with even strokes. Here are four key steps to follow:
-
Maintain even pressure: Apply consistent pressure on the trigger throughout each stroke. This will ensure an even flow of paint and prevent uneven coverage.
-
Use the proper technique: Hold the sprayer at a 90-degree angle to the surface and move your arm in a steady, back-and-forth motion. This will help distribute the paint evenly and avoid streaks.
-
Overlap each stroke: When moving from one stroke to the next, overlap the previous stroke by about 50%. This will ensure that no areas are missed and provide a seamless finish.
-
Keep a steady pace: Work at a consistent speed to maintain an even application. Rushing or pausing during strokes can result in uneven coverage.
By following these steps, you’ll be able to achieve a professional-looking paint job. Now, let’s move on to maintaining a consistent spraying distance.
Maintain a Consistent Spraying Distance
To ensure a flawless finish, you’ll want to make sure you maintain a steady distance between the sprayer and the surface you’re painting, almost as if you were gracefully dancing with the paint. This will prevent clogging and ensure an even application of paint. Adjusting the pressure on the sprayer can also help control the distance and prevent any splattering or uneven coverage. It’s important to find the sweet spot where the paint is not too close or too far from the surface. To help you visualize the ideal spraying distance, imagine a beautifully choreographed dance routine, where you and the sprayer move harmoniously together, effortlessly covering the surface with paint. Maintaining this consistent spraying distance will result in a smooth and professional-looking finish. Speaking of smooth finishes, let’s move on to the next step and talk about how to overlap each stroke for a seamless result.
Overlap Each Stroke for a Smooth Finish
As you glide the sprayer across the surface, imagine the strokes overlapping like skilled dancers, creating a seamless and polished finish. To achieve a smooth finish with an airless paint sprayer, it’s essential to overlap each stroke. This technique ensures even coverage and minimizes the appearance of lines or streaks. Here are three tips to help you achieve a flawless result:
-
Maintain a consistent speed: Keep a steady pace as you move the sprayer, ensuring that each stroke overlaps the previous one by about 50%. This helps blend the paint and create a consistent finish.
-
Watch for drips or runs: While overlapping strokes, pay attention to any areas where the paint may be pooling or running. Adjust your hand or move the sprayer closer to the surface to prevent drips.
-
Troubleshoot common problems: If you notice uneven coverage or streaks, check the sprayer’s pressure settings, paint viscosity, or nozzle condition. Making necessary adjustments can help you achieve a smoother finish.
Once you’ve mastered the technique of overlapping strokes, it’s important to clean and maintain the sprayer properly to ensure its longevity and optimal performance.
Clean and Maintain the Sprayer Properly
After achieving a smooth finish by overlapping each stroke with my airless paint sprayer, it’s vital to clean and maintain the sprayer properly. By doing so, I can ensure its longevity and optimal performance. Cleaning techniques such as flushing out the remaining paint, disassembling and cleaning the nozzle, and removing any clogs or debris are essential. Proper storage is equally important to prevent damage and maintain the sprayer’s functionality. Storing the sprayer in a clean, dry place and protecting it from extreme temperatures will prolong its lifespan. By following these cleaning and storage practices, I can keep my airless paint sprayer in excellent condition for future projects. Now, let’s move on to troubleshooting common issues that may arise during the painting process.
Troubleshooting Common Issues
When troubleshooting common issues with your sprayer, it’s important to carefully address any potential problems that may arise during the painting process. Here are some troubleshooting tips to help you resolve common issues with your airless paint sprayer:
-
Clogging: If the sprayer gets clogged, try flushing the system with water or a cleaning solution. You can also use a small brush to remove any debris from the nozzle.
-
Uneven spray pattern: If the spray pattern is uneven, check the nozzle for any blockages or wear. Adjust the pressure and fan control settings to achieve a consistent pattern.
-
Drips and runs: If you notice drips or runs in your paint, check the viscosity of the paint and adjust it if necessary. Also, ensure that you are maintaining a consistent distance from the surface while spraying.
-
Lack of pressure: If the sprayer is not delivering enough pressure, check the pump for any leaks or damage. Make sure the filters are clean and the hose is not kinked.
By following these troubleshooting steps, you can quickly resolve common issues and ensure a smooth painting experience with your airless paint sprayer.
Frequently Asked Questions
How do I choose the right paint for airless paint sprayers?
To choose the right paint for airless paint sprayers, consider the desired finish. Glossy paints are easier to clean, while matte finishes hide imperfections. Use high-quality paint and follow these tips for a smooth finish.
Can I use an airless paint sprayer for small touch-up jobs?
Yes, an airless paint sprayer can be used for small touch-up jobs. However, it is important to perform regular airless paint sprayer maintenance and troubleshoot any issues that may arise to ensure optimal performance.
How do I prevent clogging in my airless paint sprayer?
To prevent clogging in airless paint sprayers, proper maintenance is essential. Regularly clean the filters, nozzle, and hose. Use a compatible paint thinner if necessary. Troubleshoot clogs by checking for debris or adjusting the pressure settings.
What safety precautions should I take when using an airless paint sprayer?
When using an airless paint sprayer, it is important to take paint sprayer safety seriously. Always wear protective gear, such as goggles and a respirator, and ensure proper ventilation. Follow manufacturer instructions and maintain a safe distance from the spray.
How do I properly store my airless paint sprayer when not in use?
Proper maintenance is crucial for storing an airless paint sprayer. Cleaning and care are essential to prevent clogs and damage. Troubleshooting common issues promptly ensures the sprayer is ready for use when needed.
Conclusion
In conclusion, using an airless paint sprayer is a game-changer for any DIY enthusiast or professional painter. It allows for quick and efficient coverage, resulting in a smooth and professional finish.
By following the proper steps and maintaining the equipment, you can achieve stunning results. So, don’t let the daunting task of painting discourage you. Embrace the power of the airless paint sprayer, and let your creativity soar.
You’ll be amazed at the transformative power of this tool. Happy painting!