Did you know that choosing the right tip size for a Graco Pro 17 airless paint sprayer can greatly affect your ability to spray 6-inch curbs successfully? It’s true! Based on my years of painting experience, I have learned that the tip size plays a crucial role in achieving consistent and smooth coverage on curbs.
In this article, I will share my knowledge and expertise on the topic, providing you with valuable insights and tips for selecting the perfect tip size for your Graco Pro 17 airless paint sprayer. From understanding the basics of airless paint sprayers to troubleshooting common issues, I will guide you through the entire process.
Additionally, I will discuss the importance of choosing the right paint for curbs, preparing the surface for painting, and how to ensure safety during the project. So, let’s dive in and discover the secrets to achieving professional-looking results when painting 6-inch curbs with a Graco Pro 17 airless paint sprayer.
Key Takeaways
- Choosing the correct tip size, such as 413 or 415, is important for spraying 6-inch curbs with a Graco Pro 17 airless paint sprayer.
- Proper surface preparation, including cleaning, repairing, and applying primer, is crucial for achieving flawless results when painting curbs.
- Maintaining a consistent distance of 12 to 18 inches and using overlapping strokes helps ensure even coverage and prevents overspray.
- Using a highly visible and durable paint color formulated for outdoor use is recommended for painting curbs.
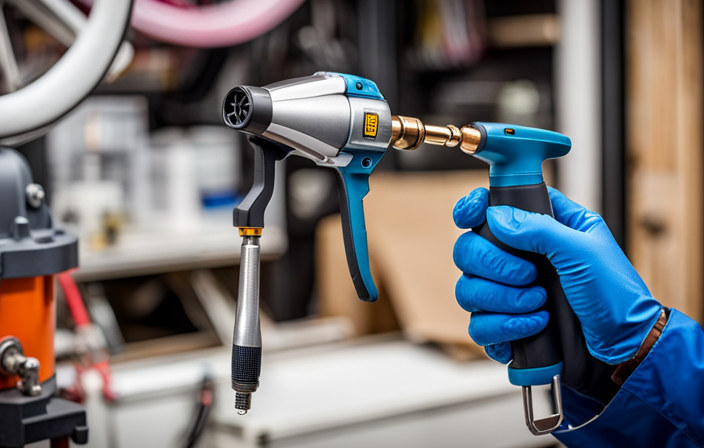
Understanding Airless Paint Sprayers
If you want to master the art of using airless paint sprayers, you need to understand the nitty-gritty details. The importance of maintenance can’t be emphasized enough when it comes to these powerful machines.
Regular cleaning and proper storage are crucial to keep your sprayer in top shape and avoid common paint sprayer problems such as clogging or uneven spray patterns. Taking the time to clean the filters, flush the system, and inspect the spray gun will ensure consistent and flawless results every time you use your Graco Pro 17 airless paint sprayer.
Now, let’s transition into the next section about the importance of choosing the right tip size without skipping a beat.
Importance of Choosing the Right Tip Size
Selecting the correct nozzle size is crucial when aiming to achieve precise and effective coverage on 6-inch curbs with the Graco Pro 17 airless paint sprayer. Choosing the appropriate nozzle ensures that the paint is dispersed evenly and efficiently, resulting in a professional-looking finish. Here are five reasons why selecting the right tip size is important:
-
Proper coverage: The right tip size allows for consistent and even paint distribution, ensuring that every inch of the curb is covered.
-
Reduced overspray: Using the correct tip size minimizes overspray, preventing wasted paint and mess.
-
Control and accuracy: By selecting the appropriate nozzle, you can have better control over the width and pattern of the spray, allowing for precise application on the curbs.
-
Time and cost savings: Using the right tip size helps you complete the job faster and with less paint, saving you time and money.
-
Professional results: When you choose the right tip size, you can achieve a smooth and professional finish on the 6-inch curbs.
By understanding the importance of choosing the right nozzle size, we can now move on to the next section, where I’ll provide tips for spraying 6-inch curbs with the Graco Pro 17 airless paint sprayer.
Tips for Spraying 6-Inch Curbs
When it comes to spraying 6-inch curbs, there are a few key points to keep in mind. First, use the right tip size to achieve the desired coverage and finish. I recommend using a tip size between 415 and 517 for spraying curbs.
Additionally, adjust the pressure on your Graco Pro 17 airless paint sprayer to ensure even application and prevent overspray.
Lastly, master the correct spraying techniques, such as maintaining a consistent distance and angle, to help you achieve professional-looking results.
Recommended Tip Sizes for Spraying Curbs
For the best results and stunning curb appeal, go with the recommended tip sizes to effortlessly spray 6-inch curbs with the Graco Pro 17 airless paint sprayer.
When it comes to spraying curbs, using the right tip size is crucial. The recommended tip sizes for spraying curbs with the Graco Pro 17 airless paint sprayer are 413 and 415. These tip sizes provide the perfect balance between coverage and precision. The 413 tip size is ideal for narrower curbs with intricate details, while the 415 tip size is better suited for wider curbs.
By using these recommended tip sizes, you can achieve a smooth and even application of paint on your curbs.
Now, let’s move on to adjusting pressure and spraying techniques to further enhance your curb painting experience.
Adjusting Pressure and Spraying Techniques
To achieve flawless results, it’s time to fine-tune the pressure and master your spraying techniques like a pro, ensuring your curbs will have that picture-perfect finish.
When it comes to adjusting pressure techniques, start by testing different pressure settings on a scrap surface to find the optimal one for your project. Remember, higher pressure doesn’t always mean better results; it can lead to overspray or uneven coverage.
Once you’ve found the right pressure, focus on spray pattern control. Hold the sprayer at a consistent distance from the curb and move in a smooth, steady motion to maintain an even coat.
To evoke confidence and excitement in your audience, imagine the satisfaction of stepping back and admiring your flawlessly painted curbs.
Now, let’s move on to choosing the right paint for curbs.
Choosing the Right Paint for Curbs
If you’re looking to paint curbs with your Graco Pro 17 airless paint sprayer, you’ll need to choose the right paint for the job.
When it comes to curb painting, it’s important to select a paint color that is highly visible and stands out against the surrounding environment. Bright and bold colors like yellow or white are often recommended for curbs.
Additionally, it’s best to use paint specifically designed for outdoor use, as it’ll be more durable and resistant to weathering. Make sure to follow the manufacturer’s instructions for application and drying times.
By choosing the right paint color and using best practices for curb painting, you can achieve professional-looking results.
Now, let’s move on to preparing the surface for painting.
Preparing the Surface for Painting
First, you’ll need to properly prepare the surface before painting to ensure a smooth and long-lasting finish. Surface preparation is crucial for achieving professional results when painting curbs. To begin, clean the surface thoroughly by removing any dirt, debris, or loose paint. Use a wire brush or pressure washer to remove stubborn stains or chipped paint. Next, repair any cracks or holes in the curb using a suitable filler or patching compound. Once the surface is clean and smooth, apply a coat of primer to promote adhesion and enhance the durability of the paint. When choosing the best paint for curbs, opt for a high-quality, weather-resistant paint that is specifically formulated for outdoor use. This will ensure that the paint withstands the elements and maintains its color and finish over time. With the surface properly prepared, you can now move on to the next section and learn about the proper technique for spraying curbs.
Proper Technique for Spraying Curbs
Mastering the art of curb painting involves using a smooth, controlled motion to achieve an even and professional finish. To ensure success, it’s important to use the proper spraying technique and select the right tip size for the job. Here are four key tips to keep in mind:
-
Choose the recommended tip size: For spraying curbs, it’s recommended to use a tip size of 6 inches. This size allows for a consistent and efficient application of paint.
-
Maintain a consistent distance: Keep the sprayer 12 to 18 inches away from the surface of the curb. This distance ensures an even distribution of paint and prevents overspray.
-
Use overlapping strokes: Apply the paint in overlapping strokes, moving the sprayer from left to right or right to left. This technique helps to achieve a uniform and seamless finish.
-
Keep a steady hand: Maintain a steady hand and move the sprayer at a consistent speed. Avoid sudden stops or starts to prevent uneven coverage.
By following these spraying techniques and using the recommended tip size, you can achieve professional-looking curb painting results.
In the next section, we’ll discuss troubleshooting common issues that may arise during the process.
Troubleshooting Common Issues
To troubleshoot common issues, make sure you’re maintaining a consistent distance and using overlapping strokes for a seamless finish. When using the Graco Pro 17 airless paint sprayer, it’s important to address any troubleshooting issues that may arise. Common problems can include clogging, uneven spray patterns, or excessive overspray. To address clogging, check the filter and clean or replace it if necessary. If you notice an uneven spray pattern, check the tip for wear or damage, and replace if needed. Excessive overspray can be minimized by adjusting the pressure and ensuring the fan width is appropriate for the surface being painted. Remember to always consult the manufacturer’s instructions for proper troubleshooting techniques. Next, we will discuss safety precautions and equipment maintenance to ensure optimal performance and longevity of your paint sprayer.
Safety Precautions and Equipment Maintenance
Ensure your safety and keep your equipment in top shape by following these essential precautions and maintaining your gear.
Remember to always wear the proper safety gear, such as goggles, gloves, and a respirator, to protect yourself from any potential hazards.
Before each use, inspect your equipment for any damage or wear, and replace any worn-out parts immediately.
Regularly clean and lubricate your sprayer to prevent clogs and ensure smooth operation.
Additionally, flush the system with water or a cleaning solution after each use to remove any paint residue.
Properly store your equipment in a clean and dry area to prevent rust and damage.
By taking these precautions and performing regular maintenance, you can extend the lifespan of your paint sprayer and ensure safe and efficient operation.
Now, let’s move on to some tips for cleaning up after painting.
Tips for Cleaning Up After Painting
When it comes to cleaning up after painting, there are a few key points to keep in mind. Firstly, if you have any paint overspray or spills, it’s important to tackle them right away before they have a chance to dry and become more difficult to remove.
Secondly, proper disposal of paint and cleaning solvents is crucial for both environmental and safety reasons.
Lastly, it’s important to use the right cleaning solvents and techniques to ensure a thorough and effective clean-up process.
Removing Paint Overspray or Spills
If you have any paint overspray or spills, simply wipe them away with a damp cloth. Removing overspray and cleaning spills is a crucial part of maintaining a clean and professional work environment.
To effectively remove overspray, start by gently wiping the affected area with a damp cloth. If the overspray has dried and is more stubborn to remove, you can use a mild solvent or paint thinner on the cloth to help loosen the paint. Be careful not to use harsh chemicals that could damage the surface you’re working on.
When it comes to cleaning spills, act quickly to prevent the paint from drying. Blot the spill with a clean cloth or paper towel, being careful not to spread the paint. Once the majority of the spill is absorbed, use a mild detergent or warm soapy water to clean the area, working in small circular motions. Rinse the cloth frequently and continue until the spill is removed.
Proper disposal of paint and cleaning solvents is essential. Transitioning into the next section, it’s important to know the correct procedures for disposing of paint and cleaning solvents without harming the environment.
Proper Disposal of Paint and Cleaning Solvents
To properly dispose of paint and cleaning solvents, you can take them to a designated hazardous waste collection site where they’ll be safely handled and disposed of. It’s important to handle these materials responsibly to protect the environment and prevent any harm to human health.
When storing paint cans, make sure they’re tightly sealed to prevent spills and leaks. Keep them in a cool, dry place away from direct sunlight.
Eco-friendly paint disposal methods include drying out small amounts of latex paint and disposing of it with regular household waste. For larger quantities or oil-based paint, it’s best to take them to a hazardous waste collection site.
Now that you’ve properly disposed of your paint and cleaning solvents, it’s time to move on to the finishing touches and final inspection of your project.
Finishing Touches and Final Inspection
For achieving those flawless finishing touches on your project, grab the Graco Pro 17 airless paint sprayer and choose the perfect tip to spray those 6-inch curbs with finesse.
When it comes to finishing techniques, the right tip can make all the difference. For curbs, I recommend using a tip size of 0.017 inches. This size allows for precise and even coverage, ensuring a smooth and professional finish.
Before spraying, it’s important to do a final inspection of the curbs to ensure they’re clean and free of any debris or dust. This’ll help the paint adhere properly and result in a long-lasting finish.
Additionally, make sure to adjust the pressure on the sprayer to achieve the desired flow and coverage.
With the Graco Pro 17 and the right tip, your curbs’ll have a flawless and professional look.
Frequently Asked Questions
How long does it typically take to spray paint a 6-inch curb using a Graco Pro 17 airless paint sprayer?
Spraying a 6-inch curb with a Graco Pro 17 airless paint sprayer usually takes longer than you’d expect. The key is to use a precise spraying technique and the recommended paint type for optimal results.
Can the Graco Pro 17 airless paint sprayer be used for other types of painting projects, or is it specifically designed for curbs?
The Graco Pro 17 airless paint sprayer can be used for a variety of other painting projects besides curbs. It is recommended to use the appropriate tip size for each application to achieve the best results.
Are there any specific safety precautions that should be followed when using the Graco Pro 17 airless paint sprayer on curbs?
When using the Graco Pro 17 airless paint sprayer on curbs, it is crucial to follow specific safety precautions. I highly recommend using the appropriate tip size for spraying 6-inch curbs to ensure accurate and efficient results.
How often should the tip of the Graco Pro 17 airless paint sprayer be replaced, and how can you tell when it needs to be replaced?
The tip of the Graco Pro 17 airless paint sprayer should be replaced regularly to ensure optimal performance. It is recommended to replace the tip every 200-300 gallons of paint or if you notice a decrease in spray pattern quality or excessive wear.
Can the Graco Pro 17 airless paint sprayer be used with different types of paint, or does it require a specific type of paint for spraying curbs?
Different types of paint can be used with the Graco Pro 17 airless paint sprayer, allowing for versatility in curb painting projects. It’s important to properly maintain the sprayer to ensure optimal performance and longevity.
Conclusion
Well, who would’ve thought that painting curbs could be such an art form? With the Graco Pro 17 Airless Paint Sprayer, the right tip size is crucial for achieving those crisp, professional-looking lines. And when it comes to spraying 6-inch curbs, you better believe that precision is key.
But don’t worry, with a little know-how and some attention to detail, you’ll be curbside Picasso in no time. Just remember to choose the right paint, prep the surface properly, and troubleshoot any issues that may arise.
Oh, and don’t forget to stay safe and maintain your equipment. Happy painting!