
To achieve clean, crisp lines when painting trim and baseboards, start with high-quality paint and prep your surfaces thoroughly by cleaning, sanding, and taping off edges. Use a fine, angled brush to apply paint in long, steady strokes, following the wood grain for control. Work slowly and carefully, smoothing out any uneven spots, and let each coat dry completely before adding another. For more tips to perfect your finish, keep exploring these techniques.
Key Takeaways
- Use high-quality, angled brushes and proper technique to control paint application and achieve sharp, clean lines.
- Prepare surfaces thoroughly by cleaning, sanding, and taping to prevent splatters and ensure smooth edges.
- Work slowly and methodically, cutting in along edges with the brush tip for precise boundaries.
- Allow each coat to dry completely and lightly sand between coats for a flawless finish.
- Maintain a steady hand and patience throughout the process to ensure crisp, professional-looking lines.

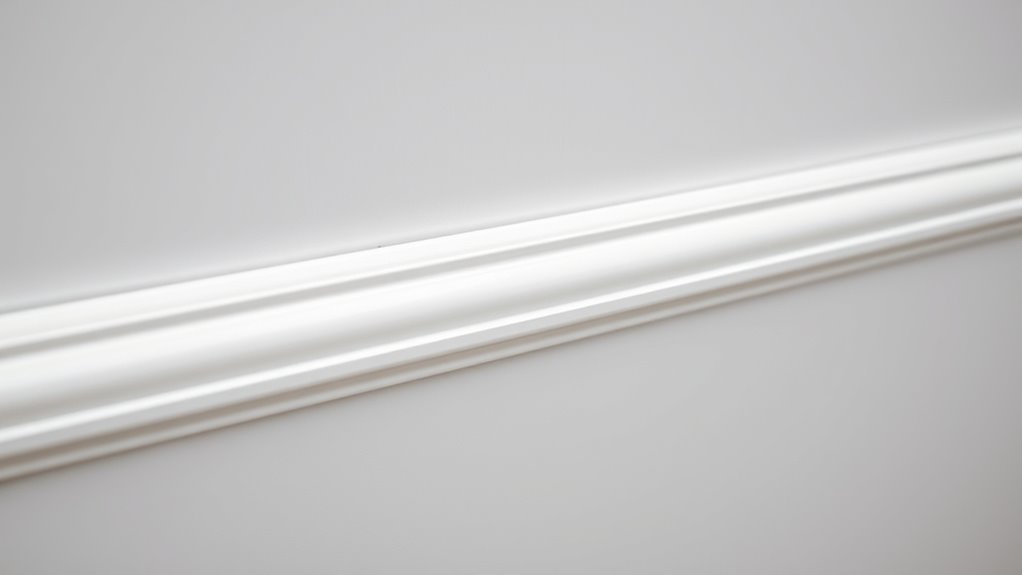
Painting trim and baseboards can dramatically improve your room’s appearance, giving it a fresh, polished look. To achieve this, paying attention to your brush techniques and paint selection is essential. The right approach guarantees clean, crisp lines and a professional finish that elevates your space.
Start by choosing the appropriate paint. Opt for a high-quality latex or oil-based paint designed specifically for trim and moldings. These paints tend to have better adhesion, durability, and a smoother finish. When selecting your paint, consider your room’s lighting and decor, as lighter shades can brighten the space, while darker hues add contrast. Investing in good-quality paint reduces the need for multiple coats and minimizes brush marks, making your job easier and the results more refined.
Choosing high-quality latex or oil-based paint enhances durability and provides a smooth, professional finish for trim and moldings.
Once you’ve selected your paint, prepare your workspace. Cover nearby surfaces with painter’s tape, especially along the edges of walls and floors, to prevent accidental splatters. Proper surface prep is essential—clean the trim thoroughly to remove dust, grease, or old peeling paint. Lightly sanding the surface helps the new paint adhere better and smooths out any imperfections. Wipe away dust with a damp cloth before you start painting.
When it comes to brush techniques, using the right brush is vital. A high-quality, angled sash brush with fine bristles provides better control and precision. Dip the brush into the paint, but avoid overloading it, as excess paint can cause drips and uneven lines. Tap off the excess on the side of the can to prevent drips. When painting, use long, smooth strokes, following the grain of the wood whenever possible. Start at the edge of the trim and work inward, maintaining a steady hand. Use the brush to carefully cut in along the edges, creating a clean boundary between the trim and the wall.
To guarantee crisp lines, work slowly and deliberately. If you notice any paint pooling or uneven coverage, gently feather out the excess with the tip of your brush. For the best results, let each coat dry completely before applying the next. Lightly sanding between coats can also help eliminate brush marks and create a perfectly smooth finish.
Frequently Asked Questions
What Type of Paint Is Best for Trim and Baseboards?
For trim and baseboards, you should choose a high-quality latex or oil-based paint with a semi-gloss or satin finish. These paint finishes provide durability and a smooth, easy-to-clean surface. The semi-gloss sheen offers a nice balance of shine and concealment of imperfections, making it ideal for trim and baseboards. Always pick a paint with good adhesion and low VOCs for a cleaner, long-lasting finish.
How Do I Prevent Paint Drips on Floors and Walls?
Did you know that 60% of painters find drips or splatters the most frustrating part of a job? To prevent paint drips on floors and walls, always use drop cloths to catch any spills. Apply painter’s tape along edges and trim to keep paint confined. Work slowly and carefully, and keep brushes and rollers well-loaded but not dripping. This approach keeps your workspace clean and your paint job crisp.
Can I Paint Trim Without Removing It From the Wall?
You can paint trim without removal by carefully taping off the edges and using a high-quality brush for precision. While removing trim for painting can give you cleaner lines, it’s not always necessary. Just make certain you tape tightly to prevent paint from bleeding onto the wall. This way, you can achieve a professional look with minimal effort and avoid the hassle of removing and reattaching trim.
How Do I Fix Uneven or Chipped Trim Paint?
To fix uneven or chipped trim paint, start with touch-up techniques by carefully applying matching paint to the damaged areas. Use fine sanding methods to smooth out rough spots and blend the touch-ups seamlessly into the existing finish. Be patient and precise, applying thin coats and sanding lightly between layers. This approach guarantees a professional look, making your trim appear fresh and well-maintained without needing to repaint entire sections.
What Tools Are Essential for Professional-Looking Trim Lines?
Think of your tools as the magic wand for perfect trim lines. You’ll need painter’s tape to create crisp, straight edges that act like a stencil for your paint. Add detail brushes for precision in tricky corners. The tape shields your walls from stray strokes, while the fine brushes help you carve out clean, professional-looking lines. Together, these tools transform your project into a masterpiece with flawless, sharp edges.
Conclusion
Think of your trim and baseboards as the frame around a beautiful painting. When you paint with care and precision, you’re highlighting the artwork within—your room’s character. Clean, crisp lines symbolize your attention to detail and pride in your space. Every stroke is like a brush of love, transforming a plain surface into a masterpiece. With patience and skill, you create a finished look that’s not just neat, but a reflection of your dedication to beauty and perfection.