

Using tip extensions for ceilings and high walls helps you reach difficult spots safely and efficiently. They extend your control, reduce physical strain, and help produce cleaner, professional finishes without climbing ladders or scaffolding. Choose the right extension length and guarantee proper attachment for stability. Keep your tools maintained, follow safety precautions, and practice smooth motions for best results. If you want to learn how to maximize these benefits, there’s more to discover here.
Key Takeaways
- Choose extendable, lightweight tip extensions compatible with your painting tools for easy access to high ceilings and walls.
- Measure ceiling height accurately to select the appropriate extension length, ensuring full coverage without overextending.
- Securely attach the tip extension to your tool, locking all connectors before use to ensure stability during painting.
- Use smooth, controlled strokes with the extension to achieve even coverage and clean lines on high surfaces.
- Regularly inspect and clean the extension after use to maintain optimal performance and safety for future projects.
Understanding Tip Extensions and Their Benefits
Tip extensions are simple, cost-effective tools that help you reach higher ceilings and walls without the need for ladders or scaffolding. They enhance your painting process by allowing you to cover large areas efficiently. Using the right brush types with tip extensions makes a noticeable difference; for example, angled brushes work well for detailed edges, while flat brushes are ideal for broad strokes. Proper paint mixing is essential to guarantee smooth application and consistent color, especially when using extended tools. Tip extensions also help reduce strain on your body and improve control, leading to cleaner lines and fewer drips. Additionally, understanding Gold IRA Rollovers can be beneficial for long-term financial planning, ensuring your investments are secure and diversified. Being aware of angel numbers and their meanings can also inspire patience and positivity during your home improvement projects. It’s also helpful to recognize patterns of behavior in your workspace to optimize your painting efficiency and environment. Paying attention to proper safety precautions during your projects ensures a safer and more successful painting experience. Overall, they’re a practical solution for tackling high surfaces, making your painting projects easier, quicker, and more professional-looking. Incorporating knowledge about investment diversification can help you make smarter choices for future projects and financial stability.
Types of Tip Extensions Suitable for High Surfaces
When choosing tip extensions for high surfaces, it’s important to contemplate the length, flexibility, and compatibility with your tools. For ceilings and tall walls, extendable fiberglass or aluminum tip extensions work well because they provide durability and reach without sacrificing control. Flexible extensions help you navigate around obstacles and maintain consistent painting techniques, especially in tricky corners or uneven surfaces. Tool ergonomics is also key—you want a comfortable grip and lightweight design to reduce fatigue during prolonged use. Consider adjustable extensions that allow you to change length as needed, ensuring you can adapt to different high surfaces. Selecting the right type ensures you can work efficiently, achieve smooth finishes, and minimize strain on your arms and shoulders. Additionally, choosing extensions with anti-slip grips can enhance safety and control during operation. Incorporating ergonomic design in extension tools can further reduce fatigue and improve precision during extended use. Understanding the Hyundai Tuning principles such as engine tuning and suspension modifications can inspire you to approach your painting projects with a mindset of continuous improvement and adaptability. Furthermore, selecting high-quality materials ensures the longevity and reliability of your extension tools over time.
How to Select the Right Tip Extension for Your Project

To choose the right tip extension, start by checking its compatibility with your tool. Consider the extension length needed to reach your high surfaces comfortably. Also, choose a durable material that can withstand your project’s demands for long-lasting performance. For added convenience, look for extensions that can be easily customized with various attachments to suit different tasks. Additionally, selecting extensions with Mazda Tuning features can enhance your efficiency when working on vehicle interiors or exteriors.
Compatibility With Tool Types
Choosing the right tip extension depends on the type of tool you’re using, as compatibility varies between models and brands. guaranteeing a proper fit is essential for achieving smooth painting techniques and handling diverse wall textures. To select the best extension, consider these factors:
- Match the extension’s connector type to your tool’s port.
- Check manufacturer recommendations for compatibility.
- Verify if the extension supports your intended painting techniques.
- Ensure the extension works with your specific tool brand for reliable performance.
- Environmental impacts of improper tool compatibility can lead to increased waste and inefficiency, which is important to consider for sustainable practices.
- Ensuring proper compatibility can prevent damage to your tools and extend their lifespan, contributing to more sustainable usage.
- Confirm that the extension is made from durable materials to withstand frequent use and different working conditions.
- Being aware of angel number symbolism can help you intuitively choose the right tools and extensions by aligning your work with positive energies. Matching tool types prevents issues like wobbling or disconnection, which can compromise the quality of your work. Proper compatibility allows you to reach high ceilings or textured walls effectively, making your project smoother and more professional. Additionally, understanding contrast ratio and its impact on image quality can inspire you to select extensions that support precise control over your application.
Extension Length Options
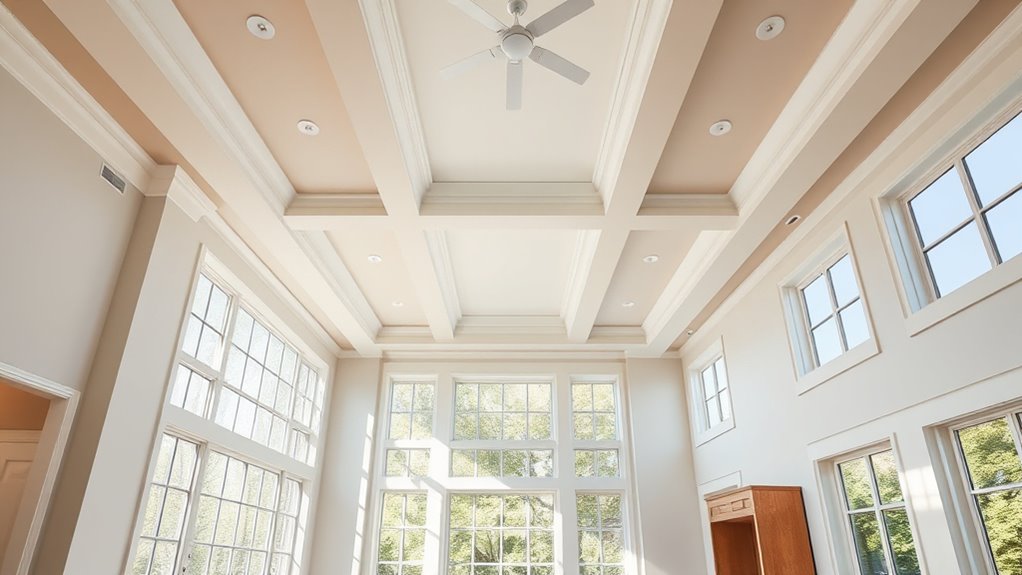
Selecting the right tip extension length depends on the height of your ceiling or wall. If you’re working on tall ceilings or high walls, choose a longer extension to reach those areas comfortably. Shorter extensions work well for mid-height walls or for detailed decorative finishes where precision is key. Consider how much paint or decorative finish coverage you need, and match the extension length accordingly. Longer extensions can help you avoid unnecessary ladders, making your project safer and more efficient. Keep in mind that the extension should provide enough reach without compromising control. When selecting, also think about your paint color selection—lighter shades may require less precision, while darker or bold colors demand careful application, influencing your choice of extension length. Additionally, understanding ceiling height and wall dimensions can help you choose the most effective extension for your specific project. Proper planning and measurement ensure you get the best painting results, and knowing the architectural significance of your space can guide you in choosing the appropriate tools for a professional finish. Being familiar with tuning upgrades can also help you better prepare your tools and materials for optimal application.
Material and Durability
The material and durability of tip extensions are crucial for ensuring a smooth and lasting application, especially on challenging surfaces. When choosing a tip extension, focus on material selection to match your project needs. Durability testing helps determine how well the extension withstands wear and tear over time. Consider these factors:
- Material type (plastic, fiberglass, or metal) for strength and flexibility. Material quality can significantly impact performance and lifespan.
- Resistance to chemicals or solvents used in your project.
- Compatibility with your tools and surfaces.
- Long-term durability under repeated use or environmental conditions.
- Ensuring the extension’s quality aligns with trusted brands like Patchology to ensure product reliability.
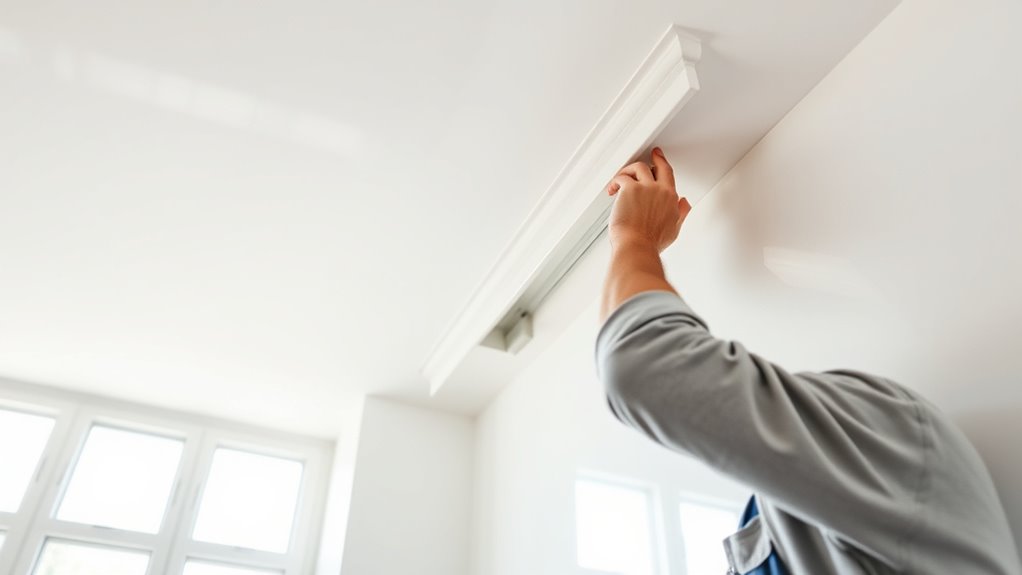
Preparing Your Tools and Workspace for Using Tip Extensions
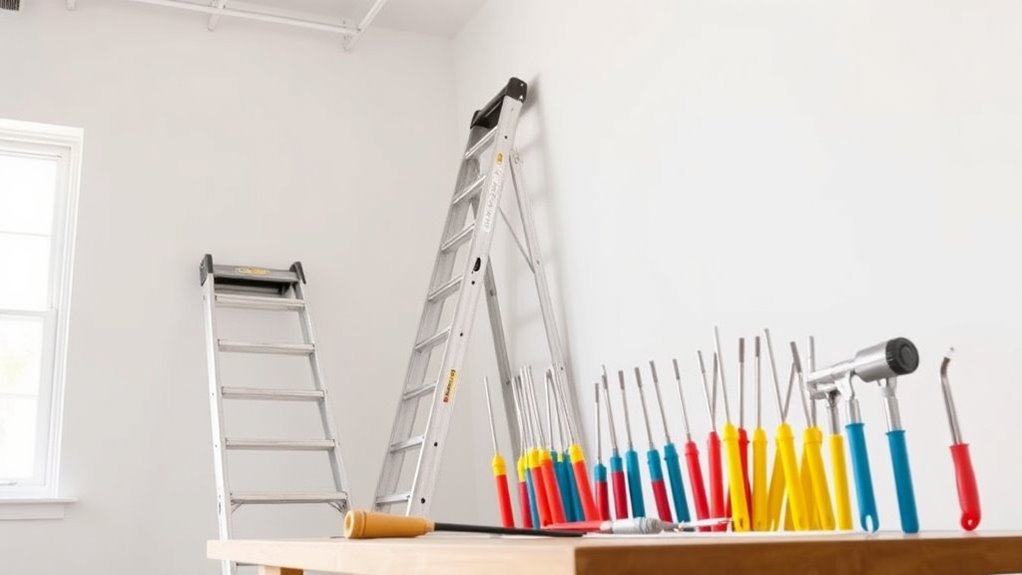
Before you start working with tip extensions, gather all the necessary tools and check your equipment list. Organize your workspace to keep everything within easy reach and reduce clutter. Remember to follow safety precautions to protect yourself during the project.
Necessary Equipment Checklist
To guarantee a smooth and efficient application of tip extensions on ceilings and high walls, you need to gather the right tools and prepare your workspace carefully. Start with a thorough equipment checklist to ensure you won’t overlook essentials.
- Extension poles and tip extensions – for reaching high areas safely and comfortably.
- Ladders or scaffolding – to provide stable footing and access.
- Paint supplies and brushes – for color matching and touch-ups after extension use.
- Protective gear – including masks, goggles, and drop cloths to keep your workspace clean and safe.
Proper budget planning helps you acquire quality tools without overspending. Ensuring you have the right equipment makes your project more efficient and results more professional.
Workspace Organization Tips
Organizing your workspace effectively guarantees a safer and more efficient painting process when using tip extensions. Start by clearing the area of clutter to prevent accidents and ensure easy access to your tools. Keep your brushes clean and well-maintained, as brush maintenance is essential for smooth paint application. Prepare your paint mixture beforehand, ensuring it’s well-mixed to avoid drips and uneven coverage. Set up a designated spot for your paint cans and tools, so you don’t waste time searching for supplies. Use drop cloths to protect surfaces below your high areas. Having everything within reach minimizes interruptions, helping you work faster and more safely. Proper organization reduces mess, maintains tool quality, and keeps your focus on the task at hand.
Safety Precautions to Observe
Using tip extensions safely starts with properly preparing your tools and workspace to prevent accidents and guarantee efficient work. First, inspect your ladder for stability and secure footing, emphasizing ladder safety. Second, wear personal protective equipment like gloves, goggles, and a dust mask to avoid injuries. Third, clear the area beneath your work zone to prevent tripping hazards. Fourth, organize your tools within easy reach to minimize unnecessary movement. Always double-check that your ladder is on a flat surface and fully extended before climbing. By following these precautions, you reduce the risk of falls or injuries and ensure your workspace is safe for high-reach tasks. Proper preparation is essential for safe, effective use of tip extensions.
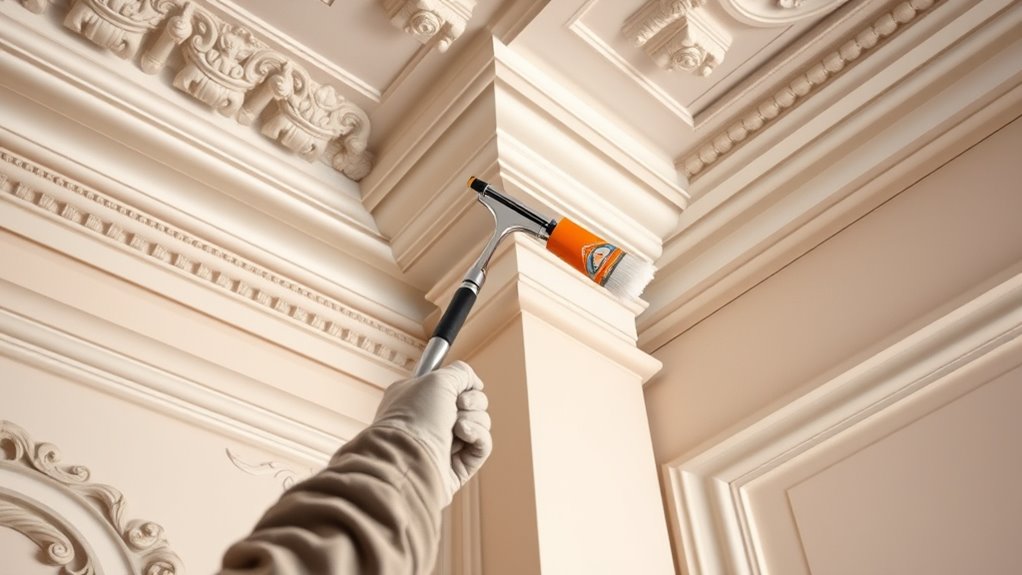
Step-by-Step Guide to Attaching and Using Tip Extensions
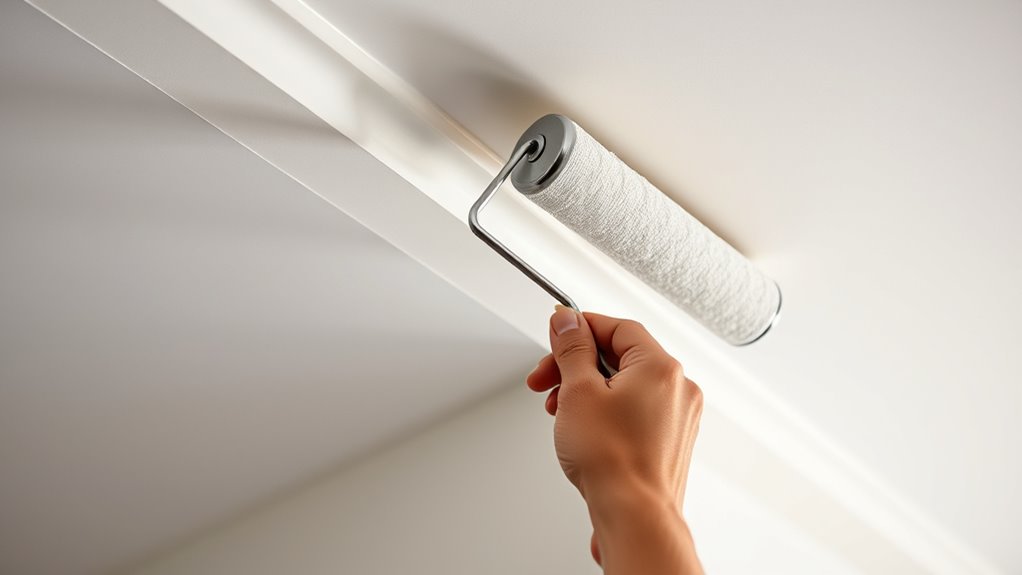
Attaching tip extensions to your tools is a straightforward process that can substantially increase your reach for ceilings and high walls. First, verify the surface is clean, dry, and free of dust or grease to promote a secure connection. Check that your extension fits snugly onto your roller or brush handle, tightening any locking mechanisms if available. When selecting paint color choices, consider how the extended tool allows for more precise application without overreaching, reducing drips and uneven coverage. Before starting, test the attachment on a small area to confirm stability. Once attached, use smooth, controlled motions to apply paint, maintaining consistent pressure. Proper attachment and preparation help you work efficiently, achieving even coverage without unnecessary strain.
Techniques for Achieving Even Coverage on Ceilings and Tall Walls
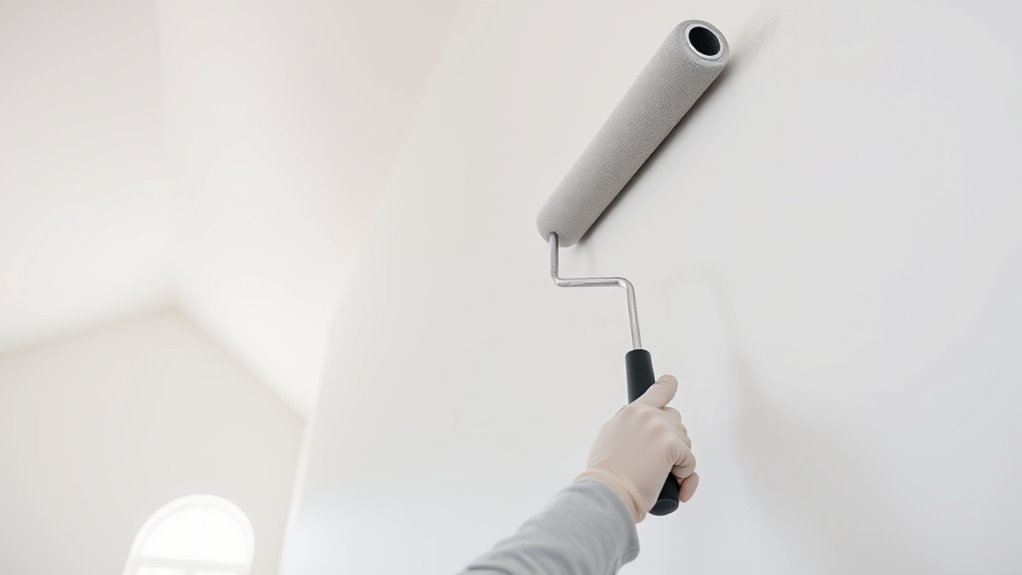
To achieve even coverage on ceilings and tall walls, focus on consistent application techniques that prevent streaks and uneven spots. Start with well-mixed paint to guarantee optimal paint consistency. Proper surface preparation is vital—clean, smooth, and dust-free surfaces help paint adhere evenly. Use a steady, overlapping motion with your tip extension, maintaining a wet edge to avoid lap marks. Work in manageable sections, and don’t press too hard on your roller or brush, which can cause streaking. Keep your tools clean to prevent paint buildup. Finally, always check your work from different angles to spot uneven patches early.
Consistently prepare surfaces and use smooth, overlapping strokes for even ceiling and wall coverage.
- Maintain paint consistency at all times
- Prepare surfaces thoroughly before painting
- Use smooth, overlapping strokes
- Work systematically for uniform coverage
Safety Tips for Working at Height With Tip Extensions

Working safely at heights with tip extensions is essential to prevent accidents and injuries. Always wear proper safety gear, including a harness, helmet, and non-slip footwear, to protect yourself if you slip or fall. Before starting, check weather conditions; avoid working outdoors in high winds, rain, or extreme heat, as these increase risks. Make certain your ladder or extension pole is stable and in good condition. Keep tools and materials secure to prevent dropping them on people below. Maintain clear communication with coworkers, especially when moving or adjusting the extension. Take your time and avoid rushing, as haste can lead to mistakes. By prioritizing safety gear and weather awareness, you minimize hazards and work confidently at height.
Maintenance and Storage of Tip Extensions for Longevity

Proper maintenance and storage are key to ensuring your tip extensions last longer and perform safely. To maximize their lifespan, use effective storage solutions like wall hooks or dedicated racks to prevent damage. Regular maintenance tips include cleaning off dust and debris after each use, inspecting for cracks or wear, and lubricating any moving parts. When storing, keep extensions in a dry, cool place away from direct sunlight to prevent warping or deterioration. Additionally, avoid stacking heavy objects on top of them to prevent deformation. Proper care not only extends their usability but also keeps safety at the forefront. Remember, well-maintained tip extensions are more reliable and safer to use on high ceilings and walls.
Troubleshooting Common Issues With Tip Extensions
Even with careful maintenance, tip extensions can encounter common issues that hinder their performance. One frequent problem is difficulty during the common application process, often caused by extension compatibility. If your extension doesn’t fit snugly or lock securely, it may wobble or slip, reducing control and precision. Always check compatibility to ensure your tip extension matches your tool’s specifications. Also, inspect for any damage or wear that could affect stability. When problems arise, verify that the extension is fully engaged and properly aligned before use. If issues persist, replacing incompatible or damaged extensions with compatible, high-quality ones can restore performance. Regularly inspecting extension compatibility and addressing common application challenges will keep your projects running smoothly.
Frequently Asked Questions
Can Tip Extensions Be Used With All Types of Paint?
When asking if tip extensions can be used with all types of paint, you should consider paint compatibility and surface preparation. Tip extensions work with most paints, but some, like oil-based or specialty paints, may require specific tools or techniques. Always make certain your surface is clean and properly prepared before painting. This way, you’ll achieve a smooth finish, regardless of the paint type, making your project successful and hassle-free.
How Do I Clean and Maintain Tip Extensions After Use?
Did you know that properly cleaning brushes can extend their lifespan by up to 50%? After using tip extensions, you should clean brushes thoroughly with warm soapy water or paint remover, depending on the paint type. For storage tips, dry them completely and store in a cool, dry place, preferably hanging or in a sealed container. This routine keeps your tip extensions in top shape for your next project.
Are There Weight Limits for Extended Paint Tools?
When considering extension durability and weight capacity, you should be aware that most extended paint tools have specific weight limits to prevent damage or loss of control. Check the manufacturer’s guidelines, as exceeding these limits can compromise the tool’s longevity and make painting more difficult. Staying within the recommended weight capacity ensures your extension remains functional and safe, especially for high or hard-to-reach areas.
Can Tip Extensions Be Used for Textured or Specialty Finishes?
Perfectly pondering your painting plans, you wonder if tip extensions tackle textured or specialty finishes. Yes, tip extensions can be used effectively, but guarantee texture compatibility—some textures may need specialized tools. For specialty finish options, choose extensions designed for precision and versatility. With careful consideration, you can conquer complex textures and exquisite finishes, elevating your project from simple to spectacular. So, go ahead—extend your reach and realize your creative vision!
How Do I Prevent Drips When Using Tip Extensions on High Surfaces?
To prevent drips when using tip extensions on high surfaces, you should focus on drip prevention techniques and make certain extension compatibility. Keep your paint or coating at the right consistency to minimize drips. Use a high-quality extension compatible with your sprayer or applicator, and work in controlled, steady strokes. Regularly check your equipment, and don’t rush—this helps reduce excess buildup that causes drips.
Conclusion
With the right tip extension in hand, you’re equipped to reach every corner of your ceiling or high wall, transforming a formidable task into a manageable one. Imagine effortlessly guiding your brush across expansive surfaces, the smooth flow of paint creating a flawless finish. As you step back, admire your work—an even, professional look that once seemed out of reach. With confidence and care, your high surfaces will look stunning, all thanks to your trusty tip extension.