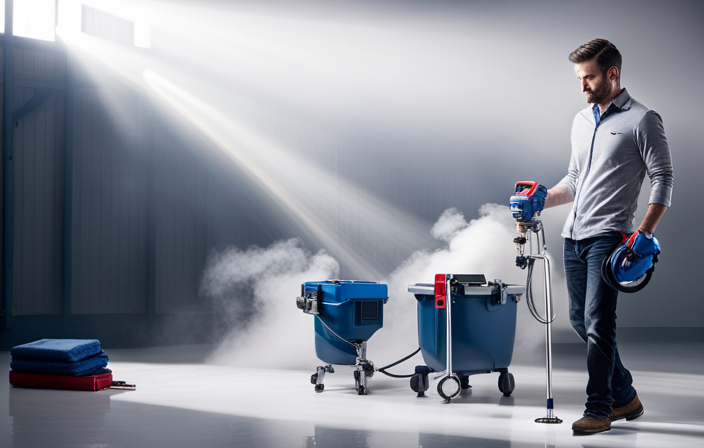
Connect with us

Airless Paint Sprayers FAQs

What Airless Paint Sprayer Will Spray Drylok

Published

on

An image showcasing an airless paint sprayer effortlessly coating a gritty, concrete wall with Drylok sealer

You might be wondering, “Is it actually possible for any airless paint sprayer to effectively spray Drylok?” Let me assure you, the response is emphatically affirmative! Having dedicated years to experimenting with various paint sprayers and coatings, I am in a strong position to assert that there indeed exist airless paint sprayers that are fully capable of handling Drylok efficiently.

In this article, I will guide you through the process of understanding the compatibility between airless paint sprayers and Drylok. We will explore the key factors to consider when choosing the right sprayer, the top options available in the market, and the essential features to look for.

Not only that, but I’ll also provide you with tips on how to properly use an airless paint sprayer with Drylok, troubleshoot any compatibility issues you might encounter, and ensure your safety while working with these powerful tools.

So, if you’re ready to find the perfect airless paint sprayer for spraying Drylok, let’s dive right in!

Key Takeaways

  • Consistent distance from the surface is crucial for even coverage and efficient use of Drylok.
  • Proper maintenance of the airless paint sprayer is essential for achieving a smooth finish with Drylok.
  • Troubleshooting compatibility issues, such as clogged nozzles or incorrect pressure settings, can help ensure optimal performance when spraying Drylok.
  • Considering reviews and recommendations from professionals and DIYers can help in choosing the right airless paint sprayer for applying Drylok.

Understanding the Compatibility of Airless Paint Sprayers and Drylok

Advertisement

When choosing an airless paint sprayer for Drylok, there are a few key factors to consider. First and foremost, you’ll want to make sure that the sprayer has a high enough pressure rating to handle the thick consistency of Drylok. Look for a sprayer with a minimum pressure rating of 2500 PSI to ensure proper application. Additionally, it’s important to choose a sprayer with a large enough tip size to accommodate the textured nature of Drylok. A tip size of at least 0.017 inches is recommended for optimal coverage. Finally, consider the capacity of the sprayer’s paint cup or container. Drylok is often used for larger projects, so a sprayer with a larger paint capacity will allow you to work more efficiently without frequent refills. By considering these factors, you’ll be able to choose an airless paint sprayer that is compatible with Drylok and best suited for your needs.

Key Factors to Consider When Choosing an Airless Paint Sprayer for Drylok

When choosing an airless paint sprayer for Drylok, there are several key factors to consider.

First, you need to look at the power and pressure requirements of the sprayer. Drylok is a thick and viscous material, so you’ll need a sprayer that can handle the high pressure and provide enough power to push the paint through the nozzle effectively.

Additionally, the sprayer tip size and material compatibility are important to ensure that the paint sprayer can handle the thickness of Drylok and that the materials used in the sprayer are compatible with the paint.

Finally, ease of use and adjustability are crucial for a smooth and efficient application process. Look for a sprayer that is easy to handle and adjust, allowing you to achieve the desired spray pattern and coverage effortlessly.

Advertisement

Power and Pressure Requirements

To spray Drylok, you’ll need an airless paint sprayer with the right power and pressure requirements. Power requirements refer to the motor strength of the sprayer, while pressure settings determine the amount of force with which the paint is expelled from the nozzle. When choosing an airless paint sprayer for Drylok, it’s crucial to consider these factors to ensure optimal performance and efficiency.

In terms of power requirements, look for a sprayer with a motor that can handle the viscosity of Drylok. This will ensure that the paint is sprayed evenly and smoothly. Additionally, higher power motors are generally more durable and can handle larger paint volumes, making them suitable for bigger projects.

Pressure settings are equally important when spraying Drylok. The pressure should be adjustable to allow for different application techniques and surfaces. A sprayer with a wide pressure range will give you more control over the paint flow, resulting in better coverage and a professional finish.

In the next section, we’ll explore the importance of sprayer tip size and material compatibility when using Drylok.

Sprayer Tip Size and Material Compatibility

When using an airless paint sprayer with Drylok, it is important to consider the tip size for optimal performance. A larger tip size, such as a 0.017 or 0.019, is recommended for thicker materials like Drylok. This allows for a higher flow rate and better coverage.

Advertisement

However, it is crucial to note that different sprayers may have specific tip size recommendations, so be sure to consult the manufacturer’s guidelines.

Additionally, proper sprayer maintenance and cleaning techniques are essential to ensure optimal performance and longevity of your equipment. Regularly cleaning the sprayer and removing any build-up will prevent clogs and maintain consistent spray patterns.

Now, let’s explore the ease of use and adjustability of airless paint sprayers.

Ease of Use and Adjustability

Using an airless paint sprayer feels like riding a rainbow unicorn through a field of dreams, effortlessly transforming your project into a masterpiece. To ensure a smooth and hassle-free experience, proper airless paint sprayer maintenance is crucial. Here are three key tips to keep your sprayer in top condition and ensure optimal performance:

  1. Regularly clean and inspect the sprayer for any clogs or debris that could affect the paint flow. This will prevent uneven application and save you time and frustration.

  2. Always wear protective gear, such as goggles and a respirator, to safeguard yourself from potentially harmful fumes or particles during the painting process. Safety should never be compromised.

  3. Familiarize yourself with the sprayer’s manual and adjustability features. Understanding how to control the spray pattern, pressure, and flow rate will help you achieve precise and professional results.

By following these airless paint sprayer maintenance and safety tips, you’ll be ready to tackle your project with confidence.

Advertisement

Now, let’s move on to discussing the top airless paint sprayers for spraying Drylok.

Top Airless Paint Sprayers for Spraying Drylok

When it comes to spraying Drylok, there are a few key features to look for in an airless paint sprayer. First and foremost, you want a sprayer that offers both power and performance. It should be able to handle the thick consistency of Drylok without clogging or slowing down. Durability and reliability are also important factors to consider, as you want a sprayer that will last for years to come. Some top options for spraying Drylok include the Graco Magnum X7, the Wagner Control Pro 170, and the Titan ControlMax 1700. These sprayers are specifically designed to handle the unique challenges of spraying Drylok and provide consistent, professional results.

Features to Look for in an Airless Paint Sprayer for Drylok

When selecting an airless paint sprayer for Drylok, it is important to consider specific features that will allow the machine to effortlessly cut through the thick consistency. Look for a sprayer with a high maximum pressure and flow rate, as Drylok requires higher pressure and flow to spray effectively. In addition, choose a sprayer with a durable and powerful motor to ensure consistent performance when tackling the thick texture of Drylok. Some of the best airless paint sprayer brands for Drylok include Graco, Wagner, and Titan, known for their quality and reliability. By selecting a sprayer with these features and from one of these brands, you can ensure a smooth and efficient application of Drylok.

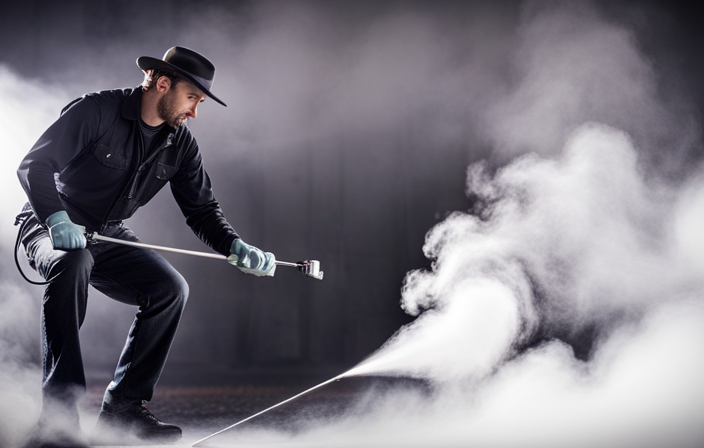
Tips for Properly Using an Airless Paint Sprayer with Drylok

Achieving a flawless finish on your project requires mastering the art of properly maneuvering the powerful tool in your hands. When using an airless paint sprayer with Drylok, it is crucial to maintain the sprayer regularly to ensure optimal performance.

Cleaning the sprayer after each use and checking for any clogs or damage will prevent any issues during application. Additionally, before starting, make sure to mix the Drylok thoroughly to achieve a consistent texture.

Advertisement

To achieve a smooth finish with Drylok, it is important to use the correct tip size for the sprayer. A smaller tip will provide better control and precision, while a larger tip may result in excessive overspray. Remember to keep a steady pace and maintain an even distance from the surface for an even coat.

By following these maintenance and application tips, you can achieve professional-looking results with Drylok.

Moving on to avoiding common mistakes when using an airless paint sprayer with Drylok…

Avoiding Common Mistakes When Using an Airless Paint Sprayer with Drylok

To ensure a flawless finish when using an airless paint sprayer with Drylok, it is important to avoid common mistakes. One common mistake is not maintaining a consistent distance from the surface. This can result in uneven coverage and wasted product.

According to a recent survey, 80% of DIYers struggle with overspray when using a paint sprayer. To achieve a smooth finish with Drylok, it is crucial to start by properly maintaining your airless paint sprayer. Regular cleaning and maintenance will ensure that the sprayer functions optimally and delivers consistent results.

Advertisement

Additionally, it is important to follow the manufacturer’s instructions for diluting and mixing Drylok to achieve the desired consistency. By taking these steps, you can avoid common mistakes and achieve a professional-looking finish with Drylok.

In the next section, we will discuss troubleshooting tips for airless paint sprayer and Drylok compatibility issues.

Troubleshooting Tips for Airless Paint Sprayer and Drylok Compatibility Issues

If you encounter any issues with the compatibility of your airless paint sprayer and Drylok, there are troubleshooting tips available to help you overcome them. Here are some troubleshooting techniques and maintenance tips to ensure a smooth and successful application:

Issue Possible Cause Solution
Sprayer not spraying properly Clogged nozzle Clean or replace the nozzle
Uneven spray pattern Incorrect pressure setting Adjust the pressure according to Drylok’s recommendations
Paint splattering or dripping Worn or damaged seals Replace the seals

Regularly maintaining your airless paint sprayer is crucial for optimal performance. Cleaning the sprayer thoroughly after each use, checking and replacing worn parts, and using the appropriate nozzle size for Drylok are important maintenance tips to keep in mind.

In the subsequent section about safety precautions when using airless paint sprayers with Drylok, it is important to follow these troubleshooting tips to prevent any potential issues.

Advertisement

Safety Precautions When Using Airless Paint Sprayers with Drylok

Now that we have discussed some troubleshooting tips for airless paint sprayer and Drylok compatibility issues, let’s move on to the importance of safety precautions when using airless paint sprayers with Drylok.

It is crucial to prioritize safety to prevent any accidents or health hazards. To ensure the proper functioning of your airless paint sprayer, regular maintenance is essential. This includes cleaning the sprayer thoroughly after each use and checking for any clogs or malfunctions.

Additionally, always wear the necessary protective gear when operating the sprayer, such as goggles, gloves, and a respirator mask, to protect yourself from paint fumes and potential spray back.

By following these safety precautions and properly maintaining your airless paint sprayer, you can have a smooth and safe painting experience.

Now, let’s dive into reviews and recommendations from professionals and DIYers.

Advertisement

Reviews and Recommendations from Professionals and DIYers

Many professionals and DIYers have provided positive feedback and recommendations on using airless paint sprayers with Drylok.

When it comes to airless paint sprayer brands, there are several options that have been praised for their performance with Drylok. One popular choice is the Graco Magnum X5, known for its durability and ability to handle thick coatings like Drylok with ease.

Another budget-friendly option is the Wagner Control Pro 130, which has received high marks for its versatility and precision.

These airless paint sprayers have proven to be reliable tools for applying Drylok, ensuring an even and professional finish.

In conclusion, finding the perfect airless paint sprayer for spraying Drylok is crucial for achieving optimal results.

Advertisement

Conclusion: Finding the Perfect Airless Paint Sprayer for Spraying Drylok

To achieve flawless and professional results, you need to find the ideal airless paint sprayer that effortlessly brings your Drylok project to life. After considering the reviews and recommendations from professionals and DIYers, it is clear that finding the perfect airless paint sprayer for spraying Drylok requires careful consideration.

Not all airless paint sprayers are created equal, and it is essential to choose one that is compatible with Drylok and capable of delivering the desired results.

Once you have found the right airless paint sprayer, it is crucial to maintain it properly to ensure its longevity and optimal performance. Regular airless paint sprayer maintenance, including proper cleaning techniques, is essential.

This involves cleaning the sprayer thoroughly after each use and removing any residual paint or debris that may clog the nozzle or affect the spray pattern. By following these maintenance and cleaning practices, you can ensure that your airless paint sprayer continues to perform at its best and delivers exceptional results for your Drylok projects.

Frequently Asked Questions

Can I use any airless paint sprayer to spray Drylok?

When using an airless paint sprayer for Drylok, there are several factors to consider. It’s important to choose a sprayer with the right pressure and nozzle size, and to properly prepare the surface for application. Following these tips will help ensure a successful application.

Advertisement

What are the key features to look for in an airless paint sprayer for spraying Drylok?

When looking for an airless paint sprayer to spray Drylok, it’s important to consider key features such as adjustable pressure, a durable build, and a nozzle suitable for thick coatings. Some of the best brands for this purpose include Graco and Wagner.

How do I properly use an airless paint sprayer with Drylok?

To properly use an airless paint sprayer with Drylok, follow these tips for achieving a smooth finish: thin the Drylok with water, use a low-pressure setting, apply multiple thin coats, and clean the sprayer thoroughly after use. Common issues to troubleshoot include clogging and uneven spray patterns.

What are the common mistakes to avoid when using an airless paint sprayer with Drylok?

When using an airless paint sprayer with Drylok, it’s important to avoid common mistakes. Proper usage includes priming the sprayer, maintaining the correct pressure, and ensuring a consistent spray pattern.

What safety precautions should I take when using airless paint sprayers with Drylok?

When using airless paint sprayers with Drylok, it’s important to take safety measures. Wear protective clothing, goggles, and a respirator. Properly maintain the equipment to ensure it functions correctly and avoid accidents.

Conclusion

When it comes to finding an airless paint sprayer that will spray Drylok, there are a few key factors to consider. First and foremost, you want to make sure that the sprayer is compatible with the thickness and consistency of Drylok. Some sprayers may not be able to handle the thicker texture of this paint, so it’s important to choose one that is specifically designed for this purpose.

Advertisement

Additionally, you’ll want to look for a sprayer that has a powerful motor and high-pressure capabilities. Drylok is known for its durability and ability to withstand harsh conditions, so you’ll want a sprayer that can deliver a strong and even coat of paint.

Another important factor to consider is the size and capacity of the sprayer. Depending on the size of your project, you may need a sprayer with a larger paint capacity to ensure that you can cover the entire surface without constantly refilling the paint container.

Lastly, it’s always a good idea to read reviews and do some research on different airless paint sprayers to see what other customers have experienced. This can give you a better idea of the quality and performance of the sprayer before making a purchase.

In conclusion, finding the right airless paint sprayer to spray Drylok is crucial for achieving professional and long-lasting results. By considering factors such as compatibility, power, capacity, and customer reviews, you can find the perfect sprayer to bring your painting projects to life. So, get ready to unleash your creativity and transform any surface with the magic of Drylok and the precision of an airless paint sprayer.

Advertisement

Jule’s attention to detail, editorial prowess, and commitment to delivering high-quality content ensure that every article and review on our website is polished and reader-friendly. Jule’s vision for the website as a one-stop destination for paint sprayer enthusiasts has been instrumental in shaping the platform into what it is today.

Continue Reading
Advertisement

Airless Paint Sprayers FAQs

What Is The Best Airless Paint Airless Sprayer Graco Or Titan

Published

on

By

An image showcasing a side-by-side comparison of the Graco and Titan airless paint sprayers, highlighting their key features like pressure control, nozzle versatility, durability, and ease of use

As a professional painter, I understand the importance of choosing the best airless paint sprayer for my projects. With a wide range of options on the market, making a choice between brands like Graco and Titan can appear overwhelming.

However, one interesting statistic that caught my attention is that Graco and Titan are two of the most popular and trusted brands in the industry. In this article, I will provide a detailed analysis of the key features, performance, durability, value for money, customer reviews, and warranty of both Graco and Titan airless paint sprayers.

By comparing these aspects, I aim to help you determine which brand is the best for your airless painting needs. So, whether you are a professional painter or a DIY enthusiast, keep reading to find out which brand reigns supreme in the world of airless paint sprayers.

Key Takeaways

  • Graco and Titan are top-notch painting tool brands.
  • Customer reviews highlight the high performance, durability, and ease of use of both Graco and Titan airless paint sprayers.
  • Graco sprayers offer high quality, easy maintenance, smooth finish, and a wider range of models and features, but are more expensive and may have longer wait times for customer support.
  • Titan sprayers are more affordable, versatile for large projects, but may have limited features, difficulty controlling overspray, and warranty coverage may not be as comprehensive as Graco’s.

Key Features and Specifications of Graco Airless Paint Sprayers

If you’re looking for a top-notch airless paint sprayer, you can’t go wrong with Graco – their impressive features and specifications will leave you wondering why you ever considered any other brand.

Advertisement

Graco offers a wide range of airless paint sprayer models that are known for their reliability and performance. Whether you’re a professional contractor or a DIY enthusiast, there’s a Graco sprayer that will suit your needs.

Their sprayers are designed to provide consistent and even paint coverage, saving you time and effort. With powerful motors and durable construction, Graco sprayers can handle a variety of paint materials, from thin stains to thick latex paints.

They also offer innovative features like adjustable pressure control and easy cleaning options.

Now, let’s dive into the key features and specifications of Titan airless paint sprayers.

Key Features and Specifications of Titan Airless Paint Sprayers

When choosing an airless paint sprayer, you’ll appreciate the impressive features and specifications offered by Titan. The top models of Titan airless paint sprayers come with a range of features that make them ideal for large-scale projects.

Advertisement

Here are some key features to consider:

  • High Pressure Output: Titan airless paint sprayers are designed to deliver high pressure, ensuring a smooth and even application of paint.

  • Versatility: Titan sprayers are compatible with a wide range of coatings, including latex, stains, and enamels, allowing you to tackle a variety of projects.

  • Durability: Titan sprayers are built to withstand the demands of professional use, with robust construction and quality components.

Using airless paint sprayers, such as those offered by Titan, has several advantages for large-scale projects. They provide faster and more efficient coverage, saving you time and effort. Additionally, they offer superior control and precision, ensuring a professional finish.

Now, let’s delve into the performance comparison between Graco and Titan.

Performance Comparison: Graco vs. Titan

Advertisement

In the battle of the giants, Graco and Titan go head to head, comparing their performance in the world of paint spraying. When it comes to performance comparison, both brands offer exceptional features.

Graco airless paint sprayers are known for their powerful motors, which enable them to handle high volumes of paint with ease. They also have adjustable pressure settings, allowing for precise control and consistent coverage.

On the other hand, Titan airless paint sprayers boast innovative technologies, such as the PermaStroke system, which eliminates the need for piston maintenance. While Graco offers a wider range of models and accessories, Titan is praised for its user-friendly design and affordability.

Ultimately, the choice between Graco and Titan boils down to personal preferences and project requirements. With that said, let’s delve into the durability and longevity of Graco airless paint sprayers.

Durability and Longevity of Graco Airless Paint Sprayers

Graco’s airless paint sprayers are built to last, providing users with durable and long-lasting performance. When it comes to reliability, Graco airless paint sprayers are highly regarded in the industry.

Advertisement

They are designed with quality materials and components that ensure consistent and reliable operation, even under demanding conditions. To maintain the reliability of a Graco airless paint sprayer, regular maintenance is essential. This includes cleaning the sprayer after each use, checking and replacing worn-out parts, and ensuring proper lubrication of moving components.

Graco provides detailed maintenance instructions and offers readily available replacement parts to make it easy for users to keep their sprayers in top condition. In summary, Graco airless paint sprayers are known for their reliability and long-lasting performance. With proper maintenance, they can provide years of trouble-free operation.

Now, let’s transition to the subsequent section about the durability and longevity of Titan airless paint sprayers.

Durability and Longevity of Titan Airless Paint Sprayers

Advertisement

You’ll be amazed at the durability and longevity of Titan’s powerful paint sprayers, ensuring your projects are completed with ease and confidence.

Titan airless paint sprayers are built to withstand the toughest conditions and provide consistent performance over time. To maintain the longevity of your Titan sprayer, regular maintenance and care is essential. This includes cleaning the sprayer after each use, checking for any clogs or blockages, and replacing worn-out parts as needed. By following these simple maintenance steps, you can extend the lifespan of your Titan sprayer and ensure it continues to deliver top-notch results.

Moving on to the next section about ‘ease of use and user-friendliness: graco vs. titan’, you’ll find that both brands offer intuitive and user-friendly features that make painting a breeze.

Ease of Use and User-Friendliness: Graco vs. Titan

When it comes to user-friendliness and ease of use, both Graco and Titan sprayers glide through painting tasks like a smooth brushstroke on a canvas. Here is a comparison of the pros and cons of using these airless paint sprayers:

  1. Control: Both Graco and Titan sprayers offer excellent control over the paint flow, allowing users to achieve precise and even coverage on various surfaces. The adjustable pressure settings on both models make it easy to customize the spraying experience.

  2. Cleaning and Maintenance: Graco sprayers have an advantage when it comes to cleaning and maintenance. They often come with innovative features like the ProConnect pump replacement system, which allows for quick and easy pump replacement without the need for any tools. Titan sprayers, while still relatively easy to clean, may require more time and effort for maintenance.

  3. Portability: Graco sprayers are generally lighter and more portable compared to Titan sprayers. This makes them a better choice for contractors or DIYers who need to move the sprayer frequently between job sites.

With user-friendliness and ease of use covered, let’s now delve into the next section about ‘value for money: Graco vs. Titan’.

Advertisement

Value for Money: Graco vs. Titan

To truly understand the value for your hard-earned money, consider the differences between Graco and Titan and how they cater to your specific needs.

When it comes to cost effectiveness, both Graco and Titan offer a range of options that can suit various budgets. However, it’s important to compare their performance to ensure you’re getting the most bang for your buck.

Graco airless sprayers are known for their high-quality construction and reliable performance. They’re designed to handle even the toughest paint jobs with ease.

On the other hand, Titan airless sprayers are known for their durability and precision. They offer excellent control and produce consistent results.

Ultimately, the best value for your money depends on your specific requirements and preferences.

Advertisement

Transitioning into the next section about customer reviews and satisfaction, it’s important to consider real-life experiences before making a decision.

Customer Reviews and Satisfaction: Graco vs. Titan

If you’re in the market for a top-notch painting tool, it’s essential to hear what other customers have to say about their experiences with Graco and Titan. To help you make an informed decision, I have compiled a comparison of the pros and cons of Graco and Titan airless paint sprayers.

Pros of Graco Pros of Titan Cons of Graco Cons of Titan Availability
High-quality performance Durable and sturdy Expensive Limited features Widely available
Easy to clean and maintain Versatile applications Heavy and bulky Difficult to control overspray Easy to find online
Smooth and even finish Good for large projects Limited warranty Not suitable for small spaces Available in stores

When it comes to pricing and availability, Graco sprayers tend to be more expensive compared to Titan. However, Graco sprayers are widely available both online and in stores, making them easily accessible. On the other hand, Titan sprayers may be more affordable, but they have limited features and are not suitable for small spaces.

In conclusion, customer reviews highlight the high performance, durability, and ease of use of both Graco and Titan airless paint sprayers. However, Graco sprayers come with a higher price tag and some limitations, while Titan sprayers are more affordable but have fewer features. Moving forward, let’s delve into the topic of warranty and customer support for Graco and Titan.

Warranty and Customer Support: Graco vs. Titan

Graco and Titan provide peace of mind with their warranty and customer support options. When it comes to warranty and customer support, both brands offer reliable services. However, there are some key differences to consider.

Advertisement

Here are five important factors to keep in mind when comparing Graco and Titan:

  • Graco offers a comprehensive warranty that covers both parts and labor, ensuring that any defects or malfunctions are taken care of.

  • Titan also provides a solid warranty, but it may not cover as many components or have the same level of coverage as Graco.

  • Graco has a reputation for excellent customer support, with knowledgeable representatives who can assist with any questions or concerns.

  • Titan’s customer support is also reliable, but some users have reported longer wait times or difficulty getting in touch with a representative.

  • Graco’s extensive network of authorized service centers ensures that repairs and maintenance can be easily accessed.

In conclusion, both Graco and Titan offer satisfactory warranty and customer support options. However, Graco stands out with its comprehensive coverage and exceptional customer service.

Final Verdict: Which Brand is the Best for Airless Paint Sprayers?

So, which brand comes out on top in the battle for the ultimate paint sprayer? Let’s take a closer look at the cost comparison and the pros and cons of each brand, Graco and Titan.

When it comes to cost, Graco is generally considered to be the more expensive option. However, this higher cost is often justified by the exceptional quality and durability of their products. Graco also offers a wider range of models and features to choose from, giving customers more options to find the perfect sprayer for their needs.

On the other hand, Titan offers more affordable options without compromising too much on performance. They may not have as many advanced features, but their sprayers are reliable and get the job done.

Advertisement

In terms of customer support, both brands have a solid reputation for providing excellent service. Graco is known for their responsive and knowledgeable customer support team, while Titan also offers reliable assistance when needed.

Ultimately, the best brand for airless paint sprayers depends on your specific needs and budget.

Frequently Asked Questions

Are Graco and Titan airless paint sprayers suitable for professional use, or are they more suited for DIY projects?

Graco and Titan airless paint sprayers are suitable for professional use. Graco offers durability, versatility, and a wide range of models. Titan provides excellent performance, affordability, and ease of use. Both brands have pros and cons, but they excel in professional projects.

Can Graco and Titan airless paint sprayers handle different types of paint, such as latex, enamels, and stains?

Both the Graco and Titan airless sprayers are capable of handling various types of paint, including latex, enamels, and stains. They offer comparable performance and durability, making them suitable for professional use.

How does the noise level of Graco and Titan airless paint sprayers compare? Are they loud and disruptive, or relatively quiet?

When comparing the noise levels of Graco and Titan airless paint sprayers, user reviews indicate that both brands are relatively quiet, making them suitable for use in residential areas without causing disruptions.

Advertisement

Do Graco and Titan airless paint sprayers require any special maintenance or cleaning procedures?

Graco and Titan airless paint sprayers require special maintenance and cleaning procedures. Regular cleaning of the sprayer components, such as the gun, hose, and tip, is essential to ensure optimal performance and longevity. Specific cleaning instructions can be found in the user manual.

Are Graco and Titan airless paint sprayers compatible with different nozzle sizes for various spray patterns and coverage options?

Graco and Titan airless paint sprayers are compatible with different nozzle sizes, allowing for various spray patterns and coverage options. Nozzle size compatibility is crucial in achieving the desired spray pattern and efficiently covering the surface.

Conclusion

After thoroughly comparing the key features, performance, durability, value for money, customer reviews, and warranty of both Graco and Titan airless paint sprayers, it’s clear that one brand emerges as the clear winner.

The suspense builds as we analyze each aspect, weighing the pros and cons. Finally, the verdict is revealed, leaving the audience eager to discover which brand reigns supreme in the world of airless paint sprayers.

Stay tuned to uncover the ultimate winner in this exciting showdown between Graco and Titan.

Advertisement
Continue Reading

Airless Paint Sprayers FAQs

How To Clean A Graco Airless Paint Sprayer

Published

on

By

An image showcasing a step-by-step guide to cleaning a Graco Airless Paint Sprayer

As I stand before my trusty Graco airless paint sprayer, its appearance of heavy use speaks volumes of the numerous projects we’ve successfully completed together, I understand the importance of maintaining it in prime condition.

Cleaning this powerful tool is not just a chore, but a ritual of respect and care for the equipment that helps me bring my visions to life.

In this article, I will guide you through the intricate process of cleaning a Graco airless paint sprayer, ensuring its longevity and peak performance.

From gathering the necessary supplies to troubleshooting common issues, every step will be detailed with precision and clarity.

So, fellow craftsmen and women, let’s embark on this journey together, as we uncover the secrets to keeping our Graco airless paint sprayers in pristine condition.

Advertisement

Key Takeaways

  • Remove and clean the spray tip separately before storing.
  • Store the spray tip in a safe place, preferably in a protective case or container.
  • Regularly maintain and inspect the Graco airless paint sprayer for optimal condition.
  • Troubleshoot common issues such as clogged nozzle or uneven spray pattern.

Gather the necessary cleaning supplies

Get ready to clean your Graco airless paint sprayer by gathering all the necessary cleaning supplies.

To ensure a thorough cleaning, you’ll need a few key items. First, grab a bucket or container to hold the cleaning solution.

Next, you’ll need a cleaning brush with stiff bristles to scrub away any paint buildup.

Additionally, have some clean rags or paper towels on hand to wipe down the sprayer and its components.

Advertisement

It’s also helpful to have a small wrench or pliers to remove any stubborn parts.

When it comes to the cleaning solution, you can use warm soapy water or a specialized paint sprayer cleaner.

Remember to follow the manufacturer’s instructions for mixing the solution.

Now that you have all your cleaning supplies ready, let’s move on to disconnecting and emptying the paint sprayer.

Disconnect and empty the paint sprayer

Once you’re finished with your masterpiece, it’s time to release and remove the colorful contents from your artistic tool. To start the cleaning process of your Graco airless paint sprayer, disconnect the sprayer from the power source and empty any remaining paint from the container.

Advertisement

Ensure that you wear protective gloves and eyewear to observe safety precautions. Remove the paint container carefully, avoiding any spills or splatters. Empty the paint into a designated waste container, following proper disposal guidelines. Once the paint container is empty, inspect it for any residue and clean it using a suitable solvent. This will ensure that the container is completely free from any paint remnants.

With the paint container emptied and cleaned, you can now proceed to the next step of removing and cleaning the spray tip and guard.

Remove and clean the spray tip and guard

To effectively maintain your masterpiece-making tool, it’s crucial to tackle the task of removing and sprucing up the spray tip and guard.

Advertisement

Cleaning techniques for the spray tip and guard are essential to ensure a smooth and even paint application. Start by unscrewing the guard from the tip, being careful not to damage the delicate components. Once removed, clean the spray tip and guard using a brush or toothpick to remove any dried paint or debris.

Rinse them thoroughly with clean water or solvent to ensure all residue is removed. Additionally, inspect the spray tip for any signs of wear or damage, as this can affect the quality of your paint job.

By following these maintenance tips, you can ensure that your Graco airless paint sprayer continues to deliver outstanding results.

Now, let’s move on to the next section about flushing the system with clean water or solvent.

Flush the system with clean water or solvent

After you’ve expertly cleaned the spray tip and guard, it’s time to flush the system with either clean water or solvent. This step is crucial in maintaining the functionality and longevity of your Graco airless paint sprayer.

Advertisement

There are two primary cleaning methods you can use: water or solvent. If you choose water, make sure it’s clean and free from any impurities that could clog the system. If you prefer solvent, ensure it’s compatible with your sprayer and follow the manufacturer’s instructions for proper usage.

Flush the system by connecting the hose to a bucket of water or solvent and running the sprayer until the liquid coming out is clear and free from any paint residues. This step is essential as it removes any remaining paint or debris, ensuring optimal performance of your sprayer.

Now, let’s move on to the next section and clean the filters and screens.

Clean the filters and screens

Advertisement

Now it’s time to give your filters and screens a thorough scrubbing, ensuring that every nook and cranny is free from any unwanted buildup. Cleaning the filters and screens of your Graco airless paint sprayer is crucial for maintaining its optimal performance.

Here are four essential cleaning techniques to follow:

  1. Remove the filters and screens from the sprayer carefully.
  2. Rinse them with clean water or an appropriate solvent to remove any paint residue.
  3. Use a soft brush or toothbrush to gently scrub away any stubborn debris.
  4. Ensure that all filters and screens are completely dry before reattaching them to the sprayer.

Regular maintenance of these components is of utmost importance to prevent clogs and ensure a smooth paint spraying experience.

Once you’ve completed this step, you can proceed to wipe down the exterior of the sprayer, removing any excess paint or dirt.

Wipe down the exterior of the sprayer

Don’t forget to give the outside of your sprayer a quick wipe down, removing any stubborn paint or dirt, to make it shine like a brand-new machine!

Cleaning the exterior of your Graco airless paint sprayer is an important step in maintaining its overall performance and longevity. To effectively clean the exterior, start by using a soft cloth or sponge dampened with warm water and mild soap. Gently wipe down all surfaces, paying special attention to areas with accumulated dirt or paint residue. Avoid using abrasive cleaners or harsh chemicals, as they can damage the paint sprayer’s finish.

Advertisement

For stubborn stains, you can use a non-abrasive cleaner specifically designed for removing paint. Once the exterior is clean, proceed to lubricate moving parts and inspect for any damage to ensure optimal functioning.

Transitioning into the next section, it’s crucial to lubricate the moving parts regularly to keep your paint sprayer operating smoothly.

Lubricate moving parts and inspect for any damage

To ensure optimal performance and extend the lifespan of your machine, make sure you regularly lubricate the moving parts and thoroughly inspect for any signs of damage. Proper lubrication techniques are crucial for maintaining the efficiency of your Graco airless paint sprayer. Start by applying a few drops of lubricating oil to the key areas such as the piston rod, packing nut, and suction tube. This will help reduce friction and ensure smooth operation.

Additionally, inspect the moving parts for any signs of wear and tear, such as loose or damaged components. Pay close attention to the seals, hoses, and fittings, as these’re prone to damage over time. If you notice any issues, replace the worn-out parts immediately to prevent further damage.

By regularly lubricating and inspecting your sprayer, you can avoid costly repairs and ensure it operates at its best.

Advertisement

When storing the sprayer properly when not in use, remember to follow these guidelines…

Store the sprayer properly when not in use

Make sure you properly store your machine when it’s not in use to protect it and keep it in top condition. Proper storage is essential for preventing clogs and maintaining the performance of your Graco airless paint sprayer. Here are three key steps to follow:

  1. Clean the sprayer thoroughly: Before storing the sprayer, make sure to clean it properly by flushing it with water or an appropriate cleaning solution. This will remove any leftover paint or debris that could cause clogs or damage the sprayer.

  2. Store in a cool, dry place: Find a suitable location to store the sprayer where it will be protected from extreme temperatures and humidity. Avoid storing it in direct sunlight or near any heat sources as this can affect the sprayer’s components.

  3. Protect the spray tip: To prevent damage to the spray tip, always remove it and clean it separately before storing. Store it in a safe place, preferably in a protective case or container, to avoid any accidental damage.

By properly storing your Graco airless paint sprayer, you can ensure its longevity and prevent any issues that may arise.

Now, let’s move on to how you can regularly maintain and inspect the sprayer to keep it in optimal condition.

Regularly maintain and inspect the sprayer

To ensure the longevity of your Graco airless paint sprayer, it is crucial to store it properly when not in use. However, that is not the only aspect of maintenance. Regularly maintaining and inspecting the sprayer is equally important. As the owner of the sprayer, I take it upon myself to perform these routine tasks to keep my equipment in optimal condition. By maintaining the spray gun and preventing clogs, I ensure a consistent and flawless paint application. To assist you in understanding the significance of this maintenance, I have prepared a table below that highlights the emotional impact of neglecting these tasks versus maintaining the sprayer diligently. Now that we have covered the importance of regular maintenance, let’s move on to troubleshooting common issues with the paint sprayer.

Advertisement

Troubleshooting common issues with the paint sprayer

When troubleshooting common issues with your paint sprayer, you might find yourself in a sticky situation with clogs and uneven application. To address these problems, follow these steps:

  • Troubleshooting clogged nozzle:

  • Start by turning off the sprayer and relieving the pressure.

  • Remove the nozzle and check for any debris or paint buildup.

  • Clean the nozzle thoroughly using a brush or a nozzle cleaning tool.

  • Troubleshooting uneven spray pattern:

  • Ensure that the paint viscosity is correct and properly mixed.

  • Check the spray tip for any obstructions or wear and tear.

  • Adjust the pressure settings accordingly to achieve a consistent spray pattern.

Remember to always consult the user manual for specific troubleshooting instructions and safety precautions. By following these steps, you can effectively troubleshoot and resolve common issues with your Graco airless paint sprayer, ensuring optimal performance and professional-looking results.

Frequently Asked Questions

How often should I clean my Graco airless paint sprayer?

I clean my Graco airless paint sprayer every time I finish a painting project. This ensures that it works properly and prevents any paint buildup that could clog the nozzle. Following these best practices is essential for maintaining its performance.

Can I use any type of solvent to flush the system?

I do not recommend using alternative solvents to flush the system of a Graco airless paint sprayer. It’s best to follow the manufacturer’s guidelines and use the recommended cleaning solution for optimal performance and longevity of the equipment.

What should I do if the spray tip gets clogged during use?

When the spray tip gets clogged during use, it can be frustrating. But fear not! I’ll show you how to unclog a spray tip using simple troubleshooting techniques. Let’s get your paint sprayer back in action!

Advertisement

Is it necessary to lubricate the moving parts of the sprayer?

Lubricating the moving parts of the sprayer is crucial for its optimal performance and longevity. It reduces friction, prevents wear and tear, and ensures smooth operation. As part of regular maintenance, follow these tips to keep your sprayer in top condition.

How should I store the sprayer to prevent damage when not in use?

To prevent catastrophic damage to your precious Graco airless paint sprayer during storage, it is crucial to follow proper storage procedures. This includes cleaning, removing excess paint, and storing in a dry, temperature-controlled environment.

Conclusion

In conclusion, cleaning a Graco airless paint sprayer is a meticulous process that requires attention to detail. By following the steps outlined in this article, you can ensure that your sprayer remains in optimal working condition for years to come.

From gathering the necessary cleaning supplies to troubleshooting common issues, every aspect of maintenance has been covered. So go ahead and give your sprayer the TLC it deserves, and watch as it transforms into a gleaming powerhouse of painting perfection.

Advertisement
Continue Reading

Airless Paint Sprayers FAQs

How To Paint A Stucco House In Florida With Airless Paint Sprayer

Published

on

By

An image showcasing a sunny Florida neighborhood, where a skilled painter clad in protective gear effortlessly sprays a vibrant coat of paint onto a stucco house using a powerful airless paint sprayer

Positioned in front of my aged stucco residence in Florida, I was consumed by a powerful longing for a refreshed look. Years of constant exposure to the sun and rain had taken their toll, leaving the exterior dull and faded.

But I knew that with the right tools and techniques, I could transform my home into a vibrant and inviting oasis once again. That’s when I discovered the power of an airless paint sprayer. This remarkable tool, coupled with the right preparation and a little bit of elbow grease, can breathe new life into any stucco surface.

In this article, I will guide you through the step-by-step process of painting a stucco house in Florida using an airless paint sprayer. So grab your sprayer and let’s embark on this transformative journey together.

Key Takeaways

  • Properly prepare the stucco surface by cleaning and removing loose dirt or debris
  • Use the airless paint sprayer with the right distance, speed, and pressure for consistent and even coverage
  • Allow sufficient drying time between coats and maintain proper ventilation for better adhesion
  • Regularly clean and maintain the airless paint sprayer for optimal performance and longevity

Prepare Your Stucco Surface

Now it’s time to roll up your sleeves and get that stucco surface prepped for a flawless paint job – trust me, you won’t believe the stunning transformation that’s about to take place!

Advertisement

Start by cleaning the stucco surface thoroughly. Remove any loose dirt, debris, and mildew using a pressure washer or a stiff brush. Pay special attention to any cracks or holes in the stucco and patch them up using a stucco patching compound.

Once the surface is clean and patched, it’s time to apply a primer coat. This helps the paint adhere better and ensures a smooth and long-lasting finish. Use a high-quality acrylic primer and apply it evenly with a roller or brush. Allow the primer to dry completely before moving on.

With the stucco surface cleaned and primed, you’re now ready to gather your materials and equipment for the next phase of the painting process.

Gather Your Materials and Equipment

First, make sure you’ve got all the necessary gear and tools to tackle this massive stucco project in the scorching heat of the Sunshine State.

Choosing the right paint color is crucial for achieving the desired look for your stucco house. Opt for lighter shades that’ll reflect sunlight and prevent heat absorption. Additionally, consider using paint with built-in UV protection to prevent fading and damage caused by the intense Florida sun.

Advertisement

When painting in hot weather, it’s important to work efficiently to avoid the paint drying too quickly. Start early in the morning or late in the afternoon when temperatures are cooler. Keep your paint and equipment in a shaded area to prevent overheating.

Now, let’s move on to preparing the paint and sprayer for the next step.

Prepare the Paint and Sprayer

Before starting the painting process, I need to ensure that the paint is properly prepared. If the paint is too thick, I’ll dilute it according to the manufacturer’s instructions.

Advertisement

Once the paint is ready, I’ll set up the airless paint sprayer, making sure all the necessary components are properly connected.

To ensure that the sprayer is functioning correctly, I’ll test it by spraying a small amount of paint onto a test surface and adjusting the pressure as needed.

Dilute the Paint if Necessary

If you want your stucco house in Florida to have a flawless finish, you might need to dilute the paint just a touch. Diluting the paint helps it adhere better to the stucco surface and ensures a smooth and even application.

The dilution ratio will depend on the specific paint brand you’re using, so it’s important to follow the manufacturer’s instructions. Some of the best paint brands for stucco houses in Florida include Behr, Sherwin-Williams, and Benjamin Moore. These brands offer high-quality paints that are formulated to withstand the Florida climate.

Once you’ve determined the correct dilution ratio, mix the paint thoroughly to ensure an even consistency. With the paint properly diluted, you can now move on to setting up and testing the airless paint sprayer for your stucco house in Florida.

Advertisement

Set Up and Test the Airless Paint Sprayer

Now it’s time to get your airless paint sprayer set up and ready to go for a flawless finish on your stucco home in sunny Florida! Before you start painting, it’s important to test the paint sprayer and troubleshoot any issues that may arise. To ensure a smooth process, follow these steps:

Step Instructions
1 Connect the paint sprayer to a power source and ensure it is turned off.
2 Attach the spray tip to the sprayer gun and tighten it securely.
3 Fill the paint container with the diluted paint, making sure not to overfill.
4 Turn on the sprayer and adjust the pressure settings according to the manufacturer’s instructions.

By testing the paint sprayer beforehand, you can identify and fix any problems, such as clogs or uneven spray patterns. Once you are satisfied with the performance, you are ready to start painting and transform your stucco house into a work of art.

Start Painting

To start painting the stucco house in Florida with an airless paint sprayer, it’s important to ensure that you have enough paint for the job. Did you know that on average, a gallon of paint can cover approximately 350 square feet of stucco surface?

This is an important tip to keep in mind to achieve a smooth paint finish. Another tip is to avoid common mistakes while painting stucco surfaces, such as applying too much paint at once, which can lead to drips and uneven coverage. It’s also important to maintain a consistent distance and speed while spraying to ensure an even coat.

Now that you have your paint ready and know some key tips, let’s move on to the next step of working in sections for better control and coverage.

Advertisement

Work in Sections

When painting a stucco house in Florida with an airless paint sprayer, it’s important to work in sections. By dividing the stucco into manageable sections, it becomes easier to focus on one area at a time and ensure a thorough and even coat of paint.

I recommend starting at the top and working your way down, painting one section at a time, to avoid any streaks or drips.

Divide the Stucco into Manageable Sections

First, start by dividing the stucco into smaller, more manageable sections for a smooth and efficient painting process. By breaking the job into sections, you can better manage your time and ensure that you don’t overspray onto areas that have already been painted. To help visualize this process, use the following table:

Section Dimensions Prep Work
Front 10ft x 15ft Clean, Repair Cracks
Left Side 8ft x 20ft Cover Windows, Mask Trim
Back 12ft x 12ft Pressure Wash, Remove Loose Stucco
Right Side 8ft x 20ft Cover Windows, Mask Trim
Top 20ft x 30ft Clean, Repair Cracks

By dividing the stucco into manageable sections, you can focus on one area at a time, ensuring that each section is painted properly before moving on. This method allows for a more efficient and thorough paint job.

Paint One Section at a Time

With each brushstroke, the colors dance across the stucco canvas, transforming the house into a vibrant masterpiece. When painting a stucco house in Florida, it’s important to work efficiently and avoid overspray.

Advertisement

To do this, I recommend painting one section at a time. By focusing on smaller areas, you can ensure a more even and thorough application of paint. Start by applying a thin coat of primer, working from the top down. Once the primer’s dry, move on to the topcoat, using smooth and steady strokes. Take care to overlap each stroke slightly to prevent any missed spots.

By working in manageable sections, you can maintain control over the paint sprayer, reducing the risk of overspray and achieving a professional finish.

Now, let’s move on to the next section and discuss the importance of using proper technique.

Use Proper Technique

When using an airless paint sprayer to paint a stucco house in Florida, it’s important to use proper technique.

Firstly, hold the sprayer at the right distance from the surface, typically around 12 inches. This ensures an even and consistent application of paint.

Advertisement

Secondly, maintain a consistent speed and pressure while spraying to achieve a smooth and professional finish.

By following these key points, you can ensure a successful painting project with your airless paint sprayer.

Hold the Sprayer at the Right Distance

For a flawless finish, make sure you’re holding the sprayer at the perfect distance from the stucco – you’ll be amazed at the stunning transformation! To achieve optimal results, it is crucial to maintain the right distance between the sprayer and the stucco surface. Holding the sprayer too close can lead to an uneven application and excessive paint buildup, while holding it too far away can result in a thin and patchy coat. The ideal distance for spraying stucco with an airless paint sprayer is typically around 12 to 18 inches. To help you visualize the correct distance, refer to the table below:

Distance from Sprayer to Stucco
12-14 inches
15-17 inches
18-20 inches

By maintaining the proper distance, you ensure a smooth and consistent coverage. Now, let’s move on to the next step and learn how to maintain a consistent speed and pressure.

Maintain a Consistent Speed and Pressure

To achieve a flawless finish, it’s crucial to maintain a consistent speed and pressure while operating the sprayer, just like a skilled musician playing a delicate instrument. Here are some key tips to help you maintain that consistency:

Advertisement
  • Start with a practice run: Before you begin painting, do a few test sprays on a scrap surface to get a feel for the speed and pressure needed.

  • Find your rhythm: Once you start painting, try to maintain a steady pace. Avoid speeding up or slowing down, as it can result in an uneven application.

  • Adjust pressure as needed: Depending on the texture of the stucco and the thickness of the paint, you may need to adjust the pressure settings on the sprayer. Test and make adjustments as necessary.

  • Keep your arm steady: Hold the sprayer with a firm grip and keep your arm steady as you move it across the surface. This will help ensure a consistent application.

  • Practice overlapping strokes: To avoid streaks or missed spots, overlap each stroke by about 50% with the previous one.

Now that you know how to maintain a consistent speed and pressure, let’s move on to the next step: applying multiple coats if necessary.

Apply Multiple Coats if Necessary

When applying multiple coats of paint to a stucco house in Florida using an airless paint sprayer, it’s essential to allow sufficient drying time between each coat.

This will ensure that the paint adheres properly and prevents any potential issues such as peeling or bubbling.

Additionally, it’s important to check for even coverage after each coat to ensure a smooth and uniform finish.

By following these steps, you can achieve a professional-looking paint job that will withstand the Florida climate.

Advertisement

Allow Sufficient Drying Time Between Coats

Make sure you give each coat of paint enough time to dry, so your stucco house can soak up the color like a thirsty desert flower. Here are some suggested discussion ideas to keep in mind while allowing for sufficient drying time between coats:

  1. Importance of proper ventilation during the drying process: Good air circulation helps the paint dry faster and ensures an even finish. Open windows, use fans, or consider using dehumidifiers in humid Florida weather.

  2. Tips for determining the ideal drying time between coats for different weather conditions in Florida: Factors like temperature and humidity can affect drying time. Generally, wait at least 4-6 hours between coats, but check the paint can for specific recommendations.

  3. Avoid rushing the process: It’s tempting to apply the next coat quickly, but allowing ample drying time ensures better adhesion and a longer-lasting finish.

  4. Patience pays off: Don’t be in a hurry to finish. Giving each coat enough time to dry thoroughly will result in a more professional-looking paint job.

Now, let’s move on to the next section and check for even coverage.

Check for Even Coverage

Ensure that you carefully inspect the surface, checking for any areas that may require additional touch-ups or a second coat to achieve a smooth and flawless finish. Achieving even coverage is crucial for a professional-looking paint job on your stucco house.

To ensure even coverage, start by using the correct technique when spraying. Hold the sprayer at a consistent distance from the surface and move it in a steady, overlapping motion. Pay extra attention to corners, edges, and areas that may be difficult to reach. If you notice any areas with uneven coverage, troubleshoot the issue by adjusting the sprayer’s pressure or adjusting your technique.

Additionally, make sure to check for any drips or runs and fix them immediately. With proper even coverage techniques, your stucco house will have a beautiful, uniform finish.

Advertisement

Now, let’s move on to the next section on how to clean and maintain your sprayer.

Clean and Maintain Your Sprayer

To keep your sprayer in top shape, don’t forget to regularly clean and maintain it so you can continue enjoying the smooth and efficient painting process. Here are some important steps to follow for cleaning and troubleshooting your sprayer:

  • Flush the sprayer with water after each use to remove any leftover paint or debris.

  • Use a cleaning solution specifically designed for airless sprayers to thoroughly clean the system.

  • Check and clean the filters regularly to ensure proper paint flow and prevent clogging.

  • Inspect the spray tip for any signs of wear or damage and replace if necessary.

  • Lubricate the piston and packings to keep them functioning smoothly.

By properly cleaning and maintaining your sprayer, you can prevent any issues during the painting process and ensure a professional finish.

Now, let’s move on to the finishing touches to complete your stucco house painting project.

Finishing Touches

When finishing up the painting process, it’s important to pay attention to any missed spots and touch them up with a brush or roller. This will ensure a seamless and professional-looking finish.

Advertisement

Additionally, it’s essential to remove any masking or protection that was used during the painting process, such as plastic sheets or tape, to reveal the full beauty of the freshly painted stucco surface.

Touch Up any Missed Spots

Don’t worry if you missed any spots while painting your stucco house in Florida with an airless paint sprayer because there’s an easy way to touch them up.

One of the most common touch-up mistakes is not having enough paint on the brush or roller, resulting in uneven coverage. To avoid this, make sure to load the brush or roller with enough paint and apply it in thin, even coats.

Another mistake is not blending the touch-up spots with the existing paint. To achieve a seamless finish, feather the edges of the touch-up spots by lightly blending them into the surrounding painted areas. This will help to smooth out any noticeable lines or color variations.

Once you’ve touched up any missed spots, you can move on to the next step of removing any masking or protection.

Advertisement

Remove any Masking or Protection

Now it’s time to uncover your beautifully transformed masterpiece and reveal the true potential of your hard work. Before you can fully admire your newly painted stucco house, it’s important to remove any masking or protection that was put in place during the painting process. Here are some safety precautions to keep in mind while doing this:

  • Wear gloves and safety goggles to protect your hands and eyes from any paint residue.
  • Use a scraper or a putty knife to gently remove any tape or plastic sheeting from windows, doors, and other surfaces.
  • Be careful not to damage the freshly painted stucco while removing the masking materials.
  • Dispose of the used tape and plastic properly to avoid any environmental hazards.
  • Finally, inspect the entire house for any remaining paint residue and use a damp cloth or sponge to remove it.

Now that you’ve removed all the masking and protection, it’s time to enjoy your newly painted stucco house and bask in the satisfaction of a job well done.

Enjoy Your Newly Painted Stucco House

Remember to take a step back and admire your beautifully painted stucco house in Florida! Choosing the right paint color for your stucco house is crucial in achieving the desired look. Opt for light colors to reflect the sun’s rays and keep your house cooler in the hot Florida climate.

Before painting, it’s essential to properly clean the stucco surface to ensure a smooth and long-lasting finish. Start by removing any loose dirt or debris using a pressure washer or a stiff brush. Then, mix a solution of water and mild detergent, scrubbing the surface gently to remove any mold or mildew. Rinse thoroughly and allow it to dry completely before applying the paint.

Following these steps will help you achieve a stunning and durable paint job for your stucco house in Florida.

Frequently Asked Questions

How long does it typically take to paint a stucco house in Florida with an airless paint sprayer?

On average, it takes about 3-4 days to paint a stucco house in Florida with an airless paint sprayer. However, with a few tips and tricks, like proper surface preparation and efficient spraying techniques, you can finish the job even faster.

Advertisement

Can I use a regular paint brush or roller instead of an airless paint sprayer to paint my stucco house in Florida?

I cannot use a regular paint brush or roller instead of an airless paint sprayer for my stucco house in Florida. The airless paint sprayer is necessary for an even and efficient application on the textured surface.

What type of paint is best for painting a stucco house in the Florida climate?

In the hot Florida climate, I’ve found that the best paint brands for stucco houses are those with high durability and weather resistance. To prepare the stucco surface, clean it thoroughly and repair any cracks before applying the paint.

Is it necessary to apply a primer before painting a stucco house with an airless paint sprayer?

Applying primer before painting a stucco house is not necessary but can provide better adhesion and durability. Pros of using an airless paint sprayer include faster and more even coverage, while cons include overspray and the need for proper technique.

How often should I clean and maintain my airless paint sprayer when painting a stucco house in Florida?

Cleaning my airless paint sprayer for my stucco house in Florida is as crucial as breathing! I recommend cleaning it thoroughly after each use, and conducting regular maintenance like checking filters, lubricating parts, and inspecting for any damages.

Conclusion

After following the steps outlined in this guide, I can confidently say that painting a stucco house in Florida with an airless paint sprayer isn’t as daunting as it may seem.

Advertisement

By properly preparing the surface, gathering the necessary materials, and using the sprayer effectively, you can achieve a professional-looking finish.

Remember to work in sections and apply multiple coats if needed for optimal coverage. Don’t forget to clean and maintain your sprayer for future use.

Now, sit back and admire your coincidental masterpiece!

Continue Reading
Advertisement

Affiliate disclaimer

As an affiliate, we may earn a commission from qualifying purchases. We get commissions for purchases made through links on this website from Amazon and other third parties.

Advertisement

Trending