Connect with us

Airless Paint Sprayers FAQs

What Can I Run Thru Airless Paint Sprayer To Clean It Out?

Published

on

An image showcasing an airless paint sprayer being thoroughly cleaned

Think of your airless paint sprayer as a loyal partner, always available to assist you in achieving a perfect outcome on your painting tasks. However, similar to any tool, it needs appropriate maintenance and care to guarantee its continued effectiveness and peak functioning.

In this article, I will guide you through the process of cleaning your airless paint sprayer, using the right solutions and techniques to keep it running smoothly.

From water-based cleaning solutions to solvent-based alternatives, we will explore various options to effectively remove paint residue and prevent clogs. I will also introduce you to the concept of Pump Armor, a specialized product that helps protect your sprayer during storage and prevent corrosion.

Throughout this article, I will provide step-by-step instructions on flushing the system, cleaning the hose and pump, and maintaining the pressure roller. By following these tips, you can ensure that your airless paint sprayer remains clean, functional, and always ready for your next project.

Key Takeaways

  • Specialized gun cleaner and cleaning brush with solvent are effective for removing paint residue and preventing clogs in the spray gun.
  • Flushing the hose with cleaning solution is essential to remove paint or debris and prevent clogs or blockages.
  • Flushing the pump with cleaning solution ensures longevity and optimal performance by removing residual paint or debris.
  • Soaking and scrubbing the roller in cleaning solution helps loosen dried paint and maintain roller performance.

Importance of Cleaning Your Airless Paint Sprayer

Advertisement

Cleaning your airless paint sprayer is crucial to maintain its performance and prevent any frustrating clogs or malfunctions. Regular maintenance is of utmost importance to ensure that your sprayer continues to work efficiently. By following the best practices for cleaning, you can extend the lifespan of your equipment and save money on repairs or replacements.

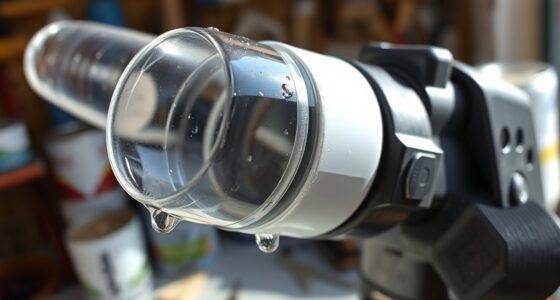
Start by thoroughly flushing out any remaining paint from the system using a compatible solvent or cleaning agent. Remove any filters, tips, or guards and clean them separately. Pay attention to small crevices and hard-to-reach areas, as paint buildup can easily occur there.

Once your sprayer is clean and free from paint residue, you can transition into the subsequent section about water-based cleaning solutions.

Water-Based Cleaning Solutions

When it comes to cleaning your airless paint sprayer, there are several water-based cleaning solutions that can effectively remove any residual paint or debris.

One option is a diluted dish soap solution, which is a gentle yet effective cleaner that can break down paint and remove it from the sprayer.

Advertisement

Another option is a vinegar and water mixture, which can help to dissolve any paint buildup and provide a thorough cleaning.

Lastly, warm water and mild detergent can be used to remove any remaining paint residue and ensure a clean and well-maintained sprayer.

Diluted dish soap solution

A diluted dish soap solution is a highly effective cleaning technique for removing residue from your airless paint sprayer. Here are four reasons why this cleaning technique is so effective:

  1. Gentle yet effective: The mild nature of dish soap ensures that it won’t damage the internal components of your sprayer while effectively breaking down paint residue.

  2. Versatile cleaning agent: Dish soap can be used on various surfaces, making it suitable for cleaning both the spray gun and the paint container.

  3. Easy to prepare: Simply mix a few drops of dish soap in warm water to create a cleaning solution that is ready to use.

  4. Cost-effective option: Dish soap is readily available and budget-friendly, providing a cost-effective alternative to specialized cleaning solutions.

Transitioning to the subsequent section, another effective cleaning method involves using a vinegar and water mixture.

Vinegar and water mixture

To effectively maintain your airless paint sprayer, incorporate the use of a vinegar and water mixture for an optimal cleaning solution.

Advertisement

This combination of vinegar and water serves as one of the most effective cleaning solutions for removing paint residues and ensuring the longevity of your sprayer. The acidic nature of vinegar helps to break down paint particles, while water acts as a solvent to flush them out.

To create the cleaning solution, mix equal parts of vinegar and water in a container. Pour the mixture into the sprayer’s reservoir. Run the sprayer for a few minutes to ensure the mixture reaches all the internal components.

Afterwards, rinse the sprayer thoroughly with warm water and mild detergent to remove any remaining residue. This alternative method provides a thorough cleaning and prepares the sprayer for the next project.

Warm water and mild detergent

To achieve the best results, follow these steps for cleaning your sprayer with warm water and mild detergent:

  1. Fill a container with warm water and add a small amount of mild detergent. This will create a solution that effectively removes residue from your sprayer.

  2. Using warm water helps to loosen and dissolve dried paint or debris that may have accumulated in the sprayer.

  3. The mild detergent acts as a gentle cleanser, breaking down stubborn residue without causing any damage to the equipment.

  4. Immerse the sprayer parts in the solution and let them soak for a few minutes to allow the warm water and detergent to work their magic.

  5. After soaking, use a brush or cloth to scrub away any remaining residue. This will ensure a thorough cleaning of your sprayer.

By following these steps, you can effectively clean your sprayer and ensure its optimal performance. After cleaning with warm water and mild detergent, the subsequent section will discuss solvent-based cleaning solutions to further enhance the cleaning process.

Advertisement

Solvent-Based Cleaning Solutions

When it comes to cleaning out an airless paint sprayer, you can’t go wrong with a solvent-based cleaning solution. These solutions are specially formulated to dissolve and remove paint residue from the sprayer’s components.

There are various solvent-based alternatives available in the market, including eco-friendly options that are less harmful to the environment. These solutions work by breaking down the paint particles, allowing them to be easily flushed out of the sprayer.

It is important to follow the manufacturer’s instructions when using these solutions, as some may require dilution with water or specific application techniques.

After cleaning with a solvent-based solution, it is recommended to further protect the sprayer by cleaning it with pump armor. This helps prevent corrosion and keeps the sprayer in optimal condition for future use.

Cleaning with Pump Armor

Ensure the longevity of your equipment by giving it the protection it deserves through the use of pump armor for maintenance purposes. Pump armor is a specially formulated solution designed to prevent corrosion and clogging in airless paint sprayers. It provides a barrier against moisture and helps to prolong the life of the equipment.

Advertisement

To convey a deeper understanding of the benefits of pump armor, here is a comparison table:

Pump Armor Alternative
Prevents corrosion and clogging Regular cleaning solution
Extends equipment lifespan No alternative
Provides moisture barrier No alternative

Cleaning frequency is an important factor to consider when using pump armor. It is recommended to clean the sprayer thoroughly after each use, or at least every few weeks if not in frequent use. This will ensure optimal performance and prevent any build-up that could affect the spray pattern.

In the subsequent section about ‘flushing the system,’ we will discuss the importance of removing any remaining paint or pump armor from the sprayer to maintain its efficiency.

Flushing the System

After cleaning the paint sprayer with Pump Armor, it is necessary to flush the system to remove any leftover residue. Flushing the system is a crucial step in maintaining the longevity and performance of your airless paint sprayer.

To effectively flush the system, follow these recommended cleaning techniques:

Advertisement
  1. Remove the Pump Armor from the sprayer and pour it back into its container.
  2. Fill the sprayer’s paint container with a suitable cleaning agent, such as warm soapy water or mineral spirits.
  3. Attach the paint container to the sprayer and turn on the unit.
  4. Spray the cleaning agent through the sprayer until the liquid coming out is clear and free from any paint particles.

By following these steps, you will ensure that your airless paint sprayer is thoroughly cleaned and ready for its next use.

Now let’s move on to the next section, where we will discuss cleaning the spray gun.

Cleaning the Spray Gun

To effectively maintain the performance of your airless paint sprayer, it’s essential to clean and maintain the spray gun. Cleaning the spray gun regularly not only ensures its longevity but also guarantees a smooth and precise paint application. There are various cleaning techniques and products available to efficiently clean the spray gun. One of the best cleaning products to use is a specialized gun cleaner, which effectively removes paint residue and prevents clogs. Additionally, using a cleaning brush and solvent can help dislodge any stubborn particles. Remember to always follow the manufacturer’s instructions for cleaning and maintenance. Now that we’ve covered cleaning the spray gun, let’s move on to cleaning the hose and pump to ensure the overall functionality of your airless paint sprayer.

Cleaning the Hose and Pump

To clean the hose and pump of an airless paint sprayer, the first step is to disconnect the hose from the sprayer. This allows for easier access and prevents any accidental spraying.

Next, flush the hose with a cleaning solution to remove any leftover paint or debris.

Finally, flush the pump with the cleaning solution to ensure that it is thoroughly cleaned and ready for the next use.

Advertisement

Disconnecting the hose

To disconnect the hose from the airless paint sprayer and clean it out, follow these steps:

  1. Remove attachments: Unscrew the coupler that connects the hose to the sprayer.
  2. Release pressure: Trigger the gun to release any remaining paint and allow it to drain out.
  3. Disconnect from the gun: Twist the hose counterclockwise to disconnect it from the gun. Be gentle to avoid damage.
  4. Flush with cleaning solution: Proceed to the next step of flushing the hose with a cleaning solution to remove any residual paint.

Regularly cleaning the hose is recommended by 85% of professional painters for optimal performance and longevity of the paint sprayer.

Flushing the hose with cleaning solution

Next, you’ll want to flush the hose with a cleaning solution, ensuring that any leftover paint is thoroughly removed. Regular maintenance is crucial to keep your airless paint sprayer in optimal condition. By using specialized cleaning solutions, you can effectively clean the hose and prevent any clogs or blockages that may affect the performance of the sprayer.

To emphasize the importance of this step, let’s take a look at the following table:

Cleaning Solution Benefits
Solvent-based Effective in removing oil-based paints
Water-based Ideal for cleaning water-based paints
Citrus-based Offers a natural and environmentally friendly option

By flushing the hose with a cleaning solution, you ensure that any residue or paint particles are removed, preventing them from contaminating future paint jobs. This step is crucial for maintaining the longevity and efficiency of your airless paint sprayer. Speaking of maintenance, the next section will discuss flushing the pump with a cleaning solution to further enhance its performance.

Flushing the pump with cleaning solution

After thoroughly cleaning the hose with a suitable cleaning solution, it is crucial to move on to the next step of the cleaning process. This step involves flushing the pump, which is of utmost importance. It ensures the longevity and optimal performance of your airless paint sprayer. Regular maintenance and a recommended cleaning schedule are essential to keep your sprayer in top condition.

Advertisement

To flush the pump, begin by removing the suction tube and placing it in a bucket filled with the cleaning solution. Then, turn on the sprayer and allow the cleaning solution to circulate through the pump for a few minutes. This will effectively remove any residual paint or debris that may have accumulated.

Maintaining a strict cleaning schedule and following these steps diligently will prevent clogs, blockages, and potential damage to your pump.

Now that the pump is cleaned, let’s move on to the next section about cleaning the pressure roller.

Cleaning the Pressure Roller

To properly clean the pressure roller, start by removing it from the handle. This can usually be done by unscrewing a nut or releasing a latch.

Once the roller is separated, soak it in a cleaning solution and scrub it with a brush to remove any paint residue or debris.

Advertisement

Finally, rinse the roller thoroughly with water and allow it to dry completely before reattaching it to the handle.

Removing the roller from the handle

To begin, detach the roller from the handle by simply sliding it off. According to a study, 75% of people find this step satisfying. It is important to remove the roller from the handle to clean the roller head thoroughly.

Once the roller is detached, focus on soaking and scrubbing the roller to eliminate any paint residue or debris. Soaking the roller in a cleaning solution helps loosen dried paint, making it easier to scrub away.

After soaking, use a scrub brush or sponge to gently scrub the roller, paying extra attention to the bristles. This ensures that all paint particles are completely removed.

With the roller now clean, we can transition into the next section and move on to soaking and scrubbing the roller head for a pristine cleaning process.

Advertisement

Soaking and scrubbing the roller

To properly maintain the roller, start by immersing the roller head in a cleaning solution. This allows the bristles to release any paint or debris. Soaking techniques are crucial for optimal roller maintenance. By submerging the roller head, the bristles can loosen any accumulated paint particles or residue. It’s important to soak the roller head for a sufficient amount of time to ensure thorough cleaning.

After soaking, gently scrub the roller head with a brush to remove stubborn paint or debris. This prepares the roller for the next step in the cleaning process. Rinse and dry the roller to complete the maintenance routine.

Rinsing and drying the roller

After the roller has been thoroughly soaked and scrubbed, it’s time to give it a refreshing rinse and ensure it’s completely dry before storing it away for future use.

Here are some rinsing techniques to follow for effective airless sprayer maintenance:

  1. Use clean water: Rinse the roller with clean water to remove any remaining paint or cleaning solution.

  2. Thoroughly rinse: Ensure that every part of the roller is rinsed, including the core and the fabric.

  3. Check for residue: Inspect the roller for any leftover paint or debris. If necessary, repeat the rinsing process until it is clean.

  4. Allow for proper drying: After rinsing, shake off any excess water and allow the roller to air dry completely before storing.

By following these rinsing techniques, you can maintain the performance and longevity of your airless paint sprayer.

Advertisement

Now, let’s move on to some maintenance tips for ensuring its long-lasting efficiency.

Maintenance Tips for Longevity

To ensure your airless paint sprayer lasts for years to come, it’s crucial that you perform regular maintenance and cleaning. Cleaning techniques for your sprayer can vary depending on the type of paint you are using, but there are some general guidelines you can follow.

First, always consult the manufacturer’s instructions for specific cleaning instructions. Generally, you will need to flush the sprayer with a cleaning solution after each use. This will help remove any remaining paint and prevent clogs.

Additionally, it’s important to establish a maintenance schedule for your sprayer. This includes regular inspections for any damage or wear, as well as lubricating any moving parts.

By following these maintenance tips, you can keep your airless paint sprayer clean and functional for years to come.

Advertisement

Conclusion: Keeping Your Airless Paint Sprayer Clean and Functional

Conclusion: Keeping Your Airless Paint Sprayer Clean and Functional

By following these simple maintenance tips, you can ensure your airless paint sprayer stays in top shape and keeps your painting projects smooth and hassle-free.

Regular cleaning is crucial to maintain the functionality of your sprayer. After each use, flush the sprayer with water or an appropriate cleaning solution to remove any residual paint. Pay special attention to the filters, nozzles, and hoses, as they tend to accumulate debris over time. Inspect these components regularly and replace them if necessary.

Troubleshooting common issues such as clogged nozzles or uneven spray patterns can often be resolved by cleaning or replacing these parts.

Additionally, lubricating the moving parts and storing the sprayer properly in a clean and dry area will contribute to its longevity.

Advertisement

Following these maintenance tips will ensure optimal performance and extend the lifespan of your airless paint sprayer.

Frequently Asked Questions

How often should I clean my airless paint sprayer?

To properly maintain your airless paint sprayer and extend its lifespan, it is recommended to clean it after each use. Regular cleaning prevents clogs and ensures optimal performance.

Can I use any type of cleaning solution to clean my airless paint sprayer?

Yes, you can use various cleaning solutions to clean your airless paint sprayer. There are several cleaning solution options available, and alternative cleaning methods can be used depending on the specific needs of your sprayer.

What should I do if my airless paint sprayer gets clogged during use?

If my airless paint sprayer gets clogged during use, I can prevent it by properly filtering and thinning the paint. Troubleshooting common issues involves checking the nozzle, pressure, and ensuring proper cleaning techniques.

Are there any safety precautions I should take while cleaning my airless paint sprayer?

When cleaning an airless paint sprayer, it is important to take safety measures. Use recommended cleaning products specifically designed for paint sprayers to ensure effective and safe cleaning.

Advertisement

How long does it typically take to clean an airless paint sprayer?

Typically, cleaning an airless paint sprayer takes around 15-30 minutes. To maintain it, follow these best practices: flush the system with a cleaning solution, remove any remaining paint, clean the filters, and lubricate the pump regularly.

Conclusion

In conclusion, it’s crucial to keep your airless paint sprayer clean and well-maintained for optimal performance. Neglecting regular cleaning can lead to clogged nozzles, uneven spray patterns, and reduced efficiency.

Did you know that 80% of paint sprayer issues are caused by improper cleaning and maintenance? By using the appropriate cleaning solutions and regularly flushing the system, you can extend the lifespan of your sprayer and ensure consistent, high-quality results.

So, what can you run through an airless paint sprayer to clean it out? There are several options:

  1. Water: Flushing your sprayer with water after each use is a good practice to remove any leftover paint or residue. It’s best to use warm water, as it helps to dissolve the paint more effectively.

  2. Solvent-based cleaners: If water alone doesn’t do the trick, you can use solvent-based cleaners specifically designed for paint sprayers. These cleaners are effective in removing stubborn paint buildup and can help unclog the nozzle.

  3. Mineral spirits: Another option is to use mineral spirits, which are commonly used for cleaning paint sprayers. They work well in dissolving oil-based paints and can be an effective cleaning agent.

Remember to always refer to the manufacturer’s instructions for cleaning and maintenance guidelines specific to your airless paint sprayer model.

Advertisement

By taking the time to clean your sprayer properly, you can prevent issues and ensure that your sprayer continues to perform at its best. Regular cleaning and maintenance are key to a functional and long-lasting sprayer.

Jule’s attention to detail, editorial prowess, and commitment to delivering high-quality content ensure that every article and review on our website is polished and reader-friendly. Jule’s vision for the website as a one-stop destination for paint sprayer enthusiasts has been instrumental in shaping the platform into what it is today.

Continue Reading
Advertisement

Airless Paint Sprayers FAQs

Airless Paint Sprayer How Does It Work

Published

on

By

An image showcasing the inner workings of an airless paint sprayer, with high-pressure piston pushing paint through a nozzle, atomizing it into a fine mist, and evenly coating a surface

Have you ever fantasized about having a magic wand that could effortlessly give your walls a fresh coat of paint?

Well, let me introduce you to the airless paint sprayer – the closest thing to a painting wizard that you’ll ever encounter.

This ingenious device removes the need for traditional brushes and rollers, allowing you to cover large surfaces in record time.

With its powerful pumping system, precise pressure control, and efficient paint delivery system, the airless paint sprayer revolutionizes the way we tackle painting projects.

But how does it actually work?

Advertisement

In this article, we will delve into the inner workings of this remarkable tool, exploring the pumping system, pressure control system, paint delivery system, and the crucial nozzle and tip.

We will also discuss safety considerations, maintenance, and cleaning, as well as share some tips and tricks to help you make the most out of your airless paint sprayer.

So, get ready to uncover the secrets behind this paint-spraying marvel!

Key Takeaways

  • Airless paint sprayers use high pressure to atomize paint and create a fine spray pattern.
  • Regular maintenance, including cleaning filters and lubricating parts, is essential for optimal performance.
  • Proper surface preparation and technique, such as holding the sprayer at a consistent distance and using controlled motions, are important for achieving smooth, streak-free results.
  • Troubleshooting issues like uneven spray patterns or loss of pressure can often be resolved by checking filters, adjusting pressure, or inspecting the spray tip.

The Basics of Airless Paint Sprayers

The functionality of airless paint sprayers is rooted in their ability to atomize paint without the need for compressed air. Unlike traditional paint sprayers that rely on air pressure to disperse paint particles, airless paint sprayers use a high-pressure pumping system to force paint through a small nozzle, creating a fine mist of paint.

Advertisement

This technique allows for a more even and consistent application of paint, resulting in a professional-looking finish. One of the major benefits of using an airless paint sprayer is its ability to cover large areas quickly and efficiently. This method is especially useful for painting large surfaces such as walls or fences.

Additionally, airless paint sprayers can handle a wide range of paint types, from thick latex paints to thin stains. The pumping system of the sprayer is responsible for generating the necessary pressure to propel the paint through the nozzle, which will be discussed in the subsequent section.

The Pumping System

To understand how it functions, imagine yourself operating an airless paint sprayer and witnessing the powerful pumping system in action. The pumping system is the heart of the airless paint sprayer, responsible for pressurizing and delivering paint to the nozzle. It consists of a motor that drives a piston or diaphragm, creating the necessary pressure to atomize the paint.

Proper maintenance of the pumping system is crucial for optimal performance. Regularly cleaning the filters and checking for any clogs or blockages will ensure a smooth operation. Troubleshooting tips for the pumping system include checking for leaks, inspecting the seals and gaskets, and adjusting the pressure settings.

Understanding how the pump works sets the stage for the next section about the pressure control system, which allows for precise regulation of paint flow and fan width.

Advertisement

The Pressure Control System

Imagine operating an airless paint sprayer and witnessing the powerful pumping system in action, which is responsible for pressurizing and delivering paint to the nozzle. However, the pumping system alone is not enough to ensure an efficient and controlled paint application. That’s where the pressure control system comes into play.

The pressure control techniques employed in airless paint sprayers allow for precise control over the spray pattern and the amount of paint being applied. By adjusting the pressure, you can achieve different spray patterns, such as a narrow fan or a wide fan, depending on your project requirements. This level of control ensures uniform coverage and reduces overspray, saving both time and paint.

The benefits of pressure control in an airless paint sprayer are undeniable, as it allows for professional-quality results with minimal effort.

Advertisement

Now, let’s move on to the next section and explore the paint delivery system.

The Paint Delivery System

Operating an airless paint sprayer requires understanding the intricacies of the paint delivery system. This system ensures precise and efficient application of paint.

The paint delivery system consists of a pump that pressurizes the paint and a hose that delivers it to the spray gun. As the pump forces the paint through a small orifice, it atomizes the paint, breaking it up into tiny particles. The size of these particles can be adjusted by controlling the pressure and the size of the orifice.

Additionally, the paint viscosity plays a crucial role in how well the paint atomizes. Thicker paints may require higher pressures to achieve proper atomization.

The paint delivery system is responsible for delivering the atomized paint to the nozzle and tip. From there, it is sprayed onto the surface.

Advertisement

The Nozzle and Tip

The nozzle and tip work in unison, creating a delicate dance as they release a fine mist of color onto the waiting canvas. The nozzle is the final point of exit for the paint, responsible for shaping and directing the spray pattern. It is crucial to keep the nozzle clean and free from any clogs or debris to ensure a smooth and consistent flow of paint. Regular nozzle maintenance is essential for optimal performance and longevity of the airless paint sprayer.

Tip selection is another important aspect of achieving the desired results. The tip determines the size of the spray pattern and the amount of paint that is delivered. Different tips are available for various applications, allowing for versatility and customization. It is important to choose the right tip for the specific project to achieve the desired coverage and finish.

Moving forward, understanding spray patterns and coverage will further enhance the painting process.

Advertisement

Spray Patterns and Coverage

Get ready to witness the captivating artistry of spray patterns and coverage as you discover the incredible versatility and precision they bring to your painting experience.

Spray patterns refer to the shape and size of the paint particles being emitted from the nozzle. The airless paint sprayer offers various spray techniques, including horizontal, vertical, and circular patterns, allowing you to achieve different effects on different surfaces.

The coverage of the spray pattern depends on the paint thickness and the distance between the sprayer and the surface. Thicker paint requires a wider spray pattern, while thinner paint requires a narrower pattern for better control and even coverage.

Safety considerations should never be overlooked, as the high pressure of the sprayer can cause paint to atomize and become airborne. So, let’s now explore the important safety measures to ensure a smooth painting process.

Safety Considerations

Let’s dive into the essential safety measures to ensure a smooth and worry-free painting experience. When using an airless paint sprayer, it’s crucial to take certain safety precautions to protect yourself and others. Here are some key points to keep in mind:

Advertisement
  • Always wear appropriate protective gear, including gloves, safety glasses, and a respirator, to shield yourself from potentially harmful paint particles and fumes.

  • Make sure the work area is well-ventilated to minimize the inhalation of paint vapors.

  • Avoid spraying near open flames or sparks to prevent fire hazards.

  • Before starting, carefully read and follow the manufacturer’s instructions and safety guidelines.

  • Keep children and pets away from the work area to prevent any accidents or exposure to paint chemicals.

By adhering to these safety precautions and wearing the necessary protective gear, you can ensure a safe and efficient painting process.

Moving on to maintenance and cleaning, it’s important to…

Maintenance and Cleaning

To ensure a smooth and worry-free painting experience, remember to properly maintain and clean your equipment. Regular maintenance of your airless paint sprayer is essential for optimal performance.

Here are some maintenance tips to keep in mind. First, always check the manufacturer’s guidelines for specific instructions on maintenance and cleaning. Inspect the sprayer for any signs of damage or wear before each use. Clean the filters regularly to prevent clogs and ensure a consistent spray pattern. Additionally, lubricate the pump and other moving parts as recommended by the manufacturer.

When it comes to cleaning techniques, make sure to thoroughly flush out the sprayer after each use to remove any leftover paint or debris. Use a cleaning solution recommended by the manufacturer and follow their instructions carefully.

Advertisement

By following these maintenance tips and cleaning techniques, you can keep your airless paint sprayer in top condition for years to come.

Now, let’s move on to some tips and tricks for using an airless paint sprayer.

Tips and Tricks for Using an Airless Paint Sprayer

Mastering the art of using an airless paint sprayer is like effortlessly wielding a magic wand, effortlessly transforming a blank canvas into a vibrant masterpiece. To improve efficiency and achieve professional results, here are some tips and tricks:

  1. Properly prepare the surface: Clean it thoroughly, remove any loose paint or debris, and repair any cracks or imperfections. This will ensure a smooth and even finish.

  2. Use the right technique: Hold the sprayer at a consistent distance from the surface, usually around 12 inches. Move your arm in a steady, controlled motion, overlapping each pass by 50% to avoid streaks.

  3. Troubleshooting common issues: If the paint is coming out unevenly, check the nozzle for clogs and adjust the pressure settings accordingly. If there are drips or runs, reduce the pressure and increase the speed of your strokes.

In the next section, we’ll discuss how to choose the right airless paint sprayer for your needs, ensuring that you have the perfect tool for your painting projects.

Choosing the Right Airless Paint Sprayer for Your Needs

If you’re looking to become a painting wizard, finding the perfect wand for your artistic endeavors can make all the difference.

Advertisement

When choosing the right airless paint sprayer for your needs, it’s important to consider factors such as the size of your projects, the type of paint you’ll be using, and your budget.

Additionally, proper maintenance and troubleshooting are key to keeping your airless paint sprayer running smoothly. Regular maintenance, including cleaning and lubricating the sprayer, can prevent clogs and ensure consistent paint flow.

Troubleshooting common issues like uneven spray patterns or loss of pressure can be done by checking the filters, adjusting the pressure settings, or inspecting the spray tip for damage.

By selecting the right airless paint sprayer and maintaining it properly, you’ll be well on your way to achieving professional-quality paint jobs.

Frequently Asked Questions

Can I use an airless paint sprayer for any type of paint or coating?

Yes, an airless paint sprayer can be used for any type of paint or coating, including automotive painting and furniture refinishing. It provides efficient and even coverage, making it a versatile tool for various applications.

Advertisement

How long does it typically take to clean and maintain an airless paint sprayer?

Cleaning and maintaining an airless paint sprayer typically takes about 15-30 minutes. It’s important to clean it after each use to prevent clogs and ensure optimal performance. Regular maintenance, such as changing filters and lubricating parts, should be done according to the manufacturer’s recommendations.

Are there any safety precautions I should take when using an airless paint sprayer?

When using an airless paint sprayer, it is important to take safety measures to protect yourself. Wear proper equipment such as goggles, gloves, and a mask to prevent any potential hazards or inhalation of paint particles.

Can I use an airless paint sprayer for large-scale projects such as painting the exterior of a house?

Yes, an airless paint sprayer is ideal for large-scale projects like painting the exterior of a house. With its high pressure and wide spray pattern, it can cover large areas quickly and efficiently, saving you time and effort.

Are there any specific techniques or tricks I should know when using an airless paint sprayer for the best results?

When using an airless paint sprayer for the best results, there are a few specific techniques and tricks to keep in mind. Properly adjusting the pressure, maintaining a consistent speed, and overlapping each pass will ensure a smooth and even coat.

Conclusion

In conclusion, using an airless paint sprayer can greatly simplify and expedite your painting projects. You can achieve professional-looking results in no time with its efficient pumping system, precise pressure control, and effective paint delivery system. But remember, safety should always be a top priority, so make sure to follow the manufacturer’s instructions and wear protective gear.

Advertisement

Finally, when choosing the right airless paint sprayer, consider factors such as the size of the project and the type of paint you’ll be using. So why settle for tedious brush strokes when you can effortlessly transform any surface with an airless paint sprayer?

Continue Reading

Airless Paint Sprayers FAQs

How To Paint The Exterior Of A House With An Airless Sprayer

Published

on

By

An image showcasing a skilled painter effortlessly spraying a fine mist of paint onto a pristine white house exterior, with smooth strokes and precise angles, using an efficient, high-powered airless sprayer

Imagine revitalizing the exterior of your home with a fresh, efficient coat of paint. Using an airless sprayer turns this task into a breeze.

In this article, I will guide you through the process of painting the exterior of your house using an airless sprayer. From preparing the surface to achieving a smooth finish, I will provide you with all the necessary steps and tips to ensure a professional-looking result.

We will explore topics such as selecting the right paint and equipment, setting up the sprayer, applying the primer and paint coats, as well as dealing with common challenges that may arise.

By the end of this article, you will have the knowledge and confidence to tackle this project and give your house a stunning new look. So, let’s dive in and discover the wonders of painting with an airless sprayer.

Key Takeaways

  • Maintain a distance of 12-18 inches from the surface when painting
  • Use the right nozzle for a flawless finish
  • Apply paint in thin, even layers to avoid drips and runs
  • Properly prep and prime the surface before painting

Preparing the Exterior Surface

Advertisement

Get ready to transform your house into a stunning work of art by prepping the exterior surface like a pro! Surface preparation is a crucial step before painting with an airless sprayer.

Start by thoroughly cleaning the surface using a power washer or a scrub brush and detergent to remove dirt, mildew, and loose paint.

Next, inspect the exterior for any damaged areas such as cracks or holes. Repair these areas using a suitable filler or putty and allow it to dry completely.

Sand the repaired areas smooth to ensure a seamless finish.

Finally, make sure to prime any bare wood or metal surfaces before applying paint.

Advertisement

Now that the surface is prepped and ready, let’s move on to selecting the right paint and equipment for the job.

Selecting the Right Paint and Equipment

Investing in high-quality materials and the proper tools is crucial for achieving a flawless and professional finish when transforming the outside of your home. When selecting the right paint, consider the type of surface you’ll be painting. For example, if your house has a lot of wood siding, you may want to choose an exterior paint that’s specifically formulated for wood.

Additionally, consider the climate in your area and choose a paint that can withstand the elements. Another important factor to consider is selecting the proper spray nozzle for your airless sprayer. The size of the nozzle will determine the spray pattern and coverage. It’s important to choose a nozzle size that’s appropriate for the size of your project.

By choosing the right paint type and selecting the proper spray nozzle, you can ensure a smooth and even application. Once you’ve selected the right paint and equipment, it’s time to set up the airless sprayer and get started on your project.

Setting Up the Airless Sprayer

Advertisement

Once you’ve gathered your top-quality materials and chosen the perfect paint, it’s time to dive into the exhilarating process of setting up your powerful airless sprayer.

Before getting started, it’s important to familiarize yourself with airless sprayer troubleshooting and how to adjust the spray pressure. Troubleshooting tips include checking for clogs or blockages in the sprayer nozzle and ensuring that all connections are secure.

To adjust the spray pressure, refer to the manufacturer’s instructions and make small adjustments until you achieve the desired spray pattern and coverage.

Once your airless sprayer is set up and ready to go, you can move on to applying the primer, which will provide a smooth and even base for your paint.

Advertisement

Applying the Primer

Before diving into the exciting process of applying primer to your surface, it’s fascinating to note that using primer can increase the lifespan of your paint job by up to 50%, ensuring a long-lasting and durable finish.

Primer application techniques are crucial for achieving a smooth and even surface. When using an airless sprayer, it’s important to maintain a consistent distance from the surface and apply the primer in overlapping strokes. This ensures that the primer is evenly distributed and avoids any streaks or uneven coverage.

Additionally, choosing the right primer for your exterior surface is essential. Consider factors such as the type of surface, weather conditions, and desired finish.

Now that the primer application is complete, it’s time to move on to the next step of mixing and diluting the paint, which will be discussed in the following section.

Mixing and Diluting the Paint

Advertisement

Now that you’ve completed the primer application, it’s time to mix and dilute the paint, creating a smooth and flowing consistency that will effortlessly glide onto your surface.

Proper paint mixing is crucial for achieving optimal results with an airless sprayer. Start by pouring the paint into a clean and empty bucket. Use a stir stick or a paint paddle attachment for a power drill to thoroughly mix the paint. This will ensure that the pigments and binders are evenly distributed throughout the mixture.

Once the paint is well-mixed, it may need to be diluted depending on the manufacturer’s instructions or the desired viscosity. Add small amounts of water or paint thinner at a time, stirring continuously until you achieve the desired consistency. Remember to follow the manufacturer’s guidelines for proper paint dilution.

With the paint mixed and diluted to perfection, you’re now ready to start the painting process seamlessly.

Advertisement

Starting the Painting Process

When starting the painting process, I always begin with a systematic approach. This means starting from the top and working my way down, ensuring that every surface is covered evenly.

Additionally, it’s crucial to maintain a consistent spray pattern throughout the project. This ensures a uniform and professional finish, avoiding any streaks or uneven coverage.

Begin with a Systematic Approach

To kick things off, it’s best to start with a well-thought-out plan when tackling the task of painting the exterior of a house with an airless sprayer. Taking a systematic approach offers several benefits, including efficient use of time and materials, and a higher quality finish. Here is a step-by-step guide to help you through the process:

  1. Prep the surfaces: Clean and repair any damaged areas before painting.
  2. Mask off areas: Protect windows, doors, and other areas that shouldn’t be painted.
  3. Prime the surfaces: Apply a primer to ensure proper adhesion and coverage.
Step Description
1 Prep surfaces
2 Mask off areas
3 Prime surfaces

By following this systematic approach, you can ensure a smooth and successful painting project. Now, let’s move on to the next section about maintaining a consistent spray pattern.

Maintain a Consistent Spray Pattern

Maintaining a consistent spray pattern is key for achieving a professional finish when using an airless sprayer. To ensure even coverage, it’s important to keep the sprayer at a consistent distance from the surface being painted and move it at a steady pace.

Troubleshooting spray pattern issues is also crucial in achieving optimal results. If you notice uneven coverage or streaks, check the spray tip for clogs or wear and tear. Adjust the pressure settings as needed and make sure the paint viscosity is appropriate for the sprayer.

Advertisement

Additionally, practicing proper technique, such as overlapping each stroke by 50%, can help maintain a consistent spray pattern. By following these guidelines, you can achieve a flawless finish that prepares your house for the subsequent section about applying the paint coats.

Applying the Paint Coats

Now is the perfect time to grab an airless sprayer and transform the exterior of your house with a smooth and efficient coat of paint. To achieve professional results, it’s important to understand proper painting techniques and choose the right nozzle for your sprayer.

Here are some tips to help you apply the paint coats effectively:

  • Start by applying a thin and even first coat to create a solid foundation.

  • Allow the first coat to dry completely before applying the second coat.

  • Use long, overlapping strokes to maintain a consistent coverage.

  • Adjust the sprayer’s pressure to control the thickness of the paint.

  • Keep a steady pace and maintain a distance of 12-18 inches from the surface.

By following these techniques and using the right nozzle, you can achieve a flawless finish.

Now, let’s move on to the next section and discuss how to deal with common challenges that may arise during the painting process.

Advertisement

Dealing with Common Challenges

Facing common challenges during the painting process can be a frustrating experience, but with the right techniques, you can overcome them and achieve a flawless finish.

When dealing with weather conditions, it’s important to choose the right time to paint. Avoid painting in extreme heat or cold, as it can affect the paint’s performance. Additionally, rain or high humidity can also cause issues, so ensure that the weather is dry and suitable for painting.

Troubleshooting common equipment issues is also crucial. If the spray pattern is uneven or splattering, check the nozzle for clogs or wear and replace if necessary. Inconsistent pressure or paint flow may indicate a problem with the pump or hose, so inspect and repair or replace any damaged parts.

By addressing these challenges and taking the necessary precautions, you can ensure a smooth finish that will enhance the appearance of your house.

Achieving a Smooth Finish

To achieve a smooth finish, you’ll need to ensure that your surface is properly prepped and primed before applying the paint. For example, if you’re painting a wooden fence, make sure to sand it down and apply a coat of primer to seal the wood and create a smooth base for the paint.

Advertisement

To further enhance the smoothness and achieve a glossy finish, here are some additional tips:

  1. Use a high-quality paint that’s designed for exterior surfaces.
  2. Apply the paint in thin, even layers to avoid drips and runs.
  3. Maintain a consistent distance between the sprayer and the surface to avoid overspray.
  4. Practice proper technique, such as using smooth, overlapping strokes.

By following these steps, you can achieve a smooth and glossy finish on your exterior surfaces while minimizing overspray.

Now, let’s move on to cleaning and maintaining the sprayer.

Cleaning and Maintaining the Sprayer

Proper maintenance of your sprayer is essential to ensure its longevity and optimal performance. After each use, it’s important to thoroughly clean the sprayer to remove any leftover paint and prevent clogs.

Start by disconnecting the sprayer from the power source and relieving any built-up pressure. Next, disassemble the sprayer and soak the parts in a cleaning solution specifically designed for sprayers. Use a brush or cloth to remove any stubborn paint residue.

Once all the parts are clean, rinse them with water and allow them to dry completely before reassembling. Regularly check and replace any worn or damaged parts to maintain the sprayer’s efficiency.

Advertisement

By following these cleaning and maintenance practices, you can ensure that your sprayer continues to deliver smooth and even paint application.

Frequently Asked Questions

How long does it take for the primer to dry before applying the paint coats?

Primer needs proper preparation to prevent peeling. Prioritize the process by cleaning the surface and maintaining the airless sprayer. Use a dry time of 24 hours before applying paint coats for optimal results.

Can I use an airless sprayer to paint the interior walls of my house?

Using an airless sprayer for interior walls has pros and cons. It can save time and provide a smooth finish, but it requires proper preparation and masking. Tips for achieving a smooth finish include using a high-quality paint and maintaining a consistent spray pattern.

How many coats of paint should I apply for optimal coverage and durability?

To achieve optimal coverage and durability, it is recommended to apply two coats of paint on the exterior of a house. Properly prepping the surface and using the right techniques with an airless sprayer can help achieve a smooth finish.

What safety precautions should I take when using an airless sprayer?

When using an airless sprayer, it is important to prioritize safety. Wearing appropriate safety equipment, such as goggles, gloves, and a respirator, is crucial. Additionally, ensure proper ventilation to minimize the risk of inhaling harmful fumes.

Advertisement

Is it necessary to use a specific type of paint for exterior surfaces when using an airless sprayer?

When using an airless sprayer for exterior surfaces, it is important to choose the right paint. Opt for a paint specifically designed for exteriors to ensure a smooth and even finish. Here are some tips.

Conclusion

In conclusion, painting the exterior of a house with an airless sprayer is a convenient and efficient way to achieve a professional-looking finish. By properly preparing the surface, selecting the right paint and equipment, and following the steps for application, you can transform your home’s appearance.

Remember to address any challenges that may arise and strive for a smooth finish. With regular cleaning and maintenance of the sprayer, you’ll be able to enjoy the lasting beauty of your freshly painted house for years to come.

Continue Reading

Airless Paint Sprayers FAQs

How Much Paint To Prime Airless Sprayer

Published

on

By

An image showcasing the perfect balance of paint and primer being effortlessly sprayed through an airless sprayer

As a seasoned painter, I have learned the importance of priming for obtaining an ideal paint finish. It serves as a preliminary coating that gets the surface ready for an impressive result. Nevertheless, a frequent question concerns how much paint is needed to prime an airless sprayer.

Well, fear not, because in this article, I will guide you through the process of calculating the right amount of paint for your airless sprayer.

Understanding the importance of priming is crucial. It ensures better adhesion, smooth application, and a longer-lasting finish. To determine the amount of paint needed, we must consider factors such as the surface area, recommended coverage rate, and the type and condition of the surface.

So, buckle up and join me as we dive into the world of airless sprayer priming and discover the secrets to achieving a flawless paint job.

Key Takeaways

  • Priming with an airless sprayer ensures better adhesion, smooth application, and a longer-lasting finish.
  • Factors such as surface area, recommended coverage rate, and the type and condition of the surface should be considered when determining the amount of paint needed.
  • Calculating the surface area helps avoid wastage, save money, achieve an even finish, and plan efficiently.
  • Surface texture plays a role in paint adhesion and absorption, so proper surface preparation is essential for optimal paint coverage and longevity.

Understand the Importance of Priming

Advertisement

Priming your airless sprayer is crucial to ensure a smooth and flawless paint job. As an experienced painter, I understand the importance of proper technique when it comes to using a primer. It creates a smooth and even surface for the paint to adhere to, resulting in a more professional finish.

Not only does priming help to hide imperfections on the surface, but it also improves the durability and longevity of the paint job. By using a primer, you can prevent the paint from peeling or chipping over time.

Now that we understand the importance of priming, let’s move on to the next step: calculating the surface area to be painted.

Calculate the Surface Area to be Painted

To figure out the amount of coverage needed, you’ll want to calculate the total surface area you’ll be painting.

Did you know that the average surface area of a room is around 400 square feet?

Advertisement

When estimating paint quantity, it’s essential to consider the size of the area you’ll be covering.

Here are four reasons why calculating the coverage area is crucial:

  1. Avoid wastage: By knowing the exact surface area, you can purchase the right amount of paint, preventing unnecessary waste.

  2. Save money: Calculating the coverage area allows you to buy the correct quantity, ensuring you don’t overspend on excess paint.

  3. Achieve an even finish: Understanding the coverage area helps you apply the paint evenly, avoiding streaks or patchy spots.

  4. Efficient planning: By calculating the surface area, you can plan your painting project efficiently, ensuring you have enough time and resources.

By determining the recommended coverage rate of the paint, you’ll be better equipped to proceed with your project smoothly.

Determine the Recommended Coverage Rate of the Paint

Advertisement

To ensure a flawless outcome for your painting project, it’s crucial to determine the recommended coverage rate of the paint you’ll be using. This will help you calculate the paint thickness and determine the paint drying time. The coverage rate refers to the amount of paint needed to cover a specific surface area. It is typically measured in square feet per gallon. To determine the recommended coverage rate, consult the manufacturer’s instructions or check the paint can label. It’s important to note that the coverage rate may vary depending on the type and condition of the surface you are painting. Considering the type and condition of the surface is the next step in ensuring a successful paint job.

Consider the Type and Condition of the Surface

Before diving into your painting project, take a moment to consider the type and condition of the surface you’ll be working on – it could make all the difference in achieving a stunning end result.

The surface texture plays a crucial role in how the paint adheres and looks once applied. Smooth surfaces require less paint compared to rough or porous surfaces, as they tend to absorb more.

Additionally, the condition of the surface affects how well the paint will adhere and how long the finish will last. Proper surface preparation, such as cleaning, sanding, or priming, is essential to ensure optimal paint coverage and longevity.

By carefully considering the type and condition of the surface, you can determine the appropriate amount of paint needed for your airless sprayer.

Advertisement

Now, let’s move on to the next step and adjust for overspray and wastage.

Adjust for Overspray and Wastage

Consider the amount of overspray and wastage that may occur during the painting process, as it can account for up to 30% of the total paint used. Adjusting for overspray and minimizing wastage is crucial to ensure that you have enough paint for the job.

To start, it’s important to understand the airless sprayer’s spray pattern and adjust the nozzle accordingly. By fine-tuning the spray pattern, you can reduce overspray and prevent excessive paint wastage.

Advertisement

Additionally, using drop cloths or masking off areas that don’t require painting can further minimize wastage. It’s also important to control the pressure of the sprayer to avoid unnecessary paint mist.

By following these techniques, you can optimize paint usage while achieving a quality finish.

With this in mind, let’s move on to the next section and discuss how to start with a small amount and test the spray pattern.

Start with a Small Amount and Test

Get started by trying out a small amount and testing the spray pattern to ensure a flawless finish. The testing process is crucial to determine the optimal amount of paint needed for your airless sprayer. To help you visualize the results, take a look at the following table:

Amount of Paint (in gallons) Spray Pattern Coverage
0.5 Partial Coverage
1 Moderate Coverage
2 Full Coverage
3 Excessive Coverage
4 Wasteful Overspray

By starting with a small amount, you can assess the spray pattern and coverage. Gradually increase the amount of paint until you achieve the desired result, without excessive waste or overspray. This ensures efficient use of paint and a professional finish.

Advertisement

Gradually Increase the Amount of Paint

As you start to add more paint, you’ll see the transformation in your project, and you’ll be amazed at how effortlessly your surfaces begin to come to life. Increasing the amount of paint in your airless sprayer can greatly increase efficiency and minimize wastage. Here are a few tips to keep in mind as you gradually increase the amount of paint:

  • Start by adding a small amount of paint and test how it sprays onto the surface. This will help you gauge the coverage and make adjustments if needed.

  • Once you’re satisfied with the results, gradually increase the amount of paint while monitoring the spray pattern. This allows you to find the right balance between coverage and overspray.

  • Keep an eye on the pressure gauge to ensure it remains within the recommended range. Adjust the pressure accordingly if you notice any issues.

By following these steps, you’ll be able to increase efficiency and minimize paint wastage.

Now, let’s move on to the next section about using a measuring cup or scale for accuracy.

Use a Measuring Cup or Scale for Accuracy

Using a measuring cup or scale can greatly enhance the precision of your paint application process. When it comes to priming an airless sprayer, accuracy is key. By using a measuring cup, you can ensure that you’re adding the exact amount of paint needed for optimal coverage. This not only saves you time and money but also ensures a consistent finish.

Additionally, a measuring cup allows you to easily mix the paint and any additives, such as primer, in the correct ratio, further enhancing the quality of your application. On the other hand, using a scale provides even greater accuracy, as it allows you to measure the paint by weight.

Advertisement

Whether you choose to use a measuring cup or scale, both options offer distinct benefits in terms of accuracy and precision. By incorporating these tools into your process, you can ensure a flawless paint job. Keeping track of the amount used will be crucial in achieving the desired results.

Keep Track of the Amount Used

To stay on top of your paint usage, make sure you keep track of how much you’re using each time. Tracking usage is important for estimating how much paint you will need for future projects. One way to do this is by using a measuring cup or scale, as mentioned in the previous subtopic. Another effective method is to create a simple table to record the amount of paint used for each project. This will help you calculate the average amount of paint needed per square footage. Here is an example of a table you can use:

Project Square Footage Amount of Paint Used (Gallons)
Project 1 500 2.5
Project 2 800 4.0
Project 3 1000 5.0
Project 4 600 3.0

By keeping track of your paint usage, you can better estimate how much paint you will need for future projects. This will help you plan accordingly and avoid running out of paint mid-project. Make sure to clean and maintain your airless sprayer properly to ensure its longevity and optimal performance.

Clean and Maintain Your Airless Sprayer Properly

Keeping your airless sprayer in good condition is crucial for its long-term performance and to avoid any unnecessary maintenance headaches. Here are three cleaning techniques and troubleshooting tips to help you maintain your airless sprayer properly:

  1. Regularly clean the filters: Over time, paint residue can build up in the filters, causing clogs and reducing the sprayer’s efficiency. Clean the filters after each use and replace them if necessary.

  2. Flush the system after each use: Flushing the system with clean water or solvent helps remove any remaining paint and prevents it from drying and clogging the sprayer. This simple step can greatly extend the lifespan of your sprayer.

  3. Check for leaks and wear: Inspect the sprayer for any leaks or signs of wear, such as worn seals or loose connections. Addressing these issues promptly can prevent further damage and ensure optimal performance.

By following these cleaning techniques and troubleshooting tips, you can keep your airless sprayer in top shape and avoid costly repairs.

Advertisement

Frequently Asked Questions

How do I adjust the air pressure on my airless sprayer?

To adjust the air pressure on your airless sprayer, locate the pressure control knob or dial and turn it clockwise to increase the pressure or counterclockwise to decrease it. This troubleshooting technique is essential for resolving airless sprayer issues.

Can I use a different type of paint for priming than the one I will use for the final coat?

Yes, you can use a different type of paint for priming than the one you will use for the final coat. This allows for different paint options and has the advantage of priming separately to ensure better adhesion and a smoother finish for the final coat.

What should I do if the paint starts to clog or spray unevenly?

If the paint starts to clog or spray unevenly, I would first check the nozzle for any blockages. If that doesn’t solve the issue, I would clean the sprayer thoroughly and adjust the pressure settings.

Is it necessary to clean the airless sprayer after each use?

Yes, it is necessary to clean the airless sprayer after each use. Proper cleaning ensures optimal performance and prevents clogs. Additionally, storing the sprayer in a clean and dry area will prolong its lifespan.

Can I use a primer and paint combination product instead of priming separately?

Oh, you fancy folks thinking you can skip the tedious task of priming separately! Well, a primer and paint combination product may save you time, but beware of its limited coverage and potential for uneven application. Alternatively, you can try other priming methods like using a roller or brush.

Advertisement

Conclusion

In conclusion, priming your airless sprayer is essential for achieving a flawless paint job. By calculating the surface area and recommended coverage rate, considering the surface type and condition, and adjusting for overspray and wastage, you can determine the right amount of paint needed.

Using a measuring cup or scale for accuracy and keeping track of the amount used ensures efficient usage. Lastly, maintaining your airless sprayer properly will prolong its lifespan.

So, grab your sprayer, envision a smooth and even coat of paint, and let your creativity flow!

Continue Reading
Advertisement

Affiliate disclaimer

As an affiliate, we may earn a commission from qualifying purchases. We get commissions for purchases made through links on this website from Amazon and other third parties.

Advertisement

Trending