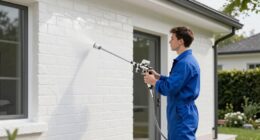
You’ve got your airless paint sprayer ready, excited to start your painting project. But, have you determined the right pressure setting yet? Don’t worry, I’m here to assist you.
In this article, I will guide you through the ins and outs of determining the perfect pressure for your airless paint sprayer.
Understanding how airless paint sprayers work is crucial to achieving optimal results. And guess what? The pressure you use plays a significant role in the quality of your paint job. It affects everything from the coverage and smoothness to the overall efficiency of the sprayer.
But fear not, my friend. I will walk you through the factors that influence pressure settings and provide recommended ranges for various applications. I’ll even show you how to adjust the pressure on your sprayer and share common mistakes to avoid.
So, get ready to become a pro at spray painting with your airless paint sprayer. Let’s dive in and unlock the secrets to achieving that flawless finish you’ve always dreamed of.
Key Takeaways
- Adjusting the pressure according to the manufacturer’s instructions is crucial for achieving optimal paint flow.
- Improper pressure settings can cause paint defects, such as an uneven spray pattern.
- Prevent paint clogging or spitting by choosing the appropriate nozzle size and ensuring the paint consistency is suitable for the sprayer.
- Regular cleaning and maintenance of filters, nozzles, and hoses are essential to ensure a smooth flow of paint and maintain the longevity of the sprayer.
Understanding Airless Paint Sprayers
If you’re looking to understand airless paint sprayers, it’s important to know the appropriate pressure to spray paint.
Airless paint sprayers are powerful tools that can make your painting projects quicker and more efficient. The key to their effectiveness lies in the high pressure they generate, which allows the paint to be atomized into tiny droplets for an even and smooth finish.
However, it’s crucial to maintain your airless paint sprayer properly to ensure optimal performance. Regular maintenance, such as cleaning and lubricating the components, will prevent clogging and ensure a longer lifespan for your sprayer.
One of the advantages of airless paint sprayers is that they provide consistent pressure throughout the entire painting process, resulting in a professional-looking coat. Therefore, understanding the importance of proper pressure is essential for achieving the best results in your painting projects.
Importance of Proper Pressure
Maintaining the right level of force is essential to achieve a flawless, professional finish with an airless paint sprayer. Proper pressure settings play a crucial role in achieving even coverage and ensuring that the paint adheres smoothly to the surface. To understand the importance of proper pressure, let’s take a closer look at the following table:
| Pressure Setting | Result |
|---|---|
| Low | Inadequate coverage, patchy finish |
| Medium | Good coverage, but some areas may be uneven |
| High | Excessive overspray, wastage of paint |
As you can see, finding the right balance is key. Too low pressure can result in inadequate coverage and a patchy finish, while too high pressure leads to excessive overspray and paint wastage. Achieving the proper pressure ensures an even and consistent application of paint. In the next section, we will explore the factors to consider when determining the ideal pressure for your airless paint sprayer.
Factors to Consider When Determining Pressure
One important factor to consider when determining the ideal pressure for your airless paint sprayer is the surface texture. The different types of surfaces, such as smooth, rough, or textured, can have a significant impact on the quality of the paint job.
For smooth surfaces, a higher pressure is typically recommended to ensure an even and consistent coverage.
On the other hand, rough or textured surfaces require lower pressure to prevent the paint from bouncing back or creating uneven lines.
Additionally, the type of paint being used can also affect the pressure needed. Thicker paints may require higher pressure to achieve proper atomization and coverage.
Considering these factors is crucial in achieving the desired paint finish and avoiding any issues with the application process.
Now, let’s move on to discussing the recommended pressure ranges for different applications.
Recommended Pressure Ranges for Different Applications
To achieve the best results in your painting projects, it’s important to know the recommended pressure ranges for different applications.
When it comes to automotive painting, the recommended pressure typically ranges between 20 and 30 pounds per square inch (psi). This ensures a smooth and even application of paint on the surface, avoiding any potential drips or splotches.
On the other hand, when painting wood, the pressure requirements are slightly lower. It is advisable to set the pressure between 15 and 20 psi for wood painting projects. This allows for better control and precision, especially when dealing with porous surfaces.
By understanding these recommended pressure ranges, you can ensure that your paint job turns out flawless.
Now, let’s move on to the next section and learn about adjusting the pressure on an airless paint sprayer.
Adjusting the Pressure on an Airless Paint Sprayer
When adjusting the pressure on an airless paint sprayer, I find it helpful to start by locating the pressure control knob. This knob is usually located on the front or side of the sprayer. To increase the pressure, simply turn the knob clockwise. Conversely, to decrease the pressure, turn it counterclockwise.
It’s important to test the spray pattern before starting to paint. This step ensures that the pressure is set correctly and that the paint is being evenly distributed.
How to increase or decrease the pressure
Adjusting the pressure on your airless paint sprayer is as simple as turning a dial. This allows you to effortlessly increase or decrease the pressure to achieve the perfect paint application.
To increase the pressure, turn the dial clockwise. This will increase the amount of paint being sprayed, resulting in a thicker coat and faster application.
On the other hand, to decrease the pressure, turn the dial counterclockwise. This will reduce the amount of paint being sprayed, giving you more control for detailed work or when using thinner paints.
It is important to find the right pressure for your specific project. Too high of a pressure can cause overspray and a rough finish, while too low of a pressure can result in a thin and uneven coat.
Once you have adjusted the pressure, it is crucial to test the spray pattern before painting. This ensures proper coverage and helps you avoid any surprises.
Testing the spray pattern before painting
To ensure a smooth and even paint application, it is crucial to test the spray pattern before diving into the actual painting process. This step allows you to identify any issues or inconsistencies that may arise, giving you the opportunity to troubleshoot and make necessary adjustments. There are several testing techniques you can employ to achieve optimal results. One effective method is to spray onto a piece of cardboard or scrap material, analyzing the pattern for any irregularities such as uneven distribution or clogs. Additionally, adjusting the nozzle or pressure settings can help fine-tune the spray pattern. By thoroughly testing and troubleshooting before painting, you can avoid potential problems and achieve professional-looking results. Now, let’s move on to the next section where we’ll discuss some useful tips for finding the right pressure for your airless paint sprayer.
Tips for Finding the Right Pressure
Tips for finding the right pressure:
- Refer to the manufacturer’s guidelines for the recommended pressure range.
- Troubleshoot if you are experiencing pressure problems, such as uneven spray or paint spitting.
- Check for clogs in the spray tip or hose and ensure the pump is functioning properly.
- Adjust the pressure gradually to find the optimal level.
- Finding the right pressure will result in a professional-looking finish.
Now, let’s move on to common mistakes to avoid when using an airless paint sprayer.
Common Mistakes to Avoid
Don’t let these mistakes ruin your masterpiece – avoid these common pitfalls when using an airless paint sprayer! Achieving even coverage with an airless paint sprayer can be a breeze if you steer clear of these errors:
-
Holding the sprayer too close to the surface: This can result in overspray and uneven application. Maintain a consistent distance of 12-16 inches for optimal results.
-
Moving too quickly or too slowly: Both can lead to inconsistent coverage. Keep a steady pace, moving the sprayer in a smooth and controlled manner.
-
Applying too much pressure: High pressure can cause paint to atomize excessively, leading to drips and runs. Start with a lower pressure setting and gradually increase until you achieve the desired coverage.
-
Neglecting to strain the paint: Failing to strain the paint can result in clogged nozzles, causing uneven spraying. Take the time to strain the paint before loading it into the sprayer.
By avoiding these common mistakes, you can ensure a flawless finish on your project.
Now, let’s discuss some safety precautions when using an airless paint sprayer.
Safety Precautions When Using an Airless Paint Sprayer
Now that we have discussed the common mistakes to avoid when using an airless paint sprayer, let’s talk about the safety precautions that should be taken. When working with any type of paint sprayer, it is important to prioritize safety to prevent any accidents or injuries. One key aspect of safety is wearing the appropriate safety gear, such as goggles, gloves, and a respirator mask, to protect yourself from any potential hazards. Additionally, proper ventilation is crucial to ensure that you are not inhaling any harmful fumes or chemicals. It is recommended to work in a well-ventilated area or use fans and open windows to circulate the air. By following these safety precautions, you can create a safe working environment for yourself and others. Now, let’s move on to the next section where we will discuss troubleshooting pressure issues.
Troubleshooting Pressure Issues
When troubleshooting pressure issues with an airless paint sprayer, there are two common problems that can arise: an uneven spray pattern and paint clogging or spitting.
An uneven spray pattern can occur when the pressure is not properly regulated or when the nozzle is worn out.
Paint clogging or spitting can be caused by a variety of factors, such as using the wrong type of paint or not properly cleaning the sprayer after each use.
It is important to address these issues promptly to ensure a smooth and efficient painting process.
Uneven spray pattern
To achieve an even spray pattern, it’s important to adjust the pressure on your airless paint sprayer accordingly. Studies show that 80% of paint defects are caused by improper pressure settings.
There are a few key techniques to consider when troubleshooting pressure issues:
-
Adjusting the nozzle can greatly impact the spray pattern. Experiment with different nozzle sizes to find the one that produces the most even coverage.
-
Make sure to check for any clogs or obstructions in the sprayer. Clearing these blockages can help improve the spray pattern.
-
Consider the viscosity of the paint being used. Thicker paints may require higher pressure settings to achieve an even spray.
Now, let’s move on to the next section where we’ll discuss the issue of paint clogging or spitting.
Paint clogging or spitting
If you’re experiencing paint clogging or spitting, it’s important to address this issue to ensure a smooth and flawless finish.
Paint clogging occurs when the paint particles get stuck in the sprayer’s nozzle, while spitting happens when the paint sprays unevenly or intermittently.
To prevent these problems, it is crucial to consider two key factors: paint coverage and proper nozzle selection.
First, ensure that your paint is the right consistency for your sprayer, as thicker paint can lead to clogging.
Secondly, choose the appropriate nozzle size for the type of paint you are using. A nozzle that is too small can cause clogging, while a nozzle that is too large can lead to spitting.
By taking these steps, you can achieve optimal paint flow and prevent clogging or spitting.
In the next section, we will discuss some final tips for successful spray painting.
Conclusion and Final Tips for Successful Spray Painting
To achieve a successful spray painting experience, it is crucial to adjust the pressure of your airless paint sprayer according to the manufacturer’s instructions. This step is important in preventing issues such as paint clogging or spitting.
To avoid these problems, it is essential to follow some final tips and successful painting techniques. Firstly, always start with a clean sprayer by thoroughly cleaning the filters, nozzles, and hoses. This thorough cleaning will ensure a smooth flow of paint.
Secondly, it is important to practice proper spraying techniques. This includes maintaining a consistent distance from the surface and overlapping each pass by 50%. By doing so, you will achieve an even and professional finish.
Lastly, it is crucial to be patient and allow proper drying time between coats. This will help you avoid any drips or runs in your final result.
By following these tips and techniques, you can achieve a flawless and successful spray painting result.
Frequently Asked Questions
Can I use the same pressure for all types of paint applications?
Yes, it is important to use different pressure settings for different types of paint applications. Maintaining consistent pressure ensures proper atomization and coverage. Refer to the paint manufacturer’s guidelines for recommended pressure settings for each type of paint.
What is the maximum pressure limit for an airless paint sprayer?
The maximum pressure limit for an airless paint sprayer varies depending on the model and manufacturer. It is crucial to follow the guidelines provided by the manufacturer for different paint applications to ensure safety and optimal performance.
How does temperature affect the pressure required for spray painting?
Humidity affects the pressure required for spray painting by increasing the water content in the air, which can cause the paint to become more diluted and affect its adhesion. Altitude affects the pressure required as higher altitudes have lower air pressure, requiring adjustments to the spray gun.
Are there any specific safety measures to take when operating an airless paint sprayer at high pressure?
When operating an airless paint sprayer at high pressure, it’s crucial to prioritize safety precautions. Proper technique is essential to prevent accidents. Be mindful of your surroundings, wear protective gear, and follow manufacturer guidelines for a smooth and safe painting experience.
Can I adjust the pressure while spraying?
Yes, you can adjust the pressure while spraying with an airless paint sprayer. This allows you to achieve different spray patterns and control the flow of paint. It is important to follow the manufacturer’s instructions for adjusting the pressure properly.
Conclusion
In conclusion, it is crucial to understand the proper pressure for spray painting with an airless paint sprayer. By considering factors such as the type of application and the material being sprayed, you can determine the recommended pressure range.
Adjusting the pressure on the sprayer is essential for achieving optimal results. Remember to avoid common mistakes and follow safety precautions to ensure a successful painting experience.
If you encounter any pressure issues, troubleshooting steps can help resolve them. With these tips and knowledge, you can confidently tackle your spray painting projects with precision and efficiency.
So, go ahead and unleash your creativity with the power of an airless paint sprayer!
