Connect with us

Airless Paint Sprayer Tips for Specific Projects

What Tips To Use With Specific Types Of Paint When Spray Painting A House With An Airless Sprayer

Published

on

An image showcasing a professional painter using an airless sprayer to apply latex paint on a wooden house exterior, while another painter applies oil-based paint on a metal fence, demonstrating tips for each type of paint

Painting a house with an airless sprayer can be daunting, especially when it comes to choosing the right nozzles for different types of paint. But fear not, dear decorators! In this article, I will share my expertise and guidance on selecting the perfect nozzles for different paints to achieve a flawless finish.

Understanding the characteristics of different types of paint is crucial in selecting the right tip size. Whether you’re dealing with smooth surfaces that require a fine finish or rough surfaces that need a wide fan tip, I’ve got you covered.

I’ll also teach you how to adjust the pressure for different paints and demonstrate proper spray techniques.

But that’s not all! I’ll also provide insights on using painting shields or masking tape, as well as tips for cleaning and maintaining your sprayer.

Safety precautions are of utmost importance, and I’ll make sure to address those as well.

Advertisement

So, prepare your airless sprayer, get your paint ready, and let’s dive into the world of spray painting with confidence and expertise!

Key Takeaways

  • Understand the characteristics of different paint types and choose the right one for your project
  • Select the appropriate tip size based on the paint type and thickness
  • Apply multiple thin coats for professional results and minimize overspray
  • Use high-quality paint designed for airless sprayers for better performance

Understanding Different Types of Paint

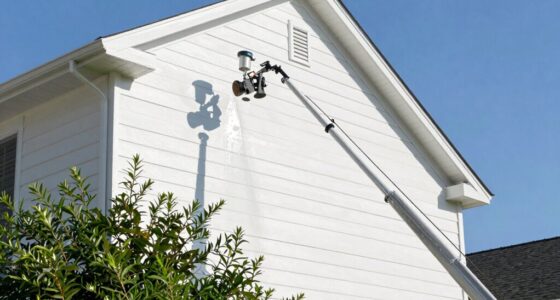
When you’re spray painting a house with an airless sprayer, it’s important to understand the different types of paint and how they can enhance the look and durability of your home.

Different paint finishes serve different purposes and can bring out the best in your exterior surfaces. For example, flat paint works well to hide imperfections, while satin and semi-gloss finishes offer better resistance to moisture and are easier to clean.

Understanding the characteristics, benefits, and limitations of each paint type will help you make an informed decision when choosing the best paint for your project.

Advertisement

Now that you have a good understanding of the different paint finishes, let’s move on to the next step: choosing the right tip size for your airless sprayer.

Choosing the Right Tip Size

To get the best results, it’s crucial to pick the perfect tip size for your airless sprayer when tackling a paint job. The right tip size will ensure that the paint is applied evenly and efficiently.

When choosing the tip size, consider the type of paint you’re using and the surface you’re painting. For latex paints, a tip size of 0.015 to 0.019 inches is recommended. Oil-based paints work well with a tip size of 0.017 to 0.021 inches. If you’re using thicker coatings like elastomeric or textured paints, go for a larger tip size, around 0.025 inches.

Remember to also consider the paint color. Lighter colors may require a smaller tip size to avoid overspray, while darker colors can benefit from a larger tip size for better coverage.

Now, let’s move on to using a fine finish tip for smooth surfaces.

Advertisement

Using a Fine Finish Tip for Smooth Surfaces

When looking to achieve a professional look on smooth surfaces, it’s essential to use a fine finish tip with an airless sprayer. This tip allows for a more controlled application, resulting in a smoother and more even finish.

Additionally, using a fine finish tip helps minimize overspray, reducing the risk of paint ending up where it shouldn’t be. It also ensures even coverage, preventing any unsightly streaks or uneven areas on the surface.

As a professional painter, I know the importance of these key points and always recommend using a fine finish tip for achieving a flawless and professional result.

Advertisement

Achieve a Professional Look

For a flawless finish, imagine your house transformed with a professional touch when using an airless sprayer. To achieve a professional look, follow these tips:

  • Use a high-quality paint: Opt for a paint specifically designed for airless sprayers. These paints are formulated to provide a smooth and even finish, minimizing the chances of paint drips.

  • Choose the right tip size: The size of the tip you’re using will depend on the type of paint you’re using and the surface you’re painting. Consult the paint manufacturer’s recommendations for the correct tip size.

  • Maintain proper technique: Hold the sprayer at a consistent distance from the surface and move your arm smoothly in a controlled manner. This helps to avoid uneven application and streaks.

  • Apply multiple thin coats: Instead of trying to cover the surface in one thick coat, apply several thin coats. This will result in a more professional and even finish.

By following these tips, you can achieve a flawless finish while minimizing the chances of paint drips. To further enhance your results, the next step is to minimize overspray.

Minimize Overspray

Achieving a flawless finish with an airless sprayer won’t just transform your home, but it’ll also leave you with a professional look that’ll make you feel like a painting expert.

When using an airless sprayer, it’s important to minimize overspray to avoid paint buildup and reduce paint wastage. To do this, start by adjusting the spray pressure on your sprayer. Lower pressure settings will help control the amount of paint being sprayed, resulting in less overspray.

Additionally, use a technique called ‘feathering’ to blend each stroke smoothly and prevent heavy buildup in certain areas. By moving your hand in a sweeping motion while painting, you can create an even, thin layer of paint. This will ensure even coverage and a flawless finish.

Advertisement

Transitioning into the next section, let’s discuss how to achieve perfect coverage with an airless sprayer.

Ensure Even Coverage

To ensure a smooth and flawless finish, make sure you evenly cover every surface with your airless sprayer, creating a seamless and professional look. Achieving even coverage is essential for a uniform appearance and to avoid streaks.

When using an airless sprayer, it’s important to maintain a consistent distance from the surface being painted. This ensures that the paint is applied evenly and prevents any areas from being overlapped or missed. Additionally, consider using a technique called ‘back brushing’ to help spread the paint evenly and eliminate any excess build-up. This involves using a brush to lightly smooth out the paint after spraying, ensuring a more even distribution.

By following these tips, you can achieve a flawless finish with your airless sprayer. Speaking of techniques, using a wide fan tip for rough surfaces can further enhance your results.

Using a Wide Fan Tip for Rough Surfaces

When working on rough surfaces, using a wide fan tip with an airless sprayer offers several advantages.

Advertisement

Firstly, it allows me to cover large areas quickly, saving valuable time and effort.

Secondly, the wide fan pattern helps the paint to penetrate deep into the textured surfaces, ensuring even coverage.

Lastly, this tip helps to prevent clogging and drips, resulting in a smoother and more professional finish.

As an experienced painter, I’ve found that using a wide fan tip is the most efficient and effective method for painting rough surfaces with an airless sprayer.

Cover Large Areas Quickly

For lightning-fast coverage, whip out an airless sprayer and watch as your large areas become a canvas for transformation. To cover large areas quickly, it’s important to choose the right tip size for your airless sprayer. This will depend on the type of paint you’re using and the texture of the surface you’re painting. Here’s a helpful table to guide you:

Advertisement
Paint Type Tip Size Recommended Use
Latex 0.015-0.017 inches Smooth surfaces
Oil-based 0.017-0.021 inches Smooth or textured surfaces
Acrylic 0.015-0.017 inches Smooth or textured surfaces

By selecting the appropriate tip size, you can achieve efficient and even coverage, reducing paint waste and saving you time and money. Now, let’s move on to the next section where we’ll explore how to penetrate deep into textured surfaces.

Penetrate Deep into Textured Surfaces

To achieve even coverage on deep textured surfaces when spray painting a house with an airless sprayer, it’s important to follow specific tips for each type of paint.

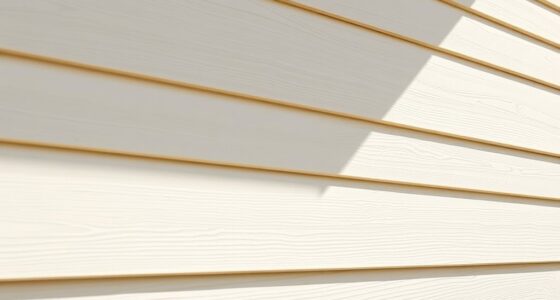
  • For textured surfaces, such as stucco or brick, use a paint with a thicker consistency. This will help the paint penetrate deep into the crevices and provide a more uniform finish.

  • Consider using elastomeric paint, which is designed to stretch and contract with the surface, preventing cracking or peeling.

  • Another option is to apply a high-build primer. This fills in the texture and creates a smooth base for the top coat.

  • Additionally, adjust the spray nozzle to a wider fan pattern. This will help ensure that the paint reaches all areas of the textured surface.

By following these tips, you can achieve a professional-looking finish on deep textured surfaces.

Now, let’s move on to the next section about preventing clogging and drips.

Prevent Clogging and Drips

Prevent clogging and drips by mastering the art of controlling the flow and consistency of your paint. When using an airless sprayer, it’s important to choose the right tip size for the type of paint you’re using.

Advertisement

For thicker paints, such as elastomeric or textured coatings, a larger tip size like a 0.021 or 0.023 is recommended. This will help prevent paint buildup and ensure a smooth application.

Additionally, regularly inspect and clean the filter and tip to prevent clogs. If you encounter any issues with clogging or drips, try adjusting the pressure or thinning the paint slightly to improve flow.

Troubleshooting common issues like these will help you achieve professional results. Speaking of adjusting the pressure for different paints…

Adjusting the Pressure for Different Paints

When it comes to adjusting the pressure for different paints, it’s important to understand that thick paints require high pressure while thin paints need low pressure. Finding the right balance between the two is crucial for achieving optimal results.

As a professional painter, I’ve learned that high pressure helps thick paints atomize properly and provides better coverage, while low pressure prevents overspray and allows for a smoother finish with thin paints.

Advertisement

By understanding the characteristics of different paints and adjusting the pressure accordingly, you can ensure a successful paint job.

High Pressure for Thick Paints

If you’re using thick paints, crank up that pressure on your airless sprayer for a smooth and even application! Here are some tips to help you achieve the best results:

  1. Use a larger tip size: Thick paints require larger tip sizes to allow for better atomization and flow. This helps prevent clogging and ensures an even coat.

  2. Increase the pressure gradually: Start with a lower pressure setting and gradually increase it until you achieve the desired spray pattern and coverage. This will help you avoid overspray and ensure a smooth finish.

  3. Maintain a consistent distance: Keep a consistent distance between the sprayer and the surface being painted. This will ensure an even application and prevent uneven coverage.

  4. Watch for drips and runs: Thick paints are more prone to dripping and running. Take your time and apply multiple thin coats instead of one thick coat to minimize these issues.

By following these tips, you can effectively use your airless sprayer with thick paints. Speaking of thin paints, let’s now discuss how to adjust the pressure for achieving smooth finishes with them.

Low Pressure for Thin Paints

To achieve those smooth finishes with thin paints, go ahead and give that pressure a little low-key love.

When it comes to spraying thin paints with an airless sprayer, it’s important to lower the pressure to ensure a professional finish. Thin paints, such as lacquers or stains, require a lower pressure setting to avoid overspray and achieve even coverage. By adjusting the pressure on your airless sprayer, you can control the flow of the paint and prevent it from misting or splattering.

Advertisement

Start by testing the paint on a scrap surface to find the right balance between too much and too little pressure. This will help you achieve that perfect application and ensure a flawless outcome.

So, let’s find that sweet spot and move on to the next step of finding the right balance.

Finding the Right Balance

Achieving a flawless outcome requires finding the perfect balance between pressure and paint application. When using an airless sprayer, it’s crucial to find the right pressure that allows for smooth and even coverage. Here are some tips to help you find the right balance:

  • Experiment with different pressure settings to determine the ideal one for your specific paint type.
  • Start with a lower pressure and gradually increase it until you achieve the desired results.
  • Consider the viscosity of the paint and adjust the pressure accordingly. Thicker paints may require higher pressure settings.
  • Pay attention to the spray pattern. If it appears uneven or blotchy, you may need to adjust the pressure or the nozzle size.
  • Regularly check the pressure gauge during the painting process to ensure it remains consistent.

Choosing the right paint type is equally important. Different paints have different characteristics, benefits, and limitations. Understanding these factors will help you make an informed decision and achieve a professional finish.

Now, let’s move on to the next step and discuss the importance of preparing the surface properly.

Preparing the Surface Properly

When preparing the surface for painting, it’s important to clean and remove any loose paint. This ensures that the new paint will adhere properly and create a smooth finish.

Advertisement

Additionally, it’s crucial to repair any cracks and holes in the surface to ensure a uniform appearance.

Lastly, if needed, using a primer can help to create a strong bond between the surface and the paint, resulting in a longer-lasting finish.

As a professional painter, I understand the importance of properly preparing the surface before painting to achieve the best results.

Clean and Remove Loose Paint

Start by scraping away any loose paint with a sturdy putty knife, revealing a clean canvas ready for your fresh coat of paint. To ensure a smooth and long-lasting finish, it’s crucial to clean the surface thoroughly before applying paint. For this task, you’ll need some cleaning equipment such as a pressure washer or a scrub brush, along with a mild detergent. Begin by removing any dirt, grime, or mold from the walls using the pressure washer or scrub brush. Be careful not to damage the surface while cleaning. Once the walls are clean, protect the surrounding areas by covering them with plastic sheets or drop cloths. This will prevent overspray and ensure that your paint job is neat and precise. After cleaning and protecting, you can proceed to the next step of repairing any cracks and holes in the surface.

Cleaning Equipment Protecting Surrounding Areas
Pressure Washer Plastic Sheets
Scrub Brush Drop Cloths

Now, let’s move on to repairing any cracks and holes in the surface.

Advertisement

Repair Cracks and Holes

To successfully repair cracks and holes in your walls, you’ll need to gather some essential tools such as a putty knife, spackling compound, sandpaper, and a primer. Here’s a step-by-step guide to help you with the surface preparation and filling compound:

  1. Clean the area: Before filling the cracks and holes, make sure to clean the surface thoroughly to remove any dirt, dust, or loose paint. This will ensure better adhesion for the filling compound.

  2. Apply the filling compound: Use a putty knife to apply the spackling compound into the cracks and holes. Make sure to fill them completely and level it with the surrounding surface. Allow it to dry according to the manufacturer’s instructions.

  3. Sand the filled areas: Once the compound is dry, use sandpaper to smooth out the filled areas. This will create a seamless finish and prepare the surface for painting.

Remember, if there are larger cracks or holes, you may need to use a patching material instead of a filling compound.

Now that the cracks and holes are repaired, let’s move on to the next step: using primer if needed.

Use Primer if Needed

If you want to achieve a professional-looking finish on your walls, primer is an essential step that shouldn’t be overlooked. Using primer before spray painting with an airless sprayer helps to ensure that the paint adheres properly and provides a smooth and even coverage.

Before applying primer, it’s important to prepare the surface by cleaning it thoroughly and repairing any cracks or holes. Primer can be especially beneficial if you’re painting over a previously painted surface, as it helps to hide stains and imperfections. Additionally, primer creates a uniform surface for the paint, allowing it to adhere better and last longer.

Advertisement

By using primer and properly preparing the surface, you can achieve a flawless paint job that’ll enhance the overall appearance of your house.

Now, let’s move on to the next step: practicing proper spray technique.

Practicing Proper Spray Technique

When practicing proper spray technique with an airless sprayer, I always maintain a consistent distance from the surface being painted. This helps to ensure an even application of paint and prevents any potential drips or uneven coverage.

I also move in smooth and even strokes, being careful not to linger in one area for too long. Lastly, I make sure to overlap each pass slightly to avoid any visible lines or streaks in the finished paint job.

These techniques, honed through years of experience, result in a professional and flawless finish.

Advertisement

Maintain a Consistent Distance

Maintaining a consistent distance while spray painting with an airless sprayer is like dancing with the paint, ensuring a smooth and even application. To achieve this, it’s important to maintain a steady distance between the spray gun and the surface being painted.

This distance typically ranges from 12 to 18 inches, but it may vary depending on the type of paint being used. Adjusting the spray pattern on the gun can also help maintain consistency. By rotating the nozzle or adjusting the fan width, you can create a more focused or wider spray pattern, allowing for better coverage and control.

Professionals in the painting industry understand the importance of clear communication. They provide detailed instructions on how to maintain the spray gun and adjust the spray pattern for different paint types, ensuring a thorough understanding of the topic.

Moving in smooth, even strokes is the next step in achieving a professional finish.

Move in Smooth, Even Strokes

Achieving a flawless finish requires moving the spray gun in smooth, even strokes, ensuring a seamless application of paint. This technique is crucial for avoiding streaks and achieving a professional-looking result.

Advertisement

To achieve a smooth application, it’s important to maintain a consistent distance from the surface being painted. This distance will vary depending on the type of paint being used, so it’s essential to refer to the manufacturer’s guidelines for specific recommendations.

Additionally, it’s important to move the spray gun at a steady pace, neither too fast nor too slow. This will help to distribute the paint evenly and prevent buildup in certain areas.

By moving in smooth, even strokes, you can achieve a beautiful, streak-free finish on your house.

Transitioning into the next section, it’s also important to overlap each pass to ensure complete coverage.

Overlap Each Pass

To create a flawless finish that will impress even the most discerning eye, it’s crucial to carefully overlap each pass of the spray gun. By doing so, you ensure that every inch of the surface receives an even coat of paint, achieving seamless coverage and avoiding streaks and lines.

Advertisement

When using an airless sprayer, it’s important to maintain a consistent speed and distance as you move the gun across the surface. Start each pass slightly overlapping the previous one, about 50% to 75%. This ensures that there are no missed spots and that the paint is evenly distributed. Take your time and be mindful of any corners or edges that may require extra attention.

By overlapping each pass, you’ll achieve a professional-looking paint job with no visible lines or uneven areas.

Speaking of attention to detail, the next section will explore how using a painting shield or masking tape can further enhance the quality of your work.

Using a Painting Shield or Masking Tape

For a flawless finish, make sure to use a painting shield or masking tape to protect areas you don’t want to be painted. A painting shield is a handy tool that can be held or attached to a spray gun to create a barrier between the paint and the surrounding surfaces. It helps prevent overspray and ensures clean, crisp edges. Masking tape, on the other hand, is ideal for protecting smaller areas or intricate details. Apply it carefully along the edges of windows, trim, or any other surfaces you want to keep paint-free. Remember to remove the masking tape promptly after painting to avoid any peeling or damage to the fresh paint. Now that you’ve protected the areas you don’t want to paint, let’s move on to the next step of cleaning and maintaining the sprayer.

Cleaning and Maintaining the Sprayer

After you’ve finished transforming your space with a fresh coat of color, it’s crucial to ensure the longevity of your sprayer by properly cleaning and maintaining it.

Advertisement

Cleaning equipment is an essential part of this process. Start by thoroughly flushing the sprayer with water to remove any residual paint. Next, disassemble the spray gun and clean each part individually using a brush and solvent. Pay special attention to the nozzle and filters, as they’re prone to clogs.

Regularly inspect and replace any worn or damaged parts to avoid potential issues. Additionally, lubricate the moving parts of the sprayer to keep it running smoothly.

By following these cleaning and maintenance steps, you can prevent clogs and ensure the optimal performance of your airless sprayer.

Now, let’s move on to discussing important safety precautions to keep in mind during the spraying process.

Safety Precautions

Now that we’ve covered how to clean and maintain your airless sprayer, let’s talk about safety precautions when spray painting a house. Safety should always be a top priority when working with any type of paint, especially when using an airless sprayer.

Advertisement

One important aspect of safety is respiratory protection. Paint fumes can be harmful if inhaled, so it’s crucial to wear a respirator mask that’s specifically designed for painting.

Another safety consideration is the handling of hazardous materials. Some paints may contain toxic substances, so it’s important to read the product labels and follow the manufacturer’s instructions for safe handling and disposal.

Additionally, make sure to wear protective gloves and clothing to prevent any skin contact with the paint.

By taking these safety precautions, you can ensure a safe and successful spray painting project.

Frequently Asked Questions

Can I use the same tip size for all types of paint when using an airless sprayer?

No, it is not recommended to use the same tip size for all types of paint when using an airless sprayer. Adjusting pressure and using the appropriate tip size is important for optimal paint application and safety precautions.

Advertisement

How do I know if I need to adjust the pressure when using different types of paint?

To determine the optimal pressure for different types of paint, I assess their consistency and viscosity. If the paint is thicker, I increase the pressure; if it’s thinner, I decrease it. I troubleshoot issues by adjusting the pressure gradually until I achieve the desired results.

Are there any specific safety precautions I need to take when using an airless sprayer?

When using an airless sprayer, it’s important to take specific safety precautions. Some common mistakes to avoid include wearing protective clothing, using proper ventilation, and following the manufacturer’s instructions. Stay safe!

What is the best way to clean and maintain the sprayer after use?

To ensure optimal performance and longevity of your airless sprayer, follow these best maintenance practices. After each use, clean the sprayer thoroughly, inspect for any damage, and troubleshoot common issues like clogs or leaks.

Can I use a painting shield or masking tape with any type of paint?

Yes, you can use a painting shield or masking tape with different types of paint finishes. It helps achieve smooth and even coverage. Here are some tips for using them effectively with an airless sprayer.

Conclusion

In conclusion, when spray painting a house with an airless sprayer, it’s crucial to understand the different types of paint and choose the right tip size accordingly.

Advertisement

Using a fine finish tip for smooth surfaces and a wide fan tip for rough surfaces will ensure the best results.

Adjusting the pressure for different paints and practicing proper spray technique are also important.

Using a painting shield or masking tape can help protect surrounding areas.

Cleaning and maintaining the sprayer regularly will prolong its lifespan.

Remember to prioritize safety precautions throughout the process.

Advertisement

With these tips, you’ll be able to achieve a professional-looking paint job that’ll leave your house looking brand new, as if it were painted by a magical unicorn!

Whether it’s a step-by-step tutorial on achieving flawless finishes or an in-depth analysis of the latest airless paint sprayer models, Joe’s ability to articulate complex ideas in a simple and engaging manner resonates with our diverse audience. His practical tips and techniques empower readers to tackle their projects with confidence.

Continue Reading
Advertisement

Airless Paint Sprayer Tips for Specific Projects

How Many Gallons Of Psint To Paint A House With Airless Sprayer

Published

on

By

An image showcasing a vibrant, spacious house exterior being effortlessly coated with a high-powered airless sprayer

Many people believe that applying a fresh coat of paint can transform a house into a home. Using an airless sprayer can make the application process quick and efficient. Before starting your painting project, it’s important to determine how many gallons of paint you will need.

That’s where I come in. In this article, I’ll guide you through the process of calculating the right amount of paint for your house, so you can avoid the hassle of running out mid-project or ending up with too much leftover. We’ll cover everything from measuring the surface area of your house to considering the number of coats needed.

By following these steps, you’ll be able to estimate the perfect amount of paint, ensuring a smooth and successful painting project with your airless sprayer.

So, let’s dive in and get your house looking brand new.

Key Takeaways

  • Hiring a professional for an accurate estimate and advice can save time and money when using an airless sprayer to paint a house.
  • A professional can accurately calculate the amount of paint needed, taking into consideration factors such as the size of the house and the number of coats required.
  • They can also provide advice on the best type of paint to use with an airless sprayer, ensuring optimal results.
  • Additionally, a professional can offer suggestions for necessary preparations before using the sprayer, ensuring a smooth and efficient painting process.

Measure the Surface Area of Your House

Advertisement

To accurately determine the amount of paint needed, you should measure the surface area of your house using an airless sprayer. Calculating the surface area is crucial in estimating the amount of paint required for the job.

Start by measuring the length and height of each wall, including any windows or doors. Multiply the length by the height to get the area of each wall, and then add up all the wall areas to get the total surface area.

Don’t forget to subtract any areas that won’t be painted, such as trim or eaves. Once you have the surface area, you can determine the paint coverage per gallon. This will help you figure out how many gallons of paint you’ll need to complete the job effectively.

Determine the Paint Coverage per Gallon

Determining the paint coverage per gallon is like uncovering the hidden potential of a masterpiece waiting to be unveiled. It allows you to calculate the amount of paint needed for your project, estimate the drying time, and even calculate the paint cost. To help you visualize the process, take a look at the table below:

Surface Type Coverage per Gallon (in square feet)
Smooth surfaces 350-400
Textured surfaces 200-250
Porous surfaces 150-200
Exterior surfaces 250-300
Interior surfaces 400-450

By knowing the coverage per gallon for different surface types, you can accurately calculate how many gallons of paint you’ll need for your project. With this knowledge, you can confidently move on to the next step: calculating the total surface area to be painted. This will ensure you have all the necessary information to complete your painting project efficiently.

Advertisement

Calculate the Total Surface Area to be Painted

Now, as you delve into the next step, calculate the total surface area awaiting a fresh coat of paint.

To do this, you need to measure the length and height of each wall in the house. Once you have these measurements, multiply the length by the height to find the area of each wall.

Add up the areas of all the walls to get the total surface area to be painted.

Advertisement

Imagine a large canvas encompassing every nook and cranny of your home, ready to be transformed with a vibrant new color. As you calculate the paint quantity, keep in mind that one gallon typically covers around 350-400 square feet, but this can vary depending on the type of paint and texture of the surface.

By estimating the paint cost and considering the number of coats needed, you can better plan for this exciting home improvement project.

Now, let’s consider the number of coats needed for a flawless finish.

Consider the Number of Coats Needed

It’s important to understand how many coats are needed for a flawless finish. When considering the paint color options, it’s crucial to research the best type of paint to use.

Certain colors or finishes may require multiple coats to achieve the desired result. Some paints have better coverage and may only need one coat, while others may require two or even three coats.

Advertisement

By understanding the number of coats needed, you can accurately estimate the amount of paint required for the job. This will prevent unnecessary wastage and ensure that you have enough paint for any touch-ups that may be needed.

Now, let’s move on to the next section and account for wastage and touch-ups.

Account for Wastage and Touch-Ups

Make sure you account for a little extra paint for those inevitable touch-ups and a dash of exaggeration in case of any unexpected wastage. Calculating wastage and estimating touch-up paint needs can help ensure that you have enough paint to complete the job without running out. To give you an idea of how much extra paint you might need, consider the following table:

Advertisement
Type of Surface Wastage Percentage Touch-Up Percentage
Smooth 10% 5%
Textured 15% 10%
Porous 20% 15%

Using this table, you can estimate the additional paint needed based on the type of surface you are painting. By incorporating these factors into your calculations, you can ensure that you have enough paint to cover any unexpected needs. With the additional paint accounted for, you can now move on to choosing the right type of paint for your project.

[Transition Sentence]: Now that you have estimated the amount of paint needed, it’s time to choose the right type of paint for your project.

Choose the Right Type of Paint

Now that we’ve accounted for wastage and touch-ups, let’s move on to choosing the right type of paint for your house.

When it comes to painting a house with an airless sprayer, it’s important to choose the right color and consider the paint finish. The color should complement your house’s exterior and reflect your personal style. Additionally, the paint finish can affect the durability and appearance of the paint job. For example, a matte finish may hide imperfections better, while a glossy finish can be easier to clean.

To make the best decision, consider factors such as weather conditions and the desired maintenance level. Remember to consult the manufacturer’s guidelines for specific recommendations on color and finish options. This will ensure a successful painting project.

Advertisement

Consult the Manufacturer’s Guidelines

For the best results, make sure to consult the manufacturer’s guidelines on color and finish options, so you can create a stunning and long-lasting paint job that truly reflects your personal style. When estimating paint quantity, it’s essential to follow the recommendations provided by the manufacturer. They will typically provide guidance on how many gallons of paint are needed for a specific area, taking into account factors such as the type of surface and the desired thickness of the paint. Additionally, the manufacturer’s guidelines will also provide valuable information on paint sprayer maintenance. Proper maintenance is crucial to ensure that the sprayer functions optimally and delivers a smooth and even coat of paint. By following the manufacturer’s guidelines, you can achieve professional-looking results and avoid any potential issues. Moving forward, let’s explore how to use an online paint calculator to further assist you in determining the amount of paint needed for your project.

Use an Online Paint Calculator

Get ready to paint like a pro with the help of an online paint calculator, which is as easy to use as a breeze on a sunny day. When using an airless sprayer instead of traditional painting methods, it’s essential to know exactly how many gallons of paint you’ll need.

An online paint calculator takes the guesswork out of the equation by considering factors such as the size of the house, number of coats, and type of surface. Simply input these details, and the calculator will provide you with an accurate estimate of the amount of paint required.

However, it’s important to keep in mind that online paint calculators may not account for variables like textured surfaces or wastage. Therefore, consider hiring a professional for an accurate estimate to ensure you have the right amount of paint for the job.

Consider Hiring a Professional for an Accurate Estimate

Consider bringing in a professional for a precise estimate, ensuring you have the right amount of paint for your project. Hiring professionals can save you time and money in the long run. They have the expertise to accurately calculate the amount of paint needed, taking into account factors such as the size of the house, the number of coats required, and any specific requirements for the surface being painted.

Advertisement

Additionally, they can provide advice on the best type of paint to use and any necessary preparations that need to be made before starting the project. While it may be tempting to try and estimate the amount of paint yourself, hiring a professional guarantees a more accurate result. This will help you avoid the hassle of running out of paint or having to buy extra gallons unnecessarily.

Transitioning into the next section, it’s also important to consider buying extra paint for future touch-ups.

Buy Extra Paint for Future Touch-Ups

Now that you’ve considered hiring a professional for an accurate estimate, let’s talk about the importance of buying extra paint for future touch-ups. When painting a house with an airless sprayer, it’s always a good idea to have some extra paint on hand. Not only does it ensure that you have enough to complete the job, but it also allows you to store paint leftovers for future use.

Here are five reasons why buying extra paint and storing the leftovers is a smart move:

  • Easy color matching for touch-ups
  • Cost-effective solution for small repairs
  • Convenient way to maintain the appearance of your home
  • Peace of mind knowing you have the right paint available
  • Flexibility to make changes or additions to your color scheme

By buying extra paint and properly storing the leftovers, you can ensure that your house stays looking fresh and well-maintained for years to come.

Frequently Asked Questions

What are the benefits of using an airless sprayer to paint a house?

What are the benefits of using an airless sprayer to paint a house? Wondering how to achieve a flawless finish? Airless sprayers offer faster application, even coverage, and reduced overspray. Follow these tips for optimal results.

Advertisement

Can I use the same paint type for both interior and exterior surfaces of my house?

Using the same paint type for both interior and exterior surfaces has pros and cons. While it may provide consistency, different surfaces have different needs. Also, using different paint finishes can enhance the aesthetics of each space.

How long does it typically take to paint a house using an airless sprayer?

On average, it takes about 2-3 days to paint a house using an airless sprayer. To paint efficiently, make sure to properly prepare the surfaces, use the right technique, and work in favorable weather conditions.

Are there any specific safety precautions I need to take when using an airless sprayer for painting?

When it comes to safety precautions with airless sprayer painting, it’s crucial to protect yourself with goggles, gloves, and a respirator. Mastering airless sprayer techniques ensures even coating, but always prioritize safety first.

Are there any additional tools or equipment required when using an airless sprayer for painting a house?

When using an airless sprayer for house painting, there are some additional accessories and maintenance requirements. These include protective gear, cleaning materials, and regular maintenance of the sprayer for optimal performance.

Conclusion

After considering all the factors involved in calculating the amount of paint needed to paint a house with an airless sprayer, it’s clear that accuracy is key.

Advertisement

One interesting statistic to note is that the average paint coverage per gallon is approximately 350-400 square feet. This means that for a typical 2,000 square foot house, you would need around 5-6 gallons of paint.

However, it’s always advisable to consult the manufacturer’s guidelines and consider hiring a professional for an accurate estimate. Don’t forget to buy extra paint for future touch-ups!

Continue Reading

Airless Paint Sprayer Tips for Specific Projects

What Is The Best Airless Paint Sprayer For Interior Walls And Woodwork

Published

on

By

An image showcasing a professional-grade airless paint sprayer gently applying a flawless coat of paint on the smooth surface of an interior wall, while another sprayer effortlessly coats intricate woodwork with precision and ease

As a fan of DIY projects, I know how difficult it can be to achieve a flawless finish on interior walls and trim. That’s why finding the best airless paint sprayer is essential.

Imagine effortlessly transforming your living space with a smooth, professional-looking coat of paint that rivals the work of a seasoned painter. Well, that dream can become a reality with the right airless paint sprayer.

In this article, I will guide you through the world of airless paint sprayers and help you choose the perfect one for your needs. We’ll explore factors to consider, such as power, versatility, and ease of use.

I’ll also provide in-depth reviews of some top-rated airless paint sprayers on the market, including the Graco Magnum X7, Wagner Control Pro 170, Titan ControlMax 1700 Pro, and Graco Ultra Corded Handheld.

So, whether you’re a weekend warrior or a professional painter, get ready to discover the best airless paint sprayer that will revolutionize your painting projects and make them a breeze.

Advertisement

Key Takeaways

  • Airless paint sprayers provide fast coverage of large areas and an even and consistent finish.
  • The Graco Ultra Corded Airless Handheld Paint Sprayer offers compact size, adjustable pressure control, and unmatched precision and control.
  • Proper cleaning and maintenance of the sprayer can avoid clogging issues.
  • Factors to consider when choosing an airless paint sprayer include the specific use (interior or exterior), cost comparison, reading reviews and seeking recommendations, and making an informed decision for professional-quality results.

Understanding Airless Paint Sprayers

Understanding airless paint sprayers is important if you want to tackle your interior walls and woodwork with ease. These sprayers are popular among DIY enthusiasts and professionals due to their efficiency and versatility. One of their main advantages is the ability to provide a smooth and even finish, saving you time and effort compared to traditional painting methods.

However, it’s important to note that airless paint sprayers can be messy and require proper preparation and masking to avoid overspray. To achieve a smooth finish, it’s recommended to use the right nozzle size and pressure settings, as well as maintaining a consistent spraying motion. Taking these tips into consideration will help ensure a professional-looking result.

Now, let’s move on to the factors to consider when choosing an airless paint sprayer.

Factors to Consider When Choosing an Airless Paint Sprayer

When choosing a paint sprayer for your indoor projects, there are a few key factors to consider.

Advertisement

Firstly, cost considerations play a significant role in determining which airless paint sprayer is best for you. It’s important to establish a budget and find a sprayer that offers the right balance of features and affordability. Some factors that can affect the cost include the power and performance of the sprayer, the materials it can handle, and any additional features it may offer.

Additionally, brand reputation is another essential factor to take into account. Look for a well-known and reputable brand that has a history of producing high-quality paint sprayers. Choosing a paint sprayer from a trusted brand ensures you are getting a reliable and durable product. Look for brands that have been in the industry for a long time and have positive customer reviews.

Considering these factors will help you make an informed decision when choosing the best airless paint sprayer for your interior walls and woodwork. Speaking of airless paint sprayers, let’s dive into the details of the Graco Magnum X7 in the next section.

Graco Magnum X7 Airless Paint Sprayer

Advertisement

The Graco Magnum X7, a popular choice among professionals, has a maximum spray tip size of 0.017 inches, allowing for efficient and precise application of paint.

The Graco Magnum X7 airless paint sprayer is known for its exceptional performance and reliability.

One of the main benefits of using an airless paint sprayer like the Graco Magnum X7 is that it provides a consistent and even coat of paint, resulting in a smooth and professional finish on interior walls and woodwork.

This sprayer is also designed with a powerful motor and a high-pressure pump, allowing for faster paint application compared to traditional methods.

Additionally, the Graco Magnum X7 features an adjustable pressure control knob, making it easy to customize the paint flow for different projects.

Advertisement

Transitioning to the next section, let’s now discuss the Wagner Control Pro 170 High Efficiency Airless Paint Sprayer.

Wagner Control Pro 170 High Efficiency Airless Paint Sprayer

Moving on to the Wagner Control Pro 170, this high efficiency airless paint sprayer is known for its exceptional performance and reliability.

Pros and cons:

Pros:

  • The Control Pro 170 offers a maximum pressure of 1500 PSI, allowing for precise control and a smooth finish on both interior walls and woodwork.
  • Its HEA (High Efficiency Airless) technology reduces overspray by up to 55%, making it more efficient and minimizing waste.

Cons:

  • The sprayer can be quite loud during operation, which may be a concern for some users.
  • It requires regular cleaning and maintenance to ensure optimal performance.

Key features:

  • The sprayer comes with a 515 HEA reversible tip, which provides a consistent spray pattern and can handle a variety of coatings.
  • It has a 0.60 horsepower motor, ensuring enough power to handle even the toughest painting tasks.
  • The sprayer is compatible with both 1 and 5-gallon paint containers, providing flexibility for different project sizes.

Moving forward to the subsequent section about the Titan ControlMax 1700 Pro sprayer, let’s explore another option in the airless paint sprayer market.

Titan ControlMax 1700 Pro Sprayer

Advertisement

Get ready to experience the power and precision of the Titan ControlMax 1700 Pro sprayer. This top-of-the-line airless paint sprayer effortlessly transforms your surfaces with its flawless application and smooth finish.

The Titan ControlMax 1700 Pro sprayer offers numerous benefits. First, it provides excellent coverage and allows for a more even distribution of paint, resulting in a professional-looking finish. The sprayer’s high efficiency pump ensures consistent pressure and reduces overspray, saving you time and money.

Additionally, the ControlMax 1700 Pro sprayer is easy to use and clean, making it a convenient choice for both professionals and DIY enthusiasts.

With its powerful performance and user-friendly features, the Titan ControlMax 1700 Pro sprayer is an excellent option for all your interior wall and woodwork painting needs.

Advertisement

Speaking of power, let’s move on to the next section about the HomeRight Power Flo Pro 2800 C800879 airless paint sprayer.

HomeRight Power Flo Pro 2800 C800879 Airless Paint Sprayer

When it comes to choosing the best airless paint sprayer for interior walls and woodwork, the HomeRight Power Flo Pro 2800 C800879 is a top contender.

This sprayer boasts a range of key features that make it a great choice for any DIY enthusiast or professional painter.

From its powerful ½ horsepower motor to its adjustable pressure control, this sprayer offers precision and efficiency.

However, it’s important to consider the pros and cons before making a decision.

Advertisement

While the HomeRight Power Flo Pro 2800 C800879 offers excellent performance, it may be a bit on the heavier side and can be a bit noisy during operation.

Overall, this sprayer is a reliable option for those looking for a powerful and versatile tool for their painting projects.

Key Features

One important aspect to consider when choosing the best airless paint sprayer for interior walls and woodwork is its key features. The HomeRight Power Flo Pro 2800 C800879 Airless Paint Sprayer offers several advantages that make it a top choice.

Firstly, it has a powerful motor that delivers consistent and even paint coverage, ensuring a professional-looking finish.

Additionally, it has a large capacity hopper, allowing for longer painting sessions without the need for frequent refills.

Advertisement

Another key feature is the adjustable pressure control, which allows for precise control over the paint flow and spray pattern.

However, it is important to note that this sprayer may not be suitable for small-scale projects due to its size and weight.

In conclusion, the key features of the HomeRight Power Flo Pro 2800 C800879 Airless Paint Sprayer provide several advantages, but it is important to consider the potential disadvantages as well.

Pros and Cons

Consider the pros and cons of this powerful tool to determine if it’s the right fit for your painting needs.

Airless paint sprayers offer several advantages over traditional paint application methods. One major benefit is the speed at which they can cover large areas, making them ideal for painting interior walls and woodwork. They also provide a more even and consistent finish, eliminating brush or roller marks. Additionally, airless sprayers can handle a variety of paint types, including thick and textured coatings.

Advertisement

However, there are a few drawbacks to consider. They can be more expensive than traditional methods, and they require more setup and cleanup time. They also tend to generate more overspray, which can be wasteful and create a mess.

Overall, if you value efficiency and a professional-looking finish, an airless paint sprayer may be the right choice for you.

Moving on to the next section, let’s delve into the features of the Graco Ultra Corded Airless Handheld Paint Sprayer.

Graco Ultra Corded Airless Handheld Paint Sprayer

The Graco Ultra Corded Airless Handheld Paint Sprayer is the best choice for interior walls and woodwork. It offers unmatched precision and control, even for beginners.

One of the pros of this sprayer is its compact size. This allows for easy maneuverability in tight spaces.

Advertisement

Additionally, the airless technology ensures a smooth and even finish. This eliminates the need for multiple coats.

Another advantage is the adjustable pressure control. This allows for customization based on the type of surface being painted.

As for cons, some users have reported clogging issues. However, these can be easily avoided by properly cleaning and maintaining the sprayer.

In terms of tips for using the Graco Ultra Corded Airless Handheld Paint Sprayer, it is recommended to start with a test spray on a scrap surface. This ensures the desired flow and coverage.

Transitioning to the next section, let’s explore some helpful tips for using an airless paint sprayer.

Advertisement

Tips for Using an Airless Paint Sprayer

Get ready to take your painting projects to the next level with these helpful tips for using an airless paint sprayer! Using an airless paint sprayer can save you time and effort, but it’s important to properly maintain and troubleshoot the sprayer to ensure optimal performance. Here are some key tips to keep in mind:

  • Regularly clean the sprayer and its components to prevent clogs and ensure smooth operation.
  • Use the correct paint viscosity for the sprayer to avoid clogging or uneven coverage.
  • Before spraying, test the sprayer on a scrap surface to ensure the desired spray pattern and adjust the pressure if needed.
  • Keep a consistent distance from the surface being painted to avoid overspray or uneven application.
  • If the sprayer starts to sputter or lose pressure, check for any clogs or blockages and clear them before continuing.

By following these tips, you’ll be able to achieve professional-looking results with your airless paint sprayer.

Now, let’s dive into the maintenance and cleaning of airless paint sprayers.

Maintenance and Cleaning of Airless Paint Sprayers

To keep your airless paint sprayer performing at its peak, it’s crucial to regularly maintain and clean its components, ensuring smooth operation and avoiding any hiccups along the way. Cleaning techniques and a maintenance schedule are key to prolonging the lifespan of your sprayer. Here are some important tips to keep in mind:

Cleaning Technique Maintenance Schedule
Flush the system with water after each use Check the filters and replace if necessary every 3 months
Clean the spray tip with a brush or nozzle cleaner Lubricate the pump rod and packings every 6 months
Remove and clean the suction tube and prime valve Inspect the hoses for wear or leaks every 12 months

By following these cleaning techniques and adhering to a regular maintenance schedule, you can ensure that your airless paint sprayer stays in top shape for years to come. Now, let’s move on to the conclusion and final thoughts.

Conclusion and Final Thoughts

Now that we have discussed the importance of maintenance and cleaning for airless paint sprayers, let’s conclude our discussion by considering some final thoughts.

Advertisement

When it comes to choosing the best airless paint sprayer for interior walls and woodwork, there are a few key factors to consider. First, you should determine whether you will be using the sprayer primarily for interior or exterior projects. While some sprayers are versatile and can be used for both, others are specifically designed for one or the other.

Next, it’s important to compare the cost of different airless paint sprayers. Consider not only the initial purchase price, but also the long-term costs such as maintenance and replacement parts. Finally, don’t forget to read reviews and seek recommendations from others who have used the sprayers.

In conclusion, finding the best airless paint sprayer for your specific needs requires careful consideration of factors such as interior vs exterior use and cost comparison. By taking the time to research and compare different models, you can ensure that you make an informed decision and achieve professional-quality results in your painting projects.

Frequently Asked Questions

Can I use an airless paint sprayer for both interior walls and woodwork?

Yes, an airless paint sprayer can be used for both interior walls and woodwork. It provides a smooth and even finish, saving time and effort. The high-pressure system ensures thorough coverage and the ability to reach intricate details on furniture.

How much paint can an airless paint sprayer hold?

With an airless paint sprayer, I can hold a significant amount of paint. The capacity varies depending on the model, but it is typically measured in gallons. To determine the right amount of paint to use, consider factors like surface area and desired coverage.

Advertisement

Are airless paint sprayers easy to clean?

Airless paint sprayers are easy to clean, but it’s important to follow the proper steps. Pros include faster painting and a smooth finish. Cons include overspray and the need for proper protective gear. Use warm soapy water and clean all parts thoroughly.

Can I use any type of paint with an airless paint sprayer?

Yes, you can use any type of paint with an airless paint sprayer. One of the benefits of using an airless paint sprayer is that it allows for easy application of various paint types. Proper airless paint sprayer maintenance ensures optimal performance.

Do I need to wear any protective gear when using an airless paint sprayer?

When using an airless paint sprayer, it is important to wear protective gear to ensure your safety. Safety precautions include wearing goggles, a respirator mask, and gloves to protect your eyes, lungs, and skin from paint particles and fumes.

Conclusion

Choosing the best airless paint sprayer for your interior walls and woodwork is a crucial decision that can significantly impact the outcome of your painting project. Just like a trusted companion, the right airless paint sprayer can make the task easier and more enjoyable.

There are several options to consider when selecting an airless paint sprayer for interior walls and woodwork. Some popular choices include the Graco Magnum X7, the Wagner Control Pro 170, the Titan ControlMax 1700 Pro, and the Graco Ultra Corded handheld sprayer. Each of these sprayers has its own unique symbol of reliability and performance.

Advertisement

When making your decision, it’s important to consider factors such as power, pressure control, and ease of use. The Graco Magnum X7, for example, offers a powerful motor and adjustable pressure control, making it suitable for both small and large projects. The Wagner Control Pro 170, on the other hand, is known for its efficient paint flow and consistent coverage. The Titan ControlMax 1700 Pro boasts a high-performance pump and a durable construction, making it a reliable choice for demanding projects. Lastly, the Graco Ultra Corded handheld sprayer is a convenient option for smaller jobs and touch-ups.

Regardless of the airless paint sprayer you choose, it’s important to properly maintain and clean it to ensure its longevity and performance. Regular cleaning and maintenance will help prevent clogs and ensure a smooth painting experience.

In conclusion, selecting the best airless paint sprayer for your interior walls and woodwork requires careful consideration. By weighing factors such as power, pressure control, and ease of use, you can find a sprayer that will be your reliable partner in achieving professional-looking results. So, happy painting!

Continue Reading

Airless Paint Sprayer Tips for Specific Projects

How Hard It Painting With An Airless Paint Sprayer

Published

on

By

-up shot capturing the intense concentration on a painter's face as they maneuver an airless paint sprayer, their gloved hand expertly controlling the nozzle, while vibrant paint particles gracefully dance through the air

Let me tell you, using an airless paint sprayer for your painting projects can really enhance the whole process.

Picture this: you’ve got a room to paint, and you want it done quickly and efficiently. That’s where the airless paint sprayer comes in. With its high-pressure system, it can cover large areas in no time, leaving a smooth and even finish.

But let me warn you, it’s not as easy as it looks. It takes practice and technique to master the art of using an airless paint sprayer. From understanding the basics to choosing the right paint and equipment, there’s a lot to learn.

And don’t even get me started on dealing with overspray and drips! But fear not, because I’m here to guide you through it all.

In this article, I’ll share my knowledge, experience, and tips to make painting with an airless paint sprayer a breeze. So, let’s dive in and get those walls looking fabulous in no time!

Advertisement

Key Takeaways

  • Blending techniques and fixing uneven paint require practice and refinement
  • Managing paint flow and pressure is important for controlling paint thickness and achieving desired results
  • Cleaning and maintaining the airless sprayer is crucial to prevent clogs and ensure smooth operation
  • Safety precautions and protective gear, such as wearing a respirator, should be taken while using an airless paint sprayer

Understanding the Basics of Airless Paint Sprayers

Using an airless paint sprayer may seem intimidating at first, but once you understand the basics, you’ll be amazed at how effortless and efficient it is.

One of the key advantages of an airless paint sprayer is its ability to prevent clogs. Traditional paint sprayers often get clogged with paint, causing interruptions and frustration. With an airless sprayer, the paint is forced through a small nozzle at high pressure, eliminating the risk of clogs.

Additionally, airless sprayers excel at achieving even coverage. The high-pressure stream of paint creates a fine mist that evenly coats surfaces, providing a smooth and professional finish.

Now that you know the basics of using an airless paint sprayer, let’s move on to preparing your surface for painting.

Advertisement

Preparing Your Surface for Painting

Before you start, imagine transforming a worn-out, dull wall into a vibrant, inviting space with just a few simple steps. Surface preparation is crucial to achieve a smooth and long-lasting finish when painting with an airless paint sprayer. To ensure optimal adhesion, it is important to remove any loose paint, dirt, or debris from the surface. A thorough cleaning can be done using a power washer or a scraper. Once the surface is clean, it is essential to address any imperfections by filling in cracks or holes with a suitable filler. After the surface is smooth and clean, priming techniques come into play. Priming helps the paint adhere better and provides a uniform base for the topcoat. A 2 column and 4-row table can help illustrate the different primers and their uses, making the process easier to understand.

Primer Type Use
Stain-blocking Prevents stains from bleeding through
Bonding Enhances adhesion on difficult surfaces
Sealing Blocks moisture and prevents peeling
Tinted Enhances color and coverage

Transitioning into the next section about choosing the right paint and equipment, it is crucial to consider the type of paint and equipment that will best suit your project’s needs.

Choosing the Right Paint and Equipment

To achieve the best results, it’s important to select the right paint and equipment for your project.

Advertisement

When choosing the right paint color, consider the mood and ambiance you want to create in the space. Bold and vibrant colors can add energy, while soft and neutral tones create a calming atmosphere.

Proper ventilation during painting is crucial to ensure a safe and comfortable environment. Open windows and use fans to circulate fresh air, especially when using oil-based paints.

Now that you’ve chosen the perfect paint color and set up proper ventilation, it’s time to master the technique of spraying. This will ensure an even and professional finish on your surfaces.

Mastering the Technique of Spraying

When it comes to mastering the technique of spraying with an airless paint sprayer, there are a few key points to keep in mind.

  • First and foremost, holding the sprayer correctly is crucial for achieving even and smooth coverage.

  • Maintaining a consistent speed and distance from the surface being painted is also important to ensure a professional-looking finish.

With my years of experience, I’ve found that paying attention to these details can make all the difference in the final result.

Advertisement

Holding the Sprayer Correctly

To hold the sprayer correctly, follow these steps:

  1. Hold the sprayer firmly in your hand, ensuring a steady and controlled grip that allows you to effortlessly maneuver it across the surface you’re painting.

  2. Correct hand position is crucial for maintaining control and achieving a smooth, even finish. Place your hand comfortably on the handle, with your fingers wrapped around it and your thumb resting on the trigger. This grip provides stability and prevents the sprayer from slipping or tilting during operation.

  3. As you hold the sprayer, make sure to keep your wrist straight and your arm relaxed to avoid fatigue.

  4. Maintaining a consistent speed and distance is the next key step in achieving professional results.

By following these guidelines, you can hold the sprayer correctly and ensure a seamless painting process.

Maintaining a Consistent Speed and Distance

Maintaining a consistent speed and distance is key to achieving a professional finish with your sprayer. This ensures that the paint is applied evenly and smoothly.

To maintain speed, start by setting a comfortable pace that allows you to cover a consistent area without rushing. Adjust your speed as needed to match the size of the surface being painted.

When it comes to distance, keep the sprayer nozzle about 12 inches away from the surface. This helps to avoid overspray and drips. Maintaining this distance allows for optimal paint coverage without creating excess build-up or wasting paint.

Advertisement

By maintaining speed and distance, you can increase efficiency and avoid clogs and blockages in your sprayer. This will also help you achieve a flawless paint job.

Now let’s discuss how to deal with overspray and drips to further enhance your painting process.

Dealing with Overspray and Drips

When it comes to dealing with overspray and drips while using an airless paint sprayer, there are a few key points to keep in mind.

First, using drop cloths and masking tape is essential in protecting surfaces and areas you don’t want to be painted.

Secondly, if mistakes do happen, it’s important to correct them immediately by wiping away the excess paint or sanding it down before it dries.

Advertisement

Lastly, blending is crucial in achieving a seamless finish by feathering out any visible lines or uneven areas with a brush or roller.

Using Drop Cloths and Masking Tape

Before you start using the airless paint sprayer, it’s important to spread out a drop cloth and secure it with masking tape. This will protect the surrounding area and prevent overspray and drips from landing on surfaces you don’t want to paint. Using a drop cloth is highly recommended for its durability and ability to absorb paint spills, although alternatives like plastic sheets or old newspapers can also be used. When it comes to masking tape, it’s crucial to choose a high-quality brand like 3M, Scotch, or FrogTape. This ensures that the tape adheres well and doesn’t leave any residue behind. Now, let’s move on to the next section about correcting mistakes and blending, where I’ll share some tips on how to fix any errors that may occur during the painting process.

Correcting Mistakes and Blending

Once you’ve taken the time to set up your drop cloths and masking tape, you’ll be relieved to know that correcting mistakes and blending is like adding the final strokes of a masterpiece. It’s all about seamlessly blending colors together to create a flawless finish.

When it comes to blending techniques, there are a few tricks that can help you achieve professional-looking results.

  • Feathering: By lightly overlapping the edges of wet paint with a dry brush, you can blend different shades together smoothly.

  • Wet-on-wet: Applying a fresh coat of paint while the previous one is still wet allows the colors to mix and blend naturally.

  • Touch-ups: If you notice uneven paint or missed spots, use a small brush to gently correct the areas without disturbing the surrounding paint.

  • Layering: Building up thin layers of paint gradually can help you achieve a more even and consistent finish.

  • Practice on a test surface: Before tackling your main project, practice blending techniques on a scrap piece of material to gain confidence and refine your skills.

By mastering these blending techniques and fixing uneven paint, you’ll be well on your way to achieving a professional-looking paint job.

Advertisement

In the next section, we will explore the importance of managing paint flow and pressure to ensure optimal results.

Managing Paint Flow and Pressure

To make your painting experience with an airless paint sprayer more enjoyable, you can easily manage the paint flow and pressure.

Managing paint thickness is crucial for achieving a smooth and even finish. By adjusting the pressure on the sprayer, you can control the flow of paint and ensure that it is not too thick or too thin. This will help prevent any clogs or splattering during the painting process.

Additionally, you can adjust the spray pattern to suit the specific area you are painting. Whether you need a narrow pattern for detailed work or a wide pattern for larger surfaces, the airless paint sprayer allows for easy customization.

By mastering the art of managing paint flow and pressure, you can achieve professional-looking results with your airless paint sprayer.

Advertisement

Speaking of achieving professional results, the next section will cover cleaning and maintaining your airless sprayer seamlessly.

Cleaning and Maintaining Your Airless Sprayer

When it comes to cleaning and maintaining your airless sprayer, there are a few key points to keep in mind.

First, flushing the system is crucial to prevent any leftover paint from drying and clogging the nozzle. This should be done after every use to ensure optimal performance.

Additionally, lubricating the pump and components is essential for smooth operation and longevity of your sprayer. Regularly applying lubricant to the piston rod and other moving parts will help prevent wear and tear, keeping your sprayer running smoothly for years to come.

Flushing the System

Don’t overlook the importance of flushing the system – it’s a critical step that ensures the best possible paint application with your airless paint sprayer. Proper flushing techniques are essential to prevent clogs and maintain the efficiency of your sprayer.

Advertisement

After each use, I recommend thoroughly cleaning the system by flushing it with a cleaning solution. Start by removing the paint container and attaching a clean water source to the sprayer. Turn on the sprayer and let the water run through the system until it comes out clear. This will remove any leftover paint and debris, preventing them from clogging the nozzle or other components.

Flushing the system regularly will keep your airless paint sprayer in top condition, allowing you to achieve flawless results.

Now, let’s move on to the next step of lubricating the pump and components.

Lubricating the Pump and Components

Maintaining the smooth operation of your airless paint sprayer is like oiling the gears of a well-oiled machine – it keeps everything running smoothly and ensures flawless results. When it comes to pump maintenance, one of the most important steps is lubricating the pump and its components. This not only enhances the lifespan of the equipment, but also prevents clogs and ensures consistent paint flow. Here are five essential points to consider:

  • Regularly lubricate the pump rod and piston to reduce friction and enhance performance.
  • Apply a thin layer of lubricant to the packings and seals to prevent leaks and maintain a tight seal.
  • Lubricate the ball and seat valves to ensure smooth operation and prevent sticking.
  • Check and clean the filters regularly to prevent debris buildup and maintain optimal paint flow.
  • Use the recommended lubricant specified by the manufacturer for optimal results.

By following these pump maintenance practices, you can prevent clogs and keep your airless paint sprayer operating at its best.

Now, let’s move on to discussing safety precautions and the importance of protective gear.

Advertisement

Safety Precautions and Protective Gear

Wearing the proper protective gear is crucial when using an airless paint sprayer. Safety should always be the top priority to prevent any accidents or health risks.

One important precaution is to wear a respirator that meets the requirements for filtering paint particles and fumes. This helps protect the respiratory system from potential harm.

Additionally, it is essential to handle paint spills carefully to avoid slips or falls. Clean up any spills immediately using absorbent materials and dispose of them properly.

Now that we have discussed the importance of safety precautions and protective gear, let’s move on to troubleshooting common issues that may arise while using an airless paint sprayer. It’s important to be prepared for any challenges that may occur during the painting process.

Troubleshooting Common Issues

If you encounter any problems while using your airless paint sprayer, troubleshooting common issues will help you overcome them smoothly. Here are four common issues that you may come across and how to troubleshoot them:

Advertisement
  1. Troubleshooting a clogged nozzle: A clogged nozzle can lead to a disrupted spray pattern. To fix this, turn off the sprayer and remove the nozzle. Clean it thoroughly with warm water or a suitable cleaning solution. Ensure there are no dried paint particles blocking the nozzle openings before reattaching it.

  2. Troubleshooting an uneven spray pattern: An uneven spray pattern can result from various factors, such as incorrect pressure settings or a worn-out tip. Check the pressure settings and adjust them accordingly. If the tip is worn, replace it with a new one that matches your desired spray pattern.

  3. Troubleshooting paint spitting or sputtering: Paint spitting or sputtering can occur due to worn-out or damaged pump packings. Inspect the packings and replace them if necessary.

  4. Troubleshooting excessive overspray: Excessive overspray can waste paint and create a messy work environment. Adjust the pressure settings and hold the sprayer at the correct distance from the surface to minimize overspray.

By troubleshooting these common issues, you can ensure a smooth and efficient painting experience.

Now, let’s move on to the next section about the importance of practice, practice, practice!

Practice, Practice, Practice!

Get ready to dive in and put your skills to the test because practice, practice, practice is the key to mastering the art of using an airless paint sprayer! When it comes to painting with an airless paint sprayer, there is no substitute for experience. By practicing regularly, you will not only become more familiar with the equipment, but you will also develop a better understanding of the technique required for a flawless finish.

To help you on your journey to becoming an airless paint sprayer pro, here are some common mistakes to avoid:

  1. Overspraying: This occurs when you apply too much paint in one area, resulting in a thick and uneven coat. To avoid this, maintain a consistent distance from the surface and use smooth, controlled strokes.

  2. Not cleaning the sprayer properly: Failing to clean the sprayer after each use can lead to clogs and malfunctions. Make sure to follow the manufacturer’s instructions for cleaning and maintenance.

Remember, mastering the technique of using an airless paint sprayer takes time and practice. By avoiding common mistakes and honing your skills through repetition, you’ll soon be creating professional-quality results. So don’t be afraid to roll up your sleeves and get painting!

Advertisement

Frequently Asked Questions

Can I use an airless paint sprayer for small touch-up jobs?

Yes, an airless paint sprayer is a great tool for small touch-up jobs. It allows for precise application and saves time compared to traditional methods. It’s the perfect alternative for touch-up techniques.

How long does it typically take to paint a room using an airless paint sprayer?

Typically, it takes less time to paint a room using an airless paint sprayer compared to using a roller and brush. The pros of using an airless paint sprayer include faster coverage, but it may require more skill and preparation.

What type of paint is best suited for airless paint sprayers?

The best paint brands suited for airless paint sprayers are Sherwin-Williams, Behr, and Benjamin Moore. To achieve a smooth finish, thin the paint, use the proper tip size, and maintain a consistent spraying technique.

How do I prevent clogging or blockages in the spray gun?

To prevent clogging or blockages in the spray gun, I recommend cleaning it thoroughly after each use. Regularly inspect and replace worn or damaged parts. Adjust the pressure settings to prevent overspray.

Is it necessary to use a primer before applying paint with an airless paint sprayer?

Using a primer before applying paint with an airless paint sprayer is crucial. It provides better adhesion, durability, and a smoother finish. While there are alternative options, a primer ensures optimal results.

Advertisement

Conclusion

In conclusion, painting with an airless paint sprayer can be challenging. It requires practice and skill. However, with the right techniques and equipment, it can produce professional-looking results.

Did you know that airless paint sprayers can cover up to 10 times more area than traditional paint brushes or rollers? This means that you can complete your painting projects in a fraction of the time.

So, don’t be discouraged by the learning curve. Embrace it and soon you’ll be a pro at using airless paint sprayers!

Continue Reading
Advertisement

Affiliate disclaimer

As an affiliate, we may earn a commission from qualifying purchases. We get commissions for purchases made through links on this website from Amazon and other third parties.

Advertisement

Trending