Cleaning your airless paint sprayer can be more challenging than expected. Trust me, I’ve been there too.
But fear not, because in this article, I’m going to share with you everything you need to know about what to use to clean your airless paint sprayer effectively.
Picture this: you’ve just finished a big painting project and now it’s time to clean up. You grab your airless paint sprayer, but are unsure of where to start. Well, you’re in the right place.
I’m going to guide you through the step-by-step process of cleaning your sprayer, from gathering the necessary cleaning supplies to troubleshooting common cleaning issues.
Whether you’re a seasoned painter or just starting out, understanding the importance of regular cleaning for your airless paint sprayer is crucial. By following the tips and techniques I’ll share with you, you’ll be able to maintain the performance and longevity of your sprayer, ensuring that it’s always ready for your next project.
So let’s dive in and discover the best cleaning methods for your airless paint sprayer.
Key Takeaways
- Use a cleaning solution or warm soapy water to clean water-based paints.
- Use a solvent like mineral spirits or turpentine to clean oil-based paints.
- Use warm soapy water to clean latex or acrylic paints.
- Regularly clean and maintain the sprayer to achieve professional-quality results.
Importance of Regular Cleaning for Your Airless Paint Sprayer
Regularly cleaning your airless paint sprayer is crucial to keep it running smoothly and prevent clogs or malfunctions. The importance of regular maintenance can’t be stressed enough when it comes to these powerful tools.
Over time, paint residue can build up and harden inside the sprayer, which can lead to reduced performance and even damage. To ensure the longevity and efficiency of your airless paint sprayer, it’s essential to employ effective cleaning techniques.
This involves disassembling the sprayer, removing any leftover paint or debris, and thoroughly cleaning each component with appropriate solvents or cleaning agents. It’s also important to pay special attention to the spray tip, as this is often the area where clogs occur.
By regularly cleaning your airless paint sprayer, you can ensure optimal performance and extend its lifespan.
Now, let’s move on to gathering the necessary cleaning supplies.
Gather the Necessary Cleaning Supplies
First, you’ll need to gather all the supplies necessary for a thorough cleaning of your trusty tool. When it comes to cleaning an airless paint sprayer, there are a few key cleaning techniques you should know.
Firstly, you’ll want to have a bucket of clean water, as well as a cleaning solution specifically designed for paint sprayers. Additionally, you’ll need a soft brush or toothbrush to scrub away any built-up paint or debris. It’s also important to have some clean rags or paper towels on hand to wipe down the various components of the sprayer.
As for recommended cleaning products, look for ones that are specifically labeled for airless paint sprayers and follow the manufacturer’s instructions. Taking these cleaning techniques and recommended cleaning products into consideration, you can ensure your sprayer stays in top shape.
Now, let’s move on to the safety precautions to take before cleaning.
Safety Precautions to Take Before Cleaning
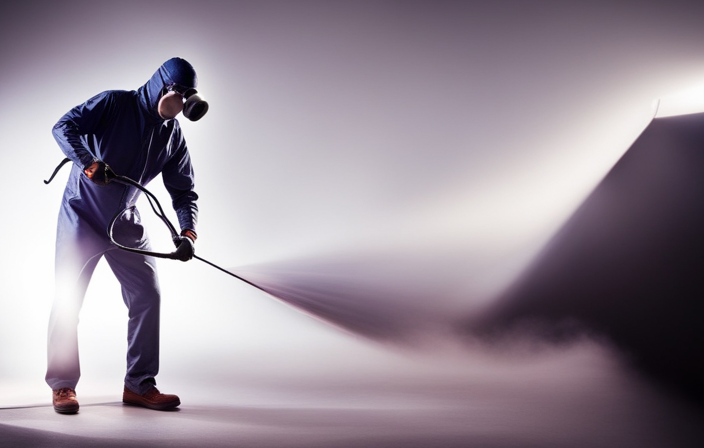
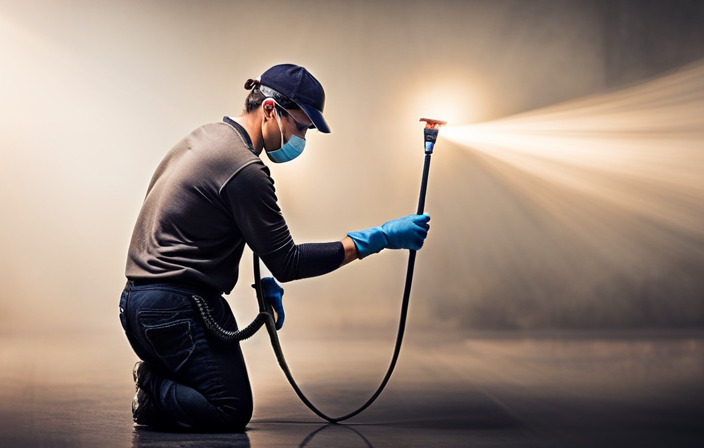
Before you start cleaning, make sure to take the necessary safety precautions to protect yourself and prevent any accidents. When working with an airless paint sprayer, it’s important to wear appropriate protective gear, such as safety goggles, a respirator mask, and gloves, to prevent any injuries or exposure to harmful chemicals.
Additionally, make sure to work in a well-ventilated area to avoid inhaling fumes. Before cleaning the equipment, make sure to turn off the sprayer and unplug it from the power source. This’ll prevent any accidental spraying or electrical shocks.
Always refer to the manufacturer’s instructions for specific safety guidelines and recommendations. Taking these precautions will ensure your safety while cleaning your airless paint sprayer and prevent any accidents.
Now, let’s move on to the step-by-step guide to cleaning your airless paint sprayer.
Step-by-Step Guide to Cleaning Your Airless Paint Sprayer
Now, let’s dive into the easy step-by-step process of giving your trusty paint sprayer a thorough cleaning to keep it in top-notch condition.
Cleaning your airless paint sprayer is essential to maintain its performance and longevity. To begin, you’ll want to start by flushing the system with a cleaning solution recommended by the manufacturer. This will remove any leftover paint or debris from the sprayer.
Next, disassemble the spray gun and clean all the individual parts, such as the nozzle and filters, using a brush and the cleaning solution. Pay close attention to any clogs or buildup that may affect the sprayer’s performance.
Once all the parts are clean, reassemble the spray gun and run clean water through the system to rinse out any remaining cleaning solution. It’s recommended to clean your airless paint sprayer after every use, but a more thorough cleaning should be done on a regular basis to prevent any paint residue from hardening.
Now, let’s move on to the next section about removing stubborn paint residue.
Removing Stubborn Paint Residue
To tackle tenacious traces of paint, employ a potent solution to obliterate obstinate residue. Here’s a step-by-step guide to removing stubborn paint residue from your airless paint sprayer using eco-friendly cleaners:
-
Start by disconnecting the sprayer from the power source and removing any remaining paint from the container.
-
Detach the nozzle and soak it in a mixture of warm water and eco-friendly cleaner for about 30 minutes.
-
Scrub the nozzle gently with a soft brush to remove any remaining paint particles.
-
Rinse the nozzle thoroughly with clean water and allow it to dry completely before reattaching it to the sprayer.
By using eco-friendly cleaners, you can effectively remove paint residue without harming the environment. Once the stubborn paint residue is removed, you can move on to maintaining and storing your cleaned airless paint sprayer.
Maintaining and Storing Your Cleaned Airless Paint Sprayer
When it comes to maintaining and storing your cleaned airless paint sprayer, there are a few key points to keep in mind.
Firstly, it’s important to lubricate the moving parts of the sprayer regularly to ensure smooth and efficient operation.
Secondly, proper storage is essential to prevent clogs and damage to the sprayer. This includes storing it in a clean and dry environment, protecting it from extreme temperatures, and ensuring that the sprayer is properly cleaned and flushed before storage.
Lubricating Moving Parts
Ensure your airless paint sprayer continues to operate smoothly by regularly lubricating its moving parts. Proper lubrication techniques are essential for maintaining the longevity and performance of your equipment. By using the right lubricants, you can minimize friction and wear on critical components, ensuring optimal functionality. Here are some recommended lubricants and their applications for your airless paint sprayer:
| Lubricant | Application |
|---|---|
| Silicone Spray | Piston rod and packings |
| Grease | Gear teeth and bearings |
| Oil | Motor and pump maintenance |
| Teflon Tape | Threaded connections |
Using these lubricants in the appropriate areas will help reduce friction, prevent damage, and extend the lifespan of your airless paint sprayer. Proper lubrication is just one aspect of maintaining your equipment. In the next section, we will discuss proper storage techniques to prevent clogs and damage.
Proper Storage to Prevent Clogs and Damage
After properly lubricating the moving parts of your airless paint sprayer, it’s essential to store it correctly to prevent clogs and damage. This step is often overlooked, but it’s crucial for maintaining the longevity and performance of your equipment.
One of the main issues that can occur during storage is paint buildup, which can clog the sprayer and affect its functionality. To prevent this, it’s recommended to thoroughly clean the sprayer after each use. You can do this by using effective cleaning techniques such as flushing the system with a cleaning solution and running clean water through it.
Additionally, storing the sprayer in a cool, dry place and removing any leftover paint from the system will further prevent clogs and damage. By following these proper storage practices, you can ensure that your airless paint sprayer remains in optimal condition.
Now, let’s move on to troubleshooting common cleaning issues.
Troubleshooting Common Cleaning Issues
To troubleshoot common cleaning issues with your airless paint sprayer, start by visualizing the gunk and residue buildup inside the machine, as if it were a murky swamp clogging up the smooth flow of paint.
One of the most common problems is paint sprayer clogs, which can occur due to paint buildup. To prevent this, it’s important to regularly clean the sprayer after each use and properly store it.
Begin by removing the spray tip and filter, then flush the machine with water or a cleaning solution. Use a brush or toothpick to remove any stubborn paint particles. Pay close attention to the intake valve and pump, as these areas are prone to clogs.
Once the sprayer is clean, you can move on to the next section about cleaning tips for different types of paint, ensuring a smooth and efficient painting process.
Cleaning Tips for Different Types of Paint
When it comes to cleaning different types of paint, it’s important to understand the specific requirements for each type. For water-based paints, I recommend using warm soapy water and a soft cloth to gently remove any residue.
Oil-based paints, on the other hand, require a solvent such as mineral spirits or turpentine for effective cleaning.
Lastly, for latex or acrylic paints, a mixture of warm water and mild detergent will do the trick in removing any excess paint.
Water-based Paints
Using water-based paints with your airless paint sprayer? Let me tell you the best way to clean it! Cleaning water-based paints from your airless paint sprayer is a breeze. Here’s what you need to do:
- Use a cleaning solution specifically designed for water-based paints.
- Flush the sprayer with clean water to remove any excess paint.
- Run the cleaning solution through the sprayer to break down any remaining paint particles.
- Let the cleaning solution sit for a few minutes to ensure it thoroughly cleans the system.
- Flush the sprayer with clean water again to remove any residue.
Cleaning water-based paints from your airless paint sprayer is essential to maintain its performance and prevent clogs. Once you’ve cleaned your sprayer, you can move on to using oil-based paints.
Oil-based Paints
Painting with oil-based paints can provide a rich and durable finish that adds depth and character to your surfaces. However, cleaning airless paint sprayers after using oil-based paints requires specific techniques and products.
Start by emptying any remaining paint from the sprayer and wiping down the exterior with a clean cloth. Next, disassemble the spray gun and remove any remaining paint from the nozzle, tip, and filters. Use a solvent, such as mineral spirits or paint thinner, to clean these parts thoroughly. You can also soak them in the solvent for a more effective cleaning.
After cleaning the individual parts, reassemble the spray gun and flush the system with the solvent to remove any residual paint. It’s important to wear gloves and protective eyewear when handling solvents.
Transitioning to cleaning airless paint sprayers used with latex or acrylic paints, these water-based options require different cleaning techniques and recommended cleaning products.
Latex or Acrylic Paints
To truly understand the capabilities of latex or acrylic paints, you should explore the theory and see if it paints a picture for you.
When it comes to cleaning airless paint sprayers after using latex or acrylic paints, there are some cleaning techniques and best practices to follow. First, you should start by removing any excess paint from the sprayer and its components. Then, you can use warm soapy water to clean the paint container, hose, and nozzle. It’s important to thoroughly rinse all parts to ensure no paint residue remains. Additionally, using a brush or a soft cloth can help to remove any stubborn paint. Finally, make sure to dry all the parts properly before storing the sprayer.
Transitioning into the subsequent section about professional cleaning services for airless paint sprayers, it’s essential to consider these cleaning techniques as a preventive measure.
Professional Cleaning Services for Airless Paint Sprayers
Did you know that professional cleaning services can help you maintain the performance and longevity of your airless paint sprayer? When it comes to airless paint sprayers, professional maintenance is crucial.
While DIY cleaning methods can be effective to some extent, they may not completely remove all the paint residue and debris from the sprayer components. This can lead to clogs, reduced spraying efficiency, and even damage to the sprayer.
Hiring professional cleaning services ensures that your airless paint sprayer is thoroughly cleaned using specialized equipment and techniques. They have the knowledge and expertise to disassemble the sprayer, clean each component meticulously, and remove any buildup or blockages.
By entrusting your airless paint sprayer to professionals, you can ensure its optimal performance and extend its lifespan.
Now let’s move on to the frequently asked questions about cleaning airless paint sprayers.
Frequently Asked Questions about Cleaning Airless Paint Sprayers
Now that we’ve discussed professional cleaning services for airless paint sprayers, let’s dive into some frequently asked questions about cleaning these machines.
As an expert in paint sprayer maintenance, I understand the importance of proper cleaning techniques to ensure the longevity and optimal performance of your equipment. When it comes to cleaning airless paint sprayers, there are a few key steps to follow.
First, make sure to flush out any remaining paint by running a cleaning solution through the sprayer. Then, disassemble the spray gun and clean each component thoroughly. It’s crucial to pay attention to the nozzle, as any clogs can affect the spray pattern.
Additionally, don’t forget to clean the filters and check for any signs of wear or damage. By regularly performing these cleaning techniques, you can keep your airless paint sprayer in top-notch condition and achieve professional-quality results every time.
Frequently Asked Questions
Can I use regular household cleaning products to clean my airless paint sprayer?
Yes, you can use regular household cleaning products to clean your airless paint sprayer. However, it is important to take safety precautions, such as wearing protective gloves and eyewear, and ensuring proper ventilation during the cleaning process.
How often should I clean my airless paint sprayer?
Cleaning your airless paint sprayer regularly is crucial for its longevity. To maintain peak performance, clean it after each use. The best cleaning solutions include water-based cleaners and solvents specifically designed for airless paint sprayers.
Can I clean my airless paint sprayer with just water?
Yes, you can clean your airless paint sprayer with just water. However, it is recommended to use alternative cleaning solutions specifically designed for airless paint sprayers to achieve the best results. Following best practices for cleaning is essential for maintaining optimal performance.
Is it necessary to disassemble the spray gun for cleaning?
Yes, it is necessary to disassemble the spray gun for cleaning. By doing so, it ensures thorough removal of paint residue and allows for cleaning of individual parts, resulting in improved cleaning efficiency.
Can I use a pressure washer to clean my airless paint sprayer?
Yes, you can use a pressure washer to clean your airless paint sprayer. However, it is important to be cautious as the high pressure can damage the delicate components. There are alternative cleaning methods available, such as using solvents or disassembling the spray gun.
Conclusion
In conclusion, regular cleaning of your airless paint sprayer is crucial to maintain its efficiency and prolong its lifespan. By following the step-by-step guide and using the necessary cleaning supplies, you can ensure that your sprayer is always ready for the next paint job.
Remember to take safety precautions and troubleshoot any cleaning issues that may arise. Additionally, consider seeking professional cleaning services for a thorough and comprehensive cleaning experience.
With these tips and techniques, you can keep your airless paint sprayer in top-notch condition and achieve flawless paint finishes every time.