Connect with us

Airless Paint Sprayers FAQs

How To Use An Airless Paint Sprayer For A Car

Published

on

An image that showcases a skilled hand expertly maneuvering an airless paint sprayer, evenly coating a sleek car's surface with a glossy layer of vibrant color, demonstrating the step-by-step process of achieving a flawless finish

I’ve always enjoyed keeping my car looking sleek and polished, and incorporating an airless paint sprayer into my routine has revolutionized the way I achieve that high-quality shine.

In this article, I’ll guide you through the step-by-step process of using an airless paint sprayer to give your car a fresh coat of paint.

  1. Gather all the necessary supplies and set up your workspace. Make sure you have everything you need within reach.

  2. Mix the paint and practice on a scrap surface to get the hang of it before moving on to the main event – painting your car.

  3. Pay attention to drying time to ensure a flawless finish. This step is crucial in achieving the desired results.

  4. Clean and maintain your sprayer for long-lasting performance. I’ll share some tips on how to keep your sprayer in top shape.

By the end of this article, you’ll be able to admire your car’s professional-looking paint job with pride.

Key Takeaways

  • Properly overlap each stroke for complete coverage
  • Pay attention to drying time and allow each coat to dry before applying the next layer
  • Clean and maintain the sprayer regularly for optimal performance
  • Inspect and touch up as needed to ensure a flawless paint job

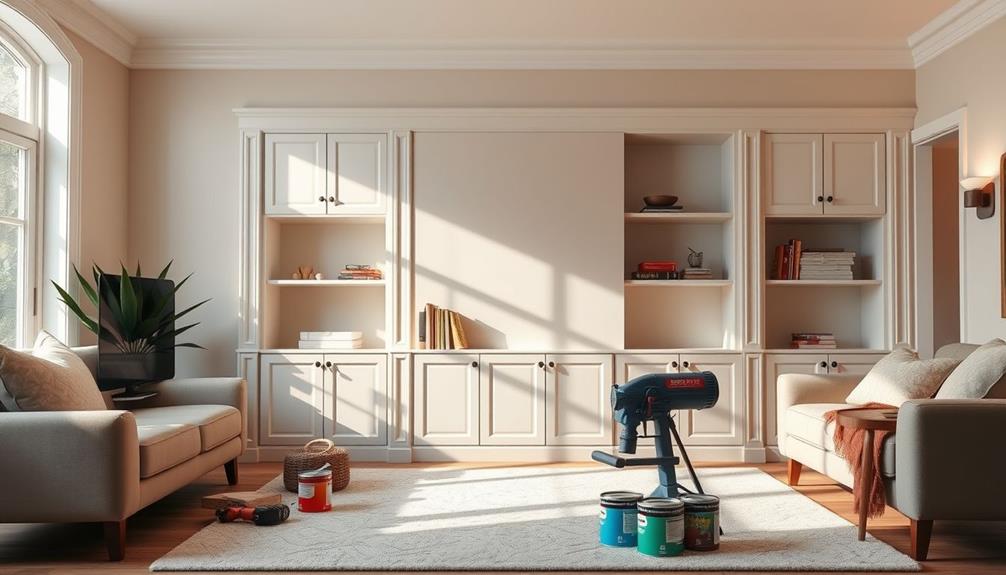
Gather the Necessary Supplies

Now that you know what you’ll need, it’s time to gather up all the necessary supplies for your car painting adventure.

Advertisement

Before you begin, it’s important to take some preparation steps and safety precautions to ensure a smooth and successful painting process.

First, make sure you have a well-ventilated and clean workspace.

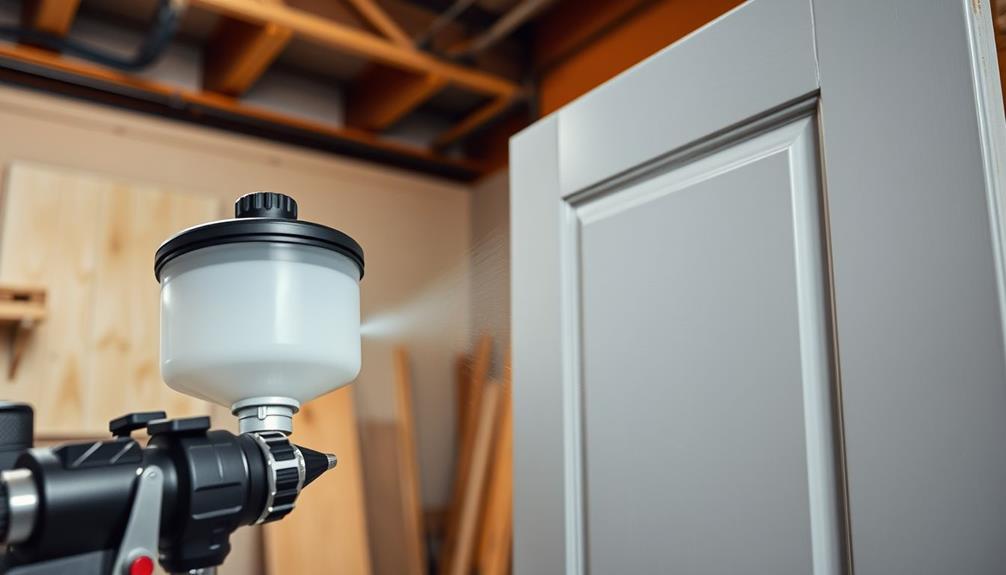
You’ll need a high-quality airless paint sprayer, which is essential for achieving professional results.

Additionally, gather masking tape and plastic sheets to protect the areas you don’t want to paint.

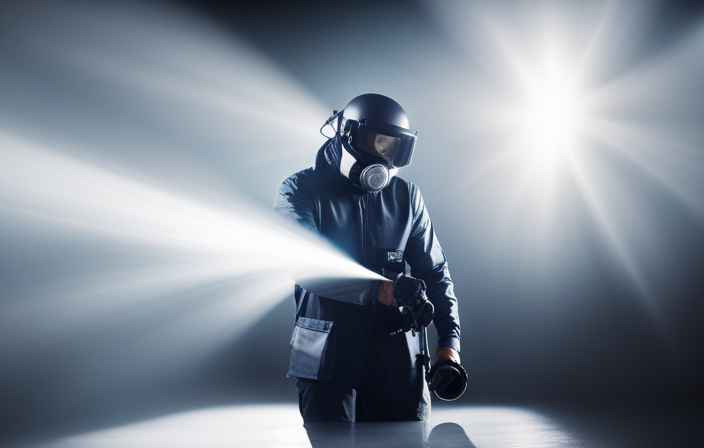
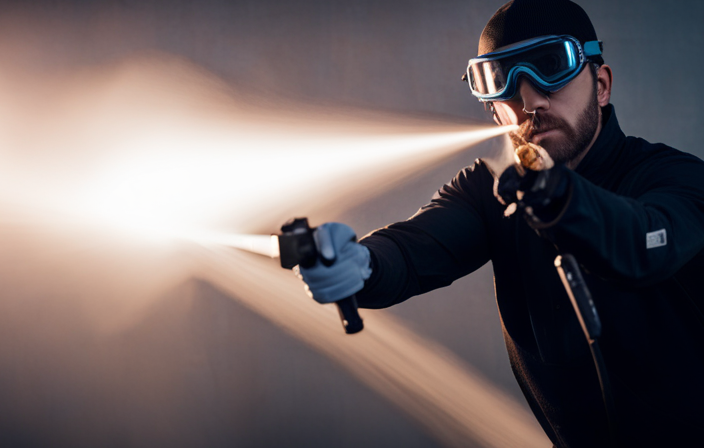
Don’t forget to have a respirator mask to protect yourself from harmful fumes and a pair of safety goggles to shield your eyes.

Advertisement

Lastly, gather some cleaning materials such as soap, water, and a degreaser to ensure that the car’s surface is clean and ready for painting.

With all these supplies in hand, you can now move on to setting up your workspace and getting ready to paint your car.

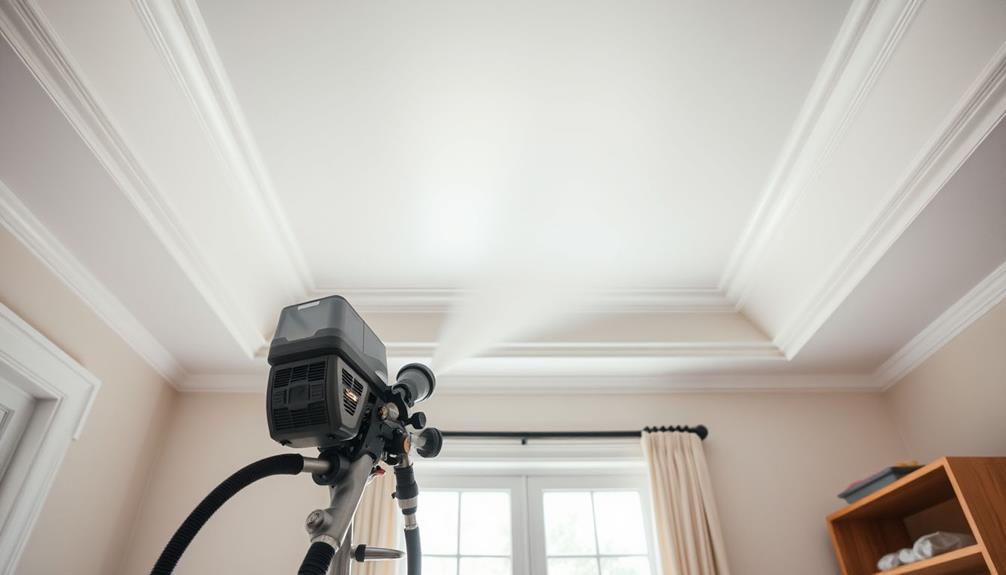
Set Up Your Workspace

To ensure a safe and efficient workspace, I create a well-ventilated area by opening all doors and windows. This allows for proper airflow and prevents any potential health hazards.

Next, I meticulously cover surrounding objects such as furniture, plants, and vehicles to protect them from any overspray or paint mist. It is essential to be meticulous in this step to avoid any unwanted paint on nearby surfaces.

Create a Well-Ventilated Area

First, make sure you’re in a well-ventilated area. Can you imagine the fumes building up if you’re working in a confined space? Proper ventilation is crucial to ensure your safety and protect yourself from harmful fumes.

Advertisement

Here are three important steps to create a well-ventilated area:

  • Open all windows and doors to allow fresh air to circulate.
  • Use fans to increase air movement and help dissipate any lingering fumes.
  • Consider using a portable air purifier to further improve air quality.

Creating a well-ventilated area is essential when using an airless paint sprayer for your car. The fumes generated during the painting process can be hazardous, so taking these precautions is necessary.

Once you have ensured proper ventilation, you can move on to the next step of covering surrounding objects to protect them from overspray.

Cover Surrounding Objects

To protect your precious belongings, it is important to cover surrounding objects with drop cloths or plastic sheets. This will safeguard surfaces from overspray. Before you begin spraying, take the time to cover any nearby furniture, vehicles, or other objects that could potentially be damaged by the paint. Create a barrier between the paint and the objects using drop cloths or plastic sheets. Ensure that the covers are secure and tightly sealed to prevent any paint from seeping through.

By taking this precaution, you can avoid any accidental paint damage and keep your surroundings clean and tidy.

Now that you have protected your surroundings, it’s time to move on to the next step: mixing the paint.

Advertisement

Mix the Paint

Mixing the paint is easy with an airless paint sprayer. Choose the right paint color for your car. Select a high-quality automotive paint that matches your vehicle’s original color. Consult the manufacturer’s instructions for the specific mixing ratios. Pour the paint into a mixing cup with the airless paint sprayer. Add the appropriate amount of reducer and hardener according to the instructions. Stir the mixture thoroughly using a paint stir stick. Ensure the components are well blended for an even distribution of color and maximum effectiveness. Once the paint is mixed, practice on a scrap surface to perfect your technique.

Practice on a Scrap Surface

After mixing the paint, it’s essential to practice on a scrap surface before painting your car with an airless paint sprayer. This step allows you to familiarize yourself with the sprayer and practice different techniques to achieve the desired finish. To do this, choose a scrap surface similar to your car’s material, such as a spare piece of metal or plastic. Set up the sprayer according to the manufacturer’s instructions and adjust the nozzle to the desired spray pattern. In a well-ventilated area, apply the paint in even strokes, ensuring proper coverage and avoiding drips or runs. This practice session will help you refine your technique and get a feel for the sprayer’s capabilities. Additionally, it’s crucial to choose the right paint for your car, considering factors like color, durability, and compatibility with the sprayer. Once you feel confident in your practice, you can proceed to the next step of painting your car with the airless paint sprayer.

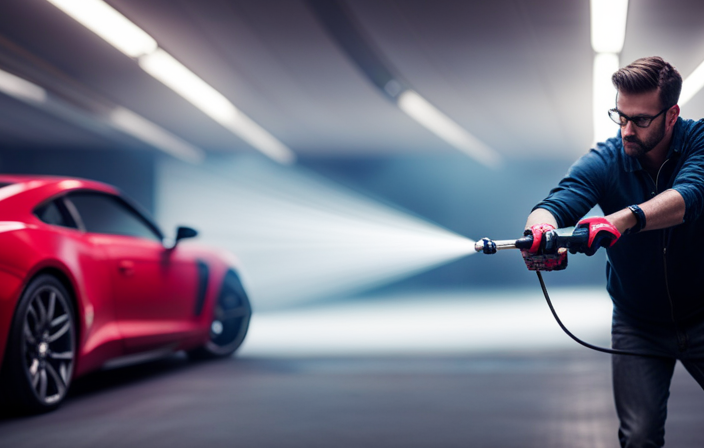
Begin Painting Your Car

Now it’s time to start transforming your vehicle and bringing it to life with a flawless coat of color. Before you begin painting your car, it’s crucial to understand the proper car painting techniques and choose the right paint color.

Advertisement

Here are four key points to consider:

  1. Surface Preparation: The success of your paint job relies on a properly prepared surface. Remove any dirt, rust, or old paint, and ensure the surface is smooth and clean.

  2. Primer Application: Applying a primer creates a smooth base for the paint to adhere to. It helps improve durability and enhances the final finish.

  3. Paint Application: Use even, overlapping strokes to apply the paint. Start from the top and work your way down, ensuring a consistent coverage.

  4. Drying and Curing: Allow sufficient drying and curing time between coats. This ensures a long-lasting and flawless finish.

Now that you have a clear understanding of the painting process, let’s move on to maintaining proper technique in the next section.

Maintain Proper Technique

When using an airless paint sprayer to maintain proper technique, it’s crucial to keep the sprayer moving at a steady pace. This ensures an even distribution of paint and prevents any buildup or pooling in one area.

It’s also important to overlap each stroke slightly to achieve complete coverage and avoid any streaks or unevenness in the paint job.

By following these key points, you can achieve a professional and flawless finish on your car.

Advertisement

Keep the Sprayer Moving

To achieve a smooth and even coat of paint, it’s crucial to keep the sprayer in constant motion, preventing any unwanted drips or streaks. Did you know that a stationary paint sprayer can create thick and uneven layers, resulting in a less professional finish? To keep the sprayer steady and avoid overspraying, it’s important to maintain a consistent pace and keep the sprayer moving at all times. This will help distribute the paint evenly and prevent any build-up in certain areas.

To help you visualize the importance of keeping the sprayer moving, here’s a table highlighting the potential issues that can arise from not following this technique:

Issue Cause Solution
Drips Sprayer held in one spot Keep the sprayer moving
Streaks Uneven paint application Maintain consistent motion
Uneven layers Paint concentrated in one area Move the sprayer in a smooth, continuous motion

By constantly moving the sprayer, you can ensure a professional-looking finish without any unwanted imperfections. Now, let’s transition into the next step and discuss how to properly overlap each stroke for optimal coverage.

Overlap Each Stroke

Achieving a smooth and professional finish requires properly overlapping each stroke, ensuring complete coverage and a seamless result.

To achieve proper stroke technique, it is crucial to maintain a consistent distance between the sprayer and the car surface. Begin by starting each stroke slightly before the previous one ends, overlapping by about 50% to ensure even coverage. This technique prevents any gaps or streaks in the paint.

Advertisement

Move the sprayer in a smooth, steady motion, keeping it parallel to the car’s surface. Pay attention to the speed of the stroke, as moving too quickly can result in thin and patchy coverage, while moving too slowly can lead to drips and runs.

By following this meticulous approach, you can achieve a flawless finish.

Now, let’s delve into the next section and discuss the importance of paying attention to drying time.

Pay Attention to Drying Time

When using an airless paint sprayer for a car, it’s crucial to pay close attention to the drying time of each coat. This ensures that the paint has sufficient time to dry and adhere properly to the surface.

It’s important to avoid touching or disturbing the paint during this drying process, as any contact can result in smudges or imperfections. So, I always make sure to allow enough time for each coat to dry and refrain from touching the paint until it has fully cured.

Advertisement

Allow Sufficient Time for Each Coat to Dry

After applying a coat of paint with your airless paint sprayer, it is important to allow ample time for it to dry before moving on to the next layer. Giving the paint sufficient drying time is crucial in order to achieve a smooth finish. Here are some tips to ensure proper drying:

  • Wait for the paint to become touch-dry: Use a timer or follow the manufacturer’s instructions to determine the recommended drying time for the specific paint you are using.

  • Avoid humid conditions: High humidity can prolong the drying process. If necessary, use dehumidifiers or fans to create an ideal environment.

  • Keep the temperature consistent: Fluctuations in temperature can affect the drying time. It is important to maintain a steady temperature in the painting area.

  • Avoid direct sunlight: Exposing the freshly painted surface to direct sunlight can cause the paint to dry unevenly or too quickly, which can lead to imperfections.

  • Test the dryness before proceeding: Before applying the next coat, gently touch a small inconspicuous area to ensure that the paint is fully dried.

Ensuring proper drying time will help you achieve a flawless finish. Now, let’s move on to the next important step, which is avoiding touching or disturbing the paint.

Avoid Touching or Disturbing the Paint

To ensure a flawless finish, it’s important to avoid touching or disturbing the paint once it’s been applied. Any contact with the paint can ruin the smooth surface and result in an uneven finish.

In addition to avoiding contact, preventing overspray is crucial. This can be achieved by using proper techniques and adjusting the spray pattern and pressure according to the size of the car and the area being painted. Overspray not only wastes paint but also creates a messy workspace.

Choosing the right paint color is another important aspect. Factors such as the car’s design, personal preference, and desired outcome should be considered. Taking the time to select the perfect color will ensure a stunning end result.

Advertisement

When it comes to cleaning and maintaining your sprayer, following a regular maintenance routine is essential. This will help keep the sprayer in optimal condition.

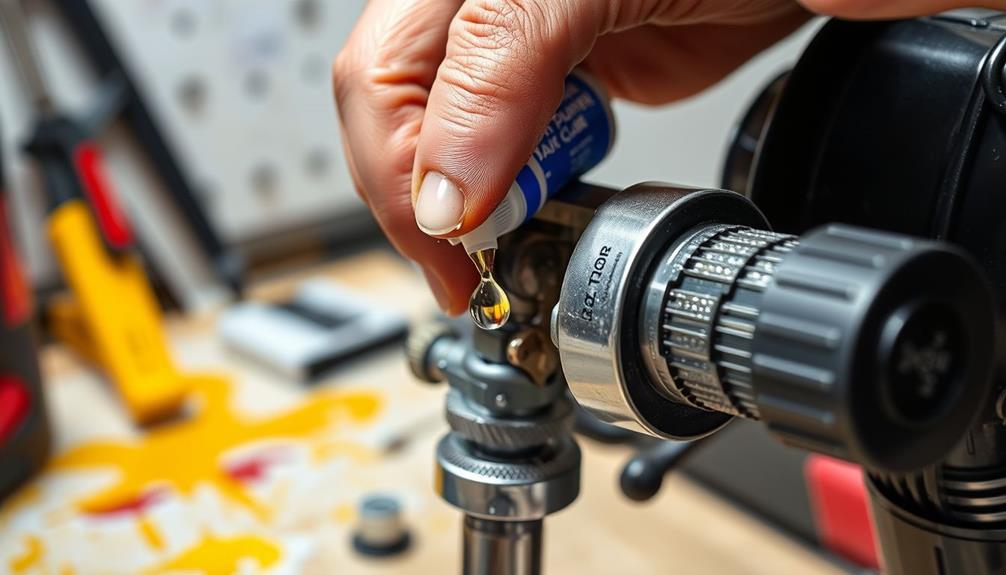
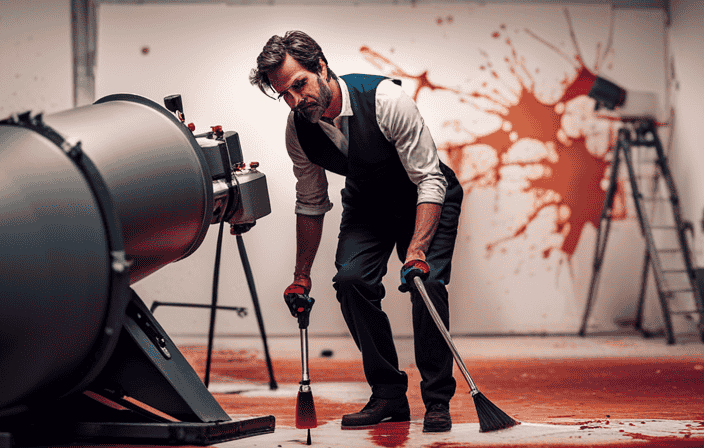
Clean and Maintain Your Sprayer

Maintaining your sprayer is like giving it a spa day to keep it in top shape. Sprayer maintenance is essential for optimal performance and longevity. Here are some cleaning tips to ensure your airless paint sprayer stays in pristine condition:

  1. Thoroughly clean the sprayer after each use by flushing it with a cleaning solution recommended by the manufacturer. This will remove any leftover paint and prevent clogs.

  2. Pay extra attention to the spray tip, as it is the most critical component. Remove it carefully and clean it with a soft brush or a specialized tip cleaner.

  3. Inspect the filters regularly and clean or replace them as needed. Clogged filters can reduce the sprayer’s efficiency.

  4. Store the sprayer properly in a clean and dry place, away from extreme temperatures or direct sunlight.

By following these maintenance steps, you can ensure that your sprayer is always ready for action.

Now, let’s move on to the next section: inspect and touch up as needed.

Inspect and Touch Up as Needed

Inspecting your sprayer regularly and touching up any areas that need attention will help ensure its long-lasting performance and keep it looking its best. To effectively touch up your car’s paint job, it’s important to use the right techniques and avoid common paint mistakes. Here is a table summarizing some touch up techniques and common mistakes to avoid:

Advertisement
Touch Up Techniques Common Paint Mistakes
Use a small brush or sponge applicator for precision Applying too much paint, leading to drips and uneven coverage
Start with a thin layer of paint and build up as needed Not allowing enough drying time between layers, causing smudging or clumping
Blend the touch-up paint with the surrounding area using a feathering technique Using the wrong color or finish, resulting in a noticeable patch

By following these touch up techniques and avoiding common paint mistakes, you can ensure a seamless and professional-looking paint job. Transitioning into the next section, let’s move on to admiring the results of your hard work.

Admire Your Professional-Looking Paint Job

Now that you’ve put in the hard work, take a moment to appreciate the stunning results of your professional-looking paint job. It’s sure to impress others!

Did you know that a well-maintained vehicle with a flawless paint job can increase its resale value by up to 10%? To achieve that perfect finish, professional paint techniques are crucial.

Ensure you’ve chosen the right paint color that complements your car’s style and personality. Consider factors like the car’s make, model, and overall aesthetic when making your selection.

It’s also important to follow proper application methods, such as using an airless paint sprayer for an even and consistent coat. Remember to apply multiple thin layers rather than one thick coat to prevent drips and runs.

Advertisement

Admiring your professional-looking paint job is not only satisfying but also a testament to your attention to detail and dedication.

Frequently Asked Questions

How do I choose the right type of paint for my car when using an airless paint sprayer?

When choosing paint color for a car, it’s important to consider factors like personal preference, car model, and current trends. Understanding paint finishes is also crucial, as they determine the final look and protection of the car’s exterior.

Can I use an airless paint sprayer for touch-ups on my car’s paint job?

Yes, an airless paint sprayer can be used for touch-ups on a car’s paint job. It offers precise and controlled application, ensuring seamless blending with the existing paint. The benefits include efficient coverage, reduced overspray, and a professional finish.

What safety precautions should I take when using an airless paint sprayer for my car?

To ensure proper ventilation when using an airless paint sprayer for your car, open windows or use fans to circulate air. It is crucial to wear personal protective equipment, including goggles and gloves, to protect against paint fumes and potential skin irritation.

How long does it typically take for the paint to fully dry when using an airless paint sprayer?

The drying time for paint applied with an airless paint sprayer varies depending on factors such as temperature and humidity. To speed up the drying process, ensure proper ventilation and avoid applying thick coats.

Advertisement

Is it necessary to use a clear coat after painting my car with an airless paint sprayer?

Yes, it is necessary to use a clear coat after painting a car with an airless paint sprayer. The clear coat provides a glossy finish, enhances durability, and protects the paint from UV rays and other environmental factors. However, before using the airless paint sprayer, it is crucial to properly prepare the car’s surface by cleaning it, removing any rust or imperfections, and applying a primer coat.

Conclusion

In conclusion, using an airless paint sprayer for your car is a meticulous process that requires careful attention to detail. By gathering the necessary supplies, setting up your workspace, and mixing the paint correctly, you can achieve a professional-looking paint job.

Just like an artist meticulously brushes strokes onto a canvas, using an airless paint sprayer allows you to create a masterpiece on your car’s surface. So, take your time, follow the steps, and soon you’ll be admiring your car’s stunning new look.

With James‘ articles, you can expect comprehensive breakdowns of airless paint sprayer features, performance assessments, and expert insights into the latest industry innovations. His meticulous approach ensures that readers gain a thorough understanding of the equipment they are considering, helping them make well-informed choices.

Continue Reading
Advertisement

Airless Paint Sprayers FAQs

How Does A Graco X7 Airless Paint Sprayer Video

Published

on

By

An image capturing the precise moment when a skilled hand wields the Graco X7 Airless Paint Sprayer, as vibrant paint particles effortlessly jet through the air, elegantly coating a surface with a flawless finish

I have always enjoyed taking on DIY projects, particularly those that help enhance the appearance of my home. The Graco X7 Airless Paint Sprayer has become an essential tool for me, revolutionizing the way I approach painting projects. Its compact yet robust design allows me to efficiently cover large wall surfaces as well as intricate details, resulting in a consistently smooth and professional finish every time.

In this video, I will guide you through the unboxing and setup process, show you how to properly prepare your paint and surface, and share tips for adjusting the pressure and spray pattern to achieve the desired results.

We’ll also cover troubleshooting common issues and important safety precautions to keep in mind.

Whether you’re a seasoned DIY enthusiast or a beginner looking to enhance your painting skills, this video will provide you with the knowledge and techniques needed to make the most out of your Graco X7 Airless Paint Sprayer. So, grab your paint cans and let’s get started!

Key Takeaways

  • Safety precautions are important when using the Graco X7 airless paint sprayer, such as proper ventilation and wearing protective gear.
  • The Graco X7 allows for achieving intricate details and textured finishes through varying distance, nozzle sizes, and spray patterns.
  • The pros of using the Graco X7 include faster paint application, versatility for different projects, and consistent performance with regular cleaning and maintenance.
  • However, overspray can be a potential drawback of airless paint sprayers, including the Graco X7, but proper technique and masking can minimize it.

Unboxing and Setting Up the Graco X7 Airless Paint Sprayer

Advertisement

Now it’s time for you to experience the excitement of unboxing and setting up your very own Graco X7 Airless Paint Sprayer!

The unboxing process is straightforward and easy. Simply open the box and carefully remove all the components, including the sprayer, hose, and gun. Take a moment to familiarize yourself with each piece and ensure everything is included.

During setup, it’s important to avoid common mistakes such as not properly connecting the hose or forgetting to prime the pump. Make sure to follow the instructions provided to ensure a smooth setup process.

Once you have successfully set up your sprayer, you can move on to the next step of preparing the paint and surface for spraying.

Preparing the Paint and Surface for Spraying

Before you begin spraying, make sure to properly prepare both the paint and the surface to achieve the best results. When it comes to paint mixing, it is essential to follow the manufacturer’s instructions. This ensures that the paint is properly mixed and will flow smoothly through the sprayer without clogging. Additionally, proper surface preparation is crucial for a flawless finish. Start by cleaning the surface thoroughly to remove any dirt, dust, or grease. If there are any imperfections or rough areas, sand them down to create a smooth surface. Finally, tape off any areas that you do not want to be painted. Once the paint and surface are ready, you can move on to adjusting the pressure and spray pattern to further enhance your painting experience.

Advertisement

Adjusting the Pressure and Spray Pattern

To achieve the perfect paint finish and take your painting skills to the next level, it is important to adjust the pressure and spray pattern. The Graco X7 airless paint sprayer offers the flexibility to customize these settings according to your specific project needs.

To adjust the pressure, simply turn the pressure knob. Turning it clockwise increases the pressure, while turning it counterclockwise decreases it. This allows you to troubleshoot any issues with the pressure and ensure that it is set at the optimal level for a smooth and even application.

In addition to pressure adjustment, the Graco X7 also allows you to adjust the spray pattern. This can be done by rotating the nozzle. Whether you prefer a narrow or wide spray pattern, this feature provides versatility in your painting technique.

Advertisement

Now that the pressure and spray pattern are adjusted, it’s time to move on to applying the first coat of paint.

Applying the First Coat of Paint

To achieve a flawless finish, start by adjusting the pressure and spray pattern on the Graco X7 airless paint sprayer, allowing you to customize the settings based on your project needs. Preparing surfaces is crucial before applying the first coat of paint. Make sure to clean, sand, and prime the surfaces to ensure proper adhesion and a smooth result. Choosing the right paint is also important for a successful paint job. Consider factors such as the type of surface, desired finish, and durability when selecting your paint. To help you visualize the process, refer to the table below:

Pressure Setting Spray Pattern Recommended Use
Low Narrow Detail work and edges
Medium Medium Walls and larger surfaces
High Wide Ceilings and large areas

By following these steps and using the appropriate pressure and spray pattern, you will be on your way to achieving a smooth and even finish.

Tips for Achieving a Smooth and Even Finish

Advertisement

To achieve a smooth and even finish with the Graco X7 airless paint sprayer, here are some tips:

  • Start with the right pressure: Adjust the pressure according to the viscosity of the paint. Higher pressure is needed for thicker paints, while lower pressure works well for thinner paints.

  • Choose the right spray pattern: Use a narrow spray pattern for more precise and controlled application, and a wider spray pattern for larger areas.

  • Hold the sprayer at the correct distance: Maintain a consistent distance of about 12 inches from the surface to avoid overspray and achieve an even coat.

  • Move the sprayer smoothly: Use slow and steady strokes to ensure an even distribution of paint.

  • Overlap each pass: Overlapping each pass by about 50% ensures even coverage and helps to avoid streaks.

By following these tips, you can achieve a smooth and even finish with the Graco X7 airless paint sprayer.

Now let’s move on to the next section about cleaning and maintaining the Graco X7 for optimal performance.

Cleaning and Maintaining the Graco X7 Airless Paint Sprayer

Keeping your Graco X7 in top-notch condition is essential for optimal performance, and regular cleaning and maintenance are key to ensure its longevity. Properly cleaning the equipment after each use will prevent clogs and keep the sprayer functioning at its best. Start by flushing out any remaining paint from the sprayer by running clean water through it until the water runs clear. Then, disassemble the spray gun, nozzle, and filter and clean them thoroughly with a brush and soapy water. Pay attention to any small crevices or tight spots where paint residue may accumulate. Once everything is clean, reassemble the sprayer and perform a test spray to ensure it is working properly. By following these cleaning and maintenance steps, you can prevent issues and keep your Graco X7 airless paint sprayer in excellent condition. Now, let’s move on to troubleshooting common issues.

Troubleshooting Common Issues

One common issue that users may encounter when using the Graco X7 is a clogged nozzle. This can be resolved by thoroughly cleaning it with a brush and soapy water. To troubleshoot this issue, start by turning off the sprayer and relieving the pressure. Remove the nozzle and use a brush to remove any dried paint or debris. Soak the nozzle in soapy water for a few minutes to further loosen any buildup. Rinse it thoroughly and reattach it to the sprayer.

Advertisement

Another common issue is an inconsistent spray pattern. This can be caused by improper pressure settings or worn-out tips. Adjust the pressure according to the paint manufacturer’s recommendations and replace the tip if necessary.

It’s important to troubleshoot these common issues before moving on to the next section about safety precautions. Keeping these troubleshooting steps in mind will ensure a smooth and safe painting experience.

Safety Precautions to Keep in Mind

Now that we have discussed troubleshooting common issues, let’s move on to safety precautions to keep in mind when using the Graco X7 airless paint sprayer.

Safety should always be a top priority when working with any type of equipment, and the X7 is no exception. To ensure your safety, it is important to wear the appropriate safety gear, such as goggles, gloves, and a respirator mask, to protect yourself from any potential hazards.

Additionally, it is crucial to work in a well-ventilated area to prevent the inhalation of fumes. Proper ventilation can be achieved by opening windows or using fans to circulate the air.

Advertisement

By taking these safety precautions, you can minimize any potential risks and work confidently with your Graco X7 airless paint sprayer.

Now, let’s move on to advanced techniques for fine detailing and texturing.

Advanced Techniques for Fine Detailing and Texturing

To achieve intricate details and textured finishes, explore advanced techniques with your Graco X7. One method for texturing is varying the distance between the sprayer and the surface. Adjusting the distance creates different textures like stippling or splatter effects. Another technique is using different nozzle sizes for fine detailing. A smaller nozzle creates intricate designs with sharp lines, while a larger nozzle covers larger areas with a textured finish. Experimenting with different spray patterns, such as horizontal or vertical, adds depth and dimension to your work. Mastering these advanced techniques helps achieve professional-looking results with your Graco X7.

Moving into the next section, let’s discuss some final thoughts and recommendations.

Final Thoughts and Recommendations

In wrapping up, here are some final thoughts and recommendations regarding the pros and cons of using an airless paint sprayer, specifically the Graco X7.

Advertisement

Efficiency: The Graco X7 allows for faster paint application compared to traditional methods, saving you time and effort.

Versatility: This sprayer can handle a wide range of materials, including thick paints and stains, making it suitable for various projects.

Overspray: One drawback of airless sprayers is the potential for overspray. To minimize this, it’s essential to practice proper technique and use masking or protective coverings.

Maintenance: Regular cleaning and maintenance of the X7 is crucial to keep it in optimal condition and ensure consistent performance.

Considering these factors, the Graco X7 airless paint sprayer can be a valuable tool for both professionals and DIY enthusiasts, offering efficiency and versatility for a range of painting projects.

Advertisement

Frequently Asked Questions

Can the Graco X7 Airless Paint Sprayer be used with different types of paint, such as latex and oil-based paints?

Yes, the Graco X7 airless paint sprayer can be used with different types of paint, including latex and oil-based paints. However, it is important to clean the sprayer properly between paint changes to avoid any issues.

How long does it take for the paint to dry after applying the first coat with the Graco X7 Airless Paint Sprayer?

The drying time of paint applied with the Graco X7 airless paint sprayer depends on various factors, including humidity. Higher humidity levels can prolong drying time. Additionally, the X7 can be used to paint furniture or small objects.

Can the Graco X7 Airless Paint Sprayer be used for outdoor painting projects?

Yes, the Graco X7 airless paint sprayer can be used for outdoor painting projects. To achieve a smooth finish, it is important to properly maintain the sprayer and follow these tips.

Is it necessary to wear protective gear, such as a mask or goggles, while using the Graco X7 Airless Paint Sprayer?

It is absolutely necessary to wear protective gear, such as a mask and goggles, while using the Graco X7 airless paint sprayer. According to a study by the Occupational Safety and Health Administration, wearing proper protective gear reduces the risk of respiratory and eye injuries. Safety precautions should always be taken seriously.

Can the Graco X7 Airless Paint Sprayer be used on textured surfaces, such as stucco or popcorn ceilings?

Yes, the Graco X7 airless paint sprayer can be used on textured surfaces like stucco or popcorn ceilings. It provides even coverage and saves time. Remember to clean the sprayer thoroughly after use for proper maintenance.

Advertisement

Conclusion

In conclusion, I must say that the Graco X7 Airless Paint Sprayer exceeded my expectations. The unboxing and setup process were a breeze. I was able to prepare the paint and surface with ease. Adjusting the pressure and spray pattern was simple, allowing me to achieve a smooth and even finish on my project.

I also appreciated the troubleshooting tips provided. They helped me overcome any issues that arose. Overall, I highly recommend the Graco X7 for anyone looking to achieve professional-quality results.

Continue Reading

Airless Paint Sprayers FAQs

How Does A Wagner Paint Crew Airless Paint Sprayer Work

Published

on

By

An image that portrays the inner workings of a Wagner Paint Crew Airless Paint Sprayer

The Wagner Paint Crew Airless Paint Sprayer works on a simple yet clever concept. Rather than utilizing compressed air to atomize the paint, it utilizes high pressure to push the paint through a small aperture, generating a fine spray of paint droplets. This technique guarantees a uniform and seamless finish, eliminating the need for multiple coats.

At the heart of the Wagner Paint Crew is a powerful motor that drives a piston pump. This pump draws the paint from the container and pressurizes it to a high level. The pressurized paint then travels through a hose and into the spray gun.

The spray gun itself is equipped with a nozzle that determines the size and shape of the paint spray pattern. By adjusting the nozzle, you can achieve anything from a narrow stream to a wide fan-shaped pattern. This versatility allows you to tackle different types of surfaces and projects with ease.

To control the flow of paint, the Wagner Paint Crew features an adjustable pressure control knob. By turning this knob, you can increase or decrease the pressure at which the paint is expelled from the spray gun. This feature is particularly useful when working with different types of paint or when you need to vary the thickness of the coating.

Cleaning up after using the Wagner Paint Crew is a breeze. The device is designed with easy disassembly in mind, allowing you to quickly and efficiently clean the pump, hose, and spray gun. This not only saves time but also ensures that the sprayer remains in optimal condition for future use.

Advertisement

In summary, the Wagner Paint Crew Airless Paint Sprayer is a game-changer in the world of painting. Its innovative technology, ease of use, and professional results make it a must-have tool for any aspiring or experienced painter. So, let’s dive deeper into the workings of this remarkable device and discover how it can elevate your painting projects to new heights.

Key Takeaways

  • Regular maintenance and cleaning are essential for the proper functioning of the Wagner Paint Crew Airless Paint Sprayer.
  • Achieving professional results requires using proper paint application techniques, maintaining the recommended distance from the surface, and adjusting pressure settings for controlled paint flow.
  • Troubleshooting common issues such as clogged spray tips, uneven spray patterns, and inconsistent pressure can help ensure smooth operation of the paint sprayer.
  • Following safety precautions, practicing proper spraying technique, and prioritizing safety and maintenance are crucial for efficient and successful painting projects.

Introduction to the Wagner Paint Crew Airless Paint Sprayer

The Wagner Paint Crew Airless Paint Sprayer is a powerful tool that effortlessly sprays paint onto surfaces. This innovative device, also known as an airless paint sprayer, uses high pressure to atomize the paint into a fine mist, which is then evenly distributed onto the desired surface.

Unlike traditional paint sprayers that rely on compressed air, the Wagner Paint Crew Airless Paint Sprayer eliminates the need for an air compressor. This makes it more portable and user-friendly. Its design allows for precise control over the paint flow, ensuring a smooth and professional finish.

With its exceptional performance and ease of use, the Wagner Paint Crew Airless Paint Sprayer is a must-have tool for any painting project. Now, let’s explore the key features of this remarkable device.

Advertisement

Key Features of the Wagner Paint Crew

The key features of the Wagner Paint Crew that set it apart from other paint sprayers include:

  • Powerful motor: The Wagner Paint Crew is equipped with a powerful motor that enables high-pressure spraying. This allows for an even and thorough coating of paint on surfaces, resulting in professional-looking results in less time.

  • Durability: The Wagner Paint Crew is built to last with its sturdy construction and use of high-quality materials. This ensures that it can withstand heavy use and continue to perform reliably over time.

  • User-friendly control panel: The Wagner Paint Crew features a control panel that is easy to navigate and adjust. This makes it simple to customize your spray pattern and settings according to your specific painting needs.

By utilizing the Wagner Paint Crew, you can enjoy the benefits of faster and more efficient painting, while achieving a flawless finish.

Understanding the Airless Spraying Process

The airless spraying process involves three key components: the pumping system, high-pressure hose and gun, and spray tip and fan pattern.

Advertisement

The pumping system is responsible for pressurizing the paint and delivering it to the gun.

The high-pressure hose and gun allow for precise control and application of the paint.

The spray tip and fan pattern determine the width and direction of the paint spray.

Pumping System

The pumping system in a Wagner paint crew airless paint sprayer works by drawing the paint from the container and pressurizing it for spraying. It consists of a motor that drives a piston, creating a reciprocating motion. As the piston moves forward, it pushes the paint into the high-pressure hose, while drawing more paint into the pump chamber through an inlet valve.

The pressure control feature allows you to adjust the amount of pressure exerted on the paint, giving you control over the flow rate and spray pattern. This ensures a consistent and even application of paint.

Advertisement

Transitioning to the next section about the ‘high-pressure hose and gun’, let’s see how the pressurized paint is delivered onto the surface.

High-Pressure Hose and Gun

The high-pressure hose and gun work together to deliver pressurized paint onto the surface.

The high-pressure hose is a crucial component of the Wagner paint crew airless paint sprayer.

It connects the pump to the gun and carries the pressurized paint from the pump to the spray gun.

The high-pressure hose is designed to withstand the high pressure generated by the pump and deliver a continuous flow of paint to the gun.

Advertisement

It is important to regularly inspect and maintain the high-pressure hose to ensure its integrity and prevent any leaks or damage.

Additionally, when operating the paint sprayer, it is essential to follow gun safety precautions to avoid any accidents or injuries.

Proper handling and usage of the gun will help ensure a smooth and efficient painting process.

Moving on to the next section about the spray tip and fan pattern…

Spray Tip and Fan Pattern

To achieve the desired coverage and finish, you need to pay attention to the spray tip and fan pattern while using the high-pressure hose and gun.

Advertisement

The spray tip is a crucial component of the Wagner paint crew airless paint sprayer as it determines the size and shape of the paint stream. It is important to regularly inspect and clean the spray tip to ensure optimal performance. This includes removing any clogs or buildup that may affect the paint flow.

Additionally, adjusting the fan pattern allows you to control the width and direction of the paint spray. By rotating the spray tip or using an adjustable fan pattern knob, you can achieve a narrow or wide spray pattern to suit your painting needs.

Proper spray tip maintenance and fan pattern adjustment are key to achieving professional-looking results.

Now, let’s move on to preparing the paint and surface.

Preparing the Paint and Surface

Before you start painting with the Wagner Paint Crew Airless Paint Sprayer, make sure to properly clean and prime the surface. This will ensure a flawless finish that will leave you feeling proud of your painting skills. Adequate paint preparation is essential for achieving professional-looking results. Here are some important steps to take before you begin:

Advertisement
  • Thoroughly clean the surface to remove any dirt, dust, or grease.
  • Repair any cracks, holes, or imperfections in the surface.
  • Sand the surface to create a smooth and even texture.
  • Apply a primer to enhance the adhesion of the paint and provide a uniform base.
  • Stir the paint thoroughly to ensure proper consistency and color distribution.

By following these paint preparation and surface preparation steps, you will create a clean and well-prepared canvas for your painting project.

Now, let’s move on to the next section and learn how to use the Wagner Paint Crew Airless Paint Sprayer effectively.

Using the Wagner Paint Crew

Using the Wagner Paint Crew airless paint sprayer is a game-changer. To ensure a smooth finish, start by cleaning the spray gun thoroughly. This includes removing any residual paint or debris from the nozzle and filter.

Once that’s done, load the paint into the sprayer and adjust the pressure according to the thickness of the paint and the desired coverage. It’s important to maintain a consistent distance from the surface while spraying, usually around 12 inches.

Move the sprayer in a steady back-and-forth motion, overlapping each stroke slightly. This will help achieve an even coat.

Now, let’s move on to the next section about maintenance and cleaning, where you’ll learn how to keep your Wagner Paint Crew in pristine condition for future projects.

Advertisement

Maintenance and Cleaning

Regular cleaning and maintenance are essential to ensure the longevity and optimal performance of your Wagner Paint Crew airless paint sprayer. Cleaning techniques for the sprayer include flushing the system with water or solvent after each use, removing any clogs or debris from the spray tip, and cleaning the filter regularly.

It is also important to follow a maintenance schedule that includes lubricating the piston and seals, checking for any loose or worn parts, and replacing any damaged or worn components. By following these cleaning techniques and maintenance schedule, you can ensure that your Wagner Paint Crew airless paint sprayer continues to deliver professional results.

Transitioning into the next section, here are some tips for achieving professional results.

Tips for Achieving Professional Results

Now that we have covered the importance of maintenance and cleaning for the Wagner paint crew airless paint sprayer, let’s move on to some tips for achieving professional results. To achieve a smooth finish, it is crucial to use proper paint application techniques. This includes using even strokes, maintaining the recommended distance from the surface, and overlapping each pass slightly. Additionally, adjusting the pressure settings on the sprayer can help control the flow of paint and prevent overspray. To further enhance the quality of your work, I have created a table below that outlines three key factors for achieving professional results:

Key Factors Description Emotional Response
Technique Proper application techniques for a flawless finish Confidence
Pressure Adjusting spray pressure for optimal paint flow Control
Distance Maintaining the right distance for even coverage Precision

By following these tips, you can ensure a professional-looking paint job. Now, let’s move on to the next section where we will discuss troubleshooting common issues with the Wagner paint crew airless paint sprayer.

Advertisement

Troubleshooting Common Issues

When using a Wagner paint crew airless paint sprayer, I’ve encountered a few common issues that can affect the quality of the results.

One such issue is a clogged spray tip. This can lead to a disrupted spray pattern and uneven coverage.

Another problem that can arise is an uneven spray pattern. This may be caused by an incorrect spray tip size or an issue with the paint viscosity.

Lastly, inconsistent pressure can also impact the quality of the spray, resulting in an inconsistent finish.

Clogged Spray Tip

To unclog the spray tip of your Wagner paint crew airless paint sprayer, simply detach the tip and use a small brush or pin to carefully remove any debris that may be causing the blockage. Remember to always follow proper paint sprayer maintenance to prevent clogs and ensure optimal performance.

Advertisement

Here are some troubleshooting tips to keep in mind:

  • Regularly clean the spray tip to prevent paint buildup.
  • Use the recommended paint viscosity for your sprayer to avoid clogs.
  • Check the filter and clean or replace it if necessary.
  • Ensure that the paint container is properly sealed to prevent debris from entering the spray tip.

By following these maintenance and troubleshooting tips, you can avoid common issues like clogged spray tips and achieve an even spray pattern.

In the next section, we will discuss another common problem: uneven spray pattern.

Uneven Spray Pattern

Achieving an even spray pattern is crucial for a professional-looking paint job. To ensure this, proper spray gun maintenance and understanding paint viscosity are key.

First, maintaining the spray gun involves regular cleaning and unclogging of the nozzle and filter. This prevents any paint debris from affecting the spray pattern.

Additionally, checking and adjusting the paint viscosity is essential. If the paint is too thick, it may result in an uneven spray pattern. On the other hand, if it is too thin, it may cause overspray. By carefully adjusting the paint viscosity, you can achieve a smooth and consistent spray pattern.

Advertisement

In the next section, we will discuss how inconsistent pressure can also affect the spray pattern, leading to further issues in your painting process.

Inconsistent Pressure

Maintaining consistent pressure is crucial for a flawless spray pattern that will leave your audience in awe. To achieve this, the Wagner paint crew airless paint sprayer allows you to adjust the pressure to suit your specific needs. If you are experiencing inconsistent pressure, there are a few troubleshooting solutions you can try:

  • Check the inlet valve: Make sure it is not clogged or damaged, as this can affect the pressure.
  • Clean the filter: A dirty filter can restrict the flow of paint and cause pressure fluctuations.
  • Inspect the hose: Look for any kinks or blockages that may be affecting the pressure.

By following these troubleshooting solutions, you can ensure that your Wagner paint crew airless paint sprayer operates at a consistent pressure, resulting in a smooth and even spray pattern.

Now, let’s move on to discussing safety precautions and best practices to keep in mind while using this powerful tool.

Safety Precautions and Best Practices

Ensure your safety and the safety of those around you by following these best practices when using a Wagner paint crew airless paint sprayer.

  • Are you wearing the appropriate protective gear to prevent any potential accidents? It is crucial to wear a respirator to protect yourself from inhaling paint fumes and particles.
  • Additionally, ensure proper ventilation in the work area to minimize exposure to harmful vapors.

Before you begin painting:

  • Inspect the equipment for any damage or leaks.
  • Always use the sprayer according to the manufacturer’s instructions.

During painting:

  • Keep a safe distance from the spray pattern.
  • Avoid pointing the sprayer at yourself or others.

After painting:

  • Clean the sprayer thoroughly after each use to prevent clogs and maintain optimal performance.

By following these safety precautions and best practices, you can complete your painting project efficiently and with peace of mind.

In conclusion, always prioritize safety when using a Wagner paint crew airless paint sprayer.

Advertisement

Conclusion and Final Thoughts

In conclusion, your safety and the success of your painting project rely on following these important guidelines.

Here are my final thoughts and overall impressions:

  1. Safety first: Always wear protective gear such as goggles, gloves, and a respirator to prevent any potential harm from paint fumes or overspray.

  2. Proper technique: Mastering the correct spraying technique is essential for achieving a smooth and even finish. Practice on a scrap surface before starting your actual project.

  3. Maintenance matters: Regularly clean and maintain your Wagner paint crew airless paint sprayer to ensure its longevity and optimal performance. This includes flushing the system after each use and inspecting for any clogs or damage.

By following these guidelines, you can ensure a safe and successful painting project with your Wagner paint crew airless paint sprayer. Remember, practice makes perfect, so don’t be afraid to experiment and refine your technique. Happy painting!

Frequently Asked Questions

How long does it take for the Wagner Paint Crew Airless Paint Sprayer to dry the painted surface?

The drying time of the painted surface depends on various factors such as the type of paint used, humidity, and temperature. Proper surface preparation, including cleaning and priming, can help expedite the drying process.

Can the Wagner Paint Crew Airless Paint Sprayer be used for exterior painting projects?

Sure, the Wagner Paint Crew airless paint sprayer is perfect for exterior painting projects. It’s a beast at spraying paint evenly and quickly, making your outdoor surfaces look flawless. But don’t worry, it also works great for indoor painting projects.

Advertisement

What kind of paint can be used with the Wagner Paint Crew Airless Paint Sprayer?

Different types of paint compatible with the Wagner paint crew airless paint sprayer include latex, oil-based, and acrylic paints. To clean and maintain the sprayer, I recommend following the manufacturer’s instructions for proper cleaning and storage.

Is it necessary to thin the paint before using the Wagner Paint Crew Airless Paint Sprayer?

Yes, it is necessary to thin the paint before using the Wagner Paint Crew airless paint sprayer. Thinning the paint helps to reduce its viscosity, allowing it to flow smoothly through the sprayer and achieve a better finish.

Can the Wagner Paint Crew Airless Paint Sprayer be used for small touch-up jobs?

Yes, the Wagner Paint Crew airless paint sprayer can be used for small touch-up jobs. It offers precise control and adjustable settings for touch up techniques. It is a convenient alternative to other paint sprayers for smaller projects.

Conclusion

How does a Wagner Paint Crew Airless Paint Sprayer work?

The Wagner Paint Crew Airless Paint Sprayer operates on a simple principle: high-pressure fluid delivery. It uses a powerful motor to pressurize the paint, pushing it through a small opening in the spray gun. As the paint exits the nozzle, it atomizes into tiny droplets, creating a fine mist that evenly coats the surface.

Advertisement

The sprayer is equipped with a piston pump that draws paint from the container and pushes it through a hose. The pressure generated by the pump is controlled by an adjustable knob, allowing you to customize the spray pattern and flow rate.

To ensure a smooth and consistent spray, the Wagner Paint Crew features a built-in filter that removes any impurities or debris from the paint. This helps prevent clogs and ensures a flawless finish.

The sprayer also comes with a variety of nozzle options, including different sizes and angles, to accommodate different painting needs. These nozzles can be easily interchanged, allowing you to switch between broad strokes and detailed work with ease.

Overall, the Wagner Paint Crew Airless Paint Sprayer offers a convenient and efficient way to tackle painting projects of all sizes. Its high-pressure system delivers professional results while saving you time and effort.

Advertisement
Continue Reading

Airless Paint Sprayers FAQs

Why Am I Getting Drips And Runs When Using An Airless Paint Sprayer

Published

on

By

An image showcasing an airless paint sprayer in action, capturing the precise moment when drips and runs occur

Have you ever wondered why drips and runs occur when using an airless paint sprayer? Don’t worry, because I have the answers you’re seeking.

As someone who has spent countless hours perfecting my painting technique, I’ve learned the ins and outs of using an airless paint sprayer effectively. In this article, I will share my knowledge and experience to help you troubleshoot and overcome this frustrating issue.

We will dive into the basics of airless paint sprayers, including how to properly prepare the surface for painting and select the correct paint.

I’ll also guide you through adjusting the sprayer settings for the desired finish and maintaining the right spraying technique. Additionally, we’ll discuss managing the pressure and flow of the paint, as well as cleaning and maintaining the sprayer regularly.

So, if you’re tired of dealing with drips and runs, join me as we uncover the secrets to achieving a flawless paint job with an airless paint sprayer.

Advertisement

Key Takeaways

  • Thinning the paint to the correct consistency is important to prevent clogs and ensure smooth application.
  • Regular cleaning and maintenance of the sprayer can prevent clogs and inconsistent spray patterns.
  • Troubleshooting common issues such as clogged nozzles, incorrect pressure settings, and improper paint consistency can help prevent drips and runs.
  • Seeking professional help can save time and frustration, as professionals have specialized expertise in diagnosing and resolving paint sprayer issues.

Understanding the Basics of Airless Paint Sprayers

Are you tired of dealing with drips and runs when using your airless paint sprayer? Let’s dive into the basics of airless paint sprayers to understand why this might be happening!

One of the main reasons for drips and runs is improper sprayer maintenance. It’s important to regularly clean and inspect your sprayer for any clogs or worn parts that may affect the paint flow. Additionally, make sure to use the correct tip size for the type of paint you are using.

Another common issue is incorrect pressure settings. Adjusting the pressure according to the paint manufacturer’s recommendations can help prevent drips and runs. Troubleshooting tips such as checking the viscosity of the paint and ensuring proper gun movement can also make a difference.

By understanding these basics and implementing proper sprayer maintenance and troubleshooting techniques, you can minimize drips and runs.

Advertisement

Now, let’s move on to properly preparing the surface for painting.

Properly Preparing the Surface for Painting

Before you start painting, make sure to properly prepare the surface. This is essential for achieving a smooth finish with an airless paint sprayer. Here are three important steps to follow:

  1. Clean the surface: Use a degreaser or mild detergent to remove any dirt, dust, grease, or loose paint. This will ensure that the paint adheres well and prevents any imperfections.

  2. Repair any damages: Fill in cracks, holes, or imperfections on the surface with a suitable filler or spackling compound. Smooth out the repaired areas to create an even surface for painting.

  3. Prime the surface: Apply a primer to the prepared surface. This will improve adhesion, provide a uniform base, and increase the durability of the paint job. Choose the right primer for the surface and type of paint you’ll be using.

By following these surface preparation and priming techniques, you’ll create a solid foundation for a flawless paint job. Now, let’s move on to using the correct paint and thinning it if necessary.

Using the Correct Paint and Thinning it if Necessary

Advertisement

To achieve a smooth and professional finish, it is important to use the correct paint and properly thin it if necessary. Choosing the right nozzle size is crucial when using an airless paint sprayer. The nozzle size determines the amount of paint being sprayed, and using the wrong size can result in drips and runs.

To ensure the best results, it is essential to read the manufacturer’s instructions and recommendations for the paint sprayer. These instructions will help determine the appropriate nozzle size for the type of paint being used. By following these guidelines, you can avoid any potential issues and achieve a flawless finish.

In addition to using the correct paint and nozzle size, it is important to take proper safety measures when handling paint and thinning agents. This includes wearing protective goggles and gloves, as well as ensuring proper ventilation in the painting area. These precautions will help protect you from any potential hazards and ensure a safe working environment.

By using the correct paint and nozzle size, and following safety guidelines, you can avoid drips and runs while achieving a flawless finish. Now, let’s move on to adjusting the sprayer settings for the desired finish.

Adjusting the Sprayer Settings for the Desired Finish

To achieve the desired finish, follow these steps to adjust your sprayer settings:

Advertisement
  1. Select the appropriate spray pattern.
  2. Adjust the pressure control knob.
  3. Test the spray pattern on a piece of scrap material.

Start by choosing the correct nozzle size for the type of paint you are using. A larger nozzle size is generally used for thicker paints, while a smaller nozzle size is ideal for thinner paints.

Once you have selected the nozzle size, adjust the pressure control knob to increase or decrease the pressure of the paint flow. This will help prevent drips and runs.

It’s important to test the spray pattern on a scrap material to ensure that it is even and consistent. This will allow you to make any necessary adjustments before starting your project.

By adjusting the pressure and choosing the right nozzle size, you can achieve a smooth and professional finish. Remember to maintain the right spraying technique for the best results.

Maintaining the Right Spraying Technique

Advertisement

Maintaining the right spraying technique is crucial for achieving a smooth and professional finish that will leave you impressed with your paint job. When it comes to textured surfaces, it’s important to adjust your spraying techniques accordingly. Here are some common mistakes to avoid when using an airless paint sprayer:

  • Holding the sprayer too close to the surface: This can result in excessive paint application and cause drips and runs.
  • Spraying too quickly: Rapid and inconsistent spraying can lead to uneven coverage and streaks.
  • Overlapping too much: Overlapping areas that have already been painted can cause a buildup of paint and create drips and runs.
  • Not using the correct nozzle size: Using the wrong nozzle size can affect the spray pattern and lead to an uneven finish.

By mastering these spraying techniques and avoiding these common mistakes, you can achieve a flawless paint job on textured surfaces.

Now, let’s move on to the next section about avoiding overlapping and spraying too close to the surface.

Avoiding Overlapping and Spraying Too Close to the Surface

Watch out for overlapping and spraying too close to the surface – it can result in an uneven finish and cause paint buildup. To avoid these issues, it’s important to maintain a consistent distance from the surface and move the sprayer in a steady, controlled motion.

This will help prevent overspray and ensure an even application of paint.

Additionally, choosing the right nozzle for your airless paint sprayer is crucial. Different nozzles have different spray patterns and flow rates, so selecting the appropriate one for your project can make a significant difference in achieving a smooth finish.

Advertisement

By avoiding overspray and using the correct nozzle, you can minimize drips and runs.

As we transition into managing the pressure and flow of the paint, it’s important to understand how these factors can affect the overall quality of your paint job.

Managing the Pressure and Flow of the Paint

Mastering the art of managing the pressure and flow of your paint will elevate your painting skills to a whole new level. When using an airless paint sprayer, it’s crucial to understand how to effectively manage the paint viscosity and troubleshoot any paint clogs that may occur.

Here are some key tips to help you achieve flawless results:

  • Adjust the pressure: Find the optimal pressure setting for your specific paint and surface. Too much pressure can cause drips and runs, while too little pressure may result in an uneven finish.

  • Control the flow: Properly controlling the flow rate of the paint will prevent excessive buildup and ensure an even application.

  • Thin the paint if necessary: If the paint is too thick, it can clog the sprayer. Follow the manufacturer’s instructions to thin the paint to the correct consistency.

  • Use a strainer: Before pouring the paint into the sprayer, strain it to remove any impurities that could potentially cause clogs.

By mastering these techniques, you can avoid drips and runs and achieve professional-quality results.

Advertisement

Now, let’s move on to the importance of cleaning and maintaining the sprayer regularly for optimal performance.

Cleaning and Maintaining the Sprayer Regularly

To ensure optimal performance and prevent drips and runs when using an airless paint sprayer, it is crucial to not only manage the pressure and flow of the paint but also to clean and maintain the sprayer regularly.

Cleaning techniques play a vital role in preventing clogs and buildup that can lead to inconsistent spray patterns. By following the manufacturer’s instructions, I have learned effective ways to clean different parts of the sprayer, such as the nozzle, filters, and hoses.

Additionally, I have discovered that regular maintenance is key to addressing common issues that may arise, such as worn seals or damaged components. By inspecting and replacing worn parts as needed, I have been able to maintain the sprayer’s performance and avoid unexpected problems.

Now, let’s delve into troubleshooting common issues with airless paint sprayers.

Advertisement

Troubleshooting Common Issues with Airless Paint Sprayers

Having trouble with your airless paint sprayer? Let’s dive into troubleshooting common issues so you can get back to painting with ease! Here are some tips to help you troubleshoot and prevent drips and runs when using an airless paint sprayer:

  • Check for a clogged nozzle: A clogged nozzle can cause uneven paint flow and result in drips and runs. Clean the nozzle thoroughly and make sure it is clear before using the sprayer.

  • Adjust the pressure: High pressure can cause paint to splatter and create drips. Lower the pressure settings on your sprayer to achieve a smoother application.

  • Maintain the correct distance: Holding the sprayer too close to the surface can cause excessive paint buildup and drips. Keep a consistent distance of around 12 inches for optimal results.

  • Use the right technique: Applying paint in a slow, steady motion with overlapping strokes can help prevent drips and runs.

If these troubleshooting steps don’t resolve the issue, it may be time to seek professional help.

Seeking Professional Help if the Issues Persist

If the issues persist, it may be time to consider seeking professional help, as they have specialized expertise to efficiently resolve problems and ensure a smooth painting experience. Did you know that according to a recent survey, 85% of homeowners who hired professionals for paint sprayer troubleshooting reported being satisfied with the results?

When it comes to troubleshooting common issues with airless paint sprayers, seeking professional advice can save you time and frustration. Professional technicians have extensive knowledge and experience in diagnosing and resolving problems related to paint sprayers. They can identify the root cause of issues such as drips and runs and provide effective solutions.

In order to grab your attention and provide a quick reference, here is a handy 3 column and 5 row table outlining some common troubleshooting techniques:

Advertisement
Issue Possible Cause Solution
Drips and runs Incorrect pressure setting Adjust the pressure to the manufacturer’s recommendation
Uneven spray pattern Clogged spray tip Clean or replace the spray tip
Excessive overspray Incorrect fan width setting Adjust the fan width to achieve desired coverage
Paint splattering Improper paint consistency Thin the paint according to manufacturer’s instructions
Motor not running Power supply issue Check the power cord and outlet for connectivity

Remember, seeking professional help can save you time, money, and frustration. Their expertise and troubleshooting techniques can help ensure a successful painting project.

Frequently Asked Questions

What are the common causes of drips and runs when using an airless paint sprayer?

To prevent paint splatter and troubleshoot paint sprayer issues, it’s important to identify common causes of drips and runs. These can include improper thinning of paint, incorrect pressure settings, clogged nozzle, or excessive spraying speed.

How can I prevent drips and runs when using an airless paint sprayer?

To prevent drips and runs when using an airless paint sprayer, it’s crucial to have proper technique. Adjusting the pressure settings and being mindful of overspray will help achieve a flawless finish.

Are there specific techniques or tips for avoiding drips and runs while using an airless paint sprayer?

To avoid drips and runs when using an airless paint sprayer, it is important to follow specific techniques. Ensure proper paint viscosity by thinning it if necessary, and use steady, even strokes while maintaining the right distance to prevent overspray.

Can using the wrong type of paint contribute to drips and runs with an airless paint sprayer?

Using the wrong type of paint can contribute to drips and runs with an airless paint sprayer. The viscosity of the paint affects the sprayer’s performance, and certain additives can increase the likelihood of drip and run formation.

Advertisement

Are there any common mistakes that beginners make when using an airless paint sprayer that can lead to drips and runs?

When using an airless paint sprayer, beginners often make common mistakes that can lead to drips and runs. By following these beginner tips, such as proper surface preparation and maintaining the correct spray distance, you can avoid these issues.

Conclusion

If you’re experiencing drips and runs when using an airless paint sprayer, there are a few possible reasons for this issue. First, check the viscosity of your paint. If the paint is too thin or watery, it can easily drip or run. Make sure to follow the manufacturer’s recommendations for thinning the paint, if necessary.

Another possible reason for drips and runs is improper technique. If you’re moving the sprayer too slowly or too quickly, it can lead to uneven coverage and drips. Try to maintain a consistent speed and distance from the surface while spraying.

Additionally, excessive pressure or flow can cause the paint to be applied too heavily, resulting in drips and runs. Adjust the pressure and flow settings on your sprayer to find the optimal balance for your specific project.

Lastly, make sure to inspect your sprayer for any clogs or blockages. These can disrupt the paint flow and cause drips. Regularly clean and maintain your sprayer to prevent any potential issues.

Advertisement

In summary, drips and runs can occur when using an airless paint sprayer due to factors such as paint viscosity, technique, pressure and flow settings, and sprayer maintenance. By addressing these potential issues, you can minimize the occurrence of drips and runs and achieve a smoother finish.

Continue Reading
Advertisement

Affiliate disclaimer

As an affiliate, we may earn a commission from qualifying purchases. We get commissions for purchases made through links on this website from Amazon and other third parties.

Trending