Connect with us

Airless Paint Sprayers FAQs

How To Operate A Campbell Hausfeld Airless Paint Sprayer

Published

on

An image showcasing a hand wearing a protective glove, firmly gripping a Campbell Hausfeld airless paint sprayer handle, while a steady stream of paint shoots out from the nozzle onto a smooth surface

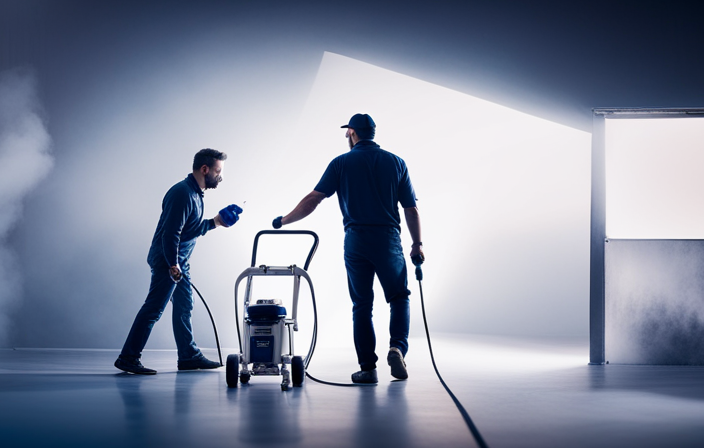
I remember my first try at painting a room by hand. It was a disaster. The brush strokes were uneven, there were drips everywhere, and my arm hurt for days afterwards. This led me to buy a Campbell Hausfeld airless paint sprayer. It changed everything. With this handy tool, I was able to achieve a professional-looking finish in no time at all.

In this article, I will guide you through the process of operating a Campbell Hausfeld airless paint sprayer. From unpacking and assembling the sprayer to troubleshooting common issues, I will provide you with the step-by-step instructions you need to confidently tackle any painting project.

But before we dive in, let me share a hypothetical scenario with you. Imagine you have a large room to paint, complete with high ceilings and intricate details. Using a brush or roller would take forever and result in a less-than-perfect finish. However, with a Campbell Hausfeld airless paint sprayer, you can effortlessly cover large areas, reach high spots, and achieve a smooth, professional finish.

Ready to get started? Let’s dive in!

Key Takeaways

  • Proper storage is essential for maintaining the longevity and performance of a Campbell Hausfeld airless paint sprayer.
  • Troubleshooting common issues such as low pressure, uneven spray pattern, excessive overspray, motor not running, and excessive noise or vibrations is important for smooth painting process and efficiency.
  • Referring to the user manual for specific troubleshooting instructions and safety guidelines is crucial.
  • Regular maintenance, including cleaning, timely troubleshooting, and periodic inspections, is necessary to prevent issues and ensure consistent and quality results.

Unpack and Assemble Your Airless Paint Sprayer

Advertisement

To unpack and assemble your Campbell Hausfeld airless paint sprayer, follow these steps carefully:

  1. Unpack all the components from the box and lay them out on a clean work surface.
  2. Familiarize yourself with the different parts, such as the spray gun, hose, and motor unit.
  3. Connect the hose to the motor unit and tighten the fittings securely.
  4. Attach the spray gun to the other end of the hose and tighten that fitting as well.

Before you start painting, it’s important to troubleshoot any potential issues:

  1. Check for any loose fittings or leaks.
  2. Make sure all connections are secure.

With the assembly complete, you’re now ready to prepare your work area for painting.

Prepare Your Work Area

To prepare your work area, follow these steps:

  1. Clear any clutter and create enough space to move around comfortably.
  2. Set up a ventilation system to ensure proper airflow and prevent the buildup of fumes. Open windows or use fans for this purpose.
  3. Organize all the tools and supplies you will need for the job, such as the paint sprayer, paint, masking tape, drop cloths, and any other accessories. Having everything easily accessible will save you time and frustration.
  4. Protect surrounding surfaces by covering nearby furniture, floors, and other areas with drop cloths or plastic sheeting. This will prevent any accidental paint overspray and help keep your work area clean and damage-free.

Now that your work area is ready, let’s move on to choosing the right paint and properly mixing it.

Choose the Right Paint and Mix it Properly

To achieve a smooth and vibrant finish, it is crucial to choose the right paint and mix it properly. When selecting paint colors, consider the surface you will be painting and the desired look you want to achieve. Ensure that the paint you choose is compatible with your Campbell Hausfeld airless paint sprayer for optimal performance. Always prioritize safety by wearing protective clothing, gloves, and a respirator when working with paint. To mix the paint correctly, follow the manufacturer’s instructions and use a stir stick or paint mixer to thoroughly blend the paint. This will prevent clumps and ensure consistent color throughout. Now, let’s move on to the next step and learn how to prime the pump and fill the paint container.

Advertisement

Prime the Pump and Fill the Paint Container

Before you begin, it’s important to prime the pump and fill the paint container to ensure a smooth and flawless application.

To prime the pump, follow these steps:

  • Turn the prime/spray knob to the prime position.
  • Hold the spray gun trigger and switch the power on.
  • Allow the pump to run until a steady stream of paint comes out of the gun.
  • Switch the prime/spray knob to the spray position.

To fill the paint container, follow these steps:

  • Unscrew the container from the sprayer.
  • Pour the paint into the container, making sure not to overfill it.
  • Screw the container back onto the sprayer.

Priming techniques are crucial for proper paint flow and preventing clogs. If you encounter any issues, try troubleshooting tips such as checking for clogs in the pump or nozzle, cleaning or replacing filters, and ensuring the paint is properly mixed.

Now, let’s move on to adjusting the pressure and spray pattern.

Adjust the Pressure and Spray Pattern

Advertisement

To ensure a flawless application, you’ll want to adjust the pressure and spray pattern on your sprayer. This will allow you to achieve the perfect outcome with ease.

Start by adjusting the pressure according to the type of paint you’re using and the surface you’re painting. Lower pressure is ideal for thinner paints and delicate surfaces, while higher pressure works best for thicker paints and rough surfaces.

It’s important to select the right nozzle size as well. A smaller nozzle will create a narrow spray pattern, perfect for detailed work. On the other hand, a larger nozzle will cover a wider area.

Take the time to experiment with different pressure and nozzle settings until you find the perfect combination for your project. This will ensure a professional-looking finish.

Once you’ve adjusted the pressure and spray pattern, you’re ready to start painting.
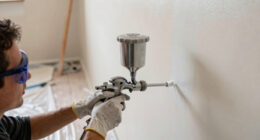
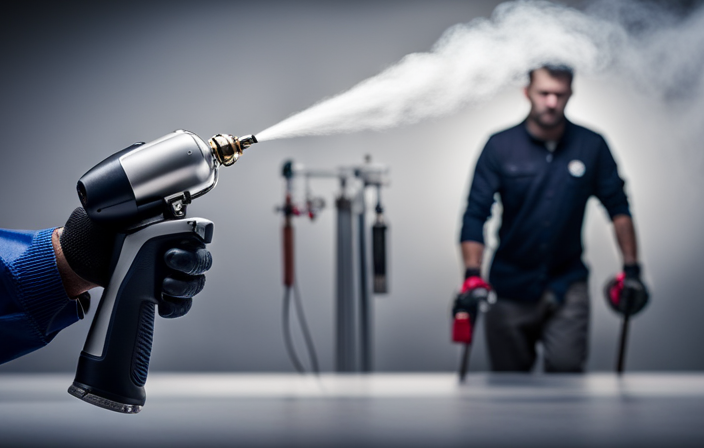
Advertisement

Start Painting

Now it’s time to dive in and get those walls transformed with a flawless coat of paint!

Before starting, it’s important to ensure the paint sprayer is clean and free of any debris. Cleaning techniques vary depending on the type of paint used, so refer to the manufacturer’s instructions for specific guidelines.

Safety precautions should also be taken, such as wearing protective eyewear and gloves, and working in a well-ventilated area.

Once everything is set, hold the sprayer about 12 inches away from the wall and start painting in a smooth, even motion. Move the sprayer from side to side, overlapping each stroke by about 50%. Maintain a consistent speed and distance to achieve a uniform finish.

Transitioning into the next section, it’s crucial to maintain a consistent speed and distance to avoid any streaks or uneven coverage.

Advertisement

Maintain a Consistent Speed and Distance

As you glide the sprayer across the wall, envision yourself gracefully dancing with each stroke, maintaining a rhythmic pace and distance for a flawlessly painted masterpiece.

Maintaining consistent spray coverage is crucial to achieving professional-looking results. To do this, keep the sprayer at a consistent distance from the surface, usually around 12 inches. This ensures an even application of paint without creating drips or overspray.

It’s important to move at a steady speed, neither too fast nor too slow, to maintain an even coat. Avoiding overspray and drips can be achieved by overlapping each pass by about 50% and maintaining a constant distance from the surface.

By maintaining these techniques, you’ll achieve a consistent finish and avoid any paint mishaps.

Now, let’s transition into the next section on how to clean the sprayer after use.

Advertisement

Clean the Sprayer After Use

After you have finished your painting project, it’s time to give your sprayer a thorough cleaning to ensure it stays in top condition for future use. To clean the sprayer, follow these steps:

  1. Start by disconnecting the sprayer from the power source and relieving any pressure in the system. This can be done by turning off the sprayer and triggering the gun to release any remaining paint.

  2. Next, disassemble the sprayer by removing the spray tip, guard, and filter. Rinse them under warm water to remove any paint residue.

  • Make sure to use a soft brush or toothbrush to gently scrub the parts, especially the tip, to remove any stubborn paint.

  • Avoid using harsh chemicals or solvents as they may damage the sprayer. Instead, use a mild detergent or a recommended cleaning solution specifically designed for airless paint sprayers.

Once all the parts are clean and dry, reassemble the sprayer and store it properly for future use.

Store the Sprayer Properly

To ensure your sprayer is ready for future use, store it properly in a clean and dry place, protecting it from dust and damage. Proper storage is crucial for maintaining the longevity and performance of your Campbell Hausfeld airless paint sprayer.

After cleaning the sprayer, make sure all parts are dry before storing. Store the sprayer in an upright position to prevent leaks and clogs. Avoid placing heavy objects on top of the sprayer, as it may damage the delicate components.

Additionally, keep the sprayer away from extreme temperatures, as it can affect its functionality. By following these proper storage practices, you can prevent clogs and ensure that your sprayer is always ready for your next painting project.

Advertisement

Now, let’s move on to troubleshooting common issues with the sprayer.

Troubleshooting Common Issues

Now that we have learned how to store the Campbell Hausfeld airless paint sprayer properly, let’s discuss troubleshooting common issues that may arise during its operation. It’s important to be prepared for any challenges that may occur while using the sprayer. In order to assist you with this, I have provided a table below with some common troubleshooting tips to help you identify and resolve any problems you may encounter. By following these guidelines, you can ensure a smooth and efficient painting process with your Campbell Hausfeld airless paint sprayer.

Common Issue Troubleshooting Tip
No spray or low pressure Check for clogged spray tip or filter. Clean or replace as needed.
Uneven spray pattern Adjust the pressure setting. Make sure the spray tip is clean and properly aligned.
Excessive overspray Decrease the pressure setting. Adjust the spray pattern width if needed.
Motor not running Check power source and ensure the motor is properly connected.
Excessive noise or vibrations Check for loose or damaged parts. Tighten or replace as needed.

Remember to always refer to the user manual for specific troubleshooting instructions and safety guidelines.

Frequently Asked Questions

What safety precautions should I take when operating a Campbell Hausfeld airless paint sprayer?

When operating a Campbell Hausfeld airless paint sprayer, I take several safety precautions. I ensure proper ventilation, use protective equipment like goggles and gloves, and follow the manufacturer’s instructions for paint sprayer maintenance to prevent common paint sprayer problems.

Can I use any type of paint with the airless paint sprayer or are there specific types that I should avoid?

To choose the right paint for an airless paint sprayer, consider the different types available. Avoid using oil-based paints as they can clog the sprayer. Instead, opt for water-based or latex paints which are compatible with most airless paint sprayers.

Advertisement

How do I properly clean the nozzle of the paint sprayer to prevent clogging?

To properly maintain your paint sprayer and prevent clogging, it’s crucial to clean the nozzle regularly. A stitch in time saves nine! Use troubleshooting techniques like flushing with solvent or using a nozzle cleaning kit.

What should I do if the paint sprayer is not spraying evenly or is leaving streaks on the surface?

If the paint sprayer is not spraying evenly or leaving streaks on the surface, there are troubleshooting tips to achieve a smooth finish. Check the nozzle for clogs, adjust the pressure, and ensure proper technique for consistent coverage.

Is there a recommended technique for overlapping spray patterns to ensure even coverage while painting?

To achieve even coverage while painting, use an overlapping technique. Imagine it as sweeping the surface with paint, like a gentle breeze rustling through leaves. This ensures every area is covered and prevents streaks.

Conclusion

Operating a Campbell Hausfeld airless paint sprayer is a breeze! By following the steps outlined in this article, you can easily achieve professional-looking results.

First, start by unpacking and assembling the paint sprayer. Make sure all the parts are in place and securely connected.

Advertisement

Next, choose the right paint for your project and mix it properly. This will ensure optimal performance and a smooth finish.

Once your paint is ready, adjust the pressure and spray pattern on the paint sprayer. It’s important to maintain a consistent speed and distance while spraying to avoid uneven coverage.

When you’re finished painting, clean the paint sprayer thoroughly. This will help prolong its lifespan and prevent clogs or damage.

Finally, store the paint sprayer in a safe and dry place. This will protect it from dust and other potential hazards.

With a little practice and attention to detail, you’ll be painting like a pro in no time! So, spritz, splatter, and splash away with your Campbell Hausfeld airless paint sprayer, and watch your walls become a work of art.

Advertisement

With James‘ articles, you can expect comprehensive breakdowns of airless paint sprayer features, performance assessments, and expert insights into the latest industry innovations. His meticulous approach ensures that readers gain a thorough understanding of the equipment they are considering, helping them make well-informed choices.

Continue Reading
Advertisement

Airless Paint Sprayers FAQs

How To Clean A Dirty Airless Paint Sprayer

Published

on

By

An image that visually depicts the step-by-step process of cleaning a grimy airless paint sprayer

Just finished a big painting project and now you have a dirty airless paint sprayer? Don’t worry, I’m here to assist.

In this article, I will show you how to clean a dirty airless paint sprayer with ease.

Cleaning an airless paint sprayer might seem like a daunting task, but with the right tools and techniques, it can be a breeze. By following a few simple steps, you can ensure that your sprayer stays in top condition, ready for future use.

First, gather all the necessary cleaning supplies.

Then, disconnect the sprayer from the power source and release any remaining pressure.

Advertisement

Remove the spray tip and filter, and flush the sprayer with water or a cleaning solution.

Use a brush or toothpick to remove any stubborn paint residue.

Rinse the sprayer thoroughly, dry it, and reassemble it.

Finally, store it in a clean and dry area.

So let’s get started and get that dirty airless paint sprayer looking brand new again.

Advertisement

Key Takeaways

  • Pay attention to hard-to-reach areas to prevent moisture buildup
  • Thoroughly dry and reassemble the sprayer to prevent damage or malfunction
  • Carefully reassemble the sprayer after drying, ensuring snug fit of all parts
  • Regularly clean filters and nozzles to prevent clogging

Gather the necessary cleaning supplies

Now, you’re gonna wanna gather all the necessary cleaning supplies to get that airless paint sprayer sparkling clean. Cleaning techniques are important, but before you can even begin, you need to make sure you have the right tools.

Start by grabbing a bucket or container that can hold the cleaning solution. You’ll also need a clean cloth or sponge for wiping down the sprayer. Don’t forget to grab some gloves to protect your hands from the cleaning solution.

As for choosing the right cleaning solution, you want to make sure it’s compatible with the paint you were using. Look for a mild detergent or a specific cleaning solution made for airless paint sprayers.

Once you have everything you need, you can move on to the next step of disconnecting the sprayer from the power source.

Advertisement

Disconnect the sprayer from the power source

First, make sure you’ve unplugged the machine from the power source. This is an essential step in ensuring your safety while cleaning the airless paint sprayer. Cleaning precautions should always be taken to avoid any accidents or injuries.

Once the sprayer is disconnected, you can proceed with the cleaning process. It’s important to follow the manufacturer’s maintenance tips to ensure the longevity of your sprayer. Regular cleaning and maintenance will also guarantee optimal performance.

Now that the sprayer is safely disconnected, the next step is to release any remaining pressure in the sprayer. This will prevent any unexpected spray or splatter when disassembling and cleaning the different parts of the sprayer.

Release any remaining pressure in the sprayer

Advertisement

Before you proceed, make sure all pressure has been released from the sprayer to prevent any unexpected spray or splatter. To safely release pressure in an airless paint sprayer, follow these precautions:

  • Wear protective gloves and goggles to shield yourself from any accidental paint spray.
  • Position the sprayer outlet away from yourself and others to avoid any potential harm.
  • Slowly turn the pressure relief valve counterclockwise to release the pressure gradually.
  • Allow any remaining paint or fluid to drain from the sprayer before proceeding.

Double-check that the pressure gauge reads zero before continuing.

Taking these precautions will help prevent any accidents or mishaps while releasing pressure in an airless paint sprayer.

Once all the pressure has been safely released, you can move on to the next step of removing the spray tip and filter.

Remove the spray tip and filter

To safely continue, it’s time to take off the spray tip and filter. This step is crucial in the cleaning process of your airless paint sprayer.

Start by unscrewing the spray tip counterclockwise using a wrench or pliers. Be careful not to damage the tip or the threads.

Advertisement

Once the spray tip is removed, you’ll find the filter located inside the gun handle. Gently pull out the filter and inspect it for any clogs or debris. If necessary, clean the filter using water or a cleaning solution. Cleaning techniques may vary depending on the type of filter, so refer to the manufacturer’s instructions for specific maintenance tips.

With the spray tip and filter removed, we can now move on to flushing the sprayer with water or a cleaning solution.

Flush the sprayer with water or cleaning solution

Once you’ve removed the spray tip and filter, it’s time to give your sprayer a refreshing cleanse by flushing it with water or a cleaning solution. It’s just like giving your car a much-needed wash to remove all the dust and grime. Cleaning a paint sprayer can be done using either water or a cleaning solution. Using water is a more cost-effective option, as it’s readily available and easy to use. However, a cleaning solution specifically designed for paint sprayers can provide a more thorough and effective clean, removing any stubborn residue or paint buildup. The choice between water and cleaning solution ultimately depends on the level of dirt and paint on your sprayer.

Advertisement

After flushing the sprayer, it’s important to clean the filter and spray tip separately to ensure optimal performance.

Clean the filter and spray tip separately

Now, let me show you how you can give your filter and spray tip the attention they deserve to ensure flawless performance.

Cleaning the filter and spray tip is crucial for maintaining the efficiency of your airless paint sprayer. Start by removing the filter and rinsing it with water to remove any loose paint particles. For stubborn residue, you can use a cleaning solution specifically designed for airless paint sprayers. Scrub the filter gently with a brush to remove any clogs or build-up.

Next, move on to the spray tip. Unscrew it from the sprayer and soak it in a cleaning solution for a few minutes. Use a small brush to remove any paint residue that might be blocking the openings.

Rinse both the filter and spray tip thoroughly with water before reassembling them back onto the sprayer.

Advertisement

Now, let’s move on to the next section about using a brush or toothpick to remove any stubborn paint residue.

Use a brush or toothpick to remove any stubborn paint residue

Take a brush or toothpick and give those stubborn paint residues a good scrub to ensure a flawless finish. Using alternative cleaning methods can help remove any paint buildup on the sprayer.

Here are two effective techniques to try:

  1. Dampen a brush with warm water and gently scrub the spray tip. Be sure to remove any paint that may be clogging the small openings. This will help maintain a consistent spray pattern and prevent blockages during future use.

  2. Use a toothpick to carefully scrape off any dried paint from the filter. Be gentle to avoid damaging the filter mesh. Removing paint residue from the filter will improve the sprayer’s performance and extend its lifespan.

After successfully cleaning the filter and spray tip separately, it’s time to move on to the next step: rinsing the sprayer thoroughly. This will ensure all remaining paint particles are removed and the sprayer is ready for its next use.

Rinse the sprayer thoroughly

Make sure you thoroughly flush out the sprayer with water to remove any remaining particles. This step is crucial for deep cleaning your airless paint sprayer and maintaining its optimal performance.

Advertisement

Start by detaching the spray tip and guard, as well as the filter, if applicable. Then, using a hose or faucet, run water through the sprayer for several minutes. Make sure to rotate and move the sprayer in different positions to ensure all areas are thoroughly rinsed. Pay close attention to the hose, as paint residue can often accumulate there.

Once you’re confident that the sprayer is clean, you can move on to the next step of drying and reassembling the sprayer, which we’ll discuss in the following section.

Dry and reassemble the sprayer

After thoroughly rinsing the sprayer, it’s essential to ensure it’s completely dry and reassembled before moving on to the next step of the cleaning process. Start by using a clean cloth or towel to dry all the components, including the nozzle, hose, and gun.

Pay attention to any hard-to-reach areas to prevent moisture buildup. Once dry, carefully reassemble the sprayer, making sure all parts fit snugly and securely. This is also a good time to inspect the sprayer for any worn-out parts that may need replacing. Troubleshoot common issues such as leaks or clogs before proceeding.

By taking the time to thoroughly dry and reassemble the sprayer, you can prevent any potential damage or malfunction.

Advertisement

Now, let’s move on to the next step and store the sprayer in a clean and dry area for future use.

Store the sprayer in a clean and dry area for future use

Once you’ve ensured everything is dry and reassembled, find a nice, cozy spot to store your trusty sprayer for future projects. Storing your airless paint sprayer properly is essential to maintain its longevity and performance. Here are some important storing precautions and maintenance tips to keep in mind:

Storing Precautions Maintenance Tips
Store in a clean and dry area away from direct sunlight or extreme temperatures. Regularly clean the sprayer’s filters and nozzles to prevent clogging.
Protect the sprayer from dust and debris by covering it with a clean cloth or plastic bag. Lubricate the sprayer’s moving parts with a suitable lubricant to prevent rusting.
Keep the sprayer upright to prevent any leaking or damage to the internal components. Check the sprayer’s hoses and connections for any signs of wear or damage. Replace if necessary.
Avoid storing the sprayer near any flammable materials to reduce the risk of fire hazards. Always follow the manufacturer’s instructions for proper maintenance and storage.

By following these storing precautions and maintenance tips, you can ensure that your airless paint sprayer will be in optimal condition for your future painting projects.

Frequently Asked Questions

Can I use any type of cleaning solution to flush the sprayer?

Sure, any cleaning solution can be used to flush the sprayer, but it’s essential to choose the right one. While vinegar and water work well for water-based paints, mineral spirits are perfect for oil-based paints.

How often should I clean the filter and spray tip?

I recommend cleaning the filter and spray tip of your airless paint sprayer regularly to ensure optimal performance. It is important to clean them after every use to prevent clogs and maintain a consistent spray pattern.

Advertisement

Can I use a regular brush or toothpick to remove paint residue or is there a specific type of tool I should use?

To effectively remove paint residue from an airless paint sprayer, it’s important to use the right tools. While a regular brush or toothpick might work for small areas, it’s recommended to use specialized cleaning tools for better results and to prevent damage to the sprayer.

Is it necessary to dry the sprayer completely before reassembling it?

Yes, it is necessary to completely dry the sprayer before reassembling it. This ensures that there is no moisture left inside the sprayer, which can lead to clogs or damage during the reassembly process.

How often should I clean and store the sprayer if I use it frequently?

If I use the airless paint sprayer frequently, I should clean it after every use. Proper cleaning frequency ensures optimal performance. Additionally, storing the sprayer in a clean and dry place helps maintain its functionality.

Conclusion

In conclusion, cleaning a dirty airless paint sprayer is a meticulous task that requires the right tools and techniques. By following the steps outlined above, you can ensure that your sprayer is thoroughly cleaned and ready for future use.

Remember, a clean sprayer is a happy sprayer, so don’t neglect this important maintenance task. As the saying goes, "A stitch in time saves nine," taking the time to clean your sprayer now will prevent bigger issues down the road.

Advertisement

So go ahead and give your sprayer the TLC it deserves.

Continue Reading

Airless Paint Sprayers FAQs

How To Clean An Airless Paint Sprayer With Water

Published

on

By

An image of a hand holding a disassembled airless paint sprayer under a running faucet, with water flowing through the nozzle, cleansing the paint residue

Are you interested in learning the most effective method for cleaning your airless paint sprayer using only water? Look no further! This guide will provide you with a thorough, step-by-step process for cleaning your airless paint sprayer with water, ensuring that it is in top condition and ready for your next painting project.

Cleaning your airless paint sprayer is crucial to maintain its performance and prolong its lifespan. By following these instructions, you can avoid clogs, reduce paint buildup, and prevent any potential damage to your equipment.

From gathering the necessary materials to properly storing the sprayer, each step is explained in a technical and precise manner. By the end of this article, you will have a clear understanding of how to clean your airless paint sprayer, leaving it in optimal condition for your future painting endeavors.

So, let’s get started and make sure your airless paint sprayer stays in top shape!

Key Takeaways

  • Fill sprayer with water before cleaning
  • Flush sprayer with water to remove paint or debris
  • Run water and pump preservative mixture through sprayer to protect components
  • Thoroughly clean and store sprayer after use

Gather Your Materials

Advertisement

Now it’s time to gather all the materials you’ll need to clean your airless paint sprayer with just water! Before we get started, let’s talk about some cleaning solution alternatives.

If you don’t have a specific airless paint sprayer cleaner, you can use warm soapy water or a mixture of vinegar and water. These options work well in removing any leftover paint or debris from the sprayer.

Additionally, it’s essential to have some maintenance tips in mind. Make sure to wear protective gloves and goggles to avoid any accidents. You’ll also need a clean bucket or container, a soft brush or cloth, and a wrench for removing any nozzle or tip.

With all these materials in hand, let’s move on to preparing the sprayer for cleaning, ensuring it’s ready for the next painting project.

Prepare the Sprayer for Cleaning

Before you begin preparing the sprayer for maintenance, it’s important to know that 90% of paint sprayer failures are caused by improper cleaning techniques. To avoid any mishaps, there are certain precautions to take while cleaning an airless paint sprayer.

Advertisement

Firstly, make sure to wear protective gloves and goggles to prevent any contact with the cleaning solution or paint residues. Disconnect the sprayer from the power source and relieve any pressure in the system by triggering the gun into a waste container.

Next, remove the spray tip, guard, and filter, and soak them in a cleaning solution. Avoid using harsh chemicals or solvents as they can damage the sprayer components. Additionally, it’s crucial to avoid common mistakes such as neglecting to clean the intake tube or leaving any paint residues in the system.

Once the sprayer is properly prepared, it’s time to move on to the next section and flush the system with water to complete the cleaning process.

Flush the System with Water

Advertisement

Make sure you’re fully prepared to maintain your sprayer by thoroughly flushing the system with water, ensuring optimal performance and longevity. The importance of using clean water for flushing the airless paint sprayer can’t be overstated. It helps remove any leftover paint residue or debris, preventing clogs and blockages in the system. To avoid common mistakes during the water flushing process, always use fresh, clean water without any additives or chemicals.

Avoid using dirty or contaminated water, as it can cause damage to the sprayer. Additionally, be careful not to apply too much pressure when flushing the system, as it may lead to leaks or other issues.

Once the system is flushed, you can proceed to the next section to clean the spray gun and nozzles, ensuring a thorough cleaning process.

Clean the Spray Gun and Nozzles

To achieve optimal performance and longevity, it’s essential to give the spray gun and nozzles a thorough scrubbing, like giving your car a sparkling wash and wax.

Start by disassembling the spray gun and removing any remaining paint or debris. Use a cleaning solution alternative, such as warm soapy water or a mixture of water and vinegar, to soak the parts for a few minutes. Then, scrub the inside and outside of the gun with a soft brush, making sure to clean the trigger, needle, and air cap.

Advertisement

Rinse everything with clean water and dry with a lint-free cloth.

Next, check for common spray gun issues like clogs or uneven spray patterns. Troubleshoot these problems by adjusting the nozzle or cleaning the air passages.

Finally, transition into the next section about removing and cleaning the filters for a complete maintenance process.

Remove and Clean the Filters

Advertisement

Once you’ve given your spray gun a good scrub, it’s time to tackle the next step: getting those filters removed and cleaned. Properly maintaining and cleaning the filters is essential for the optimal performance of your airless paint sprayer. By regularly cleaning the filters, you can prevent clogs and ensure a smooth paint application.

To clean the filters, follow these simple steps:

  1. Start by turning off the sprayer and relieving any pressure.
  2. Locate the filters, which are usually located near the pump or at the end of the spray gun.
  3. Carefully remove the filters using a wrench or pliers, making sure not to damage them.
  4. Rinse the filters thoroughly with clean water to remove any paint residue or debris.
  5. Once the filters are clean, reassemble them back into the sprayer.

By following these cleaning techniques and maintenance tips, you can keep your airless paint sprayer in top condition. Now, let’s move on to the next section and discuss how to scrub the paint reservoir.

Scrub the Paint Reservoir

After properly maintaining and cleaning the filters, it’s time to delicately cleanse the container that holds the paint. The paint reservoir is a crucial component of an airless paint sprayer, and regular maintenance is essential to prevent paint buildup and ensure optimal performance.

To scrub the paint reservoir, start by emptying any remaining paint and wiping it clean with a damp cloth. Next, fill the reservoir with warm water and a mild detergent solution. Use a soft-bristle brush to scrub the inside of the reservoir, paying special attention to any areas with dried paint. Rinse the reservoir thoroughly with clean water to remove any residue. This step is important to ensure that the paint sprayer operates at its best.

Now that the paint reservoir is clean, it’s time to move on to the next section about rinsing and drying all components.

Advertisement

Rinse and Dry all Components

After scrubbing the paint reservoir, it’s crucial to thoroughly rinse and dry all components of the airless paint sprayer. This step ensures that no paint residue or cleaning solution is left behind, which could potentially clog the sprayer or affect the quality of future paint jobs.

To rinse the components, I recommend using clean water and a soft brush or cloth to remove any remaining debris. Pay special attention to the nooks and crannies of the sprayer, as paint can often accumulate in these hard-to-reach areas.

After rinsing, be sure to dry all components completely before reassembling the sprayer. Proper drying techniques, such as air drying or using a clean cloth, are essential to prevent any moisture from causing rust or damage to the sprayer.

Once all components are thoroughly rinsed and dried, we can proceed to the next step of reassembling the sprayer and preparing it for future use.

Reassemble the Sprayer

Now that all the components have been thoroughly rinsed and dried, it’s time to put the sprayer back together and get it ready for future use.

Advertisement

Reassembling the sprayer is a crucial step in ensuring its proper functioning. Start by carefully aligning the spray gun with the hose and securely attaching them together. Make sure all the fittings are tightened to prevent any leaks.

Next, reattach the intake valve and the pressure control knob, ensuring they’re properly aligned and securely fastened. Double-check all the connections and fittings to ensure they’re tight and secure.

If you encounter any issues during reassembly, refer to the user manual for troubleshooting tips.

Once the sprayer is reassembled, you can proceed to the next step of testing the sprayer’s performance and functionality.

Test the Sprayer

To ensure proper functionality, how can the sprayer be tested? Testing the sprayer is an important step to identify any potential issues and ensure that it is working at the desired pressure. To do this, follow these steps:

Advertisement
  1. Connect the sprayer to a power source and turn it on.
  2. Adjust the pressure settings according to the manufacturer’s instructions.
  3. Fill the sprayer with water and attach the spray gun.
  4. Hold the spray gun at a safe distance from a test surface and pull the trigger.
  5. Observe the spray pattern and check for any irregularities in pressure or clogging.

By testing the sprayer, you can troubleshoot any issues such as low pressure or uneven spray patterns. This will help you make any necessary adjustments or repairs before proceeding to properly store the sprayer.

Properly Store the Sprayer

Make sure you store the sprayer correctly to maintain its functionality and prevent any damage. Proper maintenance is essential for keeping your airless paint sprayer in good working condition.

After using the sprayer, clean it thoroughly as mentioned in the previous subtopic. Once the sprayer is clean, you need to store it properly. Start by disconnecting the sprayer from the power source and relieving any pressure in the system. Remove the spray tip and filter, and clean them separately. Store them in a clean, dry place to prevent clogs.

Next, flush the sprayer with water to remove any remaining paint or debris. After flushing, run a mixture of water and a pump preservative through the sprayer to protect its internal components.

Finally, cover the sprayer with a clean cloth or a plastic bag to keep it dust-free. By following these steps, you can ensure the longevity of your airless paint sprayer.

Frequently Asked Questions

How often should I clean my airless paint sprayer with water?

I should clean my airless paint sprayer with water after each use to ensure proper functioning and prevent clogs. This is essential for maintaining the sprayer’s performance and prolonging its lifespan.

Advertisement

Can I use any type of water to clean my airless paint sprayer?

I can use tap water or distilled water to clean my airless paint sprayer. Using improper water, such as saltwater or dirty water, can lead to clogs and damage the sprayer’s components.

Is it necessary to remove the filters for cleaning or can I clean them in place?

It is necessary to remove the filters for cleaning. Regularly replacing filters is recommended to maintain optimal performance. Water is the recommended cleaning agent for an airless paint sprayer.

What should I do if the spray gun or nozzles are clogged after cleaning?

If the spray gun or nozzles are clogged after cleaning, I recommend troubleshooting the issue by checking for any debris or residues in the nozzle or gun. Clear any obstructions and ensure proper spray gun maintenance to prevent further clogging.

How can I ensure that all components are completely dry before reassembling the sprayer?

To ensure all components are completely dry before reassembling the sprayer, use drying methods such as air-drying or using a clean cloth to remove any moisture. Additionally, follow reassembly tips provided by the manufacturer for optimal results.

Conclusion

In conclusion, cleaning an airless paint sprayer with water is a crucial step to maintaining its efficiency and longevity. By following the step-by-step process outlined in this article, you can ensure that your sprayer continues to deliver flawless results with every use.

Advertisement

Remember, regular cleaning not only extends the life of your equipment but also prevents clogs and blockages that can hinder its performance. So, don’t neglect this important maintenance task and keep your sprayer in top-notch condition. Happy painting!

Continue Reading

Airless Paint Sprayers FAQs

How To Clean Dried Paint From Airless Sprayer

Published

on

By

An image showcasing a person wearing protective gloves, using a paint scraper to delicately remove dried paint residue from the nozzle of an airless sprayer

It is commonly believed that keeping your airless sprayer properly maintained leads to a happy airless sprayer, a sentiment that I completely agree with. If you have ever experienced the frustration of dried paint clogging your sprayer, you understand the importance of keeping it in top condition. Luckily, I have some valuable tips on how to remove dried paint from your airless sprayer, and I am excited to share this information with you.

In this article, we’ll walk through the step-by-step process of restoring your sprayer to its former glory. We’ll start by gathering the necessary supplies and disconnecting the sprayer from the power source.

Then, we’ll tackle the task of removing any remaining paint, soaking the spray gun and nozzle in a cleaning solution, and scrubbing away the dried paint. We’ll also cover how to clean the filters and screens, reassemble the sprayer, and test for proper functionality.

Finally, we’ll discuss the importance of regular maintenance and provide tips for preventing future paint buildup.

So, grab your cleaning gloves and let’s get started on giving your airless sprayer the cleaning it deserves.

Advertisement

Key Takeaways

  • Thoroughly clean the airless sprayer before storing it.
  • Disassemble all components and ensure they are completely dry before storing.
  • Use protective covers to shield the sprayer from dust and debris during storage.
  • Store the airless sprayer in a controlled environment that is clean and free from moisture.

Gather the necessary supplies

First, gather all the supplies you’ll need to clean the dried paint from your airless sprayer. Start by getting cleaning solutions that are specifically designed to remove dried paint. Look for products that are safe to use on the materials of your sprayer and follow the instructions on the label.

Additionally, make sure to have proper disposal methods in place for any paint residue or cleaning solutions. This may include using a paint disposal bag or taking the waste to a local recycling center.

Once you have all the necessary supplies, you can move on to the next step of disconnecting the sprayer from the power source.

Disconnect the sprayer from the power source

Once you’ve unplugged it, you can safely move on to the next step in disconnecting your trusty painting tool from its power source.

Advertisement

Disconnecting safety measures are crucial to avoid any accidents or electrical mishaps. Make sure to switch off any switches or buttons on the sprayer itself before proceeding. Additionally, ensure that the power cord is completely detached from the outlet. This will prevent any power surges or accidental starts while you’re working on cleaning the sprayer.

Now that you’ve disconnected the sprayer from the power source, you can focus on removing any remaining paint from the sprayer.

Remove any remaining paint from the sprayer

To effectively prepare your sprayer for storage, it’s essential to ensure that all traces of paint have been thoroughly eliminated. Cleaning techniques for removing dried paint from an airless sprayer can vary, but there are a few common methods that can be effective. One option is to use a cleaning solution specifically designed for paint removal. These solutions are typically available at hardware stores and can help break down the dried paint. Alternatively, you can try using household items like vinegar or rubbing alcohol as alternative cleaning solutions. These can be effective at loosening the paint and making it easier to remove. Once all the paint has been cleaned off, it’s important to soak the spray gun and nozzle in a cleaning solution to ensure thorough cleaning. This will be discussed in the subsequent section about ‘soak the spray gun and nozzle in a cleaning solution.’

Advertisement

Soak the spray gun and nozzle in a cleaning solution

Now, it’s time to give your spray gun and nozzle a refreshing dip in a cleansing solution, like a rejuvenating soak for tired muscles after a long day. Cleaning techniques are crucial to ensure the longevity of your airless sprayer.

Here are four alternative cleaning solutions that can effectively remove dried paint:

  1. Vinegar solution: Mix equal parts of vinegar and warm water to create a natural and affordable cleaning solution.

  2. Paint thinner: Use a paint thinner specifically formulated for cleaning airless sprayers. Follow the manufacturer’s instructions for proper usage.

  3. Commercial cleaning solutions: There are various commercial cleaning solutions available in the market that are specifically designed to clean dried paint from airless sprayers.

  4. Hot soapy water: Soak the spray gun and nozzle in hot soapy water to loosen the dried paint before scrubbing.

After giving your spray gun and nozzle a good soak, it’s time to move on to the next step: using a brush or cloth to scrub away the dried paint.

Use a brush or cloth to scrub away the dried paint

Advertisement

Grab a sturdy brush or cloth and vigorously scrub away the stubborn remnants of color that cling to your trusty tool. Using solvents for removing dried paint is an effective method to tackle tough stains. Apply a suitable solvent, such as paint thinner or mineral spirits, to the brush or cloth and work it into the dried paint. Be sure to wear protective gloves and work in a well-ventilated area. The solvents will help break down the paint and make it easier to remove. As you scrub, focus on areas where paint buildup is most prominent, such as the nozzle and spray gun. By regularly cleaning your airless sprayer and preventing paint buildup, you can ensure optimal performance and extend the lifespan of your equipment. Once you’ve thoroughly scrubbed away the dried paint, it’s time to move on to the next step: rinsing the spray gun and nozzle with clean water.

Rinse the spray gun and nozzle with clean water

After vigorously scrubbing away the stubborn remnants of color, it’s time to give the spray gun and nozzle a good rinse with clear water. This step is crucial to ensure that all traces of dried paint are completely removed from the airless sprayer.

Using a pressure washer can provide a more thorough cleaning, as it effectively blasts away any remaining paint particles that may be stuck in the nozzle or gun. Additionally, using a cleaning solution specifically designed for paint removal can offer great benefits. These solutions are formulated to break down and dissolve dried paint, making it easier to rinse away.

Once the spray gun and nozzle have been thoroughly rinsed, it’s time to move on to the next step of cleaning the filters and screens, ensuring optimal performance of the airless sprayer.

Clean the filters and screens

After rinsing the spray gun and nozzle with clean water, it’s important to clean the filters and screens to ensure the airless sprayer’s proper functionality. Cleaning these components will prevent any clogs or blockages that can hinder the paint flow and affect the quality of your work. Here are some steps to follow:

Advertisement
  • Remove the filters and screens from the sprayer.
  • Rinse them thoroughly with clean water to remove any paint residue.
  • Soak them in a cleaning solution specifically designed for removing dried paint.
  • Use a soft brush or cloth to gently scrub away any remaining paint.
  • Once clean, rinse them again with water and allow them to dry completely before reassembling the sprayer.

By properly cleaning the filters and screens, you’ll ensure the sprayer operates at its best.

Now, let’s move on to reassembling the sprayer and testing for proper functionality.

Reassemble the sprayer and test for proper functionality

To ensure the proper functionality of your sprayer, you should carefully reassemble all the components and conduct a thorough test to ensure everything is working as expected. Here are some troubleshooting tips for testing the functionality of your airless sprayer:

Test Description
Pressure Test Check if the sprayer maintains the appropriate pressure.
Trigger Test Verify that the trigger is working smoothly and effectively.
Spray Pattern Test Ensure that the spray pattern is even and consistent.
Nozzle Test Confirm that the nozzle is not clogged and spraying properly.
Suction Tube Test Test the suction tube to make sure it is properly drawing paint from the container.

Once you have reassembled the sprayer and completed these tests, you can proceed to the next step of storing the sprayer in a clean and dry area.

Store the sprayer in a clean and dry area

Make sure you store your sprayer in a spot that’s both neat and free from moisture. Here are four key tips for proper storage to prevent paint clogs and ensure the longevity of your airless sprayer:

  1. Clean the sprayer thoroughly: Before storing, remove any excess paint and clean all parts of the sprayer according to the manufacturer’s instructions. This’ll prevent dried paint from building up and causing clogs.

  2. Disassemble and dry: Take apart the sprayer and allow all components to dry completely. Moisture can lead to paint clogs and damage the sprayer over time.

  3. Use protective covers: Cover the sprayer and its accessories with protective materials, like plastic bags or cloth covers, to shield them from dust, debris, and potential damage.

  4. Store in a controlled environment: Find a clean and dry area to store the sprayer. Avoid extreme temperatures and humidity, as they can affect the performance and lifespan of the sprayer.

By following these storage guidelines, you can prevent paint clogs and ensure your airless sprayer stays in excellent condition. Regularly maintain and clean your airless sprayer to prevent future paint buildup, ensuring optimal functionality.

Advertisement

Regularly maintain and clean your airless sprayer to prevent future paint buildup

Regularly maintaining and cleaning my sprayer ensures that paint buildup is prevented in the future, keeping my equipment in top-notch condition. Regular maintenance is crucial to prevent paint clogs and ensure optimal performance.

After each use, I make sure to thoroughly clean the sprayer by flushing it with water or a suitable cleaning solution. I pay special attention to the nozzle, filters, and hoses, removing any dried paint or debris that could lead to clogs.

It’s also important to inspect the sprayer for any worn or damaged parts and replace them as needed. By taking these preventative measures, I can avoid costly repairs and downtime caused by paint buildup, allowing me to efficiently complete my painting projects.

Frequently Asked Questions

How long should the spray gun and nozzle be soaked in the cleaning solution?

For best results, soak the spray gun and nozzle in a cleaning solution for at least 30 minutes. This will help loosen and remove dried paint, making it easier to clean and maintain your airless sprayer.

What type of cleaning solution is recommended for removing dried paint from the spray gun and nozzle?

I recommend using a strong solvent, like mineral spirits or paint thinner, to remove dried paint from the spray gun and nozzle. Alternatively, you can try using a commercial paint remover or warm soapy water.

Advertisement

Should I wear any protective gear while cleaning the airless sprayer?

Yes, wearing protective gear is essential when cleaning the airless sprayer. It includes gloves, goggles, and a mask. Using a suitable cleaning solution will help remove dried paint effectively while ensuring your safety.

How often should the filters and screens be cleaned?

Filters and screens should be cleaned regularly to maintain the airless sprayer’s performance. It is recommended to clean them after every use to prevent clogs and ensure optimal paint flow. Regular maintenance is essential for efficient operation.

Are there any specific maintenance steps I should follow to prevent paint buildup in the airless sprayer?

To prevent paint buildup in the airless sprayer, I recommend regularly cleaning the filters and screens and using cleaning techniques like flushing the sprayer with water or solvent. This will ensure smooth operation and prolong the sprayer’s lifespan.

Conclusion

In conclusion, cleaning a dried paint from an airless sprayer is like restoring a masterpiece. You can restore your sprayer to its former glory with the right supplies and a little elbow grease. Here are the crucial steps in this artistic endeavor:

  1. Disconnect the power source.
  2. Remove any remaining paint.
  3. Soak the gun and nozzle in a cleaning solution.
  4. Scrub away the dried paint.
  5. Don’t forget to clean the filters and screens.
  6. Reassemble the sprayer.
  7. Test it for proper functionality.

Lastly, store your sprayer in a clean and dry space to prevent future paint buildup. Remember, maintaining and cleaning your airless sprayer is the key to keeping your artistic visions flowing smoothly.

Advertisement
Continue Reading
Advertisement

Affiliate disclaimer

As an affiliate, we may earn a commission from qualifying purchases. We get commissions for purchases made through links on this website from Amazon and other third parties.

Advertisement

Trending