Connect with us

Airless Paint Sprayer Tips for Specific Projects

How To Paint A Wall With An Airless Sprayer

Published

on

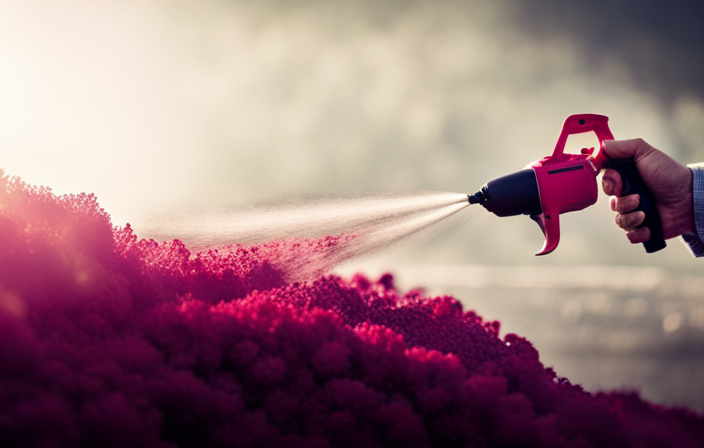
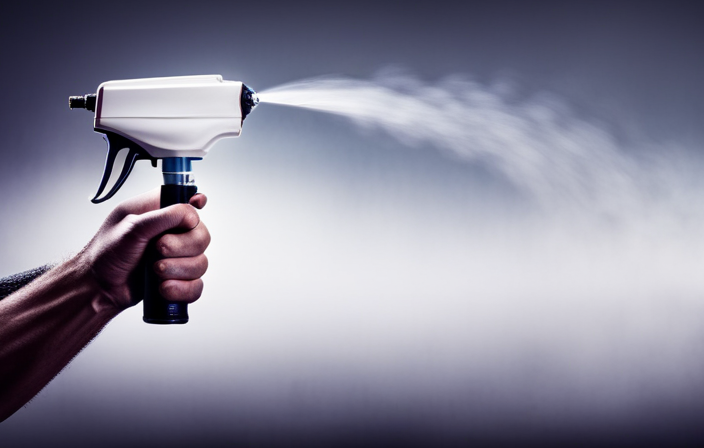
An image capturing a skilled hand effortlessly gliding an airless sprayer over a wall, releasing a mist of vibrant paint particles that gracefully coat the surface, leaving behind a flawless and professional finish

Using an airless sprayer can cut your painting time in half. This powerful tool makes it easy to quickly paint large areas, giving your walls a professional finish. In this article, I will guide you through the steps of painting a wall with an airless sprayer.

First, you need to prepare the surface. Start by cleaning the wall thoroughly to remove any dirt or grease. Fill any holes or cracks with spackle and sand them smooth. Next, protect any areas you don’t want to paint, such as trim or windows, with painter’s tape and drop cloths.

Once the surface is prepped, it’s time to set up the sprayer. Start by assembling the sprayer according to the manufacturer’s instructions. Fill the sprayer with your chosen paint and adjust the pressure settings to achieve the desired spray pattern.

Before you start spraying, it’s important to practice your technique on a piece of cardboard or scrap material. This will help you get a feel for the sprayer and ensure you have the right settings.

When you’re ready to paint, start at one corner of the wall and work your way across in a smooth, even motion. Keep the sprayer about 12 inches away from the wall and overlap each pass slightly to ensure full coverage.

Advertisement

After you’ve finished painting, allow the wall to dry completely before applying a second coat if needed. Once the paint is dry, carefully remove the painter’s tape and clean the sprayer according to the manufacturer’s instructions.

By following these steps, you’ll be able to achieve a flawless paint job with an airless sprayer. Remember to always wear protective gear, such as goggles and a mask, and work in a well-ventilated area. Happy painting!

Key Takeaways

  • Maintaining the correct distance from the wall surface ensures an even application of paint and reduces the chances of drips or splatter.
  • Following techniques for a professional-looking finish can minimize mess and waste.
  • Regularly cleaning and maintaining the sprayer is vital for a flawless finish and the sprayer’s longevity. This includes thoroughly cleaning the sprayer after each use and paying attention to the nozzle and filters for clogging.
  • Regularly inspecting the sprayer for worn or damaged parts and replacing them as needed is important to avoid breakdowns during a painting project.

Prepare the Surface

Now it’s time to get your wall ready for a flawless paint job – you’ll want to start by prepping the surface.

Surface preparation is crucial to ensure the paint adheres properly and lasts longer. Begin by cleaning the wall thoroughly, removing any dirt, dust, or grease. Use a mild detergent and water solution for best results.

Advertisement

Next, inspect the surface for any cracks or holes and fill them with a suitable filler. Sand the wall to create a smooth and even surface.

Once the surface is clean and smooth, apply a primer using a roller or brush. Priming techniques vary depending on the type of surface, so make sure to follow the manufacturer’s instructions.

With the surface prepped and primed, it’s time to move on to the next section about choosing the right paint and equipment.

Choose the Right Paint and Equipment

When choosing paint for an airless sprayer, it’s important to select the appropriate type that is compatible with the sprayer and the surface you’re painting.

Additionally, gather all the necessary supplies such as paint filters, stir sticks, and safety equipment before starting the project.

Advertisement

Finally, set up and test the airless sprayer to ensure it is working properly before beginning the painting process.

Select the Appropriate Paint

To achieve the best results, it’s important to choose the right paint for your airless sprayer. When selecting the appropriate paint, there are two key factors to consider: choosing the right color and understanding different paint finishes.

Choosing the right color is essential for achieving the desired aesthetic for your wall. Consider the overall style and mood you want to create in the room. It’s also important to take into account the lighting conditions and the existing colors in the space.

Understanding different paint finishes is crucial as it determines the final look and durability of the painted surface. Common paint finishes include matte, eggshell, satin, semi-gloss, and high-gloss. Each finish has its own characteristics, such as the level of shine and ease of cleaning.

By carefully considering these factors, you can select the perfect paint that will work well with your airless sprayer and give your walls a professional and polished look. In the next section, we will discuss how to gather the necessary supplies for the painting process.

Advertisement

Gather the Necessary Supplies

Once you’ve carefully selected the perfect paint and considered the desired aesthetic, it’s time to gather all the necessary supplies for your upcoming painting project. Here are the four items you’ll need:

  1. Airless sprayer: Make sure you have a reliable airless sprayer that suits your project’s size and requirements.

  2. Paint: Acquire the chosen paint color scheme in the desired finish. Ensure it is compatible with an airless sprayer.

  3. Safety equipment: Prioritize safety by wearing protective gear, including goggles, a respirator mask, and gloves. This will protect you from any potential hazards during the painting process.

  4. Drop cloths and tape: Prepare the workspace by covering furniture, floors, and any other areas you want to protect from overspray. Secure the drop cloths with tape for added stability.

Once you have gathered these supplies, you’re ready to move on to the next section about setting up and testing the airless sprayer.

Set Up and Test the Airless Sprayer

Get ready to experience the thrill of setting up and testing your trusty airless sprayer, ensuring a smooth and flawless painting process.

Before starting, make sure you have all the necessary supplies, including the sprayer, paint, extension cords, and protective gear.

Begin by assembling the sprayer according to the manufacturer’s instructions, making sure all connections are secure.

Advertisement

Next, prime the sprayer by filling it with water and running it for a few minutes to remove any air bubbles.

If you encounter any issues during setup, such as leaks or clogs, consult the troubleshooting guide provided with your sprayer.

Common mistakes with airless sprayers include spraying too close to the wall or using too high of a pressure, resulting in uneven coverage or paint drips.

Once the sprayer is set up and tested, you can move on to the next section about practicing proper technique for a professional finish.

Practice Proper Technique

Mastering the art of airless spraying gives you the power to effortlessly glide the sprayer along the wall, leaving behind a flawless coat of paint. To improve efficiency and avoid common issues, here are some techniques to practice:

Advertisement
  • Hold the sprayer perpendicular to the wall, maintaining a consistent distance of about 12 inches.
  • Begin each stroke slightly before the starting point and continue slightly past the ending point to ensure even coverage.
  • Move your whole arm, not just your wrist, to create smooth, overlapping passes.
  • Maintain a steady, consistent speed to prevent drips or uneven application.

By practicing these techniques, you can ensure a professional finish and minimize the need for touch-ups.

Now that you’ve mastered the proper technique, let’s move on to the next section and start painting.

Start Painting

Now that you have honed your skills, it’s time to unleash your artistic touch and bring your vision to life. When starting to paint with an airless sprayer, it’s crucial to employ proper painting techniques to ensure a smooth and professional finish. Here are some helpful tips to guide you through the process and troubleshoot any issues that may arise.

Painting Techniques Troubleshooting Tips
Maintain a consistent distance from the wall while spraying. If the paint is uneven or streaky, adjust the sprayer’s pressure settings.
Move your arm smoothly and steadily to avoid uneven coverage. If the paint is dripping or splattering, check the nozzle for clogs and clean if necessary.
Overlap each pass by 50% to prevent missed spots. If the paint is coming out in a misty spray, check the sprayer’s filter and clean or replace as needed.

By mastering these techniques and troubleshooting tips, you can achieve professional-looking results. In the next section, we will discuss how to effectively manage overspray and drips without compromising your project.

Manage Overspray and Drips

To effectively manage overspray and drips, it’s important to be mindful of your surroundings and have careful control over the direction and flow of your artistic creation. Here are some key strategies to avoid paint splatter and control the spray pattern:

  • Prepare the area: Cover nearby furniture, floors, and objects with drop cloths or plastic sheets to protect them from accidental overspray.

  • Adjust the spray pattern: Use the nozzle adjustment feature on your airless sprayer to change the width and shape of the spray pattern. This allows you to control the coverage and minimize overspray.

  • Maintain the correct distance: Hold the sprayer nozzle at a consistent distance from the wall surface. This helps ensure an even application of paint and reduces the chances of drips or splatter.

By following these techniques, you can achieve a professional-looking finish while minimizing mess and waste.

Advertisement

In the next section, we will discuss how to clean and maintain the sprayer to prolong its lifespan.

Clean and Maintain the Sprayer

To keep your equipment running smoothly and ensure a flawless finish, it’s vital that you regularly clean and maintain your sprayer.

Sprayer maintenance is crucial for its longevity and performance. After each use, make sure to clean the sprayer thoroughly. Flush out any leftover paint or debris by running clean water or solvent through the system.

Pay close attention to the nozzle and filters, as they are prone to clogging. Remove any obstructions or buildup to prevent issues with the spray pattern.

Additionally, regularly inspect the sprayer for any worn or damaged parts. Replace them as needed to avoid any potential breakdowns during your painting project.

Advertisement

By following these maintenance steps and troubleshooting tips, you can ensure that your sprayer operates at its best and delivers impeccable results every time.

Frequently Asked Questions

How do I ensure that my walls are properly prepared before using an airless sprayer?

Before using an airless sprayer, I make sure my walls are properly prepared. It’s like laying a strong foundation for a building; it ensures smooth, even paint application and a flawless finish. I focus on wall cleaning, repairing imperfections, and using proper masking techniques.

What are the key factors to consider when selecting the right paint and equipment for airless spraying?

When selecting paint colors for airless spraying, consider factors such as viscosity, coverage, and drying time. The benefits of using an airless sprayer include faster application, smoother finish, and reduced overspray.

Can you provide some tips on how to practice proper technique when using an airless sprayer?

Proper airless sprayer technique is crucial for effective use. Here are some tips: maintain a consistent spraying distance, use smooth and overlapping strokes, adjust pressure and nozzle size accordingly, and practice with different materials and surfaces.

What are some common mistakes to avoid when starting to paint with an airless sprayer?

Common mistakes when starting to paint with an airless sprayer include not properly preparing the surface, using the wrong nozzle size, spraying too quickly or too close, and not cleaning the sprayer thoroughly. Here are some troubleshooting tips to avoid these errors.

Advertisement

Are there any specific techniques or tools to help manage overspray and drips while using an airless sprayer?

To manage overspray and prevent drips when using an airless sprayer, there are a few techniques and tools you can use. Adjusting the pressure, using a spray shield, and practicing proper spraying techniques can help minimize these issues.

Conclusion

In conclusion, painting a wall with an airless sprayer can be a game-changer in terms of efficiency and quality.

To achieve professional-looking results, it is important to follow a few key steps.

First, prepare the surface properly by cleaning it thoroughly and repairing any cracks or imperfections. This will ensure that the paint adheres well and provides a smooth finish.

Next, select the appropriate paint and equipment for the job. Consider factors such as the type of surface, the desired finish, and the size of the project.

Advertisement

Once you have everything ready, it’s time to master the technique. Hold the sprayer about 12-18 inches away from the wall and move it in a steady, overlapping motion. Start from the top and work your way down, making sure to maintain a consistent distance from the surface.

Be mindful of overspray by using drop cloths and masking off areas that you don’t want to paint. This will help prevent any accidental splatters or stains.

Finally, don’t forget about maintenance. Clean the sprayer thoroughly after each use to prevent clogs and ensure its longevity.

With careful attention to these steps, painting a wall with an airless sprayer can be a rewarding and efficient process. Just like an artist wielding a brush, the sprayer becomes an extension of your hand, effortlessly transforming the wall into a canvas of color.
Advertisement

With James‘ articles, you can expect comprehensive breakdowns of airless paint sprayer features, performance assessments, and expert insights into the latest industry innovations. His meticulous approach ensures that readers gain a thorough understanding of the equipment they are considering, helping them make well-informed choices.

Advertisement

Airless Paint Sprayer Tips for Specific Projects

How Much Elastomeric Paint Does I Need For Stucco Walls Airless Sprayer

Published

on

By

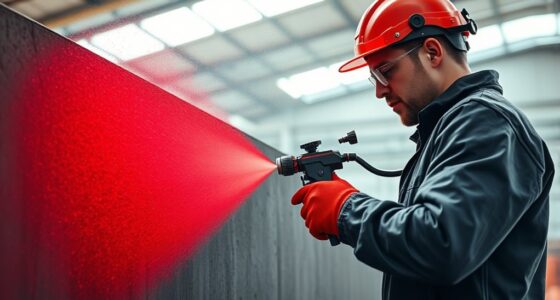
An image featuring an airless sprayer loaded with elastomeric paint, evenly coating stucco walls

It is commonly said that applying a fresh coat of paint can work wonders, particularly for stucco walls, where elastomeric paint is the top option. As a homeowner with stucco walls, I was interested in determining the precise amount of elastomeric paint needed for my airless sprayer. In this article, I will guide you on how to calculate the correct amount of paint required for your stucco walls.

First, let’s delve into the world of elastomeric paint and understand its unique properties. Then, I will show you how to accurately assess the surface area of your stucco walls and estimate the paint coverage. Armed with this knowledge, we can move on to choosing the right quantity of elastomeric paint for your project.

But before we dive into the painting process, I will share some important tips on preparing the stucco walls and protecting surrounding areas. Once the stage is set, I will walk you through the application of elastomeric paint with an airless sprayer.

Finally, we will discuss drying and curing time, finishing touches, and ongoing maintenance. So, let’s get started and transform those stucco walls into a work of art.

Key Takeaways

  • Applying multiple thin coats of elastomeric paint with an airless sprayer is recommended for stucco walls.
  • Properly protecting surrounding areas during the stucco project is important to avoid damage and maintain a professional finish.
  • When mixing elastomeric paint for stucco walls, follow the manufacturer’s instructions and thoroughly mix all ingredients for a smooth and consistent consistency.
  • Starting with a primer coat on stucco walls helps enhance paint adhesion, create a smooth surface, and prevent moisture infiltration.

Understanding Elastomeric Paint

Advertisement

Understanding elastomeric paint is essential for anyone looking to protect their stucco walls. This type of coating offers numerous benefits, including a flexible, waterproof seal that helps prevent cracks and water damage. It also has the ability to expand and contract with temperature changes, ensuring long-term durability. When applying elastomeric paint, it’s crucial to follow proper techniques. This includes thoroughly cleaning the surface and removing any loose or flaking paint. To achieve the best results, it’s recommended to apply the paint evenly using an airless sprayer. Additionally, assessing the surface area of your stucco walls is important in determining how much elastomeric paint you’ll need. By properly assessing the surface area, you can ensure you have enough paint to cover the entire surface.

Assessing the Surface Area of Your Stucco Walls

To accurately calculate the amount of paint required for your stucco walls, follow these steps:

  1. Measure the height and width of each individual wall. Take multiple measurements to ensure accuracy.

  2. Calculate the total square footage of each wall by multiplying the height by the width.

  3. Include any windows, doors, or other openings in your measurements. Subtract the square footage of these areas from the total square footage of the walls.

  4. Add up the square footage of all the walls to get the total surface area that needs to be painted.

By accurately measuring the surface area, you will have the information needed to estimate the amount of elastomeric paint required for your stucco walls.

In the next section, we will discuss estimating paint coverage.

Estimating Paint Coverage

Advertisement

Understanding the paint coverage rate is essential when estimating the amount of paint needed for a project. By knowing how much area a gallon of paint can cover, I can calculate the quantity of paint needed based on the coverage rate.

It is important to adjust for multiple coats and texture, as these factors can affect the amount of paint required for complete coverage.

Understanding the paint coverage rate

Get ready to be amazed by the amount of elastomeric paint you’re going to need for those stucco walls when using an airless sprayer! Understanding the paint coverage rate is crucial in calculating the paint quantity required.

The paint coverage rate refers to the amount of surface area that can be covered by a specific quantity of paint. It is typically measured in square feet per gallon (sq ft/gal). By knowing the coverage rate of the elastomeric paint you are using, you can estimate how much paint you will need for your stucco walls. This information is essential for planning and budgeting your project.

Advertisement

Once you have determined the coverage rate, you can proceed to calculate the amount of paint needed based on this rate. Transitioning into the next section about calculating the amount of paint needed based on coverage rate, let’s dive into the process of determining the exact quantity required for your project.

Calculating the amount of paint needed based on coverage rate

Prepare to be amazed by the simple process of calculating the amount of paint you’ll require for your project, based on the coverage rate.

To determine the paint quantity needed, you’ll first need to know the coverage rate of your specific paint. This information is usually provided by the manufacturer and can be found on the paint can or in the product specifications. The coverage rate is typically measured in square feet per gallon.

Once you have this number, you can calculate the amount of paint needed by dividing the total square footage of your stucco walls by the coverage rate. This will give you an estimation of how many gallons of paint you’ll need for a single coat.

Keep in mind that this calculation does not account for multiple coats or textured surfaces. Transitioning into the next section about adjusting for multiple coats and texture, it’s important to consider these factors to ensure you have enough paint for the job.

Advertisement

Adjusting for multiple coats and texture

To calculate the amount of elastomeric paint needed for stucco walls with an airless sprayer, it’s important to consider not only the coverage rate but also the number of coats and desired texture. Applying multiple coats is common when using elastomeric paint to ensure optimal protection and durability. Additionally, the texture of the stucco surface can affect the amount of paint required.

To help visualize this, consider the following table:

Coats Texture Paint Needed
1 Smooth X gallons
2 Smooth 2X gallons
2 Textured 3X gallons

As shown in the table, applying two coats with a textured finish may require three times the amount of paint compared to a single coat with a smooth finish. This adjustment is necessary to achieve the desired texture and ensure adequate coverage.

In the next section, we will discuss the process of choosing the right quantity of elastomeric paint for your project.

Choosing the Right Elastomeric Paint Quantity

Choosing the right elastomeric paint quantity is crucial for achieving the desired coverage on your stucco walls. Once you’ve determined the square footage of your walls, consider the texture of the surface and the number of coats you plan to apply. Elastomeric paint typically covers around 100-150 square feet per gallon for a smooth surface and around 75-100 square feet per gallon for a textured surface. If you’re applying multiple coats, it’s recommended to purchase extra paint to ensure complete coverage. Keep in mind that the porosity of the stucco may affect the quantity of paint needed. Once you have the right amount of elastomeric paint, you can move on to preparing the stucco walls for painting, ensuring a smooth and durable finish.

Advertisement

Preparing the Stucco Walls for Painting

Before you begin painting, make sure you clean the stucco walls thoroughly to ensure a smooth and long-lasting finish. Preparing the stucco surface is crucial for a successful paint job. Start by removing any loose or flaking paint using a scraper or wire brush. Next, repair any cracks or imperfections with a stucco patching compound, following the manufacturer’s instructions. Allow the patch to dry completely before proceeding. Once the surface is clean and repaired, it’s important to prime the stucco walls with a high-quality primer to promote adhesion and enhance the durability of the paint. This step will also help the paint to go on more smoothly. Once the walls are prepped and primed, you can move on to using an airless sprayer for an efficient application.

Using an Airless Sprayer for an Efficient Application

Using an airless sprayer ensures a smooth and efficient application, delivering a flawless coat of paint that effortlessly glides over the stucco surface like a gentle breeze. To achieve the best results when using an airless sprayer for stucco walls, consider the following efficient spraying techniques:

  1. Adjust the pressure: Set the sprayer’s pressure according to the manufacturer’s recommendations to achieve an even and consistent application.

  2. Maintain a consistent distance: Keep the sprayer nozzle approximately 12 inches away from the stucco surface to ensure an even coverage without oversaturating or missing spots.

  3. Overlap your strokes: Make sure to overlap each stroke by about 50% to avoid streaks or inconsistencies in the paint finish.

  4. Use multiple thin coats: Instead of applying one thick coat, apply multiple thin coats to achieve a more durable and uniform finish.

Using an airless sprayer for stucco walls offers several benefits, including quicker application, reduced paint wastage, and the ability to reach difficult-to-reach areas with ease. By efficiently spraying the paint onto the stucco surface, you can save time and achieve professional-looking results.

Once the spraying is complete, it’s important to transition into the subsequent section about protecting surrounding areas to ensure a clean and tidy workspace.

Protecting Surrounding Areas

To ensure a pristine and orderly workspace, it’s essential for you to safeguard the surrounding areas when working on your stucco project. This includes covering furniture and protecting windows from overspray and potential damage. By taking these precautions, you can avoid costly repairs and maintain a professional finish.

Advertisement

To help you visualize the steps you need to take, here is a table outlining the necessary protective measures:

Area to Protect Protective Method
Furniture Cover with plastic sheeting or drop cloths
Windows Use masking tape and plastic film or cardboard

By following these guidelines, you can create a safe and controlled environment for your stucco project, minimizing the risk of unintended paint application. Once the surrounding areas are adequately protected, you can proceed with confidence to the next section on applying the elastomeric paint.

Applying the Elastomeric Paint

When applying elastomeric paint, it’s crucial to mix the paint properly to ensure a consistent texture and prevent lumps or clumps. Start with a primer coat to help the paint adhere better and provide a smooth base for subsequent coats.

To achieve a professional finish, apply thin and even layers. Make sure to cover the entire surface without any drips or uneven areas.

Mixing the paint properly

Properly mixing the paint is essential for achieving a flawless finish on your stucco walls. To ensure proper paint mixing, it is important to follow the manufacturer’s instructions and use the right tools.

Advertisement

Start by pouring the elastomeric paint into a clean bucket, making sure to remove any debris or foreign particles. Use a drill with a paint mixing attachment to thoroughly mix the paint, ensuring that all the ingredients are well combined. Pay special attention to the bottom and edges of the bucket to avoid any unmixed paint.

Proper paint mixing will result in a smooth and consistent paint consistency, which is crucial for a successful application. Once the paint is thoroughly mixed, you can move on to starting with a primer coat to prepare the stucco walls for the final application.

Starting with a primer coat

Before applying the primer coat, it’s important to thoroughly clean and prepare the surface of the stucco walls. This step ensures proper adhesion and enhances the durability of the elastomeric paint. The primer coat acts as a foundation, creating a smooth and uniform surface for the paint to adhere to. It also helps to seal any cracks or imperfections in the stucco, preventing moisture infiltration and future damage.

To emphasize the importance of using a primer coat, let’s take a look at the benefits in the table below:

Benefits of Using a Primer Coat
1. Improves paint adhesion 2. Enhances durability 3. Seals cracks and imperfections 4. Prevents moisture damage

By applying a primer coat, you ensure that the elastomeric paint will have a strong bond with the stucco walls, resulting in a long-lasting and high-quality finish. Now, let’s move on to the next section and discuss the technique of applying thin and even layers.

Advertisement

Applying thin and even layers

To achieve a flawless and professional finish, follow these key tips for applying thin and even layers of primer and paint on your stucco walls:

  • Use an airless sprayer: An airless sprayer provides even application and minimizes paint drips.

  • Start with a primer: Applying a primer coat enhances adhesion and creates a smooth surface for the paint.

  • Apply thin coats: Avoid thick coats of paint to prevent uneven drying and potential cracking.

  • Overlap each pass: When spraying, overlap each pass by 50% for even coverage.

By following these guidelines, you can prevent paint drips and achieve a professional-looking finish.

Once the paint is applied, consider the drying and curing time for optimal results.

Drying and Curing Time

Unfortunately, drying and curing time for elastomeric paint on stucco walls seems to take an eternity, leaving you eagerly waiting for the transformation to be complete.

The drying time for elastomeric paint can vary depending on factors such as temperature, humidity, and thickness of the applied layers. Generally, it takes around 24 to 48 hours for the paint to dry completely.

Advertisement

However, the curing process is a different story. It can take up to 30 days for the paint to fully cure and achieve its maximum durability and flexibility.

During this time, it is important to avoid any contact or interaction with the painted surface to prevent damage or premature wear.

Once the paint has fully cured, you can proceed with the finishing touches and maintenance, ensuring a long-lasting and beautiful result.

Finishing Touches and Maintenance

Ready to add those finishing touches and keep your stucco walls looking pristine? After applying elastomeric paint using an airless sprayer, it’s important to take some extra steps to maintain the quality and longevity of your walls.

Regular maintenance is key to preventing any future issues. One common mistake is neglecting to clean the walls regularly. Dirt, debris, and even mildew can accumulate over time, affecting the appearance and performance of the paint. To avoid this, simply wash the walls with a mild detergent and water solution every few months.

Advertisement

Another mistake is not addressing any cracks or damages promptly. These can lead to water infiltration and further damage. Inspect your walls regularly and repair any cracks using a suitable elastomeric patching compound.

By following these maintenance tips and avoiding common mistakes, you can ensure that your stucco walls remain beautiful and protected for years to come.

Frequently Asked Questions

Can I use a regular paint sprayer instead of an airless sprayer for applying elastomeric paint on stucco walls?

Yes, a regular paint sprayer can be used to apply elastomeric paint on stucco walls. It is important to choose a sprayer with a high-pressure setting to ensure proper application and adhesion of the paint.

What are the recommended safety precautions to follow when using an airless sprayer for applying elastomeric paint?

When using an airless sprayer for applying elastomeric paint, it is important to follow recommended safety precautions. This includes wearing protective clothing, goggles, and a respirator, as well as ensuring proper usage of the sprayer to avoid accidents or injuries.

How long should I wait before applying a second coat of elastomeric paint on stucco walls?

I should wait for the first coat of elastomeric paint to dry completely before applying a second coat. This ensures proper application and allows the paint to adhere and provide maximum protection to the stucco walls.

Advertisement

Are there any specific maintenance requirements for stucco walls painted with elastomeric paint?

Maintenance requirements for stucco walls painted with elastomeric paint include regular cleaning to remove dirt and debris. The benefits of elastomeric paint, such as its durability and ability to resist cracking, make it a low-maintenance option for stucco walls.

Can I apply elastomeric paint over existing paint on stucco walls, or do I need to remove the old paint first?

I can apply elastomeric paint over existing paint on stucco walls, but it is recommended to remove the old paint first for better adhesion. This will ensure a longer-lasting and more durable finish.

Conclusion

So, there you have it! After assessing the surface area of your stucco walls and estimating the paint coverage, you can confidently determine the right quantity of elastomeric paint needed for your airless sprayer.

Remember to properly prepare the walls, protect surrounding areas, and apply the paint evenly.

With a little patience during the drying and curing time, your stucco walls will be looking fresh and protected.

Advertisement

This process may seem daunting, but with the right amount of elastomeric paint, your walls will be as resilient as ever – it’s like giving them a suit of armor!

Continue Reading

Airless Paint Sprayer Tips for Specific Projects

Can I Leave Paint in My Airless Sprayer Overnight?

Published

on

By

Can I leave paint in my airless sprayer overnight?

Coming from a background in journalism and copywriting, I have frequently been asked about the proper maintenance and care of airless sprayers. One common question that comes up is whether it is safe to leave paint in an airless sprayer overnight. I am excited to provide helpful tips and advice in this article to help you make the most out of your airless sprayer investment.

Key Takeaways:

  • Leaving paint in your airless sprayer overnight can lead to clogs and reduced performance.
  • Understanding the components of an airless sprayer and proper cleaning techniques are crucial to maintaining its longevity and optimal performance.
  • Proper paint storage, thinning, and maintenance are essential for optimal airless sprayer performance.

Understanding Airless Sprayers and Their Components

Before diving into the topic of leaving paint in your airless sprayer overnight, it’s important to understand how these sprayers work and the components involved. This knowledge will help you grasp the impact of leaving paint in the sprayer and the precautions that need to be taken.

Airless sprayers are commonly used for painting large surfaces quickly and efficiently. They work by pumping paint from a container through a hose and out of a spray gun at high pressure. This pressure breaks up the paint into small droplets and creates a fine mist that evenly coats surfaces.

The main components of an airless sprayer include:

Component Name Description
Inlet Tube Draws paint from the container and into the pump
Pump Creates high pressure required to atomize the paint
Hose Transfers pressurized paint from the pump to the spray gun
Spray Gun Controls the fluid flow, paint fan width, and pattern, as well as the air pressure, if applicable
Spray Tip Determines the size of the paint droplets and the fan width of the spray pattern

Understanding these components and how they work together is crucial for maintaining your airless sprayer’s performance and preventing issues with leaving paint in the sprayer overnight. In the next section, we will discuss why this can be problematic and the potential consequences.

Why Leaving Paint in Your Airless Sprayer Overnight Can Be Problematic

If you’re wondering whether you can leave paint in your airless sprayer overnight, the answer is generally no. Leaving paint in the sprayer can lead to several issues, including clogging and reduced performance.

Advertisement

When paint is left in the sprayer for an extended period, it can begin to dry and harden, causing buildup and clogs in the system. This can result in an uneven spray pattern, reduced pressure, and ultimately damage to the sprayer.

Additionally, when paint is left in the sprayer, it can mix with any residue from previous jobs, which can compromise the color and quality of the new paint. This can result in an undesirable finish and additional work to rectify the issue.

Moreover, leaving paint in the sprayer overnight can cause the paint to settle and separate, which can make it challenging to achieve a consistent color and texture. If the paint is not thoroughly mixed, it can result in an inconsistent finish.

Overall, it is best to avoid leaving paint in your airless sprayer overnight as it can lead to several problems that can affect the quality of your work and your sprayer’s lifespan. In the next section, we will explore how long paint can stay in an airless sprayer before causing problems and provide guidelines for proper paint storage.

How Long Can Paint Stay in an Airless Sprayer?

Leaving paint in your airless sprayer overnight is not ideal, but it’s possible to keep paint in the sprayer for a short period. How long paint can stay in an airless sprayer before causing issues depends on the type of paint and the conditions in which it’s stored.

Advertisement

The general rule of thumb is to keep paint in an airless sprayer for no longer than 24 hours. Water-based paints dry faster and are therefore more likely to cause clogs, whereas oil-based paints take longer to dry and may be less likely to cause problems. However, leaving oil-based paint in your sprayer for too long can still lead to issues.

To prevent paint from drying in your airless sprayer, it’s essential to store it in a cool and dry place, away from direct sunlight and heat. Additionally, make sure to keep the lid of the paint container tightly closed to prevent evaporation.

If you need to keep paint in your airless sprayer for longer than 24 hours, it’s recommended to clean the sprayer thoroughly and store the paint in a separate container. This ensures that the paint doesn’t dry up or cause clogs in your sprayer.

Tips for Cleaning Your Airless Sprayer After Use

Proper cleaning of your airless sprayer after each use is critical to its longevity and performance. Here are step-by-step tips to help you clean your sprayer effectively:

  1. Flush the sprayer with water: Fill the sprayer with water and flush it through the system until the water runs clear. This removes any excess paint and prevents it from drying in the sprayer.
  2. Disassemble the sprayer: Take apart the spray gun and remove any remaining paint or debris. This will ensure that all parts are clean and ready for storage.
  3. Clean the gun filter: Remove the gun filter and clean it thoroughly with water and a soft brush. A clogged filter can affect spray quality and cause issues with the sprayer.
  4. Soak the gun tip: Soak the gun tip in water or a cleaning solution for at least 30 minutes. This softens any remaining paint and makes it easier to remove.
  5. Clean the gun tip: Use a soft brush or toothbrush to remove any remaining paint from the gun tip. Rinse it with water and dry it thoroughly.
  6. Reassemble the sprayer: Once all parts are clean and dry, reassemble the sprayer and store it in a cool, dry place.

By following these cleaning tips, you can help extend the life of your airless sprayer and avoid any issues caused by dried paint residue.

Avoiding Paint Drying in Your Sprayer

Keeping paint from drying inside your airless sprayer is crucial for its performance and longevity. Here are some practical tips that can help you avoid this issue:

Advertisement
  1. Thinning your paint appropriately: Thick paint can easily dry out inside your sprayer, so it’s essential to thin it to the right consistency. Always follow the manufacturer’s recommendations when it comes to thinning your paint.
  2. Using the right filters: The filters in your sprayer are crucial for keeping the paint flowing smoothly while preventing debris from clogging the nozzle. Make sure to use the correct filter for the type of paint you’re using.
  3. Cleaning your sprayer regularly: Properly cleaning your airless sprayer after each use is essential to avoid paint residue buildup that can lead to clogs and other issues. Follow our step-by-step guide in section 5 to properly clean your sprayer.
  4. Storing your paint correctly: Keeping your paint in a cool, dry place can help prevent drying out. Always store your paint according to the manufacturer’s recommendations, and avoid leaving it open for too long.
  5. Using the right nozzle: The size of the nozzle you use can affect the spray pattern and the amount of paint that comes out. Using a nozzle that is too small can cause the paint to dry out, while using one that is too large can lead to overspray.
  6. Using a spray gun conditioner: Spray gun conditioners are products that can help clean and lubricate your airless sprayer’s internal components, preventing paint from drying out and extending the life of your sprayer. Follow the manufacturer’s instructions for use.

By following these tips, you can avoid or minimize paint drying inside your airless sprayer, ensuring that it operates smoothly and efficiently.

Proper Paint Storage Tips for Airless Sprayers

Storing your paint correctly is essential to keep it fresh and prevent clogs or other issues in your airless sprayer. Follow these guidelines to ensure proper paint storage:

  1. Store paint in a cool, dry place away from direct sunlight.
  2. Keep the containers tightly sealed to prevent air from entering.
  3. Store paint containers in an upright position to prevent leaks or spills.
  4. Avoid storing paint in humid environments, as this can cause the paint to spoil.
  5. Label each container with the paint type, color, and date of purchase to keep track of inventory and expiration dates.

By following these tips, you can keep your paint fresh and avoid potential issues with your airless sprayer.

Maintaining Your Airless Sprayer’s Performance

As with any tool, regular maintenance is essential to keep your airless sprayer performing to its best ability. By following these simple steps, you can avoid paint-related problems and prolong your sprayer’s lifespan.

Clean Your Sprayer After Use

Proper cleaning after each use is crucial to prevent paint from drying inside your sprayer and causing clogs. To clean your sprayer, first, turn off and unplug it. Next, remove the spray tip and guard and rinse them with warm water. Then, fill the sprayer with water and run it through the system until the water runs clear. Finally, use a cloth or brush to clean the outside of the sprayer and let it dry completely before storing.

Perform Regular Maintenance

Performing regular maintenance is key to ensuring your airless sprayer performs optimally. This includes replacing worn or damaged parts, checking for leaks, and lubricating moving parts. Consult your sprayer’s manual for specific maintenance instructions and recommended schedules.

Use Properly Thinned Paint

Using paint that is properly thinned to the correct consistency is essential for optimal airless sprayer performance. Consult your paint manufacturer’s instructions for recommended thinning ratios and use a viscosity cup to ensure your paint is the right consistency.

Advertisement

Store Your Paint Properly

Storing your paint properly is just as important as maintaining your sprayer. Keep your paint in a cool, dry place, and avoid exposing it to extreme heat or cold. Make sure the lid is tightly sealed to prevent air from entering, which can cause the paint to thicken or skin over.

By following these simple tips for airless sprayer maintenance, you can ensure your sprayer continues to perform optimally and avoid any paint-related issues.

The Importance of Properly Thinning Your Paint

When using an airless sprayer, it’s essential to thin your paint to the correct consistency for optimal performance. Proper thinning ensures that the paint flows smoothly through the sprayer and creates an even finish without clogs or uneven coverage.

The recommended thinning ratio for your paint will depend on several factors, including the type of paint and the sprayer’s specifications. It’s important to follow the manufacturer’s instructions carefully to achieve the best results.

If the paint is too thick, it may cause clogs in the sprayer or produce an uneven finish. On the other hand, if the paint is too thin, it may create drips and splatters and require multiple coats for adequate coverage.

Advertisement

One way to test the paint consistency is to use a viscosity cup, which measures how fast the paint flows through a tiny hole. You can also check the paint for its performance on a test surface.

Tip: When thinning the paint, use the appropriate solvent recommended by the paint manufacturer. Avoid adding too much solvent, as this can negatively affect the paint’s quality and durability.

Troubleshooting Common Airless Sprayer Problems

If your airless sprayer is not performing as expected, there may be several reasons why. Here are some common issues and solutions to help you troubleshoot your sprayer:

  1. Uneven spray pattern: If your sprayer is producing an uneven spray pattern, it’s likely due to a clogged tip. To fix this, stop spraying and remove the tip using a wrench. Clean the tip with warm water and a stiff brush, then reattach it and test the sprayer.
  2. Poor spray quality: Poor spray quality can be caused by several factors, including the wrong tip size or worn-out parts. Check that you’re using the correct tip size for the paint you’re using and replace any worn-out parts.
  3. Excessive overspray: Excessive overspray can be caused by a clogged or damaged inlet valve. Disassemble the inlet valve and clean or replace any damaged parts.
  4. Lack of pressure: If your sprayer is not producing enough pressure, it may be due to a worn-out pump or a clogged filter. Check the pump for signs of wear and replace any damaged parts. Clean or replace the filter as needed.
  5. Leaks: Leaks can be caused by loose fittings, worn-out seals, or crack hoses. Tighten any loose fittings and replace any worn-out seals or hoses.

If you’re still experiencing issues, consult your sprayer’s manual or seek professional help. Remember to always perform regular maintenance and cleaning to prevent problems from occurring in the first place.

Ensuring Proper Spray Pattern and Quality

When using an airless sprayer, the quality of the output and spray pattern are critical in achieving the desired results. Here are some factors to consider:

Spray Tip Size

The spray tip determines the amount of material output and the spray pattern size. Choosing the correct tip size for your project is crucial in achieving the desired results. Too small of a tip size can result in uneven coverage, while too large of a tip size can overspray and waste material. Consult the manufacturer’s guidelines for the recommended tip size for your specific paint and project.

Advertisement

Paint Consistency

The consistency of the paint also affects the spray pattern and quality. Thin paint will result in overspray and a poorly defined pattern, while thick paint can cause clogs and an uneven spray pattern. Check the manufacturer’s guidelines for the recommended viscosity of the paint and add water or paint thinner as necessary.

Spraying Technique

Your spraying technique also plays a role in achieving a proper spray pattern and quality. Hold the sprayer at a consistent distance from the surface, keep a steady hand, and move in a smooth, even motion. Avoid stopping or starting abruptly, as this can result in drips or uneven coverage.

Sprayer Maintenance

Regular maintenance of your airless sprayer is essential in ensuring optimal performance and spray pattern quality. Clean the sprayer after each use and ensure all components are free of paint residue. Replace any damaged or worn parts as necessary and follow the manufacturer’s maintenance schedule.

By considering these factors and maintaining your airless sprayer, you can achieve a high-quality spray pattern and output for your painting projects.

Tips for Preventing Clogs in Your Airless Sprayer

One of the most common issues that can affect the performance of your airless sprayer is paint clogs. These can occur when paint residue dries up inside the sprayer and clogs the hose or spray tip, leading to reduced pressure and uneven spray patterns.

Advertisement

To prevent paint clogs in your airless sprayer, here are some tips to follow:

  • Use the right type of paint: Not all paints are suitable for airless sprayers. Using paint that is too thick or contains particles that are too large can clog your sprayer. Make sure to read the manufacturer’s recommendations and choose paints that are specifically labeled for airless sprayers.
  • Properly thin your paint: Thinning your paint to the correct consistency can improve your sprayer’s performance and reduce the risk of clogs. Make sure to follow the manufacturer’s instructions on how to thin your paint, and test it before using it in your sprayer.
  • Filter your paint: Filtering your paint before pouring it into your sprayer can help remove any particles or debris that may clog your sprayer. Use a strainer to filter your paint, and make sure to clean it regularly.
  • Flush your sprayer regularly: After each use, make sure to flush your sprayer with the appropriate cleaning solution to remove any paint residue. This will prevent any dried paint from clogging your sprayer components.
  • Store your sprayer properly: Make sure to store your sprayer in a cool, dry place, away from direct sunlight. This will prevent your paint from drying up inside your sprayer and clogging the components.

By following these tips, you can prevent paint clogs in your airless sprayer and ensure smooth, consistent performance.

The Pros and Cons of Leaving Paint in Your Airless Sprayer Overnight

As I mentioned earlier, leaving paint in your airless sprayer overnight is generally not recommended. However, there may be circumstances where it is unavoidable or necessary. Let’s take a look at the pros and cons of this practice.

Pros:

  • It saves time and effort: If you plan to continue painting the next day, leaving paint in your airless sprayer can save time and prevent the need to clean and refill the sprayer.
  • It can be convenient: If you have limited storage space or need to transport your sprayer to another location, leaving paint in the sprayer can be a practical solution.

Cons:

  • It can cause clogs: Leaving paint in your airless sprayer for an extended period can cause the paint to dry and clog the sprayer, which can be difficult to remove and may require the services of a professional.
  • It can damage the sprayer: Paint that is left in the sprayer for too long can corrode and damage the internal components of the sprayer, resulting in reduced performance and potentially costly repairs.
  • It can affect the quality of your work: Paint that has been left in the sprayer for an extended period may have changed in consistency or dried out, affecting the quality of your work and potentially requiring rework.

If you decide to leave paint in your airless sprayer overnight, it’s important to take precautions to prevent clogs and damage. Be sure to follow proper storage guidelines, use the appropriate cleaning techniques, and check the consistency of the paint before resuming work.

What to Do If Paint Dries in Your Airless Sprayer

Paint drying in your airless sprayer can be frustrating, but there are steps you can take to address the situation and restore your sprayer’s performance. Here’s what to do:

1. Disassemble the Sprayer

The first step is to disassemble the sprayer and remove any excess paint. Follow the manufacturer’s instructions for proper disassembly and be sure to wear protective gloves and eyewear.

2. Soak the Parts in Solvent

Place the disassembled parts in a container filled with solvent and let them soak. This will help dissolve any dried paint residue and make it easier to remove. Follow the manufacturer’s instructions for the recommended solvent to use.

Advertisement

3. Use a Brush or Scraper

After soaking, use a brush or scraper to remove any remaining paint from the parts. Be gentle to avoid damaging any delicate components.

4. Rinse with Water

Once all the paint has been removed, rinse the parts thoroughly with water to remove any remaining solvent. Dry the parts completely before reassembling the sprayer.

5. Run Water or Solvent through the Sprayer

Before using the sprayer again, run water or solvent through it to flush out any remaining paint residue. This will help prevent clogs and ensure optimal performance.

By following these steps, you can effectively clean and restore your airless sprayer after paint has dried inside it. Remember to always properly clean and maintain your sprayer to prevent paint from drying and ensure its longevity.

Tips for Extending the Lifespan of Your Airless Sprayer

Investing in an airless sprayer can save you both time and money in the long run, but proper maintenance is key to extending its lifespan and ensuring optimal performance. Here are some tips to help you get the most out of your investment:

Advertisement
  1. Flush the sprayer after each use: It’s essential to clean your sprayer properly to prevent paint residue from building up and affecting performance. Keep your sprayer in top shape by flushing it with water or appropriate cleaning solution.
  2. Store the sprayer in a dry, cool place: Protect your sprayer from extreme temperatures and humidity by storing it in a clean, dry spot. Ensure the sprayer is covered to keep dust and debris out.
  3. Replace worn or damaged parts: Regularly inspect your sprayer’s parts to ensure they’re in good condition. Replace any worn or damaged parts to avoid potential problems.
  4. Use the right type of paint: Consult the sprayer’s manual to determine which types of paint are compatible. Using the wrong type of paint can lead to clogs and other issues.
  5. Follow manufacturer’s maintenance guidelines: Each sprayer is unique and requires specific maintenance guidelines. Follow the manufacturer’s instructions to ensure proper care and maintenance of your sprayer.
  6. Store paint properly: Store paint in a cool, dry area away from direct sunlight. Avoid exposing it to extreme temperatures or humidity to prevent clogs and other issues.
  7. Regularly clean spray tips: Clogged spray tips can lead to uneven spray patterns and other issues. Clean the tips regularly to ensure optimal performance.
  8. Properly thin paint: It’s essential to thin paint to the correct consistency for optimal performance. Be sure to follow the manufacturer’s guidelines for thinning paint.
  9. Practice safe operation: Always wear appropriate protective gear such as goggles and gloves while operating your sprayer. Ensure proper ventilation in the workspace to avoid inhaling fumes.

By following these tips, you can help extend the lifespan of your airless sprayer and ensure continued high performance for years to come.

Conclusion

After delving into the topic of leaving paint in your airless sprayer, it’s clear that proper paint storage, cleaning, and maintenance are crucial for preventing potential issues and ensuring optimal performance. While leaving paint in your sprayer overnight may sometimes be unavoidable, it’s generally not recommended due to the risks of clogs and reduced performance.

By following the tips and guidelines provided in this article, I now feel confident in my ability to use my airless sprayer effectively and maintain its longevity. Regular cleaning and maintenance, proper paint storage, and avoiding paint drying in my sprayer are all essential practices I plan to implement moving forward.

FAQ

Q: Can I Leave Paint in My Airless Sprayer Overnight?

A: Leaving paint in your airless sprayer overnight is generally not recommended. It can lead to clogs and reduced performance. However, there are specific circumstances where it may be acceptable. Proper paint storage, regular cleaning, and maintenance are crucial to prevent potential issues and ensure optimal performance.

Advertisement

Q: Understanding Airless Sprayers and Their Components

A: Before delving into the topic, it’s crucial to understand how airless sprayers work and the components involved. This knowledge will help us grasp the impact of leaving paint in the sprayer overnight and the precautions that need to be taken.

Q: Why Leaving Paint in Your Airless Sprayer Overnight Can Be Problematic

A: Leaving paint in your airless sprayer overnight can lead to various issues, such as clogs and reduced performance. In this section, we will discuss the reasons why this can be problematic and the potential consequences.

Q: How Long Can Paint Stay in an Airless Sprayer?

Advertisement

A: While leaving paint in your airless sprayer overnight is generally not recommended, there are specific timeframes within which it can still be acceptable. We will explore how long paint can stay in an airless sprayer before causing problems and offer guidelines for proper paint storage.

Q: Tips for Cleaning Your Airless Sprayer After Use

A: Proper cleaning of your airless sprayer is crucial to maintain its performance and prevent issues caused by dried paint residue. In this section, we will provide step-by-step tips on how to effectively clean your sprayer after each use.

Q: Avoiding Paint Drying in Your Sprayer

A: Preventing paint from drying inside your sprayer is vital for its longevity and performance. Here, we will share practical tips and techniques to help you avoid paint drying in your airless sprayer.

Advertisement

Q: Proper Paint Storage Tips for Airless Sprayers

A: Storing your paint correctly is essential to keep it fresh and prevent clogs or other issues in your airless sprayer. This section will provide you with valuable tips on how to store your paint properly to maintain its quality and prevent damage to your sprayer.

Q: Maintaining Your Airless Sprayer’s Performance

A: Regular maintenance is key to ensuring your airless sprayer performs optimally. In this section, we will discuss the essential maintenance steps you should take to keep your sprayer in top shape and avoid any paint-related problems.

Q: The Importance of Properly Thinning Your Paint

Advertisement

A: Thinning paint to the correct consistency is crucial for airless sprayer performance. Here, we will explain why proper thinning is essential and provide guidance on how to achieve the right paint consistency for your sprayer.

Q: Troubleshooting Common Airless Sprayer Problems

A: Even with proper maintenance and care, airless sprayers can encounter issues. In this section, we will cover common problems that may arise and provide troubleshooting tips to help you resolve them effectively.

Q: Ensuring Proper Spray Pattern and Quality

A: The spray pattern and overall quality of your airless sprayer’s output are essential for achieving the desired results. This section will discuss factors that can affect spray pattern and quality and offer suggestions to ensure optimal performance.

Advertisement

Q: Tips for Preventing Clogs in Your Airless Sprayer

A: Paint clogs can disrupt the smooth operation of your airless sprayer. In this section, we will provide tips and techniques to help you prevent clogs and maintain your sprayer’s performance.

Q: The Pros and Cons of Leaving Paint in Your Airless Sprayer Overnight

A: Although not recommended, leaving paint in your airless sprayer overnight may sometimes be unavoidable. In this section, we will weigh the pros and cons of this practice and suggest alternative solutions.

Q: What to Do If Paint Dries in Your Airless Sprayer

Advertisement

A: In the unfortunate event that paint dries in your airless sprayer, it’s essential to know how to address the situation. This section will provide steps to follow if you encounter dried paint and offer guidance on how to clean and restore your sprayer.

Q: Tips for Extending the Lifespan of Your Airless Sprayer

A: To make the most of your airless sprayer investment, it’s important to extend its lifespan. In this section, we will share tips and techniques to help you prolong the life of your sprayer and ensure continued high performance.

Continue Reading

Airless Paint Sprayer Tips for Specific Projects

Choosing the Right Paint Sprayer for Your Next DIY Project!

Published

on

By

Which paint sprayer is right for your next DIY project?

As an individual who loves taking on DIY projects at home, I recognize the importance of using the right tools. When it comes to painting, choosing the right paint sprayer is essential for achieving a professional-looking finish. With so many options available in the market, it can be overwhelming to figure out which one is best suited for your project. That’s why I have put together this guide to help you make a knowledgeable decision.

Key Takeaways:

  • Choosing the right paint sprayer is essential for achieving professional-looking results
  • There are many options available on the market for DIY projects
  • Factors to consider when selecting a paint sprayer include project size, paint type compatibility, ease of use, and budget

Factors to Consider when Choosing a Paint Sprayer for DIY Projects

When it comes to choosing the right paint sprayer for your DIY project, there are several factors that you should consider to ensure optimal results. Here are some key factors that I recommend taking into account:

Factor Description
Project Size The size of your project will determine the type of sprayer you need. For larger projects, an airless sprayer is recommended, while a handheld sprayer is suitable for smaller projects or touch-ups.
Paint Type Compatibility Not all paint types are compatible with all sprayers. Make sure to choose a sprayer that is suitable for the type of paint you are using.
Ease of Use Consider the level of experience you have with using a sprayer and choose a model that is easy to operate.
Budget There are various sprayers available at different price points. Determine your budget and choose a sprayer that provides the best value for your money.

By taking these factors into consideration, you can ensure that you choose the perfect paint sprayer for your DIY project. In the next section, we will explore the different types of paint sprayers available for DIY projects.

Different Types of Paint Sprayers for DIY Projects

When it comes to selecting the right paint sprayer for your DIY project, it’s essential to consider the type of sprayer that best suits your needs. There are different types of paint sprayers available on the market, each with its own unique features and benefits.

In this section, I’ll walk you through the different types of paint sprayers for DIY projects to help you make an informed decision for your next project.

Advertisement

Airless Paint Sprayers

Airless paint sprayers are a popular choice for DIYers who want to tackle larger projects quickly and efficiently. These sprayers use high pressure to atomize paint, producing a smooth and even finish. They are well-suited for spraying thicker paint, such as latex, and work well on exterior surfaces, including walls, fences, and decks.

One of the significant benefits of airless paint sprayers is their speed. They can cover a large area quickly, making them an excellent choice for larger projects. However, they tend to produce more overspray than other types of sprayers, which can be wasteful and messy.

HVLP Paint Sprayers

High Volume Low Pressure (HVLP) paint sprayers are ideal for smaller DIY projects that require more precision and control. They are well-suited for spraying thinner paints, such as lacquer or varnish, and can produce a fine finish with minimal overspray.

The low pressure used by HVLP sprayers means less paint is wasted, making them an economical choice for small projects. They are also suitable for spraying furniture and cabinets, producing a smooth and professional-looking finish.

Handheld Paint Sprayers

Handheld paint sprayers are a convenient and portable option for DIYers who need to touch up or complete small projects. They are easy to use and do not require an air compressor or other equipment to operate.

Advertisement

However, handheld paint sprayers are not as powerful as airless or HVLP sprayers and are not suitable for large-scale projects. They are an excellent option for spraying furniture or completing touch-ups around your home.

Now that you have a better understanding of the different types of paint sprayers available for DIY projects, you can make an informed decision about the one that’s best for your needs.

Airless Paint Sprayers for DIY Projects

If you are looking for a paint sprayer that can handle large-scale DIY projects, you may want to consider an airless paint sprayer. These sprayers use high pressure to atomize paint, which results in even coverage and a smooth finish.

One of the benefits of airless paint sprayers is their ability to handle thick or high-viscosity coatings, such as latex paint or primers. This makes them ideal for painting walls, fences, decks, and other large surfaces.

Another advantage of airless paint sprayers is their speed. They can cover large areas quickly and efficiently, which is a major time-saver for DIYers. They are also versatile, with adjustable pressure settings that allow for precise control over the amount of paint being sprayed.

Advertisement

It is important to note, however, that airless paint sprayers can be more difficult to clean than other types of sprayers. They require thorough cleaning after each use to ensure proper functioning and longevity.

Pros Cons
High pressure for even coverage Can be more difficult to clean
Handles thick coatings well May have overspray
Fast coverage of large areas May require more skill to use

Overall, airless paint sprayers are a great choice for DIYers who need to tackle large-scale projects quickly and efficiently. They may require a bit more maintenance and cleaning than other types of sprayers, but their high-pressure capabilities and versatility make them well worth considering.

HVLP Paint Sprayers for DIY Projects

If you’re looking for a paint sprayer that provides a fine finish and reduces overspray, then an HVLP (High Volume Low Pressure) paint sprayer could be the right choice for your DIY project. These sprayers work by using a high volume of air to atomize the paint, which results in less waste and a more controlled spray. HVLP paint sprayers are also suitable for thinner materials such as stains and lacquers.

One advantage of HVLP paint sprayers is that they produce less overspray, which means less paint on surrounding surfaces. This can be especially important when working indoors or in tight spaces. Another benefit is that they provide a smooth, even finish that is hard to achieve with other types of paint sprayers. HVLP paint sprayers are also relatively easy to use, making them suitable for beginners.

Features to Look for in an HVLP Paint Sprayer

When choosing an HVLP paint sprayer, consider factors such as the size of your project, the viscosity of the paint you will be using, and the type of material you will be spraying. Look for a sprayer with adjustable controls so you can adjust the spray pattern and flow rate to suit your needs. You may also want to choose a model with a long hose for greater flexibility and easier maneuverability.

Advertisement

Top HVLP Paint Sprayers for DIY Projects

Brand/Model Price Features
Wagner Control Spray Max HVLP Paint Sprayer $109.00 Adjustable controls, 20-foot hose, two-stage turbine
Fuji Semi-PRO 2 HVLP Spray System $399.00 Adjustable controls, 25-foot hose, professional-grade
HomeRight Finish Max HVLP Paint Sprayer $69.99 Adjustable controls, lightweight, easy to use

These are just a few examples of top-rated HVLP paint sprayers available for DIY projects. Be sure to read reviews and compare features before making your purchase.

When using an HVLP paint sprayer, it’s important to wear protective gear such as a respirator, gloves, and eye protection. Work in a well-ventilated area and follow the manufacturer’s instructions for safe operation.

Handheld Paint Sprayers for DIY Projects

If you are looking for a paint sprayer that is lightweight, portable and easy to use, then a handheld paint sprayer may be just what you need. These sprayers are perfect for smaller DIY projects, touch-ups, or painting in tight spaces where larger sprayers cannot reach.

Handheld paint sprayers are available in both HVLP and airless models, and they come in a range of sizes and price points, making them a popular choice for DIYers on a budget.

Pros of Handheld Paint Sprayers

One of the biggest advantages of handheld paint sprayers is their portability. They are small enough to be carried around easily and can be used in tight spaces like small rooms, closets, or even on furniture.

Advertisement

Handheld paint sprayers are also easy to use and require minimal setup time, perfect for DIYers who are new to painting. Plus, they are easy to clean and maintain, making them a convenient choice for occasional use.

Cons of Handheld Paint Sprayers

While handheld paint sprayers are easy to use, they are not always the most efficient choice. They are best suited for small projects and touch-ups, so if you are planning to tackle a large-scale project, you may need to opt for a larger sprayer.

Another thing to consider is that handheld sprayers can be tiring to use for long periods of time. If you have a lot of painting to do, you may want to consider investing in a more comfortable spray gun with a larger capacity.

Tips for Choosing a Handheld Paint Sprayer

When choosing a handheld paint sprayer, consider the size of your project, the type of paint you will be using, and your budget. Look for a sprayer with adjustable settings so you can customize the spray pattern and ensure even coverage.

It’s also important to read reviews and compare different models before making a purchase. Look for sprayers with good customer ratings, warranty coverage, and customer support, so you can be sure you are making a wise investment.

Advertisement

Tips for Selecting the Perfect Paint Sprayer for DIY Projects

Choosing the right paint sprayer for your DIY project can be overwhelming. Here are a few tips to make the process easier:

  1. Research and read reviews: Take the time to research different types of paint sprayers and read reviews from other DIYers to get an idea of their experiences. This will help you narrow down your options and find the best fit for your project.
  2. Consider your project requirements: Think about the size of your project, the type of paint you will be using, and the level of precision you need. This will help you determine which type of paint sprayer is the most suitable for your needs.
  3. Seek expert advice: If you’re unsure about which paint sprayer to choose, don’t be afraid to seek advice from an expert. Consult with a paint supplier or a professional painter to get their input on which tool is best for your project.
  4. Test it out: If possible, try out the paint sprayer before purchasing to get a feel for its weight, ease of use, and handling. This can help you determine whether or not it’s the right fit for you.
  5. Stick to your budget: Paint sprayers come in a range of prices, so it’s important to consider your budget. While you may be tempted to splurge on the newest and most expensive model, remember to keep your needs and budget in mind.

By following these tips, you can select the perfect paint sprayer for your next DIY project with confidence.

Reviews of Top Paint Sprayers for DIY Projects

After careful research and consideration, I have compiled a list of the top paint sprayers for DIY projects. These sprayers have been chosen based on their features, performance, and customer satisfaction. Whether you are a beginner or a seasoned DIYer, these sprayers will help you achieve optimal results for your painting projects.

Paint Sprayer Features Performance Customer Satisfaction
Graco Magnum X5 Adjustable pressure control, stainless steel piston pump, easy to clean Even coverage, suitable for larger projects 4.6 out of 5 stars on Amazon
Wagner Control Spray Max Adjustable flow control, three spray patterns, lightweight Fine finish, reduced overspray, suitable for thinner materials 4.4 out of 5 stars on Amazon
Fuji Semi-PRO 2 Adjustable spray pattern, non-bleed spray gun, quiet operation Professional-looking finish, suitable for furniture and cabinets 4.8 out of 5 stars on Amazon
TACKLIFE Paint Sprayer Adjustable pressure control, three spray patterns, lightweight Even coverage, suitable for small to medium-sized projects 4.2 out of 5 stars on Amazon

These paint sprayers have been tested and reviewed by experts in the field and have received high marks from satisfied customers. With their various features and capabilities, you can choose the sprayer that best fits your needs and budget.

Budget-Friendly Paint Sprayers for DIY Projects

While paint sprayers can be an investment, there are many affordable options available that can provide good quality and value for your DIY projects. As someone who loves to do DIY projects, I understand the importance of selecting a paint sprayer that suits both my needs and budget. Here are some budget-friendly options that you may want to consider:

Paint Sprayer Price Features
Wagner Control Spray Max HVLP Paint Sprayer $109.00 Adjustable flow control, 3 spray patterns, holds up to 1.5 quarts of paint
HomeRight Finish Max C800766 Paint Sprayer $69.99 Adjustable flow control, 3 spray patterns, holds up to 27 ounces of paint
RexBeTi Ultimate-750 Paint Sprayer $59.99 Adjustable flow control, 3 spray patterns, holds up to 1000ml of paint

These budget-friendly options provide good quality and value for their price point. They also offer adjustable flow control and multiple spray patterns for customized performance. While they may not have all the features of their pricier counterparts, they can provide a great option for those just starting out with DIY projects or on a tighter budget.

Advertisement

It’s important to note that when selecting a budget-friendly paint sprayer, you may have to compromise on certain features such as the amount of paint it can hold or the types of paint it can use. However, with proper research and consideration of your project needs, you can still find a paint sprayer that meets your requirements at an affordable price.

Expert Advice on Maintaining and Cleaning Your Paint Sprayer

As a professional copywriting journalist, I’ve had my fair share of experience with paint sprayers for DIY projects. One thing I’ve learned is that proper maintenance and cleaning can significantly extend the life and performance of your sprayer. Here are some expert tips to keep your paint sprayer in top shape:

Regular Maintenance Routines

Make it a habit to inspect your paint sprayer before and after each use. Check the nozzle for any damage or clogging. Wipe down the exterior with a damp cloth and remove any paint residue. Lubricate the moving parts with a recommended lubricant. Following these simple routine maintenance steps will ensure optimal performance and reduce the risk of breakdowns.

Proper Cleaning Techniques

Cleaning your paint sprayer thoroughly after each use is crucial. Failure to do so can result in damage to the sprayer and poor paint quality. First, remove the paint canister and rinse it with water or appropriate solvent. Next, run the sprayer with water or solvent to flush out the remaining paint. Use a soft-bristled brush to clean the nozzle and other small parts. Finally, disassemble the sprayer and soak the parts in water or solvent for a few hours before rinsing and drying them.

Storage Tips

Proper storage is essential for maintaining the longevity of your paint sprayer. When not in use, store the sprayer and its parts in a clean, dry, and cool place. Avoid extreme temperatures and direct sunlight. Use the manufacturer’s recommended storage method if available.

Advertisement

By following these expert tips, you can keep your paint sprayer in top condition and achieve professional-quality results in your DIY projects. Don’t skip on maintenance and cleaning – it’s worth the effort in the long run!

Troubleshooting Common Issues with Paint Sprayers for DIY Projects

As much as we’d like everything to go smoothly, it’s not uncommon to experience some issues when using paint sprayers for DIY projects. Here are some common issues and how to troubleshoot them:

Clogging

If you notice your sprayer is clogging and the paint is not being sprayed evenly, try the following:

  • Clear the obstruction: Turn off the sprayer and remove the nozzle. Try to clear the obstruction using a long needle or toothpick, being careful not to scratch the nozzle.
  • Thin the paint: If the paint is too thick, it can clog the sprayer. Try thinning it with some water or paint thinner to improve its flow.

Uneven Spraying

If the paint is not being distributed evenly, try these tips:

  • Adjust the spray pattern: Check the sprayer’s manual on how to adjust the spray pattern. You may need to change the nozzle or dial in the desired pattern.
  • Hold the sprayer at the right distance: Keep the sprayer 6-8 inches from the surface and move it in a steady back-and-forth motion to get an even coverage.

Paint Splattering

If the sprayer is splattering paint, follow these steps:

  • Check the viscosity: If the paint is too thin, it can cause splattering. Adjust the viscosity by adding more paint to the mixture.
  • Check for leaks: Make sure there are no leaks in the nozzle or hose that can cause the paint to splatter. Tighten any loose fittings or replace damaged parts.

By following these troubleshooting tips, you can ensure that your paint sprayer is performing optimally and achieving the desired results for your DIY project.

Safety Precautions When Using Paint Sprayers for DIY Projects

Safety should be your top priority when using paint sprayers for DIY projects. Follow these safety precautions to ensure that you and your family stay safe:

  1. Protective gear: Wear protective gear, including a respirator or mask, goggles, gloves, and a hat to protect your eyes, skin, and lungs from paint fumes and debris.
  2. Well-ventilated area: Work in a well-ventilated area to avoid inhaling toxic fumes. Open all windows and doors and turn on fans to circulate fresh air.
  3. Manufacturer instructions: Always read and follow the manufacturer’s instructions and safety guidelines before using a paint sprayer. Make sure you understand how to operate the sprayer, and never modify or alter it.
  4. Cleaning and maintenance: Regularly clean and maintain your paint sprayer to prevent accidents and ensure optimal performance. Always unplug the sprayer before cleaning or making any adjustments.
  5. Fire hazards: Avoid smoking or lighting cigarettes near the paint sprayer, and keep it away from any heat sources or open flames.

By following these safety precautions, you’ll be able to use your paint sprayer with confidence and avoid any accidents or injuries.

Conclusion

Choosing the right paint sprayer for your DIY projects is essential to achieving optimal results. By considering factors such as project size, paint type compatibility, ease of use, and budget, you can narrow down your options and find the perfect tool for your needs.

Advertisement

When comparing different types of paint sprayers, it’s important to understand their pros and cons and their suitability for different types of projects. Airless sprayers are ideal for large-scale projects, while HVLP sprayers provide a fine finish and reduced overspray. Handheld sprayers are perfect for smaller projects or touch-ups.

By following these practical tips for selecting a paint sprayer, reading expert reviews, and seeking advice from the professionals, you can find the top paint sprayers suitable for your DIY projects.

Maintaining and cleaning your paint sprayer is crucial for its longevity and optimal performance. With the right tips and techniques, you can ensure that your paint sprayer lasts for many projects to come.

Safety always comes first

Always remember to prioritize safety when using paint sprayers for DIY projects. Wear protective gear, such as goggles and masks, and work in well-ventilated areas. Be sure to follow the manufacturer’s instructions carefully and avoid any risky shortcuts.

With the right paint sprayer and proper safety precautions, you can achieve your desired results and take pride in your DIY projects. Happy painting!

Advertisement

FAQ


Q: Which paint sprayer is right for my next DIY project?

A: The right paint sprayer for your DIY project depends on various factors such as project size, paint type, ease of use, and budget. Consider these factors to make an informed decision.

Q: What factors should I consider when choosing a paint sprayer for DIY projects?

A: Factors to consider include project size, paint type compatibility, ease of use, and budget. These factors will help you select a paint sprayer that suits your specific project needs.

Q: What are the different types of paint sprayers suitable for DIY projects?

Advertisement

A: The different types of paint sprayers suitable for DIY projects are airless sprayers, HVLP sprayers, and handheld sprayers. Each type has its own advantages and suitability for different projects.

Q: What are the benefits of using airless paint sprayers for DIY projects?

A: Airless paint sprayers are ideal for large-scale projects due to their high-pressure capabilities and ability to provide even coverage.

Q: Why should I consider using HVLP paint sprayers for DIY projects?

A: HVLP (High Volume Low Pressure) paint sprayers are perfect for achieving a fine finish, reducing overspray, and working well with thinner materials.

Advertisement

Q: Are handheld paint sprayers suitable for DIY projects?

A: Handheld paint sprayers are ideal for smaller DIY projects or touch-ups, thanks to their portability and ease of use in tight spaces.

Q: What tips can you offer for selecting the perfect paint sprayer for DIY projects?

A: Research and read reviews, consider your project requirements, and seek expert advice to ensure you choose the perfect paint sprayer for your DIY projects.

Q: Can you recommend any top paint sprayers for DIY projects?

Advertisement

A: We provide expert reviews of top paint sprayers suitable for DIY projects, highlighting their features, performance, and customer satisfaction.

Q: Are there any budget-friendly paint sprayers for DIY projects?

A: Yes, there are budget-friendly paint sprayers available that offer good quality and value for DIY projects without compromising on performance.

Q: What expert advice can you give on maintaining and cleaning paint sprayers?

A: Regular maintenance routines and proper cleaning techniques are essential to ensure the longevity and optimal performance of your paint sprayer. Follow our expert advice for best results.

Advertisement

Q: How can I troubleshoot common issues with paint sprayers for DIY projects?

A: We provide troubleshooting tips for common issues such as clogging, uneven spraying, and paint splattering to help you overcome any challenges with your paint sprayer.

Q: What safety precautions should I take when using paint sprayers for DIY projects?

A: Safety is paramount when using paint sprayers. Wear protective gear, work in well-ventilated areas, and always follow the manufacturer’s instructions for safe operation.

Advertisement
Continue Reading
Advertisement

Affiliate disclaimer

As an affiliate, we may earn a commission from qualifying purchases. We get commissions for purchases made through links on this website from Amazon and other third parties.

Trending