
I remember the moment I decided to start my painting project. The walls looked dull and desperately needed a fresh coat of paint. However, I had no idea where to start. That’s when I discovered the Wagner Airless Paint Sprayer.
This powerful tool revolutionized the way I approached painting, making the process faster, easier, and more efficient. In this article, I’ll guide you through the step-by-step process of using the Wagner Airless Paint Sprayer, from familiarizing yourself with the sprayer to troubleshooting common issues.
With this guide, you’ll be able to transform your walls with ease and achieve professional-looking results. So, grab your materials and get ready to unleash your inner painter with the Wagner Airless Paint Sprayer.
Key Takeaways
- Proper maintenance and cleaning of the paint sprayer is essential for optimal performance and longevity.
- Ensuring the right paint consistency and preventing clogs and air leakage are crucial for even and professional results.
- Choosing the right paint color and considering the overall design and aesthetics of the room is important for a cohesive look.
- Taking safety precautions, achieving a smooth finish, and allowing sufficient drying time are key steps for a successful painting project.
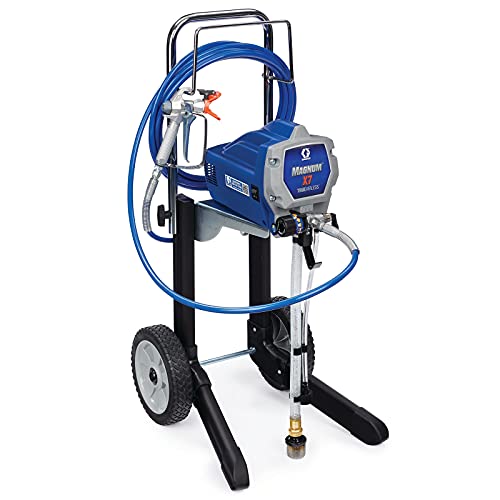
Graco Magnum 262805 X7 Cart Airless Paint Sprayer, Gray
CONTROL PAINT FLOW: Fully adjustable pressure to give you ultimate control of paint flow for any project size;...
As an affiliate, we earn on qualifying purchases.
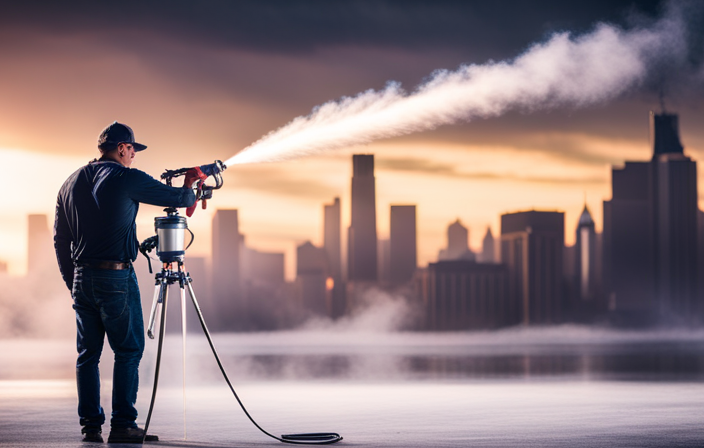
Familiarize Yourself with the Wagner Airless Paint Sprayer
Get ready to unleash your inner artist and effortlessly transform any surface with the powerful and user-friendly Wagner Airless Paint Sprayer! Before you dive into your painting project, it’s important to familiarize yourself with the features and functions of this amazing tool.
To do this, start by reading the instruction manual thoroughly and understanding the different parts of the sprayer. Next, practice assembling and disassembling the sprayer to become comfortable with its setup.
Don’t forget to take note of the safety precautions, such as wearing protective goggles and gloves, and ensuring proper ventilation in your workspace.
Once you have familiarized yourself with the sprayer, you can move on to preparing your painting area by clearing the space, covering any nearby objects or furniture, and laying down drop cloths.
With your Wagner Airless Paint Sprayer knowledge and a well-prepared painting area, you’re ready to create your masterpiece!

Wagner Spraytech 2435698 Control Pro 130 Paint Sprayer with T2 Gun, High Efficiency Airless Sprayer with Low Overspray, Yellow
WAGNER AIRLESS PAINT SPRAYER: The Control Pro 130 Power Tank applies coatings 3X faster than a roller with...
As an affiliate, we earn on qualifying purchases.
Prepare Your Painting Area
Prepare your painting area by creating a space that is ready for your artistic masterpiece. Start by ensuring that the surfaces you plan to paint are clean and free from any dust or debris. Use a damp cloth or mild detergent to wipe down the walls and remove any dirt.
Next, protect any areas that you don’t want to get paint on, such as trim, furniture, or flooring, by covering them with drop cloths or painter’s tape.
Once your surfaces are prepped and protected, it’s time to choose the right paint color for your project. Consider the mood and ambiance you want to create in the room and select a color that complements your overall design.
With your painting area prepared and your paint color chosen, you’re now ready to gather your materials and paint, continuing your journey towards a beautifully finished space.

VEVOR 750W Stand Airless Paint Sprayer, 3000PSI High Efficiency Electric Airless Sprayer, Fine and Even Painting Effect, Handheld Paint Sprayers for Home Interior and Exterior Furniture and Fences
Efficient Painting: Our stand airless paint sprayer is equipped with a powerful 750W motor, capable of delivering up...
As an affiliate, we earn on qualifying purchases.
Gather Your Materials and Paint
To get started, gather all the necessary materials like brushes, rollers, and paint trays. Let your creativity flow as you begin transforming your space into a work of art.
Before you start painting with the Wagner airless paint sprayer, make sure you have all the materials needed. You will need high-quality paint, preferably acrylic or latex-based, along with a paint thinner if required.
It’s important to have a clean and smooth surface, so prepare it accordingly by sanding and cleaning any dirt or debris. To achieve a smooth finish, consider using a primer before applying the paint. This will help the paint adhere better and provide a more even coverage.
Once you have gathered all the necessary materials and prepared the surface, it’s time to set up the Wagner airless paint sprayer and get ready to paint.

VEVOR Stand Airless Paint Sprayer, 650W, 3000PSI High Pressure Airless Sprayer with Cart, Cleaning Brush, Hose, Extension Rod, Nozzles, Electric Spray Paint Machine for House Exterior and Interior
Efficient Coating: The 650W motor, 0.31 GPM flow, and 3000 PSI pressure deliver spraying speeds 5x faster than...
As an affiliate, we earn on qualifying purchases.
Set Up the Wagner Airless Paint Sprayer
To start setting up your Wagner Airless Paint Sprayer, carefully assemble the different components. Attach the spray gun to the hose using the provided connector. Connect the suction tube to the spray gun and ensure it is securely in place. Fill the paint container with your desired paint, making sure not to overfill. Attach the container to the sprayer and tighten it securely. Plug in the sprayer and turn it on to test if it is working properly.
Proper maintenance of the Wagner Airless Paint Sprayer is important for optimal performance. Regularly clean the spray gun and hose after each use to prevent clogs. Check the paint container for any leaks or cracks before using. Troubleshooting tips include checking for any blockages in the spray gun or hose, and adjusting the pressure if the spray pattern is uneven.
Now that the Wagner Airless Paint Sprayer is set up, let’s move on to adjusting the spray pattern and pressure.
Adjust the Spray Pattern and Pressure
Once you have set up the Wagner Airless Paint Sprayer, adjusting the spray pattern and pressure is essential for achieving the desired results.
To adjust the spray pattern:
- Start by loosening the knob on the nozzle.
- Twist the nozzle to change the width of the spray pattern.
- Turn it clockwise for a narrower pattern and counterclockwise for a wider one.
- Make sure to tighten the knob once you have selected the desired pattern.
To troubleshoot pressure issues:
- First, check if the sprayer is properly connected to the power source.
- Check for any clogs in the nozzle or hose.
- Adjust the pressure control knob to increase or decrease the pressure as needed.
Once you have adjusted the spray pattern and pressure, you are ready to start painting in a systematic manner.
Start Painting in a Systematic Manner
Begin by systematically painting your desired surface, ensuring even coverage and a professional finish. To achieve smooth finishes, follow these systematic painting techniques:
- Start from the top and work your way down, moving in a consistent pattern.
- Maintain a consistent distance from the surface, usually around 6 to 8 inches.
- Keep the sprayer moving at a steady speed, avoiding sudden stops or starts.
By following these steps, you can ensure that the paint is applied evenly and smoothly, eliminating any streaks or uneven patches. This systematic approach will help you achieve a professional-looking result every time.
Remember, maintaining a consistent distance and speed is crucial in achieving a flawless finish.
Maintain a Consistent Distance and Speed
Achieving a flawless finish requires maintaining a consistent distance and speed while painting. To maintain spray control and avoid overspray, it is crucial to keep a steady pace and distance from the surface being painted.
Start by holding the Wagner airless paint sprayer approximately 12 inches away from the wall or object. Move the sprayer in a smooth, sweeping motion, keeping the same distance throughout.
It is important to avoid moving too quickly or too slowly, as this can result in an uneven coat. By maintaining a consistent distance and speed, you will ensure an even application of paint and minimize the risk of overspray. This will help you achieve a professional-looking finish.
Now, let’s move on to the next section about cleaning the Wagner airless paint sprayer after use.
Clean the Wagner Airless Paint Sprayer After Use
To ensure the longevity and performance of your tool, it’s essential to properly clean the Wagner airless paint sprayer after each use. Here are the best practices for cleaning the sprayer:
-
Start by disconnecting the sprayer from the power source and relieving any pressure by triggering the gun into a waste container.
-
Remove the spray tip, guard, and filter housing, and clean them thoroughly with warm water and a mild detergent. Inspect for any clogs or damage.
-
Flush the sprayer system by filling the paint container with clean water and running it through the sprayer until the water runs clear.
By following these steps, you can prevent paint buildup, maintain optimum spray performance, and extend the lifespan of your Wagner airless paint sprayer.
Now let’s move on to troubleshooting common issues with the sprayer.
Troubleshooting Common Issues
When troubleshooting common issues with your sprayer, you might be surprised to learn that approximately 80% of problems can be solved by properly cleaning and maintaining the tool.
Here are some troubleshooting tips to help you address common problems with your Wagner Airless Paint Sprayer:
-
Clogging: If you notice the paint is not spraying evenly or the nozzle is clogged, first check the paint consistency and make sure it is not too thick. If it is, thin it out according to the manufacturer’s instructions. You can also try cleaning the nozzle with a small brush or using a cleaning solution.
-
Air leakage: If you hear air leaking from the sprayer, check the connections between the hose, gun, and pump. Make sure they are tight and secure. Replace any damaged gaskets or seals.
-
Uneven spray pattern: If the spray pattern is uneven, check the nozzle and make sure it is properly aligned. Adjust the pressure settings to achieve the desired spray pattern.
By following these troubleshooting tips, you can ensure that your Wagner Airless Paint Sprayer operates smoothly and efficiently.
Enjoy your newly painted walls!
Enjoy Your Newly Painted Walls!
After all your hard work, it’s time to sit back and enjoy your beautifully painted walls! But before you do, here are a few tips for choosing the right paint color and ensuring proper ventilation during the painting process.
When choosing a paint color, consider the overall theme and mood you want to create in the room. Take into account the furniture, lighting, and decor to ensure a cohesive look. It’s also helpful to test the paint color on a small area of the wall before committing to the whole room.
Proper ventilation is crucial while painting to ensure your safety and the quality of the paint job. Open windows and doors to allow fresh air to circulate. If possible, use fans to help improve airflow. This will help to minimize the fumes and odors from the paint.
By following these tips, you can ensure a successful painting project and enjoy your newly painted walls to the fullest.
Frequently Asked Questions
Can I use any type of paint with the Wagner Airless Paint Sprayer?
You can use a variety of paint types with the Wagner airless paint sprayer. However, it’s important to choose the best paint for optimal results. Consider factors like viscosity, coverage, and compatibility with the sprayer.
How do I prevent overspray when using the Wagner Airless Paint Sprayer?
To prevent overspray when using the Wagner airless paint sprayer, start by adjusting the spray pattern. Hold the sprayer 12-18 inches away from the surface and keep it moving in a steady motion. Practice on a scrap material first to get the hang of it.
What safety precautions should I take when using the Wagner Airless Paint Sprayer?
Before using the Wagner airless paint sprayer, it’s crucial to take safety precautions for proper usage. Start by wearing protective clothing, goggles, and a respirator. Keep a safe distance from the spray and ensure proper ventilation.
Can I use the Wagner Airless Paint Sprayer for small touch-up jobs?
Yes, the Wagner airless paint sprayer can be used for small touch-up jobs. Simply fill the sprayer with paint, adjust the pressure, and spray the desired area in a smooth, even motion.
How do I clean the nozzle of the Wagner Airless Paint Sprayer?
To clean the nozzle of the Wagner airless paint sprayer, start by disconnecting the sprayer from the power source. Then, remove the nozzle and soak it in a cleaning solution. Finally, use a small brush to remove any remaining residue and reassemble the sprayer.
Conclusion
After following the step-by-step guide on how to use the Wagner Airless Paint Sprayer, I am amazed at how easy and efficient the process was.
The sprayer allowed me to achieve a professional-looking finish, saving me time and effort.
By juxtaposing the simplicity of the sprayer with the stunning results, I felt a sense of pride and satisfaction.
Now, my walls look brand new and I can’t help but feel a sense of accomplishment.
I highly recommend using the Wagner Airless Paint Sprayer for your next painting project.