Have you ever envisioned yourself as an artist with a magical brush, effortlessly guiding the movement of paint with each stroke? Get ready to unleash your inner creator, as I am about to uncover the secrets of expertly controlling paint flow in an airless sprayer.
As a seasoned painter, I’ve learned that the key to achieving flawless results lies in understanding the basics, choosing the right nozzle size, and adjusting the pressure settings just right. But it doesn’t stop there.
Preparing your paint, practicing proper technique, and maintaining your sprayer are equally essential steps on the path to paint flow perfection. In this article, I’ll guide you through every step, while sharing troubleshooting tips and techniques for fine-tuning your skills.
So, grab your sprayer and let’s dive into the world of controlled paint flow, where precision and creativity unite.
Key Takeaways
- Testing and adjusting paint flow
- Fine-tuning paint flow by adjusting sprayer settings
- Starting with low pressure and increasing gradually
- Adding thinner or water to adjust paint viscosity

Baotree Airless Paint Sprayer, High-Pressure Electric Paint Spray Gun with Extension Rod, Thinning-Free Professional Painting Tool for Interior/Exterior Walls, Fences, Ceilings, Cabinets
1. High efficiency and time saving, the spraying speed is 5 times faster than traditional brushing ✅ High...
As an affiliate, we earn on qualifying purchases.
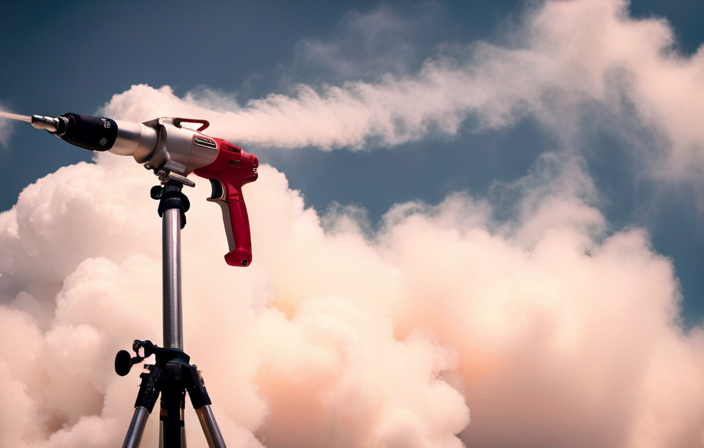
Understanding the Basics of Airless Sprayers
Understanding the basics of airless sprayers is crucial for effectively controlling paint flow. When using an airless sprayer, it’s important to be familiar with spraying techniques and safety precautions.
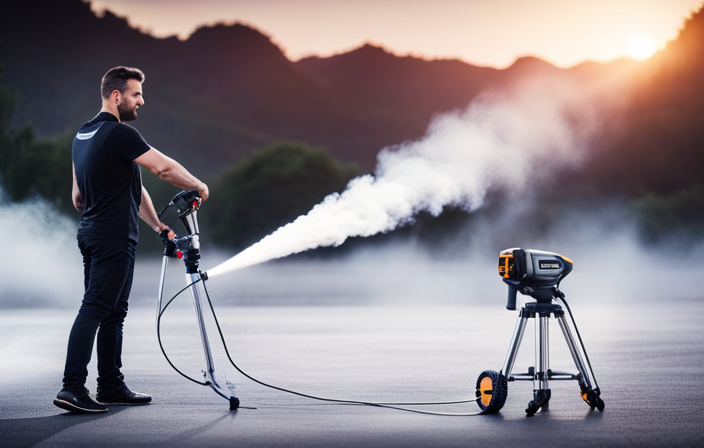
Proper spraying techniques involve holding the sprayer at the correct distance from the surface, usually around 12 to 18 inches, and moving it in a steady, overlapping motion to ensure even coverage. It’s also important to maintain a consistent speed while spraying to avoid uneven paint application.
Safety precautions include wearing protective clothing, goggles, and a respirator to protect against paint fumes. Additionally, it’s essential to properly clean and maintain the sprayer to prevent clogs and ensure optimal performance.
Understanding these basics will allow for better control over paint flow and create a smoother finish. Now, let’s move on to choosing the right nozzle size for your airless sprayer.

VEVOR 750W Stand Airless Paint Sprayer, 3000PSI High Efficiency Electric Airless Sprayer, Fine and Even Painting Effect, Handheld Paint Sprayers for Home Interior and Exterior Furniture and Fences
Efficient Painting: Our stand airless paint sprayer is equipped with a powerful 750W motor, capable of delivering up...
As an affiliate, we earn on qualifying purchases.
Choosing the Right Nozzle Size
To ensure optimal performance, it’s crucial to pick the correct nozzle size for your airless sprayer. The nozzle size determines the flow rate and spray pattern of the paint, so choosing the right one is essential for achieving the desired results. Proper nozzle maintenance is also important to ensure consistent performance. Cleaning the nozzle regularly and removing any clogs or debris will prevent issues with paint flow. Additionally, adjusting the spray pattern is another way to control the paint flow. By changing the nozzle angle or width, you can achieve different coverage patterns. It’s important to experiment and find the right settings for your specific project. In the next section, we will discuss how to adjust the pressure settings to further fine-tune the paint flow.

MaXpray M1 Airless Paint Sprayer, Highly Efficient Thinning-Free Minimal Overspray for Up to 10 Gallon DIY Painting Projects Home Interior & House Exterior, Comes with Sprayer Accessories
Your DIY Partner - All DIY Homeowners, upgrade your DIY game with the MaXpray M1 airless paint sprayer—far...
As an affiliate, we earn on qualifying purchases.
Adjusting the Pressure Settings
Fine-tuning the pressure settings on your airless sprayer will give you the power to unleash the perfect paint storm. Adjusting the pressure is crucial for regulating the flow of paint and achieving optimal results.
To begin, start with a low pressure setting and gradually increase it until you reach the desired flow. Keep in mind that different paints require different pressure levels, so it’s essential to consult the manufacturer’s recommendations. Additionally, factors like nozzle size and distance from the surface can affect the pressure needed.
Regularly check and adjust the pressure throughout the painting process to ensure consistent coverage and avoid any unwanted splattering or uneven application. By mastering the art of adjusting pressure, you’ll have better control over your airless sprayer and achieve professional-looking results.
Now, let’s move on to preparing your paint for spraying.

AEROPRO Tools Airless Paint Sprayer for House Painting, 3000PSI High Pressure, Thinning-Free, with Tip Sets & Tip Extension, Indoor Paint Sprayer for 5 Gallon DIY Painting Projects
Make Your DIY Painting Simple - Start your painting projects right away with this easy airless sprayer. Perfect...
As an affiliate, we earn on qualifying purchases.
Preparing Your Paint for Spraying
When preparing paint for spraying, it’s essential to ensure proper paint consistency, filtering, and straining. To achieve a smooth and even finish, the paint should be of the right viscosity, allowing it to flow easily through the sprayer.
Filtering and straining the paint helps remove any impurities or debris that could clog the sprayer nozzle and affect the final result.
It’s important to pay attention to these key points to ensure optimal paint application and a professional-looking finish.
Proper Paint Consistency
Achieving the perfect paint consistency in your airless sprayer is like finding the right rhythm for a flawless masterpiece. It’s crucial for achieving precision and avoiding clogging.
To ensure the best results, follow these two sub-lists:
-
First, start by adding a small amount of water or paint thinner to your paint. This’ll help thin out the paint and make it easier to flow through the sprayer. Remember to add the thinner gradually and mix well after each addition. This way, you can control the consistency and avoid over-thinning the paint.
-
Second, test the paint consistency by spraying a small amount onto a test surface. If the paint is too thick and doesn’t flow smoothly, add a bit more thinner. If it’s too thin and runs or drips, add a small amount of paint to thicken it up.
By achieving the perfect paint consistency, you can ensure a smooth and even application. Once you’ve mastered this step, it’s time to move on to filtering and straining the paint to further enhance your spraying experience.
Filtering and Straining the Paint
To ensure a flawless finish, you’ll want to make sure you filter and strain your paint properly. Straining paint is an essential step that helps remove impurities such as dirt, debris, and dried paint particles. These impurities can clog the nozzle and disrupt the paint flow, resulting in an uneven application. By using a fine mesh filter or strainer, you can effectively remove these unwanted particles, ensuring a smooth and consistent paint flow. It is recommended to strain the paint before pouring it into the sprayer’s container. This simple yet crucial step will save you time and effort in the long run, preventing potential clogs and ensuring a professional-looking finish. By straining your paint, you’ll be one step closer to achieving excellent results. Now, let’s move on to practicing proper technique for optimal paint application.
Practicing Proper Technique
When it comes to practicing proper technique in airless spraying, two key points to focus on are maintaining a consistent speed and distance, as well as utilizing overlapping and crosshatching techniques.
It’s important to maintain a steady pace while spraying to ensure an even application of paint. Additionally, overlapping each stroke and using crosshatching techniques helps to ensure full coverage and avoid any missed spots.
By mastering these techniques, you can achieve professional-looking results with your airless sprayer.
Maintaining a Consistent Speed and Distance
Keep your hand steady and maintain a consistent speed and distance while operating the airless sprayer. This is crucial for achieving an even and smooth paint application. To help you achieve this, here are three important factors to consider:
-
Maintaining a steady hand: A steady hand is essential to avoid uneven paint distribution. Keep your hand relaxed but firm, and try to minimize any unnecessary movements that may cause paint splatters.
-
Adjusting the paint flow rate: Controlling the paint flow is crucial for achieving the desired coverage. Adjust the flow rate according to the surface being painted. Experiment with different settings to find the optimal flow rate that provides good coverage without excessive overspray.
-
Consistent speed and distance: Move the sprayer at a consistent speed to ensure an even application. Similarly, maintain a consistent distance from the surface being painted. This will help you achieve uniform coverage and prevent any blotchy or streaky areas.
By maintaining a steady hand and adjusting the paint flow rate, you can ensure a smooth and even paint application. Transitioning to the next section about overlapping and crosshatching, it’s important to understand how these techniques contribute to a flawless finish.
Overlapping and Crosshatching
Achieving a flawless finish with an airless sprayer is like creating a beautiful tapestry, carefully weaving overlapping strokes and crosshatching for a seamless and professional result. The overlapping technique ensures even coverage and eliminates any streaks or lines that may occur when spraying in a straight line. By overlapping each pass by about 50%, you can ensure that the paint is applied evenly and consistently. Crosshatching, on the other hand, involves spraying in a crisscross pattern over the already painted area. This technique helps to fill in any gaps and ensure complete coverage, especially in corners and edges. To visualize the process, refer to the table below:
| Overlapping Technique | Crosshatching Tips |
|---|---|
| Overlap each pass by about 50% | Spray in a crisscross pattern |
| Ensure even coverage | Fill in gaps and corners |
| Eliminate streaks and lines | Achieve complete coverage |
In the next section, we will explore the crucial step of testing and adjusting the paint flow to optimize the results.
Testing and Adjusting the Paint Flow
To ensure optimal paint distribution, you can fine-tune the paint flow by making small adjustments to the sprayer settings. Testing techniques are essential to determine the right paint flow for your project.
Begin by adjusting the pressure control knob on the sprayer to regulate the flow rate. Start with a low setting and gradually increase until you achieve the desired coverage without excessive overspray.
Additionally, you can adjust the paint viscosity by adding small amounts of thinner or water to the paint. This will help to achieve a smoother and more even flow.
Once you have tested and adjusted the paint flow, you can move on to maintaining and cleaning your sprayer to ensure its longevity and optimal performance, ensuring a flawless finish on your projects.
Maintaining and Cleaning Your Sprayer
Maintaining and cleaning your sprayer is crucial for optimal performance. Regular maintenance, such as checking for clogs, leaks, and worn parts, ensures that your sprayer functions smoothly and efficiently.
After each use, it’s important to thoroughly clean the sprayer to prevent any leftover paint or debris from causing blockages or damage.
Regular Maintenance for Optimal Performance
Keep your airless sprayer performing at its best by regularly maintaining it for optimal performance. Here are four key steps for regular maintenance and troubleshooting issues:
-
Check the spray tip: Inspect the spray tip regularly for any signs of wear or clogs. Replace or clean the tip as needed to ensure an even paint flow.
-
Clean the filters: Clean the gun filter and manifold filter regularly to prevent clogs and maintain proper paint flow. Refer to the manufacturer’s instructions for the recommended cleaning procedure.
-
Lubricate moving parts: Apply lubricant to the piston rod and other moving parts to reduce friction and ensure smooth operation. This will help prevent damage and extend the life of your sprayer.
-
Inspect the hoses and connections: Check the hoses and connections for any signs of wear, leaks, or damage. Replace any damaged parts to maintain a consistent paint flow and prevent accidents.
By following these regular maintenance steps, you can keep your airless sprayer in optimal condition.
Now, let’s move on to cleaning the sprayer after each use.
Cleaning the Sprayer After Each Use
After each use, make sure you thoroughly clean your sprayer to ensure its longevity and peak performance. Proper sprayer maintenance is essential for preventing clogs and maintaining a consistent paint flow.
Start by flushing out any remaining paint from the system by running clean water or solvent through the sprayer. Remove the spray tip and filter and clean them separately with a brush or a specialized cleaning solution. Pay close attention to the gun and hose, as they can accumulate dried paint residue. Use a soft cloth or brush to remove any buildup.
Finally, inspect all parts for wear or damage and replace as necessary. By following these cleaning techniques, you can keep your sprayer in optimal condition.
Now, let’s move on to troubleshooting common issues without skipping a beat.
Troubleshooting Common Issues
If your airless sprayer is acting up, don’t fret! Troubleshooting common issues is like untangling a web of confusion, but with a little know-how, you’ll be spraying smoothly in no time.
When it comes to troubleshooting clogging, start by checking the paint viscosity. If it’s too thick, thin it out with the recommended solvent. Also, make sure the filters are clean and unclogged.
If you’re experiencing an uneven spray pattern, check the spray tip for any blockages or wear. Replace or clean the tip if necessary. Additionally, check the pressure settings on your sprayer to ensure they are appropriate for the paint being used.
By following these troubleshooting steps, you’ll be able to overcome common issues and achieve a flawless paint job.
Now, let’s delve into using accessories for better control.
Using Accessories for Better Control
Now that we’ve discussed troubleshooting common issues with airless sprayers, let’s move on to using accessories for better control.
One of the key ways to control the paint flow in an airless sprayer is by using pressure control. This allows you to adjust the pressure of the paint being sprayed, giving you more control over the application.
Additionally, using flow control can further enhance your control by adjusting the flow rate of the paint. This is particularly useful when you need to switch between different surfaces or when you want to achieve different effects.
By utilizing these accessories and fine-tuning your skills, you’ll be able to achieve precise and professional results with your airless sprayer.
Now, let’s delve into the next section and explore how to fine-tune your skills for even better control.
Fine-Tuning Your Skills
Hone your skills and achieve precise and professional results by fine-tuning your technique with the help of accessories and practice. Skill refinement is crucial when it comes to controlling the paint flow in an airless sprayer. By mastering advanced techniques, you can ensure even coverage and eliminate any potential streaks or drips. To further enhance your understanding, consider the following table:
| Technique | Description |
|---|---|
| Back-rolling | Rolling over freshly sprayed areas to smooth out any excess paint. |
| Feathering | Gradually reducing pressure at the end of each stroke to create a seamless finish. |
| Cross-hatching | Overlapping strokes in a crisscross pattern to achieve uniform coverage. |
| Wrist rotation | Rotating your wrist while spraying to create different spray patterns. |
| Pressure adjustment | Adjusting the pressure to control the flow and atomization of the paint. |
By implementing these techniques and continuously practicing, you can refine your skills and become a proficient airless sprayer operator. Remember, attention to detail and precision are key to achieving professional-level results.
Frequently Asked Questions
Can I use any type of paint with an airless sprayer?
Yes, you can use various types of paint with an airless sprayer. The benefits of using an airless sprayer for painting include faster application, even coverage, and the ability to handle thicker paints and coatings.
How long does it take for the paint to dry after spraying?
The drying time of paint after spraying depends on various factors such as humidity, temperature, and paint type. However, using proper paint application techniques can help expedite the drying process for a smoother finish.
Can I adjust the fan pattern on an airless sprayer?
Yes, you can adjust the fan pattern on an airless sprayer. By using different airless sprayer techniques, such as adjusting the nozzle or pressure settings, you can easily modify the fan pattern to suit your needs.
What is the recommended distance between the sprayer and the surface being painted?
The recommended distance between the sprayer and the surface being painted is typically around 12 inches. This distance allows for optimum paint coverage and ensures an even application without excessive overspray.
Is it necessary to strain the paint before using it in an airless sprayer?
Yes, it is necessary to strain the paint before using it in an airless sprayer. Paint straining benefits include preventing clogs and ensuring a smooth flow. Best practices for paint straining involve using a mesh strainer to remove any impurities or debris from the paint.
Conclusion
In conclusion, mastering the art of controlling paint flow in an airless sprayer requires practice, patience, and attention to detail.
With the right nozzle size and pressure settings, as well as proper paint preparation and technique, you can achieve professional results.
Maintaining and cleaning your sprayer regularly is essential for its longevity.
Interestingly, did you know that using the right accessories can improve control and precision by up to 30%? So don’t overlook the importance of investing in high-quality accessories to enhance your painting experience.