Connect with us

Airless Paint Sprayers

Airless Paint Sprayer Maintenance Checklist

Learn essential maintenance tips for your airless paint sprayer to boost performance and longevity—discover the checklist that will keep it running smoothly.

Published

on

airless sprayer care guidelines

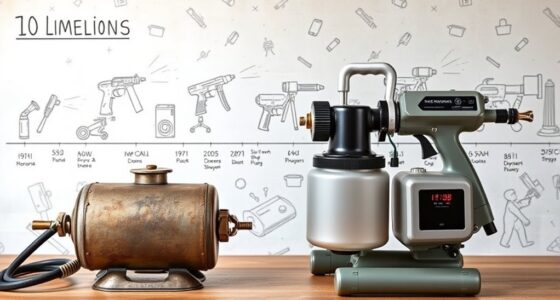
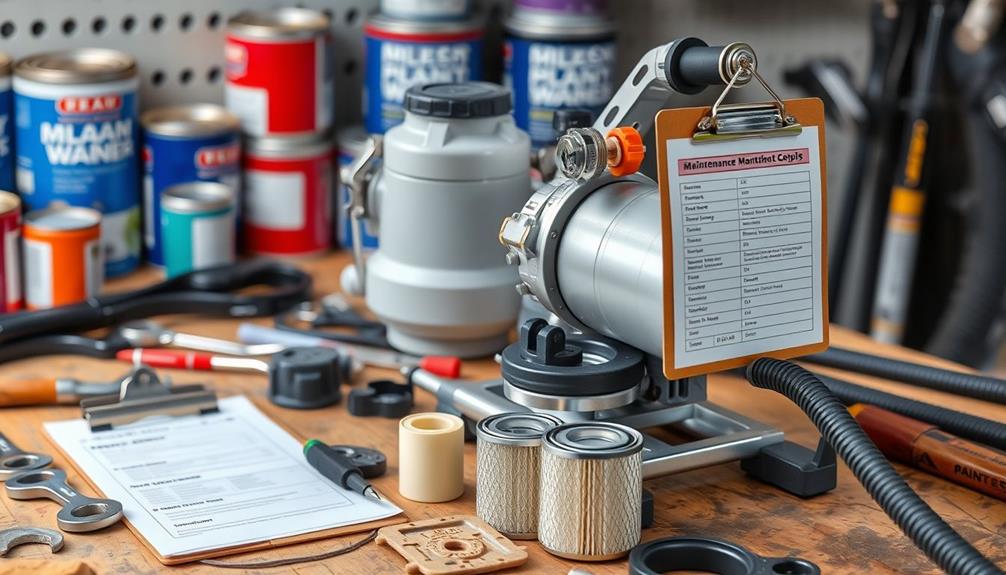
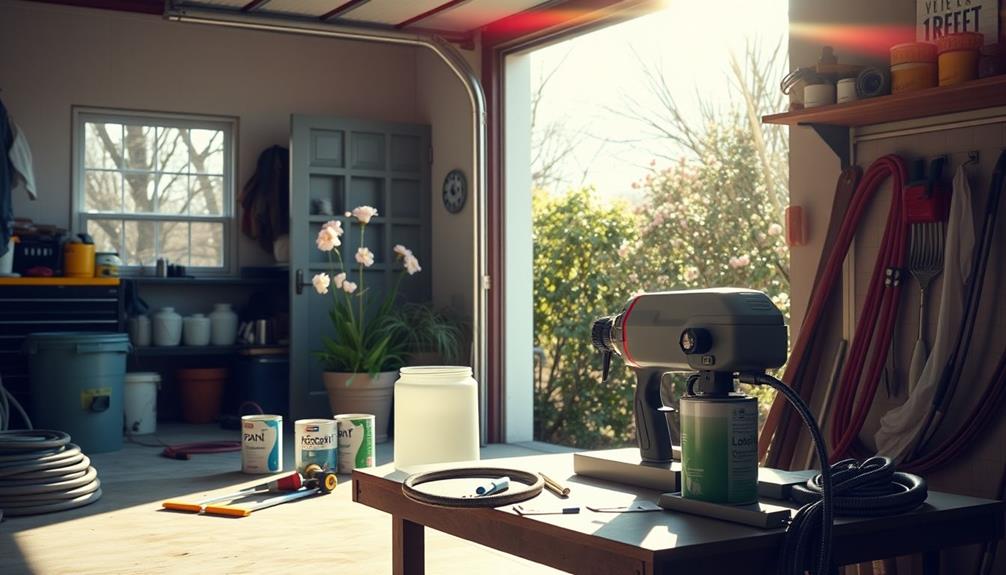
To keep your airless paint sprayer in top condition, follow a strict maintenance checklist. Clean it thoroughly after each use to prevent paint buildup, and always flush the system with clean water. Check the gun filter weekly, and inspect hoses for wear or damage. Don't forget to winterize by using pump preserver and storing it properly. Monthly, replace worn spray tips to maintain finish quality. Finally, conduct annual checks at a repair center for thorough inspections. Stick to this routine, and you'll enhance performance and longevity, while discovering helpful tips for ongoing care along the way.

Key Takeaways

  • Clean the sprayer thoroughly after each use to prevent paint buildup and ensure optimal performance.
  • Regularly inspect and replace worn spray tips and filters to maintain consistent paint application.
  • Follow proper pressure relief techniques before performing maintenance to ensure safety.
  • Perform weekly and monthly inspections to catch potential issues early and extend equipment lifespan.
  • Use pump saver and appropriate antifreeze solutions during winterization to protect internal components.

Importance of Maintenance

When it comes to maintaining your airless paint sprayer, regular upkeep is essential for maximizing its lifespan and ensuring dependable performance. One of the most vital aspects of maintenance is cleaning your airless after each use. This practice greatly reduces the risk of damage from dried paint and debris buildup, which can lead to costly repairs.

Additionally, understanding airless paint sprayer basics can further enhance your maintenance practices, as it allows you to recognize the importance of proper cleaning techniques and the right cleaning solutions.

Make sure to pay special attention to the gun filter during your cleaning routine. A clogged filter can impede the sprayer's performance, resulting in uneven paint application and frustration on the job. By regularly checking and replacing the gun filter as needed, you'll maintain ideal functioning.

Following a structured maintenance schedule—daily, weekly, and annually—helps you identify potential issues early on. This proactive approach prevents unexpected downtime, ensuring your projects run smoothly.

Products like Graco Throat Seal Liquid (TSL) can also be beneficial; they keep packings wet and reduce wear, thereby enhancing overall efficiency.

Advertisement

Neglecting maintenance not only ramps up repair costs but can also create considerable operational issues. By committing to regular upkeep, you'll enhance your sprayer's reliability and productivity, ultimately making your painting projects more efficient.

Regular Maintenance Steps

routine care procedures checklist

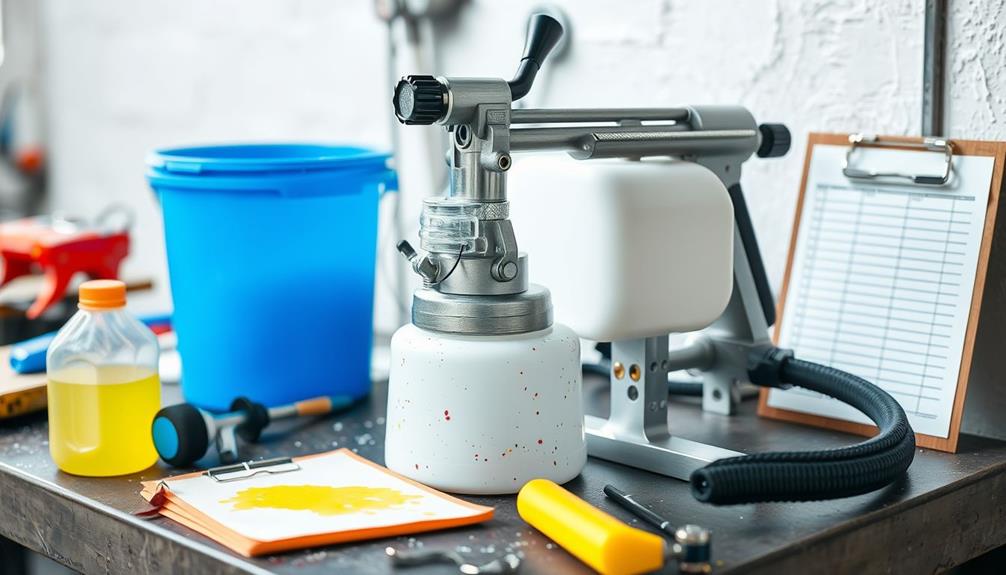
To keep your airless paint sprayer running smoothly, start with a thorough cleaning immediately after each use. This prevents paint buildup and protects the internal components from damage.

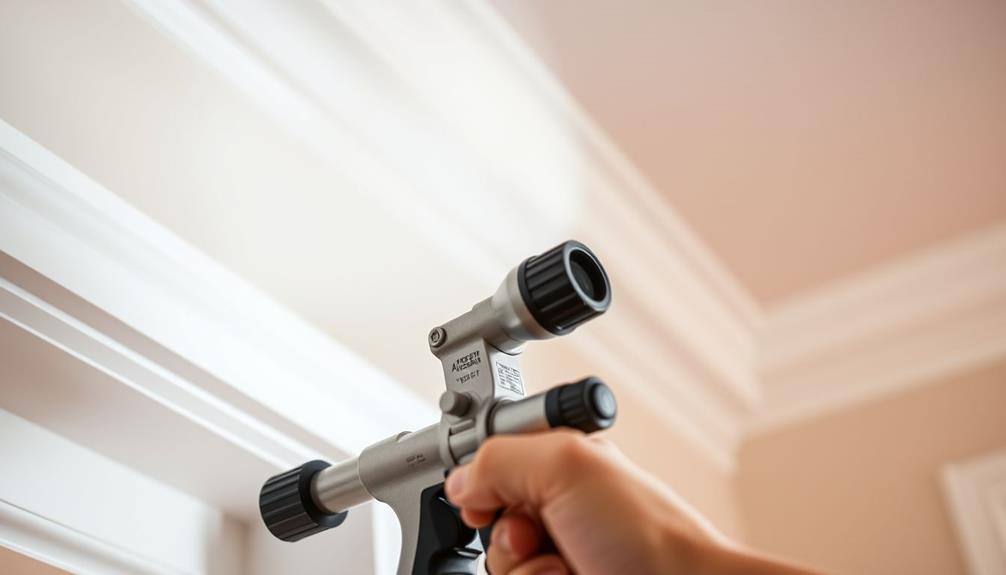
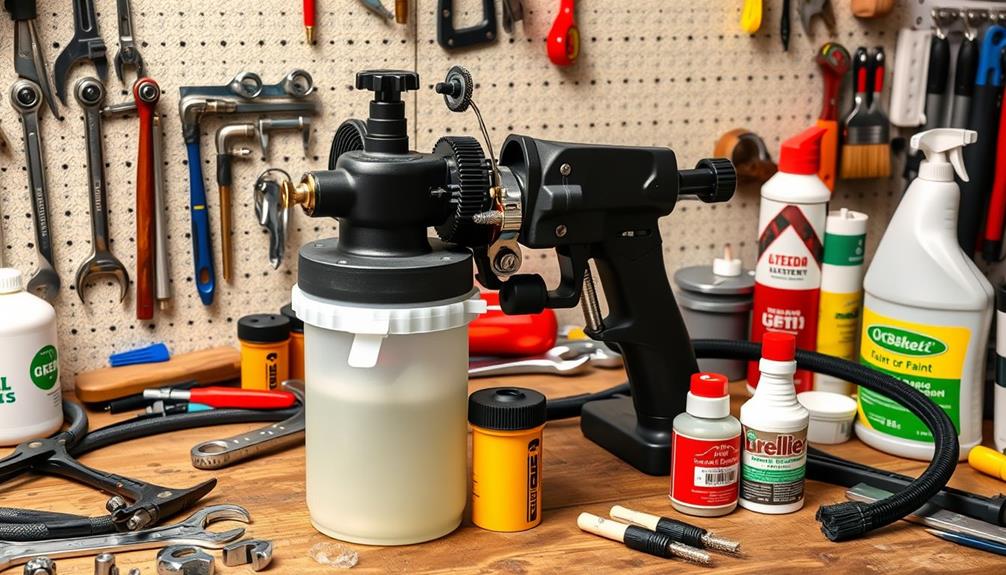
Begin by flushing the system with water or solvent, depending on the paint used. Don't forget to clean the spray gun and remove the airless spray tip for a detailed wash. Using the Graco FFLP Fine Finish Low Pressure Reversible Tip can enhance your control and finish quality during intricate projects.

Next, use Graco Throat Seal Liquid (TSL) to keep the packings wet, which helps reduce wear during operation.

Daily inspections are essential, so check the manifold filter, gun filter, and inlet strainer to guarantee proper flow and avoid clogs. If you notice any debris, clean or replace the filters as needed.

Also, check the wet cup for leaks and tighten it if necessary to maintain pressure and prevent paint loss.

Advertisement

Finally, regularly replace worn airless spray tips. This not only improves your finish quality but also reduces paint usage and minimizes strain on your equipment.

Weekly and Annual Checks

routine maintenance schedules

To keep your airless paint sprayer in top shape, you should perform weekly inspections and schedule annual maintenance.

Regularly checking components like the wet cup and filters helps you catch issues early, preventing breakdowns when you need your sprayer most.

Additionally, consider using a home cleaning service to maintain a clean workspace, which can positively impact the longevity of your equipment.

Don't forget to visit an authorized Graco Repair Center for those annual check-ups to guarantee everything runs smoothly.

Weekly Inspection Tasks

Performing weekly inspections on your airless paint sprayer is essential for maintaining its efficiency and longevity. By dedicating some time each week to check various components, you can prevent issues that may lead to costly repairs or downtime.

Advertisement

Start by tightening the wet cup to avoid paint leaks, and inspect high-pressure paint hoses for any signs of wear or damage. Additionally, confirming your workspace has good air quality can enhance your overall painting experience, as air purifiers reduce allergens that may affect your health.

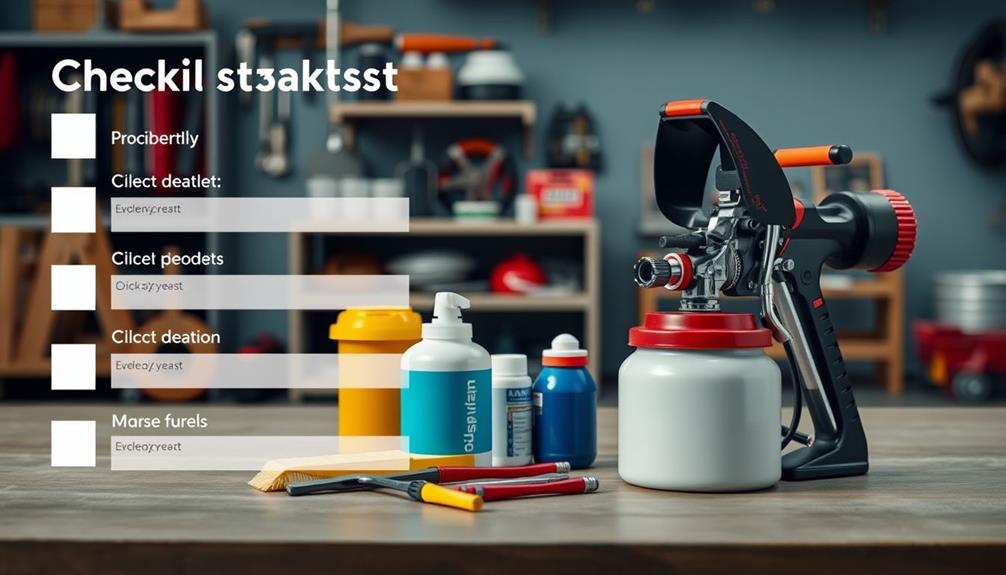
Make sure to check the following items during your inspection:

  • Inspect the manifold filter, gun filter, and inlet strainer for clogs or debris.
  • Verify that all fluid connections are secure and free from leaks.
  • Regularly check the condition of the sprayer's packing nut and adjust as necessary.

Document any findings during your inspections. Keeping track of maintenance history will help you identify recurring issues that may need further attention.

By staying proactive with your weekly inspections, you confirm that your airless sprayers operate smoothly, minimizing the risk of pressure loss and inefficiency.

Annual Maintenance Scheduling

Scheduling annual maintenance for your airless paint sprayer is vital to keeping it in peak condition. Make it a priority to book a check at an authorized Graco Repair Center. This guarantees your sprayer remains in ideal working order and allows for any potential issues to be addressed before they escalate.

Regular maintenance is similar to the importance of home security systems in protecting your valuable equipment and providing peace of mind. In addition to your annual maintenance, conduct weekly inspections to tighten the wet cup and check the high-pressure paint hoses for signs of wear or leaks. These small, proactive measures can help you avoid costly repairs down the line.

Advertisement

Regularly inspecting the manifold filter, gun filter, and inlet strainer daily will maintain your sprayer's performance and prevent blockages that could disrupt your work.

It's also important to keep a record of all maintenance activities—this includes inspections and repairs. Tracking the condition of your airless paint sprayer will help facilitate timely servicing and allow you to identify any signs of wear and tear during your weekly checks.

Early Issue Identification

Regular inspections play an important role in early issue identification for your airless paint sprayer. By conducting weekly checks, you can spot potential problems before they escalate into costly repairs.

Make it a routine to inspect the manifold filter, gun filter, and inlet strainer to verify they're free from debris and functioning properly. This helps prevent clogs and keeps your sprayer efficient. Additionally, making sure you have a reliable power source for your sprayer is vital, as gas appliances typically function without electricity and can offer peace of mind during power outages.

Here's a quick checklist for your weekly inspections:

Advertisement
  • Tighten the wet cup to prevent leakage; a loose cup can lead to paint loss and higher costs.
  • Regularly inspect high-pressure paint hoses for signs of wear or damage to avoid leaks that could compromise safety.
  • Don't forget to check the tip guard for any blockages or cracks, verifying a smooth spray pattern.

Additionally, schedule an annual maintenance check at an authorized Graco Repair Center. This thorough inspection can identify issues you might miss, helping you maintain performance.

Document all maintenance activities, including inspections and repairs. Doing so will give you insights into your sprayer's condition and help you spot recurring problems, making sure your equipment remains in top shape.

Winterizing Procedures

preparing for cold weather

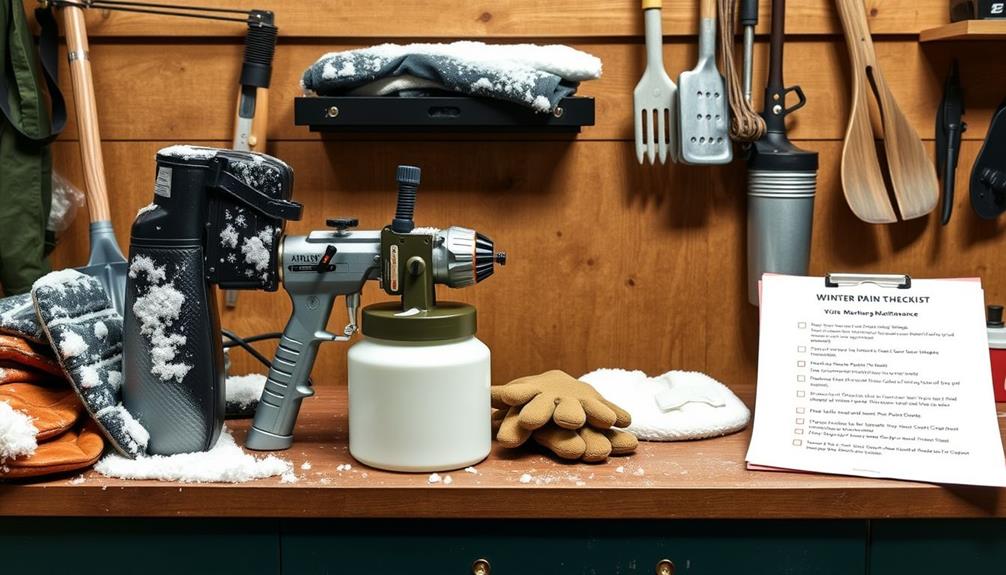
To guarantee your airless paint sprayer remains in top condition through the winter months, it's vital to follow proper winterizing procedures.

Start by thoroughly cleaning your sprayer to prevent dried paint from causing damage, as neglecting this can lead to extensive repairs. If you skip this step, you could face costly repairs in the spring.

After cleaning, consider using a pump preserver like Graco Pump Armor to protect the internal components during storage. Many other tools and products, such as safety glasses, can also enhance your maintenance routine.

When winterizing, avoid using automotive anti-freeze as a preservative. It can harm your sprayer's internal parts. Instead, run clean water through the pump to remove any residual materials. This step is vital for preparing the sprayer for winter storage, ensuring that nothing hinders its performance.

If you notice any dried paint on the pump rod, it's best to seek professional cleaning services. Neglecting this can lead to serious internal damage and extended downtime come spring.

Advertisement

Spring Cleaning and De-winterizing

seasonal home maintenance tasks

As spring arrives, it's important to give your airless paint sprayer a thorough cleaning and de-winterizing to guarantee it's ready for your projects. Start by flushing the pump with clean water to remove any residual fluids.

If you cleaned your sprayer properly before winterizing, you'll find that minimal effort is required—often just a simple flush and inspection will suffice. In addition, consider utilizing eco-friendly materials during your painting projects to contribute to sustainability.

However, be vigilant for any dried paint on the pump rod, as this may necessitate professional cleaning to prevent significant internal damage.

Be sure to inspect all hoses, filters, and connections for signs of wear or damage that might've developed during storage. Running clean water through the entire system is vital for preventing clogs and guaranteeing smooth operation when you're ready to start using the sprayer.

  • Check for any leaks in hoses and connections.
  • Inspect filters and replace them if clogged or damaged.
  • Confirm the pump rod is clean and free of paint buildup.

Daily Maintenance Tasks

routine upkeep responsibilities list

When you finish using your airless paint sprayer, it's essential to clean it thoroughly to keep it running smoothly.

Regular maintenance practices, such as confirming proper flushing issues are addressed, can help prevent long-term damage to your equipment.

Make certain you follow proper pressure relief techniques to guarantee your safety during maintenance.

Advertisement

Staying on top of these daily tasks will help extend the life of your sprayer and maintain its performance.

Daily Cleaning Procedures

After each use, proper cleaning of your airless paint sprayer is imperative to maintain its functionality and longevity. Start by thoroughly cleaning the sprayer immediately after use. This includes all filters, suction hoses, and the gun to prevent paint buildup and potential damage.

Regular maintenance is essential for keeping your equipment in good working order, just as regular vet check-ups are critical for your dog's health.

Here are some key steps to follow:

  • Remove the flexible suction hose and flush it with clean water to guarantee no paint residue remains inside the system.
  • Test the sprayer with water to check for consistent pressure, ideally maintaining a range of 3300 psi for peak performance.
  • Use a pump saver during the final flush to protect internal components from rust and scale buildup during storage.

Additionally, applying a piston throat seal before transporting the sprayer will help avoid leaks and maintain the integrity of the system.

Always prioritize these cleaning procedures to keep your airless paint sprayer in prime condition, making sure it works efficiently for your next project.

Advertisement

Regular maintenance won't only enhance performance but also extend the life of your equipment.

Pressure Relief Techniques

Pressure relief is an essential step in maintaining safety and efficiency with your airless paint sprayer. To begin, always engage the gun trigger lock and close the bleed-type master air valve before attempting any pressure relief. This prevents accidental spraying while you're working on your sprayer.

Next, hold the gun against a grounded metal pail and trigger it until all pressure is released. This step is important for your safety.

Afterward, drain any remaining fluid by opening all fluid drain valves into a waste pail. This prevents fluid buildup in the system, which can lead to clogs and other issues.

If you suspect clogging, carefully loosen the tip guard or hose end coupling to safely clear any obstructions. Make sure you do this slowly to avoid injury.

Advertisement

Lastly, always follow the pressure relief procedure before any maintenance tasks. This guarantees safe operation and helps prevent accidents.

Monthly and Yearly Maintenance

regular upkeep scheduling needed

Regular monthly and yearly maintenance is vital for keeping your airless paint sprayer in top condition. If you use your sprayer heavily, perform monthly maintenance to inspect the foot valve and seals for debris and damage.

Even if you're an occasional user, consider checking every six months based on your usage frequency. During your monthly inspection, make certain to clean the threads and apply marine grease to facilitate easier disassembly and reassembly of components.

For yearly maintenance, you'll want to conduct a thorough inspection of the paint hose. Look for abrasions and any signs of damage; replace any compromised hoses immediately to guarantee safe operation.

Changing packing seals annually is also important. This step helps prevent premature wear on your sprayer components, extending the overall lifespan and reliability of your equipment.

Here's a quick checklist for your maintenance routine:

Advertisement
  • Inspect foot valve and seals for damage.
  • Clean threads and apply marine grease.
  • Check paint hose for abrasions and replace if necessary.

Safety Precautions

health and safety measures

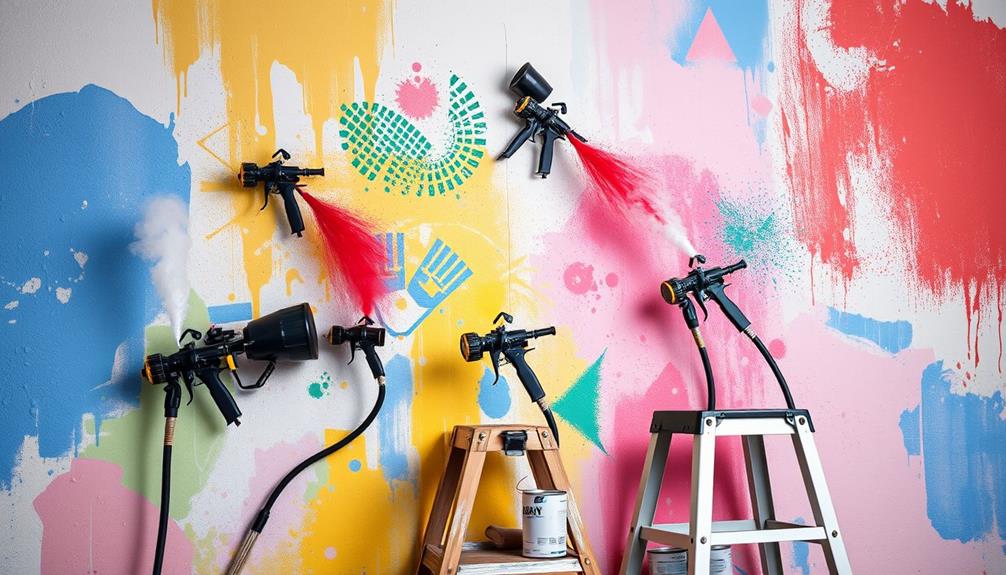
When using your airless paint sprayer, safety should always be your top priority. Start by aiming the sprayer's trigger away from people, and only release it when you're actively spraying. This simple action can prevent serious accidents.

Regularly inspect the hoses for any signs of damage or wear, as even minor flaws can lead to dangerous high-pressure leaks. Handle your sprayer with care; high pressure can be hazardous. Avoid unnecessary increases in pressure, which can escalate risks.

Before getting started, verify all attachments and connections are secure to minimize the risk of paint leaks and potential injuries. Always follow established safety precautions.

Wear appropriate protective gear, like goggles and masks, to safeguard yourself against overspray and inhalation of paint fumes. Staying protected is essential for a safe working environment.

Frequently Asked Questions

How Do You Maintain an Airless Sprayer?

To maintain an airless sprayer, clean it immediately after use, inspect filters daily, use Graco TSL to keep packings moist, schedule annual checks, and winterize with a preservative to prevent internal damage.

How Do You Maintain an Airless Sprayer?

You've got a paint-slinging beast in your hands, so treat it like royalty! Clean it right after use, swap out tips when they're worn, and don't forget to pamper those seals with TSL for longevity!

Advertisement

How Often Do You Need to Repack a Paint Sprayer?

You should repack your paint sprayer annually for peak performance. If you use it frequently, consider repacking every three to six months. Watch for leaks or pressure loss; these are signs it's time to repack.

Can You Leave Paint in an Airless Sprayer Between Coats?

You shouldn't leave paint in an airless sprayer between coats. It can lead to clogs and dried paint. If you must, fill the wet cup with a compatible solvent to keep everything lubricated.

Conclusion

By keeping up with your airless paint sprayer maintenance, you can extend its lifespan and guarantee peak performance. Did you know that regular maintenance can boost your sprayer's efficiency by up to 30%? That means you'll save time and paint while achieving a smoother finish. So, stick to your checklist, follow seasonal procedures, and don't overlook daily tasks. Taking care of your equipment not only enhances your projects but also makes painting more enjoyable and efficient.

Whether it’s a step-by-step tutorial on achieving flawless finishes or an in-depth analysis of the latest airless paint sprayer models, Joe’s ability to articulate complex ideas in a simple and engaging manner resonates with our diverse audience. His practical tips and techniques empower readers to tackle their projects with confidence.

Continue Reading
Advertisement

Airless Paint Sprayers

How to Use an Airless Paint Sprayer for Priming

Navigate the essentials of using an airless paint sprayer for priming and discover expert tips that will elevate your painting project to the next level.

Published

on

By

airless paint sprayer priming guide

Using an airless paint sprayer for priming can make your project quicker and more efficient. First, verify you're wearing safety gear like a respirator and goggles. Set up the sprayer by connecting the gun and adjusting the pressure to the lowest setting. Clean and prepare your surface, removing any dirt or old paint. Remove the tip and guard, place the hoses in your paint and waste pails, then set the sprayer to the PRIME position. Once you get a steady flow, switch to spray mode, maintaining about 12 inches from the surface. More tips on mastering your sprayer are just ahead!

Key Takeaways

  • Always wear safety gear, including a respirator mask, gloves, and goggles, to protect yourself from paint fumes and splatters.
  • Properly prepare surfaces by cleaning, repairing, and sanding to ensure smooth primer application and good adhesion.
  • Prime the sprayer by removing the tip, setting the valve to PRIME, and confirming a steady paint flow before switching to spray mode.
  • Maintain a consistent distance of about 12 inches from the surface, using long, smooth strokes and overlapping passes for even coverage.
  • Clean the sprayer immediately after use by flushing it with water or solvent until clear, and store components in a dry place.

Safety Precautions

Before you start using your airless paint sprayer, it's vital to prioritize safety precautions. First and foremost, you should always wear a respirator mask with vapor filters. This will protect you from inhaling aerosolized paint particles that can be harmful to your health.

In addition to the mask, put on safety goggles to shield your eyes from paint mist and potential splatters. Paint can be unpredictable, and you don't want to risk an accident. Additionally, verify your workspace is equipped with proper sound system configuration to enhance focus while you work, as distractions can lead to safety hazards.

Don't forget to wear gloves to prevent skin contact with paint and guarantee safe handling of all equipment and materials. This simple step can save you from unnecessary irritation or allergic reactions.

Proper ventilation is vital for maintaining a safe workspace. Open windows and use fans to help reduce inhalation of fumes and improve air circulation. This not only keeps the air fresh but also helps you work more comfortably.

Finally, familiarize yourself with the specific safety procedures outlined in your equipment manual. Understanding how to operate the high-pressure sprayer safely will further mitigate any risks while you work.

Advertisement

Following these safety precautions will guarantee a safer and more efficient painting experience.

Equipment Setup

prepare gear for use

Setting up your airless paint sprayer correctly is essential for a smooth painting process. Start by verifying the sprayer is clean and free of excess water. Check all components for tightness to prevent leaks.

Here's a quick checklist to help you with the equipment setup:

  1. Attach the Spray Gun and Hose: Securely connect the spray gun to the hose, making sure the manifold and gun connections are tightly fitted.
  2. Set the Pressure Control: Before priming, set the pressure control to the lowest setting to avoid excessive pressure buildup. This verifies that paint flows smoothly during the initial setup.
  3. Position Hoses Correctly: Place the fluid intake hose into the paint pail and the drain tube into an empty bucket. This setup enables proper fluid circulation during priming.
  4. Activate the Sprayer: Turn on the sprayer and adjust the prime valve to the PRIME position. Wait for bubbles to stop before switching to the paint setting.

Surface Preparation

preparation of surface materials

Preparing your surfaces is essential for achieving a flawless paint job with an airless paint sprayer. Start by thoroughly cleaning the surfaces to remove dirt, grease, and old paint using a suitable cleaning solution, like TSP. Let them dry completely before priming.

Next, repair any cracks, chips, or holes to guarantee a smooth application of primer. Sand rough areas with sandpaper to create an even surface, which helps the primer adhere better. Don't forget to use painter's tape to mask off edges and trim to prevent overspray.

Finally, lay down drop cloths to protect your floors and furniture from paint splatters. This step is vital for maintaining a clean work area.

Here's a quick checklist for effective surface preparation:

Advertisement
Task Description
Clean the surface Remove dirt, grease, and old paint
Repair imperfections Fix cracks, chips, or holes
Sand rough areas Guarantee an even surface for better adhesion
Protect the area Use drop cloths to cover floors and furniture

Priming the Sprayer

preparing the spray equipment

With your surfaces prepped and ready, it's time to prime the airless paint sprayer for a smooth application. Start by confirming the trigger lock is engaged to prevent any accidental spraying while you set up.

Follow these steps for effective priming the sprayer:

  1. Remove the tip and guard from the spray gun. This allows for a clear path for the paint, making priming more efficient.
  2. Place the fluid intake hose into the paint pail and the drain tube into a waste pail. This directs any excess paint properly during the priming process.
  3. Set the prime valve to the PRIME position and turn the on/off switch to ON. Gradually increase the pressure until the paint circulates smoothly through the system.
  4. Test the paint flow by holding the gun against a grounded metal waste pail. Disengage the trigger lock and pull the gun trigger to confirm a steady flow before switching to spray mode.

This process is essential for achieving a consistent spray pattern and preventing unwanted clogs.

Now you're ready to start painting!

Spray Techniques

advanced spray application methods

To achieve the best results when using an airless paint sprayer, mastering your spray techniques is vital. Start by maintaining a consistent distance of about 12 inches from the surface. This distance helps guarantee even coverage and minimizes drips.

Proper spraying distance is essential for effective application. Use long, smooth strokes, overlapping each pass by roughly 50% to assure a uniform application of primer.

Before you begin spraying, test the spray pattern on a piece of cardboard. This step allows you to fine-tune your settings and guarantees a consistent spray when you move to the actual surface.

Remember to begin moving the spray gun before pulling the trigger and continue moving after releasing it. This technique prevents excessive buildup of primer in one spot.

Advertisement

Lastly, adjust the pressure control knob depending on the thickness of the primer you're using. Lighter primers generally require lower pressure for ideal atomization.

Common Mistakes

frequent errors encountered often

When using an airless paint sprayer, you might find yourself making some common mistakes that can ruin your finish.

Holding the sprayer too close or moving it too slowly are key issues that can lead to drips and uneven coverage. Additionally, selecting the wrong tip size can greatly affect the spray pattern and finish quality, potentially compounding these issues.

Improper Distance Maintenance

One of the most common mistakes you can make while using an airless paint sprayer is letting your distance slip. Maintaining about 12 inches from the surface is vital; being too close can lead to drips and paint buildup.

Conversely, spraying from too far away results in uneven coverage and overspray, wasting paint and causing touch-ups. To achieve the best outcomes, consider the importance of flexibility in scheduling and customization options when planning your painting project.

To help you maintain the right distance, keep these tips in mind:

Advertisement
  1. Aim for Consistency: Keep a steady distance throughout your spraying process to guarantee an even spray pattern.
  2. Watch for Build-Up: If you notice a heavy edge or paint build-up, you're likely too close. Adjust to achieve a softer spray with low pressure.
  3. Practice First: Before tackling your project, practice on cardboard or waste material. This helps you find the ideal distance for a fine finish.
  4. Stay Mindful: Be conscious of your distance as you move. Varying it can lead to inconsistent results.

Inconsistent Speed Control

Often, beginners struggle with inconsistent speed control while using an airless paint sprayer. This issue can lead to uneven coverage or excessive paint buildup. To avoid these problems, aim for a steady hand and a uniform pace. Ideally, keep the spray gun moving at a speed that allows for a 50% overlap of your spray patterns, similar to the techniques needed for achieving an ideal finish with a Graco FFLP Fine Finish Low Pressure Reversible Tip. This guarantees an even application across the surface.

Before tackling your actual project, practice on cardboard or waste material to find your rhythm. Long, smooth strokes are essential; begin your motion before pulling the trigger and continue after releasing it. This technique helps prevent abrupt stops that can create heavy spots or inconsistencies in the finish.

Throughout your project, regularly monitor your spraying technique. Fatigue or distractions can easily lead to changes in speed, resulting in inconsistent results. By staying focused and maintaining a consistent pace, you'll achieve a professional-looking finish.

Cleanup Process

organized waste management procedure

After you're done painting, start the cleanup process right away to avoid dried paint clogging your sprayer.

Regular maintenance guarantees peak performance, similar to how air purifiers improve indoor air quality by eliminating pollutants.

Replace the paint container with a bucket of clean water or solvent and flush the system until it runs clear.

Proper storage is just as important, so make certain to keep your sprayer in a clean, dry place.

Advertisement

Immediate Cleaning Steps

When you finish using an airless paint sprayer, immediate cleanup is essential to maintain its performance and longevity. Neglecting this step can lead to clogs and diminished functionality.

Proper maintenance, much like guaranteeing your home has reliable garage door openers, keeps your equipment in top shape. Follow these steps for effective immediate cleaning:

  1. Flush the airless paint sprayer: Start by running clean water or an appropriate solvent through the system to eliminate any leftover paint. This usually takes about 5-10 minutes.
  2. Disassemble the spray gun: Remove the spray gun and take apart the tip, filter, and any other removable parts. Clean these components in warm, soapy water to remove any paint residue effectively.
  3. Run clean water through the sprayer: Verify you continue flushing until the water runs clear, which indicates that all paint has been removed from the system.
  4. Dispose of cleaning materials: Properly dispose of any leftover paint and cleaning materials according to local regulations to prevent environmental contamination.

Proper Storage Techniques

Proper storage techniques are essential for extending the life of your airless paint sprayer. After you've finished spray painting, make sure to clean the sprayer promptly to prevent paint from drying inside, which can lead to clogs and damage.

Start by flushing the pump with water or the appropriate solvent until the paint runs clear. Engaging in breathtaking destinations can provide the perfect backdrop for your creative projects, enhancing your inspiration.

Next, disassemble the gun and clean all components thoroughly with a brush and solvent.

Once you've completed the cleaning, it's time for proper storage. Store your sprayer in a cool, dry place, ensuring all parts are free of paint and moisture to avoid corrosion.

Advertisement

Before storing for an extended period, run a small amount of pump protector or oil through the system. This helps maintain seals and prevents them from drying out, which is vital for the longevity of your equipment.

Benefits of Using a Sprayer

efficient application of substances

One of the greatest advantages of using an airless paint sprayer is its ability to deliver a flawless finish on various surfaces. With an airless sprayer, you can achieve a smooth and even coverage, considerably reducing the likelihood of brush marks or roller texture.

This efficiency translates into a better working environment, allowing you to focus on the quality of your work rather than the application method. Additionally, just like with candles, proper maintenance is key for peak performance; keeping your sprayer clean can guarantee longevity and consistent results candle maintenance tips.

Here are some key benefits of using an airless paint sprayer:

  1. Speed: It drastically decreases application time, enabling you to cover large areas quickly and complete jobs in a fraction of the time compared to brushes or rollers.
  2. Thick Application: Airless sprayers handle thicker paints and primers without the need for thinning, making them perfect for heavy-duty coatings.
  3. Versatility: You can use them for various finishes, including stains and sealants, accommodating a wide range of project needs.
  4. Minimized Overspray: They reduce overspray, resulting in less wasted paint and a cleaner work area, especially beneficial for intricate details and large surfaces.

Using an airless paint sprayer can truly enhance your painting experience.

Frequently Asked Questions

Can You Use Airless Sprayer for Primer?

Yes, you can definitely use an airless sprayer for primer. It efficiently handles thick materials, ensuring smooth application. Just choose the right spray tip and pressure settings for ideal coverage, and you'll achieve fantastic results.

How Do I Prime an Airless Paint Sprayer?

To prime an airless paint sprayer, engage the trigger lock, set low pressure, remove the tip, and prepare hoses. Turn it on, adjust pressure, and guarantee smooth paint flow before switching to spray mode.

Advertisement

Do You Dilute Paint When Using an Airless Sprayer?

Why wouldn't you dilute paint for an airless sprayer? You should, especially with thicker latex. Typically, a 10-20% water mix helps achieve a smoother application and prevents clogs. Always check your manufacturer's guidelines first.

What Causes Airless Sprayer Not to Prime?

If your airless sprayer won't prime, check for trapped air, clogged filters, insufficient pressure settings, or thick paint. Confirm all components are securely attached and the fluid intake hose is submerged in the paint.

Conclusion

In the end, using an airless paint sprayer for priming can transform your project from drab to fab in no time. By following the steps outlined, you'll guarantee a smooth and even application, avoiding the pitfalls that often trip up beginners. Remember, practice makes perfect, so don't be afraid to refine your technique. With a little patience and the right approach, you'll be painting like a pro, turning walls into works of art.

Continue Reading

Airless Paint Sprayers

Airless Paint Sprayer Techniques for Avoiding Overspray

Harness expert techniques to minimize overspray with an airless paint sprayer and discover secrets that can transform your painting projects forever.

Published

on

By

minimizing overspray with precision

To avoid overspray with an airless paint sprayer, maintain a distance of 12 inches from the surface. Use high-efficiency airless (HEA) tips to minimize waste and control spray patterns. Lowering the spray pressure can also help you achieve better results. Always hold the spray gun perpendicular to the surface for even coverage, and practice smooth, consistent strokes. Additionally, consider using physical barriers or spray guides to protect surrounding areas. Mastering these techniques not only reduces cleanup but can improve your overall efficiency. Keep exploring to discover more tips and tricks for achieving a perfect finish every time.

Key Takeaways

  • Maintain a distance of about 12 inches from the surface to ensure an even spray pattern and reduce overspray.
  • Use high-efficiency airless (HEA) tips operating at around 1000 PSI to minimize paint waste and improve control.
  • Hold the spray gun perpendicular to the surface for accurate coverage and optimal spray pattern delivery.
  • Start with the lowest effective PSI and adjust pressure settings to find the best balance for reduced overspray.
  • Utilize physical barriers and spray guides to capture overspray and enhance control during application.

Importance of Managing Overspray

Managing overspray is vital for any painting project. When you minimize overspray, you not only reduce paint waste but also use your materials more efficiently, which can markedly cut your overall project costs. By implementing effective overspray management techniques, you could see reductions in paint consumption of up to 35% with high-efficiency airless (HEA) tips.

Airless paint sprayer basics provide useful insights into how to achieve an even finish while reducing overspray. Less overspray translates to improved productivity. With less time spent on cleanup and reapplication, you'll enhance your job efficiency and completion rates.

Plus, when you manage overspray effectively, you can confidently spray in challenging environments, such as around vehicles or delicate surfaces, without the worry of damaging adjacent areas.

Moreover, controlling overspray contributes to a safer job site. It minimizes the need for extensive prep work and reduces hazards associated with ladders and scaffolding during painting tasks.

Fundamentally, by focusing on ways to minimize overspray, you not only optimize your painting process but also create a safer, more efficient work environment. Understanding the importance of managing overspray can lead to better results in your painting projects, making it a vital aspect to prioritize.

Advertisement

Techniques for Reducing Overspray

minimizing spray application waste

To reduce overspray, you should maintain a proper distance of about 12 inches from the surface you're painting.

Additionally, considering the use of a quality garage door opener can enhance your workspace's safety by keeping areas clear of unnecessary obstacles.

Lowering your spray pressure, especially using High-Efficiency Airless tips, can also make a big difference in minimizing waste.

Maintain Proper Distance

Maintaining a proper distance while using an airless paint sprayer is essential for achieving a smooth finish and reducing overspray. Aim to keep your spray gun about 12 inches from the surface you're painting. This distance helps create an even spray pattern, which minimizes the risk of overspray.

Utilizing tools like the Graco FFLP Fine Finish Low Pressure Reversible Tip can further improve your control and reduce overspray due to its low-pressure design.

It's also important to hold the spray gun perpendicular to the surface. This position guarantees accurate paint coverage and further reduces the chances of overspray onto adjacent areas.

Advertisement

When you aim for a spray pattern that's free of tails and holidays, you notably decrease overspray while enhancing the overall finish quality.

Practice smooth and even strokes while maintaining a consistent distance for better control during the application process. If you find yourself struggling with overspray, check your distance and angle.

Remember, the key is consistency—both in distance and technique. By focusing on maintaining a proper distance, you'll not only reduce overspray but also achieve a professional-looking finish.

Adjust Spray Pressure

After ensuring you've got the right distance from the surface, adjusting the spray pressure is the next key step in reducing overspray. Start at the lowest effective PSI to minimize paint waste while achieving proper atomization. High-pressure settings can create excessive overspray, so gradually increase the pressure until you find the ideal setting for your specific project.

Using high-efficiency airless (HEA) tips can also help. These allow for operation at around 1000 PSI, resulting in up to 55% less overspray compared to traditional tips. Maintaining a consistent distance of about 12 inches from the surface helps control the spray pattern, further minimizing overspray.

Advertisement

Experimenting with different tip sizes and fan patterns while adjusting pressure settings can lead to significant improvements. Check out the table below for a quick reference on pressure adjustments:

PSI Level Overspray Risk Recommended Tip Size
1000 Low HEA Tip
1500 Moderate Standard Tip
2000 High Large Tip

Technological Advances in Spraying

innovative spraying technology developments

Recent advancements in airless paint sprayer technology have revolutionized how you approach painting projects, especially with the introduction of low-pressure spraying techniques. These innovations considerably reduce overspray while ensuring effective paint application.

High-efficiency airless (HEA) tips are a game changer, operating at just 1000 PSI, and they can produce up to 55% less overspray compared to traditional tips. Additionally, using air purifiers can improve the overall air quality in your workspace, which is beneficial during painting projects where fumes may be present air purifiers reduce allergens.

By utilizing HEA tips, you can also achieve estimated savings of 35% in paint consumption, making your projects not only efficient but also cost-effective. These advances deliver better control over spray patterns, creating softer fan patterns that enhance finish quality.

With airless sprayers that incorporate HEA technology, you'll find it easier to apply paint smoothly and evenly, resulting in a professional-looking finish.

Moreover, these tips reduce wear on your equipment, extending its lifespan and ensuring you get the most out of your investment. As you embrace these technological advances in spraying, you'll notice a marked improvement in your painting results, allowing you to tackle projects with greater confidence and efficiency.

Advertisement

Accessories to Control Overspray

overspray control accessories available

To achieve a clean and professional finish while minimizing overspray, incorporating the right accessories is key. Using physical barriers like cardboard or metal shields can effectively protect adjacent surfaces from overspray during airless spraying applications. Spray guides that attach directly to your spray gun help capture and control spray patterns, guaranteeing precise application.

Additionally, spray rollers offer a great combination of spraying and rolling techniques, allowing for efficient coverage while considerably reducing the likelihood of overspray on surrounding areas. For those hard-to-reach spots, extensions and reach tools provide enhanced control when spraying at heights, which helps maintain proper technique and further minimizes overspray.

Here's a summary of helpful accessories:

Accessory Type Purpose Benefits
Physical Barriers Protect adjacent surfaces Reduces overspray risk
Spray Guides Control spray patterns Guarantees precise application
Spray Rollers Combine spraying and rolling Efficient coverage, less overspray
Extensions & Tools Enhance reach and control Maintains technique, minimizes overspray

Utilizing these accessories designed for overspray control can dramatically improve your paint application quality and reduce cleanup efforts.

Benefits of Effective Overspray Management

efficient overspray control advantages

When you manage overspray effectively, you boost job efficiency, allowing you to complete projects faster and with fewer mistakes.

This not only saves time but also reduces the environmental impact by cutting down on wasted materials.

Additionally, understanding the importance of protecting your savings can lead to more strategic investment decisions in your business.

Advertisement

Plus, a cleaner application enhances the overall quality, leading to happier customers and a more profitable business.

Enhanced Job Efficiency

Mastering effective overspray management is key to enhancing job efficiency in airless painting projects. By controlling overspray, you can greatly reduce the time spent on cleanup and reapplication, allowing you to complete projects faster.

Incorporating eco-friendly practices, such as choosing low-emission paints, can further align with sustainable energy solutions, similar to how geothermal energy utilizes the earth's internal heat to generate electricity. When using high-efficiency airless (HEA) tips, you could cut paint consumption by up to 35%, leading to substantial cost savings.

Implementing techniques to minimize overspray not only improves the quality of your paint application but also results in fewer defects and touch-ups. This translates into saved labor time and a more polished finish.

Additionally, effective overspray management contributes to a safer job site by reducing the need for ladders and scaffolding, which lowers the risk of accidents and injuries.

Advertisement

As you enhance efficiency through careful overspray control, you'll notice a positive impact on your profitability. With reduced material waste and increased productivity, your project margins will improve, allowing you to take on more work without sacrificing quality.

In short, mastering overspray management isn't just about aesthetics—it's essential for maximizing your overall job efficiency and boosting your bottom line.

Environmental Impact Reduction

Effective overspray management plays an essential role in reducing environmental impact during painting projects. When you effectively control overspray, you can cut paint waste by up to 55%, which not only lowers your material costs but also minimizes your ecological footprint. Using high-efficiency airless (HEA) tips can lead to an additional 35% savings in paint consumption.

Here's a quick overview of the benefits of effective overspray management:

Benefit Description Impact
Reduced Waste Cuts down on excess paint and materials used Lowers costs and impact
Enhanced Efficiency Speeds up project completion and cleanup Saves time and resources
Improved Safety Minimizes hazardous waste and cleanup Creates a safer job site

Related Products and Resources

associated items and materials

Choosing the right equipment can greatly enhance your airless painting experience. For best results, consider the Graco Magnum Pro X17, which offers a high-pressure capability of 3000 PSI and a flow rate of 0.34 GPM. This model allows for reduced overspray when paired with the correct techniques and tip selection, making it essential for projects that require precision and control.

Additionally, exploring island getaways can provide inspiration for color choices and themes that can translate beautifully into your painting projects.

Advertisement

Alternatively, the Airlessco SL1250 boasts a maximum pressure of 3300 PSI and a flow rate of 0.95 GPM, making it ideal for professional applications while minimizing paint waste.

If you're looking for efficiency, the Airlessco MP455, also at 3300 PSI but with a flow rate of 0.48 GPM, is designed to enhance paint application while controlling overspray.

Don't forget to invest in high-efficiency airless (HEA) tips; they can lead to up to 55% less overspray and save you up to 35% in paint consumption.

Additionally, utilizing supplemental spray equipment like HVLP spray guns or spray rollers can enhance your control and further reduce overspray during your projects.

Frequently Asked Questions

How to Avoid Overspray With an Airless Sprayer?

To avoid overspray, keep your sprayer at a consistent distance from the surface, use the right tip size, and maintain a steady hand. Adjust pressure settings, and practice proper techniques for better control.

Advertisement

What Is the Number One Rule When Using Airless Spray Guns?

The number one rule when using airless spray guns is to use the lowest pressure needed for proper atomization. This not only minimizes overspray but also conserves paint, ensuring you get the best results possible.

How Do You Get a Smooth Finish With an Airless Sprayer?

To get a smooth finish, you'll want to start with low pressure and choose the right tip size. Keep a steady distance, use even strokes, and consider warming your paint for better flow.

What Type of Paint Sprayer Has the Least Overspray?

If you're looking for the least overspray, consider HVLP spray guns. They operate at lower pressures, providing excellent control and precision, which minimizes waste and helps achieve a smooth finish on your projects.

Conclusion

By mastering airless paint sprayer techniques, you're not just avoiding overspray; you're crafting a masterpiece with every stroke. Think of your project as a canvas, where precision is the brush and control is the palette. With the right methods and tools, you can dance around those pesky overspray issues, leaving nothing but vibrant colors and smooth finishes in your wake. Embrace these strategies, and watch your painting transform into a flawless work of art!

Advertisement
Continue Reading

Airless Paint Sprayers

How to Properly Thin Paint for Your Airless Sprayer

Understand the essential steps to thin paint for your airless sprayer effectively, ensuring a flawless finish—discover the crucial tips inside!

Published

on

By

thin paint for sprayer

To properly thin paint for your airless sprayer, start by pouring latex paint into a clean bucket. Add about half a cup of water per gallon and stir thoroughly without creating bubbles. Test the viscosity using a funnel to check if it flows freely. Aim to thin by 10-15%, but don't exceed one pint of water per gallon to maintain adhesion. Allow the thinned paint to rest for 10-15 minutes before using it. This guarantees a smoother application and minimizes clogs. For tips on achieving the perfect consistency and avoiding common mistakes, you're in the right place.

Key Takeaways

  • Assess paint viscosity by observing drip rate, conducting spray tests, or using a funnel flow test to determine if thinning is needed.
  • Thin latex paint by adding ½ cup of water per gallon, ensuring not to exceed 1 pint to maintain adhesion.
  • Stir paint thoroughly before adding water, and mix gradually to avoid over-thinning and achieve the desired consistency.
  • Test thinned paint on a sample surface to ensure proper flow and coverage before full application.
  • Allow thinned paint to rest for 10-15 minutes before use to improve flow and reduce clogs in the sprayer.

Understanding Latex Paint

When it comes to modern painting, understanding latex paint is essential. This water-based product, made with synthetic resins, offers several advantages over traditional oil-based paints. Its thinner consistency makes it perfect for use with airless sprayers, allowing you to achieve a smooth finish without the hassle of excessive thinning paint.

Additionally, airless paint sprayers use high pressure to atomize paint, which enhances the overall application process.

One of the key benefits of latex paint is its ease of cleanup. Since it doesn't rely on petroleum-based solvents, you can clean brushes and tools using just soap and water. This makes it a popular choice for DIY enthusiasts and professionals alike.

Latex paint has come a long way since its introduction in the 1940s by Sherwin-Williams as Super Kem-Tone. Today's formulations are specifically designed to work seamlessly with airless spray guns, often eliminating the need for any thinning.

This versatility means you can tackle a variety of projects with confidence, knowing you're using a product that's both effective and user-friendly.

Advertisement

Importance of Thinning Paint

essential for paint application

Thinning paint is essential for achieving a smooth and professional finish, especially with airless sprayers. When you thin latex paint, you enhance its flow and leveling properties, which are critical for ideal performance.

Utilizing the right techniques can also help you achieve a fine finish with Graco FFLP Fine Finish Low Pressure Reversible Tip, designed specifically for intricate projects. Over time, paint can thicken due to loss of water content or exposure to high temperatures, leading to clumpy consistency.

Thinned paint helps restore proper consistency, making it easier to apply and ensuring an even coat on surfaces. Using thicker paint can clog your spray equipment, so proper thinning techniques become essential.

When you thin your paint, you not only improve its adherence to surfaces but also minimize the chances of runs and uneven patches. A well-thinned mixture allows your sprayer to create a finer mist, leading to better coverage and a more uniform finish.

Assessing Paint Consistency

evaluating paint texture quality

To assess paint consistency, start by testing its viscosity with a stick; the drip rate will help you determine if it's too thick.

It's crucial to verify you have the right tools at hand, similar to how a professional uses essential items in their home cleaning kit.

Conduct a spray test on cardboard to identify any thinning indicators, like sputtering or uneven patterns.

Advertisement

These simple methods will guide you in adjusting the paint for peak performance with your airless sprayer.

Viscosity Testing Methods

Evaluating your paint's consistency is essential for achieving a smooth finish with an airless sprayer. You can perform a viscosity test by dipping a stick into the paint and observing the drip rate. A slow, thick stream indicates you might need to thin the paint. To further test the spray performance, apply thinned paint on cardboard; an even spray pattern signifies proper consistency, while sputtering suggests more thinning is necessary.

You can also pour the paint through a funnel to visually check its flow. If it doesn't pour freely, it likely requires additional thinning. Additionally, using a paint strainer can help you check for clogs, ensuring any lumps are removed before spraying.

Here's a quick reference table for your viscosity testing methods:

Method What to Look For Action Required
Viscosity Test Slow drip Thin paint if needed
Spray Performance Test Even spray pattern Adjust thinning as necessary
Funnel Flow Test Free flow Thin paint if not flowing well

Consistent flow and uniformity during these tests indicate that your paint is ready for application.

Advertisement

Identifying Thinning Indicators

Recognizing the signs that your paint needs thinning is essential for achieving ideal results with an airless sprayer. Start by conducting a viscosity test. Dip a stick into the paint and observe the drip rate. If you notice a slow, thick stream, it's time to thin the paint.

Additionally, take into account the environment in which you're painting, as factors like temperature and humidity can affect paint consistency and performance. For example, unique cultural experiences during travel can inspire your choice of colors and textures in your home projects.

Next, spray a sample on cardboard to check for spray consistency. If the paint sputters or leaves globs, it clearly requires thinning for best performance. A uniform flow during your test indicates that the paint may not need further thinning, ensuring a smoother application.

Remember to test the paint's spray consistency before application to avoid clogs or uneven coverage. Regularly assess the paint's consistency, especially if it's been sitting for a while. Older paint tends to thicken, so you may need to take into account thinning latex to achieve the right viscosity.

Thinning Process Steps

thinning procedure detailed steps

Before you start thinning your paint, it's important to have a clean 5-gallon bucket ready. Proper preparation is key for achieving the best results, just like confirming your garage door openers are properly installed for maximum security.

Follow these steps to confirm your paint is properly thinned for your spray gun:

Advertisement
  1. Pour the Paint: Begin by pouring the latex paint into your clean bucket. For every gallon of paint, add approximately ½ cup (118 milliliters) of clean, room temperature water.
  2. Stir Thoroughly: Use an up-and-down motion to mix the paint and water. Be careful to avoid excessive bubbles while confirming even mixing.
  3. Test Viscosity: After mixing, test the paint's viscosity by pouring it through a funnel. If it doesn't flow freely, gradually add an additional ⅓ cup (30 milliliters) of water per gallon and mix again.
  4. Let it Sit: Allow the thinned paint to sit for 10-15 minutes before use. This will confirm proper incorporation of water and help you achieve the desired consistency.

Proper Thinning Techniques

effective plant pruning methods

Achieving the perfect paint consistency is fundamental for a smooth and even finish when using an airless sprayer. To thin latex paint effectively, start by thoroughly stirring it to guarantee an even mixture.

Cats, much like paint, require proper care and attention to avoid issues—cat health and nutrition is essential for their well-being. Use a separate clean bucket for mixing, and gradually add water in small increments. Scrape the sides and bottom of the bucket as you mix, employing an up-and-down stirring motion to minimize bubbles that could affect your spray finish.

Once you've combined the paint and water, let the thinned paint sit for 10-15 minutes. This waiting period allows for proper incorporation of the water, which is critical for achieving the right consistency.

Before you immerse yourself in your final application, always test the thinned paint on a sample surface. This step confirms its flow and performance, verifying you're ready to proceed confidently.

If you find that the mixture isn't flowing well, you might need to adjust it further. Using a paint strainer can help filter out any lumps that may have formed during mixing, guaranteeing the best way to thin your paint.

Following these proper thinning techniques will set you up for success with your airless sprayer.

Advertisement

Tips for Successful Thinning

effective plant thinning strategies

When thinning paint, it's essential to follow specific guidelines to get the right consistency without overdoing it.

Maintaining a healthy lifestyle, as discussed in various healthy lifestyle blogs, can also enhance your overall energy and focus during projects like these.

Always thin only what you'll use right away to maintain quality, and choose a high-quality latex paint designed for airless sprayers for the best results.

Thinning Quantity Guidelines

Success in thinning paint for an airless sprayer hinges on following precise guidelines. When working with latex paint, it's crucial to adhere to specific thinning quantity guidelines to achieve the best results.

To maintain a healthy indoor environment while working on your painting project, consider using an air purifier to reduce dust and allergens.

Here's what you need to know:

Advertisement
  1. Thinning Ratio: Generally, thin latex paint by 10-15%. This means adding about 1/8 to 1/4 cups of water to each gallon.
  2. Maximum Limit: Never exceed 1 pint of water per gallon. Too much thinning can compromise adhesion and finish quality.
  3. Incremental Testing: After each addition of water to thin, test the consistency. This helps guarantee ideal flow and performance before you start spraying.
  4. Immediate Use: Only thin paint you plan to use right away. This prevents spoilage and promotes a consistent application.

Immediate Use Importance

Thinning paint for immediate use is essential to preventing spoilage and guaranteeing a consistent application. When you thin paint, it's important to prepare only what you need for your project. Always thin paint in small batches—typically no more than a gallon at a time—to avoid the risk of over-thinning the entire can. This approach not only helps maintain the quality but also minimizes waste.

Additionally, using quality latex paint specifically designed for airless spraying will yield best results when thinned appropriately, similar to how projector maintenance tips can enhance the longevity of your devices. For professional results, consider using the AEROPRO AP8628 sprayer, as it assures effective atomization and coverage with your thinned paint.

Before you start spraying, always conduct a viscosity test after thinning to confirm the paint's flow is suitable for your airless sprayer. This step is significant, as it determines whether your paint will apply smoothly or if further adjustments are needed.

Quality Paint Selection

Choosing the right paint is essential for achieving perfect results with your airless sprayer. Quality latex paint specifically designed for airless spraying minimizes the need for thinning and enhances performance. Additionally, understanding innovative architectural solutions can inspire creative applications for your painting projects.

Here are some tips to help you select the best paint:

  1. Opt for High-Quality Paint: Always choose premium latex paint to avoid excessive thinning and guarantee a smooth finish.
  2. Check Sprayer Compatibility: Confirm the paint is suitable for your sprayer model. Some sprayers can handle unthinned paint, while others might require a specific thinning ratio for best flow.
  3. Test Before Full Application: Always test a small quantity of paint on a sample surface. This helps you determine the perfect thinning ratio and guarantees compatibility with your sprayer.
  4. Consider Professional Equipment: Using a reliable sprayer like the AEROPRO AP8628 can make a significant difference. It's designed to handle various paint viscosities efficiently, resulting in a professional finish.

Common Thinning Mistakes

avoiding thinning errors commonly

Many DIYers make common thinning mistakes that can compromise their paint job. One major error is over-thinning paint, which often leads to a poor finish and increased runs. When you're adding water to thin your paint, be careful not to go overboard, as excessive thinning can hinder the paint's ability to adhere properly to surfaces.

Another mistake is using solvents like paint thinner instead of water for latex paints. This can ruin the paint's integrity and performance. Always stick to the recommended thinning method for the specific type of paint you're using.

Advertisement

Failing to conduct a viscosity test before you start thinning can also lead to issues. If you don't check the paint's thickness first, you might end up thinning it too much, making it tough to achieve even coverage.

Additionally, neglecting to stir the paint thoroughly before adding water can result in an uneven consistency, causing performance problems during spraying.

Finally, if you're thinning paint meant for long-term storage, remember that this can lead to spoilage—only thin paint you plan to use immediately.

Avoid these mistakes, and you'll set yourself up for a successful painting project.

Final Considerations for Spraying

spraying best practices summary

Before you start spraying, it's crucial to guarantee your paint is properly prepared for the airless sprayer. This means paying close attention to the viscosity and following the manufacturer's recommendations. Here are some final considerations to keep in mind:

  1. Thinning: Ideally, thin latex paint by no more than 10-15% with water for best flow. Remember, excessive thinning can lead to longer drying times and might require extra coats.
  2. Monitor the Spray Pattern: As you spray, keep an eye on the pattern. A smooth, even spray is a good sign that your paint is thinned correctly. If you notice sputtering or inconsistent coverage, it may need further adjustment.
  3. Let It Sit: After thinning, allow your paint to rest for 10-15 minutes. This helps promote proper incorporation and can reduce clogs in your sprayer.
  4. Consult the Manual: Always refer to your airless sprayer's manual for specific guidelines regarding paint consistency. Different models have varying requirements that could impact your results.

Frequently Asked Questions

How Do You Thin Paint for an Airless Spray Gun?

To thin paint for an airless spray gun, mix in 10-15% water, using clean, room temperature water. Test the viscosity by pouring it through a funnel until it flows freely for best performance.

How Much to Thin Paint for an Airless Sprayer?

To thin paint for your airless sprayer, aim for 10-15% dilution, which means adding 1/8 to 1/4 cup of water per gallon. Don't exceed 1 pint to maintain paint performance. Always check manufacturer guidelines.

Advertisement

What Is the Ratio of Paint to Thinner for a Spray Gun?

When thinning paint for a spray gun, start with a 10% water-to-paint ratio. If needed, adjust up to 20%, but remember to test the viscosity to guarantee it flows smoothly without clogging.

How Much Water to Thin a Gallon of Paint?

Did you know that nearly 70% of DIY painters struggle with paint consistency? To thin a gallon of paint, start by adding ½ cup of water, mix well, and adjust for the desired flow.

Conclusion

In summary, properly thinning paint for your airless sprayer is vital for achieving a smooth finish. Did you know that over 50% of paint application issues stem from incorrect consistency? By following the steps and techniques outlined, you can avoid common mistakes and guarantee a successful project. Remember, the right thickness not only improves the sprayer's performance but also enhances the overall appearance of your work. So, take the time to thin your paint correctly and enjoy the results!

Continue Reading
Advertisement

Affiliate disclaimer

As an affiliate, we may earn a commission from qualifying purchases. We get commissions for purchases made through links on this website from Amazon and other third parties.

Advertisement

Trending