TL;DR

Get business pricing on tools and workshop supplies
- Business-only prices and quantity discounts
- Tax-exempt purchasing
- Multiple users, one account, clear invoices
Airless paint sprayers use a pump to force paint through a small tip at high pressure, laying down a fan-shaped coat quickly across large surfaces. They’re most useful for fences, siding, sheds, and several rooms—not necessarily one small touch-up—because masking and cleanup take time. Match the tip to the coating, test your spray pattern, protect nearby surfaces, and follow the sprayer’s pressure-relief instructions every time.
A paint sprayer can coat a long fence in the time it takes you to set up a roller tray—but it can also mist your patio, your shoes, and the neighbor’s car if you rush the prep. That tradeoff is the heart of using airless paint sprayers for DIY projects: speed comes with setup, overspray control, and careful cleanup.
An airless sprayer pumps paint through a small tip at high pressure, creating a fan-shaped spray. It can leave a smooth coat on broad surfaces such as siding, walls, fences, and sheds, but it won’t automatically make every job faster or neater.
This guide helps you decide whether to rent or buy, compare spraying with rolling, choose a workable setup, and avoid common problems like runs, striped coverage, and clogged tips. You’ll also learn the safety steps that matter when a machine can inject paint through skin.
Use an airless sprayer for broad surfaces such as fences, siding, and sheds; a roller often makes more sense for one small room or a touch-up.
Match the tip to the coating and sprayer capacity using both manufacturers’ directions, and test the pattern on scrap before painting.
Hold the gun perpendicular, maintain a steady distance and pace, and overlap each pass by about half the fan width.
Mask nearby surfaces, check outdoor wind, and wear eye, skin, and respiratory protection suited to the coating.
Follow the manual’s pressure-relief procedure before clearing a clog, changing a tip, servicing, or cleaning the sprayer.
See when an airless sprayer beats a roller—and when it doesn’t
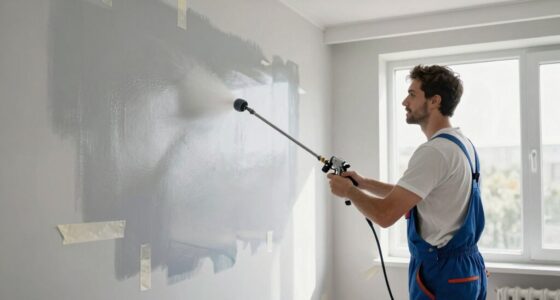
Airless paint sprayers for DIY projects are most useful when you need to coat a large, fairly open surface quickly; rolling is often simpler for one small room or a few touch-ups. Spraying cuts brush marks and can cover broad areas evenly, but masking and cleanup add work that a roller avoids.
| Method | Works well for | What you trade |
|---|---|---|
| Airless sprayer | Fences, siding, sheds, multiple rooms | Fast application, more masking and cleanup |
| Brush and roller | Small rooms, trim, isolated repairs | Slower coverage, simple setup and control |
| HVLP sprayer | Smaller, detailed work | More control for detail, generally less suited to broad coverage |
For example, imagine repainting a 40-foot fence. A sprayer can lay paint into the boards’ texture quickly, while a roller may take longer and miss tight gaps. But if you only need to repaint one bedroom, moving furniture, masking windows, and protecting the floor may take longer than rolling the walls.
The key comparison is total project time, not how fast paint comes out of the gun. A sprayer’s advantage grows with the amount of open surface; its preparation and cleanup are mostly fixed tasks, whether you spray a little or a lot. That means a large fence can spread those tasks across many square feet, while a small patch cannot. Detail-heavy work can also erase the speed advantage because edges and corners may still need brushing.
Think about the whole job, not just trigger time. A sprayer can save hours on a large project, yet setup, masking, and cleaning are real parts of the work. Compact electric and handheld models make occasional spraying more accessible, but features vary by model. Check current manufacturer specifications and independent reviews instead of assuming every model handles every coating.
airless paint sprayer for DIY projects
As an affiliate, we earn on qualifying purchases.
As an affiliate, we earn on qualifying purchases.
Know how paint moves from the bucket to the wall
An airless paint sprayer is a pump-powered tool that forces paint through a tiny opening in its spray tip to create a fan-shaped pattern. It doesn’t rely on a stream of compressed air to carry the paint, and the pressure can push coating onto large surfaces quickly.
The tip controls the shape and amount of paint leaving the gun. Tip numbers generally relate to the fan width and orifice size, but the correct choice depends on both the paint and the sprayer’s capacity. A tip suited to thin stain may not work well with a thicker coating, so check the paint label and equipment manual before loading up.
This match matters because the tip and pressure determine how much material reaches the surface and how well it atomizes. An unsuitable orifice can make a coating difficult to spray or produce a poor pattern; increasing pressure to compensate can add overspray and wear without solving the underlying mismatch. Choose from the coating maker’s and sprayer maker’s guidance, then test the fan on scrap. If the pattern is inconsistent, troubleshoot the setup rather than assuming more pressure is always the answer.
That high pressure makes safe handling non-negotiable. Paint can penetrate skin even when a puncture looks tiny; an injection injury needs urgent medical attention. Never point the gun at a person or put a hand near the tip. Before cleaning, clearing a clog, changing the tip, or servicing the machine, follow the model’s exact pressure-relief procedure.
High-pressure spray is not something you test on your hand or “just clear” with a finger. Keep the gun pointed away from people and use the manual’s pressure-relief steps before touching the tip.
On a real job, that means you stop spraying, secure the gun, and complete the manufacturer’s relief steps before removing a tip to rinse it. Wear eye and skin protection, plus respiratory protection and ventilation suitable for the coating. Read the coating label too: its instructions matter as much as the sprayer’s.
Get a smoother coat with these five setup and spraying steps
To get an even finish, prepare the surface, select a compatible tip, test the spray pattern, and move steadily with overlapping passes. Keep the gun perpendicular to the surface and start and stop each pass just beyond the edge where practical; this helps prevent heavy spots at the ends.
- Clean and repair the surface. Remove dirt and loose paint, then fill and sand flaws. Paint won’t hide a greasy handprint or a splintered fence board.
- Mask the surroundings. Cover floors, windows, plants, vehicles, and anything else you don’t want speckled. Outdoors, check wind; fine droplets travel.
- Choose a compatible tip. Match the tip to the coating and machine using both manufacturers’ guidance. Strain paint if needed, and don’t thin it unless the product and equipment instructions call for it.
- Test on scrap material. Start with a low setting and increase pressure only until the fan looks consistent. Tails or an uneven fan can mean pressure is too low or the setup needs attention; excessive pressure creates more overspray and equipment wear.
- Spray in steady, overlapping passes. Hold the gun at a consistent distance and overlap each pass by about half the spray fan. Keep your arm moving rather than swinging your wrist toward the surface.
Each step prevents a different kind of rework. Surface prep helps the coating adhere and keeps defects from showing through; masking avoids cleanup that can take longer than painting. The tip and pattern test help you avoid wasting paint on an unsuitable setup. Steady passes then make the coating thickness more consistent, which is important because a smooth-looking wet coat can still dry with thin stripes or runs if application varies.
Picture a shed wall with vertical boards. Test your pattern on a spare board first; then work in manageable sections, keeping the gun square to each face. A half-fan overlap helps the wet bands blend instead of leaving pale stripes between them. If the boards are uneven or have deep gaps, adjust your angle and work methodically so paint reaches the surface without lingering too long in one spot.
If you see a run forming, don’t pile on another pass while the paint is wet. Pause and follow the coating’s directions for fixing the surface. Consistent distance, pace, and overlap do more for the finish than simply cranking up pressure.
Keep overspray off your windows, plants, and neighbors’ cars
Overspray is fine paint mist that can drift past your target, so protect nearby surfaces before pulling the trigger. A sprayer’s fast coverage feels tempting, but droplets can land on glass, shrubs, siding, patio furniture, or a parked car before you notice the breeze has shifted.
For an indoor room, cover the floor and mask windows, doors, outlets, and trim you’re not painting. Move furniture out when possible; otherwise, wrap it fully. Keep ventilation appropriate to the coating and wear protective gear specified by its label. Don’t assume a common dust mask suits every product.
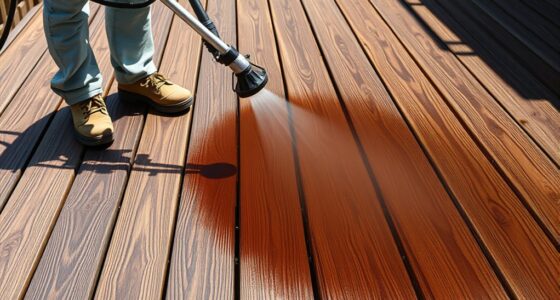
For an outdoor fence, check wind and the surrounding area. A calm morning may be safer for nearby property than a breezy afternoon, but conditions can change while you work. Cover plants and hard surfaces, and avoid spraying toward people, pets, open windows, or vehicles. Masking is cheaper than removing dried paint from a windshield.
Here’s a practical example: if a shed wall sits beside a flower bed, place a protective sheet over the plants and extend it beyond the wall’s edges. Keep the spray fan aimed squarely at the siding, not across the yard. If wind carries mist away from the work area, stop and wait or switch to a brush or roller.
Before starting, do a slow walk around the work zone and look for anything you’ve missed. Airless spraying is a poor match for a tight space where you can’t protect nearby surfaces or manage ventilation safely. This is not just about avoiding a paint-removal chore: overspray can reach people, pets, neighboring property, or areas where ventilation is limited. If you cannot control where the mist goes, changing tools or postponing the job is the safer tradeoff.
Choose a DIY sprayer that matches your projects, not a sales claim
Choose a DIY sprayer by matching its supported coatings, tip capacity, portability, hose, cleaning demands, and available parts to the work you actually plan to do. A lightweight handheld model may suit a small gate, while a cart or stand model can make a large fence or several rooms easier to manage.
| What to check | Why it matters | Example |
|---|---|---|
| Supported coatings and tip size | Not every model handles every paint or tip | Check whether the sprayer supports the coating on your siding project |
| Hose length and portability | Affects how easily you can move around the job | A longer fence may favor a cart model over a handheld unit |
| Cleaning process and parts | Paint residue can clog filters, tips, or the pump | Confirm you can get replacement filters and tips |
| How often you’ll use it | Occasional jobs may not justify buying | Renting can make sense for one weekend project |
These checks are connected: a model that can handle your paint is no help if its hose makes the job awkward, and a convenient unit can still be a poor fit if compatible tips or replacement parts are hard to find. Consider access and storage as well as spraying capacity. A lighter machine is easier to carry, but a larger project may make its limited reach or capacity more noticeable.
For instance, if you plan one backyard fence and don’t expect another paint job soon, compare local rental options with the cost of buying. If you maintain a shed, deck, and outbuildings every year, ownership may be more practical—provided you’re willing to clean and store the machine correctly. Rental avoids storage and maintenance, but check that the available unit comes with suitable instructions, parts, and a tip for your coating.
Don’t choose by a promise of “fastest coverage” alone. The paint’s label and the sprayer’s manual decide what coatings and tips are suitable. Wider availability of accessories and simpler setup features can help, but model features differ. Check current manufacturer specifications and independent reviews before you buy.
Clean the sprayer now so it works next weekend
Clean an airless sprayer promptly after each use, following the paint label and the equipment manual. Paint left to dry can block the tip, filters, or pump, turning a quick weekend project into an expensive repair—or a machine that won’t spray when you need it.
Plan cleanup before you begin. Set aside the time and supplies the manual calls for, and use the cleaning fluid recommended for that coating and model. Follow the sprayer’s pressure-relief process before cleaning or removing a tip. Don’t guess at a clog by poking the gun or putting your hand near it.
Cleanup is part of choosing a tool, not an afterthought. Water-based and other coatings may call for different cleaning methods, and a method that is wrong for the product or sprayer can leave residue or damage components. The manual and coating directions determine what to use. Planning for cleanup also makes the project time estimate more honest: if you have no time to clean thoroughly before leaving, spraying may not be the practical choice that day.
Suppose you finish spraying a shed late in the afternoon. Rinse and clean the machine straight away rather than leaving paint in it while you pack tools and head inside. A tiny plug of dried paint can spoil the fan pattern next time, even if the sprayer ran smoothly today. Residue may also create a problem that is difficult to diagnose later, because a partial blockage can make a sound setup seem faulty.
When the machine is clean, inspect its parts and store it as directed. Some manufacturers specify a storage fluid; use it when required. Keep the tip and filters from collecting dried residue, and check that replacement parts are available before a project depends on them. Fast cleanup protects both your finish and your investment.
Cleanup also belongs in your time estimate. Spraying the wall may take minutes, but preparation and washing the machine can take much longer. For a small patch, a brush often wins simply because it’s ready to use and easy to clean.
Frequently Asked Questions
Do I need to thin paint for an airless sprayer?
Not automatically. Check the coating label and sprayer manual because thinning requirements vary by paint and model. Test the paint and setup as directed rather than thinning by guesswork.
How do I avoid runs and stripes?
Keep the gun perpendicular to the surface, hold a consistent distance, and move at a steady pace. Overlap each pass by about half the fan, test on scrap first, and use only enough pressure for a consistent spray pattern.
Can I use an airless sprayer indoors?
Yes, if you can mask nearby surfaces and provide ventilation suitable for the coating. Protect floors, windows, trim, and furniture, then wear the protective equipment specified by the product label. For a single small room, rolling may be easier.
How do I unclog an airless spray tip safely?
Never put a hand near the tip or point the gun at anyone. Follow the sprayer manual’s pressure-relief procedure before clearing or removing the tip, then use the maker’s recommended method. A high-pressure paint injection injury needs urgent medical care.
Should I rent or buy a DIY airless sprayer?
Renting can suit a one-off weekend job such as a single fence, while buying may make sense if you expect to spray several projects over time. Compare rental and purchase costs alongside cleaning effort, replacement-part availability, and whether the model supports your planned coatings.
Conclusion
Use an airless sprayer when the size of the job earns the setup. Prepare the surface, protect everything around it, choose a compatible tip, and practice on scrap before you coat the fence or siding. For a small repair, pick up a roller; for a broad project, a sprayer can make the work faster and the finish smooth.
Give the same care to pressure safety and cleanup as you give to the paint job itself. The best finish is the one that looks even on the wall—and leaves no mist on the neighbor’s car.
Fall yard work Picks
leaf blowers
As an affiliate, we earn on qualifying purchases.