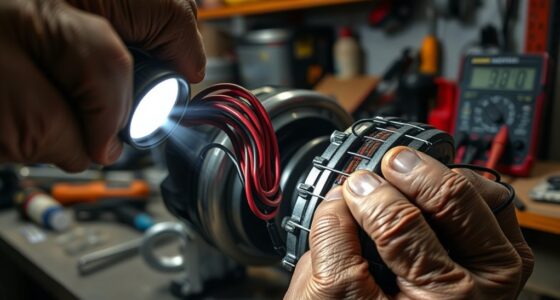

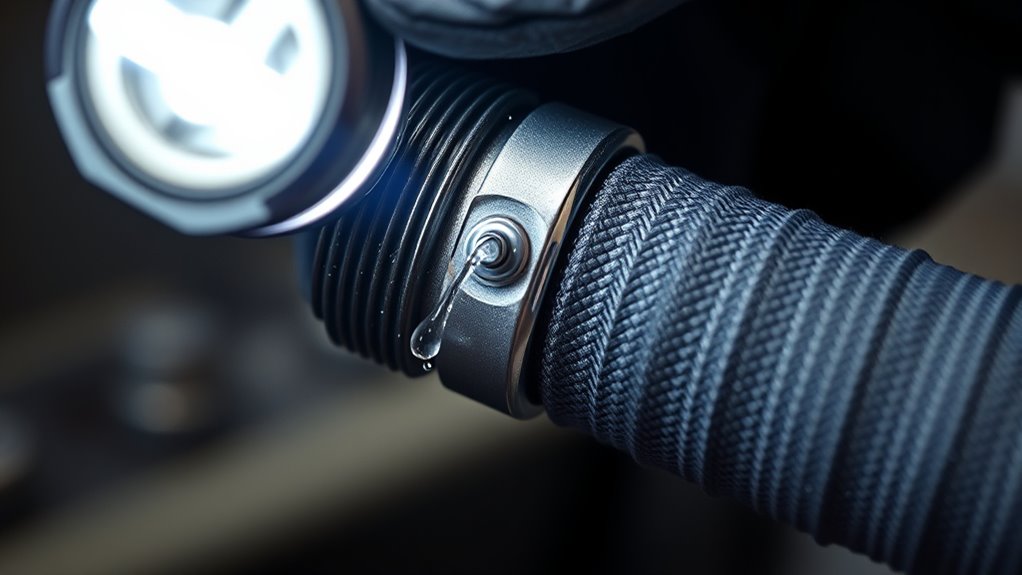
To diagnose leaks at the gun or hose connection, first do a visual check for wet spots, corrosion, or damaged seals, using a flashlight for better visibility. Listen for hissing sounds or use ultrasonic leak detectors to pinpoint escaping air or water. You can also apply a soap solution around fittings to see bubbles forming at the leak. If needed, isolate sections with shutoff valves or replace worn seals—discover more tips below to fix the issue effectively.
Key Takeaways
- Inspect connections visually for wet spots, corrosion, cracks, or residue indicating leaks.
- Use a soap solution around fittings; watch for bubbling to confirm escaping fluid.
- Listen for hissing sounds or use ultrasonic detectors to identify escaping air or fluid.
- Ensure fittings are properly tightened and seals are intact without deformities or wear.
- Apply leak detection dye and observe for colored fluid escaping at the gun or hose connection.
Visual Inspection Techniques

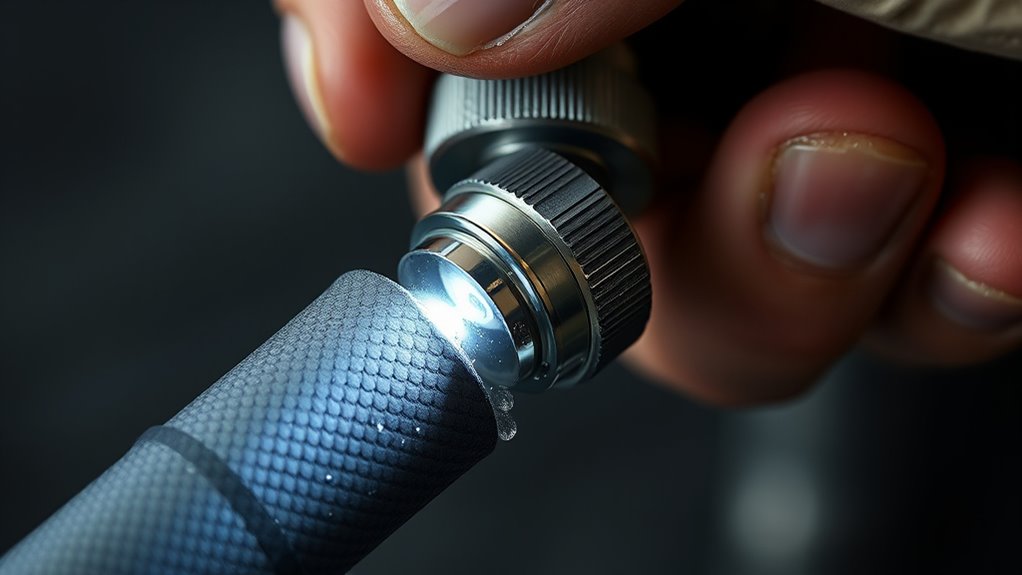
Visual inspection is often the first step in identifying leaks at the gun or hose connection. You should look for obvious visual cues like wet spots, drips, or puddles near the connection point. Color indicators, such as a buildup of mineral deposits or corrosion, can also signal a leak. Pay close attention to any discoloration or residue that may suggest fluid escape. Use a flashlight to enhance visibility in dark or shadowed areas. Carefully examine the fitting, hose, and surrounding areas for cracks or damage that could cause leaks. Remember, early detection with sharp visual cues can save you time and prevent further damage. Conducting a thorough visual check is essential before moving on to listening methods. Additionally, inspecting for HEPA filtration and other filter components can help identify potential leak sources, since degraded or damaged filters may contribute to air or fluid leaks. It’s also helpful to check for any fluid buildup around connections, which can be a clear sign of a leak even if it’s not immediately visible. Regular inspections can also reveal signs of corrosion or wear, which often precede leaks and should be addressed promptly.
Listening for Leaks
Listening for leaks is an effective way to detect issues that may not be visible to the eye. Noise detection helps identify leaks by listening for hissing or other sounds that indicate escaping air or water. Ultrasonic testing is especially useful, as it amplifies high-frequency sounds that are inaudible to humans, making leaks easier to locate. You can use a stethoscope or specialized ultrasonic leak detector to listen around the hose or gun connection. Move the device slowly along the fitting, paying attention to sudden shifts in sound intensity. Remember, quiet or subtle noises often point to small leaks. By actively listening and employing ultrasonic testing techniques, you can quickly identify leaks before they cause more significant problems. Additionally, understanding field recording techniques can enhance your ability to detect subtle sounds associated with leaks. Properly soundproofing the area can also help minimize background noise, making leak detection more accurate. Incorporating AI-driven analysis can further improve the precision of leak detection by analyzing sound patterns for anomalies. Using advanced sensor technology not only aids in identifying even minor leaks with higher sensitivity but also improves detection speed and accuracy.
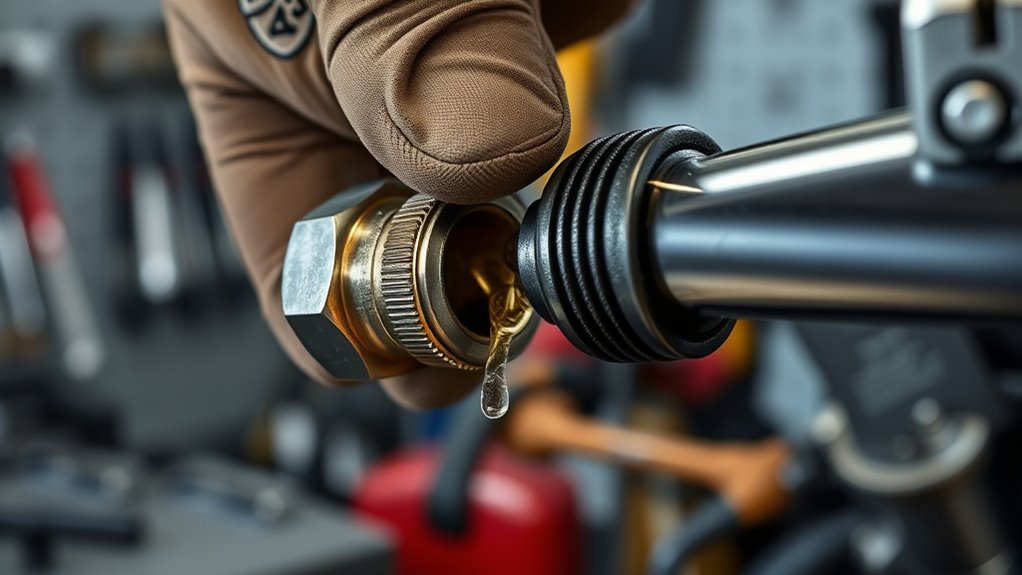
Using Soap Solution to Detect Air or Water Leaks
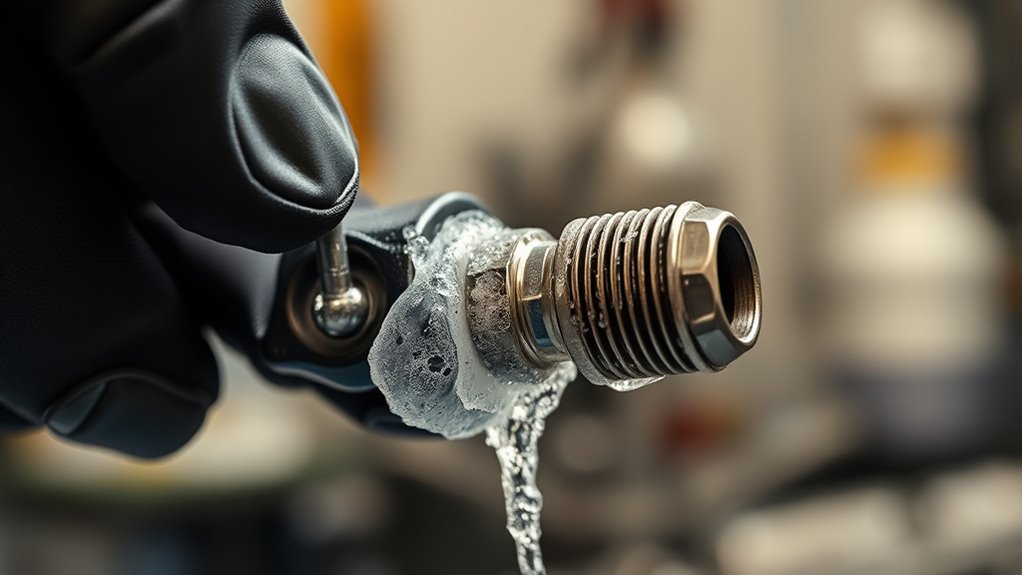
Applying soap solution is a straightforward and effective way to pinpoint leaks at hose or gun connections. Start by mixing a mild soap with water and applying it around the connection points. The hose material can affect how easily leaks are detected; flexible hoses may trap air bubbles, making leaks more visible. Focus on the connection threading, ensuring the soap covers all threaded areas thoroughly. If there’s a leak, you’ll see bubbles forming at the exact spot. This method quickly reveals even small leaks that might not be audible or visible otherwise. Be sure to check all connection points, especially where fittings are tightened or threaded together. Using soap solution provides a simple, cost-effective way to confirm whether your connection is secure or needs adjustment. Additionally, detecting leaks early helps prevent water waste and potential damage, and understanding the proper connection techniques can further improve leak prevention. Being aware of how connection integrity impacts overall system performance is also crucial for effective maintenance.
Checking for Loose Connections

Before operating your equipment, it’s essential to verify all connections are tight and secure. Loose connections can compromise connection stability and cause leaks. Carefully inspect each fitting at the gun and hose connection points, ensuring they are properly tightened without over-tightening, which can damage fittings. Check for any signs of movement or looseness when gently tugging on hoses or fittings. Secure fittings maintain proper fitting security, preventing leaks and ensuring safe operation. If you notice any wobbling or if fittings feel loose, tighten them appropriately. Regularly checking for loose connections helps maintain system integrity and prevents potential equipment damage or safety hazards. Incorporating proper maintenance practices and regular inspections can also help prevent leaks and extend the lifespan of your equipment, especially by paying attention to connection integrity, which is vital for overall system safety. Additionally, understanding air quality can assist in identifying issues caused by leaks that might affect your equipment’s performance. Paying attention to system pressure can also help detect early signs of leaks or connection problems.
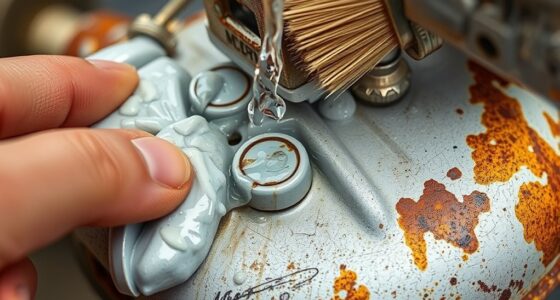
Examining the O-Rings and Seals
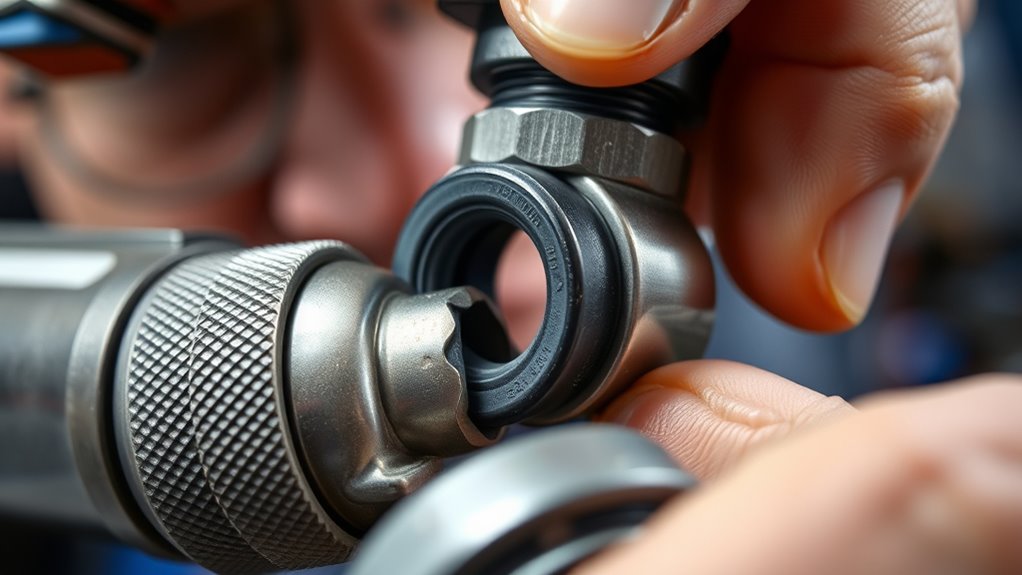
To effectively identify leaks, you should carefully examine the O-rings and seals at each connection point. Look for signs of wear, cracking, or deformation that compromise the seal. The O-ring material varies—rubber, silicone, or Viton—so choose one suitable for your pressure and fluid type. Proper seal lubrication is essential; apply a compatible lubricant to prevent drying or tearing during assembly. Visualize the connection with this table:
| O Ring Material | Seal Condition | Lubrication Needed |
|---|---|---|
| Rubber | Cracks or tears | Light oil or silicone |
| Silicone | Hardening | Silicone grease |
| Viton | Deformation | Appropriate lubricant |
Additionally, inspecting sealing surfaces for smoothness and cleanliness can help prevent leaks and ensure a secure fit. Ensuring the surfaces are free of debris and damage can be crucial in maintaining a leak-proof connection. Regularly inspecting connection points for signs of deterioration can help catch issues early. It is also helpful to understand that maintenance routines can extend the lifespan of connections and prevent costly repairs. Incorporating preventive maintenance into your routine can significantly improve connection longevity. Inspect carefully to guarantee a tight, leak-free connection.
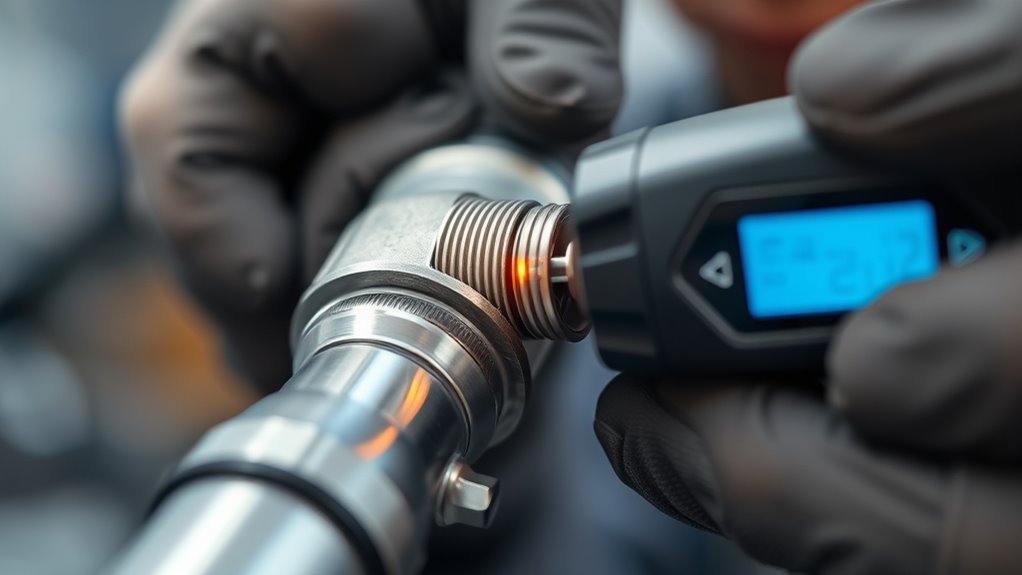
Testing With a Pressure Gauge
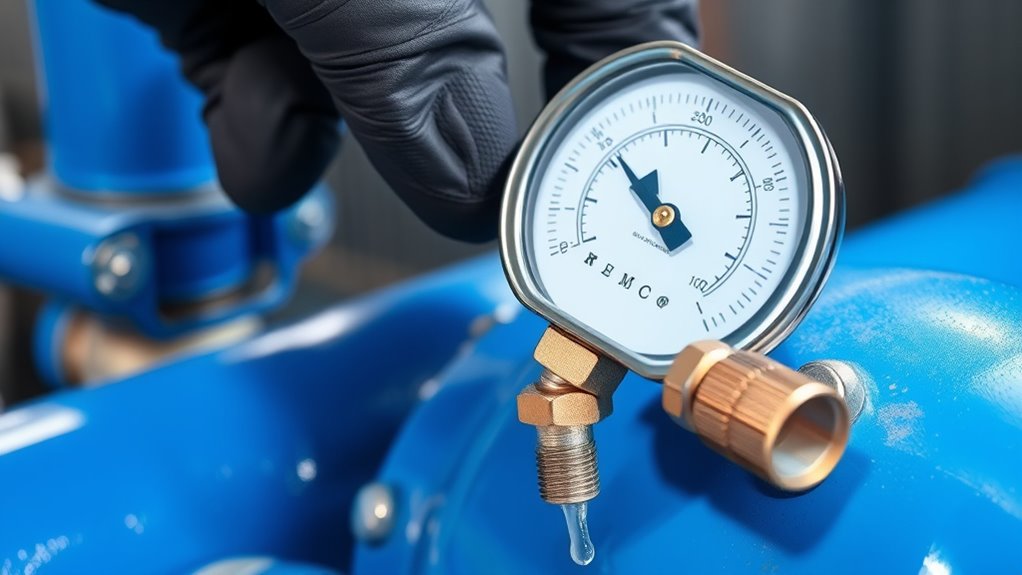
Attach the pressure gauge securely to the hose or gun connection. Turn on the system and watch for any drops in pressure. If the gauge shows a decrease, you likely have a leak that needs further investigation. Additionally, testing different connection points can help identify the exact location of the leak. Using a pressure gauge regularly can help maintain optimal system performance and detect issues early.
Attach the Pressure Gauge
Connecting the pressure gauge correctly is vital for accurate leak detection. First, ensure the gauge is properly calibrated; an uncalibrated gauge can give false readings. Next, check that the hose material is compatible with the gauge fitting to prevent damage or inaccurate pressure readings. Attach the gauge securely to the hose or fitting, making sure it’s tight but not over-tightened, which could strip threads or cause leaks. Confirm there are no obstructions or debris that could interfere with a proper seal. Once connected, double-check the connection for stability and leaks. Proper attachment guarantees reliable pressure readings, helping you accurately identify any leaks at the gun or hose connection. This step is essential before proceeding to observe for pressure drops.
Observe for Leaks
Once the pressure gauge is securely attached, you should observe the system for leaks by monitoring the pressure reading. Ensure the gauge is properly calibrated; an uncalibrated gauge can give inaccurate results, making it harder to identify leaks. Watch the pressure closely over a few minutes; a steady drop indicates a leak at the gun or hose connection. Be mindful of the hose material, as flexible or porous hoses may develop leaks that aren’t immediately obvious. If you notice fluctuating or decreasing pressure, tighten connections or inspect the hose for damage. Consistent pressure readings suggest a sealed system, but any decline points to a leak needing further investigation. Regularly checking the gauge calibration guarantees your readings remain accurate for reliable leak detection.
Isolating Sections of the Hose System
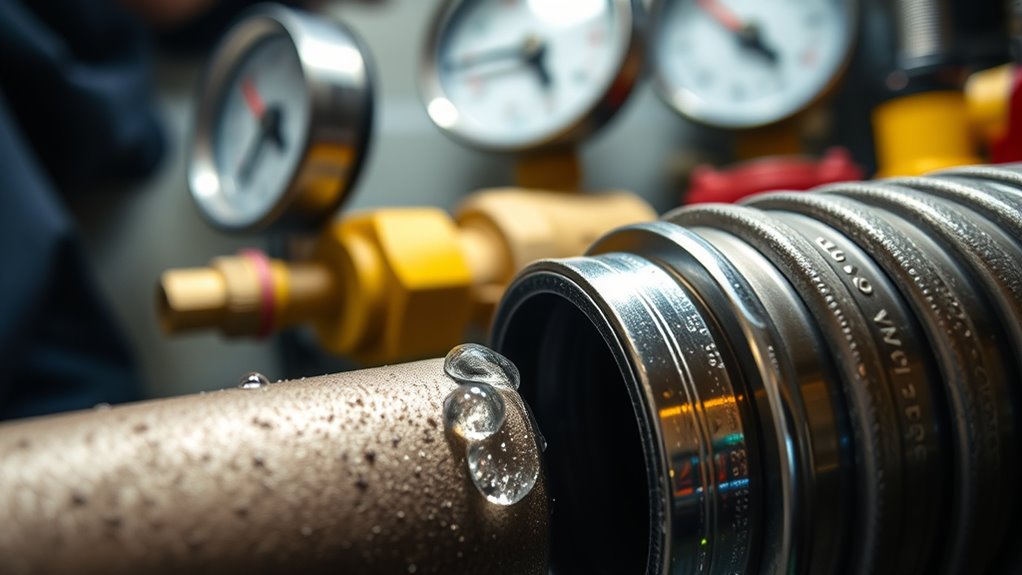
To find leaks, you need to isolate sections of the hose system effectively. Using segment isolation techniques, like closing shutoff valves, helps you pinpoint the problem area. This approach saves time and makes leak detection much more straightforward.
Segment Isolation Techniques
Segment isolation is a crucial step in pinpointing leaks within a hose system. By isolating specific sections, you can narrow down where the leak originates. Start by examining the hose material; different materials like rubber or polyurethane may influence how leaks form and how easily they can be detected. Pay attention to the gun design, as certain models have built-in features that help isolate sections more effectively. You can temporarily disconnect or block off parts of the hose to test each segment individually. This method allows you to identify whether the leak is before or after the connection point. Proper segmentation saves time and ensures you target the exact area needing repair, preventing unnecessary replacements or disassembly.
Shutoff Valve Usage
Shutoff valves are essential tools for isolating sections of a hose system during leak diagnosis. By closing a shutoff valve, you prevent fluid flow to specific areas, making it easier to identify the leak’s exact location. Using a shutoff valve effectively reduces the risk of leaks spreading or worsening during inspection, aiding in leak prevention. Before testing, ensure the valve is fully closed to block pressure and isolate the suspected section. This allows you to pressurize other parts of the system without risking additional leaks. Proper shutoff valve use saves time and effort, preventing unnecessary disassembly. Always verify that the valve is secure before proceeding with leak detection, and reopen it carefully once the problem is resolved.
Using a Leak Detection Dye

Using a leak detection dye is an effective way to pinpoint leaks at the gun or hose connection. You simply add the dye to the fluid system, allowing it to circulate through the hoses. If there’s a leak, the dye will escape at the source, making leaks detection straightforward. This method is especially helpful when visual inspection isn’t enough, as dye tracing reveals even small leaks quickly. To get accurate results, ensure the system is pressurized and the dye is compatible with your fluid. Once the system runs, carefully inspect connections, fittings, and joints for signs of colored dye. Using dye tracing simplifies leak detection, saves time, and helps you identify issues precisely, ensuring you can address leaks effectively before they cause further damage.
Replacing Worn or Damaged Components
When you notice persistent leaks or decreased performance, replacing worn or damaged components is often the most effective solution. Start by conducting a pressure test to identify the exact source of the leak. Once you’ve pinpointed the faulty part, remove and replace it with a new, compatible component. This may involve swapping out worn O-rings, cracked fittings, or damaged hoses. Ensure the replacement parts are properly fitted and tightened to prevent future leaks. After replacing the component, perform another pressure test to confirm the repair was successful. Regular component replacement not only stops leaks but also maintains system efficiency and safety. Keep spare parts on hand for quick repairs, and always follow manufacturer guidelines during the replacement process.
Preventative Maintenance Tips
Regularly inspecting your hoses and connections helps catch leaks early before they become bigger problems. Make sure you connect the gun or hose properly each time to prevent unnecessary stress on fittings. Consistent maintenance keeps your system running smoothly and reduces downtime.
Regular Inspection Routine
Conducting routine inspections of your gun or hose connections is vital to catch leaks early and prevent costly repairs. Regular checks help ensure connection stability, which is essential for safe and efficient operation. Pay close attention to areas where the hose material meets the fitting, as these are common leak points. Look for signs of wear, cracks, or deterioration in the hose material that could compromise the connection. Tighten fittings if you notice any looseness, but avoid over-tightening, which can damage the connection. Establish a consistent inspection schedule—weekly or after heavy use—to identify issues before they escalate. Staying proactive with your inspection routine preserves the integrity of your equipment and extends its lifespan, saving you time and money in the long run.
Proper Connection Techniques
Proper connection techniques are key to preventing leaks and maintaining the integrity of your equipment. Using the right hose material and connection types ensures a secure fit. When attaching hoses, always match the connection type to the hose and gun, such as threaded or quick-connect fittings. Tighten connections firmly but avoid over-tightening, which can damage threads or deform the hose. Regularly check for wear or damage on the hose material that might compromise the connection. Properly aligned connections prevent leaks and reduce stress on fittings. Here’s a quick guide:
| Connection Type | Suitable Hose Material |
|---|---|
| Threaded | Rubber, PVC, or reinforced hoses |
| Quick-connect | Vinyl or lightweight hoses |
| Cam-and-Groove | Heavy-duty rubber hoses |
| Flanged | Steel or reinforced hoses |
| Push-fit | Flexible, lightweight hoses |
Following these tips helps keep your connections leak-free.
Frequently Asked Questions
What Safety Precautions Should I Take During Leak Detection?
When detecting leaks, you should prioritize safety by wearing the right personal protective equipment, like gloves and goggles, to prevent injury. Guarantee proper ventilation and safety measures are in place to avoid inhaling fumes or hazardous vapors. Always follow safety guidelines and procedures, and keep an eye on your surroundings. Taking these precautions helps you stay safe, minimizes risks, and makes leak detection more effective.
How Do Temperature Changes Affect Leak Detection Accuracy?
Did you know that temperature changes can impact leak detection accuracy by up to 30%? When temperatures fluctuate, thermal expansion occurs, causing materials to expand or contract. This affects the consistency of your readings, making temperature stability essential. To get reliable results, you should perform leak detection in a controlled environment, minimizing temperature variations. Keeping conditions stable guarantees that thermal expansion doesn’t skew your ability to detect leaks accurately.
Can External Environmental Factors Cause False Leak Indicators?
External environmental factors can cause false alarm triggers when detecting leaks. Environmental interference, such as wind, dust, or temperature fluctuations, can disrupt sensing equipment and lead you to believe there’s a leak when there isn’t. These factors may trigger false positives, making it seem like there’s a leak even if the system is fine. To avoid this, you should minimize environmental interference and guarantee proper calibration of your detection tools.
What Tools Are Most Effective for Pinpointing Small Leaks?
When it comes to leak detection techniques, your goal is to find small leaks precisely. Tools for pinpointing include ultrasonic leak detectors, which can detect high-frequency sounds from tiny leaks, and spray leak detectors that use soap solutions to reveal bubbles at the leak site. You might also use visual inspection tools like dye penetrants. These tools help you identify even the smallest leaks quickly and accurately.
How Often Should Leak Inspections Be Performed for Optimal Safety?
They say “prevention is better than cure,” which applies perfectly here. You should perform regular leak inspections to guarantee safety and efficiency. Your leak detection schedule depends on usage, but generally, inspecting weekly or monthly is ideal. This consistent inspection frequency helps catch small leaks early, preventing bigger problems and ensuring your system stays safe and reliable. Don’t wait for a problem—stay proactive with your inspection routine.
Conclusion
Regularly inspecting your gun and hose connections can catch leaks early, saving you time and money. Did you know that leaks in compressed air systems can account for up to 30% of energy loss? By following these simple techniques, you can guarantee your system stays efficient and safe. Stay vigilant with routine checks, and you’ll prevent costly repairs while maintaining ideal performance. Don’t wait—early detection makes all the difference.