Connect with us

Airless Paint Sprayers FAQs

How Do You Rebuild A Inlet Valve On A Wagner 770 Airless Paint Sprayer

Published

on

An image capturing the step-by-step process of rebuilding an inlet valve on a Wagner 770 Airless Paint Sprayer

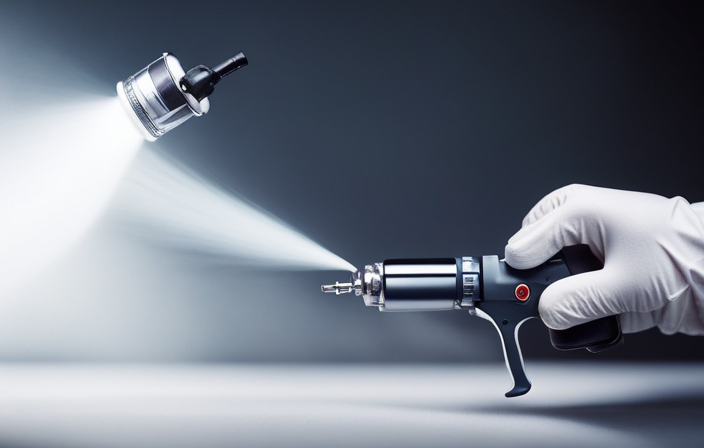
Standing in front of my trusty Wagner 770 airless paint sprayer, I noticed the worn-out inlet valve. This part was essential in guiding the flow of paint and was in desperate need of repair.

With determination in my eyes and tools in hand, I embarked on a mission to restore my sprayer to its former glory. In this article, I will guide you through the step-by-step process of rebuilding an inlet valve on a Wagner 770 airless paint sprayer.

From gathering the necessary tools to testing the sprayer for proper functioning, I’ll share my technical expertise and knowledge to help you successfully complete this repair.

So, if you’re ready to roll up your sleeves and bring your paint sprayer back to life, let’s dive in and get started on this rewarding journey of restoration.

Key Takeaways

  • Proper alignment and secure installation of the valve assembly is crucial for the functioning of the Wagner 770 airless paint sprayer.
  • Regular inspection of the valve assembly for debris or damage is necessary to maintain optimal condition and prevent clogging or malfunctioning.
  • Ensuring tight and secure connections, as well as checking for leaks or loose parts, is important for the proper functioning of the paint sprayer.
  • Priming the sprayer with water and flushing out debris before filling the container with paint helps to maintain the performance and longevity of the sprayer.

Gather the necessary tools and materials

Advertisement

You’ll need to gather all the tools and materials necessary to rebuild the inlet valve on your Wagner 770 airless paint sprayer, ensuring that you’re prepared to restore its functionality and unleash your creative potential once again.

Choosing the right paint for your project is crucial, as it’ll determine the final outcome of your work. Take into consideration factors such as the surface you’ll be painting and the desired finish.

Understanding the different types of paint sprayers is also essential. Airless paint sprayers, like the Wagner 770, offer efficient and precise coverage, making them ideal for larger projects.

Once you have gathered all the necessary tools and materials, it’s time to turn off and disconnect the sprayer, ensuring safety during the rebuilding process.

Turn off and disconnect the sprayer

First, make sure to switch off the power and detach the hose from the machine, severing the connection between the sprayer and its life force, creating a sense of detachment and isolation. This important step ensures your safety and prevents any accidental paint spray. Additionally, it allows you to work on the sprayer without any interference.

Advertisement

Once the sprayer is disconnected, you can proceed with proper storage and maintenance. Store the sprayer in a clean, dry place, away from extreme temperatures and direct sunlight. Regularly clean the sprayer to remove any paint residue and debris that may affect its performance. Lubricate the moving parts to ensure smooth operation.

With the sprayer turned off and disconnected, we can now move on to removing the inlet valve assembly, which is the next crucial step in rebuilding the sprayer.

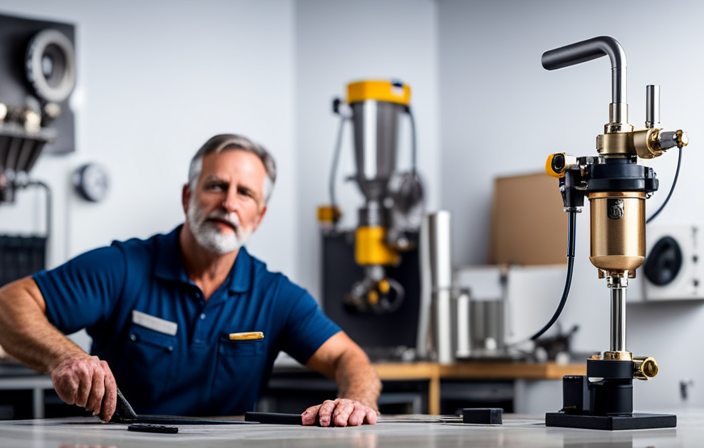
Remove the inlet valve assembly

Now, it’s time to take out the assembly that controls the flow of paint into the sprayer. The inlet valve assembly is a vital component of the Wagner 770 airless paint sprayer, and regular maintenance is crucial to ensure its proper functioning. Neglecting this maintenance can lead to issues such as clogging, reduced performance, and even damage to the sprayer.

Advertisement

One common issue with inlet valves is a stuck or blocked valve, which can cause a loss of pressure or uneven spray patterns. To troubleshoot this, you can try cleaning the valve with a solvent or replacing it if necessary. Another issue is a worn or damaged valve seat, which can result in leaks. In such cases, replacing the valve seat is recommended.

Next, we’ll disassemble the inlet valve, which will allow us to access and inspect its individual components.

Disassemble the inlet valve

To disassemble the inlet valve, start by removing the screws that hold the valve cover in place, revealing the inner components. It’s important to use the appropriate screwdriver to avoid damaging the screws.

Once the cover is off, carefully lift out the spring and valve assembly. Take note of the position and orientation of each component for easy reassembly later on.

Inspect the valve for any signs of wear or damage, such as cracks or debris buildup.

Advertisement

Reassembly tips include ensuring the valve is properly aligned and the spring is correctly seated.

Common inlet valve issues may include sticking or clogging, which can lead to poor spray patterns. To address these issues, the next step is to clean the inlet valve components.

Clean the inlet valve components

Once you’ve removed the valve cover and carefully lifted out the spring and valve assembly, it’s crucial that you thoroughly clean all the components to ensure optimal performance. To properly maintain the inlet valve and troubleshoot any issues, here are five key steps to follow:

Advertisement
  • Use a mild detergent and warm water to clean the valve cover, spring, and valve assembly.
  • Gently scrub the components with a soft brush to remove any paint residue or debris.
  • Rinse the parts thoroughly to remove any remaining detergent.

Inspect the components for any signs of damage, such as cracks or wear. Dry all parts completely before reassembling the inlet valve.

By following these steps, you can effectively clean the inlet valve components and ensure they’re in good working condition.

Now, let’s move on to inspecting for any damage or wear in the next section.

Inspect for any damage or wear

After thoroughly cleaning the components, it’s time to carefully inspect for any damage or wear.

To ensure optimal performance of the Wagner 770 airless paint sprayer, it is crucial to conduct a thorough inspection. Begin by visually examining the inlet valve for any signs of cracks, chips, or other visible damage. Pay close attention to the valve seat and the valve itself.

Additionally, inspect the valve spring for any signs of wear or deformation. To further assess the condition of the inlet valve, perform a functional test by operating the sprayer and observing the valve’s response. If there are any irregularities such as leaks or inconsistent pressure, it may indicate a problem with the inlet valve.

Advertisement

Troubleshooting tips include checking for clogs or blockages in the valve assembly.

Once the inspection is complete, we can move on to the next step of replacing any damaged or worn parts.

Replace any damaged or worn parts

Inspect the components for any signs of damage or wear, and if you find any, replace them to ensure optimal performance. When replacing worn parts on the inlet valve of a Wagner 770 airless paint sprayer, it’s important to troubleshoot common issues that may arise.

Firstly, check the gasket for any tears or cracks, as a damaged gasket can cause leaks and decrease the spray pattern.

Secondly, examine the valve seat for any signs of wear, such as pitting or erosion, which can affect the seal and lead to inconsistent spray.

Advertisement

By replacing these worn parts, you can improve the overall efficiency and functionality of the inlet valve.

Once all necessary components have been replaced, you can proceed to the next step of reassembling the inlet valve.

Reassemble the inlet valve

Now that you’ve replaced any damaged or worn parts, it’s time to put the inlet valve back together. Reassembling the inlet valve requires careful attention to detail to ensure proper functioning of the Wagner 770 airless paint sprayer. Here are some reassembling techniques and troubleshooting tips to guide you through the process.

First, refer to the manufacturer’s manual for specific instructions on reassembling the inlet valve. Make sure to clean all parts thoroughly before starting. Begin by placing the valve seat onto the valve body, ensuring a snug fit. Then, insert the ball into the valve body, followed by the spring. Apply a small amount of lubricant to the threads of the valve body before screwing it back into the sprayer.

By following these reassembling techniques and troubleshooting tips, you can ensure that the inlet valve is correctly put back together. Once the inlet valve assembly is complete, you can proceed to install it back into the sprayer.

Advertisement

Install the inlet valve assembly back into the sprayer

To successfully complete the reassembly process, it’s time for you to confidently reinstall the inlet valve assembly into your powerful painting machine. Here are three important steps to follow when reinstalling the inlet valve:

  • Carefully align the inlet valve assembly with the corresponding slots in the sprayer body.
  • Gently press the assembly into place, making sure it’s securely seated.
  • Tighten the retaining nut using a wrench or pliers, ensuring it’s snug but not overly tightened.

By following these steps, you can ensure that the inlet valve is properly installed and ready for use. Troubleshooting common issues during this process may include checking for any debris or damage on the valve assembly, as well as ensuring that all connections are tight and secure.

Once the inlet valve assembly is reinstalled, it’s time to test the sprayer to ensure proper functioning.

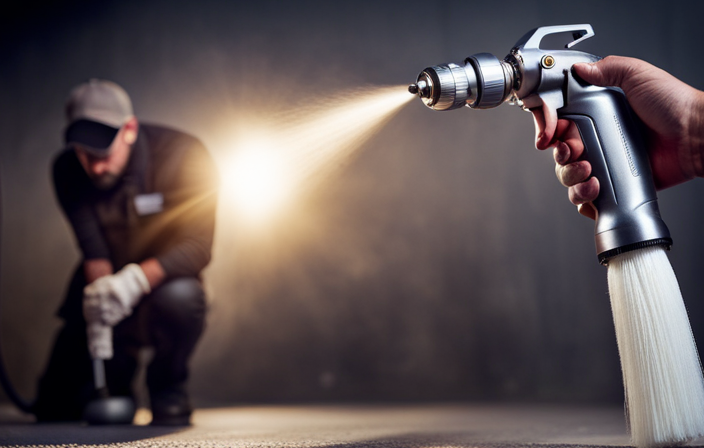
Test the sprayer to ensure proper functioning

Once the inlet valve assembly is securely in place, it’s time to put your sprayer to the test and see if it’s ready to unleash its powerful painting abilities.

To ensure proper functioning, there are a few sprayer troubleshooting and maintenance tips you should follow. First, check all the connections and fittings for any leaks or loose parts. Tighten or replace as necessary.

Next, prime the sprayer by filling the paint container with water and running the sprayer for a few minutes to flush out any debris. Once the water runs clear, drain it and fill the container with the desired paint.

Advertisement

Finally, test the sprayer on a scrap piece of material to check for consistent spray patterns and smooth operation. Make any necessary adjustments before starting your paint job.

By following these steps, you can ensure that your Wagner 770 airless paint sprayer is in optimal condition for your painting needs.

Frequently Asked Questions

What are the necessary tools and materials needed to rebuild an inlet valve on a Wagner 770 airless paint sprayer?

To rebuild the inlet valve on a Wagner 770 airless paint sprayer, the necessary tools include a screwdriver, pliers, and a small brush. Required materials consist of replacement inlet valve parts, such as seals and springs.

How do you turn off and disconnect the sprayer before starting the inlet valve rebuild process?

To turn off and disconnect the sprayer, first, locate the power switch and turn it off. Then, unplug the power cord from the outlet. Finally, detach any hoses or connections from the sprayer to ensure a safe and isolated workspace.

Are there any specific instructions or precautions for removing the inlet valve assembly from the sprayer?

When removing the inlet valve assembly from the sprayer, it is important to follow specific instructions. Start by disconnecting the sprayer from the power source and removing any paint or debris. Then, carefully unscrew and remove the inlet valve assembly. Clean the inlet valve components thoroughly before proceeding with the rebuild process.

Advertisement

How do you clean the inlet valve components once they have been removed?

To clean the inlet valve components, it’s crucial to use proper cleaning techniques and follow best practices. This ensures thorough removal of any dirt or debris, maintaining the valve’s functionality.

What should I look for when inspecting the inlet valve components for damage or wear?

When inspecting the inlet valve components for damage or wear, I carefully examine the valve seat for cracks or chips. I also check the valve stem for any signs of bending or corrosion.

Conclusion

In conclusion, rebuilding the inlet valve on a Wagner 770 airless paint sprayer is a detailed and technical process that requires the right tools and materials. By following the steps outlined in this article, you can successfully disassemble, clean, and replace any damaged parts of the inlet valve.

Remember to reassemble the valve correctly and test the sprayer to ensure proper functioning. Just like a well-oiled machine, a properly rebuilt inlet valve will keep your paint sprayer running smoothly and efficiently, allowing you to achieve professional-looking results.

Advertisement

Whether it’s a step-by-step tutorial on achieving flawless finishes or an in-depth analysis of the latest airless paint sprayer models, Joe’s ability to articulate complex ideas in a simple and engaging manner resonates with our diverse audience. His practical tips and techniques empower readers to tackle their projects with confidence.

Continue Reading
Advertisement

Airless Paint Sprayers FAQs

How To Clean A Dirty Airless Paint Sprayer

Published

on

By

An image that visually depicts the step-by-step process of cleaning a grimy airless paint sprayer

Just finished a big painting project and now you have a dirty airless paint sprayer? Don’t worry, I’m here to assist.

In this article, I will show you how to clean a dirty airless paint sprayer with ease.

Cleaning an airless paint sprayer might seem like a daunting task, but with the right tools and techniques, it can be a breeze. By following a few simple steps, you can ensure that your sprayer stays in top condition, ready for future use.

First, gather all the necessary cleaning supplies.

Then, disconnect the sprayer from the power source and release any remaining pressure.

Advertisement

Remove the spray tip and filter, and flush the sprayer with water or a cleaning solution.

Use a brush or toothpick to remove any stubborn paint residue.

Rinse the sprayer thoroughly, dry it, and reassemble it.

Finally, store it in a clean and dry area.

So let’s get started and get that dirty airless paint sprayer looking brand new again.

Advertisement

Key Takeaways

  • Pay attention to hard-to-reach areas to prevent moisture buildup
  • Thoroughly dry and reassemble the sprayer to prevent damage or malfunction
  • Carefully reassemble the sprayer after drying, ensuring snug fit of all parts
  • Regularly clean filters and nozzles to prevent clogging

Gather the necessary cleaning supplies

Now, you’re gonna wanna gather all the necessary cleaning supplies to get that airless paint sprayer sparkling clean. Cleaning techniques are important, but before you can even begin, you need to make sure you have the right tools.

Start by grabbing a bucket or container that can hold the cleaning solution. You’ll also need a clean cloth or sponge for wiping down the sprayer. Don’t forget to grab some gloves to protect your hands from the cleaning solution.

As for choosing the right cleaning solution, you want to make sure it’s compatible with the paint you were using. Look for a mild detergent or a specific cleaning solution made for airless paint sprayers.

Once you have everything you need, you can move on to the next step of disconnecting the sprayer from the power source.

Advertisement

Disconnect the sprayer from the power source

First, make sure you’ve unplugged the machine from the power source. This is an essential step in ensuring your safety while cleaning the airless paint sprayer. Cleaning precautions should always be taken to avoid any accidents or injuries.

Once the sprayer is disconnected, you can proceed with the cleaning process. It’s important to follow the manufacturer’s maintenance tips to ensure the longevity of your sprayer. Regular cleaning and maintenance will also guarantee optimal performance.

Now that the sprayer is safely disconnected, the next step is to release any remaining pressure in the sprayer. This will prevent any unexpected spray or splatter when disassembling and cleaning the different parts of the sprayer.

Release any remaining pressure in the sprayer

Advertisement

Before you proceed, make sure all pressure has been released from the sprayer to prevent any unexpected spray or splatter. To safely release pressure in an airless paint sprayer, follow these precautions:

  • Wear protective gloves and goggles to shield yourself from any accidental paint spray.
  • Position the sprayer outlet away from yourself and others to avoid any potential harm.
  • Slowly turn the pressure relief valve counterclockwise to release the pressure gradually.
  • Allow any remaining paint or fluid to drain from the sprayer before proceeding.

Double-check that the pressure gauge reads zero before continuing.

Taking these precautions will help prevent any accidents or mishaps while releasing pressure in an airless paint sprayer.

Once all the pressure has been safely released, you can move on to the next step of removing the spray tip and filter.

Remove the spray tip and filter

To safely continue, it’s time to take off the spray tip and filter. This step is crucial in the cleaning process of your airless paint sprayer.

Start by unscrewing the spray tip counterclockwise using a wrench or pliers. Be careful not to damage the tip or the threads.

Advertisement

Once the spray tip is removed, you’ll find the filter located inside the gun handle. Gently pull out the filter and inspect it for any clogs or debris. If necessary, clean the filter using water or a cleaning solution. Cleaning techniques may vary depending on the type of filter, so refer to the manufacturer’s instructions for specific maintenance tips.

With the spray tip and filter removed, we can now move on to flushing the sprayer with water or a cleaning solution.

Flush the sprayer with water or cleaning solution

Once you’ve removed the spray tip and filter, it’s time to give your sprayer a refreshing cleanse by flushing it with water or a cleaning solution. It’s just like giving your car a much-needed wash to remove all the dust and grime. Cleaning a paint sprayer can be done using either water or a cleaning solution. Using water is a more cost-effective option, as it’s readily available and easy to use. However, a cleaning solution specifically designed for paint sprayers can provide a more thorough and effective clean, removing any stubborn residue or paint buildup. The choice between water and cleaning solution ultimately depends on the level of dirt and paint on your sprayer.

Advertisement

After flushing the sprayer, it’s important to clean the filter and spray tip separately to ensure optimal performance.

Clean the filter and spray tip separately

Now, let me show you how you can give your filter and spray tip the attention they deserve to ensure flawless performance.

Cleaning the filter and spray tip is crucial for maintaining the efficiency of your airless paint sprayer. Start by removing the filter and rinsing it with water to remove any loose paint particles. For stubborn residue, you can use a cleaning solution specifically designed for airless paint sprayers. Scrub the filter gently with a brush to remove any clogs or build-up.

Next, move on to the spray tip. Unscrew it from the sprayer and soak it in a cleaning solution for a few minutes. Use a small brush to remove any paint residue that might be blocking the openings.

Rinse both the filter and spray tip thoroughly with water before reassembling them back onto the sprayer.

Advertisement

Now, let’s move on to the next section about using a brush or toothpick to remove any stubborn paint residue.

Use a brush or toothpick to remove any stubborn paint residue

Take a brush or toothpick and give those stubborn paint residues a good scrub to ensure a flawless finish. Using alternative cleaning methods can help remove any paint buildup on the sprayer.

Here are two effective techniques to try:

  1. Dampen a brush with warm water and gently scrub the spray tip. Be sure to remove any paint that may be clogging the small openings. This will help maintain a consistent spray pattern and prevent blockages during future use.

  2. Use a toothpick to carefully scrape off any dried paint from the filter. Be gentle to avoid damaging the filter mesh. Removing paint residue from the filter will improve the sprayer’s performance and extend its lifespan.

After successfully cleaning the filter and spray tip separately, it’s time to move on to the next step: rinsing the sprayer thoroughly. This will ensure all remaining paint particles are removed and the sprayer is ready for its next use.

Rinse the sprayer thoroughly

Make sure you thoroughly flush out the sprayer with water to remove any remaining particles. This step is crucial for deep cleaning your airless paint sprayer and maintaining its optimal performance.

Advertisement

Start by detaching the spray tip and guard, as well as the filter, if applicable. Then, using a hose or faucet, run water through the sprayer for several minutes. Make sure to rotate and move the sprayer in different positions to ensure all areas are thoroughly rinsed. Pay close attention to the hose, as paint residue can often accumulate there.

Once you’re confident that the sprayer is clean, you can move on to the next step of drying and reassembling the sprayer, which we’ll discuss in the following section.

Dry and reassemble the sprayer

After thoroughly rinsing the sprayer, it’s essential to ensure it’s completely dry and reassembled before moving on to the next step of the cleaning process. Start by using a clean cloth or towel to dry all the components, including the nozzle, hose, and gun.

Pay attention to any hard-to-reach areas to prevent moisture buildup. Once dry, carefully reassemble the sprayer, making sure all parts fit snugly and securely. This is also a good time to inspect the sprayer for any worn-out parts that may need replacing. Troubleshoot common issues such as leaks or clogs before proceeding.

By taking the time to thoroughly dry and reassemble the sprayer, you can prevent any potential damage or malfunction.

Advertisement

Now, let’s move on to the next step and store the sprayer in a clean and dry area for future use.

Store the sprayer in a clean and dry area for future use

Once you’ve ensured everything is dry and reassembled, find a nice, cozy spot to store your trusty sprayer for future projects. Storing your airless paint sprayer properly is essential to maintain its longevity and performance. Here are some important storing precautions and maintenance tips to keep in mind:

Storing Precautions Maintenance Tips
Store in a clean and dry area away from direct sunlight or extreme temperatures. Regularly clean the sprayer’s filters and nozzles to prevent clogging.
Protect the sprayer from dust and debris by covering it with a clean cloth or plastic bag. Lubricate the sprayer’s moving parts with a suitable lubricant to prevent rusting.
Keep the sprayer upright to prevent any leaking or damage to the internal components. Check the sprayer’s hoses and connections for any signs of wear or damage. Replace if necessary.
Avoid storing the sprayer near any flammable materials to reduce the risk of fire hazards. Always follow the manufacturer’s instructions for proper maintenance and storage.

By following these storing precautions and maintenance tips, you can ensure that your airless paint sprayer will be in optimal condition for your future painting projects.

Frequently Asked Questions

Can I use any type of cleaning solution to flush the sprayer?

Sure, any cleaning solution can be used to flush the sprayer, but it’s essential to choose the right one. While vinegar and water work well for water-based paints, mineral spirits are perfect for oil-based paints.

How often should I clean the filter and spray tip?

I recommend cleaning the filter and spray tip of your airless paint sprayer regularly to ensure optimal performance. It is important to clean them after every use to prevent clogs and maintain a consistent spray pattern.

Advertisement

Can I use a regular brush or toothpick to remove paint residue or is there a specific type of tool I should use?

To effectively remove paint residue from an airless paint sprayer, it’s important to use the right tools. While a regular brush or toothpick might work for small areas, it’s recommended to use specialized cleaning tools for better results and to prevent damage to the sprayer.

Is it necessary to dry the sprayer completely before reassembling it?

Yes, it is necessary to completely dry the sprayer before reassembling it. This ensures that there is no moisture left inside the sprayer, which can lead to clogs or damage during the reassembly process.

How often should I clean and store the sprayer if I use it frequently?

If I use the airless paint sprayer frequently, I should clean it after every use. Proper cleaning frequency ensures optimal performance. Additionally, storing the sprayer in a clean and dry place helps maintain its functionality.

Conclusion

In conclusion, cleaning a dirty airless paint sprayer is a meticulous task that requires the right tools and techniques. By following the steps outlined above, you can ensure that your sprayer is thoroughly cleaned and ready for future use.

Remember, a clean sprayer is a happy sprayer, so don’t neglect this important maintenance task. As the saying goes, "A stitch in time saves nine," taking the time to clean your sprayer now will prevent bigger issues down the road.

Advertisement

So go ahead and give your sprayer the TLC it deserves.

Continue Reading

Airless Paint Sprayers FAQs

How To Clean An Airless Paint Sprayer With Water

Published

on

By

An image of a hand holding a disassembled airless paint sprayer under a running faucet, with water flowing through the nozzle, cleansing the paint residue

Are you interested in learning the most effective method for cleaning your airless paint sprayer using only water? Look no further! This guide will provide you with a thorough, step-by-step process for cleaning your airless paint sprayer with water, ensuring that it is in top condition and ready for your next painting project.

Cleaning your airless paint sprayer is crucial to maintain its performance and prolong its lifespan. By following these instructions, you can avoid clogs, reduce paint buildup, and prevent any potential damage to your equipment.

From gathering the necessary materials to properly storing the sprayer, each step is explained in a technical and precise manner. By the end of this article, you will have a clear understanding of how to clean your airless paint sprayer, leaving it in optimal condition for your future painting endeavors.

So, let’s get started and make sure your airless paint sprayer stays in top shape!

Key Takeaways

  • Fill sprayer with water before cleaning
  • Flush sprayer with water to remove paint or debris
  • Run water and pump preservative mixture through sprayer to protect components
  • Thoroughly clean and store sprayer after use

Gather Your Materials

Advertisement

Now it’s time to gather all the materials you’ll need to clean your airless paint sprayer with just water! Before we get started, let’s talk about some cleaning solution alternatives.

If you don’t have a specific airless paint sprayer cleaner, you can use warm soapy water or a mixture of vinegar and water. These options work well in removing any leftover paint or debris from the sprayer.

Additionally, it’s essential to have some maintenance tips in mind. Make sure to wear protective gloves and goggles to avoid any accidents. You’ll also need a clean bucket or container, a soft brush or cloth, and a wrench for removing any nozzle or tip.

With all these materials in hand, let’s move on to preparing the sprayer for cleaning, ensuring it’s ready for the next painting project.

Prepare the Sprayer for Cleaning

Before you begin preparing the sprayer for maintenance, it’s important to know that 90% of paint sprayer failures are caused by improper cleaning techniques. To avoid any mishaps, there are certain precautions to take while cleaning an airless paint sprayer.

Advertisement

Firstly, make sure to wear protective gloves and goggles to prevent any contact with the cleaning solution or paint residues. Disconnect the sprayer from the power source and relieve any pressure in the system by triggering the gun into a waste container.

Next, remove the spray tip, guard, and filter, and soak them in a cleaning solution. Avoid using harsh chemicals or solvents as they can damage the sprayer components. Additionally, it’s crucial to avoid common mistakes such as neglecting to clean the intake tube or leaving any paint residues in the system.

Once the sprayer is properly prepared, it’s time to move on to the next section and flush the system with water to complete the cleaning process.

Flush the System with Water

Advertisement

Make sure you’re fully prepared to maintain your sprayer by thoroughly flushing the system with water, ensuring optimal performance and longevity. The importance of using clean water for flushing the airless paint sprayer can’t be overstated. It helps remove any leftover paint residue or debris, preventing clogs and blockages in the system. To avoid common mistakes during the water flushing process, always use fresh, clean water without any additives or chemicals.

Avoid using dirty or contaminated water, as it can cause damage to the sprayer. Additionally, be careful not to apply too much pressure when flushing the system, as it may lead to leaks or other issues.

Once the system is flushed, you can proceed to the next section to clean the spray gun and nozzles, ensuring a thorough cleaning process.

Clean the Spray Gun and Nozzles

To achieve optimal performance and longevity, it’s essential to give the spray gun and nozzles a thorough scrubbing, like giving your car a sparkling wash and wax.

Start by disassembling the spray gun and removing any remaining paint or debris. Use a cleaning solution alternative, such as warm soapy water or a mixture of water and vinegar, to soak the parts for a few minutes. Then, scrub the inside and outside of the gun with a soft brush, making sure to clean the trigger, needle, and air cap.

Advertisement

Rinse everything with clean water and dry with a lint-free cloth.

Next, check for common spray gun issues like clogs or uneven spray patterns. Troubleshoot these problems by adjusting the nozzle or cleaning the air passages.

Finally, transition into the next section about removing and cleaning the filters for a complete maintenance process.

Remove and Clean the Filters

Advertisement

Once you’ve given your spray gun a good scrub, it’s time to tackle the next step: getting those filters removed and cleaned. Properly maintaining and cleaning the filters is essential for the optimal performance of your airless paint sprayer. By regularly cleaning the filters, you can prevent clogs and ensure a smooth paint application.

To clean the filters, follow these simple steps:

  1. Start by turning off the sprayer and relieving any pressure.
  2. Locate the filters, which are usually located near the pump or at the end of the spray gun.
  3. Carefully remove the filters using a wrench or pliers, making sure not to damage them.
  4. Rinse the filters thoroughly with clean water to remove any paint residue or debris.
  5. Once the filters are clean, reassemble them back into the sprayer.

By following these cleaning techniques and maintenance tips, you can keep your airless paint sprayer in top condition. Now, let’s move on to the next section and discuss how to scrub the paint reservoir.

Scrub the Paint Reservoir

After properly maintaining and cleaning the filters, it’s time to delicately cleanse the container that holds the paint. The paint reservoir is a crucial component of an airless paint sprayer, and regular maintenance is essential to prevent paint buildup and ensure optimal performance.

To scrub the paint reservoir, start by emptying any remaining paint and wiping it clean with a damp cloth. Next, fill the reservoir with warm water and a mild detergent solution. Use a soft-bristle brush to scrub the inside of the reservoir, paying special attention to any areas with dried paint. Rinse the reservoir thoroughly with clean water to remove any residue. This step is important to ensure that the paint sprayer operates at its best.

Now that the paint reservoir is clean, it’s time to move on to the next section about rinsing and drying all components.

Advertisement

Rinse and Dry all Components

After scrubbing the paint reservoir, it’s crucial to thoroughly rinse and dry all components of the airless paint sprayer. This step ensures that no paint residue or cleaning solution is left behind, which could potentially clog the sprayer or affect the quality of future paint jobs.

To rinse the components, I recommend using clean water and a soft brush or cloth to remove any remaining debris. Pay special attention to the nooks and crannies of the sprayer, as paint can often accumulate in these hard-to-reach areas.

After rinsing, be sure to dry all components completely before reassembling the sprayer. Proper drying techniques, such as air drying or using a clean cloth, are essential to prevent any moisture from causing rust or damage to the sprayer.

Once all components are thoroughly rinsed and dried, we can proceed to the next step of reassembling the sprayer and preparing it for future use.

Reassemble the Sprayer

Now that all the components have been thoroughly rinsed and dried, it’s time to put the sprayer back together and get it ready for future use.

Advertisement

Reassembling the sprayer is a crucial step in ensuring its proper functioning. Start by carefully aligning the spray gun with the hose and securely attaching them together. Make sure all the fittings are tightened to prevent any leaks.

Next, reattach the intake valve and the pressure control knob, ensuring they’re properly aligned and securely fastened. Double-check all the connections and fittings to ensure they’re tight and secure.

If you encounter any issues during reassembly, refer to the user manual for troubleshooting tips.

Once the sprayer is reassembled, you can proceed to the next step of testing the sprayer’s performance and functionality.

Test the Sprayer

To ensure proper functionality, how can the sprayer be tested? Testing the sprayer is an important step to identify any potential issues and ensure that it is working at the desired pressure. To do this, follow these steps:

Advertisement
  1. Connect the sprayer to a power source and turn it on.
  2. Adjust the pressure settings according to the manufacturer’s instructions.
  3. Fill the sprayer with water and attach the spray gun.
  4. Hold the spray gun at a safe distance from a test surface and pull the trigger.
  5. Observe the spray pattern and check for any irregularities in pressure or clogging.

By testing the sprayer, you can troubleshoot any issues such as low pressure or uneven spray patterns. This will help you make any necessary adjustments or repairs before proceeding to properly store the sprayer.

Properly Store the Sprayer

Make sure you store the sprayer correctly to maintain its functionality and prevent any damage. Proper maintenance is essential for keeping your airless paint sprayer in good working condition.

After using the sprayer, clean it thoroughly as mentioned in the previous subtopic. Once the sprayer is clean, you need to store it properly. Start by disconnecting the sprayer from the power source and relieving any pressure in the system. Remove the spray tip and filter, and clean them separately. Store them in a clean, dry place to prevent clogs.

Next, flush the sprayer with water to remove any remaining paint or debris. After flushing, run a mixture of water and a pump preservative through the sprayer to protect its internal components.

Finally, cover the sprayer with a clean cloth or a plastic bag to keep it dust-free. By following these steps, you can ensure the longevity of your airless paint sprayer.

Frequently Asked Questions

How often should I clean my airless paint sprayer with water?

I should clean my airless paint sprayer with water after each use to ensure proper functioning and prevent clogs. This is essential for maintaining the sprayer’s performance and prolonging its lifespan.

Advertisement

Can I use any type of water to clean my airless paint sprayer?

I can use tap water or distilled water to clean my airless paint sprayer. Using improper water, such as saltwater or dirty water, can lead to clogs and damage the sprayer’s components.

Is it necessary to remove the filters for cleaning or can I clean them in place?

It is necessary to remove the filters for cleaning. Regularly replacing filters is recommended to maintain optimal performance. Water is the recommended cleaning agent for an airless paint sprayer.

What should I do if the spray gun or nozzles are clogged after cleaning?

If the spray gun or nozzles are clogged after cleaning, I recommend troubleshooting the issue by checking for any debris or residues in the nozzle or gun. Clear any obstructions and ensure proper spray gun maintenance to prevent further clogging.

How can I ensure that all components are completely dry before reassembling the sprayer?

To ensure all components are completely dry before reassembling the sprayer, use drying methods such as air-drying or using a clean cloth to remove any moisture. Additionally, follow reassembly tips provided by the manufacturer for optimal results.

Conclusion

In conclusion, cleaning an airless paint sprayer with water is a crucial step to maintaining its efficiency and longevity. By following the step-by-step process outlined in this article, you can ensure that your sprayer continues to deliver flawless results with every use.

Advertisement

Remember, regular cleaning not only extends the life of your equipment but also prevents clogs and blockages that can hinder its performance. So, don’t neglect this important maintenance task and keep your sprayer in top-notch condition. Happy painting!

Continue Reading

Airless Paint Sprayers FAQs

How To Clean Dried Paint From Airless Sprayer

Published

on

By

An image showcasing a person wearing protective gloves, using a paint scraper to delicately remove dried paint residue from the nozzle of an airless sprayer

It is commonly believed that keeping your airless sprayer properly maintained leads to a happy airless sprayer, a sentiment that I completely agree with. If you have ever experienced the frustration of dried paint clogging your sprayer, you understand the importance of keeping it in top condition. Luckily, I have some valuable tips on how to remove dried paint from your airless sprayer, and I am excited to share this information with you.

In this article, we’ll walk through the step-by-step process of restoring your sprayer to its former glory. We’ll start by gathering the necessary supplies and disconnecting the sprayer from the power source.

Then, we’ll tackle the task of removing any remaining paint, soaking the spray gun and nozzle in a cleaning solution, and scrubbing away the dried paint. We’ll also cover how to clean the filters and screens, reassemble the sprayer, and test for proper functionality.

Finally, we’ll discuss the importance of regular maintenance and provide tips for preventing future paint buildup.

So, grab your cleaning gloves and let’s get started on giving your airless sprayer the cleaning it deserves.

Advertisement

Key Takeaways

  • Thoroughly clean the airless sprayer before storing it.
  • Disassemble all components and ensure they are completely dry before storing.
  • Use protective covers to shield the sprayer from dust and debris during storage.
  • Store the airless sprayer in a controlled environment that is clean and free from moisture.

Gather the necessary supplies

First, gather all the supplies you’ll need to clean the dried paint from your airless sprayer. Start by getting cleaning solutions that are specifically designed to remove dried paint. Look for products that are safe to use on the materials of your sprayer and follow the instructions on the label.

Additionally, make sure to have proper disposal methods in place for any paint residue or cleaning solutions. This may include using a paint disposal bag or taking the waste to a local recycling center.

Once you have all the necessary supplies, you can move on to the next step of disconnecting the sprayer from the power source.

Disconnect the sprayer from the power source

Once you’ve unplugged it, you can safely move on to the next step in disconnecting your trusty painting tool from its power source.

Advertisement

Disconnecting safety measures are crucial to avoid any accidents or electrical mishaps. Make sure to switch off any switches or buttons on the sprayer itself before proceeding. Additionally, ensure that the power cord is completely detached from the outlet. This will prevent any power surges or accidental starts while you’re working on cleaning the sprayer.

Now that you’ve disconnected the sprayer from the power source, you can focus on removing any remaining paint from the sprayer.

Remove any remaining paint from the sprayer

To effectively prepare your sprayer for storage, it’s essential to ensure that all traces of paint have been thoroughly eliminated. Cleaning techniques for removing dried paint from an airless sprayer can vary, but there are a few common methods that can be effective. One option is to use a cleaning solution specifically designed for paint removal. These solutions are typically available at hardware stores and can help break down the dried paint. Alternatively, you can try using household items like vinegar or rubbing alcohol as alternative cleaning solutions. These can be effective at loosening the paint and making it easier to remove. Once all the paint has been cleaned off, it’s important to soak the spray gun and nozzle in a cleaning solution to ensure thorough cleaning. This will be discussed in the subsequent section about ‘soak the spray gun and nozzle in a cleaning solution.’

Advertisement

Soak the spray gun and nozzle in a cleaning solution

Now, it’s time to give your spray gun and nozzle a refreshing dip in a cleansing solution, like a rejuvenating soak for tired muscles after a long day. Cleaning techniques are crucial to ensure the longevity of your airless sprayer.

Here are four alternative cleaning solutions that can effectively remove dried paint:

  1. Vinegar solution: Mix equal parts of vinegar and warm water to create a natural and affordable cleaning solution.

  2. Paint thinner: Use a paint thinner specifically formulated for cleaning airless sprayers. Follow the manufacturer’s instructions for proper usage.

  3. Commercial cleaning solutions: There are various commercial cleaning solutions available in the market that are specifically designed to clean dried paint from airless sprayers.

  4. Hot soapy water: Soak the spray gun and nozzle in hot soapy water to loosen the dried paint before scrubbing.

After giving your spray gun and nozzle a good soak, it’s time to move on to the next step: using a brush or cloth to scrub away the dried paint.

Use a brush or cloth to scrub away the dried paint

Advertisement

Grab a sturdy brush or cloth and vigorously scrub away the stubborn remnants of color that cling to your trusty tool. Using solvents for removing dried paint is an effective method to tackle tough stains. Apply a suitable solvent, such as paint thinner or mineral spirits, to the brush or cloth and work it into the dried paint. Be sure to wear protective gloves and work in a well-ventilated area. The solvents will help break down the paint and make it easier to remove. As you scrub, focus on areas where paint buildup is most prominent, such as the nozzle and spray gun. By regularly cleaning your airless sprayer and preventing paint buildup, you can ensure optimal performance and extend the lifespan of your equipment. Once you’ve thoroughly scrubbed away the dried paint, it’s time to move on to the next step: rinsing the spray gun and nozzle with clean water.

Rinse the spray gun and nozzle with clean water

After vigorously scrubbing away the stubborn remnants of color, it’s time to give the spray gun and nozzle a good rinse with clear water. This step is crucial to ensure that all traces of dried paint are completely removed from the airless sprayer.

Using a pressure washer can provide a more thorough cleaning, as it effectively blasts away any remaining paint particles that may be stuck in the nozzle or gun. Additionally, using a cleaning solution specifically designed for paint removal can offer great benefits. These solutions are formulated to break down and dissolve dried paint, making it easier to rinse away.

Once the spray gun and nozzle have been thoroughly rinsed, it’s time to move on to the next step of cleaning the filters and screens, ensuring optimal performance of the airless sprayer.

Clean the filters and screens

After rinsing the spray gun and nozzle with clean water, it’s important to clean the filters and screens to ensure the airless sprayer’s proper functionality. Cleaning these components will prevent any clogs or blockages that can hinder the paint flow and affect the quality of your work. Here are some steps to follow:

Advertisement
  • Remove the filters and screens from the sprayer.
  • Rinse them thoroughly with clean water to remove any paint residue.
  • Soak them in a cleaning solution specifically designed for removing dried paint.
  • Use a soft brush or cloth to gently scrub away any remaining paint.
  • Once clean, rinse them again with water and allow them to dry completely before reassembling the sprayer.

By properly cleaning the filters and screens, you’ll ensure the sprayer operates at its best.

Now, let’s move on to reassembling the sprayer and testing for proper functionality.

Reassemble the sprayer and test for proper functionality

To ensure the proper functionality of your sprayer, you should carefully reassemble all the components and conduct a thorough test to ensure everything is working as expected. Here are some troubleshooting tips for testing the functionality of your airless sprayer:

Test Description
Pressure Test Check if the sprayer maintains the appropriate pressure.
Trigger Test Verify that the trigger is working smoothly and effectively.
Spray Pattern Test Ensure that the spray pattern is even and consistent.
Nozzle Test Confirm that the nozzle is not clogged and spraying properly.
Suction Tube Test Test the suction tube to make sure it is properly drawing paint from the container.

Once you have reassembled the sprayer and completed these tests, you can proceed to the next step of storing the sprayer in a clean and dry area.

Store the sprayer in a clean and dry area

Make sure you store your sprayer in a spot that’s both neat and free from moisture. Here are four key tips for proper storage to prevent paint clogs and ensure the longevity of your airless sprayer:

  1. Clean the sprayer thoroughly: Before storing, remove any excess paint and clean all parts of the sprayer according to the manufacturer’s instructions. This’ll prevent dried paint from building up and causing clogs.

  2. Disassemble and dry: Take apart the sprayer and allow all components to dry completely. Moisture can lead to paint clogs and damage the sprayer over time.

  3. Use protective covers: Cover the sprayer and its accessories with protective materials, like plastic bags or cloth covers, to shield them from dust, debris, and potential damage.

  4. Store in a controlled environment: Find a clean and dry area to store the sprayer. Avoid extreme temperatures and humidity, as they can affect the performance and lifespan of the sprayer.

By following these storage guidelines, you can prevent paint clogs and ensure your airless sprayer stays in excellent condition. Regularly maintain and clean your airless sprayer to prevent future paint buildup, ensuring optimal functionality.

Advertisement

Regularly maintain and clean your airless sprayer to prevent future paint buildup

Regularly maintaining and cleaning my sprayer ensures that paint buildup is prevented in the future, keeping my equipment in top-notch condition. Regular maintenance is crucial to prevent paint clogs and ensure optimal performance.

After each use, I make sure to thoroughly clean the sprayer by flushing it with water or a suitable cleaning solution. I pay special attention to the nozzle, filters, and hoses, removing any dried paint or debris that could lead to clogs.

It’s also important to inspect the sprayer for any worn or damaged parts and replace them as needed. By taking these preventative measures, I can avoid costly repairs and downtime caused by paint buildup, allowing me to efficiently complete my painting projects.

Frequently Asked Questions

How long should the spray gun and nozzle be soaked in the cleaning solution?

For best results, soak the spray gun and nozzle in a cleaning solution for at least 30 minutes. This will help loosen and remove dried paint, making it easier to clean and maintain your airless sprayer.

What type of cleaning solution is recommended for removing dried paint from the spray gun and nozzle?

I recommend using a strong solvent, like mineral spirits or paint thinner, to remove dried paint from the spray gun and nozzle. Alternatively, you can try using a commercial paint remover or warm soapy water.

Advertisement

Should I wear any protective gear while cleaning the airless sprayer?

Yes, wearing protective gear is essential when cleaning the airless sprayer. It includes gloves, goggles, and a mask. Using a suitable cleaning solution will help remove dried paint effectively while ensuring your safety.

How often should the filters and screens be cleaned?

Filters and screens should be cleaned regularly to maintain the airless sprayer’s performance. It is recommended to clean them after every use to prevent clogs and ensure optimal paint flow. Regular maintenance is essential for efficient operation.

Are there any specific maintenance steps I should follow to prevent paint buildup in the airless sprayer?

To prevent paint buildup in the airless sprayer, I recommend regularly cleaning the filters and screens and using cleaning techniques like flushing the sprayer with water or solvent. This will ensure smooth operation and prolong the sprayer’s lifespan.

Conclusion

In conclusion, cleaning a dried paint from an airless sprayer is like restoring a masterpiece. You can restore your sprayer to its former glory with the right supplies and a little elbow grease. Here are the crucial steps in this artistic endeavor:

  1. Disconnect the power source.
  2. Remove any remaining paint.
  3. Soak the gun and nozzle in a cleaning solution.
  4. Scrub away the dried paint.
  5. Don’t forget to clean the filters and screens.
  6. Reassemble the sprayer.
  7. Test it for proper functionality.

Lastly, store your sprayer in a clean and dry space to prevent future paint buildup. Remember, maintaining and cleaning your airless sprayer is the key to keeping your artistic visions flowing smoothly.

Advertisement
Continue Reading
Advertisement

Affiliate disclaimer

As an affiliate, we may earn a commission from qualifying purchases. We get commissions for purchases made through links on this website from Amazon and other third parties.

Advertisement

Trending