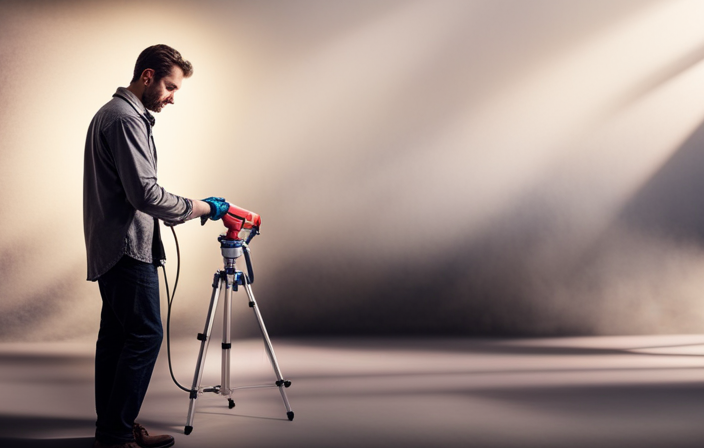
Ever wondered how professional painters achieve such smooth and flawless finishes? The secret to their success lies in the use of airless paint sprayers. These powerful tools can transform any painting project, whether it’s a small indoor room or a large outdoor area, into a masterpiece.
Imagine you have a wooden deck that needs a fresh coat of paint. With a traditional brush or roller, it would take hours, if not days, to complete the job. But with an airless paint sprayer, you can cover the entire surface in a fraction of the time.
In this article, I will delve into the inner workings of airless paint sprayers and explain how they operate.
We will explore the basic principles behind their functionality, the advantages they offer over other types of sprayers, and the components that make them so efficient.
By the end, you’ll have a thorough understanding of how airless paint sprayers work and how to achieve professional results with these remarkable tools.
Key Takeaways
- Airless paint sprayers use a high-pressure pump to atomize the paint and create a fine mist for application.
- They are capable of delivering quick and even coverage on large surfaces, resulting in a smooth and professional finish.
- Airless sprayers offer precise control over paint flow and pressure, allowing for optimal performance with various paint types.
- While they may require more cleanup and maintenance compared to other sprayer types, airless sprayers are efficient and versatile tools for both professionals and DIY enthusiasts.

Baotree Airless Paint Sprayer, High-Pressure Electric Paint Spray Gun with Extension Rod, Thinning-Free Professional Painting Tool for Interior/Exterior Walls, Fences, Ceilings, Cabinets
1. High efficiency and time saving, the spraying speed is 5 times faster than traditional brushing ✅ High...
As an affiliate, we earn on qualifying purchases.
Overview of Airless Paint Sprayers
Airless paint sprayers, also known as high-pressure paint sprayers, revolutionize the way we paint by eliminating the need for air, allowing for faster and more efficient coverage.
These sprayers operate on a simple yet effective working mechanism. The paint is pressurized using a pump, which forces the paint through a small opening in the spray gun tip. This creates a fine mist of paint particles that are propelled at high speed onto the surface being painted.
The high-pressure stream of paint ensures even distribution and complete coverage, making it ideal for large-scale projects or rough surfaces.
Understanding the basic principles behind airless paint sprayers is essential for achieving professional-looking results.

VEVOR 750W Stand Airless Paint Sprayer, 3000PSI High Efficiency Electric Airless Sprayer, Fine and Even Painting Effect, Handheld Paint Sprayers for Home Interior and Exterior Furniture and Fences
Efficient Painting: Our stand airless paint sprayer is equipped with a powerful 750W motor, capable of delivering up...
As an affiliate, we earn on qualifying purchases.
Understanding the Basic Principles
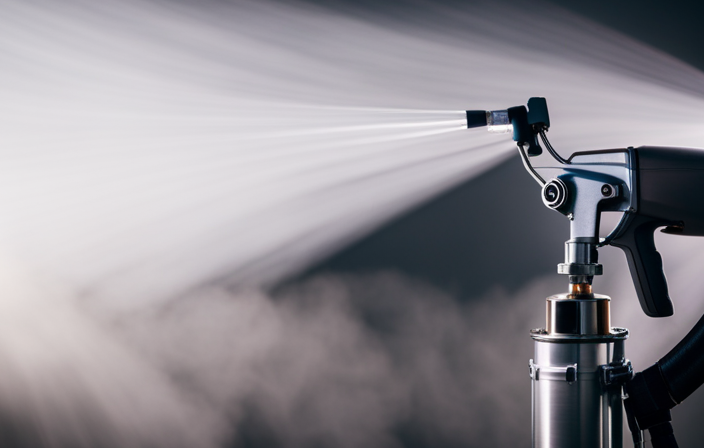
Using a high-pressure system, this innovative tool propels a powerful stream of paint onto surfaces, like a fierce summer storm unleashing a torrential downpour on a parched garden.
The basic principles behind an airless paint sprayer involve a motor-driven pump that pressurizes the paint, forcing it through a small orifice at high velocity. This creates a fine mist of paint particles that evenly coats the surface being painted.
The working mechanism of an airless paint sprayer allows for a continuous flow of paint, eliminating the need for frequent refills. Additionally, the high-pressure stream ensures that the paint reaches even the most hard-to-reach corners and crevices.
This efficient and precise application method provides a uniform and professional finish. Transitioning into the next section on the advantages of airless paint sprayers, it is important to note that this working mechanism contributes to their superior performance.

MaXpray M1 Airless Paint Sprayer, Highly Efficient Thinning-Free Minimal Overspray for Up to 10 Gallon DIY Painting Projects Home Interior & House Exterior, Comes with Sprayer Accessories
Your DIY Partner - All DIY Homeowners, upgrade your DIY game with the MaXpray M1 airless paint sprayer—far...
As an affiliate, we earn on qualifying purchases.
Advantages of Airless Paint Sprayers
Advantages of Airless Paint Sprayers:
-
Speed: An airless paint sprayer allows you to complete projects quickly, covering large surfaces in a fraction of the time it would take with a brush or roller.
-
Even and Consistent Coat: Airless sprayers provide a more even and consistent coat of paint, resulting in a smoother and more professional-looking finish.
-
Versatility: You can easily adjust the spray pattern and pressure of an airless sprayer to accommodate different surfaces and paint types, making it a versatile tool for a wide range of projects.
-
Efficiency: Airless sprayers are more efficient, wasting less paint and requiring fewer coats to achieve the desired coverage.
Components of an Airless Paint Sprayer: Now, let’s dive into the inner workings of this powerful tool.

Graco Magnum 262805 X7 Cart Airless Paint Sprayer, Gray
CONTROL PAINT FLOW: Fully adjustable pressure to give you ultimate control of paint flow for any project size;...
As an affiliate, we earn on qualifying purchases.
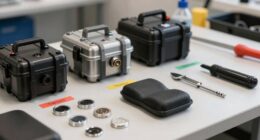
Components of an Airless Paint Sprayer
The inner components of this powerful tool work together to create a flawless and professional finish, making it a must-have for any DIY enthusiast or professional painter. An airless paint sprayer consists of several key components that play a crucial role in its operation. These include a motor, a pump, a pressure control valve, a spray gun, and a hose. The motor powers the pump, which draws paint from the container and pressurizes it. The pressure control valve allows the user to adjust the spray pressure according to their needs. The spray gun, connected to the hose, atomizes the paint and propels it onto the surface. This combination of components enables the airless paint sprayer to deliver a consistent and even coat of paint. Now, let’s delve into the next section and explore how to prepare for painting with an airless sprayer.
Preparing for Painting with an Airless Sprayer
Before you start painting with an airless sprayer, it’s important to properly prepare the surface for a flawless and professional finish. Surface preparation is key to ensure that the paint adheres well and the final result is smooth and long-lasting.
First, clean the surface thoroughly, removing any dirt, dust, or grease. Repair any cracks or imperfections with a suitable filler and sand the area to create a smooth surface.
Next, apply a primer to improve adhesion and create a uniform base for the paint.
Once the surface is prepped, you can move on to the painting techniques using an airless paint sprayer. This involves adjusting the spray pattern, maintaining the right distance from the surface, and ensuring even coverage.
Techniques for Using an Airless Paint Sprayer
When using an airless paint sprayer, it’s crucial to maintain the proper spraying distance and angle for optimal results. This ensures that the paint is evenly distributed and adheres smoothly to the surface.
Achieving even coverage and overlapping is essential to avoid streaks or missed spots.
Regular cleaning and maintenance of the sprayer is necessary to prevent clogs and maintain its efficiency.
Proper Spraying Distance and Angle
To achieve flawless paint coverage, it’s crucial that you position yourself at the correct distance and angle while using an airless paint sprayer. Here are four key techniques for proper spraying distance and angle:
-
Maintain a consistent distance: Keep the sprayer nozzle approximately 12 to 18 inches away from the surface you’re painting. This ensures even paint application without excessive overspray.
-
Angle the sprayer correctly: Hold the sprayer at a 90-degree angle to the surface for vertical areas and a 45-degree angle for horizontal surfaces. This helps the paint adhere smoothly and prevents drips or runs.
-
Overlap each pass: When moving the sprayer across the surface, make sure to overlap each pass by about 50%. This ensures even coverage and eliminates any gaps or streaks.
-
Practice steady, even strokes: Maintain a steady pace while spraying and use smooth, consistent strokes. This helps achieve a uniform finish without uneven patches or lines.
By following these techniques for proper spraying distance and angle, you can ensure a professional-looking paint job.
Next, we’ll discuss the importance of achieving even coverage and overlapping.
Even Coverage and Overlapping
Achieving even coverage and proper overlapping is essential for a flawless paint job. When using an airless paint sprayer, there are specific techniques you can employ to ensure consistent and uniform results.
To achieve even coverage, it is crucial to maintain a consistent distance between the sprayer and the surface being painted. This distance typically ranges from 8 to 12 inches, but it may vary depending on the type of paint being used.
Additionally, overlapping each pass by 50% ensures that no areas are missed and that the paint is applied evenly. This technique avoids creating visible lines or patches.
By mastering these overlapping techniques and achieving even coverage, you can achieve a professional-looking finish.
Moving on to the next section about cleaning and maintenance, it is important to properly maintain your sprayer to ensure its longevity and optimal performance.
Cleaning and Maintenance
Properly maintaining and cleaning your sprayer is crucial to ensure its longevity and keep it performing at its best, so you can avoid any disastrous paint catastrophes.
When it comes to cleaning techniques, start by removing the paint container and cleaning it thoroughly with warm, soapy water.
Next, disassemble the spray gun and clean each component separately using a brush and solvent. Don’t forget to clean the nozzle as well, as any clogs can affect the spray pattern.
As for maintenance, it’s important to follow a regular schedule. This includes checking for any loose or damaged parts, lubricating moving components, and inspecting the hoses for any signs of wear.
By following these cleaning techniques and sticking to a maintenance schedule, you can ensure your sprayer stays in top shape and achieves professional results.
Tips for Achieving Professional Results
Mastering the technique of using an airless paint sprayer will allow you to effortlessly achieve professional results. To achieve a smooth finish, it is important to choose the right paint type for your project. Different paints have different viscosity levels, so selecting the appropriate one will ensure optimal performance. Additionally, using a high-quality paint will result in a more even and durable finish.
To help you achieve professional results, here are some tips:
| Tip | Description |
|---|---|
| 1. | Maintain the correct spray distance to avoid overspray and ensure even coverage. |
| 2. | Apply paint in multiple thin coats rather than one thick coat to prevent drips and runs. |
| 3. | Keep a consistent speed and motion while spraying to avoid uneven application. |
| 4. | Practice on a test surface before tackling your main project to get a feel for the sprayer’s settings and technique. |
By following these tips, you can achieve a flawless finish with your airless paint sprayer. In the next section, we will explore the various applications of airless paint sprayers.
Applications of Airless Paint Sprayers
One of the many ways to utilize an airless paint sprayer is by exploring its various applications. The advantages of using an airless paint sprayer are numerous.
Firstly, it allows for a faster and more efficient application of paint, as it can cover large areas in a short amount of time. Additionally, the technique used with an airless paint sprayer ensures a smooth and even finish, eliminating any brush or roller marks. This makes it ideal for painting large surfaces such as walls, fences, or even exterior surfaces like decks and siding.
Another advantage is that it can handle a wide range of paint types, from thin stains to thick latex paints. This versatility makes it suitable for both professional painters and DIY enthusiasts.
Transitioning to the next section, let’s now compare the airless paint sprayer to other types of paint sprayers.
Comparison to Other Paint Sprayer Types
When comparing airless paint sprayers to HVLP sprayers, there are a few key differences to consider. Airless sprayers use high pressure to atomize the paint, resulting in a thicker, more even coat of paint. HVLP sprayers, on the other hand, use a lower pressure and a high volume of air to produce a finer, more controlled spray pattern.
When comparing airless sprayers to compressed air sprayers, the main difference lies in the source of power. Airless sprayers rely on a hydraulic or electric pump to pressurize the paint, while compressed air sprayers use an air compressor. This means that airless sprayers can be more portable and easier to set up, as they don’t require an external air source.
When weighing the pros and cons of airless sprayers, it’s important to consider their advantages and disadvantages. Airless sprayers are known for their speed and efficiency, as they can cover large areas in a short amount of time. However, they can also be more difficult to control and may result in overspray if not used properly. Additionally, airless sprayers tend to be more expensive than other types of paint sprayers.
Airless vs. HVLP Sprayers
When comparing airless sprayers to HVLP sprayers, it becomes clear that they have distinct functionalities. Airless paint sprayers employ a high-pressure pump to push paint through a small opening in the spray gun, creating a fine mist of paint particles. This allows for faster application and a thicker coat of paint, making it ideal for large-scale projects and exterior surfaces.
On the other hand, HVLP sprayers utilize a high volume of air at low pressure to atomize the paint, resulting in a softer and more controlled spray. These sprayers are renowned for their precision and ability to produce a fine finish on smaller surfaces, making them particularly popular for furniture and automotive painting.
Now, let’s delve into the differences between airless and compressed air sprayers.
Airless vs. Compressed Air Sprayers
If you’re looking for a versatile and efficient option for your painting projects, consider the differences between airless and compressed air sprayers.
When it comes to airless spray guns, they utilize a high-pressure pump to force paint through a small opening in the spray tip, creating a fine mist of paint. This technique allows for a smooth and even application, making it ideal for large surfaces or projects that require a thick coating.
Here are some reasons why airless sprayers are a popular choice:
- Faster application: Airless sprayers can cover large areas quickly, saving you time and effort.
- Versatility: These sprayers can handle a wide range of coating materials, including thicker paints and stains.
- Reduced overspray: With proper technique, airless sprayers minimize overspray, resulting in less wasted paint.
- Uniform finish: The high-pressure system ensures an even distribution of paint, resulting in a professional-looking finish.
Now, let’s explore the pros and cons of airless sprayers in more detail.
Pros and Cons of Airless Sprayers
Looking to tackle a big painting project? Consider the pros and cons of using an airless sprayer.
Airless sprayers offer several advantages. Firstly, they can cover large areas quickly and evenly, making them ideal for painting walls, ceilings, and fences. Additionally, they provide a smooth, professional finish that is difficult to achieve with a brush or roller. Airless sprayers also allow for precise control over the paint flow and pressure, enabling you to adjust the settings to match your specific project requirements.
However, there are some drawbacks to using airless sprayers. They tend to be more expensive than compressed air sprayers, and they require more cleanup and maintenance. Additionally, they can create a significant amount of overspray, which may require additional precautions when working in confined spaces.
Overall, when considering the pros and cons, airless sprayers offer a fast and efficient painting solution, but careful consideration is necessary.
In conclusion, understanding the advantages and disadvantages of airless sprayers will help you make an informed decision for your painting project.
Conclusion and Final Thoughts
To wrap things up, using an airless paint sprayer is like a piece of cake – it’s a breeze to operate and delivers flawless results in no time!
The pros and cons, benefits and drawbacks of these sprayers should be considered before making a decision.
One of the major advantages of airless sprayers is their ability to cover large areas quickly and efficiently. They also provide a smooth, even finish that is difficult to achieve with traditional methods. Additionally, airless sprayers can handle a variety of paint types, including thicker materials like latex.
However, there are a few drawbacks to consider. Airless sprayers can be expensive, and the initial investment may not be feasible for everyone. They also require proper maintenance and cleaning to ensure optimal performance.
Despite these drawbacks, the benefits of using an airless paint sprayer far outweigh the cons, making it a top choice for professional painters and DIY enthusiasts alike.
Frequently Asked Questions
Can I use an airless paint sprayer for small touch-up jobs or is it only suitable for larger projects?
Yes, an airless paint sprayer is suitable for small touch-up jobs. Its high-pressure system atomizes the paint into fine particles, allowing for precise application on small areas without the need for additional equipment.
How loud is an airless paint sprayer when in use?
When it comes to noise levels, airless paint sprayers typically produce around 85 decibels, which is similar to the sound of heavy city traffic. However, the benefits of using an airless paint sprayer for touch-up jobs outweigh the noise factor.
Are there any safety precautions I should take when using an airless paint sprayer?
When using an airless paint sprayer, it is important to take safety precautions and ensure proper usage. This includes wearing protective gear, following manufacturer instructions, and properly ventilating the area to avoid any potential hazards.
Can I use any type of paint with an airless paint sprayer or are there specific types that work best?
Different types of paint can be used with an airless paint sprayer, but there are pros and cons to consider. Some paints may require thinning or special additives, while others may not provide the desired finish.
How long does it typically take for paint to dry when using an airless paint sprayer compared to traditional brush or roller methods?
When comparing paint drying times, an airless paint sprayer usually dries faster than traditional brush or roller methods. However, it’s important to consider the pros and cons of using an airless paint sprayer for your specific project.
Conclusion
In conclusion, after exploring the inner workings of an airless paint sprayer, it is clear that this tool is a game-changer in the world of painting.
With its powerful and efficient design, it allows for quick and flawless application of paint on various surfaces.
The ability to achieve professional results with ease is truly remarkable.
So, if you’re tired of the traditional brush and roller method, why not embrace the ‘painting revolution’ and give an airless paint sprayer a try?
You won’t be disappointed!