Connect with us

Airless Paint Sprayer Tips for Specific Projects

How Hard It Painting With An Airless Paint Sprayer

Published

on

-up shot capturing the intense concentration on a painter's face as they maneuver an airless paint sprayer, their gloved hand expertly controlling the nozzle, while vibrant paint particles gracefully dance through the air

Let me tell you, using an airless paint sprayer for your painting projects can really enhance the whole process.

Picture this: you’ve got a room to paint, and you want it done quickly and efficiently. That’s where the airless paint sprayer comes in. With its high-pressure system, it can cover large areas in no time, leaving a smooth and even finish.

But let me warn you, it’s not as easy as it looks. It takes practice and technique to master the art of using an airless paint sprayer. From understanding the basics to choosing the right paint and equipment, there’s a lot to learn.

And don’t even get me started on dealing with overspray and drips! But fear not, because I’m here to guide you through it all.

In this article, I’ll share my knowledge, experience, and tips to make painting with an airless paint sprayer a breeze. So, let’s dive in and get those walls looking fabulous in no time!

Advertisement

Key Takeaways

  • Blending techniques and fixing uneven paint require practice and refinement
  • Managing paint flow and pressure is important for controlling paint thickness and achieving desired results
  • Cleaning and maintaining the airless sprayer is crucial to prevent clogs and ensure smooth operation
  • Safety precautions and protective gear, such as wearing a respirator, should be taken while using an airless paint sprayer

Understanding the Basics of Airless Paint Sprayers

Using an airless paint sprayer may seem intimidating at first, but once you understand the basics, you’ll be amazed at how effortless and efficient it is.

One of the key advantages of an airless paint sprayer is its ability to prevent clogs. Traditional paint sprayers often get clogged with paint, causing interruptions and frustration. With an airless sprayer, the paint is forced through a small nozzle at high pressure, eliminating the risk of clogs.

Additionally, airless sprayers excel at achieving even coverage. The high-pressure stream of paint creates a fine mist that evenly coats surfaces, providing a smooth and professional finish.

Now that you know the basics of using an airless paint sprayer, let’s move on to preparing your surface for painting.

Advertisement

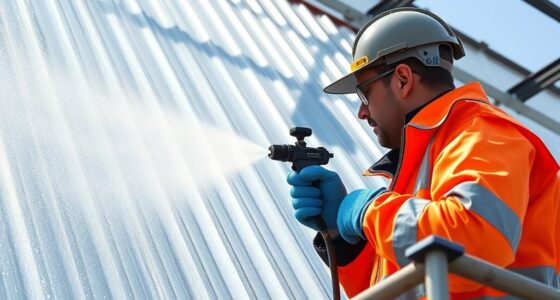
Preparing Your Surface for Painting

Before you start, imagine transforming a worn-out, dull wall into a vibrant, inviting space with just a few simple steps. Surface preparation is crucial to achieve a smooth and long-lasting finish when painting with an airless paint sprayer. To ensure optimal adhesion, it is important to remove any loose paint, dirt, or debris from the surface. A thorough cleaning can be done using a power washer or a scraper. Once the surface is clean, it is essential to address any imperfections by filling in cracks or holes with a suitable filler. After the surface is smooth and clean, priming techniques come into play. Priming helps the paint adhere better and provides a uniform base for the topcoat. A 2 column and 4-row table can help illustrate the different primers and their uses, making the process easier to understand.

Primer Type Use
Stain-blocking Prevents stains from bleeding through
Bonding Enhances adhesion on difficult surfaces
Sealing Blocks moisture and prevents peeling
Tinted Enhances color and coverage

Transitioning into the next section about choosing the right paint and equipment, it is crucial to consider the type of paint and equipment that will best suit your project’s needs.

Choosing the Right Paint and Equipment

To achieve the best results, it’s important to select the right paint and equipment for your project.

Advertisement

When choosing the right paint color, consider the mood and ambiance you want to create in the space. Bold and vibrant colors can add energy, while soft and neutral tones create a calming atmosphere.

Proper ventilation during painting is crucial to ensure a safe and comfortable environment. Open windows and use fans to circulate fresh air, especially when using oil-based paints.

Now that you’ve chosen the perfect paint color and set up proper ventilation, it’s time to master the technique of spraying. This will ensure an even and professional finish on your surfaces.

Mastering the Technique of Spraying

When it comes to mastering the technique of spraying with an airless paint sprayer, there are a few key points to keep in mind.

  • First and foremost, holding the sprayer correctly is crucial for achieving even and smooth coverage.

  • Maintaining a consistent speed and distance from the surface being painted is also important to ensure a professional-looking finish.

With my years of experience, I’ve found that paying attention to these details can make all the difference in the final result.

Advertisement

Holding the Sprayer Correctly

To hold the sprayer correctly, follow these steps:

  1. Hold the sprayer firmly in your hand, ensuring a steady and controlled grip that allows you to effortlessly maneuver it across the surface you’re painting.

  2. Correct hand position is crucial for maintaining control and achieving a smooth, even finish. Place your hand comfortably on the handle, with your fingers wrapped around it and your thumb resting on the trigger. This grip provides stability and prevents the sprayer from slipping or tilting during operation.

  3. As you hold the sprayer, make sure to keep your wrist straight and your arm relaxed to avoid fatigue.

  4. Maintaining a consistent speed and distance is the next key step in achieving professional results.

By following these guidelines, you can hold the sprayer correctly and ensure a seamless painting process.

Maintaining a Consistent Speed and Distance

Maintaining a consistent speed and distance is key to achieving a professional finish with your sprayer. This ensures that the paint is applied evenly and smoothly.

To maintain speed, start by setting a comfortable pace that allows you to cover a consistent area without rushing. Adjust your speed as needed to match the size of the surface being painted.

When it comes to distance, keep the sprayer nozzle about 12 inches away from the surface. This helps to avoid overspray and drips. Maintaining this distance allows for optimal paint coverage without creating excess build-up or wasting paint.

Advertisement

By maintaining speed and distance, you can increase efficiency and avoid clogs and blockages in your sprayer. This will also help you achieve a flawless paint job.

Now let’s discuss how to deal with overspray and drips to further enhance your painting process.

Dealing with Overspray and Drips

When it comes to dealing with overspray and drips while using an airless paint sprayer, there are a few key points to keep in mind.

First, using drop cloths and masking tape is essential in protecting surfaces and areas you don’t want to be painted.

Secondly, if mistakes do happen, it’s important to correct them immediately by wiping away the excess paint or sanding it down before it dries.

Advertisement

Lastly, blending is crucial in achieving a seamless finish by feathering out any visible lines or uneven areas with a brush or roller.

Using Drop Cloths and Masking Tape

Before you start using the airless paint sprayer, it’s important to spread out a drop cloth and secure it with masking tape. This will protect the surrounding area and prevent overspray and drips from landing on surfaces you don’t want to paint. Using a drop cloth is highly recommended for its durability and ability to absorb paint spills, although alternatives like plastic sheets or old newspapers can also be used. When it comes to masking tape, it’s crucial to choose a high-quality brand like 3M, Scotch, or FrogTape. This ensures that the tape adheres well and doesn’t leave any residue behind. Now, let’s move on to the next section about correcting mistakes and blending, where I’ll share some tips on how to fix any errors that may occur during the painting process.

Correcting Mistakes and Blending

Once you’ve taken the time to set up your drop cloths and masking tape, you’ll be relieved to know that correcting mistakes and blending is like adding the final strokes of a masterpiece. It’s all about seamlessly blending colors together to create a flawless finish.

When it comes to blending techniques, there are a few tricks that can help you achieve professional-looking results.

  • Feathering: By lightly overlapping the edges of wet paint with a dry brush, you can blend different shades together smoothly.

  • Wet-on-wet: Applying a fresh coat of paint while the previous one is still wet allows the colors to mix and blend naturally.

  • Touch-ups: If you notice uneven paint or missed spots, use a small brush to gently correct the areas without disturbing the surrounding paint.

  • Layering: Building up thin layers of paint gradually can help you achieve a more even and consistent finish.

  • Practice on a test surface: Before tackling your main project, practice blending techniques on a scrap piece of material to gain confidence and refine your skills.

By mastering these blending techniques and fixing uneven paint, you’ll be well on your way to achieving a professional-looking paint job.

Advertisement

In the next section, we will explore the importance of managing paint flow and pressure to ensure optimal results.

Managing Paint Flow and Pressure

To make your painting experience with an airless paint sprayer more enjoyable, you can easily manage the paint flow and pressure.

Managing paint thickness is crucial for achieving a smooth and even finish. By adjusting the pressure on the sprayer, you can control the flow of paint and ensure that it is not too thick or too thin. This will help prevent any clogs or splattering during the painting process.

Additionally, you can adjust the spray pattern to suit the specific area you are painting. Whether you need a narrow pattern for detailed work or a wide pattern for larger surfaces, the airless paint sprayer allows for easy customization.

By mastering the art of managing paint flow and pressure, you can achieve professional-looking results with your airless paint sprayer.

Advertisement

Speaking of achieving professional results, the next section will cover cleaning and maintaining your airless sprayer seamlessly.

Cleaning and Maintaining Your Airless Sprayer

When it comes to cleaning and maintaining your airless sprayer, there are a few key points to keep in mind.

First, flushing the system is crucial to prevent any leftover paint from drying and clogging the nozzle. This should be done after every use to ensure optimal performance.

Additionally, lubricating the pump and components is essential for smooth operation and longevity of your sprayer. Regularly applying lubricant to the piston rod and other moving parts will help prevent wear and tear, keeping your sprayer running smoothly for years to come.

Flushing the System

Don’t overlook the importance of flushing the system – it’s a critical step that ensures the best possible paint application with your airless paint sprayer. Proper flushing techniques are essential to prevent clogs and maintain the efficiency of your sprayer.

Advertisement

After each use, I recommend thoroughly cleaning the system by flushing it with a cleaning solution. Start by removing the paint container and attaching a clean water source to the sprayer. Turn on the sprayer and let the water run through the system until it comes out clear. This will remove any leftover paint and debris, preventing them from clogging the nozzle or other components.

Flushing the system regularly will keep your airless paint sprayer in top condition, allowing you to achieve flawless results.

Now, let’s move on to the next step of lubricating the pump and components.

Lubricating the Pump and Components

Maintaining the smooth operation of your airless paint sprayer is like oiling the gears of a well-oiled machine – it keeps everything running smoothly and ensures flawless results. When it comes to pump maintenance, one of the most important steps is lubricating the pump and its components. This not only enhances the lifespan of the equipment, but also prevents clogs and ensures consistent paint flow. Here are five essential points to consider:

  • Regularly lubricate the pump rod and piston to reduce friction and enhance performance.
  • Apply a thin layer of lubricant to the packings and seals to prevent leaks and maintain a tight seal.
  • Lubricate the ball and seat valves to ensure smooth operation and prevent sticking.
  • Check and clean the filters regularly to prevent debris buildup and maintain optimal paint flow.
  • Use the recommended lubricant specified by the manufacturer for optimal results.

By following these pump maintenance practices, you can prevent clogs and keep your airless paint sprayer operating at its best.

Now, let’s move on to discussing safety precautions and the importance of protective gear.

Advertisement

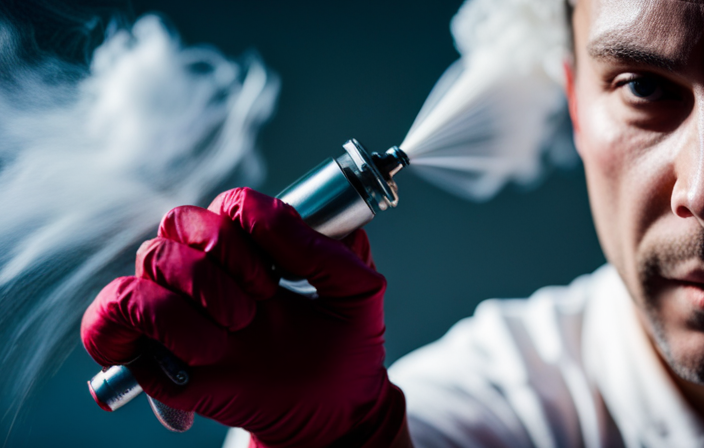
Safety Precautions and Protective Gear

Wearing the proper protective gear is crucial when using an airless paint sprayer. Safety should always be the top priority to prevent any accidents or health risks.

One important precaution is to wear a respirator that meets the requirements for filtering paint particles and fumes. This helps protect the respiratory system from potential harm.

Additionally, it is essential to handle paint spills carefully to avoid slips or falls. Clean up any spills immediately using absorbent materials and dispose of them properly.

Now that we have discussed the importance of safety precautions and protective gear, let’s move on to troubleshooting common issues that may arise while using an airless paint sprayer. It’s important to be prepared for any challenges that may occur during the painting process.

Troubleshooting Common Issues

If you encounter any problems while using your airless paint sprayer, troubleshooting common issues will help you overcome them smoothly. Here are four common issues that you may come across and how to troubleshoot them:

Advertisement
  1. Troubleshooting a clogged nozzle: A clogged nozzle can lead to a disrupted spray pattern. To fix this, turn off the sprayer and remove the nozzle. Clean it thoroughly with warm water or a suitable cleaning solution. Ensure there are no dried paint particles blocking the nozzle openings before reattaching it.

  2. Troubleshooting an uneven spray pattern: An uneven spray pattern can result from various factors, such as incorrect pressure settings or a worn-out tip. Check the pressure settings and adjust them accordingly. If the tip is worn, replace it with a new one that matches your desired spray pattern.

  3. Troubleshooting paint spitting or sputtering: Paint spitting or sputtering can occur due to worn-out or damaged pump packings. Inspect the packings and replace them if necessary.

  4. Troubleshooting excessive overspray: Excessive overspray can waste paint and create a messy work environment. Adjust the pressure settings and hold the sprayer at the correct distance from the surface to minimize overspray.

By troubleshooting these common issues, you can ensure a smooth and efficient painting experience.

Now, let’s move on to the next section about the importance of practice, practice, practice!

Practice, Practice, Practice!

Get ready to dive in and put your skills to the test because practice, practice, practice is the key to mastering the art of using an airless paint sprayer! When it comes to painting with an airless paint sprayer, there is no substitute for experience. By practicing regularly, you will not only become more familiar with the equipment, but you will also develop a better understanding of the technique required for a flawless finish.

To help you on your journey to becoming an airless paint sprayer pro, here are some common mistakes to avoid:

  1. Overspraying: This occurs when you apply too much paint in one area, resulting in a thick and uneven coat. To avoid this, maintain a consistent distance from the surface and use smooth, controlled strokes.

  2. Not cleaning the sprayer properly: Failing to clean the sprayer after each use can lead to clogs and malfunctions. Make sure to follow the manufacturer’s instructions for cleaning and maintenance.

Remember, mastering the technique of using an airless paint sprayer takes time and practice. By avoiding common mistakes and honing your skills through repetition, you’ll soon be creating professional-quality results. So don’t be afraid to roll up your sleeves and get painting!

Advertisement

Frequently Asked Questions

Can I use an airless paint sprayer for small touch-up jobs?

Yes, an airless paint sprayer is a great tool for small touch-up jobs. It allows for precise application and saves time compared to traditional methods. It’s the perfect alternative for touch-up techniques.

How long does it typically take to paint a room using an airless paint sprayer?

Typically, it takes less time to paint a room using an airless paint sprayer compared to using a roller and brush. The pros of using an airless paint sprayer include faster coverage, but it may require more skill and preparation.

What type of paint is best suited for airless paint sprayers?

The best paint brands suited for airless paint sprayers are Sherwin-Williams, Behr, and Benjamin Moore. To achieve a smooth finish, thin the paint, use the proper tip size, and maintain a consistent spraying technique.

How do I prevent clogging or blockages in the spray gun?

To prevent clogging or blockages in the spray gun, I recommend cleaning it thoroughly after each use. Regularly inspect and replace worn or damaged parts. Adjust the pressure settings to prevent overspray.

Is it necessary to use a primer before applying paint with an airless paint sprayer?

Using a primer before applying paint with an airless paint sprayer is crucial. It provides better adhesion, durability, and a smoother finish. While there are alternative options, a primer ensures optimal results.

Advertisement

Conclusion

In conclusion, painting with an airless paint sprayer can be challenging. It requires practice and skill. However, with the right techniques and equipment, it can produce professional-looking results.

Did you know that airless paint sprayers can cover up to 10 times more area than traditional paint brushes or rollers? This means that you can complete your painting projects in a fraction of the time.

So, don’t be discouraged by the learning curve. Embrace it and soon you’ll be a pro at using airless paint sprayers!

Jule’s attention to detail, editorial prowess, and commitment to delivering high-quality content ensure that every article and review on our website is polished and reader-friendly. Jule’s vision for the website as a one-stop destination for paint sprayer enthusiasts has been instrumental in shaping the platform into what it is today.

Continue Reading
Advertisement

Airless Paint Sprayer Tips for Specific Projects

How Many Gallons Of Psint To Paint A House With Airless Sprayer

Published

on

By

An image showcasing a vibrant, spacious house exterior being effortlessly coated with a high-powered airless sprayer

Many people believe that applying a fresh coat of paint can transform a house into a home. Using an airless sprayer can make the application process quick and efficient. Before starting your painting project, it’s important to determine how many gallons of paint you will need.

That’s where I come in. In this article, I’ll guide you through the process of calculating the right amount of paint for your house, so you can avoid the hassle of running out mid-project or ending up with too much leftover. We’ll cover everything from measuring the surface area of your house to considering the number of coats needed.

By following these steps, you’ll be able to estimate the perfect amount of paint, ensuring a smooth and successful painting project with your airless sprayer.

So, let’s dive in and get your house looking brand new.

Key Takeaways

  • Hiring a professional for an accurate estimate and advice can save time and money when using an airless sprayer to paint a house.
  • A professional can accurately calculate the amount of paint needed, taking into consideration factors such as the size of the house and the number of coats required.
  • They can also provide advice on the best type of paint to use with an airless sprayer, ensuring optimal results.
  • Additionally, a professional can offer suggestions for necessary preparations before using the sprayer, ensuring a smooth and efficient painting process.

Measure the Surface Area of Your House

Advertisement

To accurately determine the amount of paint needed, you should measure the surface area of your house using an airless sprayer. Calculating the surface area is crucial in estimating the amount of paint required for the job.

Start by measuring the length and height of each wall, including any windows or doors. Multiply the length by the height to get the area of each wall, and then add up all the wall areas to get the total surface area.

Don’t forget to subtract any areas that won’t be painted, such as trim or eaves. Once you have the surface area, you can determine the paint coverage per gallon. This will help you figure out how many gallons of paint you’ll need to complete the job effectively.

Determine the Paint Coverage per Gallon

Determining the paint coverage per gallon is like uncovering the hidden potential of a masterpiece waiting to be unveiled. It allows you to calculate the amount of paint needed for your project, estimate the drying time, and even calculate the paint cost. To help you visualize the process, take a look at the table below:

Surface Type Coverage per Gallon (in square feet)
Smooth surfaces 350-400
Textured surfaces 200-250
Porous surfaces 150-200
Exterior surfaces 250-300
Interior surfaces 400-450

By knowing the coverage per gallon for different surface types, you can accurately calculate how many gallons of paint you’ll need for your project. With this knowledge, you can confidently move on to the next step: calculating the total surface area to be painted. This will ensure you have all the necessary information to complete your painting project efficiently.

Advertisement

Calculate the Total Surface Area to be Painted

Now, as you delve into the next step, calculate the total surface area awaiting a fresh coat of paint.

To do this, you need to measure the length and height of each wall in the house. Once you have these measurements, multiply the length by the height to find the area of each wall.

Add up the areas of all the walls to get the total surface area to be painted.

Advertisement

Imagine a large canvas encompassing every nook and cranny of your home, ready to be transformed with a vibrant new color. As you calculate the paint quantity, keep in mind that one gallon typically covers around 350-400 square feet, but this can vary depending on the type of paint and texture of the surface.

By estimating the paint cost and considering the number of coats needed, you can better plan for this exciting home improvement project.

Now, let’s consider the number of coats needed for a flawless finish.

Consider the Number of Coats Needed

It’s important to understand how many coats are needed for a flawless finish. When considering the paint color options, it’s crucial to research the best type of paint to use.

Certain colors or finishes may require multiple coats to achieve the desired result. Some paints have better coverage and may only need one coat, while others may require two or even three coats.

Advertisement

By understanding the number of coats needed, you can accurately estimate the amount of paint required for the job. This will prevent unnecessary wastage and ensure that you have enough paint for any touch-ups that may be needed.

Now, let’s move on to the next section and account for wastage and touch-ups.

Account for Wastage and Touch-Ups

Make sure you account for a little extra paint for those inevitable touch-ups and a dash of exaggeration in case of any unexpected wastage. Calculating wastage and estimating touch-up paint needs can help ensure that you have enough paint to complete the job without running out. To give you an idea of how much extra paint you might need, consider the following table:

Advertisement
Type of Surface Wastage Percentage Touch-Up Percentage
Smooth 10% 5%
Textured 15% 10%
Porous 20% 15%

Using this table, you can estimate the additional paint needed based on the type of surface you are painting. By incorporating these factors into your calculations, you can ensure that you have enough paint to cover any unexpected needs. With the additional paint accounted for, you can now move on to choosing the right type of paint for your project.

[Transition Sentence]: Now that you have estimated the amount of paint needed, it’s time to choose the right type of paint for your project.

Choose the Right Type of Paint

Now that we’ve accounted for wastage and touch-ups, let’s move on to choosing the right type of paint for your house.

When it comes to painting a house with an airless sprayer, it’s important to choose the right color and consider the paint finish. The color should complement your house’s exterior and reflect your personal style. Additionally, the paint finish can affect the durability and appearance of the paint job. For example, a matte finish may hide imperfections better, while a glossy finish can be easier to clean.

To make the best decision, consider factors such as weather conditions and the desired maintenance level. Remember to consult the manufacturer’s guidelines for specific recommendations on color and finish options. This will ensure a successful painting project.

Advertisement

Consult the Manufacturer’s Guidelines

For the best results, make sure to consult the manufacturer’s guidelines on color and finish options, so you can create a stunning and long-lasting paint job that truly reflects your personal style. When estimating paint quantity, it’s essential to follow the recommendations provided by the manufacturer. They will typically provide guidance on how many gallons of paint are needed for a specific area, taking into account factors such as the type of surface and the desired thickness of the paint. Additionally, the manufacturer’s guidelines will also provide valuable information on paint sprayer maintenance. Proper maintenance is crucial to ensure that the sprayer functions optimally and delivers a smooth and even coat of paint. By following the manufacturer’s guidelines, you can achieve professional-looking results and avoid any potential issues. Moving forward, let’s explore how to use an online paint calculator to further assist you in determining the amount of paint needed for your project.

Use an Online Paint Calculator

Get ready to paint like a pro with the help of an online paint calculator, which is as easy to use as a breeze on a sunny day. When using an airless sprayer instead of traditional painting methods, it’s essential to know exactly how many gallons of paint you’ll need.

An online paint calculator takes the guesswork out of the equation by considering factors such as the size of the house, number of coats, and type of surface. Simply input these details, and the calculator will provide you with an accurate estimate of the amount of paint required.

However, it’s important to keep in mind that online paint calculators may not account for variables like textured surfaces or wastage. Therefore, consider hiring a professional for an accurate estimate to ensure you have the right amount of paint for the job.

Consider Hiring a Professional for an Accurate Estimate

Consider bringing in a professional for a precise estimate, ensuring you have the right amount of paint for your project. Hiring professionals can save you time and money in the long run. They have the expertise to accurately calculate the amount of paint needed, taking into account factors such as the size of the house, the number of coats required, and any specific requirements for the surface being painted.

Advertisement

Additionally, they can provide advice on the best type of paint to use and any necessary preparations that need to be made before starting the project. While it may be tempting to try and estimate the amount of paint yourself, hiring a professional guarantees a more accurate result. This will help you avoid the hassle of running out of paint or having to buy extra gallons unnecessarily.

Transitioning into the next section, it’s also important to consider buying extra paint for future touch-ups.

Buy Extra Paint for Future Touch-Ups

Now that you’ve considered hiring a professional for an accurate estimate, let’s talk about the importance of buying extra paint for future touch-ups. When painting a house with an airless sprayer, it’s always a good idea to have some extra paint on hand. Not only does it ensure that you have enough to complete the job, but it also allows you to store paint leftovers for future use.

Here are five reasons why buying extra paint and storing the leftovers is a smart move:

  • Easy color matching for touch-ups
  • Cost-effective solution for small repairs
  • Convenient way to maintain the appearance of your home
  • Peace of mind knowing you have the right paint available
  • Flexibility to make changes or additions to your color scheme

By buying extra paint and properly storing the leftovers, you can ensure that your house stays looking fresh and well-maintained for years to come.

Frequently Asked Questions

What are the benefits of using an airless sprayer to paint a house?

What are the benefits of using an airless sprayer to paint a house? Wondering how to achieve a flawless finish? Airless sprayers offer faster application, even coverage, and reduced overspray. Follow these tips for optimal results.

Advertisement

Can I use the same paint type for both interior and exterior surfaces of my house?

Using the same paint type for both interior and exterior surfaces has pros and cons. While it may provide consistency, different surfaces have different needs. Also, using different paint finishes can enhance the aesthetics of each space.

How long does it typically take to paint a house using an airless sprayer?

On average, it takes about 2-3 days to paint a house using an airless sprayer. To paint efficiently, make sure to properly prepare the surfaces, use the right technique, and work in favorable weather conditions.

Are there any specific safety precautions I need to take when using an airless sprayer for painting?

When it comes to safety precautions with airless sprayer painting, it’s crucial to protect yourself with goggles, gloves, and a respirator. Mastering airless sprayer techniques ensures even coating, but always prioritize safety first.

Are there any additional tools or equipment required when using an airless sprayer for painting a house?

When using an airless sprayer for house painting, there are some additional accessories and maintenance requirements. These include protective gear, cleaning materials, and regular maintenance of the sprayer for optimal performance.

Conclusion

After considering all the factors involved in calculating the amount of paint needed to paint a house with an airless sprayer, it’s clear that accuracy is key.

Advertisement

One interesting statistic to note is that the average paint coverage per gallon is approximately 350-400 square feet. This means that for a typical 2,000 square foot house, you would need around 5-6 gallons of paint.

However, it’s always advisable to consult the manufacturer’s guidelines and consider hiring a professional for an accurate estimate. Don’t forget to buy extra paint for future touch-ups!

Continue Reading

Airless Paint Sprayer Tips for Specific Projects

What Is The Best Airless Paint Sprayer For Interior Walls And Woodwork

Published

on

By

An image showcasing a professional-grade airless paint sprayer gently applying a flawless coat of paint on the smooth surface of an interior wall, while another sprayer effortlessly coats intricate woodwork with precision and ease

As a fan of DIY projects, I know how difficult it can be to achieve a flawless finish on interior walls and trim. That’s why finding the best airless paint sprayer is essential.

Imagine effortlessly transforming your living space with a smooth, professional-looking coat of paint that rivals the work of a seasoned painter. Well, that dream can become a reality with the right airless paint sprayer.

In this article, I will guide you through the world of airless paint sprayers and help you choose the perfect one for your needs. We’ll explore factors to consider, such as power, versatility, and ease of use.

I’ll also provide in-depth reviews of some top-rated airless paint sprayers on the market, including the Graco Magnum X7, Wagner Control Pro 170, Titan ControlMax 1700 Pro, and Graco Ultra Corded Handheld.

So, whether you’re a weekend warrior or a professional painter, get ready to discover the best airless paint sprayer that will revolutionize your painting projects and make them a breeze.

Advertisement

Key Takeaways

  • Airless paint sprayers provide fast coverage of large areas and an even and consistent finish.
  • The Graco Ultra Corded Airless Handheld Paint Sprayer offers compact size, adjustable pressure control, and unmatched precision and control.
  • Proper cleaning and maintenance of the sprayer can avoid clogging issues.
  • Factors to consider when choosing an airless paint sprayer include the specific use (interior or exterior), cost comparison, reading reviews and seeking recommendations, and making an informed decision for professional-quality results.

Understanding Airless Paint Sprayers

Understanding airless paint sprayers is important if you want to tackle your interior walls and woodwork with ease. These sprayers are popular among DIY enthusiasts and professionals due to their efficiency and versatility. One of their main advantages is the ability to provide a smooth and even finish, saving you time and effort compared to traditional painting methods.

However, it’s important to note that airless paint sprayers can be messy and require proper preparation and masking to avoid overspray. To achieve a smooth finish, it’s recommended to use the right nozzle size and pressure settings, as well as maintaining a consistent spraying motion. Taking these tips into consideration will help ensure a professional-looking result.

Now, let’s move on to the factors to consider when choosing an airless paint sprayer.

Factors to Consider When Choosing an Airless Paint Sprayer

When choosing a paint sprayer for your indoor projects, there are a few key factors to consider.

Advertisement

Firstly, cost considerations play a significant role in determining which airless paint sprayer is best for you. It’s important to establish a budget and find a sprayer that offers the right balance of features and affordability. Some factors that can affect the cost include the power and performance of the sprayer, the materials it can handle, and any additional features it may offer.

Additionally, brand reputation is another essential factor to take into account. Look for a well-known and reputable brand that has a history of producing high-quality paint sprayers. Choosing a paint sprayer from a trusted brand ensures you are getting a reliable and durable product. Look for brands that have been in the industry for a long time and have positive customer reviews.

Considering these factors will help you make an informed decision when choosing the best airless paint sprayer for your interior walls and woodwork. Speaking of airless paint sprayers, let’s dive into the details of the Graco Magnum X7 in the next section.

Graco Magnum X7 Airless Paint Sprayer

Advertisement

The Graco Magnum X7, a popular choice among professionals, has a maximum spray tip size of 0.017 inches, allowing for efficient and precise application of paint.

The Graco Magnum X7 airless paint sprayer is known for its exceptional performance and reliability.

One of the main benefits of using an airless paint sprayer like the Graco Magnum X7 is that it provides a consistent and even coat of paint, resulting in a smooth and professional finish on interior walls and woodwork.

This sprayer is also designed with a powerful motor and a high-pressure pump, allowing for faster paint application compared to traditional methods.

Additionally, the Graco Magnum X7 features an adjustable pressure control knob, making it easy to customize the paint flow for different projects.

Advertisement

Transitioning to the next section, let’s now discuss the Wagner Control Pro 170 High Efficiency Airless Paint Sprayer.

Wagner Control Pro 170 High Efficiency Airless Paint Sprayer

Moving on to the Wagner Control Pro 170, this high efficiency airless paint sprayer is known for its exceptional performance and reliability.

Pros and cons:

Pros:

  • The Control Pro 170 offers a maximum pressure of 1500 PSI, allowing for precise control and a smooth finish on both interior walls and woodwork.
  • Its HEA (High Efficiency Airless) technology reduces overspray by up to 55%, making it more efficient and minimizing waste.

Cons:

  • The sprayer can be quite loud during operation, which may be a concern for some users.
  • It requires regular cleaning and maintenance to ensure optimal performance.

Key features:

  • The sprayer comes with a 515 HEA reversible tip, which provides a consistent spray pattern and can handle a variety of coatings.
  • It has a 0.60 horsepower motor, ensuring enough power to handle even the toughest painting tasks.
  • The sprayer is compatible with both 1 and 5-gallon paint containers, providing flexibility for different project sizes.

Moving forward to the subsequent section about the Titan ControlMax 1700 Pro sprayer, let’s explore another option in the airless paint sprayer market.

Titan ControlMax 1700 Pro Sprayer

Advertisement

Get ready to experience the power and precision of the Titan ControlMax 1700 Pro sprayer. This top-of-the-line airless paint sprayer effortlessly transforms your surfaces with its flawless application and smooth finish.

The Titan ControlMax 1700 Pro sprayer offers numerous benefits. First, it provides excellent coverage and allows for a more even distribution of paint, resulting in a professional-looking finish. The sprayer’s high efficiency pump ensures consistent pressure and reduces overspray, saving you time and money.

Additionally, the ControlMax 1700 Pro sprayer is easy to use and clean, making it a convenient choice for both professionals and DIY enthusiasts.

With its powerful performance and user-friendly features, the Titan ControlMax 1700 Pro sprayer is an excellent option for all your interior wall and woodwork painting needs.

Advertisement

Speaking of power, let’s move on to the next section about the HomeRight Power Flo Pro 2800 C800879 airless paint sprayer.

HomeRight Power Flo Pro 2800 C800879 Airless Paint Sprayer

When it comes to choosing the best airless paint sprayer for interior walls and woodwork, the HomeRight Power Flo Pro 2800 C800879 is a top contender.

This sprayer boasts a range of key features that make it a great choice for any DIY enthusiast or professional painter.

From its powerful ½ horsepower motor to its adjustable pressure control, this sprayer offers precision and efficiency.

However, it’s important to consider the pros and cons before making a decision.

Advertisement

While the HomeRight Power Flo Pro 2800 C800879 offers excellent performance, it may be a bit on the heavier side and can be a bit noisy during operation.

Overall, this sprayer is a reliable option for those looking for a powerful and versatile tool for their painting projects.

Key Features

One important aspect to consider when choosing the best airless paint sprayer for interior walls and woodwork is its key features. The HomeRight Power Flo Pro 2800 C800879 Airless Paint Sprayer offers several advantages that make it a top choice.

Firstly, it has a powerful motor that delivers consistent and even paint coverage, ensuring a professional-looking finish.

Additionally, it has a large capacity hopper, allowing for longer painting sessions without the need for frequent refills.

Advertisement

Another key feature is the adjustable pressure control, which allows for precise control over the paint flow and spray pattern.

However, it is important to note that this sprayer may not be suitable for small-scale projects due to its size and weight.

In conclusion, the key features of the HomeRight Power Flo Pro 2800 C800879 Airless Paint Sprayer provide several advantages, but it is important to consider the potential disadvantages as well.

Pros and Cons

Consider the pros and cons of this powerful tool to determine if it’s the right fit for your painting needs.

Airless paint sprayers offer several advantages over traditional paint application methods. One major benefit is the speed at which they can cover large areas, making them ideal for painting interior walls and woodwork. They also provide a more even and consistent finish, eliminating brush or roller marks. Additionally, airless sprayers can handle a variety of paint types, including thick and textured coatings.

Advertisement

However, there are a few drawbacks to consider. They can be more expensive than traditional methods, and they require more setup and cleanup time. They also tend to generate more overspray, which can be wasteful and create a mess.

Overall, if you value efficiency and a professional-looking finish, an airless paint sprayer may be the right choice for you.

Moving on to the next section, let’s delve into the features of the Graco Ultra Corded Airless Handheld Paint Sprayer.

Graco Ultra Corded Airless Handheld Paint Sprayer

The Graco Ultra Corded Airless Handheld Paint Sprayer is the best choice for interior walls and woodwork. It offers unmatched precision and control, even for beginners.

One of the pros of this sprayer is its compact size. This allows for easy maneuverability in tight spaces.

Advertisement

Additionally, the airless technology ensures a smooth and even finish. This eliminates the need for multiple coats.

Another advantage is the adjustable pressure control. This allows for customization based on the type of surface being painted.

As for cons, some users have reported clogging issues. However, these can be easily avoided by properly cleaning and maintaining the sprayer.

In terms of tips for using the Graco Ultra Corded Airless Handheld Paint Sprayer, it is recommended to start with a test spray on a scrap surface. This ensures the desired flow and coverage.

Transitioning to the next section, let’s explore some helpful tips for using an airless paint sprayer.

Advertisement

Tips for Using an Airless Paint Sprayer

Get ready to take your painting projects to the next level with these helpful tips for using an airless paint sprayer! Using an airless paint sprayer can save you time and effort, but it’s important to properly maintain and troubleshoot the sprayer to ensure optimal performance. Here are some key tips to keep in mind:

  • Regularly clean the sprayer and its components to prevent clogs and ensure smooth operation.
  • Use the correct paint viscosity for the sprayer to avoid clogging or uneven coverage.
  • Before spraying, test the sprayer on a scrap surface to ensure the desired spray pattern and adjust the pressure if needed.
  • Keep a consistent distance from the surface being painted to avoid overspray or uneven application.
  • If the sprayer starts to sputter or lose pressure, check for any clogs or blockages and clear them before continuing.

By following these tips, you’ll be able to achieve professional-looking results with your airless paint sprayer.

Now, let’s dive into the maintenance and cleaning of airless paint sprayers.

Maintenance and Cleaning of Airless Paint Sprayers

To keep your airless paint sprayer performing at its peak, it’s crucial to regularly maintain and clean its components, ensuring smooth operation and avoiding any hiccups along the way. Cleaning techniques and a maintenance schedule are key to prolonging the lifespan of your sprayer. Here are some important tips to keep in mind:

Cleaning Technique Maintenance Schedule
Flush the system with water after each use Check the filters and replace if necessary every 3 months
Clean the spray tip with a brush or nozzle cleaner Lubricate the pump rod and packings every 6 months
Remove and clean the suction tube and prime valve Inspect the hoses for wear or leaks every 12 months

By following these cleaning techniques and adhering to a regular maintenance schedule, you can ensure that your airless paint sprayer stays in top shape for years to come. Now, let’s move on to the conclusion and final thoughts.

Conclusion and Final Thoughts

Now that we have discussed the importance of maintenance and cleaning for airless paint sprayers, let’s conclude our discussion by considering some final thoughts.

Advertisement

When it comes to choosing the best airless paint sprayer for interior walls and woodwork, there are a few key factors to consider. First, you should determine whether you will be using the sprayer primarily for interior or exterior projects. While some sprayers are versatile and can be used for both, others are specifically designed for one or the other.

Next, it’s important to compare the cost of different airless paint sprayers. Consider not only the initial purchase price, but also the long-term costs such as maintenance and replacement parts. Finally, don’t forget to read reviews and seek recommendations from others who have used the sprayers.

In conclusion, finding the best airless paint sprayer for your specific needs requires careful consideration of factors such as interior vs exterior use and cost comparison. By taking the time to research and compare different models, you can ensure that you make an informed decision and achieve professional-quality results in your painting projects.

Frequently Asked Questions

Can I use an airless paint sprayer for both interior walls and woodwork?

Yes, an airless paint sprayer can be used for both interior walls and woodwork. It provides a smooth and even finish, saving time and effort. The high-pressure system ensures thorough coverage and the ability to reach intricate details on furniture.

How much paint can an airless paint sprayer hold?

With an airless paint sprayer, I can hold a significant amount of paint. The capacity varies depending on the model, but it is typically measured in gallons. To determine the right amount of paint to use, consider factors like surface area and desired coverage.

Advertisement

Are airless paint sprayers easy to clean?

Airless paint sprayers are easy to clean, but it’s important to follow the proper steps. Pros include faster painting and a smooth finish. Cons include overspray and the need for proper protective gear. Use warm soapy water and clean all parts thoroughly.

Can I use any type of paint with an airless paint sprayer?

Yes, you can use any type of paint with an airless paint sprayer. One of the benefits of using an airless paint sprayer is that it allows for easy application of various paint types. Proper airless paint sprayer maintenance ensures optimal performance.

Do I need to wear any protective gear when using an airless paint sprayer?

When using an airless paint sprayer, it is important to wear protective gear to ensure your safety. Safety precautions include wearing goggles, a respirator mask, and gloves to protect your eyes, lungs, and skin from paint particles and fumes.

Conclusion

Choosing the best airless paint sprayer for your interior walls and woodwork is a crucial decision that can significantly impact the outcome of your painting project. Just like a trusted companion, the right airless paint sprayer can make the task easier and more enjoyable.

There are several options to consider when selecting an airless paint sprayer for interior walls and woodwork. Some popular choices include the Graco Magnum X7, the Wagner Control Pro 170, the Titan ControlMax 1700 Pro, and the Graco Ultra Corded handheld sprayer. Each of these sprayers has its own unique symbol of reliability and performance.

Advertisement

When making your decision, it’s important to consider factors such as power, pressure control, and ease of use. The Graco Magnum X7, for example, offers a powerful motor and adjustable pressure control, making it suitable for both small and large projects. The Wagner Control Pro 170, on the other hand, is known for its efficient paint flow and consistent coverage. The Titan ControlMax 1700 Pro boasts a high-performance pump and a durable construction, making it a reliable choice for demanding projects. Lastly, the Graco Ultra Corded handheld sprayer is a convenient option for smaller jobs and touch-ups.

Regardless of the airless paint sprayer you choose, it’s important to properly maintain and clean it to ensure its longevity and performance. Regular cleaning and maintenance will help prevent clogs and ensure a smooth painting experience.

In conclusion, selecting the best airless paint sprayer for your interior walls and woodwork requires careful consideration. By weighing factors such as power, pressure control, and ease of use, you can find a sprayer that will be your reliable partner in achieving professional-looking results. So, happy painting!

Continue Reading

Airless Paint Sprayer Tips for Specific Projects

How To Paint A Brick Walls With Airless Sprayer

Published

on

By

An image that showcases a skilled hand maneuvering an airless sprayer, effortlessly gliding over a brick wall

The saying, ‘A fresh coat of paint works wonders,’ is accurate. Especially when it comes to painting brick walls, an airless sprayer is the most effective method to use.

Hi there, I’m here to guide you through the process of transforming your brick walls with ease and efficiency. With the right materials and equipment at hand, you’ll be able to achieve a smooth and professional finish in no time.

In this article, I will walk you through the steps involved in:

  1. Preparing the surface
  2. Cleaning the walls
  3. Priming
  4. Mixing the paint

I’ll also provide you with tips on applying multiple coats for optimal coverage. And don’t worry, I’ll make sure to include instructions on clean up and maintenance, so you can enjoy the beauty of your newly painted brick walls for years to come.

So, let’s get started and bring a fresh new look to your space!

Key Takeaways

  • Achieving even distribution and coverage is important to prevent streaks and uneven paint application.
  • Applying multiple coats of high-quality paint formulated for brick surfaces ensures a professional-looking finish and long-lasting protection against weathering and fading.
  • Regularly cleaning and maintaining the painted brick walls by dusting, using mild detergent for tougher stains, and gentle scrubbing with a sponge or brush helps preserve the paint finish.
  • Painting brick walls with an airless sprayer can increase home value by 15% and using proper maintenance tips ensures the longevity of the painted walls.

Prepare the Surface

Advertisement

Now it’s time to get the surface of your brick walls ready for a flawless paint job – let’s dive right in!

Before you start painting, it’s crucial to prepare the surface properly. First, gather your tools: a wire brush, scraper, and power washer.

Use the wire brush and scraper to remove any loose paint or dirt from the brick walls.

Next, give the surface a thorough clean with a power washer to remove any stubborn grime or debris.

Once the walls are clean, let them dry completely.

Advertisement

Now, it’s time to choose the perfect paint color for your brick walls. Consider the style of your home and the surrounding environment. Opt for a color that complements the overall aesthetic.

With the surface prepared and the paint color selected, let’s move on to gathering your materials and equipment for the next step.

Gather Your Materials and Equipment

First, make sure you have all the necessary materials and equipment ready. Here is a helpful table to guide you in gathering everything you need:

Materials Equipment
Paint Airless sprayer
Primer Paintbrushes
Drop cloth Paint roller
Painter’s tape Paint trays
Sandpaper Extension pole

Choosing the right paint colors is essential for achieving the desired look for your brick walls. Consider the overall color scheme of the room and the atmosphere you want to create. Neutral tones like whites, grays, and beiges work well for a timeless and versatile look. If you want to add a pop of color, opt for bold shades like deep blues or vibrant reds.

To achieve a smooth finish, follow these tips:

Advertisement
  1. Clean the brick walls thoroughly to remove any dirt or debris.
  2. Apply a coat of primer to ensure better paint adhesion.
  3. Use an airless sprayer for even and consistent coverage.
  4. Start painting from the top and work your way down, using smooth and overlapping strokes.
  5. Allow the paint to dry completely before applying a second coat.

Now, let’s move on to the next section and learn how to clean the brick walls effectively.

Clean the Brick Walls

To achieve a smooth and pristine surface, it’s important to give the brick walls a thorough cleaning, ensuring a fresh canvas for your next step. Brick cleaning methods vary depending on the level of dirt and stains.

For light dirt, a mixture of warm water and dish soap can do the trick. Simply scrub the walls gently with a soft-bristle brush, working in small sections.

For more stubborn stains, a solution of equal parts white vinegar and water can be effective. Apply the solution to the stains and let it sit for a few minutes before scrubbing. Rinse the walls with clean water to remove any residue.

Advertisement

Once the brick walls are clean, you can move on to priming them for painting, creating a solid foundation for a flawless finish.

Prime the Walls

Prepare for a transformative makeover by applying a high-quality primer to your freshly cleaned brick walls. This will allow the true potential of your space to shine through. When selecting a primer for brick walls, choose one specifically designed for masonry surfaces. Look for a primer that provides excellent adhesion, durability, and resistance to moisture and alkali. Before applying the primer, ensure that the walls are completely dry for proper adhesion. Once the primer is applied, allow it to dry according to the manufacturer’s instructions, typically around 24 hours. This drying time is crucial for the primer to fully bond with the surface and create a solid foundation for the paint.

With the walls primed and ready, it’s time to move on to the next step of the process: mixing and diluting the paint.

Mix and Dilute the Paint

Advertisement

Don’t worry about the hassle of measuring and mixing paint, we’ve got you covered with a simple method to achieve the perfect paint consistency for your brick surfaces. Here’s how to mix and dilute the paint for your airless sprayer:

  1. Choosing the right paint color is crucial for achieving the desired look. Consider the style of your space and select a color that complements it.

  2. Proper safety precautions are essential when working with paint. Wear protective clothing, gloves, and goggles to ensure your safety.

  3. Start by pouring the desired amount of paint into a clean container. Add water gradually while stirring until you reach the desired consistency. Remember to follow the paint manufacturer’s instructions for specific dilution ratios.

  4. Mix the paint thoroughly to ensure an even distribution of color and consistency.

Now that you have your paint mixed and ready, it’s time to test the sprayer and ensure everything is functioning properly.

Test the Sprayer

After mixing and diluting the paint, it’s time to give the sprayer a test run and make sure everything is working properly. This step is crucial to ensure a smooth painting process and avoid any potential issues. Here are some troubleshooting tips and common mistakes to watch out for when testing the sprayer:

Common Mistakes Troubleshooting Tips Proper Solution
Clogged nozzle Clean the nozzle thoroughly Use a small brush or needle
Uneven spray pattern Adjust the pressure settings Increase or decrease pressure
Paint splattering Check for loose fittings Tighten all connections
Inconsistent flow Check for air leaks Fix or replace any damaged parts
Excessive overspray Adjust the spray tip Choose a smaller tip size

Now that the sprayer is tested and ready, it’s time to start painting the brick walls.

Start Painting

Now that everything is set up and ready to go, it’s time to dive right into giving your brick walls a fresh new look!

Advertisement

Did you know that painting can instantly transform a space and increase its appeal by up to 40%? To ensure a smooth finish, here are some tips to keep in mind:

  • Start by painting from the top and work your way down to avoid drips.
  • Keep the sprayer moving at a consistent speed to prevent uneven application.
  • Hold the sprayer nozzle perpendicular to the wall for an even coat.
  • Overlap each pass by about 50% to ensure full coverage.

Troubleshooting common painting issues:

  • If you notice any clogs or uneven spraying, check the sprayer’s filter and clean it if necessary.
  • If the paint is not adhering properly, try adjusting the pressure settings on the sprayer.
  • If you encounter any drips or runs, simply smooth them out with a brush or roller while the paint is still wet.

With these tips in mind, you’re now ready to apply multiple coats and achieve a flawless finish.

Apply Multiple Coats

To achieve a truly professional and long-lasting result, it’s crucial to apply multiple coats of paint on your newly prepped surface. This ensures a smooth and even finish, covering any imperfections in the brick. When applying multiple coats, it’s important to use the proper technique and choose the right paint.

First, make sure to follow a consistent pattern when spraying the paint. Start from the top and work your way down, moving the sprayer in a horizontal or vertical motion. This will ensure an even distribution of paint and prevent streaks or uneven coverage.

Second, choose a high-quality paint that is specifically formulated for brick surfaces. This type of paint is designed to adhere well to the rough texture of the brick and provide long-lasting protection against weathering and fading.

By applying multiple coats using the proper technique and choosing the right paint, you can achieve a professional-looking finish that will stand the test of time. As you finish up with the painting process, it’s time to move on to the next step: clean up and maintenance.

Advertisement

Clean Up and Maintenance

Maintaining the cleanliness and upkeep of your newly painted surface is essential for preserving its beauty and longevity. To ensure the longevity of your paint finish, follow these cleaning techniques:

  1. Regularly dust the surface using a soft cloth or brush to remove any dirt or debris that may accumulate over time.

  2. For tougher stains, mix a mild detergent with warm water and gently scrub the affected area using a sponge or soft-bristle brush. Avoid using harsh chemicals or abrasive cleaners that could damage the paint.

  3. Rinse the surface thoroughly with clean water and pat dry with a clean cloth to prevent water spots or streaks.

By following these cleaning techniques, you can preserve the paint finish and keep your brick walls looking fresh and vibrant.

Now, let’s move on to the next section and enjoy your newly painted brick walls.

Enjoy Your Newly Painted Brick Walls

Get ready to admire your freshly painted brick walls and revel in the transformation they bring to your space.

Did you know that a study found that homeowners who painted their brick walls experienced a 15% increase in overall home value?

Advertisement

Now that you have successfully painted your brick walls with an airless sprayer, it’s important to know some maintenance tips to keep them looking their best.

Regularly inspect your walls for any signs of wear or damage, and touch up any areas that may need it.

Additionally, consider choosing the right paint color for your brick walls. Neutral shades like white, beige, or gray can create a timeless and classic look, while bolder colors can add a unique and vibrant touch to your space.

By following these maintenance tips and choosing the right paint color, you can enjoy your newly painted brick walls for years to come.

Frequently Asked Questions

Can I use an airless sprayer to paint other surfaces besides brick walls?

Yes, an airless sprayer can be used to paint surfaces other than brick walls. It is a versatile tool that can be used for various painting techniques and works well on different surfaces, providing efficient and even coverage. There are also alternative painting tools available for different surfaces.

Advertisement

How long does it typically take for the primer to dry before applying the paint?

The drying time of primer depends on several factors such as temperature and humidity. On average, it takes about 1-2 hours for primer to dry before applying paint. The best paint for brick walls is a high-quality acrylic latex paint.

What type of paint should I use for painting brick walls with an airless sprayer?

For painting brick walls with an airless sprayer, I recommend using a high-quality latex paint specifically formulated for masonry surfaces. It dries faster than oil-based paints and provides excellent coverage and durability. If you’re looking for alternative primers, consider ones designed for masonry or concrete surfaces.

Can I use a different type of primer instead of the recommended one for brick walls?

Yes, you can use alternative primers for brick walls. However, it’s important to choose one specifically designed for masonry surfaces. Different primers may require different painting techniques, so be sure to follow the manufacturer’s instructions for best results.

What safety precautions should I take when using an airless sprayer to paint brick walls?

When using an airless sprayer to paint brick walls, it’s important to prioritize safety. Wear protective goggles, gloves, and a mask to avoid inhaling paint particles. Ensure proper ventilation by opening windows or using fans.

Conclusion

As I stood back and admired my newly painted brick walls, I couldn’t help but feel a sense of transformation. The once dull and outdated surface now exuded a fresh and vibrant energy. The symbolism of the paintbrush was undeniable – it had breathed new life into the space, just as it had into my own spirit.

Advertisement

With the knowledge and precision of using an airless sprayer, I was able to achieve a flawless result. Now, I can confidently say that my brick walls are not just walls, but a work of art.

Continue Reading
Advertisement

Affiliate disclaimer

As an affiliate, we may earn a commission from qualifying purchases. We get commissions for purchases made through links on this website from Amazon and other third parties.

Advertisement

Trending