Hello there! If you have a trustworthy airless sprayer and leftover paint, and you’re unsure about how long you can store the paint in it, don’t worry. I have the information you need.
In this article, we’re going to dive into the factors that affect paint longevity in an airless sprayer, from drying times to storage tips.
You see, I’ve been there too, wondering if my paint would still be good after a few days or even weeks. That’s why I’ve done my research and gathered all the information you need to maximize the lifespan of both your paint and your sprayer.
We’ll cover everything from understanding when your paint has gone bad to troubleshooting common sprayer issues. By the end of this article, you’ll be armed with the knowledge to properly store your paint, extend its shelf life, and keep your airless sprayer in top-notch condition.
So let’s get started!
Key Takeaways
- Paint viscosity and thickness affect the lifespan and clogging of an airless sprayer.
- Temperature and humidity play a role in the drying time of paint.
- Properly sealing paint containers and storing them in a cool, dry place can extend the paint’s shelf life.
- Using additives such as retarders, thickeners, flow improvers, humectants, and anti-skinning agents can slow down the drying process of paint.
Factors Affecting Paint Longevity in an Airless Sprayer
Wondering how long you can leave paint in your airless sprayer? Let’s dive into the factors that can affect the longevity of paint in your sprayer!
One important factor is paint viscosity. Different paints have varying viscosities, which can impact how long they can remain in an airless sprayer without drying out or clogging the system. Thicker paints tend to have a longer lifespan in the sprayer, while thin or low-viscosity paints may dry out more quickly.
Another factor to consider is the impact of temperature. Higher temperatures can accelerate paint drying, potentially leading to clogs and reduced paint lifespan in the sprayer. On the other hand, colder temperatures might slow down the drying process, allowing the paint to stay in the sprayer for a longer period.
Understanding these factors will help you determine the ideal conditions for keeping paint in your airless sprayer without compromising its performance. Moving on to understanding paint drying times…
Understanding Paint Drying Times
Curious about how quickly your newly applied coat will dry? Understanding paint drying times is crucial when using an airless paint sprayer. Here are three key factors affecting paint drying times:
- Temperature: Higher temperatures accelerate the drying process, while colder temperatures slow it down.
- Humidity: High humidity can prolong the drying time, as moisture in the air hinders evaporation.
- Paint type: Different types of paint have varying drying times, with oil-based paints generally taking longer than water-based ones.
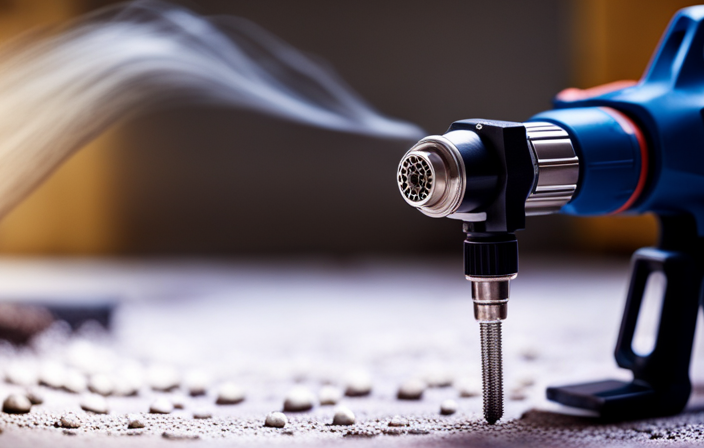
Using an airless paint sprayer offers several benefits, including faster application and a smoother finish. These sprayers atomize paint into tiny droplets, ensuring even coverage and reducing drying time.
To seamlessly transition into the subsequent section about extending paint shelf life, it’s important to properly clean your airless sprayer after each use.
Tips for Extending Paint Shelf Life
When it comes to extending the shelf life of paint, there are a few key tips that have worked for me.
-
Properly sealing paint containers: This is essential in preventing air from getting in and causing the paint to dry out.
-
Storing paint in a cool, dry place: This helps to maintain its freshness and consistency.
-
Using additives: Additives such as flow improvers or retarders can slow down the drying process and give you more time to work with the paint.
By following these steps, you can ensure that your paint lasts longer and remains usable for future projects.
Properly Sealing Paint Containers
To keep your paint fresh and ready for use, make sure to seal the containers tightly like a locked treasure chest.
Properly sealing paint cans is crucial in preventing paint contamination. When paint cans are not sealed properly, air can enter and cause the paint to dry out or form a skin on the surface. This can make it difficult to use the paint effectively and may result in wasted product.
To avoid this, ensure that the lid is securely fastened and consider using plastic wrap or a rubber mallet to create an airtight seal.
Once you have properly sealed the paint containers, it is important to store them in a cool, dry place to further extend the shelf life of the paint. This will help maintain the paint’s consistency and quality for future use.
Storing Paint in a Cool, Dry Place
To protect the quality and maximize the shelf life of your paint, it is important to store it in a cool, dry place. Storing paint in a cool environment helps prevent it from drying out too quickly, which can lead to clogging in your airless sprayer. When paint gets too warm, it can become thick and difficult to spray, causing issues with the flow and consistency of your paint job.
In addition to that, storing paint in a dry place helps prevent moisture from getting into the paint. Moisture can cause clumping and affect the performance of the paint. To ensure paint preservation and prevent paint clogging, always store your paint in a cool, dry place away from direct sunlight and extreme temperatures. This will help maintain the paint’s integrity and make it easier to use with your airless sprayer.
Next, let’s explore using additives to slow down drying.
Using Additives to Slow Down Drying
If you want to extend the drying time of your paint, try using additives that can significantly slow down the process and give you more time to perfect your project. Here are some additives you can use:
-
Retarders: These additives are specifically designed to slow down the drying time of paint. They can be added directly to the paint before spraying.
-
Thickeners: Adding a thickening agent to the paint can increase its viscosity, resulting in a slower drying time.
-
Flow improvers: These additives improve the flow and leveling of the paint, which can help slow down the drying process.
-
Humectants: Humectants are substances that attract and retain moisture. Adding them to the paint can delay drying by keeping the surface moist for longer.
-
Anti-skinning agents: These additives prevent the formation of a skin on the paint surface, allowing it to stay wet for a longer period.
Using these additives for slower drying can have an impact on the quality of the paint, so it’s important to experiment and find the right balance.
Now, let’s move on to the next section on cleaning and maintenance of your airless sprayer.
Cleaning and Maintenance of Your Airless Sprayer
When using your airless sprayer, it’s important to know how long you can leave paint in it before cleaning and maintaining it. Proper cleaning techniques and a regular maintenance schedule are essential for keeping your sprayer in good working condition.
After each use, flush out any remaining paint with the appropriate solvent or cleaning solution. This will prevent the paint from drying and clogging the sprayer components, ensuring optimal performance.
Regular maintenance tasks such as checking filters, lubricating moving parts, and inspecting for any damage should be done according to the manufacturer’s recommendations.
By following these cleaning and maintenance practices, you can extend the lifespan of your airless sprayer and ensure consistent, high-quality results.
Now, let’s explore the best practices for paint storage.
Best Practices for Paint Storage
When it comes to paint storage, I always follow a few best practices.
First, I make sure to label and organize my paint containers. This way, I can easily find the color and formula I need when I’m working on a project.
Second, I use secondary containers for small amounts of paint. This helps prevent waste and keeps everything tidy.
Lastly, I always keep track of my paint colors and formulas. This ensures consistency in my work and helps me avoid any mistakes.
By following these practices, I can stay organized and efficient in my painting projects.
Labeling and Organizing Paint Containers
To keep your paint supplies organized and ensure their longevity, follow these tips for labeling and organizing your paint containers:
-
Use clear and concise labels: Clearly label each paint can with the color, brand, and type of paint it contains. This makes it easy to locate the specific paint you need for your project.
-
Categorize by project or room: Organize your paint containers based on the project or room they are intended for. This helps you quickly find the right paint, saving time and frustration.
-
Create an inventory list: Keep a detailed inventory of your paint supplies, noting the quantity and location of each container. This prevents you from purchasing duplicate paints and ensures you always have the right paint on hand.
Properly labeling and organizing your paint containers allows for easy access and efficient use of your paint supplies. Now, let’s move on to the next section about using secondary containers for small amounts of paint.
Using Secondary Containers for Small Amounts of Paint
If you have just a little bit of paint left, transfer it into smaller containers to avoid wasting it. Using alternative storage methods, such as secondary containers, is a great way to keep small amounts of paint in good condition for future use.
These containers are typically smaller in size and can be easily sealed to keep the paint fresh. When using secondary containers, it is important to label them properly with the color and other important information. This will help you easily identify the paint later on.
When it comes to disposing of small amounts of paint, it is important to follow proper disposal methods. This may include taking it to a local hazardous waste facility or drying it out before throwing it away. Proper disposal helps protect the environment.
Now, let’s talk about keeping track of paint colors and formulas.
Keeping Track of Paint Colors and Formulas
Keeping track of paint colors and formulas is essential for both creativity and consistency in DIY projects. Having a system in place for tracking paint usage and creating a paint inventory is crucial. This system allows you to easily see what colors you have on hand and how much paint you have left for each project. By doing so, you can avoid purchasing unnecessary duplicates. Furthermore, keeping track of the formulas you use for specific colors is beneficial for future touch-ups or repainting. Now that we understand the significance of tracking paint colors and formulas, let’s examine some common mistakes to avoid in order to achieve the best results in your painting projects.
Common Mistakes to Avoid
One common mistake to avoid when using an airless sprayer is leaving paint inside it for an extended period of time. This can lead to clogs, reduced performance, and even damage to the sprayer. To ensure optimal performance and avoid these issues, it’s important to properly clean the sprayer after each use.
Here are some factors affecting paint application and common paint spraying mistakes to keep in mind:
- Inadequate thinning: Failing to properly thin the paint can result in uneven coverage and clogs in the sprayer.
- Incorrect pressure setting: Using the wrong pressure setting can lead to overspray or insufficient coverage.
- Ignoring maintenance: Neglecting regular maintenance, such as cleaning filters and checking for worn parts, can cause the sprayer to malfunction.
By avoiding these common mistakes, you can ensure a smoother paint application process and extend the lifespan of your airless sprayer.
In the next section, we will discuss signs your paint has gone bad.
Signs Your Paint Has Gone Bad
To determine if your paint has gone bad, watch out for signs such as:
- A strong, unpleasant odor
- A thick, lumpy consistency
These are clear indications that your paint has spoiled and is no longer usable. Proper paint storage is crucial to prevent spoilage. Always store paint in a cool, dry place away from extreme temperatures and direct sunlight. Additionally, make sure the paint lids are tightly sealed to prevent air exposure.
Recognizing paint spoilage is important because using bad paint can result in uneven application and poor adherence to surfaces.
Now that you know how to identify bad paint, let’s discuss the proper disposal of unused or expired paint.
Proper Disposal of Unused or Expired Paint
Properly disposing of unused or expired paint is essential to minimize environmental impact and ensure the safety of both humans and animals. When it comes to paint disposal, there are several options available to help you do your part in protecting the environment. Here are three key ways you can responsibly dispose of your unused or expired paint:
-
Recycling: Many communities offer paint recycling programs where you can drop off your old or unused paint for proper recycling. This helps to reduce waste and prevent harmful chemicals from entering landfills.
-
Donating: If your paint is still usable, consider donating it to local schools, community centers, or nonprofit organizations. They may be able to put it to good use, saving resources and benefiting the community.
-
Proper Disposal: If recycling or donating are not options, it is important to follow your local guidelines for proper disposal. This may involve drying out the paint and disposing of it in the regular trash, or taking it to a hazardous waste facility.
By taking the time to properly dispose of your unused or expired paint, you can contribute to a cleaner and safer environment for everyone. Now, let’s delve into troubleshooting common paint sprayer issues.
Troubleshooting Common Paint Sprayer Issues
If you’re experiencing issues with your paint sprayer, troubleshooting common problems can be a frustrating but necessary step in achieving a smooth and even finish. There are several factors that can affect paint sprayer performance. These include clogged or worn-out spray tips, insufficient pressure, or incorrect paint viscosity.
To troubleshoot paint spray patterns, start by checking the spray tip for any obstructions or damage. Clean or replace the tip if necessary. Next, ensure that the paint is properly thinned to the manufacturer’s recommendations and that the sprayer is set to the correct pressure. If the issue persists, check for any leaks or blockages in the hoses or filters.
Regular maintenance and cleaning of your paint sprayer can also help prevent issues. Transitioning into the subsequent section about maximizing the lifespan of your paint and sprayer, it is important to take proper care of your equipment to ensure its longevity.
Conclusion: Maximizing the Lifespan of Your Paint and Sprayer
Make sure you take good care of your paint sprayer and follow proper maintenance procedures in order to maximize its lifespan. By maximizing paint durability and prolonging the sprayer’s lifespan, you can save time and money in the long run. Here are some key tips to help you achieve this:
| Maintenance Tips | Benefits |
|---|---|
| Clean the sprayer after each use | Prevents buildup and clogging, ensuring consistent spray patterns |
| Store paint properly | Extends paint shelf life and prevents contamination |
| Use the right paint for your sprayer | Prevents damage to the sprayer and ensures optimal performance |
| Regularly inspect and replace worn parts | Maintains efficient operation and prevents costly repairs |
| Follow manufacturer’s guidelines | Ensures proper usage and avoids unnecessary damage |
By following these simple but essential steps, you can extend the lifespan of your paint sprayer and keep it in top-notch condition for years to come.
Frequently Asked Questions
How often should I clean my airless sprayer after using it?
I should clean my airless sprayer after every use to maintain its performance and prevent clogs. Proper cleaning techniques include flushing the system with water or a cleaning solution, removing any leftover paint, and lubricating the pump.
Can I mix different types of paint in my airless sprayer?
Yes, you can mix different types of paint in your airless sprayer. However, it is important to properly clean your sprayer after each use to prevent clogs and ensure optimal performance. Regular maintenance is key.
Is it normal for paint to clog the nozzle of my airless sprayer?
Paint clogging the nozzle of an airless sprayer is a common issue. To prevent this, clean the sprayer regularly and use the correct paint viscosity. If clogging occurs, troubleshoot by checking the nozzle for debris and adjusting the pressure settings.
Can I leave paint in my airless sprayer overnight?
Yes, you can leave paint in your airless sprayer overnight. However, it is not recommended as it can clog the nozzle. Airless sprayers are best for painting, not for other liquids. They offer a smooth finish and faster application.
How can I tell if the paint in my airless sprayer has expired or gone bad?
To properly store paint in an airless sprayer, ensure it is tightly sealed and stored in a cool, dry place. Signs that paint has gone bad include a foul odor, clumps, or a thickened consistency.
Conclusion
In conclusion, it’s essential to properly maintain and store your paint and airless sprayer to maximize their lifespan. By following the tips and best practices mentioned in this article, you can ensure that your paint remains usable for longer periods.
Did you know that according to a study conducted by paint manufacturers, the average shelf life of unopened paint is around 2-5 years? This statistic highlights the importance of proper storage and regular maintenance to prevent your paint from going bad.
Remember, taking care of your equipment and materials will save you time and money in the long run.