Connect with us

Airless Paint Sprayers FAQs

How Long Can You Leave Paint In An Airless Sprayer

Published

on

An image showcasing an airless sprayer filled with vibrant paint, the nozzle suspended mid-air, surrounded by a mist of fine droplets

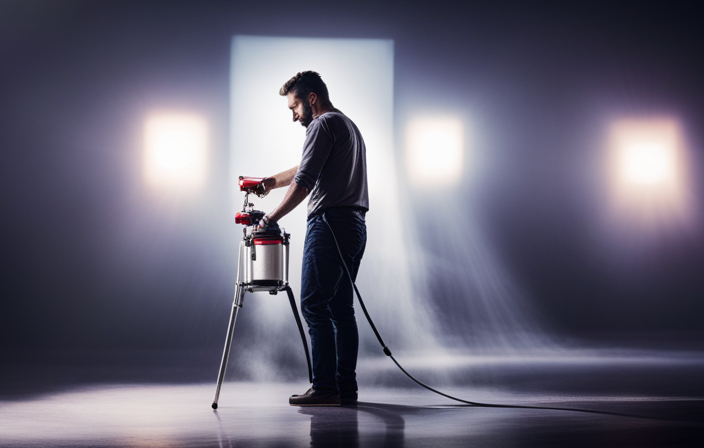
I recall the initial moment of realization when I first encountered the magic of utilizing an airless paint sprayer. It was truly a game-changer, offering a convenient way to achieve perfectly smooth and even finishes in no time. However, as I delved further into the realm of airless paint sprayers, I started pondering: how long can paint sit in an airless sprayer before encountering problems? This query is a frequent worry for both DIY enthusiasts and experts alike.

In this article, we will explore the various factors that affect the shelf life of paint in an airless sprayer. From understanding paint degradation to extending its lifespan, we’ll cover it all.

We’ll also discuss the telltale signs of paint gone bad and offer tips for efficient paint usage. Plus, we’ll delve into the best practices for cleaning the sprayer to ensure its longevity.

So, if you’ve ever wondered about the shelf life of paint in an airless sprayer, join me on this informative journey as we uncover the answers and become masters of paint preservation.

Key Takeaways

  • Paint left in an airless sprayer can undergo chemical reactions like oxidation, leading to degradation in quality and changes in color, texture, and overall performance.
  • Proper storage in sealed containers, away from air and moisture, helps prevent chemical reactions and maintain the desired color and texture of the paint.
  • Exposure to extreme temperatures can negatively impact paint quality, resulting in poor coverage at high temperatures and thicker, harder-to-spray paint at low temperatures.
  • Regular cleaning and maintenance of the airless sprayer, including flushing with water or cleaning solution after each use, inspecting and replacing worn parts, and using a filter to remove debris, are essential for optimal performance and prolonging the sprayer’s lifespan.

Factors Affecting Paint Shelf Life in an Airless Sprayer

Advertisement

The shelf life of paint in an airless sprayer can be influenced by several factors. One important factor is the viscosity of the paint. If the paint becomes too thick or too thin, it may not spray properly and could lead to clogs or uneven coverage. Factors affecting paint viscosity include the type of paint, the ratio of paint to thinner, and the temperature at which the paint is stored.

Speaking of temperature, it also plays a significant role in the shelf life of paint in an airless sprayer. Extreme temperatures can cause the paint to degrade more quickly, leading to changes in color, texture, and overall quality. It’s important to store paint in a cool, dry place to extend its shelf life.

Understanding paint degradation and how to prevent it is crucial for maintaining the quality of the paint and achieving optimal results.

Understanding Paint Degradation

When it comes to paint degradation, there are several key points to consider.

Firstly, chemical reactions can occur over time, causing the paint to break down and lose its effectiveness.

Advertisement

Secondly, color and texture changes may occur, leading to an undesirable finish.

Finally, paint degradation can result in decreased performance, such as reduced coverage or adhesion.

Understanding these factors is crucial in maintaining the quality and longevity of paint in an airless sprayer.

Chemical Reactions

After a while, paint left in an airless sprayer may start to undergo intriguing chemical reactions. These reactions occur due to the exposure of the paint to air and other elements present in the environment.

One common reaction is oxidation, where the paint molecules react with oxygen in the air, leading to the formation of new compounds. This can result in changes in the paint’s properties, such as its color and texture.

Advertisement

Additionally, some paint ingredients may interact with each other, causing chemical reactions that alter the paint’s composition.

To prevent these reactions, it’s important to properly store paint in sealed containers and avoid leaving it in an airless sprayer for extended periods. By doing so, you can maintain the desired color and texture of your paint for future use.

Color and Texture Changes

Storing paint in sealed containers can help preserve its color and texture, preventing any unwanted surprises down the road. Over time, exposure to air and other environmental factors can cause color fading and texture inconsistencies in paint. Color fading occurs when the pigments in the paint are exposed to light and begin to break down. This can result in a loss of vibrancy and intensity in the color. Texture inconsistencies can occur when the paint dries unevenly or when the particles in the paint settle over time. This can lead to an uneven, rough, or grainy finish. It is important to properly store paint and use it within its recommended shelf life to avoid these issues. Ensuring proper storage conditions and using fresh paint can help maintain the desired color and texture. Moving on to the next section, decreased performance can also be a concern when paint is left in an airless sprayer for too long.

Decreased Performance

To make sure your paint performs at its best, be mindful of how it’s handled and the duration it spends in the sprayer. Factors causing paint degradation include exposure to air, moisture, and contaminants. These can lead to color and texture changes, as well as decreased performance.

Temperature also plays a crucial role in paint performance. High temperatures can cause the paint to dry too quickly, resulting in poor coverage and an uneven finish. Conversely, low temperatures can make the paint thicker and more difficult to spray effectively. It’s important to store the sprayer in a cool, dry place to minimize these effects.

Advertisement

By understanding the factors that affect paint performance, you can extend the shelf life and ensure optimal results.

Extending the Shelf Life of Paint

If you want to keep your paint fresh for longer, make sure to store it in a cool, dry place away from direct sunlight. This will help maximize efficiency and prevent paint waste. Additionally, there are a few other steps you can take to extend the shelf life of your paint. Firstly, make sure the lid is tightly sealed to prevent air from entering the container. Secondly, consider adding a paint preservative to the can, which can help prevent the growth of mold and bacteria. Lastly, avoid exposing the paint to extreme temperatures, as this can cause it to deteriorate more quickly. By following these guidelines, you can ensure that your paint will remain in good condition for an extended period of time. Speaking of which, let’s now discuss the signs of paint gone bad.

Signs of Paint Gone Bad

Don’t be surprised if your once-vibrant paint has transformed into a monstrous concoction of clumps and curdled colors, a sight that would make any DIY enthusiast shudder in horror. Proper paint storage is crucial to maintaining its quality and preventing it from going bad. Paint, just like any other product, has an expiration date. Exposure to extreme temperatures, moisture, and air can accelerate the deterioration process. To ensure the longevity of your paint, follow these tips:

  • Store paint in a cool, dry place away from direct sunlight.
  • Seal the paint can tightly to prevent air and moisture from entering.
  • Avoid storing paint cans upside down, as this can lead to the formation of a thick skin on the surface.

Testing the paint’s viability is the next step in determining whether it’s still usable or not.

Testing the Paint’s Viability

Now, let’s find out if your paint is still good to use by testing its viability. There are several testing methods you can use to determine if your paint has gone bad. One method is to check for any changes in the paint’s consistency, such as clumps or separation. You can also perform a smell test to see if the paint has developed a foul odor. Additionally, you can apply a small amount of the paint onto a test surface and observe if it dries properly and adheres well. It’s important to note that the viability of the paint can also be influenced by storage conditions. Extreme temperatures and exposure to sunlight can cause the paint to deteriorate more quickly. If your paint is no longer viable, it’s essential to dispose of it properly to avoid environmental contamination.

Proper Disposal of Expired Paint

When it comes to the proper disposal of expired paint, there are several key points to consider.

Advertisement

First and foremost is the environmental impact of disposing of paint improperly. It’s important to be aware of local regulations and guidelines for disposing of paint, as different areas may have different rules.

Finally, it’s worth exploring recycling and reusing options for expired paint, as this can be a more sustainable and environmentally friendly solution.

Environmental Impact

Contrary to popular belief, leaving paint in an airless sprayer for an extended period can have a significant environmental impact. Each gallon of wasted paint contributes to an estimated 13.6 pounds of hazardous waste.

This waste not only pollutes our landfills, but it also has a harmful impact on air quality. When paint is left in the sprayer, it can dry up and release harmful volatile organic compounds (VOCs) into the air. These VOCs contribute to the formation of smog and can harm human health.

To minimize the environmental impact of paint disposal, it’s important to consider eco-friendly alternatives such as donating unused paint or properly recycling it. Local regulations often dictate the correct disposal methods, ensuring that paint is handled responsibly and does not harm the environment.

Advertisement

Local Regulations

When it comes to the environmental impact of leaving paint in an airless sprayer, it’s important to consider local regulations and proper disposal methods. Different areas may have specific rules and guidelines regarding the handling and disposal of paint, as well as other hazardous materials. It’s crucial to follow these regulations to ensure that paint waste is disposed of properly and does not harm the environment.

One option for proper disposal is to take the paint to a local recycling center or hazardous waste facility, where it can be processed and disposed of safely. Another option is to donate unused paint to community organizations or individuals in need. By adhering to local regulations and implementing proper disposal methods, we can minimize the environmental impact of leaving paint in an airless sprayer.

In the next section, we will explore recycling and reusing options for leftover paint.

Recycling and Reusing Options

If you’re looking for ways to be eco-friendly with your leftover paint, there are some great options for recycling and reusing it.

When it comes to recycling options, many communities have paint recycling programs where you can drop off your unused paint for proper disposal. These programs ensure that the paint is recycled or disposed of in an environmentally friendly way.

Advertisement

Another option is to donate your leftover paint to local community organizations, schools, or art programs that may have a use for it.

If recycling isn’t an option, you can also consider reusing the paint for touch-ups or small projects around your home.

By finding creative ways to repurpose your leftover paint, you can reduce waste and contribute to a more sustainable future.

Now, let’s move on to some tips for efficient paint usage.

Tips for Efficient Paint Usage

When it comes to efficient paint usage, there are three key points to keep in mind:

Advertisement
  1. Planning and calculating quantities: By carefully planning and calculating the amount of paint needed for a project, you can avoid unnecessary waste and save both time and money.

  2. Using paint strainers: Using paint strainers is essential for ensuring a smooth and even finish. They help remove any debris or impurities that may be present in the paint.

  3. Cleaning and maintaining the sprayer: Regular cleaning and maintenance of the sprayer will not only extend its lifespan, but also ensure optimal performance and prevent any clogs or blockages.

Planning and Calculating Quantities

Calculating the right amount of paint for your project can be a breeze with proper planning and some quick math. To ensure you have enough paint, here are some planning techniques and estimating quantities tips to consider:

  • Measure the surface area: Start by measuring the length and width of the area you plan to paint. Multiply these measurements to get the total square footage.

  • Consider the number of coats: Decide how many coats of paint you’ll need. Multiply the square footage by the number of coats to estimate the total paint needed.

  • Account for waste: Add a little extra paint to account for touch-ups, mistakes, or future repairs.

  • Know the coverage rate: Check the paint can for the coverage rate per gallon. Divide the total square footage by the coverage rate to determine the number of gallons needed.

  • Consult a professional: If unsure, consult with a paint professional who can provide more accurate estimates.

Planning and calculating quantities is crucial for a successful painting project. Once you have the right amount of paint, the next step is using paint strainers.

Using Paint Strainers

To ensure a smooth and flawless finish, strain your paint using paint strainers. Paint strainers are essential tools that help remove any impurities or debris from the paint, ensuring a clean application.

The benefits of using paint strainers are numerous. Firstly, they prevent clogs and blockages in the spray gun, which can result in uneven spraying and wasted paint. Additionally, paint strainers help to eliminate any particles that may cause imperfections on the painted surface, such as dust or dried paint flakes.

There are various types of paint strainers available, including mesh filters, cone filters, and bag filters. Each type is designed to cater to different paint thicknesses and preferences.

Advertisement

Now that you understand the importance of paint strainers, let’s move on to the next section about cleaning and maintaining the sprayer.

Cleaning and Maintenance of the Sprayer

After straining your paint with a paint strainer, it’s important to regularly clean and maintain your sprayer for optimal performance. Cleaning equipment and preventing clogs are crucial to ensure smooth operation and prevent any damage to the sprayer. To maintain your airless sprayer, follow these steps:

Cleaning Maintenance Preventing Clogs
Flush the sprayer with water or cleaning solution after each use Check and replace worn or damaged parts regularly Use a filter to remove debris and impurities from the paint
Clean the gun and nozzle using a brush or solvent Lubricate moving parts to minimize friction Avoid using paint that has not been properly strained
Remove any dried paint from the sprayer components Store the sprayer in a clean, dry area Regularly inspect and clean the intake valve and hose

By regularly cleaning and maintaining your sprayer, you can extend its lifespan and ensure consistent, high-quality results. In the next section, we will discuss common mistakes to avoid when using an airless sprayer.

Common Mistakes to Avoid

Watch out for these common mistakes you might be making when using an airless sprayer to avoid any issues with leaving paint in it for too long. One of the biggest mistakes is improper paint storage. It’s important to store your paint properly, in a cool and dry place, to prevent it from drying out.

Another mistake to avoid is leaving paint in the sprayer for an extended period without proper maintenance. If paint is left sitting in the sprayer for too long, it can clog the nozzle and other components, causing issues with the sprayer’s performance. To prevent this, always clean the sprayer after each use and flush it with water or a cleaning solution.

Advertisement

By following these best practices for cleaning the sprayer, you can ensure its longevity and optimal performance.

Best Practices for Cleaning the Sprayer

When it comes to cleaning the sprayer, there are a few best practices that I always follow.

First, I make sure to flush the sprayer with solvents to remove any remaining paint. This helps to prevent clogs and ensures that the sprayer is ready for the next use.

Next, I carefully remove any excess paint from the equipment, paying close attention to all the nooks and crannies.

Finally, I make sure to properly store the cleaned equipment to prevent any damage or contamination.

Advertisement

These steps may seem small, but they make a big difference in keeping the sprayer in top shape and ensuring optimal performance.

Flushing with Solvents

Before you begin flushing the airless sprayer with solvents, consider how long the paint has been sitting in the sprayer, as this can impact the effectiveness of the flushing process. The longer the paint sits in the sprayer, the more difficult it can be to clean. Flushing the sprayer with solvents is an effective technique for removing any residual paint and ensuring the sprayer is ready for future use. However, if the paint has been sitting in the sprayer for an extended period of time, alternative cleaning methods may be necessary. The table below provides a comparison of flushing techniques and alternative cleaning methods.

Flushing Technique Alternative Cleaning Method
Solvent flushing Disassembly and manual cleaning
Water flushing Pressure washing
Air flushing Brush and scraper
Dual flushing Chemical paint removers

Considering the duration of the paint in the sprayer, it is crucial to choose the appropriate cleaning approach. Once the excess paint is removed, we can move on to the next step of removing any remaining paint residue.

Removing Excess Paint

Once the excess paint’s been removed, it’s time to tackle any remaining residue. To ensure a thorough clean, follow these cleaning techniques:

  1. Use a soft cloth or sponge soaked in warm, soapy water to gently scrub the surfaces of the airless sprayer. Pay close attention to areas where paint residue may be trapped, such as around the nozzle or inside the paint container.

  2. For stubborn residue, consider using a paint remover specifically designed for the type of paint you were using. Apply the remover according to the manufacturer’s instructions and use a clean cloth or brush to scrub away the residue.

  3. Rinse the sprayer thoroughly with clean water to remove any remaining soap or paint remover.

By removing paint residue using these cleaning techniques, you can ensure that your airless sprayer is ready for proper storage of cleaned equipment.

Advertisement

Proper Storage of Cleaned Equipment

After removing excess paint from the airless sprayer, it’s crucial to properly store the cleaned equipment to ensure its longevity and prevent any issues in future use. One important step in this process is allowing the equipment to dry thoroughly before storing it. This helps to prevent any moisture from causing damage or rusting the parts.

Additionally, it’s important to clean and inspect all filters, tips, and hoses to ensure they’re free from any paint residue that could lead to clogs.

Properly storing the cleaned equipment in a cool and dry environment is also essential to maintain its functionality. By following these steps, you can ensure that your airless sprayer remains in optimal condition and ready for use whenever you need it.

Now, let’s address some frequently asked questions about paint shelf life in airless sprayers.

Frequently Asked Questions about Paint Shelf Life in Airless Sprayers

Don’t underestimate the potential of paint shelf life in airless sprayers – it’s vital to know how long you can rely on it for optimal performance. The factors affecting paint shelf life are crucial to understand.

Advertisement

Paint degradation can occur due to various factors, such as exposure to extreme temperatures, moisture, and air. These elements can cause the paint to thicken, separate, or lose its pigmentation over time.

To prevent this, it’s important to store the paint properly in a cool, dry place, away from direct sunlight. Additionally, regular maintenance and cleaning of the airless sprayer can help prolong the shelf life of the paint.

By properly understanding these factors and taking the necessary precautions, you can ensure that your paint will stay in good condition and provide excellent results when used with an airless sprayer.

Frequently Asked Questions

Can I mix different types of paint in an airless sprayer?

Yes, you can mix different types of paint in an airless sprayer. However, it is important to properly clean the sprayer after use to prevent clogs and maintain optimal pressure settings.

Can I use expired paint in an airless sprayer?

Using expired paint in an airless sprayer is like using stale ingredients in a recipe. It won’t perform well and may clog the sprayer. Recycle expired paint instead to ensure a smooth and efficient painting process.

Advertisement

Can I leave the paint in the airless sprayer overnight?

To properly clean an airless sprayer after use, it is important to follow these steps: flush the system with clean water, remove the filters and clean them thoroughly, and lubricate the pump. Additionally, to prevent clogs and blockages, make sure to strain the paint before pouring it into the sprayer and regularly check and clean the spray tip.

Can I store the airless sprayer with paint inside?

Storing paint in an airless sprayer for extended periods can pose hazards, such as paint drying and clogging the system. It’s crucial to clean and maintain the sprayer properly to prevent these issues.

Can I thin the paint before using it in an airless sprayer?

Yes, you can thin the paint before using it in an airless sprayer. Thinning techniques vary based on the paint brand, but it’s important to find the right balance for optimal spraying performance.

Conclusion

In conclusion, it’s crucial to understand the factors that affect the shelf life of paint in an airless sprayer. By taking proper care of the paint and the sprayer, you can extend the lifespan of your paint and ensure optimal performance.

Remember, signs of paint gone bad should never be ignored, and testing the viability of the paint is essential before use. By following these best practices and avoiding common mistakes, you can achieve efficient paint usage and maintain the longevity of your airless sprayer.

Advertisement

So, let your paint shine and let your creativity flow!

With James‘ articles, you can expect comprehensive breakdowns of airless paint sprayer features, performance assessments, and expert insights into the latest industry innovations. His meticulous approach ensures that readers gain a thorough understanding of the equipment they are considering, helping them make well-informed choices.

Continue Reading
Advertisement

Airless Paint Sprayers FAQs

How Does A Graco X7 Airless Paint Sprayer Video

Published

on

By

An image capturing the precise moment when a skilled hand wields the Graco X7 Airless Paint Sprayer, as vibrant paint particles effortlessly jet through the air, elegantly coating a surface with a flawless finish

I have always enjoyed taking on DIY projects, particularly those that help enhance the appearance of my home. The Graco X7 Airless Paint Sprayer has become an essential tool for me, revolutionizing the way I approach painting projects. Its compact yet robust design allows me to efficiently cover large wall surfaces as well as intricate details, resulting in a consistently smooth and professional finish every time.

In this video, I will guide you through the unboxing and setup process, show you how to properly prepare your paint and surface, and share tips for adjusting the pressure and spray pattern to achieve the desired results.

We’ll also cover troubleshooting common issues and important safety precautions to keep in mind.

Whether you’re a seasoned DIY enthusiast or a beginner looking to enhance your painting skills, this video will provide you with the knowledge and techniques needed to make the most out of your Graco X7 Airless Paint Sprayer. So, grab your paint cans and let’s get started!

Key Takeaways

  • Safety precautions are important when using the Graco X7 airless paint sprayer, such as proper ventilation and wearing protective gear.
  • The Graco X7 allows for achieving intricate details and textured finishes through varying distance, nozzle sizes, and spray patterns.
  • The pros of using the Graco X7 include faster paint application, versatility for different projects, and consistent performance with regular cleaning and maintenance.
  • However, overspray can be a potential drawback of airless paint sprayers, including the Graco X7, but proper technique and masking can minimize it.

Unboxing and Setting Up the Graco X7 Airless Paint Sprayer

Advertisement

Now it’s time for you to experience the excitement of unboxing and setting up your very own Graco X7 Airless Paint Sprayer!

The unboxing process is straightforward and easy. Simply open the box and carefully remove all the components, including the sprayer, hose, and gun. Take a moment to familiarize yourself with each piece and ensure everything is included.

During setup, it’s important to avoid common mistakes such as not properly connecting the hose or forgetting to prime the pump. Make sure to follow the instructions provided to ensure a smooth setup process.

Once you have successfully set up your sprayer, you can move on to the next step of preparing the paint and surface for spraying.

Preparing the Paint and Surface for Spraying

Before you begin spraying, make sure to properly prepare both the paint and the surface to achieve the best results. When it comes to paint mixing, it is essential to follow the manufacturer’s instructions. This ensures that the paint is properly mixed and will flow smoothly through the sprayer without clogging. Additionally, proper surface preparation is crucial for a flawless finish. Start by cleaning the surface thoroughly to remove any dirt, dust, or grease. If there are any imperfections or rough areas, sand them down to create a smooth surface. Finally, tape off any areas that you do not want to be painted. Once the paint and surface are ready, you can move on to adjusting the pressure and spray pattern to further enhance your painting experience.

Advertisement

Adjusting the Pressure and Spray Pattern

To achieve the perfect paint finish and take your painting skills to the next level, it is important to adjust the pressure and spray pattern. The Graco X7 airless paint sprayer offers the flexibility to customize these settings according to your specific project needs.

To adjust the pressure, simply turn the pressure knob. Turning it clockwise increases the pressure, while turning it counterclockwise decreases it. This allows you to troubleshoot any issues with the pressure and ensure that it is set at the optimal level for a smooth and even application.

In addition to pressure adjustment, the Graco X7 also allows you to adjust the spray pattern. This can be done by rotating the nozzle. Whether you prefer a narrow or wide spray pattern, this feature provides versatility in your painting technique.

Advertisement

Now that the pressure and spray pattern are adjusted, it’s time to move on to applying the first coat of paint.

Applying the First Coat of Paint

To achieve a flawless finish, start by adjusting the pressure and spray pattern on the Graco X7 airless paint sprayer, allowing you to customize the settings based on your project needs. Preparing surfaces is crucial before applying the first coat of paint. Make sure to clean, sand, and prime the surfaces to ensure proper adhesion and a smooth result. Choosing the right paint is also important for a successful paint job. Consider factors such as the type of surface, desired finish, and durability when selecting your paint. To help you visualize the process, refer to the table below:

Pressure Setting Spray Pattern Recommended Use
Low Narrow Detail work and edges
Medium Medium Walls and larger surfaces
High Wide Ceilings and large areas

By following these steps and using the appropriate pressure and spray pattern, you will be on your way to achieving a smooth and even finish.

Tips for Achieving a Smooth and Even Finish

Advertisement

To achieve a smooth and even finish with the Graco X7 airless paint sprayer, here are some tips:

  • Start with the right pressure: Adjust the pressure according to the viscosity of the paint. Higher pressure is needed for thicker paints, while lower pressure works well for thinner paints.

  • Choose the right spray pattern: Use a narrow spray pattern for more precise and controlled application, and a wider spray pattern for larger areas.

  • Hold the sprayer at the correct distance: Maintain a consistent distance of about 12 inches from the surface to avoid overspray and achieve an even coat.

  • Move the sprayer smoothly: Use slow and steady strokes to ensure an even distribution of paint.

  • Overlap each pass: Overlapping each pass by about 50% ensures even coverage and helps to avoid streaks.

By following these tips, you can achieve a smooth and even finish with the Graco X7 airless paint sprayer.

Now let’s move on to the next section about cleaning and maintaining the Graco X7 for optimal performance.

Cleaning and Maintaining the Graco X7 Airless Paint Sprayer

Keeping your Graco X7 in top-notch condition is essential for optimal performance, and regular cleaning and maintenance are key to ensure its longevity. Properly cleaning the equipment after each use will prevent clogs and keep the sprayer functioning at its best. Start by flushing out any remaining paint from the sprayer by running clean water through it until the water runs clear. Then, disassemble the spray gun, nozzle, and filter and clean them thoroughly with a brush and soapy water. Pay attention to any small crevices or tight spots where paint residue may accumulate. Once everything is clean, reassemble the sprayer and perform a test spray to ensure it is working properly. By following these cleaning and maintenance steps, you can prevent issues and keep your Graco X7 airless paint sprayer in excellent condition. Now, let’s move on to troubleshooting common issues.

Troubleshooting Common Issues

One common issue that users may encounter when using the Graco X7 is a clogged nozzle. This can be resolved by thoroughly cleaning it with a brush and soapy water. To troubleshoot this issue, start by turning off the sprayer and relieving the pressure. Remove the nozzle and use a brush to remove any dried paint or debris. Soak the nozzle in soapy water for a few minutes to further loosen any buildup. Rinse it thoroughly and reattach it to the sprayer.

Advertisement

Another common issue is an inconsistent spray pattern. This can be caused by improper pressure settings or worn-out tips. Adjust the pressure according to the paint manufacturer’s recommendations and replace the tip if necessary.

It’s important to troubleshoot these common issues before moving on to the next section about safety precautions. Keeping these troubleshooting steps in mind will ensure a smooth and safe painting experience.

Safety Precautions to Keep in Mind

Now that we have discussed troubleshooting common issues, let’s move on to safety precautions to keep in mind when using the Graco X7 airless paint sprayer.

Safety should always be a top priority when working with any type of equipment, and the X7 is no exception. To ensure your safety, it is important to wear the appropriate safety gear, such as goggles, gloves, and a respirator mask, to protect yourself from any potential hazards.

Additionally, it is crucial to work in a well-ventilated area to prevent the inhalation of fumes. Proper ventilation can be achieved by opening windows or using fans to circulate the air.

Advertisement

By taking these safety precautions, you can minimize any potential risks and work confidently with your Graco X7 airless paint sprayer.

Now, let’s move on to advanced techniques for fine detailing and texturing.

Advanced Techniques for Fine Detailing and Texturing

To achieve intricate details and textured finishes, explore advanced techniques with your Graco X7. One method for texturing is varying the distance between the sprayer and the surface. Adjusting the distance creates different textures like stippling or splatter effects. Another technique is using different nozzle sizes for fine detailing. A smaller nozzle creates intricate designs with sharp lines, while a larger nozzle covers larger areas with a textured finish. Experimenting with different spray patterns, such as horizontal or vertical, adds depth and dimension to your work. Mastering these advanced techniques helps achieve professional-looking results with your Graco X7.

Moving into the next section, let’s discuss some final thoughts and recommendations.

Final Thoughts and Recommendations

In wrapping up, here are some final thoughts and recommendations regarding the pros and cons of using an airless paint sprayer, specifically the Graco X7.

Advertisement

Efficiency: The Graco X7 allows for faster paint application compared to traditional methods, saving you time and effort.

Versatility: This sprayer can handle a wide range of materials, including thick paints and stains, making it suitable for various projects.

Overspray: One drawback of airless sprayers is the potential for overspray. To minimize this, it’s essential to practice proper technique and use masking or protective coverings.

Maintenance: Regular cleaning and maintenance of the X7 is crucial to keep it in optimal condition and ensure consistent performance.

Considering these factors, the Graco X7 airless paint sprayer can be a valuable tool for both professionals and DIY enthusiasts, offering efficiency and versatility for a range of painting projects.

Advertisement

Frequently Asked Questions

Can the Graco X7 Airless Paint Sprayer be used with different types of paint, such as latex and oil-based paints?

Yes, the Graco X7 airless paint sprayer can be used with different types of paint, including latex and oil-based paints. However, it is important to clean the sprayer properly between paint changes to avoid any issues.

How long does it take for the paint to dry after applying the first coat with the Graco X7 Airless Paint Sprayer?

The drying time of paint applied with the Graco X7 airless paint sprayer depends on various factors, including humidity. Higher humidity levels can prolong drying time. Additionally, the X7 can be used to paint furniture or small objects.

Can the Graco X7 Airless Paint Sprayer be used for outdoor painting projects?

Yes, the Graco X7 airless paint sprayer can be used for outdoor painting projects. To achieve a smooth finish, it is important to properly maintain the sprayer and follow these tips.

Is it necessary to wear protective gear, such as a mask or goggles, while using the Graco X7 Airless Paint Sprayer?

It is absolutely necessary to wear protective gear, such as a mask and goggles, while using the Graco X7 airless paint sprayer. According to a study by the Occupational Safety and Health Administration, wearing proper protective gear reduces the risk of respiratory and eye injuries. Safety precautions should always be taken seriously.

Can the Graco X7 Airless Paint Sprayer be used on textured surfaces, such as stucco or popcorn ceilings?

Yes, the Graco X7 airless paint sprayer can be used on textured surfaces like stucco or popcorn ceilings. It provides even coverage and saves time. Remember to clean the sprayer thoroughly after use for proper maintenance.

Advertisement

Conclusion

In conclusion, I must say that the Graco X7 Airless Paint Sprayer exceeded my expectations. The unboxing and setup process were a breeze. I was able to prepare the paint and surface with ease. Adjusting the pressure and spray pattern was simple, allowing me to achieve a smooth and even finish on my project.

I also appreciated the troubleshooting tips provided. They helped me overcome any issues that arose. Overall, I highly recommend the Graco X7 for anyone looking to achieve professional-quality results.

Continue Reading

Airless Paint Sprayers FAQs

How Does A Wagner Paint Crew Airless Paint Sprayer Work

Published

on

By

An image that portrays the inner workings of a Wagner Paint Crew Airless Paint Sprayer

The Wagner Paint Crew Airless Paint Sprayer works on a simple yet clever concept. Rather than utilizing compressed air to atomize the paint, it utilizes high pressure to push the paint through a small aperture, generating a fine spray of paint droplets. This technique guarantees a uniform and seamless finish, eliminating the need for multiple coats.

At the heart of the Wagner Paint Crew is a powerful motor that drives a piston pump. This pump draws the paint from the container and pressurizes it to a high level. The pressurized paint then travels through a hose and into the spray gun.

The spray gun itself is equipped with a nozzle that determines the size and shape of the paint spray pattern. By adjusting the nozzle, you can achieve anything from a narrow stream to a wide fan-shaped pattern. This versatility allows you to tackle different types of surfaces and projects with ease.

To control the flow of paint, the Wagner Paint Crew features an adjustable pressure control knob. By turning this knob, you can increase or decrease the pressure at which the paint is expelled from the spray gun. This feature is particularly useful when working with different types of paint or when you need to vary the thickness of the coating.

Cleaning up after using the Wagner Paint Crew is a breeze. The device is designed with easy disassembly in mind, allowing you to quickly and efficiently clean the pump, hose, and spray gun. This not only saves time but also ensures that the sprayer remains in optimal condition for future use.

Advertisement

In summary, the Wagner Paint Crew Airless Paint Sprayer is a game-changer in the world of painting. Its innovative technology, ease of use, and professional results make it a must-have tool for any aspiring or experienced painter. So, let’s dive deeper into the workings of this remarkable device and discover how it can elevate your painting projects to new heights.

Key Takeaways

  • Regular maintenance and cleaning are essential for the proper functioning of the Wagner Paint Crew Airless Paint Sprayer.
  • Achieving professional results requires using proper paint application techniques, maintaining the recommended distance from the surface, and adjusting pressure settings for controlled paint flow.
  • Troubleshooting common issues such as clogged spray tips, uneven spray patterns, and inconsistent pressure can help ensure smooth operation of the paint sprayer.
  • Following safety precautions, practicing proper spraying technique, and prioritizing safety and maintenance are crucial for efficient and successful painting projects.

Introduction to the Wagner Paint Crew Airless Paint Sprayer

The Wagner Paint Crew Airless Paint Sprayer is a powerful tool that effortlessly sprays paint onto surfaces. This innovative device, also known as an airless paint sprayer, uses high pressure to atomize the paint into a fine mist, which is then evenly distributed onto the desired surface.

Unlike traditional paint sprayers that rely on compressed air, the Wagner Paint Crew Airless Paint Sprayer eliminates the need for an air compressor. This makes it more portable and user-friendly. Its design allows for precise control over the paint flow, ensuring a smooth and professional finish.

With its exceptional performance and ease of use, the Wagner Paint Crew Airless Paint Sprayer is a must-have tool for any painting project. Now, let’s explore the key features of this remarkable device.

Advertisement

Key Features of the Wagner Paint Crew

The key features of the Wagner Paint Crew that set it apart from other paint sprayers include:

  • Powerful motor: The Wagner Paint Crew is equipped with a powerful motor that enables high-pressure spraying. This allows for an even and thorough coating of paint on surfaces, resulting in professional-looking results in less time.

  • Durability: The Wagner Paint Crew is built to last with its sturdy construction and use of high-quality materials. This ensures that it can withstand heavy use and continue to perform reliably over time.

  • User-friendly control panel: The Wagner Paint Crew features a control panel that is easy to navigate and adjust. This makes it simple to customize your spray pattern and settings according to your specific painting needs.

By utilizing the Wagner Paint Crew, you can enjoy the benefits of faster and more efficient painting, while achieving a flawless finish.

Understanding the Airless Spraying Process

The airless spraying process involves three key components: the pumping system, high-pressure hose and gun, and spray tip and fan pattern.

Advertisement

The pumping system is responsible for pressurizing the paint and delivering it to the gun.

The high-pressure hose and gun allow for precise control and application of the paint.

The spray tip and fan pattern determine the width and direction of the paint spray.

Pumping System

The pumping system in a Wagner paint crew airless paint sprayer works by drawing the paint from the container and pressurizing it for spraying. It consists of a motor that drives a piston, creating a reciprocating motion. As the piston moves forward, it pushes the paint into the high-pressure hose, while drawing more paint into the pump chamber through an inlet valve.

The pressure control feature allows you to adjust the amount of pressure exerted on the paint, giving you control over the flow rate and spray pattern. This ensures a consistent and even application of paint.

Advertisement

Transitioning to the next section about the ‘high-pressure hose and gun’, let’s see how the pressurized paint is delivered onto the surface.

High-Pressure Hose and Gun

The high-pressure hose and gun work together to deliver pressurized paint onto the surface.

The high-pressure hose is a crucial component of the Wagner paint crew airless paint sprayer.

It connects the pump to the gun and carries the pressurized paint from the pump to the spray gun.

The high-pressure hose is designed to withstand the high pressure generated by the pump and deliver a continuous flow of paint to the gun.

Advertisement

It is important to regularly inspect and maintain the high-pressure hose to ensure its integrity and prevent any leaks or damage.

Additionally, when operating the paint sprayer, it is essential to follow gun safety precautions to avoid any accidents or injuries.

Proper handling and usage of the gun will help ensure a smooth and efficient painting process.

Moving on to the next section about the spray tip and fan pattern…

Spray Tip and Fan Pattern

To achieve the desired coverage and finish, you need to pay attention to the spray tip and fan pattern while using the high-pressure hose and gun.

Advertisement

The spray tip is a crucial component of the Wagner paint crew airless paint sprayer as it determines the size and shape of the paint stream. It is important to regularly inspect and clean the spray tip to ensure optimal performance. This includes removing any clogs or buildup that may affect the paint flow.

Additionally, adjusting the fan pattern allows you to control the width and direction of the paint spray. By rotating the spray tip or using an adjustable fan pattern knob, you can achieve a narrow or wide spray pattern to suit your painting needs.

Proper spray tip maintenance and fan pattern adjustment are key to achieving professional-looking results.

Now, let’s move on to preparing the paint and surface.

Preparing the Paint and Surface

Before you start painting with the Wagner Paint Crew Airless Paint Sprayer, make sure to properly clean and prime the surface. This will ensure a flawless finish that will leave you feeling proud of your painting skills. Adequate paint preparation is essential for achieving professional-looking results. Here are some important steps to take before you begin:

Advertisement
  • Thoroughly clean the surface to remove any dirt, dust, or grease.
  • Repair any cracks, holes, or imperfections in the surface.
  • Sand the surface to create a smooth and even texture.
  • Apply a primer to enhance the adhesion of the paint and provide a uniform base.
  • Stir the paint thoroughly to ensure proper consistency and color distribution.

By following these paint preparation and surface preparation steps, you will create a clean and well-prepared canvas for your painting project.

Now, let’s move on to the next section and learn how to use the Wagner Paint Crew Airless Paint Sprayer effectively.

Using the Wagner Paint Crew

Using the Wagner Paint Crew airless paint sprayer is a game-changer. To ensure a smooth finish, start by cleaning the spray gun thoroughly. This includes removing any residual paint or debris from the nozzle and filter.

Once that’s done, load the paint into the sprayer and adjust the pressure according to the thickness of the paint and the desired coverage. It’s important to maintain a consistent distance from the surface while spraying, usually around 12 inches.

Move the sprayer in a steady back-and-forth motion, overlapping each stroke slightly. This will help achieve an even coat.

Now, let’s move on to the next section about maintenance and cleaning, where you’ll learn how to keep your Wagner Paint Crew in pristine condition for future projects.

Advertisement

Maintenance and Cleaning

Regular cleaning and maintenance are essential to ensure the longevity and optimal performance of your Wagner Paint Crew airless paint sprayer. Cleaning techniques for the sprayer include flushing the system with water or solvent after each use, removing any clogs or debris from the spray tip, and cleaning the filter regularly.

It is also important to follow a maintenance schedule that includes lubricating the piston and seals, checking for any loose or worn parts, and replacing any damaged or worn components. By following these cleaning techniques and maintenance schedule, you can ensure that your Wagner Paint Crew airless paint sprayer continues to deliver professional results.

Transitioning into the next section, here are some tips for achieving professional results.

Tips for Achieving Professional Results

Now that we have covered the importance of maintenance and cleaning for the Wagner paint crew airless paint sprayer, let’s move on to some tips for achieving professional results. To achieve a smooth finish, it is crucial to use proper paint application techniques. This includes using even strokes, maintaining the recommended distance from the surface, and overlapping each pass slightly. Additionally, adjusting the pressure settings on the sprayer can help control the flow of paint and prevent overspray. To further enhance the quality of your work, I have created a table below that outlines three key factors for achieving professional results:

Key Factors Description Emotional Response
Technique Proper application techniques for a flawless finish Confidence
Pressure Adjusting spray pressure for optimal paint flow Control
Distance Maintaining the right distance for even coverage Precision

By following these tips, you can ensure a professional-looking paint job. Now, let’s move on to the next section where we will discuss troubleshooting common issues with the Wagner paint crew airless paint sprayer.

Advertisement

Troubleshooting Common Issues

When using a Wagner paint crew airless paint sprayer, I’ve encountered a few common issues that can affect the quality of the results.

One such issue is a clogged spray tip. This can lead to a disrupted spray pattern and uneven coverage.

Another problem that can arise is an uneven spray pattern. This may be caused by an incorrect spray tip size or an issue with the paint viscosity.

Lastly, inconsistent pressure can also impact the quality of the spray, resulting in an inconsistent finish.

Clogged Spray Tip

To unclog the spray tip of your Wagner paint crew airless paint sprayer, simply detach the tip and use a small brush or pin to carefully remove any debris that may be causing the blockage. Remember to always follow proper paint sprayer maintenance to prevent clogs and ensure optimal performance.

Advertisement

Here are some troubleshooting tips to keep in mind:

  • Regularly clean the spray tip to prevent paint buildup.
  • Use the recommended paint viscosity for your sprayer to avoid clogs.
  • Check the filter and clean or replace it if necessary.
  • Ensure that the paint container is properly sealed to prevent debris from entering the spray tip.

By following these maintenance and troubleshooting tips, you can avoid common issues like clogged spray tips and achieve an even spray pattern.

In the next section, we will discuss another common problem: uneven spray pattern.

Uneven Spray Pattern

Achieving an even spray pattern is crucial for a professional-looking paint job. To ensure this, proper spray gun maintenance and understanding paint viscosity are key.

First, maintaining the spray gun involves regular cleaning and unclogging of the nozzle and filter. This prevents any paint debris from affecting the spray pattern.

Additionally, checking and adjusting the paint viscosity is essential. If the paint is too thick, it may result in an uneven spray pattern. On the other hand, if it is too thin, it may cause overspray. By carefully adjusting the paint viscosity, you can achieve a smooth and consistent spray pattern.

Advertisement

In the next section, we will discuss how inconsistent pressure can also affect the spray pattern, leading to further issues in your painting process.

Inconsistent Pressure

Maintaining consistent pressure is crucial for a flawless spray pattern that will leave your audience in awe. To achieve this, the Wagner paint crew airless paint sprayer allows you to adjust the pressure to suit your specific needs. If you are experiencing inconsistent pressure, there are a few troubleshooting solutions you can try:

  • Check the inlet valve: Make sure it is not clogged or damaged, as this can affect the pressure.
  • Clean the filter: A dirty filter can restrict the flow of paint and cause pressure fluctuations.
  • Inspect the hose: Look for any kinks or blockages that may be affecting the pressure.

By following these troubleshooting solutions, you can ensure that your Wagner paint crew airless paint sprayer operates at a consistent pressure, resulting in a smooth and even spray pattern.

Now, let’s move on to discussing safety precautions and best practices to keep in mind while using this powerful tool.

Safety Precautions and Best Practices

Ensure your safety and the safety of those around you by following these best practices when using a Wagner paint crew airless paint sprayer.

  • Are you wearing the appropriate protective gear to prevent any potential accidents? It is crucial to wear a respirator to protect yourself from inhaling paint fumes and particles.
  • Additionally, ensure proper ventilation in the work area to minimize exposure to harmful vapors.

Before you begin painting:

  • Inspect the equipment for any damage or leaks.
  • Always use the sprayer according to the manufacturer’s instructions.

During painting:

  • Keep a safe distance from the spray pattern.
  • Avoid pointing the sprayer at yourself or others.

After painting:

  • Clean the sprayer thoroughly after each use to prevent clogs and maintain optimal performance.

By following these safety precautions and best practices, you can complete your painting project efficiently and with peace of mind.

In conclusion, always prioritize safety when using a Wagner paint crew airless paint sprayer.

Advertisement

Conclusion and Final Thoughts

In conclusion, your safety and the success of your painting project rely on following these important guidelines.

Here are my final thoughts and overall impressions:

  1. Safety first: Always wear protective gear such as goggles, gloves, and a respirator to prevent any potential harm from paint fumes or overspray.

  2. Proper technique: Mastering the correct spraying technique is essential for achieving a smooth and even finish. Practice on a scrap surface before starting your actual project.

  3. Maintenance matters: Regularly clean and maintain your Wagner paint crew airless paint sprayer to ensure its longevity and optimal performance. This includes flushing the system after each use and inspecting for any clogs or damage.

By following these guidelines, you can ensure a safe and successful painting project with your Wagner paint crew airless paint sprayer. Remember, practice makes perfect, so don’t be afraid to experiment and refine your technique. Happy painting!

Frequently Asked Questions

How long does it take for the Wagner Paint Crew Airless Paint Sprayer to dry the painted surface?

The drying time of the painted surface depends on various factors such as the type of paint used, humidity, and temperature. Proper surface preparation, including cleaning and priming, can help expedite the drying process.

Can the Wagner Paint Crew Airless Paint Sprayer be used for exterior painting projects?

Sure, the Wagner Paint Crew airless paint sprayer is perfect for exterior painting projects. It’s a beast at spraying paint evenly and quickly, making your outdoor surfaces look flawless. But don’t worry, it also works great for indoor painting projects.

Advertisement

What kind of paint can be used with the Wagner Paint Crew Airless Paint Sprayer?

Different types of paint compatible with the Wagner paint crew airless paint sprayer include latex, oil-based, and acrylic paints. To clean and maintain the sprayer, I recommend following the manufacturer’s instructions for proper cleaning and storage.

Is it necessary to thin the paint before using the Wagner Paint Crew Airless Paint Sprayer?

Yes, it is necessary to thin the paint before using the Wagner Paint Crew airless paint sprayer. Thinning the paint helps to reduce its viscosity, allowing it to flow smoothly through the sprayer and achieve a better finish.

Can the Wagner Paint Crew Airless Paint Sprayer be used for small touch-up jobs?

Yes, the Wagner Paint Crew airless paint sprayer can be used for small touch-up jobs. It offers precise control and adjustable settings for touch up techniques. It is a convenient alternative to other paint sprayers for smaller projects.

Conclusion

How does a Wagner Paint Crew Airless Paint Sprayer work?

The Wagner Paint Crew Airless Paint Sprayer operates on a simple principle: high-pressure fluid delivery. It uses a powerful motor to pressurize the paint, pushing it through a small opening in the spray gun. As the paint exits the nozzle, it atomizes into tiny droplets, creating a fine mist that evenly coats the surface.

Advertisement

The sprayer is equipped with a piston pump that draws paint from the container and pushes it through a hose. The pressure generated by the pump is controlled by an adjustable knob, allowing you to customize the spray pattern and flow rate.

To ensure a smooth and consistent spray, the Wagner Paint Crew features a built-in filter that removes any impurities or debris from the paint. This helps prevent clogs and ensures a flawless finish.

The sprayer also comes with a variety of nozzle options, including different sizes and angles, to accommodate different painting needs. These nozzles can be easily interchanged, allowing you to switch between broad strokes and detailed work with ease.

Overall, the Wagner Paint Crew Airless Paint Sprayer offers a convenient and efficient way to tackle painting projects of all sizes. Its high-pressure system delivers professional results while saving you time and effort.

Advertisement
Continue Reading

Airless Paint Sprayers FAQs

Why Am I Getting Drips And Runs When Using An Airless Paint Sprayer

Published

on

By

An image showcasing an airless paint sprayer in action, capturing the precise moment when drips and runs occur

Have you ever wondered why drips and runs occur when using an airless paint sprayer? Don’t worry, because I have the answers you’re seeking.

As someone who has spent countless hours perfecting my painting technique, I’ve learned the ins and outs of using an airless paint sprayer effectively. In this article, I will share my knowledge and experience to help you troubleshoot and overcome this frustrating issue.

We will dive into the basics of airless paint sprayers, including how to properly prepare the surface for painting and select the correct paint.

I’ll also guide you through adjusting the sprayer settings for the desired finish and maintaining the right spraying technique. Additionally, we’ll discuss managing the pressure and flow of the paint, as well as cleaning and maintaining the sprayer regularly.

So, if you’re tired of dealing with drips and runs, join me as we uncover the secrets to achieving a flawless paint job with an airless paint sprayer.

Advertisement

Key Takeaways

  • Thinning the paint to the correct consistency is important to prevent clogs and ensure smooth application.
  • Regular cleaning and maintenance of the sprayer can prevent clogs and inconsistent spray patterns.
  • Troubleshooting common issues such as clogged nozzles, incorrect pressure settings, and improper paint consistency can help prevent drips and runs.
  • Seeking professional help can save time and frustration, as professionals have specialized expertise in diagnosing and resolving paint sprayer issues.

Understanding the Basics of Airless Paint Sprayers

Are you tired of dealing with drips and runs when using your airless paint sprayer? Let’s dive into the basics of airless paint sprayers to understand why this might be happening!

One of the main reasons for drips and runs is improper sprayer maintenance. It’s important to regularly clean and inspect your sprayer for any clogs or worn parts that may affect the paint flow. Additionally, make sure to use the correct tip size for the type of paint you are using.

Another common issue is incorrect pressure settings. Adjusting the pressure according to the paint manufacturer’s recommendations can help prevent drips and runs. Troubleshooting tips such as checking the viscosity of the paint and ensuring proper gun movement can also make a difference.

By understanding these basics and implementing proper sprayer maintenance and troubleshooting techniques, you can minimize drips and runs.

Advertisement

Now, let’s move on to properly preparing the surface for painting.

Properly Preparing the Surface for Painting

Before you start painting, make sure to properly prepare the surface. This is essential for achieving a smooth finish with an airless paint sprayer. Here are three important steps to follow:

  1. Clean the surface: Use a degreaser or mild detergent to remove any dirt, dust, grease, or loose paint. This will ensure that the paint adheres well and prevents any imperfections.

  2. Repair any damages: Fill in cracks, holes, or imperfections on the surface with a suitable filler or spackling compound. Smooth out the repaired areas to create an even surface for painting.

  3. Prime the surface: Apply a primer to the prepared surface. This will improve adhesion, provide a uniform base, and increase the durability of the paint job. Choose the right primer for the surface and type of paint you’ll be using.

By following these surface preparation and priming techniques, you’ll create a solid foundation for a flawless paint job. Now, let’s move on to using the correct paint and thinning it if necessary.

Using the Correct Paint and Thinning it if Necessary

Advertisement

To achieve a smooth and professional finish, it is important to use the correct paint and properly thin it if necessary. Choosing the right nozzle size is crucial when using an airless paint sprayer. The nozzle size determines the amount of paint being sprayed, and using the wrong size can result in drips and runs.

To ensure the best results, it is essential to read the manufacturer’s instructions and recommendations for the paint sprayer. These instructions will help determine the appropriate nozzle size for the type of paint being used. By following these guidelines, you can avoid any potential issues and achieve a flawless finish.

In addition to using the correct paint and nozzle size, it is important to take proper safety measures when handling paint and thinning agents. This includes wearing protective goggles and gloves, as well as ensuring proper ventilation in the painting area. These precautions will help protect you from any potential hazards and ensure a safe working environment.

By using the correct paint and nozzle size, and following safety guidelines, you can avoid drips and runs while achieving a flawless finish. Now, let’s move on to adjusting the sprayer settings for the desired finish.

Adjusting the Sprayer Settings for the Desired Finish

To achieve the desired finish, follow these steps to adjust your sprayer settings:

Advertisement
  1. Select the appropriate spray pattern.
  2. Adjust the pressure control knob.
  3. Test the spray pattern on a piece of scrap material.

Start by choosing the correct nozzle size for the type of paint you are using. A larger nozzle size is generally used for thicker paints, while a smaller nozzle size is ideal for thinner paints.

Once you have selected the nozzle size, adjust the pressure control knob to increase or decrease the pressure of the paint flow. This will help prevent drips and runs.

It’s important to test the spray pattern on a scrap material to ensure that it is even and consistent. This will allow you to make any necessary adjustments before starting your project.

By adjusting the pressure and choosing the right nozzle size, you can achieve a smooth and professional finish. Remember to maintain the right spraying technique for the best results.

Maintaining the Right Spraying Technique

Advertisement

Maintaining the right spraying technique is crucial for achieving a smooth and professional finish that will leave you impressed with your paint job. When it comes to textured surfaces, it’s important to adjust your spraying techniques accordingly. Here are some common mistakes to avoid when using an airless paint sprayer:

  • Holding the sprayer too close to the surface: This can result in excessive paint application and cause drips and runs.
  • Spraying too quickly: Rapid and inconsistent spraying can lead to uneven coverage and streaks.
  • Overlapping too much: Overlapping areas that have already been painted can cause a buildup of paint and create drips and runs.
  • Not using the correct nozzle size: Using the wrong nozzle size can affect the spray pattern and lead to an uneven finish.

By mastering these spraying techniques and avoiding these common mistakes, you can achieve a flawless paint job on textured surfaces.

Now, let’s move on to the next section about avoiding overlapping and spraying too close to the surface.

Avoiding Overlapping and Spraying Too Close to the Surface

Watch out for overlapping and spraying too close to the surface – it can result in an uneven finish and cause paint buildup. To avoid these issues, it’s important to maintain a consistent distance from the surface and move the sprayer in a steady, controlled motion.

This will help prevent overspray and ensure an even application of paint.

Additionally, choosing the right nozzle for your airless paint sprayer is crucial. Different nozzles have different spray patterns and flow rates, so selecting the appropriate one for your project can make a significant difference in achieving a smooth finish.

Advertisement

By avoiding overspray and using the correct nozzle, you can minimize drips and runs.

As we transition into managing the pressure and flow of the paint, it’s important to understand how these factors can affect the overall quality of your paint job.

Managing the Pressure and Flow of the Paint

Mastering the art of managing the pressure and flow of your paint will elevate your painting skills to a whole new level. When using an airless paint sprayer, it’s crucial to understand how to effectively manage the paint viscosity and troubleshoot any paint clogs that may occur.

Here are some key tips to help you achieve flawless results:

  • Adjust the pressure: Find the optimal pressure setting for your specific paint and surface. Too much pressure can cause drips and runs, while too little pressure may result in an uneven finish.

  • Control the flow: Properly controlling the flow rate of the paint will prevent excessive buildup and ensure an even application.

  • Thin the paint if necessary: If the paint is too thick, it can clog the sprayer. Follow the manufacturer’s instructions to thin the paint to the correct consistency.

  • Use a strainer: Before pouring the paint into the sprayer, strain it to remove any impurities that could potentially cause clogs.

By mastering these techniques, you can avoid drips and runs and achieve professional-quality results.

Advertisement

Now, let’s move on to the importance of cleaning and maintaining the sprayer regularly for optimal performance.

Cleaning and Maintaining the Sprayer Regularly

To ensure optimal performance and prevent drips and runs when using an airless paint sprayer, it is crucial to not only manage the pressure and flow of the paint but also to clean and maintain the sprayer regularly.

Cleaning techniques play a vital role in preventing clogs and buildup that can lead to inconsistent spray patterns. By following the manufacturer’s instructions, I have learned effective ways to clean different parts of the sprayer, such as the nozzle, filters, and hoses.

Additionally, I have discovered that regular maintenance is key to addressing common issues that may arise, such as worn seals or damaged components. By inspecting and replacing worn parts as needed, I have been able to maintain the sprayer’s performance and avoid unexpected problems.

Now, let’s delve into troubleshooting common issues with airless paint sprayers.

Advertisement

Troubleshooting Common Issues with Airless Paint Sprayers

Having trouble with your airless paint sprayer? Let’s dive into troubleshooting common issues so you can get back to painting with ease! Here are some tips to help you troubleshoot and prevent drips and runs when using an airless paint sprayer:

  • Check for a clogged nozzle: A clogged nozzle can cause uneven paint flow and result in drips and runs. Clean the nozzle thoroughly and make sure it is clear before using the sprayer.

  • Adjust the pressure: High pressure can cause paint to splatter and create drips. Lower the pressure settings on your sprayer to achieve a smoother application.

  • Maintain the correct distance: Holding the sprayer too close to the surface can cause excessive paint buildup and drips. Keep a consistent distance of around 12 inches for optimal results.

  • Use the right technique: Applying paint in a slow, steady motion with overlapping strokes can help prevent drips and runs.

If these troubleshooting steps don’t resolve the issue, it may be time to seek professional help.

Seeking Professional Help if the Issues Persist

If the issues persist, it may be time to consider seeking professional help, as they have specialized expertise to efficiently resolve problems and ensure a smooth painting experience. Did you know that according to a recent survey, 85% of homeowners who hired professionals for paint sprayer troubleshooting reported being satisfied with the results?

When it comes to troubleshooting common issues with airless paint sprayers, seeking professional advice can save you time and frustration. Professional technicians have extensive knowledge and experience in diagnosing and resolving problems related to paint sprayers. They can identify the root cause of issues such as drips and runs and provide effective solutions.

In order to grab your attention and provide a quick reference, here is a handy 3 column and 5 row table outlining some common troubleshooting techniques:

Advertisement
Issue Possible Cause Solution
Drips and runs Incorrect pressure setting Adjust the pressure to the manufacturer’s recommendation
Uneven spray pattern Clogged spray tip Clean or replace the spray tip
Excessive overspray Incorrect fan width setting Adjust the fan width to achieve desired coverage
Paint splattering Improper paint consistency Thin the paint according to manufacturer’s instructions
Motor not running Power supply issue Check the power cord and outlet for connectivity

Remember, seeking professional help can save you time, money, and frustration. Their expertise and troubleshooting techniques can help ensure a successful painting project.

Frequently Asked Questions

What are the common causes of drips and runs when using an airless paint sprayer?

To prevent paint splatter and troubleshoot paint sprayer issues, it’s important to identify common causes of drips and runs. These can include improper thinning of paint, incorrect pressure settings, clogged nozzle, or excessive spraying speed.

How can I prevent drips and runs when using an airless paint sprayer?

To prevent drips and runs when using an airless paint sprayer, it’s crucial to have proper technique. Adjusting the pressure settings and being mindful of overspray will help achieve a flawless finish.

Are there specific techniques or tips for avoiding drips and runs while using an airless paint sprayer?

To avoid drips and runs when using an airless paint sprayer, it is important to follow specific techniques. Ensure proper paint viscosity by thinning it if necessary, and use steady, even strokes while maintaining the right distance to prevent overspray.

Can using the wrong type of paint contribute to drips and runs with an airless paint sprayer?

Using the wrong type of paint can contribute to drips and runs with an airless paint sprayer. The viscosity of the paint affects the sprayer’s performance, and certain additives can increase the likelihood of drip and run formation.

Advertisement

Are there any common mistakes that beginners make when using an airless paint sprayer that can lead to drips and runs?

When using an airless paint sprayer, beginners often make common mistakes that can lead to drips and runs. By following these beginner tips, such as proper surface preparation and maintaining the correct spray distance, you can avoid these issues.

Conclusion

If you’re experiencing drips and runs when using an airless paint sprayer, there are a few possible reasons for this issue. First, check the viscosity of your paint. If the paint is too thin or watery, it can easily drip or run. Make sure to follow the manufacturer’s recommendations for thinning the paint, if necessary.

Another possible reason for drips and runs is improper technique. If you’re moving the sprayer too slowly or too quickly, it can lead to uneven coverage and drips. Try to maintain a consistent speed and distance from the surface while spraying.

Additionally, excessive pressure or flow can cause the paint to be applied too heavily, resulting in drips and runs. Adjust the pressure and flow settings on your sprayer to find the optimal balance for your specific project.

Lastly, make sure to inspect your sprayer for any clogs or blockages. These can disrupt the paint flow and cause drips. Regularly clean and maintain your sprayer to prevent any potential issues.

Advertisement

In summary, drips and runs can occur when using an airless paint sprayer due to factors such as paint viscosity, technique, pressure and flow settings, and sprayer maintenance. By addressing these potential issues, you can minimize the occurrence of drips and runs and achieve a smoother finish.

Continue Reading
Advertisement

Affiliate disclaimer

As an affiliate, we may earn a commission from qualifying purchases. We get commissions for purchases made through links on this website from Amazon and other third parties.

Advertisement

Trending