
As an experienced painter, I recognize the significance of achieving a flawless finish in every painting project. However, one factor that can greatly impact the results is the wind. It is essential to find the perfect balance between efficiency and top-notch quality.
So, how much wind is too much to paint with an airless sprayer?
In this article, we’ll delve into the world of airless sprayer painting and explore the impact of wind on the process. We’ll discuss the factors to consider when painting in windy conditions, the ideal wind conditions for airless sprayer painting, and the safety precautions to take.
Additionally, we’ll share techniques and best practices for achieving a smooth paint application in windy weather. Whether you’re a professional or a DIY enthusiast, this article will equip you with the knowledge and skills to tackle outdoor painting projects in windy conditions.
Key Takeaways
- Wind speed should be considered before painting with an airless sprayer
- The ideal wind speed for airless sprayer painting is between 5 and 10 miles per hour
- Strong winds can cause uneven dispersion, poor adhesion, and drifting of paint particles
- Techniques such as adjusting spraying technique and using a finer nozzle size can help achieve smooth paint application in windy conditions

Graco Magnum 262805 X7 Cart Airless Paint Sprayer, Gray
CONTROL PAINT FLOW: Fully adjustable pressure to give you ultimate control of paint flow for any project size;...
As an affiliate, we earn on qualifying purchases.
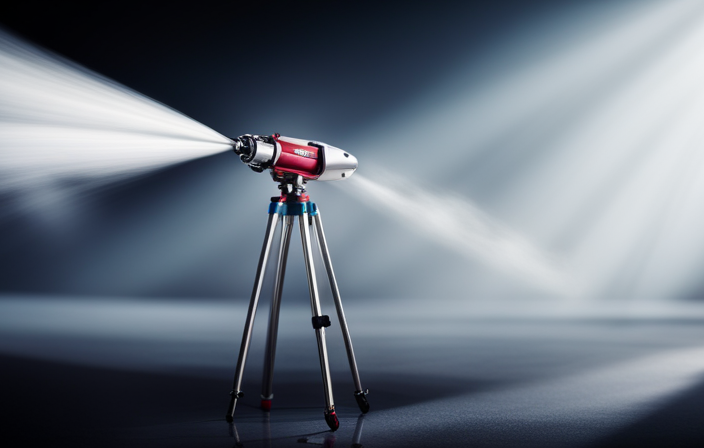
Understanding the Impact of Wind on Airless Sprayer Painting
Understanding the impact of wind on airless sprayer painting is crucial for achieving a flawless finish. Wind speed plays a significant role in determining paint adhesion. If the wind is too strong, it can cause paint particles to disperse unevenly, resulting in poor adhesion and a streaky or blotchy finish. To avoid these issues, it is important to consider wind speed before painting with an airless sprayer.
In the next section, we will discuss the factors to consider when painting in windy conditions. These factors will help you achieve a professional-looking paint job.

MaXpray M1 Airless Paint Sprayer, Highly Efficient Thinning-Free Minimal Overspray for Up to 10 Gallon DIY Painting Projects Home Interior & House Exterior, Comes with Sprayer Accessories
Your DIY Partner - All DIY Homeowners, upgrade your DIY game with the MaXpray M1 airless paint sprayer—far...
As an affiliate, we earn on qualifying purchases.
Factors to Consider When Painting in Windy Conditions
Despite the gusty weather conditions, it’s crucial to take into account various factors before embarking on a painting project. When dealing with windy conditions, there are a few key factors to consider:
-
Wind speed: The ideal wind speed for airless sprayer painting is around 5-10 miles per hour. Anything higher than that can cause the paint to overspray or drift, leading to uneven coverage and potential damage to nearby surfaces.
-
Impact on paint drying time: Windy conditions can accelerate the drying time of paint, making it difficult to achieve a smooth finish. It can cause the paint to dry too quickly, leading to visible brush strokes or roller marks.
Considering these factors will ensure a successful painting project despite the windy conditions.
Now, let’s explore the ideal wind conditions for airless sprayer painting.

Baotree Airless Paint Sprayer, High-Pressure Electric Paint Spray Gun with Extension Rod, Thinning-Free Professional Painting Tool for Interior/Exterior Walls, Fences, Ceilings, Cabinets
1. High efficiency and time saving, the spraying speed is 5 times faster than traditional brushing ✅ High...
As an affiliate, we earn on qualifying purchases.
Ideal Wind Conditions for Airless Sprayer Painting
When it comes to painting with an airless sprayer, finding the perfect breeze is key. The ideal wind speed for airless sprayer painting is between 5 and 10 miles per hour. This gentle breeze helps to atomize the paint particles and carry them smoothly onto the surface being painted.
It is important to avoid painting in winds that are too strong, as this can cause the paint to drift and create an uneven finish. Additionally, the wind direction is another crucial factor to consider. It is best to paint with the wind at your back, as this helps to prevent overspray and ensures that the paint is carried in the desired direction.
When painting in windy conditions, it is important to take safety precautions to protect yourself and the surrounding area.

VEVOR 750W Stand Airless Paint Sprayer, 3000PSI High Efficiency Electric Airless Sprayer, Fine and Even Painting Effect, Handheld Paint Sprayers for Home Interior and Exterior Furniture and Fences
Efficient Painting: Our stand airless paint sprayer is equipped with a powerful 750W motor, capable of delivering up...
As an affiliate, we earn on qualifying purchases.
Safety Precautions for Painting in Windy Weather
Take caution when facing the gusty tempest, for in this blustery weather, your safety should be your utmost concern. When painting in windy conditions, it is crucial to adhere to safety precautions to protect yourself and ensure a successful paint job. Here are three important safety measures to follow:
-
Secure your painting equipment: Strong winds can knock over your paint sprayer or other equipment, causing damage and potential injury. Make sure to secure your equipment properly to prevent accidents.
-
Wear appropriate safety gear: In windy weather, debris and paint particles can easily be blown back towards you. Wear safety goggles, a mask, and protective clothing to shield yourself from any potential harm.
-
Choose the right location: Find a sheltered area or create a windbreak to minimize the impact of the wind on your painting project.
By taking these safety precautions, you can confidently navigate windy conditions while painting.
Now, let’s explore techniques for achieving smooth paint application in windy conditions.
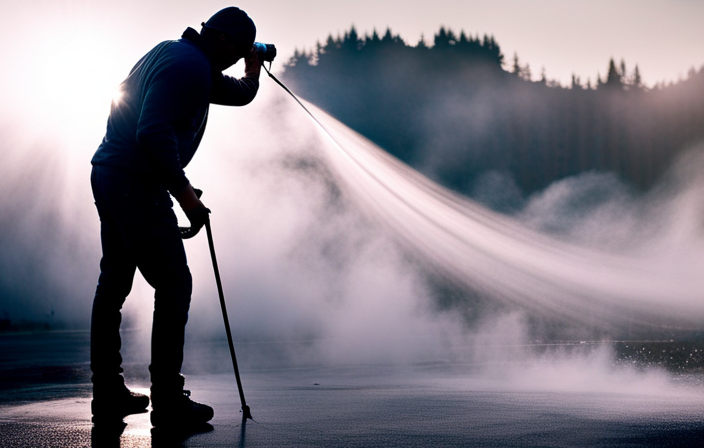
Techniques for Achieving Smooth Paint Application in Windy Conditions
To ensure a flawless finish in blustery weather, employ techniques that result in a smooth paint application. Adjust your spraying technique and use a finer nozzle size. Achieving even coverage is crucial when painting in windy conditions.
Start by holding the sprayer at a slight angle, aiming it towards the surface you’re painting. This will help reduce the impact of wind on the paint droplets.
Using a finer nozzle size can help minimize overspray and ensure that the paint is applied evenly. By choosing the right nozzle size, you can control the flow of paint and achieve better control over the spray pattern.
These techniques will help you overcome the challenges of painting in windy weather and achieve professional-looking results.
Moving on to the next section, let’s discuss some common challenges and troubleshooting tips when painting in adverse conditions.
Common Challenges and Troubleshooting Tips
Now let’s explore some common challenges you may encounter and discover effective troubleshooting tips when tackling adverse painting conditions.
When painting in windy conditions, there are a few common problems that can arise. One challenge is overspray caused by the wind blowing the paint particles away from the intended surface. To minimize this issue, try adjusting the pressure on your airless sprayer to achieve a finer mist.
Another problem is uneven coverage due to the wind causing the paint to dry too quickly in certain areas. To address this, consider working in smaller sections and applying thinner coats.
Additionally, the wind can kick up dust and debris, which may land on your freshly painted surface. To prevent this, try setting up a temporary windbreak or working early in the morning when the wind is usually calmer.
By troubleshooting these common problems, you can achieve a smoother paint application even in windy conditions.
Moving on to best practices for outdoor painting projects in windy conditions…
Best Practices for Outdoor Painting Projects in Windy Conditions
When it comes to outdoor painting projects in windy conditions, there are a few key points to keep in mind.
First, planning and timing are crucial. It’s important to choose a day with minimal wind and to schedule your painting during a time when the wind is at its lowest.
Second, choosing the right paint products is essential. Opt for a high-quality paint that is designed to withstand windy conditions, as it will adhere better and be less likely to streak or peel.
Lastly, maintaining a clean and organized work area is vital. Wind can easily blow debris onto your freshly painted surface, so be sure to keep your work area clear and covered when not in use.
Planning and Timing
Optimal planning and timing are essential when using an airless sprayer to ensure that the wind speed does not exceed the recommended limit for a flawless paint job. To achieve this, consider the following:
-
Check the weather forecast: Before starting your outdoor painting project, always check the weather forecast for the day. Look for days with lower wind speeds to minimize the risk of overspray and uneven paint application.
-
Choose the right painting equipment: Invest in high-quality airless sprayers that come with adjustable pressure settings and nozzle sizes. These features allow you to control the paint flow and pattern, compensating for moderate wind conditions.
-
Time your painting sessions wisely: Plan your painting sessions during the calmest times of the day, typically early mornings or late afternoons. During these periods, wind speeds tend to be lower, reducing the chances of wind interference.
By carefully considering these factors, you can ensure a smooth painting process and transition seamlessly into the subsequent section about choosing the right paint products.
Choosing the Right Paint Products
Selecting the appropriate paint products is crucial for achieving a flawless finish when using an airless sprayer. When choosing paint colors, it is important to consider the type of surface you will be painting on and the desired outcome. Certain colors may require multiple coats or specialized primers, so it’s essential to read the product labels and consult with experts if needed. Additionally, preparing the surface properly is key to a successful paint job. This involves cleaning, sanding, and repairing any imperfections before applying the paint. To help you make informed decisions, here is a table summarizing the different paint products and their recommended uses:
| Paint Product | Recommended Use |
|---|---|
| Primer | Provides a base for paint, improves adhesion |
| Satin Finish | Ideal for high-traffic areas, easy to clean |
| Gloss Finish | Offers a shiny, reflective surface, great for trim |
| Matte Finish | Provides a non-reflective, velvety appearance |
| Exterior Paint | Designed for outdoor use, withstands weather elements |
By choosing the right paint products and properly preparing the surface, you can ensure a smooth and long-lasting paint job. Maintaining a clean and organized work area is the next step to achieving professional results without any unnecessary distractions.
Maintaining a Clean and Organized Work Area
Maintaining a clean and organized work area is essential for achieving professional results. A clutter-free workspace can increase productivity by up to 20%. Here are four ways to maintain cleanliness and minimize distractions while painting with an airless sprayer:
-
Keep your tools and equipment organized and easily accessible. This will save you time and prevent unnecessary interruptions during the painting process.
-
Regularly clean your work area to remove dust, debris, and any other potential contaminants. This will ensure a smooth and flawless paint finish.
-
Use drop cloths and protective coverings to catch any paint overspray or drips. This will prevent unwanted messes and make cleanup much easier.
-
Stay focused and eliminate distractions, such as loud music or excessive talking. Concentration is key for achieving precise and professional results.
By maintaining cleanliness and minimizing distractions, you can create a conducive work environment for airless spraying.
Now, let’s explore alternative painting methods for windy weather.
Alternative Painting Methods for Windy Weather
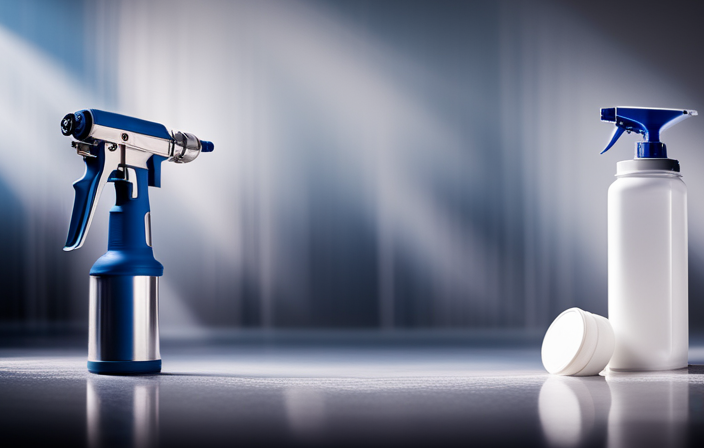
When it comes to painting in windy weather, there are alternative methods that can be used to achieve a successful outcome.
One option is to utilize brushing and rolling techniques, which allow for more control over the application of paint.
Another option is to use a HVLP (High Volume Low Pressure) sprayer, which can help minimize the impact of wind on the paint.
Lastly, it is important to consider hiring professional painting services, as they have the expertise and equipment to handle challenging weather conditions effectively.
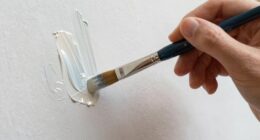
Brushing and Rolling Techniques
Brushing and rolling techniques can greatly impact the overall quality and finish of the paint job. When it comes to painting in windy conditions, these traditional methods provide more control and stability compared to using an airless sprayer. Here are some key points to consider when using brushing and rolling techniques:
| Brushing Techniques | Rolling Techniques |
|---|---|
| Use a high-quality brush with firm bristles | Choose a roller cover with the appropriate nap for the surface |
| Apply paint in smooth and even strokes, following the natural grain or texture of the surface | Start rolling from the top and work your way down, using steady pressure |
| Feather out the edges to achieve a seamless finish | Overlap each roll slightly to avoid streaks and lines |
| Be patient and allow adequate drying time between coats | Use a paint tray or roller grid to evenly distribute the paint |
By utilizing these techniques, you can achieve a professional-looking finish even in windy conditions. Transitioning into the next section, let’s explore the benefits of using a HVLP sprayer for painting.
Using a HVLP (High Volume Low Pressure) Sprayer
Using a HVLP (high volume low pressure) sprayer offers several benefits for achieving a professional-looking finish. With this type of sprayer, you can effortlessly glide the paint onto the surface, resulting in a smooth and flawless appearance. HVLP sprayers are known for their precise and controlled application, making them ideal for achieving professional-looking results.
One of the main advantages of using HVLP sprayers is that they produce less overspray compared to airless sprayers. This means that you can achieve a more efficient paint application, as less paint is wasted. HVLP sprayers are also perfect for detailed work and intricate surfaces, as they provide a fine mist of paint that evenly coats the surface without drips or streaks.
When using a HVLP sprayer, it’s important to follow proper techniques to achieve the desired coverage. This includes maintaining the correct spray distance and adjusting the flow rate. By following these techniques, you can ensure that the paint is applied evenly and smoothly.
It’s worth considering the advantages of using a HVLP sprayer compared to hiring professional painting services. While HVLP sprayers can provide excellent results, professionals bring expertise and efficiency to the table. Depending on the complexity of the project and your level of experience, it may be beneficial to weigh the advantages of using a HVLP sprayer against the expertise that professionals can offer.
Consideration of Professional Painting Services
If you want to truly enjoy the process and ensure a flawless finish, you should definitely consider hiring professional painters for your project.
Professional painting techniques are essential for achieving a high-quality result that will last. They have the expertise and experience to handle different surfaces, textures, and colors, ensuring a smooth and even coat of paint.
Additionally, professional painters understand the importance of weather conditions when it comes to painting. They know how to work around windy conditions and adjust their techniques to minimize the impact of wind on the paint application. By hiring professionals, you can trust that they will take all necessary precautions to ensure the weather conditions don’t compromise the final outcome.
Now, let’s transition to the next section and discuss some tips for cleaning and maintaining your airless sprayer.
Tips for Cleaning and Maintaining Your Airless Sprayer
To keep your airless sprayer in top shape, regularly clean the filters and nozzles. Clogged equipment can lead to a 30% decrease in paint output. Cleaning techniques are crucial for optimal performance.
Start by disconnecting the sprayer from the power source and relieving any pressure. Remove the filters and clean them thoroughly with warm soapy water, ensuring all debris is removed.
Next, inspect the nozzles for any clogs or blockages. Use a small brush or needle to clear them.
Troubleshooting tips include checking the hoses for leaks or damage and ensuring proper lubrication of moving parts.
By following these maintenance steps, you can extend the lifespan of your airless sprayer and maintain consistent paint output.
Transitioning to the next section, it’s important to find a balance between efficiency and quality when painting in windy weather.
Conclusion: Balancing Efficiency and Quality in Windy Weather Painting
Finding the right balance between getting the job done quickly and ensuring a flawless finish can be a challenge when painting in gusty conditions. When it comes to painting in windy weather, it is important to consider the impact it can have on both time and cost.
While working quickly may seem like the best option, it is crucial to maintain a high level of quality to ensure the durability of the paint. Strong winds can cause overspray and uneven coverage, resulting in a less durable finish. To combat this, it is recommended to adjust the pressure settings on your airless sprayer to compensate for the wind.
Additionally, using a windbreak or painting during less windy times of the day can help minimize the negative effects of gusty conditions.
Balancing efficiency and quality in windy weather painting is essential for achieving long-lasting and professional results.
Frequently Asked Questions
Can I use an airless sprayer to paint in extremely windy conditions?
In extremely windy conditions, it’s not advisable to use an airless sprayer for painting. The painting techniques are hindered, and the wind speed limits make it difficult to achieve precise and even coverage.
Are there any specific safety measures I should take when painting in windy weather with an airless sprayer?
When painting in windy weather with an airless sprayer, it’s essential to take safety precautions. I recommend using wind resistant paint techniques and wearing protective gear to prevent any accidents or issues.
What are some alternative painting methods I can use if the wind is too strong for an airless sprayer?
If the wind is too strong for an airless sprayer, I can use alternative painting methods such as brush or roller techniques. These techniques allow for more control and precision in windy conditions.
How often should I clean and maintain my airless sprayer when painting in windy conditions?
In windy conditions, I recommend cleaning and maintaining your airless sprayer more frequently to ensure optimal performance. A regular cleaning schedule and maintenance routine will help prevent clogs and prolong the lifespan of your sprayer.
Is it possible to achieve a smooth paint application with an airless sprayer in windy weather, and if so, what techniques can I use to achieve this?
To achieve a smooth finish with an airless sprayer in windy conditions, I recommend adjusting the pressure to minimize overspray. Additionally, using a smaller spray tip and positioning yourself upwind can help control the direction of the paint.
Conclusion
As I wrap up this discussion on painting with an airless sprayer in windy conditions, one thing becomes abundantly clear – the power of balance.
Just like a tightrope walker gracefully gliding across a thin wire, we too must find that delicate equilibrium between efficiency and quality.
The wind may challenge our every stroke, but with proper techniques, safety precautions, and a deep understanding of our equipment, we can still achieve a smooth and flawless finish.
Remember, in the face of adversity, we must adapt and conquer.
Happy painting!