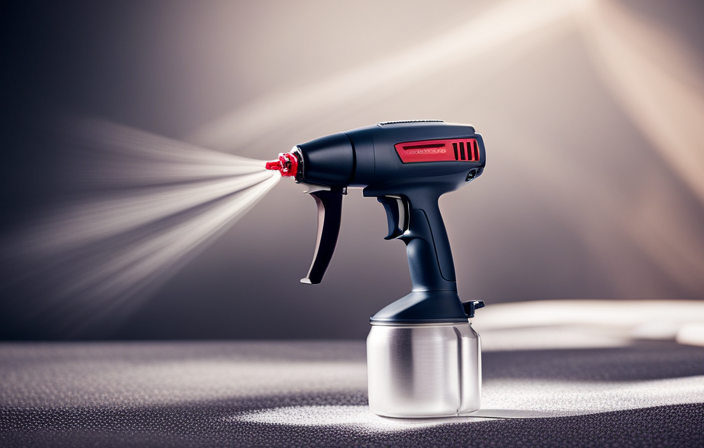
Connect with us

Airless Paint Sprayers FAQs

How Spray Paint Iron Fence Airless Sprayer

Published

on

An image that captures the intricate process of spray painting an iron fence using an airless sprayer

Using an airless sprayer is among the most efficient and effective ways to apply paint to an iron fence. This powerful tool enables you to achieve a smooth and even finish quickly.

In this article, I will guide you through the step-by-step process of spray painting your iron fence using an airless sprayer.

  1. Prepare your fence and choose the right paint.
  2. Master the spraying technique.
  3. Maintain your equipment.

Preparing your fence and choosing the right paint is crucial for a successful paint job. Make sure to clean the fence thoroughly and remove any rust or loose paint. Additionally, choose a high-quality paint that is specifically designed for metal surfaces.

Mastering the spraying technique is essential to achieve a professional-looking finish. Start by practicing on a scrap piece of metal to get a feel for the sprayer. Hold the sprayer at a consistent distance from the fence and move it in a smooth and steady motion. Overlapping each pass by 50% will ensure even coverage.

Maintaining your equipment is important to prolong its lifespan and ensure optimal performance. Clean the sprayer thoroughly after each use to prevent clogs and buildup. Check and replace any worn or damaged parts as needed.

Whether you’re a DIY enthusiast or a seasoned painter, this article will equip you with the knowledge and skills to transform your iron fence and give it a fresh, vibrant look. So let’s get started and make your fence the envy of the neighborhood!

Advertisement

Key Takeaways

  • Achieving a smooth finish requires allowing paint to dry completely and avoiding touching or disturbing the paint.
  • Allowing sufficient time for full cure is important for durability, and rushing can compromise the final result.
  • Inspecting and touching up the fence is necessary to fix any imperfections and ensure even coverage.
  • Regularly cleaning and maintaining the sprayer is crucial to prevent clogs and unexpected problems during the painting process.

Prepare Your Fence for Painting

Before you start spray painting your iron fence with an airless sprayer, make sure to properly prepare it to achieve a flawless and long-lasting finish.

Begin by gathering the necessary tools for preparing the fence, such as a wire brush, sandpaper, and a pressure washer. These tools will help you remove any existing rust, dirt, or loose paint from the surface of the fence.

Start by using the wire brush to scrape off any loose rust or paint, then sand the entire surface to smooth out any rough areas.

Once the surface is clean and smooth, use a pressure washer to thoroughly clean the fence and remove any remaining dirt or debris. This will ensure that the paint adheres properly to the surface.

Advertisement

With the fence prepped and ready, you can now move on to choosing the right paint and equipment for the job.

Choose the Right Paint and Equipment

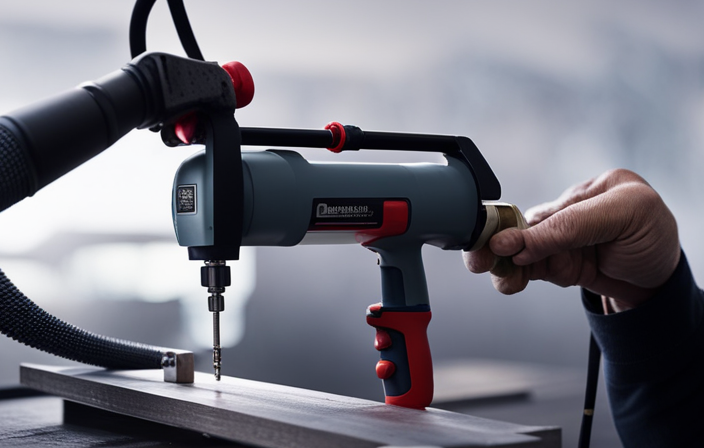
To properly coat your iron fence, make sure you select the correct type of paint and use the appropriate equipment. When choosing paint colors for your iron fence, it’s important to consider both aesthetic preferences and the durability of the paint. Opt for a high-quality exterior paint that is specifically designed for metal surfaces. Look for paints that offer protection against rust and UV damage. Additionally, consider the color of your fence and its surroundings to ensure a harmonious look. As for equipment, an airless sprayer is the best choice for painting an iron fence. It provides a smooth and even finish, saving you time and effort. Remember to maintain your equipment properly by cleaning it thoroughly after each use and storing it in a dry place. With the right paint and equipment, you’ll be well on your way to a beautifully painted iron fence. In the next section, we’ll discuss how to set up your work area.

Set Up Your Work Area

To ensure a clean and efficient painting process, it’s essential to cover surrounding areas with drop cloths or plastic sheets. This will protect them from overspray.

Advertisement

Additionally, it’s important to set up a dedicated work table for your paint and equipment. This will provide a stable and organized space to work from.

Having a dedicated work table will help prevent accidental spills and keep everything within easy reach. It will allow for a seamless painting experience.

Cover Surrounding Areas to Protect from Overspray

When using an airless sprayer to spray paint the iron fence, it is important to be careful and avoid splattering paint on the surrounding areas. To prevent overspray, protective measures should be taken. First, cover any nearby objects or surfaces that you don’t want to be painted. This can be done using drop cloths or plastic sheets to protect the ground, plants, and any other items in the vicinity. Make sure to secure the covers in place to prevent them from moving during the painting process. Pay special attention to areas directly adjacent to the fence to avoid accidental splatters. By taking these precautions, you can minimize the risk of overspray and maintain a clean work area. Once the surrounding areas are protected, you can proceed to set up a work table for paint and equipment.

Set Up a Work Table for Paint and Equipment

Once you’ve ensured proper protection for the surrounding areas, it’s time to set up a work table for your paint and equipment. A well-organized work table setup is crucial for a smooth and efficient spray painting process.

Start by selecting a sturdy table that can support the weight of your equipment and materials. Place the table in a well-ventilated area, away from any potential hazards.

Advertisement

Next, organize your equipment in a logical manner. Keep the paint cans, spray gun, and other tools within easy reach. Consider using containers or trays to keep smaller items organized.

Make sure to have an adequate supply of clean rags, paint brushes, and other necessary accessories nearby. Having everything you need within arm’s reach will help minimize delays and maximize productivity.

By having a well-planned work table setup and equipment organization, you can set yourself up for success in the painting process.

Practice Proper Spraying Technique

Mastering the art of spray painting an iron fence with an airless sprayer requires you to develop proper spraying technique. To achieve a smooth and even finish on your iron fence, it is essential to consider different weather conditions.

In hot and dry weather, you should spray paint early in the morning or late in the evening to avoid rapid drying and potential streaking. On the other hand, in cold weather, it is crucial to warm up the paint and the sprayer before starting.

Advertisement

Additionally, keep the sprayer at a consistent distance from the fence, usually around 8-12 inches, and move it in a steady, overlapping motion. This technique ensures an even coat and minimizes drips or runs.

With these proper spraying techniques in mind, you are ready to start painting your iron fence, transforming it into a beautiful and protected structure.

Start Painting Your Fence

Now it’s time for you to begin transforming your fence into a beautiful and protected structure. When painting your fence, proper maintenance is crucial to ensure its longevity.

Start by choosing the right paint for the job. Look for a high-quality paint that is specifically designed for outdoor use and can withstand the elements. Additionally, consider the color and finish that will best complement your property.

Once you have the paint, prepare the fence by cleaning it thoroughly and removing any rust or old paint. Use an airless sprayer to apply the paint evenly and efficiently. Remember to follow the manufacturer’s instructions for mixing and spraying the paint.

Advertisement

After painting, allow the paint to dry and cure before moving on to the next step of fence maintenance.

Allow the Paint to Dry and Cure

When allowing the paint to dry and cure on your fence, it’s important to follow the recommended drying time provided by the manufacturer. This will ensure that the paint fully adheres to the surface and prevents any potential damage.

It’s crucial to avoid touching or disturbing the paint during this drying period, as it can cause smudges or unevenness in the finish.

Additionally, allowing sufficient time for the paint to fully cure will result in a durable and long-lasting coating that can withstand the elements and maintain its appearance over time.

Follow the Recommended Drying Time

To ensure a flawless finish, wait for the recommended drying time before touching your freshly spray-painted iron fence with an airless sprayer. The recommended drying time varies depending on the type of paint and environmental conditions. It is crucial to follow this guideline to avoid smudging or ruining the finish.

Advertisement

Rushing the drying process can result in a less durable and less attractive paint job. If the paint is not fully dry, it may peel or chip easily, compromising the overall appearance and longevity of the fence. Patience is key when it comes to achieving a smooth finish.

Once the recommended drying time has passed, you can proceed to the next step without worrying about touching or disturbing the paint.

Avoid Touching or Disturbing the Paint

Be careful not to rock the boat and ruin the fresh coat of paint on your iron fence. When spray painting with an airless sprayer, it is crucial to avoid touching or disturbing the paint until it has fully dried.

This is essential for avoiding damage and preventing paint smudges. Even the slightest touch can leave unwanted marks or fingerprints on the surface. To ensure a flawless finish, resist the temptation to inspect or interact with the painted fence until it has had sufficient time for full cure.

Patience is key in allowing the paint to harden completely. Once the paint has fully cured, you can move on to the next step of the process, which involves allowing sufficient time for full cure.

Advertisement

Allow Sufficient Time for Full Cure

Take a moment and imagine the satisfaction of admiring your freshly painted iron fence. But remember, it’s important to allow sufficient time for the paint to fully cure and harden before moving on to the next step.

The full cure time for spray paint can vary depending on the specific product and environmental conditions. Typically, it ranges from 24 to 48 hours. Patience is key during this stage. Rushing the process can result in a less durable finish that is prone to chipping and peeling.

Allow the paint to dry completely before inspecting and touching up any areas that may need it. Once the paint has fully cured, you can move on to the next section where we will discuss how to inspect and touch up as needed.

Inspect and Touch Up as Needed

Inspect the iron fence carefully and fix any imperfections you find by using an airless sprayer. This will help you achieve a flawless finish that is sure to impress!

When inspecting, make sure to use proper techniques such as examining the fence from different angles and checking for any missed spots or uneven coverage. If you notice any areas that require touch-up, grab your touch-up tools and apply a thin layer of spray paint to those spots.

Advertisement

Be sure to blend the touch-up paint seamlessly with the rest of the fence. This meticulous attention to detail will ensure a professional-looking result.

Once you have inspected and touched up the fence, it’s time to move on to the next step and clean and maintain your sprayer, so it’s ready for future projects.

Clean and Maintain Your Sprayer

Make sure you keep your sprayer in top-notch condition by regularly cleaning and performing maintenance tasks, so you can always achieve flawless results on your future projects. Here are some cleaning tips and troubleshooting common issues to help you maintain your sprayer:

  • Clean the sprayer thoroughly after each use to prevent clogs and build-up.
  • Use a brush or toothpick to remove any dried paint from the nozzle and other parts.
  • Check the filters regularly and clean or replace them as needed to ensure proper paint flow.

By following these cleaning tips and troubleshooting common issues, you can prolong the lifespan of your sprayer and avoid any unexpected problems during your painting projects.

Now, you can move on to the next section and enjoy your newly painted iron fence.

Enjoy Your Newly Painted Iron Fence

Now that your iron fence has been freshly coated, it’s time to savor the transformation and admire the striking results.

Advertisement

To achieve a smooth finish, there are a few tips to keep in mind. Firstly, ensure that the airless sprayer is set to the correct pressure and that the paint is properly mixed. Start by spraying in a continuous motion, overlapping each pass slightly for even coverage. Avoid overspraying or applying too thick of a coat, as this can lead to drips and an uneven finish.

Additionally, be mindful of the weather conditions, as extreme heat or cold can affect the paint’s adhesion and drying time. Finally, take care to clean and maintain your sprayer after each use to prolong its lifespan.

By following these guidelines, you can avoid common mistakes and achieve a professional-looking result.

Now, let’s move on to sharing your experience and results.

Share Your Experience and Results

Take a moment to step back and admire the stunning transformation of your freshly coated iron fence, and share your experience and results with others. Here are some painting tips based on my experience:

Advertisement
  1. Prep work: Thoroughly clean the fence to remove dirt and rust. Use sandpaper or a wire brush to smooth any rough spots.

  2. Choose the right paint: Opt for a high-quality spray paint specifically designed for metal surfaces. This will ensure a smooth and durable finish.

  3. Technique: Hold the airless sprayer about 12 inches away from the fence and apply the paint in even strokes. Start from the top and work your way down, overlapping each pass slightly.

  4. Multiple coats: Apply multiple thin coats rather than one thick coat. This will prevent drips and ensure better coverage.

By following these painting tips, you’ll achieve professional-looking results. Share your experience and let others benefit from your newfound knowledge.

Frequently Asked Questions

How long does it usually take for the paint to dry and cure on an iron fence?

Typically, it takes about 24 hours for spray paint to dry on an iron fence. However, the curing process can take up to a week, depending on factors like temperature and humidity.

Can I use a regular paintbrush instead of an airless sprayer to paint my iron fence?

I can use a regular paintbrush instead of an airless sprayer to paint my iron fence. The pros of using a paintbrush are more control and precision, but it may take longer. The cons are a slower application and potential brush marks.

Are there any specific safety precautions I need to take when using an airless sprayer to paint an iron fence?

When using an airless sprayer to paint an iron fence, it’s important to prioritize safety precautions. Proper ventilation is crucial to avoid inhaling fumes, so make sure to work in a well-ventilated area or use a respirator.

What type of paint is best suited for painting an iron fence?

The best paint for an iron fence is a high-quality, rust-resistant enamel paint. It is available in a variety of colors to suit your preferences. Before painting, make sure to clean and prep the surface by removing any rust or dirt.

Advertisement

How often should I clean and maintain my airless sprayer to ensure its longevity?

To ensure your airless sprayer’s longevity, it’s wise to follow the adage "an ounce of prevention is worth a pound of cure." Regularly clean your sprayer after each use and perform routine maintenance practices to keep it in optimal condition.

Conclusion

Well, who would’ve thought that painting an iron fence could be so thrilling? Armed with my trusty airless sprayer, I embarked on a journey of transformation.

The iron fence, once dull and lifeless, now stands tall and proud, adorned in a fresh coat of vibrant paint. The smooth, even application achieved with the sprayer left me in awe. It was like watching a work of art come to life before my eyes.

Now, as I gaze upon my masterpiece, I can’t help but feel a sense of satisfaction and accomplishment.

Advertisement

With James‘ articles, you can expect comprehensive breakdowns of airless paint sprayer features, performance assessments, and expert insights into the latest industry innovations. His meticulous approach ensures that readers gain a thorough understanding of the equipment they are considering, helping them make well-informed choices.

Continue Reading
Advertisement

Airless Paint Sprayers FAQs

Magnum X5 Airless Sprayer What Paint

Published

on

By

An image showcasing a vibrant, perfectly smooth, and flawlessly finished wall painted with the Magnum X5 Airless Sprayer

Standing here, holding the Magnum x5 Airless Sprayer in my hands, I feel a sense of power and precision. This remarkable tool is more than just a sprayer; it represents the peak of engineering excellence, designed to enhance your painting projects. The innovative features and cutting-edge technology incorporated in the Magnum x5 Airless Sprayer signify a groundbreaking change in painting methods.

But before we can embark on our journey of transforming surfaces with this extraordinary sprayer, we must first understand the importance of choosing the right paint. The type of paint you select can make all the difference in achieving professional results.

In this article, we will explore the different types of paint and help you make informed decisions for your projects.

So, grab your brush and prepare to dive into the world of painting with the Magnum x5 Airless Sprayer. Together, we will unlock the secrets to mastering this art and turn your visions into reality.

Key Takeaways

  • Choosing the right paint is important for achieving professional results with the Magnum x5 Airless Sprayer.
  • Proper surface preparation is crucial before using the sprayer.
  • Different surfaces require different levels of preparation.
  • Adjusting the spray pattern and pressure according to the paint being used is essential for optimal performance.

Understanding the Magnum x5 Airless Sprayer

Advertisement

You’ll easily grasp the workings of the Magnum x5 Airless Sprayer as you watch paint effortlessly flow through the machine and onto the surface. This powerful tool offers numerous benefits for your painting projects.

One major advantage of using an airless sprayer is that it provides a smooth and even finish, saving you time and effort compared to traditional methods. To achieve a flawless result, it’s essential to follow a few tips.

First, make sure to clean and prep the surface properly before painting. Secondly, practice with the sprayer on a scrap piece to get a feel for the spray pattern and adjust the pressure accordingly. Lastly, maintain a consistent distance from the surface and move the sprayer in a steady, overlapping motion.

Now, let’s delve into choosing the right paint for your project.

Choosing the Right Paint for Your Project

When choosing the right paint for your project, it’s important to consider the surface type. Different surfaces require different types of paint in order to achieve the best results.

Advertisement

Additionally, determining the paint finish is crucial in achieving the desired aesthetic and durability.

Lastly, selecting the appropriate paint type is essential in ensuring the longevity of the paint job and the overall success of the project.

By considering these key points, you can make informed decisions and achieve professional-looking results.

Consider the Surface Type

For optimal results, choose the appropriate paint for the surface you’re working with, as using the wrong type can lead to a subpar finish and wasted effort.

When considering the surface type, it’s crucial to take into account the level of preparation needed. Different surfaces require different levels of preparation, such as cleaning, sanding, or priming.

Advertisement

Before applying the paint, make sure the surface is clean and free from any dirt, grease, or loose particles. Using a primer before painting can significantly enhance adhesion, increasing it by up to 50%. This step is particularly important for surfaces like bare wood or metal.

Once you have considered the surface preparation, you can then move on to determining the appropriate paint finish.

Determine the Paint Finish

To achieve an elegant and polished look, it is essential to carefully consider the paint finish. When choosing paint colors, it is important to understand paint sheen, which refers to the level of glossiness or shine in the paint. Different paint finishes have distinct characteristics that can greatly impact the overall appearance of a surface. To help you make an informed decision, here is a breakdown of common paint finishes:

Finish Description Best Suited For
Flat Matte finish with no shine, ideal for ceilings and low-traffic areas Bedrooms, living rooms
Eggshell Soft sheen, easy to clean, suitable for moderate-traffic areas Hallways, dining rooms
Satin Subtle shine, durable and washable, great for high-traffic areas Kitchens, bathrooms, kids’ rooms
Semi-gloss Glossy appearance, highly durable and easy to clean Trim, doors, cabinets

Understanding the different paint finishes will help you choose the appropriate one for your project. In the next section, we will discuss how to select the appropriate paint type for your Magnum X5 airless sprayer.

Select the Appropriate Paint Type

Choosing the right paint type is like selecting the perfect ingredient for a delicious recipe. It’s essential to consider various factors, such as the surface you’re painting, the desired finish, and the specific application method. When using the Magnum X5 Airless Sprayer, it’s crucial to choose a paint type that’s compatible with airless spraying techniques.

Advertisement

Some popular options include latex paints, oil-based paints, acrylic paints, and enamel paints. Each type has its own advantages and considerations, so it’s important to understand the characteristics of each before making a selection.

Additionally, color selection plays a significant role in achieving the desired outcome. Whether you opt for vibrant shades or subtle hues, the paint type should support your chosen colors.

Transitioning into the next section about preparing your project for painting, proper surface preparation is key to achieving a flawless finish.

Preparing Your Project for Painting

Once you’ve got all your prep work done, it’s time to start slapping on some paint with the Magnum X5 airless sprayer. Before you begin, it’s important to consider color schemes and choose the right primer for your project.

Color schemes can greatly impact the overall look and feel of a space, so take the time to select colors that complement each other and achieve the desired aesthetic. Additionally, using a primer is essential for creating a smooth and even surface for the paint to adhere to. It helps to hide imperfections and enhances the durability of the final paint job.

Advertisement

Once you’ve considered color schemes and chosen the right primer, you can move on to using the Magnum X5 airless sprayer for a professional-looking finish.

Using the Magnum x5 Airless Sprayer

Get ready to transform your project with the powerful and efficient Magnum X5, as it effortlessly coats your surface with a flawless, professional finish.

The Magnum X5 airless sprayer is designed to achieve a smooth finish on any surface, whether it’s walls, ceilings, furniture, or fences. Its high-pressure pump delivers a consistent spray pattern, allowing for even coverage and reducing the need for multiple coats.

To ensure optimal performance, it’s important to properly prepare your paint before loading it into the sprayer. This includes straining the paint to remove any impurities that can clog the nozzle.

Troubleshooting common issues, such as clogged tips or uneven spray patterns, is quick and easy with the Magnum X5. By adjusting the pressure settings and cleaning the nozzle, you can achieve professional results with ease.

Advertisement

Achieving Professional Results

To achieve professional results with the powerful and efficient Magnum X5, you’ll want to make sure you’re as focused and precise as a surgeon in the operating room.

When it comes to painting techniques, there are a few key factors to keep in mind. First, you’ll want to ensure that the surface you’re painting is clean and free of any debris or imperfections. This can be achieved by sanding and priming the surface beforehand.

Next, it’s important to maintain a consistent distance and speed while spraying. Keep the sprayer moving smoothly and evenly, overlapping each pass to achieve a seamless finish.

Lastly, adjust the spray pattern and pressure according to the specific paint you’re using. This will ensure that the paint is applied evenly and smoothly.

By following these techniques, you’ll be able to achieve flawless and professional results with your Magnum X5.

Advertisement

Now, let’s move on to the next section about cleaning and maintenance of the Magnum X5 airless sprayer.

Cleaning and Maintenance of the Magnum x5 Airless Sprayer

When it comes to the cleaning and maintenance of the Magnum x5 Airless Sprayer, there are three key points to keep in mind. First, it’s important to flush the system after each use to prevent any leftover paint from drying and clogging the sprayer.

Second, cleaning the spray gun and nozzles thoroughly is crucial to ensure proper functionality and prevent any blockages.

Finally, storing the sprayer properly, in a clean and dry environment, will help maintain its performance and extend its lifespan.

Flushing the System after Each Use

After each use, it’s important to thoroughly flush the Magnum X5 airless sprayer system to ensure optimal performance and prevent any residual paint from drying and clogging the machine. Flushing the system removes any leftover paint and cleans all the components, promoting longevity and preventing damage. To help you understand the importance of this step, here’s a table outlining the benefits of flushing the system:

Advertisement
Benefits of Flushing the System
1. Prevents paint buildup 2. Extends machine lifespan 3. Ensures consistent spray pattern 4. Reduces clogging 5. Improves overall performance

By following these cleaning and maintenance tips, you can keep your Magnum X5 airless sprayer in top condition. Now, let’s move on to the next section, where we will discuss cleaning the spray gun and nozzles.

Cleaning the Spray Gun and Nozzles

Don’t neglect the crucial step of cleaning the spray gun and nozzles, or else you’ll risk ruining your masterpiece with clogged and uneven spraying. Properly cleaning your Magnum X5 airless sprayer is essential for maintaining its performance and longevity. To help you with this task, here are some cleaning techniques and the best cleaning products to use:

  • Start by removing the nozzle and filter, then soak them in a cleaning solution for a few minutes.

  • Use a soft brush or toothbrush to scrub away any paint residue from the gun and nozzle.

  • For stubborn clogs, you can use a cleaning needle to clear the passageways.

  • Rinse all the components thoroughly with clean water.

  • Finally, dry everything completely before reassembling the spray gun.

By following these cleaning techniques and using the best cleaning products, you can ensure that your Magnum X5 airless sprayer stays in top shape.

Now, let’s move on to the next section about storing the sprayer properly to maintain its performance.

Storing the Sprayer Properly

To keep your masterpiece-making tool in optimal condition, it’s essential to store your sprayer properly. Proper maintenance and storage practices will help prevent clogs and ensure that your Magnum X5 Airless Sprayer is always ready for your next project. Here are some key tips for storing your sprayer:

Advertisement
  1. Clean the sprayer thoroughly after each use, following the instructions provided in the previous subtopic.
  2. Remove the spray tip and clean it separately to remove any dried paint.
  3. Store the sprayer in a clean, dry place, away from extreme temperatures and direct sunlight.

Properly storing your sprayer will help extend its lifespan and prevent any issues when you’re ready to use it again. Now, let’s move on to troubleshooting common issues that may arise with your Magnum X5 Airless Sprayer.

Troubleshooting Common Issues

When troubleshooting common issues with the Magnum x5 Airless Sprayer, there are a few key points to consider.

First, clogged nozzles or filters can cause a decrease in spray pattern quality and can be easily resolved by cleaning or replacing the affected parts.

Secondly, an uneven spray or drips can indicate issues with the pressure settings or tip wear, which can be adjusted or replaced accordingly.

Lastly, overspray or splattering can occur if the sprayer is not held at the correct distance from the surface or if the paint is not properly thinned.

Clogged Nozzles or Filters

Having trouble with clogged nozzles or filters on your Magnum X5 airless sprayer? Don’t worry, I’ve got some cleaning and troubleshooting tips for you.

Advertisement

When it comes to clogged nozzles, the first thing you should do is remove the nozzle and soak it in a cleaning solution. You can use a small brush or needle to remove any stubborn debris.

If your filters are clogged, simply remove them and rinse them thoroughly with water. Make sure to let them dry completely before putting them back in the sprayer. Remember, regular maintenance is key to preventing clogs.

Now, let’s move on to the next section about uneven spray or drips, where I’ll share some more helpful tips for you.

Uneven Spray or Drips

Let’s now address the issue of spotty mist or pesky drips that may arise when using the Magnum X5 airless sprayer. It can be frustrating to see uneven spray patterns or drips on your painted surfaces, but there are solutions to fix these problems.

To troubleshoot uneven spray or drips, consider the following tips:

Advertisement
  • Check the paint viscosity: Thin the paint if it’s too thick or add a flow additive if it’s too thin.
  • Adjust the pressure: Increase or decrease the pressure according to the paint manufacturer’s recommendations.
  • Clean the nozzle and filters: Clogged nozzles or filters can cause uneven spray. Remove them and clean thoroughly.

By following these steps, you can ensure a smooth and consistent spray pattern without any pesky drips.

Now, let’s move on to the next section about overspray or splattering.

Overspray or Splattering

After addressing the issue of uneven spray or drips with the Magnum X5 airless sprayer, let’s move on to another common problem: overspray or splattering. These issues can be frustrating and messy, but with the right techniques, they can be easily minimized.

One effective way to reduce overspray is by adjusting the pressure settings on the sprayer. Lowering the pressure will help to control the amount of paint being sprayed, resulting in less overspray. Additionally, using a smaller tip size can also help to reduce overspray and achieve a more precise application.

To prevent splattering, it is important to maintain a consistent distance between the sprayer and the surface being painted. Moving the sprayer too quickly or too closely to the surface can cause splattering.

By implementing these techniques, you can achieve a smoother and more controlled paint application with your Magnum X5 airless sprayer.

Advertisement

Now, let’s move on to discussing the safety precautions when using this powerful tool.

Safety Precautions When Using the Magnum x5 Airless Sprayer

When using the Magnum x5 Airless Sprayer, it’s crucial to prioritize safety precautions.

First and foremost, I always make sure to wear proper protective gear such as goggles, gloves, and a respirator to protect myself from any potential hazards.

Additionally, I ensure that I work in a well-ventilated area to minimize the risk of inhaling harmful fumes.

Lastly, I diligently follow the manufacturer’s instructions to ensure that I’m using the sprayer correctly and efficiently.

Advertisement

By following these key points, I can confidently operate the Magnum x5 Airless Sprayer while minimizing any potential risks.

Wear Protective Gear

Ensure you’re properly equipped with protective gear while using the Magnum X5 airless sprayer. Safety should always be a top priority when operating any type of equipment, especially one that involves spraying paint. The importance of wearing protective gear can’t be overstated. It not only protects you from potential hazards but also ensures a more efficient and comfortable working experience.

There are several types of protective gear that you should consider using with the Magnum X5 airless sprayer. These include safety goggles or a face shield to protect your eyes and face from any overspray, a respirator to filter out harmful fumes and particles, gloves to protect your hands, and a coverall or apron to shield your body from paint splatter.

By wearing the appropriate protective gear, you can minimize the risk of accidents and injuries.

Moving on to the next section, it’s also crucial to work in a well-ventilated area to further enhance safety and prevent the accumulation of fumes.

Advertisement

Work in a Well-Ventilated Area

To enhance your safety and create a more enjoyable working environment, make sure you choose a well-ventilated area for your project. Proper sprayer ventilation is essential to minimize health concerns and ensure the best results. When working with an airless sprayer like the Magnum X5, it’s important to consider the following:

  • Adequate airflow: Ensure there’s sufficient air circulation in the area to prevent the buildup of fumes and overspray.

  • Ventilation equipment: Use fans or open windows and doors to provide fresh air and remove any airborne particles.

  • Respiratory protection: Wear a mask or respirator to filter out any harmful fumes or dust.

By working in a well-ventilated area, you can reduce the risk of inhaling hazardous substances and improve the overall quality of your work.

Now, let’s move on to the next section and discuss the importance of following the manufacturer’s instructions.

Follow Manufacturer’s Instructions

It’s crucial to follow the manufacturer’s instructions for optimal results and safety when using the Magnum X5 airless sprayer. To achieve a smooth finish, it’s important to choose the right paint colors and properly prepare the surface before spraying. Here are some tips for achieving a professional-looking result:

  1. Use high-quality paint: Choose paint that is specifically formulated for airless sprayers to ensure smooth application and minimal clogging.
  2. Thin the paint if needed: Follow the manufacturer’s instructions for thinning the paint, if necessary, to achieve the desired consistency for spraying.
  3. Adjust the sprayer settings: Before starting, adjust the sprayer settings according to the type of paint and the desired finish.
  4. Maintain a consistent speed and distance: Move the sprayer at a steady speed and maintain a consistent distance from the surface to achieve an even coat.

Following these tips will help you achieve a smooth finish with your Magnum X5 airless sprayer. Now let’s move on to frequently asked questions about this versatile tool.

Frequently Asked Questions about the Magnum x5 Airless Sprayer

When it comes to using the Magnum x5 Airless Sprayer with different paint brands, it’s important to consider the compatibility of the paint with the sprayer system. The sprayer can handle a variety of paints, but it’s recommended to use paints specifically designed for airless sprayers to ensure optimal performance.

Advertisement

The drying time of the paint will depend on factors such as temperature and humidity, but generally, it can take anywhere from a few hours to a day for the paint to fully dry.

Lastly, the Magnum x5 Airless Sprayer can be used for exterior painting projects, allowing for efficient and even coverage on a variety of surfaces.

Can I use the sprayer with different paint brands?

Yes, you can use the sprayer with various paint brands, increasing your options for any project you have in mind. Did you know that the Magnum X5 airless sprayer is capable of spraying up to 0.27 gallons of paint per minute? When it comes to paint compatibility, this sprayer is quite versatile. It can handle different paint types, including latex, acrylic, enamel, and oil-based paints. To give you a better idea, here’s a table showcasing the compatibility of the Magnum X5 with various paint brands:

Paint Brand Compatibility
Behr Yes
Sherwin-Williams Yes
Valspar Yes
Rust-Oleum Yes
Benjamin Moore Yes

With this sprayer, you have the flexibility to choose from a wide range of paint brands for your projects. Now, let’s move on to the next topic and explore how long it takes for the paint to dry.

How long does the paint take to dry?

Get ready to see your masterpiece come to life as you eagerly await the drying process of your freshly painted walls. The drying time of paint applied with the Magnum X5 airless sprayer can vary depending on several factors, such as the type of paint used, the environmental conditions, and the thickness of the paint coat.

Advertisement

However, by following some best practices, you can ensure a quicker drying time for your paint. Here are a few tips:

  1. Use a paint with a fast-drying formula to expedite the drying process.
  2. Apply thin coats of paint rather than thick layers, as this allows for better airflow and faster drying.
  3. Ensure proper ventilation in the room to promote air circulation and facilitate drying.
  4. Control the humidity levels in the environment to avoid excessive moisture, which can prolong drying time.

With these tips in mind, you can enjoy the satisfaction of a freshly painted room in no time.

Now, let’s explore whether the Magnum X5 sprayer is suitable for exterior painting.

Can I use the sprayer for exterior painting?

If you’re looking to give the exterior of your home a fresh new look, the sprayer is a great tool to help you achieve professional results. When it comes to painting, there are some key differences between exterior and interior projects.

Exterior painting requires a durable and weather-resistant finish that can withstand the elements. Using an airless sprayer for exterior painting has several advantages. Firstly, it allows for faster application, covering large surface areas quickly and evenly. Additionally, the sprayer provides a smooth and consistent finish, eliminating brush or roller marks.

However, there are also some considerations to keep in mind. Exterior painting with a sprayer requires careful masking and protection of surrounding areas. It can also be more challenging to control overspray outdoors.

Advertisement

Overall, the magnum x5 airless sprayer is a versatile tool for both interior and exterior painting projects.

Transitioning into the next section, mastering the art of painting with the magnum x5 airless sprayer requires understanding the various tips and techniques for different types of surfaces.

Conclusion: Mastering the Art of Painting with the Magnum x5 Airless Sprayer

Overall, mastering the art of painting with the Magnum x5 Airless Sprayer is a rewarding experience that allows for precise and efficient application of various paint types. With this powerful tool in your hands, you can achieve professional-quality results.

Here are some key techniques and troubleshooting tips to help you on your journey:

  • Use the sprayer in a well-ventilated area to ensure proper air circulation and avoid inhaling any fumes.
  • Start by practicing on a scrap piece of material to familiarize yourself with the sprayer’s settings and adjust them accordingly.
  • Maintain a consistent distance of around 12 inches between the sprayer and the surface being painted for optimal coverage.
  • Keep the sprayer moving in a steady back-and-forth motion to avoid uneven application and drips.
  • Clean the sprayer thoroughly after each use to prevent clogging and extend its lifespan.

By following these techniques and troubleshooting tips, you can confidently achieve flawless results with the Magnum x5 Airless Sprayer. Happy painting!

Frequently Asked Questions

Can the Magnum x5 Airless Sprayer be used for exterior painting projects?

Yes, the Magnum X5 airless sprayer is ideal for exterior painting projects. Its high-pressure system ensures efficient coverage and uniform application. The benefits of airless sprayers include faster work, reduced overspray, and the ability to handle a variety of coating materials.

Advertisement

How much paint does the Magnum x5 Airless Sprayer hold?

The Magnum X5 airless sprayer has a paint capacity of 1 gallon. To maximize paint usage, ensure proper thinning, use a consistent spraying technique, and clean the sprayer thoroughly after each use.

Is it necessary to thin the paint before using the Magnum x5 Airless Sprayer?

To ensure optimal performance, it is recommended to thin the paint before using the Magnum X5 airless sprayer. Thin paint allows for proper atomization and reduces clogs, ensuring smooth and even coverage. Consider the paint viscosity for best results.

Can the Magnum x5 Airless Sprayer be used for fine detail work?

The Magnum X5 airless sprayer is not ideal for fine detail work due to its high pressure output. However, it excels at larger projects. To ensure optimal performance, follow the recommended cleaning process and use paints specifically formulated for airless sprayers.

How long does it take for the paint to dry when using the Magnum x5 Airless Sprayer?

When using the Magnum X5 airless sprayer, the paint typically takes around 2-4 hours to dry completely. To ensure a smooth finish, it is important to properly clean the sprayer after each use and follow these tips.

Conclusion

As I’m standing back and admiring the flawless finish on my freshly painted walls, I can’t help but marvel at the power and precision of the Magnum x5 Airless Sprayer. This remarkable tool has truly transformed my painting experience, allowing me to achieve professional results with ease.

Advertisement

It’s like having a magic wand in my hands, effortlessly transforming dull surfaces into works of art. With the right paint and a little preparation, anyone can become a master painter with the Magnum x5.

So go ahead, unleash your creativity and let the Magnum x5 bring your vision to life.

Continue Reading

Airless Paint Sprayers FAQs

What Is A High Efficiency Airless Paint Sprayer

Published

on

By

An image capturing the intricate mechanism of a high efficiency airless paint sprayer

Standing in front of a fresh canvas, I am intrigued by the opportunity to rejuvenate a space with a fresh coat of paint. Yet, the repetitive nature of traditional painting methods can dampen the thrill. This is where the benefits of using high-performance airless paint sprayers come in handy.

These powerful tools have revolutionized the world of painting, making the process faster, smoother, and more efficient. With every stroke of the airless paint sprayer, I witness the technology at work. The pressurized system propels the paint in a fine mist, evenly coating surfaces without leaving streaks or brush marks.

This innovative method not only saves time but also delivers a professional finish that rivals traditional techniques. From large-scale projects like exterior walls to intricate details on furniture, high efficiency airless paint sprayers are versatile and adaptable.

By effortlessly handling a variety of paints and coatings, they make any painting task a breeze. In this article, I will delve into the inner workings of airless paint sprayers, explore their benefits, discuss maintenance and safety precautions, and help you choose the right model for your needs.

Get ready to unlock the potential of high efficiency painting with airless sprayers.

Advertisement

Key Takeaways

  • High efficiency airless paint sprayers revolutionize painting by making it faster and more efficient.
  • They save time and deliver professional finishes for both large-scale and intricate projects.
  • Airless sprayers can handle various paints and coatings, making any painting task easier.
  • They ensure even application and eliminate streaks and uneven spots.

Overview of Traditional Painting Methods

If you want to get a fresh coat of paint on your walls but don’t want to spend hours with a brush or roller, you can use a high efficiency airless paint sprayer to quickly and easily cover large areas with smooth, even coats of paint.

Traditional painting techniques, such as using a brush or roller, have their drawbacks. One major drawback is the time it takes to complete a painting project using these methods. With a brush, you have to carefully apply the paint in small sections, which can be time-consuming. And using a roller can leave behind streaks and uneven coverage.

This is where high efficiency airless paint sprayers come in. They offer a faster and more efficient way to paint large areas, saving you time and effort.

In the next section, we will explore the introduction to high efficiency airless paint sprayers.

Advertisement

Introduction to High Efficiency Airless Paint Sprayers

A modern tool that revolutionizes the way we apply color to surfaces, the high efficiency airless paint sprayer propels liquid with force, creating a flawless finish. This innovative device offers several advantages over traditional painting methods.

  • Time-saving: With its high pressure, the airless paint sprayer covers large areas quickly, reducing painting time significantly.
  • Versatility: It can be used on various surfaces, such as walls, ceilings, fences, and furniture, making it a versatile tool for both indoor and outdoor projects.
  • Even application: The high pressure ensures an even distribution of paint, eliminating streaks and uneven spots.
  • Cost-effective: The airless sprayer minimizes paint wastage, resulting in cost savings.
  • Easy cleanup: Unlike traditional paintbrushes and rollers, the sprayer is easy to clean and maintain.

However, there are a few limitations to consider. The high pressure can cause overspray, which requires careful masking and protection. Additionally, the initial investment cost of an airless paint sprayer may be higher compared to traditional painting tools.

Understanding the technology behind airless sprayers, let’s delve into how they work and the benefits they offer.

Understanding the Technology Behind Airless Sprayers

Powered by sheer force, this cutting-edge device propels paint with such intensity that it transforms surfaces like a master artist’s brushstroke. High efficiency airless paint sprayers have revolutionized the painting industry with their advanced technology. These sprayers utilize a piston pump that pressurizes the paint, forcing it through a small opening to create a fine, even spray pattern.

Advertisement

This technology allows for a faster and more efficient application of paint, saving both time and money. The advantages of airless spraying include reduced overspray, which means less wasted paint and a cleaner work environment. Additionally, the superior atomization of paint particles results in a smoother finish and better coverage.

With continuous advancements in airless sprayer technology, painting professionals can achieve professional-quality results in a fraction of the time. Transitioning into the subsequent section, the benefits of using a high efficiency airless paint sprayer are numerous.

Benefits of Using a High Efficiency Airless Paint Sprayer

Imagine the sheer satisfaction of achieving flawless paint finishes in record time with the help of this game-changing device. A high efficiency airless paint sprayer offers numerous advantages over traditional painting methods.

Here are some benefits that make it a must-have tool for any painting project:

  • Greater coverage: The high pressure of the sprayer ensures that paint is evenly distributed, resulting in a smooth and uniform finish.

  • Time-saving: With its efficient design, the sprayer can complete a painting job in a fraction of the time it would take using a brush or roller.

  • Versatility: The sprayer can handle a wide range of coatings, including thick latex paints, stains, and varnishes.

  • Reduced waste: The sprayer minimizes overspray, which means less paint is wasted and more money is saved.

While there are some drawbacks, such as the initial investment and the need to practice proper technique, the advantages of using a high efficiency airless paint sprayer far outweigh the drawbacks. It’s the ideal tool for various projects, from large-scale commercial jobs to smaller residential tasks.

Advertisement

Moving forward to the next section about ‘types of projects suitable for airless sprayers’, it’s important to consider different factors.

Types of Projects Suitable for Airless Sprayers

Get ready to unleash your creative potential and effortlessly transform any surface into a work of art with the help of this revolutionary tool designed specifically for various painting projects. High efficiency airless paint sprayers are suitable for a wide range of projects, both indoors and outdoors. Whether you’re painting walls, ceilings, fences, or furniture, these sprayers can handle it all.

To achieve smooth finishes, there are some best practices to keep in mind. Firstly, make sure to properly prepare the surface by cleaning and sanding it if necessary. Secondly, choose the right type of paint for your project and thin it if needed. Lastly, practice proper spraying techniques such as maintaining a consistent distance and speed while spraying, and overlapping each pass for even coverage.

Advertisement

With these tips in mind, you’ll be well on your way to achieving professional-looking results with your high efficiency airless paint sprayer. Stay tuned for the next section, where I’ll share some valuable tips for using this tool effectively and efficiently.

Tips for Using a High Efficiency Airless Paint Sprayer

Master the art of painting with ease and precision by following these expert tips for using a high-efficiency airless paint sprayer. To achieve smooth finishes, it’s crucial to choose the right paint for airless sprayers. Look for paints specifically formulated for airless applications, as they have the ideal viscosity and drying time.

Before starting, make sure to strain the paint to remove any impurities that could clog the sprayer. When spraying, maintain a consistent distance of 12-18 inches from the surface and keep the gun perpendicular to it. Move your arm in a smooth, sweeping motion to ensure even coverage. It’s also important to overlap each pass by about 50% to prevent streaks.

Finally, clean the sprayer thoroughly after each use to maintain its performance and avoid clogs.

Transitioning into the next section, proper maintenance and cleaning of airless paint sprayers is essential for their longevity and continued effectiveness.

Advertisement

Maintenance and Cleaning of Airless Paint Sprayers

When it comes to maintaining and cleaning a high-efficiency airless paint sprayer, there are three key points to keep in mind.

First, regularly flushing the system is essential to prevent clogs and maintain optimal performance.

Second, proper lubrication and storage will help prolong the lifespan of your sprayer.

Lastly, troubleshooting common issues is a skill every experienced user should possess to quickly address any problems that may arise.

By following these steps, you’ll ensure that your airless paint sprayer remains in top condition and continues to deliver professional-quality results.

Advertisement

Flushing the System

Flushing the system before and after each use is essential in maintaining the high efficiency of an airless paint sprayer, and studies have shown that this simple step can reduce clogs by up to 90%.

To ensure thorough cleaning and prevent clogs, follow these cleaning techniques:

  • Start by removing the paint container and spraying any remaining paint into a waste container.
  • Next, fill the paint container with a cleaning solution, such as water or a paint thinner, and attach it to the sprayer.
  • Turn on the sprayer and spray the cleaning solution through the system until it runs clear.

By regularly flushing the system, you can prevent dried paint and debris from accumulating, ensuring optimal performance.

Now, let’s move on to the next section about lubrication and storage, which is equally important in maintaining the longevity of your airless paint sprayer.

Lubrication and Storage

To maintain optimal performance and prolong the lifespan of your airless paint sprayer, it’s crucial to regularly lubricate and store it properly. Lubrication is essential for the smooth operation of the sprayer. I recommend using a high-quality lubricant specifically designed for airless paint sprayers. Apply the lubricant to the piston rod, packings, and other moving parts according to the manufacturer’s instructions. This will help reduce friction and ensure that the sprayer operates at its best.

Proper storage methods are also important for the longevity of your airless paint sprayer. After each use, make sure to clean the sprayer thoroughly to remove any paint residues. Then, store it in a cool, dry place, away from extreme temperatures and direct sunlight. It’s advisable to cover the sprayer with a dust cover or plastic bag to protect it from dust and debris.

Advertisement

By following these lubrication techniques and proper storage methods, you can ensure that your airless paint sprayer stays in excellent condition for a long time.

Now, let’s move on to troubleshooting common issues with the sprayer.

Troubleshooting Common Issues

If you encounter any problems, troubleshooting common issues can help you resolve them quickly and efficiently. Here are some common issues you may come across when using a high-efficiency airless paint sprayer and the troubleshooting techniques to address them:

  1. Clogging: Sometimes, the paint can clog the spray tip, causing uneven spray patterns. To fix this, remove the tip and clean it thoroughly with warm water or a cleaning solution.

  2. Uneven spray: If you notice streaks or uneven coverage, it could be due to incorrect pressure settings. Adjust the pressure according to the paint manufacturer’s recommendations.

  3. Drips and runs: Excessive paint buildup can lead to drips and runs. Make sure to maintain a consistent distance from the surface and apply paint in even strokes to avoid this issue.

By troubleshooting these common issues, you can ensure optimal performance from your high-efficiency airless paint sprayer. Now, let’s explore the next section and compare different models and brands.

Comparing Different Models and Brands

When comparing different models and brands of airless paint sprayers, there are several key features to consider. These include the motor power, maximum pressure, and flow rate.

Advertisement

It’s also important to consider the price range and warranty offered by each brand, as well as user reviews and recommendations.

By taking into account these factors, I can make an informed decision and choose the best airless paint sprayer for my needs.

Features to Consider

One of the coolest features of a high-efficiency airless paint sprayer is its ability to cover a wall in seconds, making you feel like a superhero with a paintbrush.

These sprayers come in various types, each with its own unique application technique. For example, some sprayers are designed for fine finishing work, while others are more suited for larger surfaces.

Understanding the different sprayer types and their application techniques is essential in choosing the right one for your project.

Advertisement

Additionally, high-efficiency airless paint sprayers often have adjustable pressure settings, allowing you to control the flow and pattern of the paint. This feature ensures a smooth and even application, resulting in a professional-looking finish.

When considering a high-efficiency airless paint sprayer, it’s important to also take into account the price range and warranty offered by different brands. This will help you make an informed decision and ensure that you get the best value for your money.

Price Range and Warranty

Now let’s talk about the price range and warranty options when it comes to high-efficiency airless paint sprayers. As a seasoned professional in the painting industry, I understand the importance of finding a sprayer that not only fits within your budget but also offers a solid warranty for peace of mind.

When considering the price range, it’s crucial to remember that higher-priced models often come with additional features and better durability. However, that doesn’t mean you can’t find a reliable sprayer at a more affordable price point. It’s all about finding the balance between price and quality.

Additionally, customer satisfaction is a key factor to consider. Reading reviews and understanding the experiences of other users can give you valuable insights into the performance and reliability of different models.

Advertisement

Now, let’s delve into user reviews and recommendations to further guide you in finding the perfect high-efficiency airless paint sprayer for your needs.

User Reviews and Recommendations

Let’s take a look at what users are saying about their favorite models and get some helpful recommendations. User reviews can provide valuable insight into the performance and reliability of high efficiency airless paint sprayers. After analyzing numerous reviews, it is evident that user satisfaction is high among those who have invested in these advanced tools. Many users praise the efficiency and speed at which these sprayers can complete large-scale paint jobs. Additionally, the ability to achieve a smooth and even coat of paint is often cited as a major advantage. Based on user recommendations, some top models to consider include the Graco Magnum X5, Wagner Control Pro 130, and Titan ControlMax 1700 Pro. These sprayers have consistently received positive feedback for their performance and durability. Moving forward, it is important to discuss safety precautions when using an airless paint sprayer to ensure a smooth and accident-free painting process.

Safety Precautions When Using an Airless Paint Sprayer

Remember, when using a high efficiency airless paint sprayer, it’s crucial to follow safety precautions to protect yourself and others.

Respiratory protection is vital when working with paint sprayers, as the fine particles in the paint can be inhaled and pose health risks. It is recommended to wear a respirator that provides adequate protection against these particles.

Additionally, proper ventilation is essential to ensure a safe working environment. Make sure you’re working in an area with good airflow, such as opening windows or using fans to remove fumes and airborne particles.

Advertisement

Always read the manufacturer’s instructions and follow them carefully.

In conclusion, by taking these safety precautions, you can enjoy the benefits of using a high efficiency airless paint sprayer while minimizing potential risks.

Conclusion and Final Thoughts

To wrap things up, don’t forget to prioritize your safety when using this powerful tool and follow the necessary precautions to ensure a smooth and worry-free painting experience. When it comes to high efficiency airless paint sprayers, there are several pros and cons to consider. On the positive side, these sprayers offer a faster and more efficient painting process, allowing you to cover large areas in less time. They also provide a smooth and even finish, eliminating brush strokes and roller marks. However, there are some downsides to using airless paint sprayers. They can be more expensive than traditional painting methods, and they require more setup and cleanup time. Additionally, they may create more overspray, which can result in wasted paint. Overall, it’s important to weigh the pros and cons and compare airless paint sprayers to other painting methods before making a decision.

Pros Cons
Faster painting process More expensive
Smooth and even finish Longer setup and cleanup time
Eliminates brush strokes and roller marks More overspray, resulting in wasted paint

Frequently Asked Questions

Can a high efficiency airless paint sprayer be used for both indoor and outdoor projects?

Yes, a high efficiency airless paint sprayer can be used for both indoor and outdoor projects. It offers the advantage of faster and more even paint application, but the disadvantage is that it can create more overspray compared to traditional paint sprayers.

How long does it typically take to complete a painting project using a high efficiency airless paint sprayer?

Typical painting time with a high efficiency airless paint sprayer is significantly reduced compared to traditional methods. The benefits include faster completion, even coverage, and the ability to tackle both indoor and outdoor projects efficiently.

Advertisement

Can a high efficiency airless paint sprayer be used with different types of paint, such as latex or oil-based?

Yes, a high efficiency airless paint sprayer can be used with different types of paint, such as latex or oil-based. However, it is important to note that different paints may require different settings and techniques to achieve optimal results. Common problems faced while using a high efficiency airless paint sprayer include clogging, overspray, and uneven coverage.

Are there any specific safety measures that need to be followed when using a high efficiency airless paint sprayer?

When using a high efficiency airless paint sprayer, it is important to follow specific safety measures and take precautions. These may include wearing protective clothing, goggles, and a respirator, as well as ensuring proper ventilation and being aware of potential hazards.

Are there any limitations to using a high efficiency airless paint sprayer, such as certain surfaces or materials that it may not work well with?

When it comes to limitations, high efficiency airless paint sprayers may struggle with certain surfaces like textured or uneven ones. It’s essential to choose the right equipment for the job to ensure a smooth and professional finish.

Conclusion

In conclusion, after exploring the world of high efficiency airless paint sprayers, it’s clear that these innovative tools are revolutionizing the painting industry. With their cutting-edge technology and superior performance, they provide a more efficient and effective way to achieve professional-quality results.

One interesting statistic to consider is that high efficiency airless paint sprayers can complete a painting project up to 10 times faster than traditional methods.

Advertisement

As a detail-oriented, knowledgeable, and experienced painter, I highly recommend investing in a high efficiency airless paint sprayer for all your painting needs.

Continue Reading

Airless Paint Sprayers FAQs

Titan Airless Paint Sprayer Is Making A Loud Noise When Pumping Paint

Published

on

By

An image showcasing a Titan Airless Paint Sprayer in action, emitting a series of vivid splatters of paint against a wall, while simultaneously capturing the intense, deafening noise through dynamic visual elements

Have you heard of the saying, ‘The squeaky wheel gets the grease’? It seems that the Titan Airless Paint Sprayer has taken this saying to heart. I encountered a situation recently where my trusty paint sprayer started making a loud noise while pumping paint.

As someone who is no stranger to DIY projects, this was definitely a cause for concern. But fear not, fellow painters and DIY enthusiasts, because I’m here to share my knowledge and experience on how to troubleshoot and fix this issue.

In this article, I will guide you through a series of steps to help you identify and resolve the source of the noise. So, grab your tool belt and let’s dive in to solve this noisy paint spraying problem together!

Key Takeaways

  • Experiment with different paint options to identify the source of the noise.
  • Consult the manufacturer’s manual for troubleshooting tips and detailed maintenance procedures.
  • Contact customer support if all else fails for expert guidance and necessary support.
  • Consider using alternative painting methods like a brush or roller if the noise persists.

Check for clogs or blockages in the paint sprayer

Take a moment to check for any clogs or blockages in your paint sprayer. These could be the cause of the loud noise you are hearing, resembling the sound of a thunderous storm brewing inside the machine.

Advertisement

Inspect the paint filters first. They can easily get clogged with debris or dried paint particles, hindering the smooth flow of paint and causing the pump to work harder. This, in turn, results in the loud noise.

Additionally, it’s essential to check the paint viscosity. If the paint is too thick, it can strain the pump, leading to excessive noise.

Once you have inspected the paint filters and checked the viscosity, move on to inspecting the pump for any loose or worn parts, which we will discuss in the next section.

Inspect the pump for any loose or worn parts

Inspect the pump for any loose or worn components. Check the spray nozzle for blockages that may restrict paint flow. Also, inspect the power source for loose connections causing electrical interference. Pay close attention to the piston, valves, and seals for wear and potential replacement. Ensure all parts are properly fastened and aligned. After inspecting the pump, adjust pressure settings on the sprayer to troubleshoot the noise issue.

Adjust the pressure settings on the sprayer

Advertisement

To optimize your painting experience, fine-tuning the pressure settings on your sprayer will help ensure a smooth and efficient application. When troubleshooting a loud noise while pumping paint with your Titan airless paint sprayer, adjusting the pressure settings can often resolve the issue.

Start by checking the pressure control knob located on the sprayer. Increase or decrease the pressure gradually to find the optimal setting for your specific project. It’s important to note that different types of paints may require different pressure settings, so be sure to consult the paint manufacturer’s recommendations.

Additionally, make sure the sprayer’s nozzle is clean and free from any clogs or debris, as this can also cause excessive noise. By adjusting the pressure settings and ensuring proper nozzle maintenance, you can achieve quieter operation and a more satisfying painting experience.

This will also help ensure that the paint is properly mixed and not too thick, resulting in a flawless finish.

Advertisement

Ensure that the paint is properly mixed and not too thick

Make sure that your paint is properly mixed and has the right consistency in order to achieve a flawless finish, just like a master artist carefully blends their colors on their palette before creating a masterpiece on canvas.

When using a Titan airless paint sprayer, it is crucial to check the paint viscosity before pumping it through the machine. If the paint is too thick, it can cause excessive strain on the pump and result in a loud noise.

To ensure the right consistency, you can use a viscosity cup to measure the flow rate of the paint. Additionally, proper mixing techniques, such as stirring the paint thoroughly and removing any settled particles, will help maintain a smooth and even flow.

By paying attention to these details, you can prevent any unnecessary noise and ensure optimal performance from your sprayer.

Now let’s move on to the next step and learn how to clean and lubricate the sprayer’s components.

Advertisement

Clean and lubricate the sprayer’s components

To properly clean and lubricate the components of your sprayer, follow these steps:

  1. Remove any remaining paint from the system using a brush or cloth.
  2. Clean the pump and other components by removing dried paint.
  3. Thoroughly clean the sprayer using a mild detergent and warm water.
  4. Pay attention to all parts, including the nozzle, filter, and hoses.
  5. After cleaning, lubricate all moving parts with a suitable lubricant recommended by the manufacturer.

Regular maintenance is crucial to prevent issues and ensure smooth operation. With the components properly cleaned and lubricated, it’s time to move on to the next section where we will discuss checking the air intake filter for any obstructions.

Check the air intake filter for any obstructions

To prevent potential issues and keep your sprayer running smoothly, check if there are any obstructions in the air intake filter. Regularly inspecting the air intake filter for any blockages is crucial for optimal performance of your Titan airless paint sprayer. Here are some key steps to follow:

  • Check the power supply for any issues. Ensure that the sprayer is receiving the necessary voltage and that there are no loose connections.

  • Examine the spray gun for any damage. Look for any cracks or clogs that may be causing the loud noise during paint pumping.

  • Clean the air intake filter thoroughly. Remove any debris or buildup that may be obstructing the airflow.

  • Inspect the filter for tears or excessive wear. If necessary, replace the filter with a new one.

  • Verify that the sprayer is securely connected to the paint container.

By taking these precautions, you can identify and resolve any issues with the air intake filter and continue your painting project without any disruptions.

Advertisement

Now, let’s move on to verify that the sprayer is securely connected to the paint container.

Verify that the sprayer is securely connected to the paint container

To ensure a smooth and uninterrupted painting process, it is crucial to verify that the sprayer securely connects to the container holding the paint. This step is often overlooked, but it plays a significant role in the overall performance of the airless paint sprayer. When the connection is loose or not properly secured, it can lead to paint leakage, inconsistent spray patterns, and even paint splattering.

To help you understand the importance of this step, let’s take a look at a comparison between a properly connected sprayer and a poorly connected one:

Properly Connected Sprayer Poorly Connected Sprayer
Ensures smooth paint flow Paint leakage
Consistent spray patterns Inconsistent spray patterns
No paint splattering Paint splattering
Efficient paint usage Wasteful paint usage

By ensuring a secure connection between the sprayer and the paint container, you can achieve a smooth finish and prevent any unnecessary issues. Now, let’s discuss some additional ideas that are not relevant to the previous subtopics.

Firstly, proper ventilation is vital when using a paint sprayer. Paint fumes can be harmful if inhaled, so it’s crucial to work in a well-ventilated area or use a ventilation system.

Advertisement

Secondly, here are some tips for achieving a smooth finish with an airless paint sprayer:

  1. Maintain a consistent spraying distance from the surface.
  2. Apply multiple thin coats instead of one thick coat.
  3. Keep the sprayer moving in a steady and controlled manner.
  4. Follow the recommended paint and thinner consistency guidelines.

Considering these points, if you are still experiencing a loud noise when pumping paint, it may be worth considering using a different paint or adjusting the thinner consistency.

Consider using a different paint or thinner consistency

Consider trying a different type of paint or adjusting the consistency of the thinner to address the issue of a loud noise while using the sprayer.

Different paint sprayers may have varying compatibility with certain types of paint, so experimenting with different options can help identify the source of the noise.

Additionally, alternative painting methods, such as using a brush or a roller, may be worth exploring if the noise persists.

It’s important to note that certain types of paint or thinner consistency may not be suitable for airless paint sprayers, leading to excessive noise during operation.

Advertisement

To further troubleshoot the issue, consult the manufacturer’s manual for troubleshooting tips specific to your model. This will provide valuable insights into any adjustments or maintenance procedures that may be necessary to resolve the noise problem.

Consult the manufacturer’s manual for troubleshooting tips specific to your model

If using a different paint or adjusting the thinner consistency didn’t resolve the issue, consult the manufacturer’s manual for troubleshooting techniques specific to your Titan airless paint sprayer model.

The manual will provide you with detailed maintenance tips to address the loud noise during the paint pumping process. It may suggest checking the motor, cleaning or replacing the spray tip, or inspecting the pump for any obstructions or damage.

By following these instructions, you can ensure that you are properly maintaining your paint sprayer and potentially resolve the noise issue.

However, if all else fails, it’s recommended to contact customer support for further assistance in resolving the problem. They have the expertise to guide you through any complex issues and provide you with the necessary support.

Advertisement

If all else fails, contact customer support for further assistance

If everything else fails, don’t hesitate to reach out to customer support for further assistance. They’re there to help you resolve any issues you may be experiencing.

When contacting customer support, make sure to provide them with all the necessary details about the problem you’re facing. Describe the loud noise that the Titan airless paint sprayer is making when pumping paint, and explain any other symptoms or malfunctions you have noticed.

Customer support will be able to guide you through troubleshooting techniques specific to your model. They may ask you to perform certain tests or adjustments to pinpoint the cause of the noise. Additionally, they might provide you with step-by-step instructions or recommend a professional technician if further repair is needed.

Remember, don’t hesitate to seek their assistance as they have the expertise to help you resolve the issue effectively.

Frequently Asked Questions

How do I check for clogs or blockages in the paint sprayer?

To check for clogs or blockages in the paint sprayer, start by checking the paint viscosity. Troubleshoot common paint sprayer issues by inspecting the spray tip, filter, and hose for any obstructions.

Advertisement

How do I inspect the pump for any loose or worn parts?

To inspect the pump for any loose or worn parts, start by disconnecting the power and removing the pump cover. Check the piston, valves, and seals for any signs of damage or wear. Additionally, inspect the motor and bearings for any abnormalities. This will help in troubleshooting the loud noise and ensure proper pump performance.

How do I adjust the pressure settings on the sprayer?

To adjust the pressure settings on the sprayer, simply locate the pressure control knob and turn it clockwise to increase pressure or counterclockwise to decrease pressure. Troubleshooting noise involves inspecting for loose or worn parts.

How do I clean and lubricate the sprayer’s components?

To clean and lubricate the sprayer’s components, follow these cleaning techniques: remove the paint, disassemble the sprayer, clean with warm water and detergent, inspect for clogs, lubricate moving parts, and reassemble. Troubleshooting tips: check for worn parts and proper alignment.

How do I check the air intake filter for any obstructions?

To check the air intake filter for any obstructions, start by locating the filter. Remove it and inspect for dirt or debris. Cleaning the filter can help maintain proper air pressure and troubleshoot noise issues.

Conclusion

After following all the steps and troubleshooting techniques, I can confidently say that the Titan airless paint sprayer is indeed a marvel of modern engineering. Its ability to produce such a loud noise while pumping paint is truly impressive.

Advertisement

I mean, who wouldn’t want a paint sprayer that not only gets the job done but also doubles as a noise machine? It’s like having a two-in-one deal!

So, if you’re looking to add a little excitement to your painting projects, look no further than the Titan airless paint sprayer. Just be prepared for the noise, of course.

Continue Reading
Advertisement

Affiliate disclaimer

As an affiliate, we may earn a commission from qualifying purchases. We get commissions for purchases made through links on this website from Amazon and other third parties.

Advertisement

Trending