Connect with us

Airless Paint Sprayers

How to Achieve a Flawless Finish With an Airless Paint Sprayer

Breathe new life into your painting projects with expert tips for a flawless finish using an airless paint sprayer—discover the secrets to perfection!

Published

on

flawless finish airless spraying

To achieve a flawless finish with an airless paint sprayer, start by preparing your surface thoroughly—cleaning and scuff sanding if needed. Confirm you've got the right spray tip size and maintain a 12-18 inch distance from the surface while spraying. Use a steady sweeping motion, overlapping each pass by about 50% for even coverage. Adjust the pressure for a fine spray pattern, and always test it on cardboard first. Don't forget to keep your workspace organized and protect areas you don't want painted. Stick around to uncover more tips that guarantee perfect results every time.

Key Takeaways

  • Clean surfaces thoroughly to ensure maximum paint adhesion and a flawless finish.
  • Choose the appropriate spray tip size and adjust the pressure for even coverage.
  • Maintain a consistent distance of 12-18 inches from the surface while spraying.
  • Use a sweeping motion and overlap each pass by 50% to avoid streaks.
  • Practice on cardboard beforehand to refine your technique and achieve a smooth application.

Understanding Airless Paint Sprayers

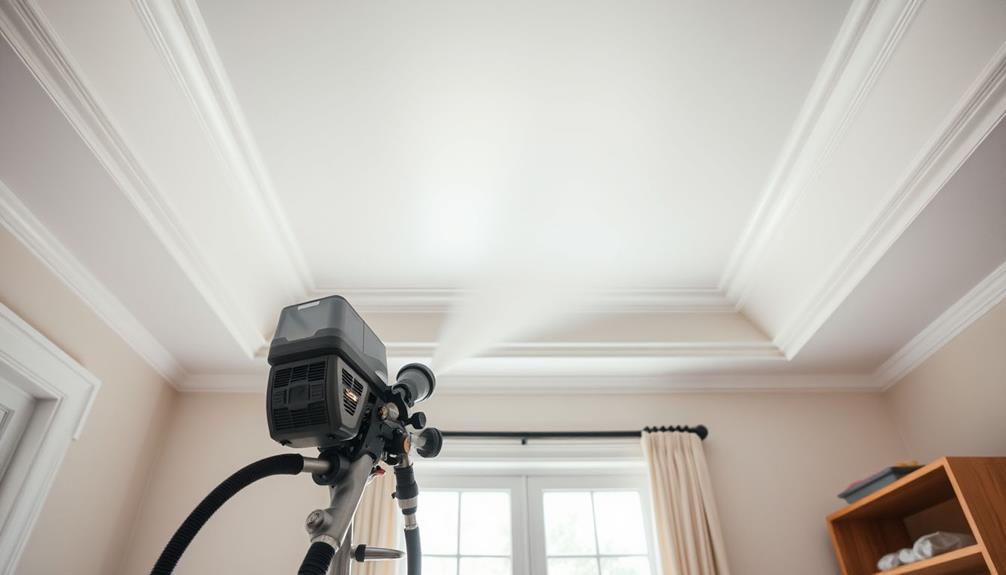
Airless paint sprayers are powerful tools that can transform your painting projects with ease and efficiency. Unlike traditional methods, they operate without compressed air, using high pressure to pump paint at levels up to 3,000 psi. This allows you to achieve a smooth finish and even coverage on various surfaces.

With the right techniques, including maintenance and cleaning tips, you can maximize the lifespan and performance of your sprayer.

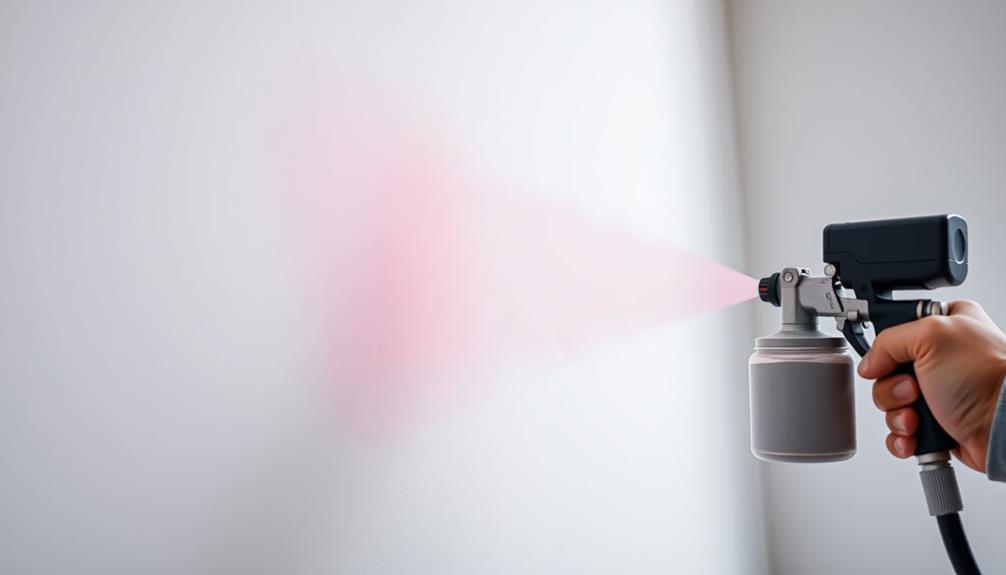
When using an airless paint sprayer, you'll notice that the spray gun tip creates a fan-shaped spray pattern of tiny droplets. You can adjust the pressure and choose different tip sizes to control the spray pattern and paint output, making it easy to tailor your application to fit different projects, whether it's stains, lacquers, or latex paints.

These sprayers are incredibly versatile, catering to both professionals and DIY enthusiasts. Plus, they provide rapid paint application directly from containers, which greatly cuts down the time needed for large jobs.

However, remember that proper cleaning and maintenance are essential. Regularly flushing the system after each use prevents clogs and guarantees your airless paint sprayer performs at its best, so you can keep enjoying that flawless finish on every project.

Advertisement

Benefits of Airless Spraying

efficient uniform spray application

When you use an airless paint sprayer, you'll notice how quickly you can cover large areas, saving you valuable time.

The high-pressure system guarantees a smooth, even coat without those annoying brush or roller marks. This means you spend less time correcting mistakes and more time enjoying your perfectly finished project.

Additionally, using the right tip size can greatly enhance the finish quality, allowing for finer details or quicker coverage depending on your project's needs.

With advancements in spray technology, like the revolutionary spray technology, achieving professional results has never been easier.

Faster Application Speed

Experience the efficiency of airless paint sprayers as they dramatically speed up your painting projects. With their ability to operate at pressures up to 3,000 psi, airless sprayers deliver a faster application speed that's perfect for large jobs. You can paint quickly without the hassle of traditional methods, cutting down on time and effort remarkably.

Additionally, using airless sprayers can enhance your overall safety by minimizing the risk of overspray, much like how safety glasses protect your eyes during various tasks.

Advertisement

One of the standout features of airless sprayers is their capability to spray directly from paint containers. This eliminates the need for additional tools or containers, streamlining your preparation process.

You'll find that these sprayers can easily cover intricate surfaces and expansive areas, making them ideal for house painting where efficiency is vital.

The smooth atomization provided by airless technology means you'll achieve a smooth paint finish with fewer coats. This not only saves you time but also enhances your productivity during painting tasks.

Smooth, Even Coverage

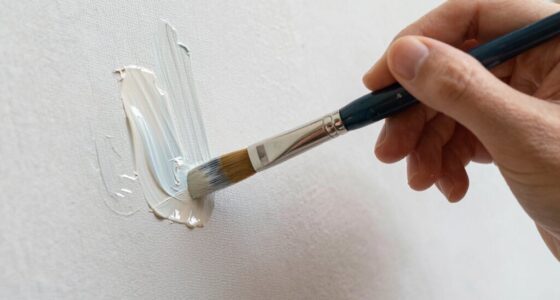
Achieving smooth, even coverage is one of the standout benefits of using an airless paint sprayer. These sprayers operate by atomizing paint at high pressure, creating fine droplets that greatly reduce the chance of brush and roller marks. This means you can achieve a flawless finish with minimal effort.

Additionally, similar to how cats may display affection upon their owner's return, the results of an airless sprayer can evoke a sense of satisfaction and pride in your work.

Advertisement

One of the key features is the ability to adjust spray tip sizes. This control allows you to fine-tune the spray pattern and paint output, ensuring ideal coverage for different surfaces and paint types.

To maximize even coverage, maintain a consistent distance of 12-18 inches from the surface while spraying. This technique helps prevent drips and unevenness.

Don't forget to overlap each pass by about 50%. This practice is essential for avoiding streaks and ensuring complete coverage, leaving no areas unpainted.

Airless sprayers excel particularly in intricate spaces, easily reaching corners and detailed areas. By following these steps, you can achieve that smooth, even coverage you're aiming for, transforming your painting project into a true work of art.

Essential Safety Measures

critical safety protocols implemented

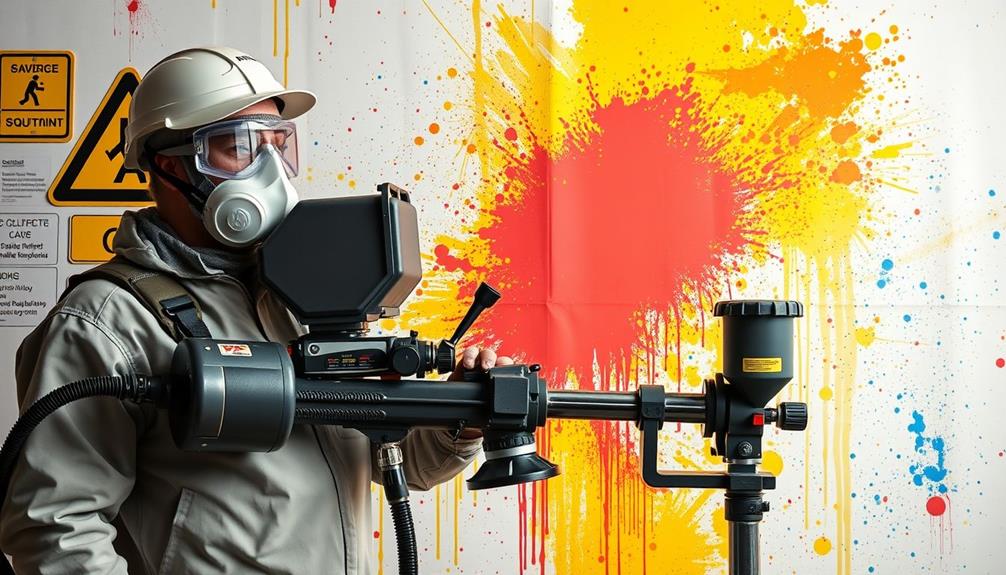
Using an airless paint sprayer can lead to stunning results, but safety must always come first. Start by wearing safety glasses and an approved respirator to shield yourself from aerosolized paint and potential overspray.

It's vital to work in a well-ventilated workspace, especially when using solvent-based paints that emit harmful fumes. To further enhance the air quality in your painting environment, consider using air purifiers to reduce allergens and harmful particles in the air.

Advertisement

Always keep the trigger of the sprayer locked when not in use. This simple safety precaution prevents accidental activation, which can lead to injuries from high-pressure paint ejection.

Additionally, you should follow all safety guidelines outlined in the sprayer's manual. Pay special attention to grounding precautions when working with flammable products to avoid electric shocks or explosions.

Avoid placing your hands or any body parts in front of the sprayer tip while it's pressurized. This can result in serious injuries from the high-pressure paint that can escape unexpectedly.

By adhering to these essential safety measures, you can guarantee a safer painting experience while achieving a flawless finish with your airless paint sprayer.

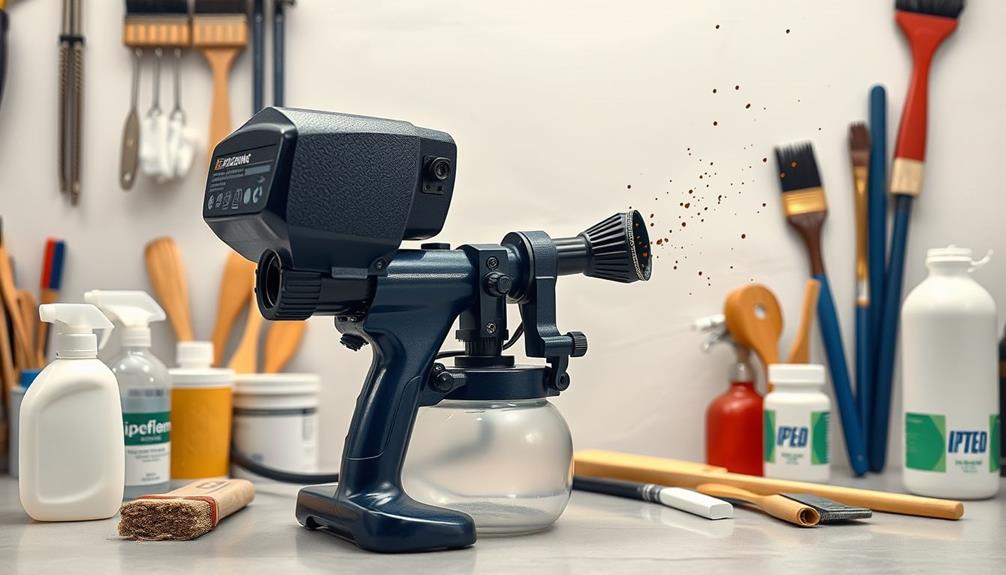
Required Tools and Materials

essential supplies needed today

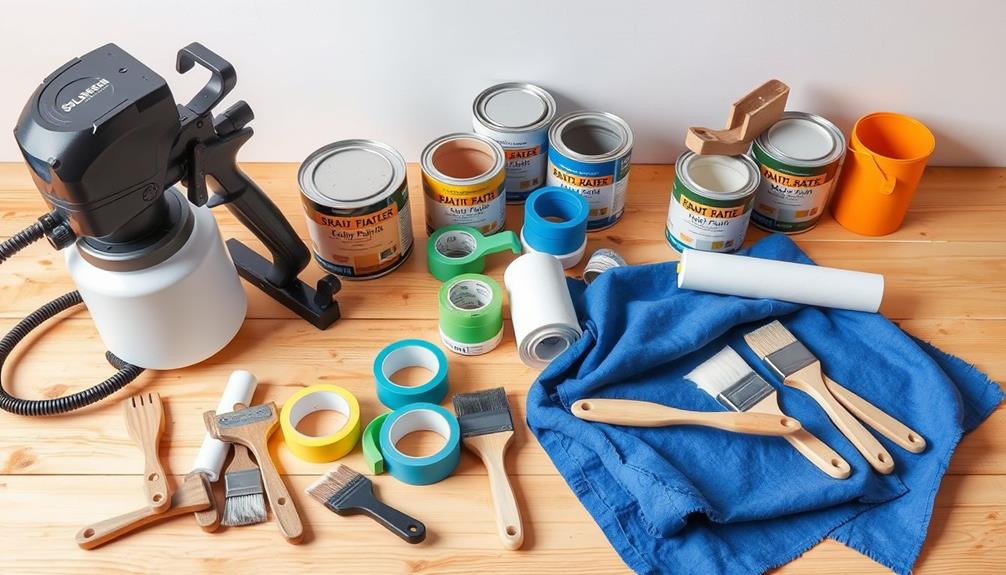
To achieve the best results with your airless paint sprayer, having the right tools and materials on hand is vital. Start with the sprayer itself, as well as a bucket for paint. A mesh filter bag is also essential to remove any debris that could affect your finish.

Additionally, consider the importance of using quality cleaning products for maintaining your equipment, as outlined in important items for a home cleaning kit. Don't forget your protective gear—safety glasses and a respirator mask will keep you safe while painting.

Advertisement

You'll need additional materials like butcher paper and painter's tape to mask off areas effectively. Plastic sheeting is great for protecting surfaces from overspray, and protective gloves will guarantee your hands stay clean during the process.

Maintaining your sprayer is key, so consider using a pump protector during downtime to prolong its lifespan. Before you start, check the consistency of your paint and verify the sprayer tip is sealed properly for peak performance.

With these tools and materials in place, you'll be set up for success. Airless paint sprayers make achieving a flawless finish easier when you're prepared, so gather everything you need for that desired spray and get ready to enjoy the transformation!

Preparation and Masking Techniques

masking techniques for preparation

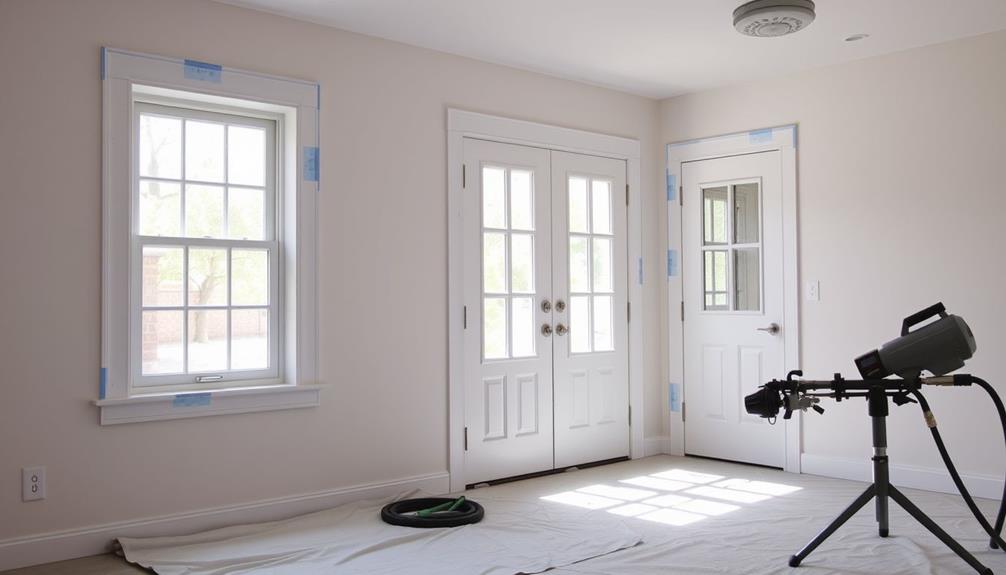
Before you start spraying, make certain to clean your surfaces thoroughly to remove any dust or grease; this guarantees the paint sticks properly.

Additionally, having a reliable setup can enhance your painting experience and lead to better results, much like how home security systems protect your property.

Next, use painter's tape and drop cloths to mask off areas you don't want to paint, protecting them and creating sharp lines.

Advertisement

These preparation steps are essential for achieving a flawless finish with your airless paint sprayer.

Surface Cleaning Importance

Achieving a flawless finish starts with meticulous surface cleaning, as it sets the foundation for a successful paint job. Before you even think about painting, take the time to thoroughly clean all surfaces. This step is essential for removing contaminants like dirt and grease, which can hinder maximum adhesion and lead to an uneven surface.

A clean surface guarantees a smooth finish when you finally apply the paint. Incorporating a serene atmosphere with the right environment can also help improve your focus during this preparation phase, similar to creating a modern farmhouse bedroom that promotes tranquility.

If you're dealing with glossy or previously painted surfaces, don't skip scuff sanding with 150 to 220 grit sandpaper. This technique enhances paint adherence, making it easier for your new coat to stick.

After sanding, make certain to clean the surface again to remove any dust and debris that could mar your final paint application.

Advertisement

Effective Masking Materials

When preparing to paint, effective masking materials are essential for protecting areas you don't want to coat. Start with heavy drop cloths to protect floors from paint drips and spills. Use plastic sheeting to cover windows and other surfaces that need safeguarding. High-quality painter's tape is vital; it adheres well and prevents paint bleed, helping you achieve clean lines on edges and trim after spraying. For those looking to enhance their space with a fresh coat of paint, consider best window treatments that can complement your newly painted walls.

Before you start, apply your masking materials thoroughly, ensuring you cover any areas that shouldn't be painted. For quick and consistent tape application, consider using dispensers. If you're working in intricate areas, a combination of tape and paper can effectively mask off corners and edges, minimizing the risk of overspray.

As you progress, regularly check and replace your masking materials to maintain protection. Keeping your masking intact is key to ensuring a clean finish in your painting work.

Adjusting Settings for Success

optimizing configurations for achievement

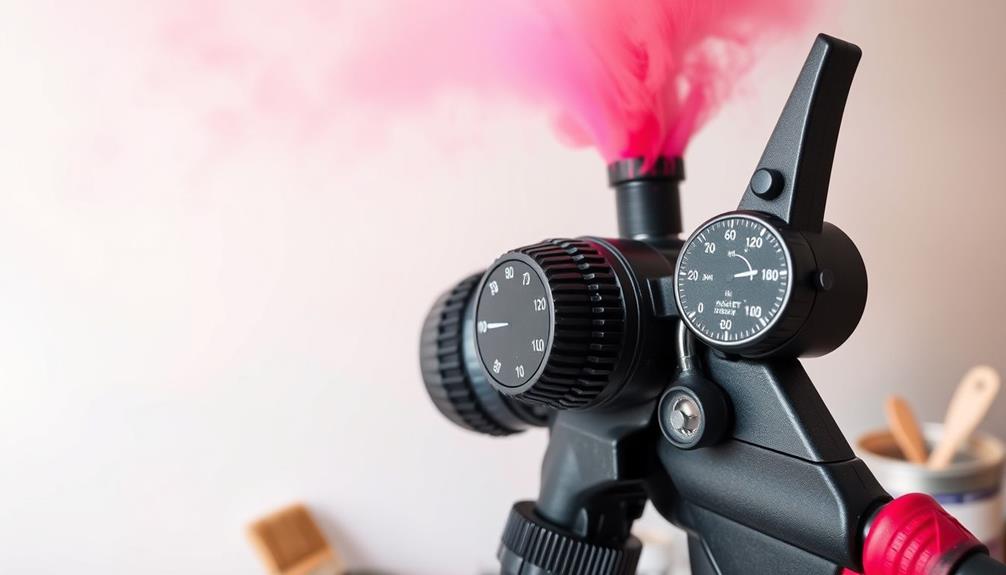
To achieve a flawless finish with your airless paint sprayer, adjusting the settings is fundamental. Start by selecting the right spray tip size based on your project's requirements. A smaller tip is ideal for fine details, while a larger one works for broader surfaces.

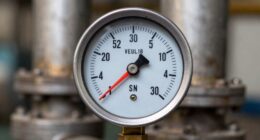
Once you've chosen your tip, adjust the pressure control knob to guarantee a consistent flow of paint. The goal is to find a balance that avoids runs or uneven application. Remember, just as proper water flow is indispensable for effective toilet flushing, achieving the right settings can greatly impact your painting results effective flushing practices.

Next, focus on the spray pattern. Ideally, you should see equally sized and spaced paint droplets, which indicate peak performance. This uniformity is essential for achieving that silky, smooth finish you're after.

Advertisement

To fine-tune your settings, test the spray pattern on cardboard before moving to the final surface. This step helps you identify any necessary adjustments.

Remember to maintain a distance of 12-18 inches from the surface while spraying. This distance is crucial for achieving even coverage and preventing drips or pooling.

Effective Spraying Techniques

optimal spraying methods explained

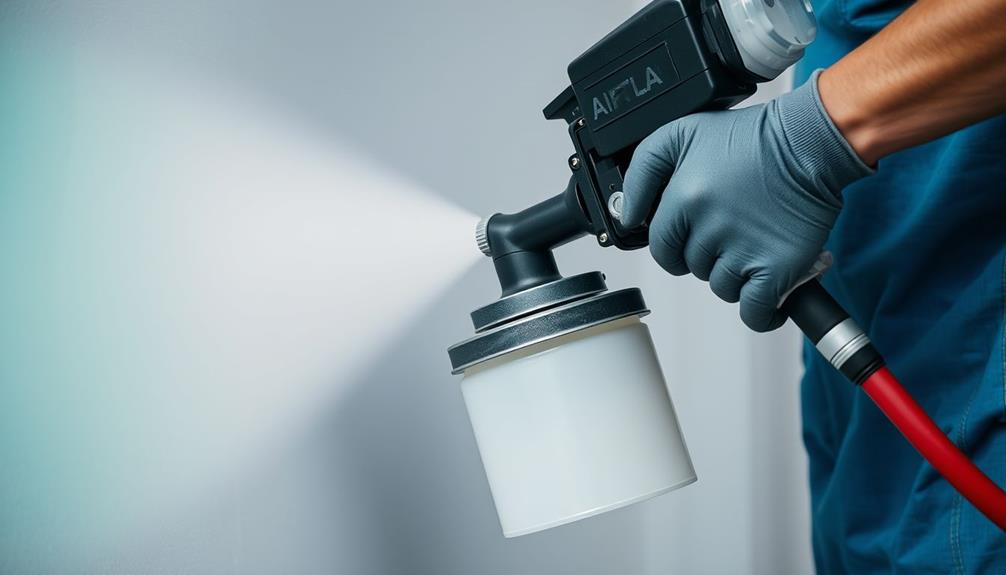
Fine-tuning your settings sets the stage, but mastering your spraying technique is what truly brings out a flawless finish. To achieve an even application with your airless paint sprayer, follow these essential techniques:

  1. Maintain Distance: Keep your spray gun 12-18 inches from the surface. This guarantees an even coat and prevents drips or runs in the paint.
  2. Use a Sweeping Motion: As you spray, move your gun in a sweeping motion, overlapping each pass by 50%. This technique helps you achieve uniform coverage without streaks.
  3. Adjust Pressure: Start with low pressure and gradually increase it to find the best setting for your spray pattern. Using high pressure can help you achieve a fuller finish, but be cautious not to overspray.
  4. Practice First: Before tackling your project, practice on a piece of cardboard. This allows you to refine your control and make sure you can apply a smooth finish.

Maintenance and Cleanup Tips

effective maintenance and cleanup

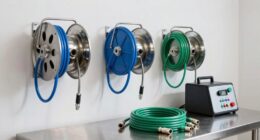
Proper maintenance and cleanup are fundamental for keeping your airless paint sprayer in top condition. To prevent clogs and guarantee peak performance, clean your sprayer immediately after use. Flush the system with solvent or clean water until the liquid runs clear.

Next, disassemble all parts for a thorough cleaning. Use a brush and an appropriate cleaning solution to tackle stubborn residue, confirming no paint remains in the system.

Regularly check and clean filters and spray tips to avoid paint buildup. This step is essential, as any buildup can lead to uneven spray patterns and decreased efficiency during your next project.

If you need to store the sprayer for a few days, seal the paint container and sprayer tip to prevent spoilage. For extended storage, make sure to clean thoroughly.

Advertisement

Always refer to your sprayer manual for specific cleaning and maintenance guidelines. Following these instructions is critical for prolonging the life of your sprayer and guaranteeing consistent performance.

Frequently Asked Questions

How to Get Smooth Finish With Airless Sprayer?

To get a smooth finish with your airless sprayer, keep a consistent distance, choose the right tip size, adjust the pressure, and apply paint evenly with overlapping passes. Allow proper drying time between coats for best results.

What Is the Number One Rule When Using Airless Spray Guns?

Using an airless spray gun is like dancing; you've gotta maintain a consistent distance of 12 inches from the surface. This rule guarantees even coverage and prevents drips, leading to a smoother paint job.

Do Airless Sprayers Give a Better Finish?

Yes, airless sprayers can give a better finish. You'll notice smoother surfaces without brush marks, thanks to high-pressure application. Just guarantee you maintain proper distance and angle for the best results during your project.

How Do You Get a Perfect Finish With Spray Paint?

To hit the nail on the head, keep your distance consistent and use sweeping motions. Test your spray pattern first, thin the paint, and allow proper drying time for that perfect finish you're after.

Advertisement

Conclusion

Achieving a flawless finish with an airless paint sprayer is like crafting a masterpiece—every detail matters. Just as a painter carefully selects their brush strokes, you need to pay attention to preparation, technique, and cleanup. Remember, the effort you put into masking and setting up will pay off in the final result. So, take your time, practice your technique, and soon you'll be reveling in the satisfaction of a job well done, just like a proud artist revealing their work.

Whether it’s a step-by-step tutorial on achieving flawless finishes or an in-depth analysis of the latest airless paint sprayer models, Joe’s ability to articulate complex ideas in a simple and engaging manner resonates with our diverse audience. His practical tips and techniques empower readers to tackle their projects with confidence.

Continue Reading
Advertisement

Airless Paint Sprayers

Airless Paint Sprayer Vs. Roller: Which Is Faster?

Overwhelmed by choosing between an airless paint sprayer and a roller? Discover the surprising truths about speed and efficiency in your painting projects.

Published

on

By

sprayer vs roller speed comparison

When it comes to speed, airless paint sprayers usually outpace rollers, especially for larger projects. They cover vast areas quickly and deliver a smooth finish, making them ideal for open spaces. However, don't overlook the prep and cleanup time; sprayers require extensive masking and thorough cleaning, which can offset some of that speed. On the other hand, rollers are easier to use, letting you pause easily without wasting paint. If you want to know more about the specific pros and cons of each method, keep going to discover the best fit for your painting needs.

Key Takeaways

  • Airless paint sprayers cover large areas faster than rollers, making them ideal for expansive spaces and large projects.
  • Sprayers provide a smoother finish, enhancing professional results but may require additional touch-ups due to streaking.
  • Rollers allow for easier pauses and can be started immediately with less prep, making them efficient for smaller jobs.
  • Although sprayers save time in application, longer prep and cleanup times can offset this advantage.
  • Overall, sprayers are faster for big projects, while rollers excel in controlled, smaller applications.

Overview of Painting Methods

When you're deciding how to tackle a painting project, it's essential to understand the two main methods: airless paint sprayers and rollers. Each has its advantages and is suited for different tasks. An airless paint sprayer can cover large areas considerably faster than a roller, making it ideal for expansive spaces or complex textures.

For example, painting a 900 sq. ft. loft with a sprayer might only take two long days, while using a roller could stretch that project to several days. Additionally, airless sprayers provide a more even finish, which is beneficial for achieving professional results on surfaces like walls and ceilings to learn more about sprayer benefits.

However, don't overlook the overall project time. While spraying reduces the application time, it often increases prep and cleanup time. You might find that the total duration of using a sprayer could end up being similar to rolling methods.

Additionally, there's a learning curve with sprayers that could impact your initial speed. If you're new to painting, rolling might be the more intuitive choice, allowing for quicker starts.

Ultimately, the best painting method depends on your specific project needs, space, and comfort level with the tools at hand. Consider these factors carefully as you plan your next painting endeavor.

Advertisement

Speed Comparison

velocity assessment analysis

When it comes to speed, airless paint sprayers outpace rollers by covering large areas much faster. These sprayers can also deliver a smoother finish, which can save time in the overall process.

While you'll need to invest time in prep and cleanup, the overall application time is greatly reduced, making sprayers ideal for big projects. Plus, you'll find that touch-ups are quicker with a sprayer, allowing you to finish your job efficiently.

Additionally, utilizing modern tools can enhance your work efficiency in various home improvement tasks, such as garage door openers.

Application Time Efficiency

Choosing between an airless paint sprayer and a roller often boils down to application time efficiency. Paint sprayers excel in covering large areas quickly, letting you finish entire rooms in just a couple of days. In contrast, rolling paint can take several days, especially for bigger projects. Here's a quick comparison to illustrate the differences:

Method Application Time Efficiency
Airless Paint Sprayer Fast for large areas, multiple coats dry quickly
Roller Slower, but easier to pause and resume in small spaces

While spraying is faster, keep in mind that the extensive prep work can offset those time savings. You might find that overall project times can be similar to rolling in some cases. Plus, for large, flat surfaces, paint sprayers allow quick drying between layers. However, rollers offer a more straightforward cleanup process, which can enhance overall efficiency. Ultimately, consider your project size and specific needs when deciding which method best suits your application time efficiency goals.

Prep and Cleanup Duration

Typically, the prep and cleanup time for an airless paint sprayer can be considerably longer than that for a roller. When you're getting ready to use a sprayer, you'll need extensive masking and taping to prevent overspray, which adds significant time to your prep work. This is similar to the care needed for gas appliances during power outages, where proper precautions must be taken to guarantee safety.

Advertisement

In contrast, rolling requires much less initial setup, allowing you to dive right into your painting project.

Once you've finished, the cleanup process with an airless sprayer is also more complex. You'll need to thoroughly clean the spray gun, hoses, and any other equipment, which can take a lot longer than just rinsing out a roller and tray.

Although airless sprayers can cover large areas quickly once they're set up, the time saved in application may be offset by the longer prep and cleanup times.

For smaller projects, you might find that the overall time is similar whether you choose a sprayer or a roller. It's important to weigh the initial time savings against the additional time required for setup and cleanup to determine which method best fits your needs.

Touch-Up Needs Comparison

The speed of touch-ups can vary greatly between airless paint sprayers and rollers. While sprayers can cover large areas quickly, allowing for multiple coats in a single day, they often lead to more touch-up needs due to potential streaking and overspray. This means that despite the initial speed advantage, you might find yourself spending extra time fixing those imperfections later on.

Advertisement

Additionally, achieving a smooth finish is vital for creating a serene atmosphere in your home, similar to the calming effects of a modern farmhouse bedroom which emphasizes tranquility.

On the other hand, rollers may take longer to set up and apply, but they offer better control over paint thickness. This control can greatly reduce the likelihood of uneven patches, meaning fewer touch-ups in the long run.

Rollers can be paused easily without wasting paint, making them a practical option for smaller touch-up jobs where precision is key.

Surface Preparation Techniques

effective surface preparation methods

When you're preparing a surface for painting, you need to focus on cleaning and priming to guarantee the best adhesion, especially with an airless sprayer.

It's essential to recognize that maintaining a clean indoor environment can greatly improve the overall air quality while you work, making it more comfortable and healthy reduce allergens.

Sanding rough areas helps the paint stick better, while masking with painter's tape protects edges and keeps your work neat.

Advertisement

Don't forget to take into account environmental factors like humidity and temperature, as they play a vital role in the paint's performance.

Cleaning and Priming Surfaces

Successful paint application hinges on meticulous surface preparation, which includes thorough cleaning and priming.

Whether you're using an airless paint sprayer or a roller, proper cleaning is essential to guarantee ideal adhesion. For airless sprayers, you'll want to meticulously clean rough surfaces, as this enhances paint adhesion and allows for a smooth application.

If the surface is porous or uneven, applying primer is a crucial step; it not only improves the overall finish but also increases durability. Additionally, making sure that your cleaning supplies, such as microfiber cloths and multi-surface cleaners, are at hand can streamline the preparation process, akin to the essential items in a home cleaning kit.

While rollers usually require less stringent preparation, you shouldn't overlook cleaning. Masking with painter's tape remains important to protect adjacent surfaces and achieve crisp lines.

Advertisement

Keep in mind that environmental conditions, like humidity and temperature, can greatly influence paint adhesion. Before you begin, it's wise to check these factors to avoid potential issues.

Sanding for Adhesion

Sanding plays an indispensable role in preparing surfaces for painting, as it enhances adhesion and guarantees a long-lasting finish. When you sand surfaces, you create a rough texture that helps the paint grip better, resulting in a more durable outcome.

For ideal results, it's best to use medium-grit sandpaper, around 120-150 grit, especially on rough surfaces before applying primer or paint. Additionally, verifying that the surface is free of contaminants will improve the overall quality of your finish, especially when using techniques like proper dilution of paint for airless sprayers.

If you're working with previously painted surfaces, sanding is vital. It helps remove any gloss, allowing the new paint to adhere more effectively and reducing the risk of peeling down the line.

However, don't forget to clean up the dust created during sanding. Use a damp cloth or vacuum to confirm the surface is free of contaminants before applying paint.

Advertisement

Proper surface preparation, including effective sanding, can greatly reduce the need for additional coats of paint. This not only saves you time but also cuts down on material costs, making your painting project more efficient.

Masking for Protection

After guaranteeing your surface is properly sanded and free of contaminants, it's time to focus on masking for protection.

Proper masking is vital when using an airless paint sprayer, as it prevents overspray from damaging adjacent surfaces. For best results, consider using well-draining soil techniques to maintain a clean work area.

Here's what you need to do:

  • Use high-quality painter's tape for clean lines and to avoid paint bleed.
  • Apply the tape at a 45-degree angle to enhance adhesion and achieve sharper edges.
  • Cover furniture and floors with drop cloths or plastic sheeting to catch any overspray.
  • Check your masking job for gaps or areas needing extra tape before spraying.
  • Remove the tape while the paint is still slightly wet to guarantee smooth edges.

Cost Analysis

financial expense evaluation

Considering your budget, understanding the cost implications of airless paint sprayers versus rollers is essential. Airless paint sprayers start at around $300, making them a significant initial investment. In contrast, rollers require minimal supplies, costing under $50, which makes them more accessible for DIY enthusiasts.

If you're looking to rent an airless sprayer, be prepared to spend between $40 and $100 per day, adding to your overall expense for short-term projects. Additionally, using tools that are budget-friendly vacuum cleaners can help you maintain a clean workspace, which is vital when painting.

Advertisement

Another important factor in this cost analysis is how much paint each method uses. Sprayers typically consume about 33% more paint due to overspray, which can inflate your material costs, especially on large jobs. In the long run, rollers tend to have lower ongoing expenses, thanks to reduced paint waste and fewer tool replacements compared to airless sprayers.

While airless paint sprayers might save you time, their higher upfront and material costs can make rollers a more budget-friendly choice for many projects. Ultimately, weighing the costs against your specific needs will help you decide which option is best suited to your financial situation.

Finish Quality

high standards assurance

When it comes to finish quality, airless paint sprayers often shine, delivering a smoother and more uniform application than rollers. If you're aiming for a high-gloss surface without lap marks, sprayers are your go-to option.

Rollers can leave a slight texture, especially with certain nap sizes, which may not meet your desired finish quality. Additionally, employing techniques that promote relaxation and focus, such as practicing meditation, can help you maintain precision during painting, leading to better results.

Here are some key points to take into account:

  • Sprayers excel in intricate designs and hard-to-reach areas.
  • They provide a finish that can greatly enhance the overall aesthetic of your project.
  • Achieving a smoother finish requires careful technique, particularly with darker colors to avoid streaking.
  • The type of paint you choose can also impact the finish; some paints don't perform well with sprayers, making rollers a better choice in those cases.
  • Overall, while both methods have their merits, sprayers typically offer a more polished result for professional-looking outcomes.

User Experience and Learning Curve

user experience learning curve

Using an airless paint sprayer can feel like stepping into a whole new world of painting for many beginners. The user experience with a sprayer often involves a considerable learning curve. You'll need to master the right distance and spray intensity to avoid drips and uneven application. If you're inexperienced, you might find yourself struggling with streaking, especially when working with darker colors.

On the other hand, rolling paint is more intuitive and easier for most newbies. It allows for better control over your application without the steep learning curve associated with sprayers. While rollers can be simpler to use initially, they mightn't yield the smooth finishes that proficient sprayer users achieve.

Advertisement

As you gain experience, mastering spray techniques can lead to faster application times and superior results. However, if you're just starting, you may find rollers to be more manageable.

Ultimately, your experience level will considerably impact the effectiveness of either method, making it essential to reflect on where you're at in your painting journey before diving into the world of airless paint sprayers.

Ideal Use Cases

optimal application scenarios

For those tackling larger painting projects, airless paint sprayers shine in their ability to cover vast areas quickly and efficiently. When you have an expansive space, like an exterior wall or an empty interior, a sprayer can greatly reduce your project time.

Here are some ideal use cases for each method:

  • Large exteriors: Sprayers handle expansive surfaces effortlessly.
  • Intricate textures: Airless sprayers excel at tackling detailed areas and hard-to-reach spots.
  • Open interiors: If you're painting a big, empty room, a sprayer will save you hours.
  • Occupied spaces: Rollers are better for occupied interiors since they require less prep and allow for quick pauses.
  • Thicker paint applications: Rollers may take longer but often need fewer coats on flat surfaces.

While sprayers are fantastic for speed, remember that their initial setup and cleanup can offset those benefits.

In some cases, your overall project time might end up similar to using rollers. Ultimately, choosing between a sprayer and rollers depends on the specifics of your project and the space you're working in.

Frequently Asked Questions

Is a Paint Sprayer Faster Than a Roller?

Yes, a paint sprayer's often faster than a roller, letting you cover large areas quickly. However, don't forget about the prep work needed; that can balance out the speed advantage when you're painting.

Advertisement

How Much Faster Is Using a Paint Sprayer?

Using a paint sprayer can save you significant time, often completing large areas in just two days. While it's quicker for application, don't forget to factor in the prep and cleanup involved.

What Are the Disadvantages of an Airless Paint Sprayer?

You'll love the overspray that dances around, wasting paint. Sure, it's costly, but who doesn't enjoy a good cleanup? And don't worry about mastering the technique—it's fun to embrace those drips and uneven coverage!

How Fast Is Airless Paint Sprayer?

An airless paint sprayer can cover up to 300 square feet per hour, letting you finish large areas quickly. Though setup takes time, the actual painting process is considerably faster than traditional methods.

Conclusion

In the battle of airless paint sprayers versus rollers, speed takes center stage. While sprayers can coat large areas in a flash, rollers offer precision in tight spots. Imagine the sprayer dancing across a wall, leaving a smooth finish, while the roller methodically fills in corners. Each method has its place: sprayers for efficiency and rollers for detail. Ultimately, your choice hinges on the job at hand, merging speed with quality for the perfect paint project.

Advertisement
Continue Reading

Airless Paint Sprayers

How to Use an Airless Paint Sprayer for Staining

Immerse yourself in the art of using an airless paint sprayer for staining, and discover essential tips for achieving a flawless finish!

Published

on

By

airless sprayer staining guide

Using an airless paint sprayer for staining can transform your wood projects quickly and efficiently. Start by preparing your surface; power-wash it and let it dry completely. Choose the right spray tip and adjust your settings to minimize overspray. Maintain a consistent spraying distance of about 12 inches, spraying with the grain of the wood and overlapping your passes by about 50%. Always wear protective gear and guarantee good ventilation while working. After finishing, clean the sprayer thoroughly to prevent clogs. Stick around to uncover more tips and techniques for a flawless staining experience!

Key Takeaways

  • Prepare the surface by power-washing and ensuring it is completely dry before staining for optimal adhesion.
  • Choose the appropriate spray tip and adjust pressure settings to minimize overspray while ensuring even application.
  • Maintain a consistent distance of 12 inches from the surface and spray with the wood grain for uniform coverage.
  • Clean the sprayer immediately after use using the Power Flush method to prevent clogging and ensure longevity.
  • Always wear protective gear and ensure proper ventilation to safeguard against harmful vapors during the staining process.

Project Overview

When tackling a staining project, using an airless paint sprayer can greatly enhance both efficiency and results. This tool is designed to apply stain evenly while protecting the wood from sun and weather damage.

With a Control Pro High Efficiency Airless Sprayer, you can cover an 8 x 6 ft. privacy fence in under a minute, considerably speeding up your project. Best Airless Paint Sprayer options are available that reduce overspray and improve coverage.

Staining isn't just about aesthetics; it's about maintaining the longevity of your wooden surfaces. Regular staining every 1-2 years is vital for ideal protection and appearance. An airless paint sprayer makes this task easier, producing 55% less overspray compared to traditional sprayers. This means cleaner results and reduced material waste, allowing you to focus on the job at hand without worrying about excess mess.

Before you start, remember to wear protective gear and guarantee adequate ventilation. Safety is key when using an airless paint sprayer, especially when handling stains that can emit harmful fumes.

Suggested Tools and Equipment

recommended tools and gear

When you're ready to start your staining project, choosing the right airless sprayer is essential; consider models like the Graco Control Pro series or Wagner's Universal Sprayer W 690 HVLP for ideal results.

To achieve an exceptional finish, you might also want to explore using the Graco FFLP Fine Finish Low Pressure Reversible Tip which is designed for intricate projects.

Advertisement

You'll also want to gather essential preparation tools, such as paint strainer bags, empty buckets, and protective gear.

With these items in hand, you'll set yourself up for a successful and efficient staining experience.

Recommended Sprayer Models

Choosing the right airless paint sprayer can make a significant difference in your staining projects. For ideal results, consider the Graco, Magnum, and TrueCoat models, which are highly recommended sprayer models known for their efficiency and versatility.

These airless sprayers excel at handling various staining materials, making them perfect for different types of wood projects. Additionally, when selecting a sprayer, it's important to think about the key factors in choosing a service that align with your specific needs.

If you're looking for something versatile, the Wagner Universal Sprayer W 690 HVLP is a great option. It works well with both stain and lacquer, catering to both DIY enthusiasts and professionals alike.

Advertisement

Another excellent choice is the Wagner HEA Control PRO 250 M, which features high-efficiency airless technology to minimize overspray and deliver a clean finish on larger surfaces.

Before you start spraying, don't forget your protective gear, such as gloves, goggles, and masks, to guarantee a safe working environment.

Essential Preparation Tools

Prepare your workspace effectively to guarantee a smooth staining process. Start by gathering essential tools and materials for your project. You'll need the appropriate paint or stain, spray tips suited for the surface, and empty buckets for mixing and transporting. Don't forget to include paint strainer bags to filter out debris and prevent clogging in your sprayer.

To guarantee overspray protection, cover surrounding areas, like lawns and shrubs, with tarps or plastic sheeting. This will keep your landscape safe from unwanted stains. Optional tools, such as a pressure roller kit or additional airless hose sections, can enhance your sprayer's efficiency and reach.

Here's a quick reference table to help you organize your preparation tools:

Advertisement
Essential Tools Purpose
Appropriate Paint The color and finish for staining
Spray Tips Suited for the specific surface
Paint Strainer Bags Prevent clogging during application
Tarps/Plastic Sheeting Overspray protection

With these tools in hand, you're ready to plunge into the staining process with confidence!

Preparation Steps

essential planning process

Before you start using an airless paint sprayer, it's essential to get everything ready for a smooth application.

Begin by power-washing the fence or deck several days prior to staining. This helps guarantee proper adhesion of the stain or paint to the surface. After washing, let the surface dry completely to prevent trapping moisture beneath the finish. Additionally, consider checking the weather conditions, as painting on a damp or windy day can affect the quality of the finish, similar to how safety features in tools promote better performance.

Next, clear the spraying area by moving outdoor furniture away and covering nearby plants and surfaces with tarps. This step is important to avoid any accidental staining and to keep your work area organized.

Collect all necessary tools and materials, including the sprayer, your chosen stain or paint, and the appropriate spray tips. Having everything at hand streamlines the preparation steps, making it easier to shift into the actual staining process.

Sprayer Setup

sprayer configuration instructions

When you're ready to set up your airless paint sprayer, start by selecting the right spray tip for your project to guarantee precision. This is especially important as using the wrong tip can lead to uneven application or excessive overspray, similar to how regular servicing of HVAC systems can improve efficiency.

Next, adjust the pressure settings to minimize overspray while maintaining an even application. Finally, test the spray pattern on cardboard to fine-tune your setup before you begin painting.

Advertisement

Selecting Right Spray Tip

Choosing the right spray tip is vital for achieving the best results with your airless paint sprayer. When you're staining wood surfaces, opt for a narrow spray tip to gain better control and precision in your application. A tip size between .015 and .019 inches is typically recommended for stains, as it provides an ideal balance for coverage while minimizing excessive overspray.

For projects that require attention to detail, consider exploring unique cultural experiences that can inspire your creative choices. Before diving into your project, always test the spray pattern on a piece of cardboard. This allows you to make any necessary adjustments for peak results. Additionally, set your sprayer to the lowest pressure setting when working with lighter materials like stains. This adjustment helps you achieve a smooth finish and reduces the risk of runs or drips.

While you're spraying, regularly check and clean the spray tip to prevent clogging. A clean tip guarantees consistent spray performance, which is imperative for a uniform application.

Adjusting Pressure Settings

After selecting the right spray tip, the next step is adjusting the pressure settings on your airless paint sprayer.

Start by choosing the lowest pressure setting, especially when applying lighter materials like stains. This helps you achieve a smooth finish while minimizing overspray.

Advertisement

For projects where you're working with different surfaces, consider using a cordless vacuum cleaner to quickly clean up any dust or debris that may affect your staining results.

Once you've set the pressure, test the spray pattern on a piece of cardboard. Adjust the pressure until you find a balance that delivers even coverage without runs or drips. If you're using a narrow spray tip, it's essential to maintain that low pressure to guarantee the stain atomizes correctly and adheres well to the surface.

If you notice uneven coverage, gradually increase the pressure, but be careful not to exceed the recommended settings outlined in your sprayer's manual. This will help prevent excessive overspray and waste.

Always refer to the specific instructions in your operation manual for the ideal pressure settings tailored to the type of stain you're using.

Testing Spray Pattern

Testing the spray pattern is essential for achieving a flawless finish with your airless paint sprayer. Before diving into your project, take a moment to test the spray pattern on a piece of cardboard. This helps you make necessary adjustments and prevents any overspray issues during application.

Advertisement

Start by adjusting the spray tip and pressure settings according to the type of stain and surface you're working with; a narrow tip is often recommended for a more precise finish. Additionally, maintaining ideal air quality in your workspace can enhance your overall painting experience, as air purifiers reduce allergens that may affect your health.

Once you've set up, hold the sprayer about 12 inches away from the surface. This distance helps maintain a consistent spray pattern and minimizes the risk of bouncing back the stain. To perfect your technique, practice starting and ending your spray slightly off the board. This way, you avoid drips and guarantee an even coat.

With the Control Pro series sprayers, you can take advantage of High Efficiency Airless technology, which allows for a clean spray pattern with 55% less overspray compared to traditional sprayers.

Application Techniques

methods for effective application

When you're ready to plunge into using an airless paint sprayer, mastering the right application techniques can make all the difference in achieving a professional finish.

Start by spraying with the grain of the wood; this guarantees even absorption and minimizes the risk of streaking. Incorporating proper best window treatments can also enhance the overall look of your space after the staining process.

Maintaining a distance of about 12 inches from the surface is essential for preventing overspray and achieving a consistent application without bounce-back.

Advertisement

Here are some key tips to keep in mind:

  • Overlap each pass by 50% for uniform coverage and to avoid missed spots.
  • Begin and end each spray pass slightly off the edge of the board to prevent drips.
  • Use a brush to quickly address any drips or runs during the application.

Clean-Up Procedures

sanitation and maintenance protocols

After you finish painting, it's vital to clean your airless paint sprayer right away to keep it in top shape.

Regular maintenance is essential for ensuring the longevity of your equipment, much like how implementing home security systems can protect your belongings.

Start by using proper cleaning techniques to remove all paint residue, ensuring smooth operation for your next project.

Then, store the sprayer safely to prevent damage and prolong its life.

Proper Cleaning Techniques

To keep your airless paint sprayer in top shape, it's crucial to clean it immediately after use. If you let the stain dry, it can clog the system, causing you headaches down the road. Follow the manufacturer's instructions for the best results.

Advertisement

For cleaning with water-based materials, utilize the Power Flush cleaning method. Connect a garden hose to the sprayer and flush water through the system. This effectively removes leftover stain and keeps your equipment functioning well.

Here are some key steps to follow:

  • Remove any remaining stain from the pick-up tube and filter by rinsing them thoroughly.
  • Regularly inspect hoses and connections for leaks or damage during the cleaning process.
  • Store the sprayer in a dry and cool place after cleaning to prolong its lifespan.

Safe Storage Practices

Putting your airless paint sprayer away properly is just as important as cleaning it. To guarantee safe storage practices, clean the sprayer immediately after use by following the manufacturer's instructions. Use the Power Flush method for water-based stains; connect a garden hose and flush with water until it runs clear. After cleaning the sprayer, disassemble all components and store them in a dry, cool place.

Here's a quick reference table for maintenance:

Maintenance Task Frequency
Inspect hoses and connections After each use
Clean the sprayer After each project
Check the manual for maintenance schedules As needed

Regularly inspect the hoses for leaks or wear, replacing them as necessary to maintain peak performance for future projects. Keep the sprayer's manual handy for specific maintenance schedules and procedures tailored to your model. By following these steps, you'll prolong the lifespan of your equipment and guarantee it's ready for your next staining job.

Safety Precautions

implementing essential safety measures

Using an airless paint sprayer can be efficient, but safety precautions are essential to protect yourself and your workspace.

First and foremost, always wear protective gear. This includes gloves, goggles, and a mask to shield against overspray and harmful fumes during the staining process.

Advertisement

Make sure your work area is well-ventilated. Open windows and use exhaust fans to help reduce the concentration of harmful vapors.

Here are a few additional safety measures to contemplate:

  • Keep a first aid kit nearby in case of accidental exposure or injury.
  • Avoid working in wet or damp conditions to prevent electrical hazards.
  • Refer to the specific safety instructions in your sprayer's operation manual for tailored precautions.

Final Touches

last minute adjustments

After finishing your staining project, it's vital to pay attention to the final touches that guarantee a professional-looking result. First, allow sufficient drying time as recommended by the manufacturer. This step is important before removing coverings from plants and surfaces, as it prevents any unwanted damage.

While waiting, check for any areas where overspray may have occurred during the staining process. Using cardboard or drop cloths behind gaps in fence boards can effectively catch any excess stain.

Once everything is dry, return outdoor furniture and items to their original locations to restore the area's functionality and appearance. This will help tie the whole project together and allow you to enjoy your newly stained surfaces fully.

Don't forget to clean the airless paint sprayer immediately after use. Following the user manual will help prevent clogging and maintain the longevity of the equipment.

Advertisement

Maintenance and Care

routine upkeep and management

Taking care of your airless paint sprayer is just as important as the project itself. Proper maintenance guarantees peak performance and extends the life of your sprayer. Here are some key steps to follow:

  • Clean immediately after use: Follow the manufacturer's instructions to avoid clogging and guarantee smooth operation.
  • Inspect and replace worn parts: Regularly check spray tips and filters for wear. Replacing them when needed can greatly improve performance.
  • Store properly: Keep your sprayer in a dry, cool place to protect it from moisture and temperature extremes that can cause damage.

Additionally, don't forget to follow the manufacturer's maintenance schedule for periodic checks.

Inspect hoses and connections for leaks or damage, as these can lead to uneven application and further issues.

By prioritizing cleaning and maintenance, you'll keep your airless paint sprayer in top shape, ready for your next staining project.

Take these steps seriously, and you'll enjoy consistent, high-quality results every time you use your sprayer.

Support Options

assistance availability choices

When you encounter issues with your airless paint sprayer, knowing where to turn for support can make all the difference. Whether you're staining your deck or operating the sprayer for the first time, help is just a call or click away.

For immediate assistance, you can call support at 888-541-9788, available 24/7. If your inquiry isn't urgent, emailing support is another option for guidance on sprayer operation and maintenance.

Here's a quick overview of the available support options:

Advertisement
Support Option Details
24/7 Phone Support Call 888-541-9788 for immediate assistance.
Email Support Use email for non-urgent inquiries.
Find a Retailer Locate retailers for sprayer and accessories.
Online Resources Access manuals and project guidance online.

Don't forget to check the privacy notice and terms of service when seeking support or using the products. With these resources at your fingertips, you can confidently tackle your staining projects and guarantee your airless paint sprayer operates smoothly.

Frequently Asked Questions

Can You Use an Airless Paint Sprayer for Stains?

Yes, you can definitely use an airless paint sprayer for stains. It'll help you achieve a quicker, more even finish. Just make sure to choose the right spray tip and maintain your sprayer properly.

How to Use a Paint Sprayer for Stains?

Using a paint sprayer for stains is like painting with the wind—quick and fluid. Choose the right tip, test your pattern, maintain distance, and clean promptly to keep your sprayer in top shape.

How to Spray Stains With a Graco Paint Sprayer?

To spray stains with a Graco paint sprayer, choose the right tip, test your spray pattern, and mix stains well. Maintain a 12-inch distance, overlapping passes, then clean the sprayer right after to avoid clogs.

How to Spray Stains With a Graco Paint Sprayer?

Did you know that using a sprayer can cut your project time in half? To spray stains with a Graco paint sprayer, choose the right tip, mix stains, adjust pressure, and follow the wood grain.

Advertisement

Conclusion

Now that you've mastered using an airless paint sprayer for staining, you'll find it's just as easy to tackle other projects around your home. Coincidentally, as you're sprucing up that fence, you might discover a hidden talent for DIY! Remember to maintain your sprayer and always prioritize safety. With a little practice, you'll achieve stunning results, turning every staining project into a rewarding experience. So grab your sprayer and get started on your next masterpiece!

Continue Reading

Airless Paint Sprayers

The Best Airless Paint Sprayers for Textured Walls

Unlock the secrets to achieving flawless finishes on textured walls with the best airless paint sprayers—discover the top models and essential tips inside!

Published

on

By

top airless sprayers reviewed

If you're tackling textured walls, airless paint sprayers are your best bet for smooth, even results. Look for features like adjustable pressure settings, which let you customize the spray for various paint types, and longer hose options for greater reach. Models like the Graco Magnum X5 and the Titan 1200sf are excellent choices for larger projects. Don't forget quality accessories like masking tape and drop cloths to protect your work area. Proper technique and regular maintenance will also enhance your experience. Keep exploring to discover more key tips and recommended models that fit your painting needs!

Key Takeaways

  • Look for airless paint sprayers with adjustable pressure settings, like the Graco Magnum X5, to handle various paint viscosities effectively.
  • Choose models with versatile tip sizes to accommodate different textures and project requirements, enhancing coverage and finish quality.
  • Opt for sprayers with longer hose lengths (50-80 feet) for larger projects to minimize repositioning and reduce overspray risk.
  • Select water-based latex paints for ease of application and quick drying on textured walls, ensuring good adhesion and coverage.
  • Prioritize models like Graco TrueCoat 360 for cordless convenience in smaller projects, delivering smooth finishes with reduced preparation time.

Overview of Airless Paint Sprayers

Airless paint sprayers are often the go-to choice for achieving a smooth finish, especially on textured walls. These high-pressure tools are designed to deliver consistent results, making them perfect for both large projects and intricate detailing.

With the ability to spray at speeds up to 0.33 gallons per minute, you'll find they can handle various materials, including water-based and oil-based paints as well as stains. Additionally, they require specific techniques for best use and cleanup, which can enhance your overall painting experience.

One of the standout features is the adjustable nozzle tips that let you switch between vertical and horizontal spray patterns. This versatility is invaluable when you're tackling different surfaces or working around obstacles. Depending on the model, airless sprayers can operate at pressures ranging from 1,500 to 3,000 psi, ensuring you get that desired smooth finish on your textured walls.

Another significant benefit is the ergonomic design of these sprayers, which enhances user comfort during prolonged use. This design minimizes fatigue, allowing you to keep spraying without constantly needing breaks.

Key Features to Consider

essential aspects to evaluate

When choosing an airless paint sprayer for your textured walls, you'll want to pay attention to adjustable pressure settings, hose length options, and tip size versatility.

The Graco FFLP Fine Finish Low Pressure Reversible Tip is particularly beneficial for achieving smooth finishes on uneven surfaces.

Advertisement

These features can make a significant difference in how effectively you cover uneven surfaces and achieve your desired finish.

Adjustable Pressure Settings

Having adjustable pressure settings in a paint sprayer can make a significant difference in your painting experience, especially when tackling textured walls. With an airless sprayer, the ability to customize the spray output allows you to accommodate various materials and guarantee ideal application.

Many advanced models, like the Graco Magnum X5, provide maximum pressure capabilities ranging from 1,500 psi to 3,000 psi. This flexibility is vital for handling different paint viscosities effectively, making it suitable for both interior and exterior painting projects, as highlighted in airless paint sprayer basics.

Adjustable pressure helps reduce overspray, giving you finer control during application, which is imperative for intricate textures. You'll appreciate how a pressure adjustment knob enables quick modifications to the spray pattern, assuring consistent finishes across uneven surfaces.

This feature not only enhances your results but also contributes to comfortable use during long projects. Ergonomic designs in sprayers with adjustable pressure settings are another plus, allowing you to paint for extended periods without fatigue.

Advertisement

When you can easily control the pressure, you gain confidence in your technique, leading to a more satisfying and efficient painting process on textured walls. Choose an airless sprayer with these features, and elevate your painting game.

Hose Length Options

Choosing the right hose length for your paint sprayer is essential for maximizing efficiency and ease during your painting projects. With airless paint sprayers, hose lengths typically range from 25 feet, with some models expandable to 75 or 80 feet. Longer hoses provide greater reach, allowing you to cover larger project areas without frequent repositioning. This is particularly beneficial for textured walls, where a consistent application is vital.

Here's a quick comparison of hose length options:

Hose Length Advantages
25 feet Good for small projects and tight spaces
50 feet Balanced flexibility for medium-sized areas
75-80 feet Ideal for large project areas, minimizes overspray

Selecting the appropriate hose length enhances the versatility of your sprayer, making it suitable for both residential and commercial tasks. A longer hose reduces the risk of overspray, ensuring a more consistent finish across textured surfaces. By considering the hose length in relation to your project area, you can streamline your painting process and achieve professional results with ease.

Tip Size Versatility

Tip size versatility is an important feature to evaluate when selecting an airless paint sprayer. The ability to adjust tip sizes allows you to tackle various projects effectively, including different textures and finishes that can impact the overall look of your work.

Advertisement

For instance, models like the Graco Magnum X5 come with up to seven different tip sizes, making it easy to switch between fine finishes and thicker materials like textured paints. This flexibility is vital when you're working on textured walls, where using the right size can greatly impact your results, similar to how hair cutting techniques can affect the volume and shape of your hairstyle.

An adjustable nozzle can help you adapt your sprayer to different spray patterns, enhancing your efficiency. Larger tip sizes are ideal for thicker materials, ensuring you achieve the desired texture without excessive overspray. Conversely, smaller tips are perfect for detailed work, allowing you to finesse your application where necessary.

Incorporating a versatile texture sprayer into your toolkit means you can handle a variety of painting tasks with confidence. By selecting the appropriate tip size, you not only improve your efficiency but also enhance the quality of your finish.

Best Paint for Textured Walls

ideal paint for texture

When it comes to selecting the best paint for textured walls, water-based latex paints stand out as a top choice for their ease of application and quick drying time. They work exceptionally well with airless sprayers, like the Graco TrueCoat 360 VSP, allowing you to tackle those uneven surfaces without hassle.

For those looking to enhance their painting experience, consider the benefits of breathtaking destinations that offer adventure and relaxation, similar to creating a serene atmosphere in your home.

While oil-based paints can provide a durable and smooth finish, they require careful cleaning of your sprayer to avoid clogs. Remember, the viscosity of your paint is essential; thicker paints may need thinning for ideal performance in airless sprayers. This guarantees a uniform application that adheres well to your textured walls.

Advertisement

Opting for high-quality paints designed specifically for textured surfaces can greatly improve adhesion and coverage, reducing the risk of peeling or cracking in the future.

Additionally, keep in mind that overspray can be substantial—up to 40%—when using airless sprayers. So, it's wise to purchase extra paint to accommodate for this.

With the right choice and preparation, you'll achieve a beautiful finish on your textured walls.

Essential Accessories for Spraying

spraying equipment must haves

To achieve the best results when using airless paint sprayers, having the right accessories is important. First, you'll want to invest in masking tape and drop cloths. These will protect surfaces from overspray and catch any paint that might escape during spraying.

Additionally, having a well-organized essential items for a home cleaning kit can help you maintain a clean workspace while you paint. Small brushes are also essential for those touch-ups and detailed work that your sprayer might miss, ensuring a polished final appearance.

Don't forget about clean containers for holding paint and cleaning solutions. They help you stay organized and prevent contamination of your materials while spraying. Safety gear is critical too; masks and goggles will protect you from inhaling paint fumes and shield against accidental splashes.

Advertisement

For ideal performance, it's wise to have extra paint on hand to account for overspray, which can waste up to 40% of your paint with airless sprayers.

With the right accessories, including texture guns for specialized finishes, you can enhance your spraying experience and achieve impressive results. By preparing with these important items, you'll make the process smoother and more effective, leading to a beautifully textured wall you can be proud of.

Tips for Effective Spraying

effective spraying techniques guide

Before you start spraying, make sure you've properly prepared the surface for the best results.

Using garage door openers can enhance home security, allowing you to focus on your painting project without worry.

Practicing your technique will help you achieve even coverage on those textured walls.

Keep in mind that adjusting your approach as you go can make a significant difference in the final finish.

Advertisement

Surface Preparation Importance

Achieving a flawless finish on textured walls hinges on thorough surface preparation. Before you even think about spraying, make certain your walls are clean and dry. Dust, grease, or loose material can greatly affect paint adhesion, leading to unsightly results.

Start by patching any holes or imperfections to create a smooth base. A smoother surface not only looks better but also enhances the effectiveness of your paint application. Consider using a primer on highly porous or uneven surfaces; this step can notably improve paint adhesion and provide a uniform base for your finish.

Don't forget the importance of masking off adjacent surfaces. This protects areas you don't want to paint and guarantees clean edges, which is particularly essential with textured finishes.

Step Importance
Clean & Dry Guarantees good paint adhesion
Smooth Base Enhances overall appearance
Masking Off Prevents overspray and messy edges

Technique for Even Coverage

Getting the technique right for even coverage on textured walls can make all the difference in your painting project. Start by maintaining a consistent distance of 10 to 12 inches from the surface while spraying. This helps guarantee uniform paint distribution.

Additionally, consider using an ozone air purifier to eliminate any airborne allergens and odors in your workspace, creating a healthier environment for your painting project. Choose a fan spray pattern that matches your wall texture; a vertical pattern works best for walls, while a horizontal one is ideal for ceilings.

Advertisement

Adjust the spray pressure based on the paint's viscosity. For thicker paints, lower spray pressure is recommended to prevent overspray and achieve a smoother application.

Begin your spraying at the edges and corners of the wall, then work your way into the middle sections. Make sure to overlap each pass by about 50% to guarantee even coverage and minimize streaks.

Before tackling the wall, practice your technique on a piece of cardboard or scrap material. This will help you get comfortable with the sprayer's operation and refine your approach.

Cleaning and Maintenance Guide

maintenance and cleaning instructions

Proper care and maintenance of your airless paint sprayer is vital for peak performance and longevity. After each use, thorough cleaning is essential to prevent dried paint from clogging the sprayer, which can greatly impact its efficiency. This is especially important if you consider the importance of using reliable equipment to guarantee safety during your projects, as highlighted in discussions about home security systems.

Use hot soapy water for effective cleaning, especially when dealing with water-based latex paints. This guarantees all paint residue is removed, keeping your sprayer in top shape.

It's best to tackle cleanup immediately after finishing your project. If you wait, you might find that cleaning takes longer than the painting itself, as dried paint can be much harder to remove. For efficient cleaning, consider using garden hose attachments or manual flushing methods. However, be aware that some models may not come with garden hose adapters, so you might need additional tools.

Advertisement

Regular maintenance is equally important. Check for worn or damaged parts and replace them as necessary to extend the lifespan of your airless sprayer.

Performance Evaluation of Sprayers

sprayer performance evaluation analysis

Evaluating the performance of airless paint sprayers is essential for ensuring you get the best results on textured walls. A thorough performance evaluation highlights key aspects like efficiency, smoothness of paint application, and user comfort. Models achieving flow rates up to 0.33 gallons per minute offer impressive efficiency, while maximum pressure ranges from 1,500 psi to 3,000 psi greatly affect the quality of your finish.

Here's a quick overview of vital performance metrics:

Model Efficiency (GPM) Cleaning Difficulty
Sprayer A 0.33 Moderate
Sprayer B 0.28 High
Sprayer C 0.30 Low
Sprayer D 0.25 Moderate
Sprayer E 0.35 High

Moreover, ergonomic design plays a pivotal role in user experience, especially for lengthy projects that require continuous use. A comfortable grip can prevent fatigue, allowing you to maintain precision while painting. Always consider these factors in your performance evaluation to achieve the best results on your textured walls.

Recommended Models for Purchase

suggested purchase model options

When it comes to choosing the right airless paint sprayer for textured walls, several models stand out for their performance and versatility.

Additionally, understanding keyword clustering and topic clustering can help you identify which features are most important for your specific project needs.

The Graco Magnum X5 is a top performer, delivering a maximum pressure of 3,000 psi and a flow rate of 0.27 gallons per minute, making it suitable for projects up to 10 gallons.

Advertisement

If you need versatility, consider the Titan 1200sf; it handles both paint and texture applications effortlessly, ideal for contractors who switch materials frequently.

For smaller projects, the Graco TrueCoat 360 VSP offers cordless convenience, allowing easy maneuverability while ensuring even coverage without thinning paints.

If you're looking for a model that minimizes overspray, the Wagner Control Pro 130 features reduced overspray capabilities and a 1.5-gallon hopper capacity, perfect for achieving smooth finishes on textured surfaces.

User Experience and Insights

enhanced user engagement strategies

With airless paint sprayers, users often find that the experience can greatly enhance their efficiency and finish quality on textured walls.

Models like the Graco TrueCoat 360 deliver smoother finishes, considerably cutting down your preparation time. Additionally, just as understanding the nuances of cat health and nutrition can optimize pet care, mastering the use of airless sprayers can lead to a more professional-looking result.

However, there are a few tips to make the most out of your airless sprayer experience:

Advertisement
  1. Practice First: Before tackling textured walls, practice on cardboard or scrap surfaces to master your technique and guarantee even coverage, avoiding overspray.
  2. Adjust Pressure: Use sprayers with adjustable pressure settings, like the Graco Magnum X5, to maintain control over paint application, especially on uneven surfaces.
  3. Protect Surroundings: Invest in quality masking tape and drop cloths to shield areas from overspray, particularly when using high-pressure airless sprayers.
  4. Clean Immediately: Make sure to prioritize cleaning after use. This is essential to prevent paint from clogging your sprayer, especially when working with thicker paints required for textured surfaces.

Frequently Asked Questions

Can You Spray Texture With an Airless Paint Sprayer?

Yes, you can spray texture with an airless paint sprayer, but you'll need specialized equipment. Regular sprayers might struggle with heavy materials, so consider renting a texture machine for the best results and to avoid damage.

Can You Use a Paint Sprayer on Textured Walls?

Like a painter's brush dancing on canvas, you can absolutely use a paint sprayer on textured walls. It delivers smooth, even coverage, but practice first to conquer the technique and avoid pesky overspray. Safety gear's a must!

How Do You Get a Smooth Finish With an Airless Sprayer?

To get a smooth finish with an airless sprayer, adjust your paint viscosity and pressure, maintain a consistent distance, use a steady motion, choose the right nozzle, and clean the sprayer immediately after use.

Can You Spray Sand Texture With a Paint Sprayer?

Imagine trying to pour syrup through a tiny funnel—frustrating, right? You can spray sand texture with a paint sprayer, but you need specialized equipment to handle that thick material effectively. Otherwise, you'll run into issues.

Conclusion

In the world of painting, using an airless sprayer on textured walls is like wielding a magic wand! You'll transform your space in record time, turning drab into fab with each effortless stroke. With the right sprayer, you're not just painting—you're creating a masterpiece that'll leave your friends speechless. So, grab one of our top picks and release your inner Picasso! Your walls are begging for a makeover, and you're just the artist to deliver!

Advertisement
Continue Reading
Advertisement

Affiliate disclaimer

As an affiliate, we may earn a commission from qualifying purchases. We get commissions for purchases made through links on this website from Amazon and other third parties.

Advertisement

Trending