To achieve a smooth finish on cabinets with an airless paint sprayer, start by thoroughly preparing the surface—clean it with TSP, sand lightly, and repair any flaws. Choose a quality sprayer, like the Titan 440, and use a fine finishing tip, such as the purple 312, to improve atomization. Maintain an ideal distance of about 12 inches from the surface while adjusting the pressure for an even spray pattern. Lightly sand between coats and inspect for missed spots. Following these steps not only enhances the finish but also sets the stage for insights into maintenance and finishing touches.
Key Takeaways
- Properly prepare surfaces by cleaning, sanding, and repairing flaws to ensure optimal paint adhesion and a smooth finish.
- Use a fine finishing tip, like the purple 312, and maintain appropriate pressure settings for better atomization and coverage.
- Apply a non-flammable, oil-based primer before the topcoat to enhance adhesion and durability of the finish.
- Lightly sand between primer and topcoat applications to achieve a smoother finish and improve paint bonding.
- Regularly clean the sprayer and adjust pressure settings to maintain even spray patterns and avoid overspray.

VONFORN Paint Sprayer, 700W HVLP Spray Gun with Cleaning & Blowing Joints, 4 Nozzles and 3 Patterns, Easy to Clean, for Furniture, Cabinets, Fence, Walls, Door, Garden Chairs etc. VF803 Yellow
【4 Nozzles & 3 Spray Patterns】VONFORN 700W paint sprayer includes 4 nozzle sizes (1.0mm, 1.5mm, 2.0mm, 3.0mm) to…
As an affiliate, we earn on qualifying purchases.
As an affiliate, we earn on qualifying purchases.
Importance of Surface Preparation
When it comes to achieving a smooth finish on your cabinets, proper surface preparation is vital. It's the foundation for paint adhesion and determines how well your final coat will look.
Start by cleaning your surfaces with TSP to remove dirt and grease. This step guarantees you have a pristine area for paint application, reducing the chance of peeling or bubbling later on. Additionally, using a high-quality airless paint sprayer can greatly enhance the finish quality, making it worthwhile to evaluate the best airless paint sprayer for your project.
Next, lightly sand the surfaces. This creates a texture that promotes better adhesion for both the primer and topcoat, resulting in a more durable and smooth finish.
Don't forget to inspect for any damage; repairing these flaws is essential. Fill in any gaps with caulk and use wood filler for existing hardware holes to achieve a uniform surface.
These steps not only enhance the overall appearance of your cabinets but also guarantee that your airless paint sprayer can deliver a flawless finish.
By investing time in proper surface preparation, you're setting yourself up for success, making the painting process smoother and more satisfying.

310 Graco FFLP310 RAC X Fine Finish Low Pressure Reversible Tip
include
As an affiliate, we earn on qualifying purchases.
As an affiliate, we earn on qualifying purchases.
Essential Equipment and Materials
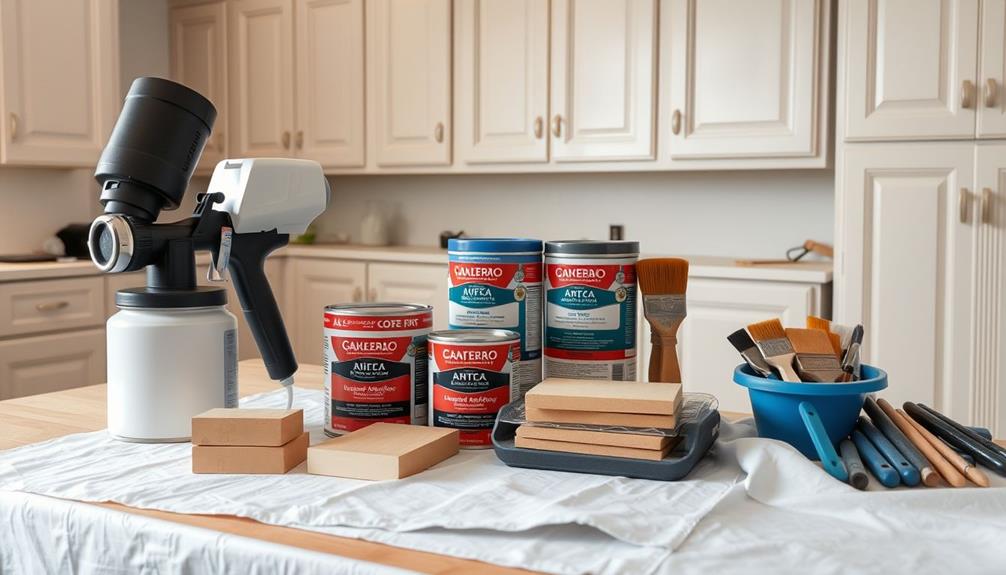
When it comes to achieving a smooth finish on your cabinets, choosing the right sprayer and paint is essential.
A Titan 440 airless sprayer paired with a fine finishing tip can make all the difference in how your project turns out.
Additionally, understanding the proper disposal methods for paint materials can help maintain a clean workspace and prevent environmental damage.
Opting for a durable coating like hybrid enamel RX Croagunk guarantees a long-lasting, professional look.
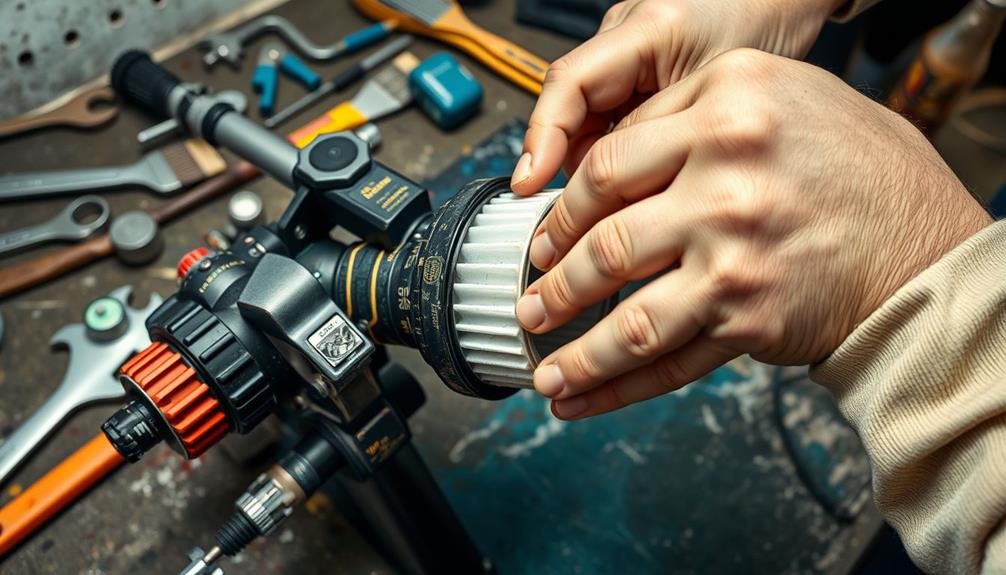
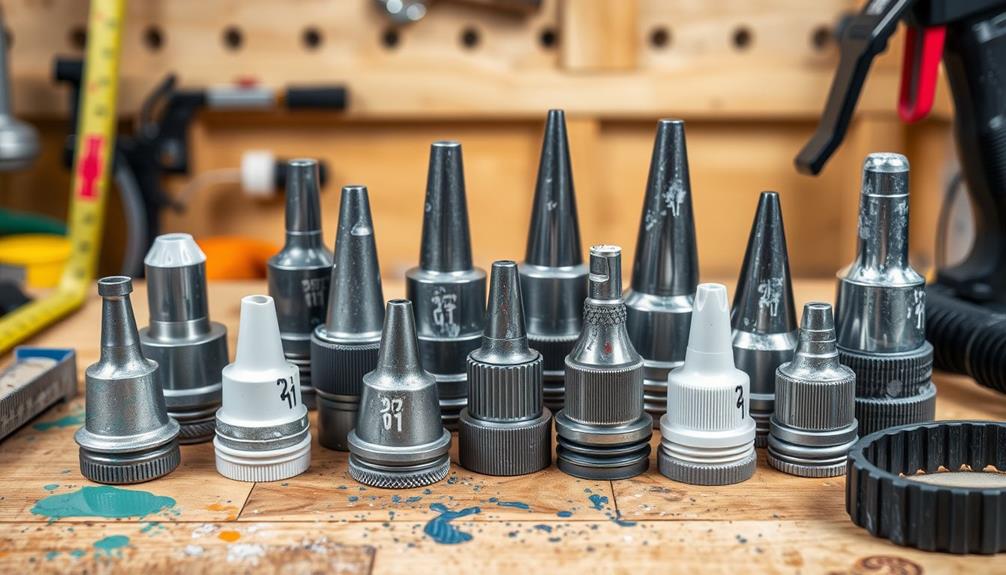
Sprayer Selection Tips
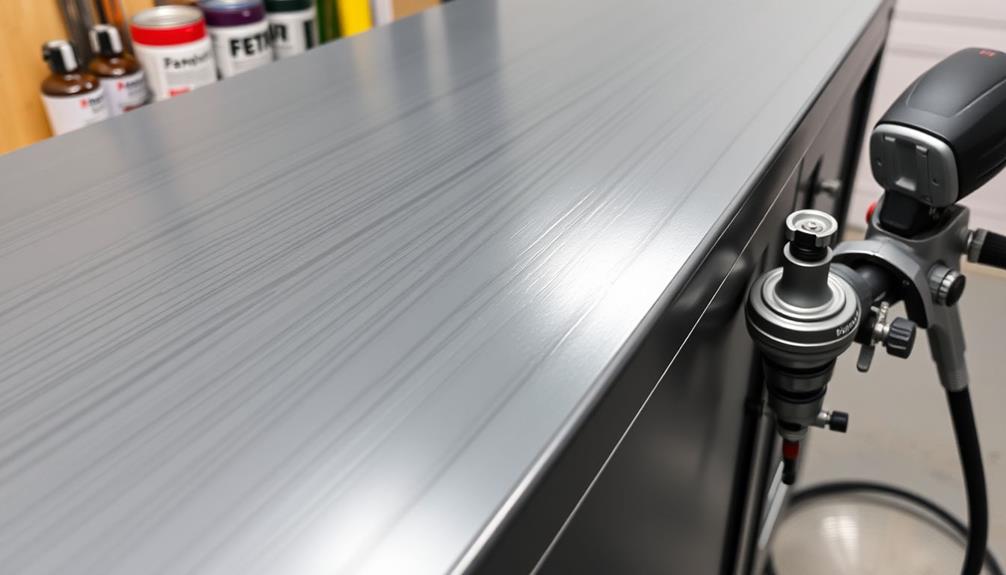
Selecting the right sprayer is vital for achieving a smooth finish on your cabinets. An airless sprayer, like the Titan 440, is an excellent choice for applying hybrid enamel paints. It guarantees durability and a quality finish, but you need to pay attention to the spray tip you use. A fine finishing tip, such as the purple 312, enhances paint atomization, allowing for lower pressure settings that lead to a smoother finish.
Here are some sprayer selection tips to take into account:
| Feature | Importance |
|---|---|
| Adjustable Pressure Settings | Eliminates issues like "tails" in spray patterns |
| Fine Spray Tip | Improves atomization for even paint distribution |
| Dual Orifice Tips | Secures ideal paint flow and coverage |
Regular maintenance is also essential for ideal performance. Clean your sprayer thoroughly after each use to extend its lifespan. By choosing the right airless sprayer and spray tip, you'll be well on your way to achieving that flawless finish on your cabinets.
Recommended Paint Types
To achieve that smooth finish on your cabinets, choosing the right paint is just as important as your sprayer selection. For the best results, consider using a hybrid enamel paint, like RX Croagunk. This type of paint is recommended for its durability and fine finish qualities, ensuring your cabinets look professional.
Additionally, using an efficient tool like an Englander 10-Cpm Corn Wood Pellet Stove can improve ambient conditions while you work. Before applying the paint, always prime the surfaces with a non-flammable, oil-based primer. This step is vital for better adhesion and a smoother final coat.
When using your airless sprayer, opt for a fine finishing tip, such as the purple 312. This tip features dual orifices, enhancing paint atomization and allowing for high-quality results. The Titan 440 airless sprayer is an excellent choice, offering consistent pressure adjustments and ideal spray patterns.
Don't forget about safety precautions, like wearing a mask and goggles to protect yourself from fumes and overspray.
Regular maintenance of your sprayer is essential too—make sure to clean it thoroughly and check the filters to prevent clogs. Following these guidelines will help you achieve a stunning, smooth finish on your cabinets.

INSL-X Cabinet Coat – Urethane Acrylic Semi-Gloss Enamel Cabinet Paint, 1 Quart, White
The ultimate acrylic cabinet paint for a “factory-like” finish when refurbishing kitchen and bathroom cabinets, shelving, furniture, trim,…
As an affiliate, we earn on qualifying purchases.
As an affiliate, we earn on qualifying purchases.
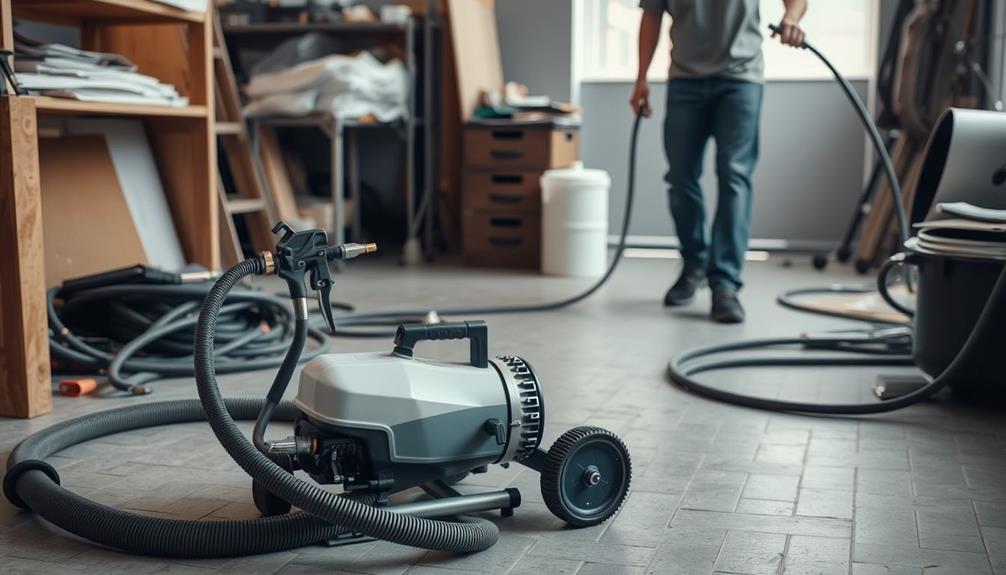
Setting Up Your Workspace
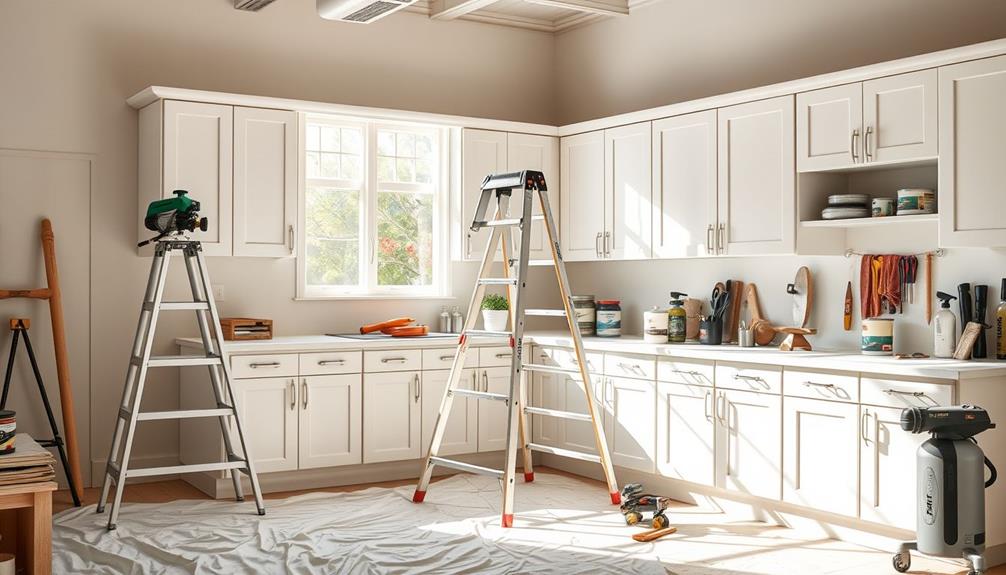
Creating an efficient workspace is essential for achieving a smooth finish on your cabinets. Start by ensuring adequate ventilation in your area to avoid inhaling fumes and to help the paint dry properly. If possible, set up your workspace in an unfinished area to create a temporary spray booth. This will help contain overspray and maintain a controlled environment.
Additionally, consider utilizing a well-organized essential items for a home cleaning kit to keep your tools at hand and your workspace tidy.
Next, cover all surfaces not meant for painting with plastic sheeting and canvas tarps. This protects against overspray and keeps your workspace clean. Tape and protect walls and ceilings with plastic sheeting to prevent unwanted paint from reaching these surfaces.
Elevate your cabinet doors using sawhorses. This not only provides comfortable access for spraying but also minimizes the risk of touching wet surfaces.
Don't forget to wear protective gear like masks, goggles, and gloves to safeguard yourself during the spraying process.

ElaraBerry 3 Packs Deglosser Surface Prep Wipes Multi Surface Degreaser Wipe for Wood Furniture 120 Counts Heavy Duty Cleaning Wipes for Paint Metal Cabinet Home Supplies
Ample Quantity: you will receive 3 pieces containing 120 deglosser surface prep wipes in total; This ample supply…
As an affiliate, we earn on qualifying purchases.
As an affiliate, we earn on qualifying purchases.
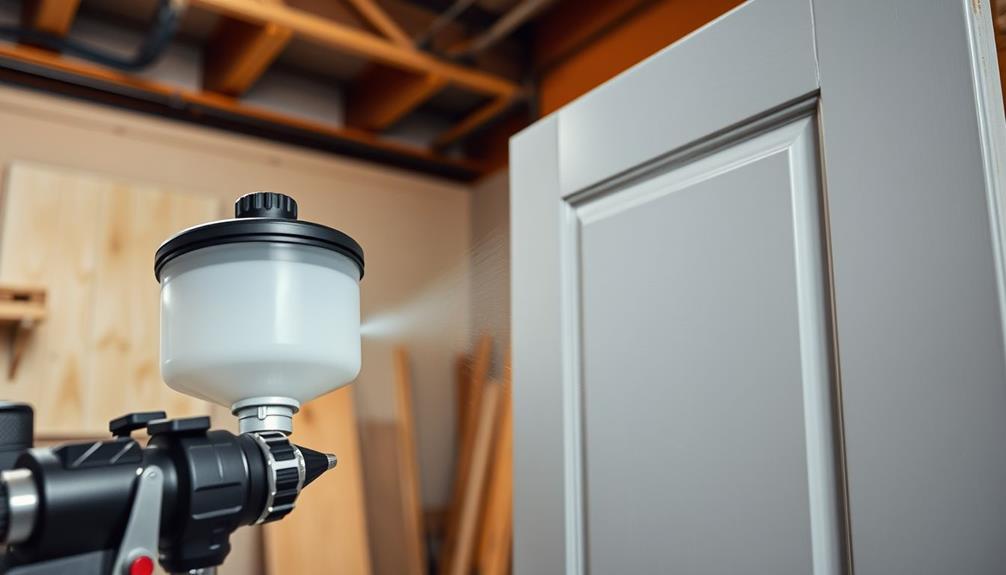
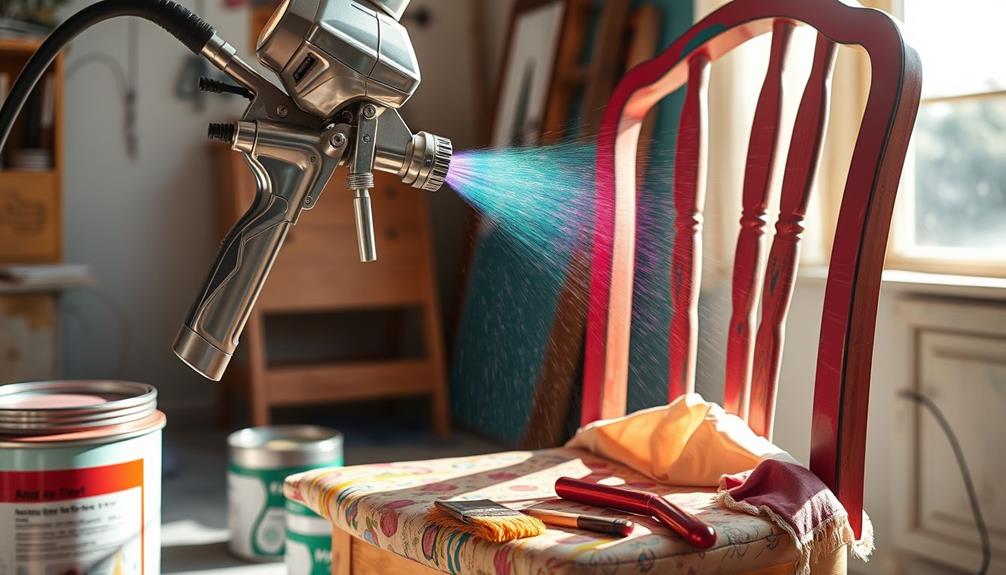
Understanding the Spraying Process

With your workspace prepared, it's time to focus on the spraying process that will bring your cabinets to life. Begin by applying a non-flammable, oil-based primer to enhance adhesion and create a smooth foundation for the topcoat. Use a 311 spray tip for smaller surfaces like cabinets, and practice on cardboard to refine your technique.
To guarantee an even coat without drips or runs, maintain a consistent distance of 12 inches from the surface while spraying. Lightly sand between the primer and topcoat applications to improve adhesion and achieve a smoother finish.
Here's a quick reference to help you understand key aspects of the spraying process:
| Step | Action | Safety Tip |
|---|---|---|
| 1. Primer Application | Apply oil-based primer | Wear a mask and goggles |
| 2. Tip Selection | Use a 311 spray tip | guarantee proper tip attachment |
| 3. Distance | Maintain 12 inches from the surface | Keep a steady hand |
| 4. Sanding | Lightly sand between coats | Sand in a well-ventilated area |
| 5. Final Coat | Apply topcoat evenly | Check for even spray pattern |
Following these steps will help you achieve a professional finish.
Achieving the Right Pressure
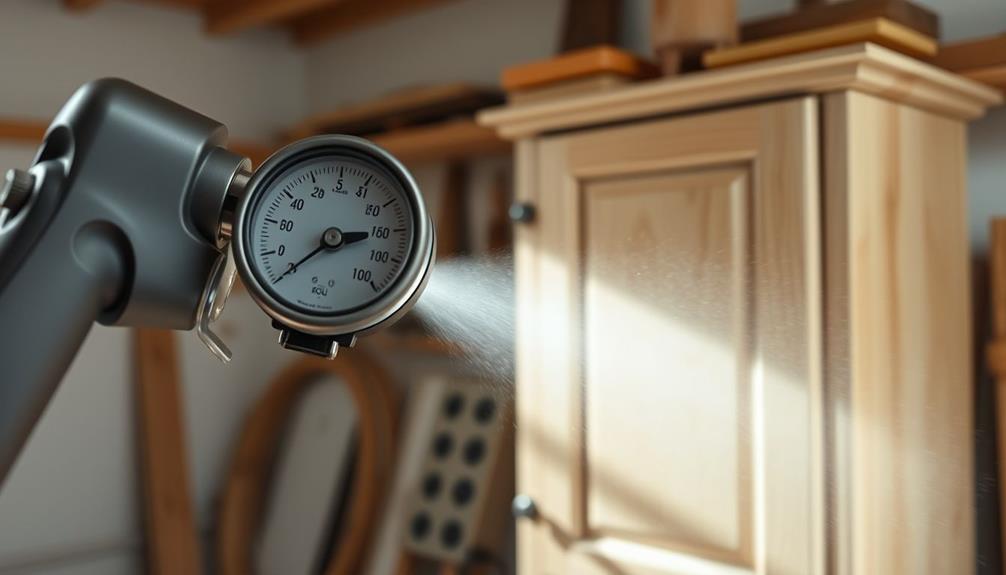
Getting the right pressure when using an airless paint sprayer is vital for achieving a smooth finish on your cabinets. Insufficient pressure can lead to "tails" at the ends of your spray patterns, which indicates poor atomization. To eliminate these tails, you'll want to increase the pressure, allowing for a smoother and more even spray across the cabinet surfaces.
Additionally, using a quality garage door opener can enhance your home security while you focus on your painting project.
Finding the ideal pressure setting is essential, as it guarantees consistent paint distribution. Excessive pressure, however, can cause overspray and waste, so you need to find that sweet spot. Regularly observe and adjust the pressure while spraying to maintain even distribution.
You should aim for your desired patterns to blend seamlessly into subsequent passes for the best results.
Additionally, using fine finishing tips, like the purple 312, allows you to work with lower pressure settings while enhancing paint atomization. This combination is significant for achieving that smooth finish you're after.
Observing and Adjusting Spray Patterns

How can you guarantee your spray patterns are spot on? Start by closely observing them as you work. Look for any "tails" at the ends of the spray patterns; these indicate insufficient pressure for proper atomization.
Ideal patterns should display an even distribution across the surface, without gaps or excess paint buildup. To achieve this, maintain a consistent distance of about 12 inches from the surface while spraying. Additionally, using the right tip size will help assure a more controlled spray pattern, particularly when working on intricate projects. If you want to learn more about this, check out tip size selection.
If you notice any issues, don't hesitate to adjust the pressure settings. Adjusting the pressure can help eliminate those tails, making sure you create a soft, overlapping pattern that seamlessly blends with adjacent passes.
Regularly check and fine-tune your spray pattern during application; a well-set pattern is vital for achieving that smooth finish you're aiming for.
Techniques for Smooth Application
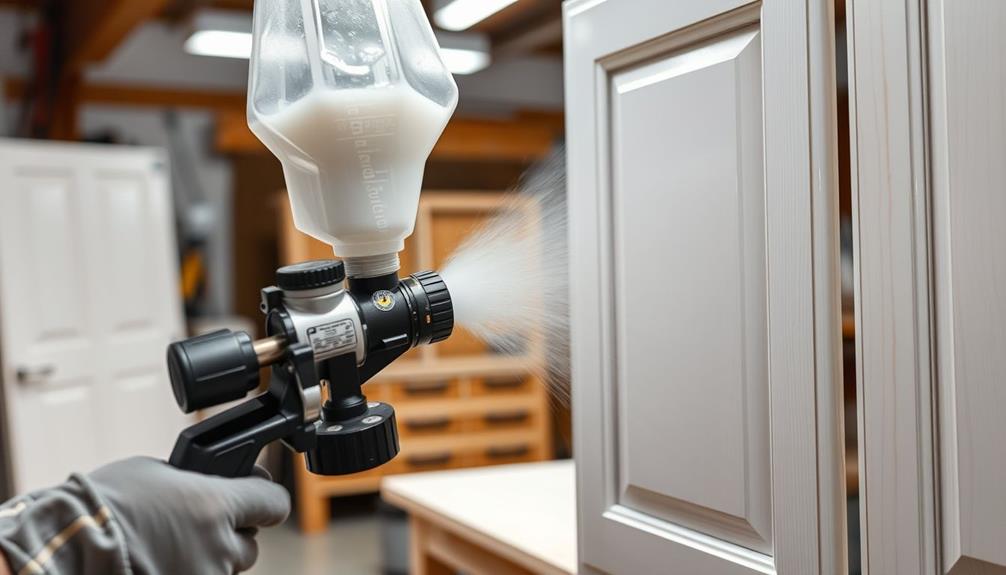
To achieve a smooth finish, you'll want to start with the right equipment setup and a solid spraying technique.
Incorporating techniques from a Modern Farmhouse Bedroom can enhance your project atmosphere by promoting a sense of tranquility during the process.
Practice on cardboard to get comfortable with your sprayer, and keep a consistent distance of 12 inches from the surface.
With these basics in place, you'll be well on your way to a flawless application.
Proper Equipment Setup
Achieving a smooth finish on cabinets starts with the right equipment setup, and using the proper tools can make all the difference.
First, make certain your airless sprayer is equipped with a fine finishing tip, like a purple 312. This will enhance paint atomization and help you achieve that smooth surface you desire.
Additionally, understanding your environment is vital; for instance, verify the area is free from strong smells that could distract you or affect the paint's drying process, as cats can be sensitive to various odors.
Next, adjust the pressure settings to eliminate "tails" at the ends of the spray pattern; insufficient pressure can lead to uneven application.
Maintain a distance of about 12 inches from the cabinet surface while spraying to guarantee an even coat and avoid drips or runs.
Before you start, it's wise to test the spray pattern on a piece of cardboard. This will help you confirm that your setup provides a soft and even distribution of paint.
Optimal Spraying Technique
When it comes to achieving a smooth application, mastering your spraying technique is essential. Start by maintaining a distance of about 12 inches from the cabinet surface. This distance helps you achieve a consistent and smooth finish. Use a fine finishing tip, like a purple 312, to enhance paint atomization and reduce the risk of overspray.
Additionally, consider the acoustics of your workspace, as a well-structured environment can lead to better focus and results while painting, similar to how a well-designed home theater setup enhances the viewing experience.
Adjust the pressure settings on your airless sprayer to eliminate any "tails" at the ends of the spray pattern. This adjustment guarantees even paint distribution, contributing to a smooth application. Remember to lightly sand between primer and topcoat applications. This step enhances adhesion and results in a more polished final finish.
Before you plunge into painting, test your spraying technique on a piece of cardboard. This will help you check the fan pattern and make necessary adjustments for peak results.
Don't forget to follow proper safety precautions, such as wearing a mask and goggles, while you work. Always adhere to the instructions and safety procedures specific to your airless sprayer. By following these guidelines, you'll be well on your way to achieving a flawless finish on your cabinets.
Finishing Touches for Cabinets

The final touches on your cabinets can make all the difference in achieving a polished, professional look. After spraying the cabinet doors and frames, inspect for any missed spots before moving on to the finishing process.
It's essential to lightly sand between the primer and topcoat applications to enhance adhesion and create a smoother final finish. For best results, make certain you choose a well-ventilated area to work in and consider the temperature and humidity as these factors can affect the drying time and finish quality.
Additionally, using a well-draining soil for your potted plants during this process can help maintain a clean workspace, preventing dirt and debris from sticking to your freshly painted surfaces.
Be sure to follow the sprayer operation manual for guidance on flushing the sprayer with appropriate solvents between different coatings. This step is important to maintain the integrity of the spray pattern and prevent contamination.
Always apply a second coat only after the first coat has dried completely; this typically results in a more durable and uniform finish.
Once the painting process is complete, carefully remove any protective coverings. Reinstall the hardware with care to achieve that polished look you desire.
Remember to observe proper safety precautions throughout the entire process, making certain a safe working environment. By following these steps, you'll not only enhance the appearance of your cabinets but also guarantee they stand up to wear and tear over time.
Equipment Cleaning and Maintenance

To maintain your airless paint sprayer's performance and longevity, it's vital to clean it thoroughly after each use.
Start by rinsing the sprayer with the appropriate solvent based on the coating you used. For water-based paints, simply use water. If you applied oil-based products, you'll need mineral spirits or a specific cleaning solution as indicated on the Technical Data Sheet (TDS).
Don't forget to regularly clean the filters in both the sprayer handle and the machine. This step is important for maintaining even paint distribution and avoiding interruptions during application.
During long-term storage, protect the pump by applying Titan liquid shield or mineral spirits to keep it lubricated and prevent damage.
Always adhere to the cleaning recommendations specified in the TDS for each coating type, as this guarantees the longevity and reliability of your spray equipment.
Remember to take proper safety precautions, such as wearing gloves and goggles, while handling solvents and cleaning agents.
Frequently Asked Questions
How Do You Get a Smooth Finish With an Airless Sprayer?
To get a smooth finish with an airless sprayer, maintain a 12-inch distance, use a fine tip, adjust pressure, and lightly sand between coats. Practice on cardboard to master your technique before tackling the project.
How Do You Get the Smoothest Finish When Painting Cabinets?
To achieve that glass-like finish, you'll want to prep surfaces meticulously, apply a quality primer, and use a fine spray tip. Keep your distance consistent and sand lightly between coats for ultimate smoothness.
How Do You Paint Cabinets to Look Like Factory Finish?
To paint cabinets like a factory finish, focus on proper prep work. Use a quality primer and paint, sand lightly between coats, and maintain consistent distance while applying for an even, smooth result.
Why Is My Paint Sprayer Not Spraying Smooth?
If your paint sprayer isn't spraying smoothly, check for clogged filters, adjust the pressure, and verify you're using the right spray tip. Also, make sure your paint's been thinned properly for ideal performance.
Conclusion
In the end, as you step back and admire your freshly painted cabinets, the smooth, flawless finish glistens like a calm lake under the sun. You've transformed your space, merging beauty with craftsmanship. With each careful spray and adjustment, you've created a masterpiece that beckons touch. Remember, the right preparation and technique are your trusted brushes in this artistic journey. So, embrace your skills, clean your tools, and let your next project shine just as brightly.