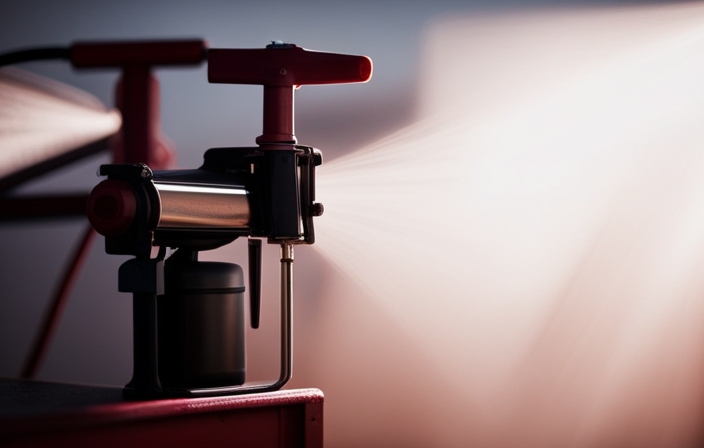
Adjusting an airless paint sprayer is like tuning a musical instrument. Just as a musician fine-tunes strings and keys for a harmonious sound, I will guide you through the process of fine-tuning your airless paint sprayer to achieve flawless results.
In this article, I will break down the components of an airless paint sprayer, share safety precautions, and provide detailed instructions for adjusting the pressure settings, selecting the right nozzle size, and achieving an even spray pattern. I will also address common troubleshooting issues and offer tips for cleaning and maintaining your sprayer for optimal performance.
With practice and a little know-how, you’ll be able to effortlessly spray paint on various surfaces, transforming your projects into works of art. So, let’s dive in and unlock the secrets of adjusting an airless paint sprayer!
Key Takeaways
- Adjusting the airless paint sprayer is important to achieve the desired width for the project.
- Thoroughly cleaning and maintaining the sprayer after each use is crucial to prevent paint buildup and maximize its lifespan and performance.
- Practice and test sprays are essential to fine-tune techniques, experiment with spraying distances, and troubleshoot any issues.
- Maintaining a consistent distance, smooth and controlled motion, and adjusting the spray pattern and pressure are key tips for efficient and effective spraying.

VEVOR 750W Stand Airless Paint Sprayer, 3000PSI High Efficiency Electric Airless Sprayer, Fine and Even Painting Effect, Handheld Paint Sprayers for Home Interior and Exterior Furniture and Fences
Efficient Painting: Our stand airless paint sprayer is equipped with a powerful 750W motor, capable of delivering up...
As an affiliate, we earn on qualifying purchases.
Understanding the Components of an Airless Paint Sprayer
Now, let’s dive into understanding the components of an airless paint sprayer so that you can confidently tackle any painting project with ease.
The two main components you need to familiarize yourself with are the nozzle and the paint pump. The nozzle is responsible for controlling the spray pattern and flow of paint, and it can be adjusted to achieve different angles for optimal coverage. By adjusting the nozzle angle, you can customize the spray pattern to suit your specific needs.
However, sometimes paint clogs can occur, causing uneven spray patterns or complete blockages. To troubleshoot paint clogs, simply remove the nozzle and clean it thoroughly with warm, soapy water.
Safety precautions before adjusting the sprayer include wearing protective goggles and gloves, as well as ensuring proper ventilation in the work area.
With these components understood and safety measures in place, let’s move on to adjusting the airless paint sprayer for your painting needs.

Graco Airless Paint Sprayer | DIY Designed for Interior or Exterior Projects | TrueCoat One TrueAirless Electric Sprayer 26DTC1
ALWAYS-ON DESIGN – Continuous operation keeps the sprayer primed and ready to spray at all times, so you...
As an affiliate, we earn on qualifying purchases.
Safety Precautions Before Adjusting the Sprayer
First things first, make sure you take the necessary safety precautions before tinkering with your trusty paint spraying machine. Safety should always be a top priority when it comes to paint sprayer maintenance.
Before you even think about adjusting any settings, ensure that you’re wearing appropriate protective gear such as safety goggles, gloves, and a respirator mask. This’ll protect you from any potential hazards like paint fumes or accidental spray back.
It’s also vital to have a well-ventilated workspace to avoid inhaling any harmful chemicals. Additionally, always handle your equipment with care and follow the manufacturer’s instructions for proper use.
By prioritizing safety and proper equipment handling, you can ensure a smooth and successful paint spraying experience.
Now, let’s move on to adjusting the pressure settings for different surfaces.

InoKraft NEO Airless Paint Sprayer Kit for House Painting, DIY Beginners' Choice with Accessories Storage Space, Lightweight Design, Quick Clean for Home Interior and Exterior Furniture and Fences
【Your DIY Partner】Upgrade your DIY projects with the NEO airless paint sprayer-significantly faster than handheld electric HVLP paint...
As an affiliate, we earn on qualifying purchases.
Adjusting the Pressure Settings for Different Surfaces
To achieve optimal results on various surfaces, you’ll want to fine-tune the pressure settings on your sprayer, ensuring a smooth and even application that effortlessly glides across each unique texture. Here are three key ways to adjust the pressure settings for different surfaces:
-
Adjusting Pressure for Textured Surfaces: Textured surfaces, such as stucco or brick, require higher pressure settings to ensure that the paint reaches all the crevices and uneven areas. Increase the pressure gradually until you achieve the desired coverage without any splattering.
-
Adjusting Pressure for Delicate Surfaces: Delicate surfaces, like wood or soft materials, require lower pressure settings to avoid causing damage or overspray. Start with a lower pressure setting and gradually increase it until you achieve a smooth and even application without any visible marks or streaks.
-
Choosing the Right Nozzle Size for Your Project: Now that you have adjusted the pressure settings, it’s important to consider the nozzle size. This will depend on the type of paint, desired coverage, and surface texture. Using the appropriate nozzle size ensures an even and efficient paint application.
When adjusting the pressure settings, keep in mind the surface texture and delicacy to achieve the best results.
Next, we will discuss choosing the right nozzle size for your project.

WORKPRO 700W Airless Paint Sprayer, 2900PSI High Efficiency Thinning-Free Electric Paint Sprayer with Extension Rod, Paint Sprayer for Home Interior, Exterior, Furniture, Fence & Ceilings
EFFICIENT SPRAY, LESS WORK: Powered by a 700W motor, this airless paint sprayer delivers up to 2900 PSI...
As an affiliate, we earn on qualifying purchases.
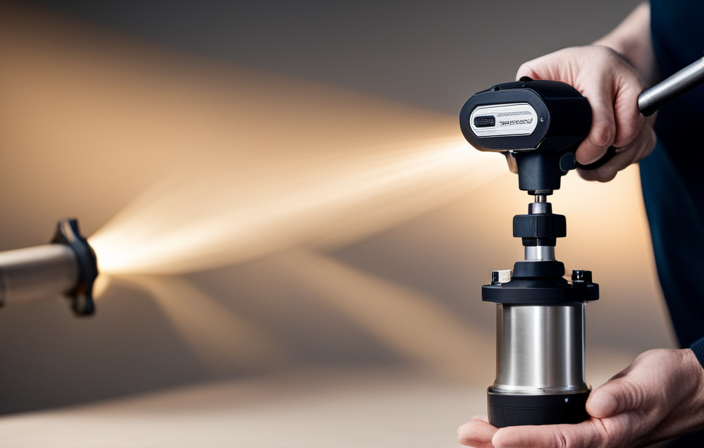
Choosing the Right Nozzle Size for Your Project
For a flawless finish that showcases my attention to detail, selecting the perfect nozzle size is essential to achieving professional results. When it comes to choosing the right nozzle size for my project, I consider two important factors: nozzle maintenance and paint viscosity.
Nozzle maintenance is crucial because a clogged or worn-out nozzle can affect the spray pattern and result in uneven coverage. Regular cleaning and replacing of the nozzle ensure optimal performance.
Additionally, I take into account the paint viscosity. Thicker paints require larger nozzle sizes to accommodate the flow, while thinner paints work best with smaller nozzle sizes. By understanding the importance of nozzle maintenance and considering the paint viscosity, I ensure that my airless paint sprayer is equipped with the appropriate nozzle size for a flawless finish.
Moving on to the next section, adjusting the spray pattern for even coverage…
Adjusting the Spray Pattern for Even Coverage
Achieving a flawless finish that captivates the eye requires mastering the art of manipulating the spray pattern to ensure consistent and even coverage. To achieve this, start by adjusting the nozzle angle. Tilting the nozzle slightly can help achieve a more even distribution of paint.
If you’re experiencing uneven spray, troubleshoot by checking for clogs or obstructions in the nozzle or hose. Cleaning or replacing these components can often solve the issue. Additionally, adjusting the pressure on the sprayer can help control the spray pattern. Experiment with different pressure settings to find the one that provides the most even coverage.
Finally, make sure to maintain a consistent distance from the surface being painted to avoid variations in the spray pattern. By following these steps, you can achieve a professional-looking finish.
Transitioning into the next section, controlling the paint flow for consistent results is equally important in achieving a flawless paint job.
Controlling the Paint Flow for Consistent Results
Mastering the art of manipulating the spray pattern involves skillfully controlling the flow of paint, ensuring consistent and professional results. To achieve this, it’s crucial to understand the importance of paint thickness and maintaining the proper distance between the sprayer and the surface being painted.
The paint thickness affects the flow rate, so it’s essential to follow the manufacturer’s guidelines for thinning the paint if necessary. Additionally, adjusting the pressure on the sprayer will help control the flow of paint. Start with a low-pressure setting and gradually increase it until you achieve the desired flow.
Maintaining a consistent distance from the surface is equally important. Too close, and the paint may run or create uneven coverage, while being too far will result in a spotty finish.
By mastering these techniques, you can achieve professional-looking results with your airless paint sprayer.
Now, let’s move on to troubleshooting common issues with the sprayer.
Troubleshooting Common Issues with the Sprayer
When troubleshooting common issues with the sprayer, it’s important to identify and address any potential problems that may arise during the painting process. One common issue is a clogged nozzle, which can result in an uneven spray pattern or no spray at all.
To troubleshoot this, start by removing the nozzle and cleaning it thoroughly with warm water or a cleaning solution. Use a small brush or toothpick to remove any stubborn clogs.
Another common issue is adjusting the spray width. If the spray pattern is too narrow or too wide, it can lead to an inconsistent finish. To adjust the spray width, refer to the sprayer’s manual for specific instructions on how to modify the settings. This will ensure that you achieve the desired width for your project.
Moving forward to the next section about cleaning and maintaining the sprayer for longevity, it’s important to properly care for your equipment to maximize its lifespan and performance.
Cleaning and Maintaining the Sprayer for Longevity
Now that we’ve addressed common issues with the airless paint sprayer, let’s move on to the crucial topic of cleaning and maintaining the sprayer for longevity. Proper cleaning and maintenance are essential to ensure the optimal performance of your sprayer and to extend its lifespan.
To help you with this, I’ve compiled a list of cleaning tips and maintenance techniques:
-
Cleaning tips:
-
Thoroughly clean the sprayer after each use to prevent paint buildup.
-
Use warm soapy water or a recommended cleaning solution to clean the spray gun, nozzle, and other components.
-
Maintenance techniques:
-
Regularly inspect and replace worn parts, such as seals or filters, to prevent clogs and leaks.
-
Lubricate moving parts to keep them running smoothly.
By following these cleaning tips and maintenance techniques, you can keep your airless paint sprayer in excellent condition.
Now, let’s move on to the next section, where we’ll discuss the importance of practice and test sprays to fine-tune your technique.
Practice and Test Sprays to Fine-tune Your Technique
To enhance your skills and achieve precision, practicing and conducting test sprays are essential steps in refining your technique with the sprayer.
When it comes to practice tips, start by using a piece of cardboard or scrap wood as your testing surface. This will allow you to get a feel for the sprayer’s pressure, speed, and pattern.
Experiment with different spraying distances to see how it affects the coverage and finish. Troubleshooting techniques can also be practiced during these test sprays. For example, if you notice any clogs or uneven spray patterns, you can adjust the pressure or clean the nozzle accordingly.
By regularly practicing and fine-tuning your technique, you’ll become more proficient in handling the airless paint sprayer. This will set you up for success when it comes to efficient and effective spraying techniques in the subsequent section.
Tips and Tricks for Efficient and Effective Spraying
Master the art of spraying with finesse and achieve flawless results by implementing these expert tips and tricks that’ll make your technique shine like a shooting star.
When it comes to spraying techniques, one key tip is to maintain a consistent distance between the sprayer and the surface being painted. This ensures an even application and prevents streaks or uneven coverage.
Additionally, it’s important to keep the sprayer moving in a smooth and controlled motion, overlapping each pass slightly to avoid any missed spots.
Another trick is to adjust the spray pattern and pressure according to the surface and desired finish. This can be done by referring to the manufacturer’s instructions or experimenting on a test surface.
Lastly, don’t forget regular paint sprayer maintenance. Clean the sprayer thoroughly after each use and inspect for any clogs or damage that may affect performance.
By following these tips and tricks, you’ll be able to spray efficiently and achieve professional-looking results every time.
Frequently Asked Questions
Can I use any type of paint with an airless paint sprayer?
Yes, you can use various types of paint with an airless paint sprayer. Latex, oil-based, and even thicker coatings like elastomeric paints are suitable. To achieve a smooth finish, use the right tip size, maintain proper pressure, and apply even coats.
How often should I clean and maintain my airless paint sprayer?
Cleaning and maintaining your airless paint sprayer regularly is crucial for optimal performance. Not only does it extend the lifespan of your equipment, but it also ensures a smooth and even paint application. To clean the nozzle, follow these steps: [Provide detailed steps on how to properly clean the nozzle of an airless paint sprayer]. By keeping up with these maintenance tasks, you can enjoy the benefits of using an airless paint sprayer for a long time.
Can I adjust the spray pattern while the sprayer is in use?
Yes, you can adjust the spray pattern while the sprayer is in use. If you’re experiencing issues with the spray pattern, troubleshooting steps can be taken to identify and resolve the problem.
What safety precautions should I take when using an airless paint sprayer?
When using an airless paint sprayer, it is important to follow safety measures and use recommended equipment. This includes wearing protective clothing, goggles, and a respirator, as well as ensuring proper ventilation in the workspace.
How do I troubleshoot a clogged nozzle on my airless paint sprayer?
Wondering how to unclog a nozzle on your airless paint sprayer? Don’t worry, I’ve got you covered! With the right troubleshooting techniques and unclogging methods, you’ll have that nozzle clear in no time.
Conclusion
In conclusion, mastering the art of adjusting an airless paint sprayer is a skill that can greatly enhance your painting projects. By understanding the components, following safety precautions, and making precise adjustments, you can achieve professional results with ease.
Just like a conductor fine-tuning an orchestra, adjusting the pressure settings, choosing the right nozzle size, and adjusting the spray pattern will create a harmonious flow of paint, resulting in even coverage and a flawless finish.
So, practice, experiment, and unleash your inner artist with confidence and precision.