Have you ever wondered how to replace a filter in a Campbell Hausfeld airless paint sprayer? Look no further! In this article, I will guide you through the necessary steps to change the filter in your paint sprayer, ensuring it performs at its optimal level.
With just a few simple tools and materials, you’ll be able to easily maintain your sprayer and keep it running smoothly. From turning off and disconnecting the sprayer to locating and removing the old filter, I’ll provide you with detailed instructions to make the process a breeze.
And don’t worry, I’ll also cover cleaning the filter housing, reassembling it, and reconnecting and testing the paint sprayer. Plus, I’ll give you tips on properly disposing of the old filter, as well as the importance of regularly checking and replacing filters.
So, let’s get started on this DIY adventure and keep your Campbell Hausfield airless paint sprayer in top shape!
Key Takeaways
- Regularly check and replace filters to ensure optimal performance and maintain a consistent and even spray pattern.
- Properly dispose of old filters to prevent negative environmental impact by checking with local waste management facilities or recycling centers for disposal instructions.
- Wear gloves when handling old filters to protect hands from residue and avoid touching skin or eyes.
- Seal old filters in a bag to prevent leakage and contamination before storing them.
Gather the Necessary Tools and Materials
Now, let’s get started by gathering all the tools and materials you’ll need to change the filter in your Campbell Hausfield airless paint sprayer.
The tools needed for this task include a screwdriver, a clean cloth or towel, and a replacement filter specifically designed for your paint sprayer model. It’s important to use the correct filter to ensure optimal performance. To find the right replacement, refer to the user manual or contact the manufacturer.
Once you have these tools ready, we can proceed to the next step by turning off and disconnecting the paint sprayer. It’s crucial to ensure the sprayer is completely powered down and disconnected from any power source before proceeding with the filter replacement.
Turn Off and Disconnect the Paint Sprayer
First, make sure to power down and unplug the paint sprayer, just like a tired truck taking a rest after a long journey. To ensure safety and avoid any accidental mishaps, follow these steps:
-
Cleaning the paint sprayer nozzle is essential before changing the filter. Remove any excess paint or debris by wiping it with a clean cloth or using an appropriate cleaning solution.
-
Troubleshooting common paint sprayer issues, such as clogs or inconsistent spray patterns, can be done before changing the filter. Refer to the manufacturer’s manual for specific troubleshooting instructions.
-
Once the nozzle is clean and any issues are resolved, it’s time to proceed with changing the filter. This step ensures optimal performance and prevents any paint particles from clogging the sprayer.
-
Finally, locate the filter housing on the paint sprayer. This is where the filter is housed and can be easily accessed for replacement.
Now that the paint sprayer is powered down and disconnected, we can move on to the next section about locating the filter housing.
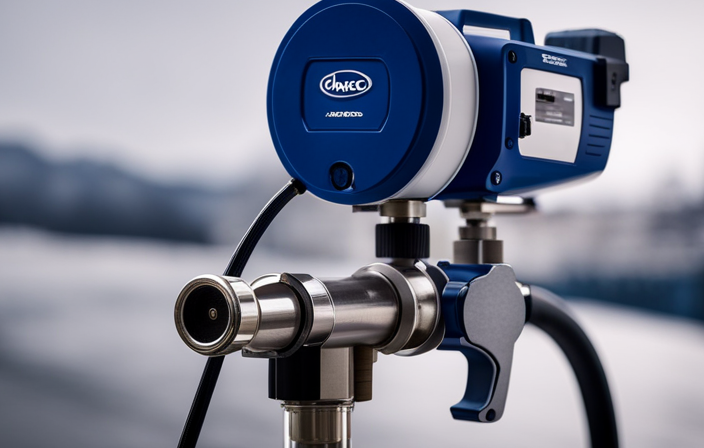
Locate the Filter Housing
To ensure optimal performance and prevent any potential issues, it’s crucial to identify the precise location of the filter housing on the paint sprayer. The filter housing is typically located near the intake tube and is easily accessible.
It’s important to clean the filter housing effectively to maintain proper functionality. Start by disconnecting the airless paint sprayer from the power source and removing any remaining paint from the system. Use a wrench or pliers to unscrew the housing and carefully remove it.
Clean the housing thoroughly using warm soapy water or a cleaning solution recommended by the manufacturer. Be sure to remove any debris or paint buildup that may be obstructing the filter.
Once the housing is cleaned, you can proceed to the next step of removing the old filter.
Remove the Old Filter
Once you’ve located the filter housing, it’s time to get rid of the old, clogged filter to ensure a smooth and efficient painting experience.
To remove the filter, first, make sure the sprayer is turned off and unplugged for safety. Then, locate the filter housing, which is usually situated near the pump assembly. Use a screwdriver or a wrench, depending on the model, to loosen the screws or bolts securing the housing.
Carefully remove the housing cover and set it aside. Next, take out the old filter by gently pulling it out of the housing. Dispose of the old filter properly.
With the old filter removed, you’re now ready to clean the filter housing and prepare it for the new filter installation.
Clean the Filter Housing
After removing the old filter, it’s important to thoroughly clean the filter housing to ensure optimal performance. Cleaning the filter housing is a crucial step in maintaining your Cambell Hausfield airless paint sprayer. By using proper cleaning techniques and following these maintenance tips, you can prolong the life of your equipment and prevent clogs or malfunctions.
To clean the filter housing, start by removing any excess paint or debris. Then, use a soft brush or toothbrush to gently scrub the housing, making sure to reach all the nooks and crannies. Next, rinse the housing with warm water to remove any remaining residue. Finally, dry the housing thoroughly before installing the new filter.
By properly cleaning the filter housing, you can ensure that your Cambell Hausfield airless paint sprayer operates at its best. Now, let’s move on to the next step: installing the new filter.
Install the New Filter
Now that you’ve completed the crucial step of cleaning the filter housing, it’s time to effortlessly install the brand new filter and experience the rejuvenated performance of your equipment. Follow these steps to properly install the filter:
-
Choose the right filter size: Refer to the user manual or consult the manufacturer’s website to determine the correct size for your Campbell Hausfield airless paint sprayer.
-
Remove the old filter: Carefully unscrew the filter housing cap and remove the old filter from its position.
-
Insert the new filter: Take the new filter and place it securely into the filter housing, ensuring it’s properly aligned.
-
Screw on the filter housing cap: Tighten the cap back onto the filter housing, making sure it’s securely fastened.
-
Test the filter: Before proceeding, run a test spray to ensure that the filter is properly installed and functioning correctly.
With the new filter installed, you’re now ready to reassemble the filter housing and continue with the next steps of the process.
Reassemble the Filter Housing
To put everything back together, make sure all the pieces of the filter housing fit snugly and securely. Start by placing the filter element into the housing, ensuring it’s properly aligned.
Then, carefully slide the filter housing cover over the filter and align the tabs or screws to secure it in place. Tighten the screws or snap the tabs shut, making sure they’re fastened securely.
Once the filter housing is reassembled, take a moment to troubleshoot common filter problems such as leaks or loose connections. Check for any signs of damage or wear on the housing and replace any faulty parts if necessary.
Finally, you’re ready to reconnect and test the paint sprayer to make sure everything’s working properly.
Reconnect and Test the Paint Sprayer
Once you’ve successfully reassembled the filter housing, it’s time to reconnect and put your paint sprayer to the test. Before reconnecting, ensure that the sprayer is powered off and unplugged. To reconnect, follow these steps:
- Align the filter housing with the sprayer unit and firmly push them together until they lock into place.
- Secure the housing by tightening the screws or clamps, ensuring a snug fit.
- Once the filter housing is securely attached, plug in the paint sprayer and turn it on.
Now, it’s time to test the paint sprayer to ensure everything is working properly. Follow these troubleshooting techniques:
- Fill the paint reservoir with water and adjust the pressure settings according to the manufacturer’s instructions.
- Squeeze the trigger to release the water, checking for any leaks or irregularities in the spray pattern.
- If everything looks good, you’re ready to start your painting project.
Remember, before moving on to the next step, properly dispose of the old filter to maintain the efficiency of your paint sprayer.
Properly Dispose of the Old Filter
When it comes to disposing of the old filter, you’ll want to make sure you handle it with the utmost care, treating it like the delicate treasure it is.
Improper filter disposal can have a negative environmental impact, so it’s crucial to follow the proper steps. Start by wearing gloves to protect your hands from any residue on the filter.
Carefully remove the old filter from the paint sprayer, avoiding any contact with your skin or eyes. Place it in a sealed bag to prevent any potential leakage or contamination.
Check with your local waste management facility or recycling center for specific instructions on how to dispose of the filter properly.
Remember, regularly checking and replacing filters is essential for optimal performance.
Now, let’s move on to the next section about regularly checking and replacing filters for optimal performance.
Regularly Check and Replace Filters for optimal performance
After properly disposing of the old filter, it’s essential to regularly check and replace filters in your Cambell Hausfield airless paint sprayer for optimal performance. Maintaining clean and functioning filters is crucial to ensure a consistent and even spray pattern, prevent clogs, and extend the lifespan of your equipment.
Neglecting filter maintenance can result in poor paint coverage, uneven application, and potential damage to the sprayer. To emphasize the importance of regular maintenance, here are two key points to consider:
-
Preventing Clogs: Regularly replacing filters prevents the accumulation of debris and paint particles, which can clog the sprayer and disrupt the paint flow.
-
Ensuring Efficiency: A clogged filter can strain the pump and result in decreased pressure, affecting the sprayer’s overall performance.
By recognizing the signs of a clogged filter, such as reduced pressure, spitting or uneven spray, and frequent clogging at the nozzle, you can stay proactive in maintaining your Cambell Hausfield airless paint sprayer.
Frequently Asked Questions
How often should I clean the filter housing?
I clean the filter housing of my airless paint sprayer regularly to ensure optimal performance. Signs of a dirty filter include reduced spray pattern, clogging, and uneven paint application. Regular maintenance is important for efficient operation.
Can I use any type of filter in my Campbell Hausfeld airless paint sprayer?
No, you cannot use any type of filter in your Campbell Hausfeld airless paint sprayer. It is essential to ensure filter compatibility to maintain proper filter maintenance and avoid any potential damage to the sprayer.
What should I do if the paint sprayer doesn’t turn on after reassembling the filter housing?
If the paint sprayer doesn’t turn on after reassembling the filter housing, there may be some common filter problems. Troubleshooting tips include checking for proper assembly, ensuring the filter is clean, and verifying electrical connections are secure.
Is it necessary to wear protective gloves while handling the old filter?
Wearing protective gloves is crucial during filter replacement. Not only do they shield your hands from harmful chemicals, but they also prevent contamination. Handling the old filter without gloves can expose you to potential health risks.
How do I know if the filter is properly installed in the filter housing?
To properly install a filter in a Campbell Hausfeld airless paint sprayer, ensure it is securely seated in the filter housing. Check for any gaps or loose connections. Troubleshoot common issues by referring to the user manual or contacting customer support.
Conclusion
In conclusion, changing the filter in a Campbell Hausfeld airless paint sprayer is a crucial step to maintain optimal performance. By following the steps outlined in this article, you can ensure that your paint sprayer continues to operate efficiently.
Remember to regularly check and replace filters to avoid any potential issues. With the right tools and materials, and by properly cleaning and reassembling the filter housing, you can ensure a smooth and uninterrupted painting process.
So, don’t wait any longer, grab your tools and get ready to experience the satisfaction of a well-maintained paint sprayer.