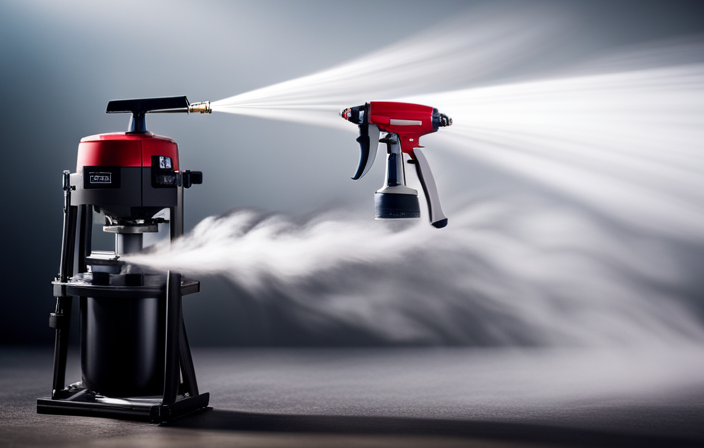
Choosing the right tip for your airless paint sprayer when working on a boat is crucial for achieving a polished and expert finish. The phrase, ‘the devil is in the details,’ rings true in this scenario, as the tip size plays a significant role in determining the overall quality of your paint job.
Having worked with airless paint sprayers for years, I can confidently guide you through the process of selecting the perfect tip. In this article, I will share my knowledge, precise techniques, and experienced tips to help you make the best decision for your boat painting project.
We will explore factors such as understanding different tip sizes, considering the type of paint, evaluating the surface area, and achieving the desired finish. Additionally, I will emphasize the importance of testing different tips, seeking expert advice, and proper cleaning and maintenance.
So, let’s dive in and ensure your boat shines with a flawless coat of paint.
Key Takeaways
- Seeking expert advice is crucial for choosing the right tip for an airless paint sprayer for boats.
- Expert recommendations save time and effort by selecting the most efficient tip size for boat painting.
- Expert advice ensures high-quality results by suggesting tips that minimize overspray and paint wastage.
- Proper cleaning and maintenance of the tip is essential for optimal performance and smooth paint application.

TICONN Anti-Fog Safety Glasses for Men and Women, ANSI Z87.1 Scratch Proof Eye Goggles with Adjustable Arms and UV Protection (Clear, 1PK)
- Durable Polycarbonate Construction: Impact-resistant and lightweight design
- Anti-Fog and UV Protection: Scratch-resistant, clear vision, blocks 99.9% UV
- Adjustable and Comfortable Fit: Rubber frame, nose pads, adjustable temples
As an affiliate, we earn on qualifying purchases.
Understanding the Different Tip Sizes
So, you’re ready to tackle painting your boat with an airless paint sprayer, but do you know the importance of understanding the different tip sizes?
Choosing the right tip size is crucial for achieving the desired finish and ensuring optimal paint application. Different tip materials, such as stainless steel or tungsten carbide, offer varying levels of durability and performance.
Additionally, considering the proper tip angle is essential for achieving the desired spray pattern. A wider angle is suitable for large surfaces, while a narrower angle is better for detailed work.
By understanding the different tip sizes and materials, you can ensure that you select the most appropriate one for your boat painting project.
Now, let’s consider the type of paint being used for further guidance.
Consider the Type of Paint Being Used
When it comes to painting your boat, it’s important to think about the specific type of paint you’re using – like choosing the right kind of brush for a masterpiece painting. The type of paint being used will determine the size of the tip you should use on your airless paint sprayer. Here are three factors to consider:
-
Type of Primer: Different types of paint require different primers. Make sure to use the appropriate primer for your specific paint type to ensure proper adhesion and longevity.
-
Drying Time: Some paints have longer drying times than others. If you’re using a paint with a quick drying time, a smaller tip size may be more suitable to achieve a smooth finish before the paint dries.
-
Coverage Area: Determine the surface area to be painted in order to select the appropriate tip size. A larger surface area may require a larger tip size to cover the space efficiently.
Considering these factors will help you choose the right tip for your airless paint sprayer when painting your boat.
Transitioning into the next section, let’s now determine the surface area to be painted.
Determine the Surface Area to be Painted
To accurately determine the surface area you’ll need to paint, imagine measuring the length and width of your boat and visualizing the size of the area that requires a fresh coat of paint. Calculating the dimensions is crucial in order to purchase the right amount of paint and ensure an even application. One effective method is to break down the boat’s surface into smaller sections and measure each one separately. This will help to account for any irregular shapes or areas that may require additional coats. To assist in this process, consider using a 3 column and 5 row table to record the measurements of each section. By measuring the surface area meticulously, you can accurately estimate the amount of paint needed and ensure a professional-looking finish. Moving forward, evaluating the desired finish will help determine the appropriate tip to use on the airless paint sprayer.
| Section | Length (ft) | Width (ft) |
|---|---|---|
| Bow | 10 | 4 |
| Stern | 8 | 3 |
| Port | 12 | 5 |
| Starboard | 12 | 5 |
| Hull | 30 | 10 |
Transitioning into the subsequent section, evaluating the desired finish will provide insight into the appropriate tip to use on the airless paint sprayer.
Evaluate the Desired Finish
Achieving the desired finish is crucial for creating a professional-looking result that’ll leave a lasting impression. When evaluating finish quality, it’s important to consider the level of smoothness and coverage you desire. Here are some key factors to keep in mind:
- Texture: Determine if you want a smooth or textured finish.
- Gloss: Decide on the level of shine you prefer, whether it’s high gloss, semi-gloss, or matte.
- Color consistency: Ensure that the paint is applied evenly and consistently across the entire surface.
- Adhesion: Evaluate how well the paint adheres to the boat’s surface to avoid premature peeling or chipping.
By considering these factors, you can achieve the desired results and get a flawless finish.
Now, let’s move on to taking into account the sprayer pressure when using an airless paint sprayer for your boat.
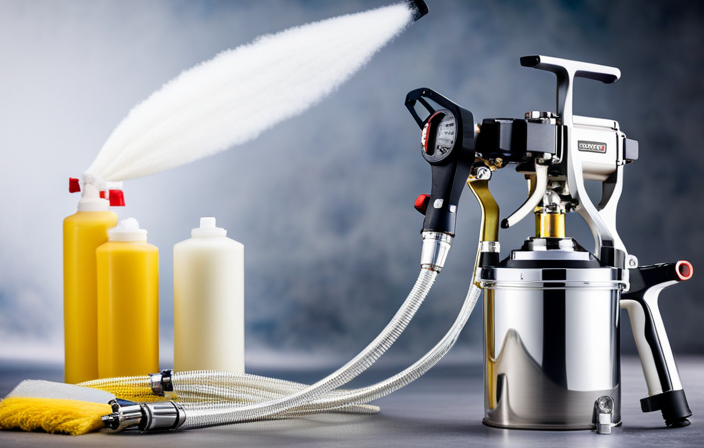
Take into Account the Sprayer Pressure
Don’t forget to factor in the sprayer pressure for that perfect, flawless finish on your boat! Sprayer pressure adjustments play a crucial role in achieving the desired paint application. Too high of a pressure can lead to overspray and uneven coverage, while too low of a pressure can result in a thin coat that may not adhere properly. To ensure optimal results, it is essential to understand the impact of pressure on paint application.
Consider the following table to help guide you in making the right sprayer pressure adjustments:
| Pressure Setting | Impact on Paint Application |
|---|---|
| High | Heavy and thicker coats |
| Medium | Balanced coverage |
| Low | Light and thinner coats |
By adjusting the sprayer pressure based on your desired finish, you can achieve a professional-looking paint job that enhances the appearance and durability of your boat. Now, let’s consider the material of the boat to further refine our approach.
Consider the Material of the Boat
Now that we’ve covered adjusting sprayer pressure, let’s take a moment to consider the boat’s material and how it can impact our painting process.
Choosing the right paint color for your boat is crucial. Not only does it contribute to the aesthetics, but it also plays a role in protecting the boat from the elements. When selecting a color, it’s important to consider the climate and weather conditions the boat will be exposed to.
For example, lighter colors tend to reflect heat and sunlight, which can be beneficial in hot and sunny climates. On the other hand, darker colors may absorb more heat, making them suitable for colder environments.
By considering the boat’s material and the environmental factors, we can ensure that the paint job is not only visually appealing but also durable and long-lasting.
With this in mind, let’s now move on to the next step of our process and test different tips on a small area.
Test Different Tips on a Small Area
To find the perfect spray pattern, try experimenting with different nozzle sizes and shapes on a small patch of the surface, like a painter exploring a new palette of colors. Testing equipment plays a crucial role in achieving optimal results when using an airless paint sprayer for boats.
By trying out alternative methods, such as using different tips, you can determine which one delivers the best coverage and finish. Start by selecting a few different tips, varying in size and shape, and spray a small area of the boat’s surface. Observe how each tip performs, noting the pattern and coverage achieved.
This hands-on approach allows you to fine-tune your technique and select the most suitable tip for the job. Once you have identified the most effective tip, you can confidently proceed with painting the entire boat. Seek expert advice or recommendations to further enhance your painting process.
Seek Expert Advice or Recommendations
Seeking advice or recommendations from experts can greatly enhance your understanding and proficiency in achieving optimal results with an airless paint sprayer for boats. When it comes to using the right tip on your airless paint sprayer, expert recommendations play a crucial role.
Here are three key reasons why seeking expert advice is essential:
-
Knowledge: Experts have a deep understanding of different tips and their suitability for specific applications. They can guide you on the ideal tip size for boat painting, taking into account factors like the type of paint, surface texture, and desired finish.
-
Efficiency: Expert recommendations can help you save time and effort by choosing the most efficient tip. They can provide insights on the spray pattern and coverage, ensuring that you achieve a smooth and even coat in a shorter time.
-
Quality: With expert advice, you can ensure high-quality results. They can suggest tips that minimize overspray, reduce paint wastage, and enhance the overall finish of your boat.
By seeking expert recommendations, you can make informed decisions and improve your overall painting experience.
Next, let’s delve into the proper cleaning and maintenance of the tip.
Proper Cleaning and Maintenance of the Tip
Getting your airless paint sprayer for boats to work its best requires proper cleaning and maintenance of its vital component—the nozzle. To ensure optimal performance, it’s important to follow the recommended cleaning techniques and adhere to a regular maintenance schedule.
After each use, I recommend thoroughly cleaning the tip with warm, soapy water to remove any paint residue. For stubborn clogs, using a small brush or needle can help dislodge the debris. It’s also essential to inspect the tip for any signs of wear or damage and replace it if necessary.
By consistently maintaining and cleaning the tip, you can prevent blockages and ensure a smooth and even paint application. With a well-maintained tip, you can now move on to perfecting your practice and technique for a professional result.
Practice and Technique for a Professional Result
Mastering the art of using an airless paint sprayer for boats is all about honing your skills and technique to achieve a flawless finish. As a professional, I have learned that the key to achieving a smooth finish lies in the proper technique and practice. Here are some tips and tricks that I have gathered over the years:
| Technique | Description |
|---|---|
| Overlapping Strokes | Ensure that each stroke overlaps the previous one by about 50% to avoid streaks and inconsistencies. |
| Consistent Pressure | Maintain a consistent pressure on the trigger throughout the entire painting process to achieve an even coat. |
| Controlled Speed | Move the sprayer at a steady and controlled speed to prevent overspray and ensure uniform coverage. |
| Proper Distance | Maintain the recommended distance between the sprayer and the surface being painted for optimal results. |
By following these professional techniques, you can achieve a flawless finish with your airless paint sprayer for boats. Practice is key, so don’t be discouraged if it takes a few tries to perfect your technique. Happy painting!
Frequently Asked Questions
Can I use the same tip size for any type of paint on my boat?
Yes, different types of paint on a boat may require different tip sizes for optimal results. For painting aluminum boats, I recommend using a tip size of 0.015-0.021 inches for smooth and even coverage.
How do I know the right pressure to use with my airless paint sprayer?
To determine the optimal pressure for your airless paint sprayer, start by considering the type of paint you’ll be using. Adjust the pressure based on the paint manufacturer’s recommendations and test it on a small area before proceeding.
What are the advantages and disadvantages of using different tip sizes?
The advantages of using different tip sizes on an airless paint sprayer are that smaller tips provide more control and finer finishes, while larger tips allow for faster coverage. However, disadvantages include potential overspray and clogging with smaller tips, and less control with larger tips.
Are there any tips specifically designed for painting fiberglass boats?
When it comes to fiberglass boat painting techniques, using the right tip on the best paint sprayer for fiberglass boats is essential. There are specific tips designed for this purpose, ensuring a smooth and even application of paint on the boat’s surface.
Can I use the same tip for both primer and topcoat paint on my boat?
When it comes to painting a boat, using the right tip size is crucial. Did you know that using the wrong tip size can lead to uneven coverage and wasted paint? For primer, a larger tip size is recommended, while for topcoat, a smaller tip size works best.
Conclusion
After considering the different tip sizes, type of paint, surface area, desired finish, sprayer pressure, and testing various tips, it’s crucial to practice and perfect your technique for a professional result. The satisfaction of achieving a flawless paint job on your boat is worth the effort and attention to detail.
So, go ahead and embark on this exciting journey, armed with the knowledge and experience to create a stunning finish that will leave your audience in awe.