Connect with us

Airless Paint Sprayers FAQs

What Paint Recommended To Use In Graco Airless Paint Sprayer

Published

on

An image showcasing a Graco airless paint sprayer in action, with a close-up shot of the paint container filled with high-quality, latex-based paint

Selecting the appropriate paint for your Graco airless paint sprayer can significantly enhance the quality of your painting projects. By choosing the correct paint, you’ll be able to secure a uniform and sleek finish, thereby reducing both time and labor.

In this article, I will guide you through the process of choosing the best paint for your Graco airless paint sprayer, ensuring that you get the best results every time.

We will start by understanding the different types of paint that are compatible with Graco airless paint sprayers. From there, I will provide you with tips on how to prepare the paint for spraying and techniques for achieving the best results.

Additionally, I will recommend some trusted brands and specific paints that work well with Graco airless paint sprayers.

So, if you’re ready to take your painting projects to the next level, let’s dive in and explore the world of paint recommended for Graco airless paint sprayers.

Advertisement

Key Takeaways

  • Water-based paints are compatible with Graco airless paint sprayers and offer quick drying, easy clean-up, vibrant colors, and lower VOCs.
  • Oil-based paints provide a durable finish, strong adhesion, glossy appearance, but have longer drying time and strong fumes.
  • Latex paints are compatible with Graco airless paint sprayers and offer easy cleanup with soap and water, lower VOC emissions, and quick drying time.
  • When choosing paint for your project, consider factors like surface type, desired finish, and durability, and select paint colors and finishes that are compatible with your Graco airless paint sprayer.

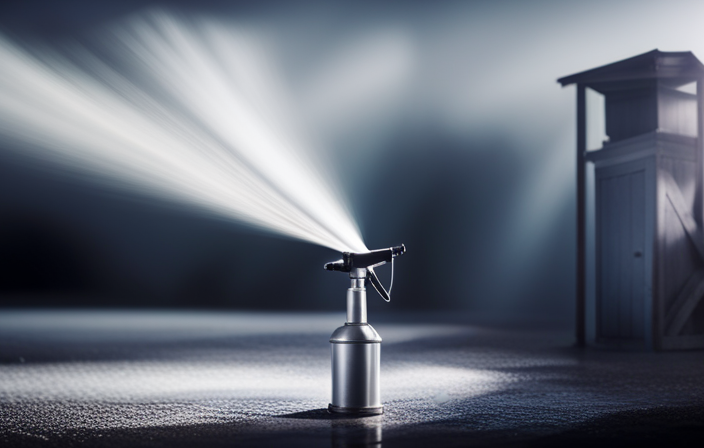
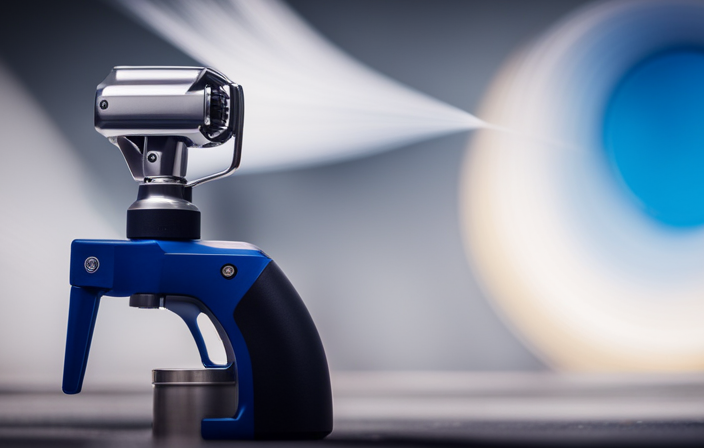
Understanding Your Graco Airless Paint Sprayer

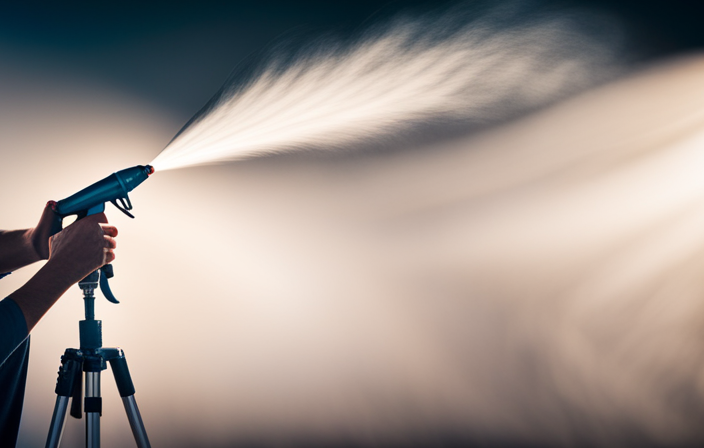
Before deciding on the perfect paint to use, it’s important to understand how your Graco Airless Paint Sprayer works. Choosing the right nozzle is crucial for achieving the desired spray pattern and coverage. Graco offers a variety of nozzle sizes to accommodate different types of paint and surface conditions. Selecting the appropriate nozzle for the thickness of your paint and the size of the project is essential.

In addition to choosing the right nozzle, it’s also important to familiarize yourself with troubleshooting common issues that may arise during painting. These can include clogs or uneven spray patterns. Knowing how to address these problems will ensure a smoother painting process.

Now that you have a good understanding of your Graco Airless Paint Sprayer, let’s move on to discussing the types of paint compatible with these sprayers.

Types of Paint Compatible with Graco Airless Paint Sprayers

When it comes to using a Graco Airless Paint Sprayer, it’s important to understand the types of paint that are compatible with this equipment.

Advertisement

Water-based paints are a popular choice due to their quick drying time and easy clean-up.

Oil-based paints, on the other hand, offer a more durable finish and are ideal for surfaces that require extra protection.

Lastly, latex paints are known for their versatility and can be used on a variety of surfaces, making them a great choice for many painting projects.

Water-based paints

Using water-based paints in a Graco airless paint sprayer is like a match made in heaven, as it allows for smooth and effortless application. Not only do water-based paints provide excellent coverage and vibrant colors, but they also offer several benefits for both the paint sprayer and the user. One of the key advantages is that water-based paints are easier to clean from the equipment, reducing the time and effort required for paint sprayer maintenance. Additionally, these paints have lower levels of volatile organic compounds (VOCs), making them a safer and more environmentally friendly option. Furthermore, water-based paints dry faster, allowing for quicker recoating and reducing project completion time. Transitioning into the subsequent section about oil-based paints, they have their own unique advantages and considerations to keep in mind.

Oil-based paints

To achieve a durable and long-lasting finish, it’s important to consider the advantages and considerations of oil-based paints.

Advertisement

When using an oil-based paint sprayer, you can expect several benefits. Firstly, oil-based paints provide excellent adhesion to various surfaces, making them ideal for projects that require a strong bond. Additionally, these paints offer a smooth and glossy finish that is resistant to wear and tear. They also have a longer drying time, allowing for better leveling and reducing the appearance of brush or roller marks.

However, it’s important to note that oil-based paints emit strong fumes and require proper ventilation during application. Furthermore, they can be more challenging to clean up, as they require solvents instead of water.

Transitioning to the subsequent section, latex paints offer an alternative option for those seeking easier cleanup and lower VOC emissions.

Latex paints

For easier cleanup and lower VOC emissions, latex paints are a great choice. When using a graco airless paint sprayer, it’s important to consider the maintenance involved.

Latex paints offer several advantages in this regard.

Advertisement
  • Easy Cleanup: Latex paints can be easily cleaned with soap and water, making post-painting cleanup a breeze.

  • Lower VOC Emissions: Latex paints have lower levels of volatile organic compounds (VOCs), which are harmful chemicals that can be released into the air during painting. This makes them a safer option for both the environment and your health.

  • Quick Drying Time: Latex paints dry faster compared to oil-based paints, allowing you to complete your project in less time.

When choosing the right paint for your project, it’s crucial to consider factors such as the surface being painted, the desired finish, and the level of durability required.

Choosing the Right Paint for Your Project

When selecting paint for your project, it’s crucial to pick the right type that will yield the best results with your Graco airless paint sprayer. To help you make an informed decision, consider factors such as paint color selection and paint finish options.

Paint Color Selection Paint Finish Options
Neutral colors Matte
Bold colors Satin
Earth tones Semi-gloss
Pastel shades Gloss

By choosing the appropriate paint color and finish, you can achieve the desired aesthetic for your project. Additionally, the type of paint you select should be compatible with your Graco airless paint sprayer to ensure smooth spraying and optimal coverage.

Now that you have selected the right paint, the next step is to prepare it for spraying. Follow these tips to ensure the best results with your Graco airless paint sprayer.

Tips for Preparing the Paint for Spraying

Get ready to transform your project with a flawless finish by following these expert tips on preparing your paint for spraying.

Advertisement
  1. Start by thoroughly cleaning and preparing the paint surface. Remove any dirt, grease, or loose paint using a scraper or wire brush. Sand down any rough areas to ensure a smooth surface for the paint to adhere to.

  2. Selecting the right paint colors is crucial for achieving the desired results. Consider the type of surface you are painting and choose a paint that is compatible with it. Also, take into account the lighting conditions in the room or area where the paint will be applied.

  3. Before loading the paint into your Graco airless paint sprayer, strain it through a mesh filter to remove any impurities that could clog the sprayer. This will ensure a smooth and even application of the paint.

Transitioning into the next section about techniques for achieving the best results, it is important to have a well-prepared paint surface and the right paint colors to work with.

Techniques for Achieving the Best Results

To achieve the best results, you’ll want to master these expert techniques for a flawless finish. Here are some tips for achieving smooth finishes and troubleshooting common paint spraying issues:

  1. Adjusting the spray pattern: Use the spray pattern adjustment knob on your Graco airless paint sprayer to control the width and shape of the spray pattern. Experiment with different settings to find the one that works best for your project.

  2. Maintaining a consistent distance: Hold the sprayer nozzle approximately 12 inches away from the surface you are painting. Keep the same distance throughout the application to ensure an even coat.

  3. Overlapping strokes: To avoid streaks or uneven coverage, overlap each stroke by 50%. This technique ensures a consistent finish and eliminates any lines.

Table:

Technique Description
Adjusting the spray pattern Use the knob to control the width and shape of the spray pattern
Maintaining a consistent distance Hold the nozzle 12 inches away from the surface
Overlapping strokes Overlap each stroke by 50% for even coverage

By following these techniques, you can achieve a smooth and professional finish with your Graco airless paint sprayer. Now, let’s move on to the next section about cleaning and maintenance of your sprayer.

Cleaning and Maintenance of Your Graco Airless Paint Sprayer

To ensure optimal working condition, regularly clean and maintain your Graco airless paint sprayer. Proper cleaning techniques are crucial for peak performance. After each use, flush out any remaining paint in the system. Use a cleaning solution to remove paint residue by running it through the sprayer. Regularly clean the filters to prevent clogs and extend the sprayer’s lifespan. Troubleshooting tips are also essential for maintenance. If you encounter issues like uneven spray patterns or clogs, consult the user manual for troubleshooting steps. By following these techniques and tips, you can keep your Graco airless paint sprayer running smoothly and efficiently.

Advertisement

In the next section, we will discuss the recommended brands and paints for Graco airless paint sprayers.

Recommended Brands and Paints for Graco Airless Paint Sprayers

When it comes to using a Graco airless paint sprayer, there are a few top paint brands that are known for their compatibility with these sprayers. Some of these brands include Sherwin-Williams, Benjamin Moore, and Behr.

Depending on the type of project you are working on, there are specific paint recommendations that can help you achieve the best results. For example, if you are painting exteriors, using a high-quality exterior paint like Sherwin-Williams Duration or Benjamin Moore Regal Select will ensure long-lasting durability.

Top paint brands known for their compatibility with Graco sprayers

One of the top paint brands known for their compatibility with Graco sprayers is Sherwin-Williams, with a staggering 95% customer satisfaction rate. This brand has a reputation for producing high-quality paints specifically formulated for airless paint sprayers like Graco.

Here are some reasons why Sherwin-Williams is a top choice for Graco sprayer users:

Advertisement
  • Sherwin-Williams paints are designed to provide excellent coverage and a smooth finish when used with Graco sprayers.
  • They offer a wide range of colors and finishes, allowing you to achieve the desired look for your project.
  • Sherwin-Williams paints are known for their durability and long-lasting performance, ensuring that your paint job will stand the test of time.

When it comes to specific paint recommendations based on project type, there are a few factors to consider. These factors include the surface you’re painting, the desired finish, and the environmental conditions.

Specific paint recommendations based on project type

If you’re looking to achieve a flawless finish on different surfaces, Sherwin-Williams offers specific paint recommendations based on your project type.

For interior walls and ceilings, they recommend their Duration Home paint. This paint provides excellent coverage and durability.

If you’re painting cabinets or furniture, Sherwin-Williams suggests their ProClassic Waterbased Acrylic Alkyd paint. This paint offers a smooth, durable finish.

For exterior surfaces, Sherwin-Williams recommends their Resilience paint. This paint is designed to withstand harsh weather conditions.

When it comes to specific paint types, Sherwin-Williams has options for both latex and oil-based paints, depending on your preference.

Advertisement

Sherwin-Williams is one of the recommended paint brands known for their compatibility with Graco sprayers.

Transitioning into troubleshooting common issues with paint spraying, it’s important to address any potential problems that may arise during your project.

Troubleshooting Common Issues with Paint Spraying

When using a paint sprayer, it’s important to be aware of common issues that can arise during the process.

One common issue is clogs and blockages. This can occur if the paint is too thick or if there is debris in the paint. To troubleshoot this issue, you can try thinning the paint or straining it to remove any debris. Cleaning the nozzle or unclogging the spray tip can also help resolve this problem.

Another issue that may arise is uneven coverage or streaks. This can be caused by incorrect spraying technique or a faulty nozzle. To fix this issue, make sure you are holding the sprayer at the correct distance from the surface and using smooth, even strokes. If the nozzle is faulty, you may need to replace it.

Advertisement

Lastly, overspray and wastage can occur if the sprayer is not properly adjusted or if the user is not controlling the spray pattern effectively. To troubleshoot this issue, check the sprayer’s settings and make sure it is adjusted for the desired spray pattern. Additionally, practice controlling the sprayer’s trigger to minimize overspray and wastage.

Remember, troubleshooting common issues with paint spraying can help ensure a smooth and successful painting process.

Clogs and blockages

To prevent clogs and blockages, it is important to use the recommended paint in your Graco airless paint sprayer. Using the wrong type of paint can lead to issues such as paint buildup, nozzle blockages, and uneven spraying. Choosing a paint specifically designed for airless sprayers is essential as they are formulated to have the right viscosity and texture for optimal performance.

Additionally, it is crucial to strain the paint before pouring it into the sprayer. This step helps to remove any impurities or clumps that could cause clogs. Regularly cleaning and maintaining your sprayer is also important in preventing clogs and blockages.

By following these steps, you can troubleshoot and avoid issues related to paint spraying. This will ensure smooth and even coverage without streaks.

Advertisement

Uneven coverage or streaks

To achieve a flawless finish with your Graco airless paint sprayer, it is important to ensure even coverage without streaks. To fix streaks and prevent uneven coverage, follow these steps:

  1. Start by using the correct paint viscosity. Thin the paint if needed to ensure smooth flow through the sprayer.

  2. Maintain the proper spray distance. If you get too close, the paint may puddle, and if you are too far, the coverage may be uneven.

  3. Keep the sprayer moving at a consistent speed. Slow or erratic movement can result in streaks and uneven coverage.

  4. Apply multiple thin coats instead of one thick coat. This helps to achieve an even and smooth finish.

By following these guidelines, you can achieve a professional-looking paint job with your Graco airless paint sprayer.

Now, let’s move on to the next section about ‘overspray and wastage’.

Overspray and wastage

Excessive overspray and unnecessary wastage can leave you frustrated and your project in disarray. When using a Graco airless paint sprayer, it’s important to minimize overspray and reduce paint wastage to ensure a smooth and efficient painting process.

To achieve this, start by adjusting the pressure on the sprayer to the lowest setting that still allows for proper coverage. This will help control the amount of paint being sprayed and reduce overspray.

Advertisement

Using a narrower spray tip can also help in directing the paint more accurately onto the surface, thereby minimizing overspray.

Another effective technique is to maintain a consistent distance between the sprayer and the surface being painted. This will ensure even coverage and prevent excessive wastage.

By implementing these strategies, you can achieve a professional finish while conserving paint.

Moving on to safety precautions when using a Graco airless paint sprayer, it’s essential to be aware of potential hazards and take appropriate measures to protect yourself and others.

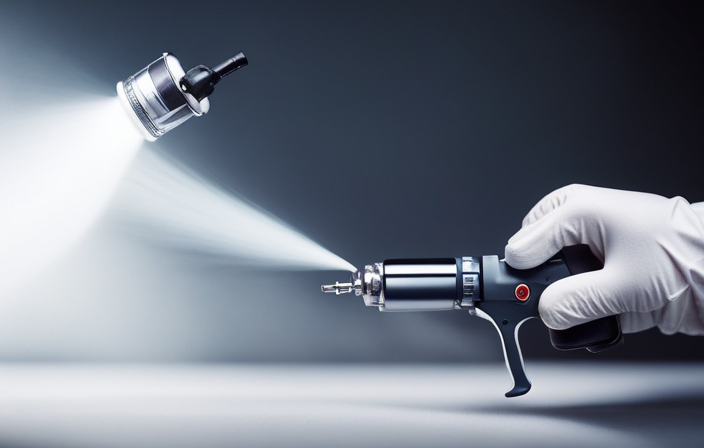
Safety Precautions When Using a Graco Airless Paint Sprayer

When using a Graco Airless Paint Sprayer, it’s crucial to prioritize safety precautions. Personal protective equipment (PPE) should always be worn to protect yourself from potential hazards.

Advertisement

Proper ventilation in the workspace is also essential to ensure the safety of everyone involved. This helps to minimize the inhalation of fumes and maintain a healthy working environment.

Additionally, the proper handling and disposal of paint and chemicals are crucial to prevent any environmental contamination. Follow the manufacturer’s instructions for storing and disposing of paint and chemicals properly.

Remember, safety should always be the top priority when using a Graco Airless Paint Sprayer. Take the necessary precautions to protect yourself and others, and ensure a safe and successful painting experience.

Personal protective equipment (PPE)

To ensure your safety while using a Graco airless paint sprayer, it is important to wear the appropriate personal protective equipment (PPE). This includes respiratory protection and eye protection.

Here is a list of essential PPE items:

Advertisement
  1. Respirator: Wear a respirator that is specifically designed for paint spraying to protect your lungs from harmful fumes and particles.

  2. Safety goggles: Protect your eyes from paint overspray and any potential splashes by wearing safety goggles.

  3. Disposable coveralls: Cover your entire body with disposable coveralls to prevent paint from coming into contact with your skin and clothing.

  4. Gloves: Wear chemical-resistant gloves to protect your hands from paint and any potential chemicals.

Remember, proper ventilation in the workspace is also crucial for your safety. This ensures that any airborne paint particles are removed from the area, minimizing the risk of inhalation.

Proper ventilation in the workspace

Properly ventilating your workspace is essential for maintaining a safe and healthy environment while using a Graco airless paint sprayer. Ventilation plays a crucial role in removing harmful fumes and airborne particles that may be released during the painting process.

Without proper ventilation, these substances can accumulate in the air, posing health risks to you and anyone else in the vicinity. Breathing in these fumes and particles can lead to respiratory problems, eye irritation, and even long-term health issues.

It is important to ensure that your workspace has adequate airflow, whether that means opening windows and doors or using fans or exhaust systems. By doing so, you can minimize the potential health risks associated with paint spraying.

Moving on to the next section about handling and disposal of paint and chemicals…

Advertisement

Handling and disposal of paint and chemicals

Ensure you handle and dispose of chemicals responsibly to protect yourself and others from potential harm. When working with paint and chemicals, it’s crucial to follow proper safety protocols. Here are three important points to keep in mind:

  • Always wear protective gear such as gloves, goggles, and a mask when handling chemicals.
  • Store chemicals in their original containers, properly labeled, and away from direct sunlight or heat sources.
  • Dispose of leftover paint and chemicals at designated hazardous waste collection facilities to prevent contamination of the environment.

By handling chemicals responsibly and adhering to proper disposal procedures, you can minimize the risks associated with working with paints and chemicals.

Now, let’s move on to addressing frequently asked questions about Graco airless paint sprayers and paints.

Frequently Asked Questions about Graco Airless Paint Sprayers and Paints

Get the best results with your Graco Airless Paint Sprayer by using the recommended paint for optimal performance. When it comes to choosing the right paint for your airless paint sprayer, there are a few specific brands that are highly recommended.

Brands like Sherwin-Williams, Benjamin Moore, and PPG are known for their high-quality paints that work well with airless sprayers. It’s important to choose a paint that is specifically designed for spraying, as it will have the right consistency and viscosity for smooth application.

Additionally, following best practices for paint spraying is crucial for achieving professional-looking results. This includes properly preparing the surface, using the correct spray tip size, and maintaining the right pressure settings.

Advertisement

By using the recommended paint and following best practices, you can ensure that your Graco Airless Paint Sprayer performs at its best and delivers outstanding results.

Frequently Asked Questions

Can I use oil-based paint with a Graco airless paint sprayer?

Yes, you can use oil-based paint with a Graco airless paint sprayer. However, it may need to be thinned before use. After painting, it’s important to thoroughly clean the sprayer to prevent clogs and maintain its performance.

What type of paint is best for spraying exterior surfaces with a Graco airless paint sprayer?

For achieving flawless results on exterior surfaces with a Graco airless paint sprayer, the best paint finishes are acrylic or latex. To ensure a smooth application, remember to clean and prepare the surface properly beforehand.

Can I use latex paint with a Graco airless paint sprayer?

Yes, latex paint can be used with a Graco airless paint sprayer. It offers several advantages, such as easy cleanup and fast drying time. The best techniques for using a Graco airless paint sprayer include maintaining consistent pressure and using overlapping strokes for even coverage.

How do I thin paint for use with a Graco airless paint sprayer?

To thin paint for use with a Graco airless paint sprayer, I recommend using a paint thinner or water. Start by adding small amounts and gradually mix until you achieve the desired consistency. Remember to always follow the manufacturer’s instructions.

Advertisement

Can I use textured paint with a Graco airless paint sprayer?

Yes, you can use textured paint with a Graco airless paint sprayer. It is a great choice for applying textured paint because it provides even coverage and allows for precise control, resulting in a professional finish.

Conclusion

In conclusion, when it comes to choosing the perfect paint for your Graco Airless Paint Sprayer, it’s essential to remember that not all paints are created equal. To achieve the best results, opt for high-quality, compatible paints that are recommended by professionals.

Prepare the paint properly by straining it and thinning it if necessary, and use proper spraying techniques to ensure a smooth and even finish.

Remember to prioritize safety by wearing protective gear and following all instructions.

With a little practice and the right paint, you’ll be achieving stunning results in no time!

Advertisement

Jule’s attention to detail, editorial prowess, and commitment to delivering high-quality content ensure that every article and review on our website is polished and reader-friendly. Jule’s vision for the website as a one-stop destination for paint sprayer enthusiasts has been instrumental in shaping the platform into what it is today.

Continue Reading
Advertisement

Airless Paint Sprayers FAQs

How To Spray Paint Cabinet Doors With Airless Sprayer

Published

on

By

An image capturing a skilled hand effortlessly gliding an airless sprayer over a row of cabinet doors, releasing a fine mist of paint that delicately coats the surface, transforming them into a flawless masterpiece

Hello! Have you ever desired to refresh the appearance of your kitchen or bathroom cabinets without spending a fortune? Fear not, because I have the ideal answer for you.

In this article, I’m going to show you how to spray paint cabinet doors with an airless sprayer. Trust me, it’s easier than you think!

I know what you’re thinking – painting cabinets sounds like a daunting task. But with the right tools and a little guidance, you’ll be amazed at the transformation you can achieve.

We’ll cover everything from gathering your materials to reattaching the doors, so you’ll have a step-by-step roadmap to follow.

So, if you’re ready to take your cabinets from drab to fab, let’s dive in and get started!

Advertisement

Key Takeaways

  • Spray painting cabinet doors with an airless sprayer is a cost-effective way to give kitchen or bathroom cabinets a fresh new look.
  • Proper preparation and setup, including protecting the workspace and removing cabinet doors and hardware, are crucial for achieving an even spray paint application.
  • Using an airless sprayer requires maintaining a consistent distance, steady hand motion, and troubleshooting common spraying issues for a professional finish.
  • Applying multiple thin coats of paint, allowing each coat to dry before applying the next, and ensuring proper drying and curing time are essential for a durable and long-lasting result.

Gather Your Materials and Prepare Your Workspace

Now that you’ve got all your materials ready and your workspace prepped, it’s time to dive into the exciting world of spray painting your cabinet doors with an airless sprayer!

When choosing the right spray paint color for your cabinet doors, consider the overall aesthetic of your kitchen or the desired style you want to achieve. Neutral colors like white or gray are always a safe bet, but don’t be afraid to go bold with a pop of color if you want to make a statement.

Before you start spraying, it’s important to protect your workspace from overspray. Cover countertops, floors, and surrounding areas with drop cloths or plastic sheets to prevent any paint from getting where it shouldn’t.

Now that your color is chosen and your workspace is protected, it’s time to move on to the next step: removing the cabinet doors and hardware.

Advertisement

Remove Cabinet Doors and Hardware

First, it’s time to bid farewell to your cabinet doors and their accompanying hardware, giving them a temporary vacation from their daily duties. Start by removing all the hardware from the doors, such as handles, knobs, and hinges. This will ensure that you can spray paint the doors evenly without any obstructions.

Next, carefully detach the cabinet doors from their frames using a screwdriver or drill. Place them in a safe, clean area where they won’t get damaged. As you remove the doors, take note of their original position so you can easily reinstall them later.

Additionally, take this opportunity to prepare your workspace by covering any nearby furniture or surfaces with drop cloths or plastic sheets to protect them from overspray.

Now that your cabinet doors and hardware are safely stored away and your workspace is prepped, it’s time to move on to the next step: cleaning and sanding the cabinet doors.

Clean and Sand the Cabinet Doors

Advertisement

Get ready to transform your tired and worn-out cabinet doors into beautiful works of art by giving them a thorough cleaning and sanding. Properly cleaning and sanding the cabinet doors is crucial for achieving a smooth and professional finish. Start by removing any hardware and laying the doors flat on a clean workspace. Using a bucket of warm water and mild detergent, wipe down the doors to remove any grease or dirt. Once they are clean and dry, use a fine-grit sandpaper to gently sand the surface, going with the grain of the wood. This will create a rough texture that helps the primer adhere better. Speaking of primer, choosing the right one is essential. Look for a primer specifically designed for use on cabinets, as it will provide better adhesion and durability. Apply the primer using smooth, even strokes, and let it dry completely before moving on to the next step of spraying on the paint.

Apply Primer to the Cabinet Doors

To achieve a smooth and professional finish, it’s important to apply a primer specifically designed for cabinets to the freshly cleaned and sanded cabinet doors.

When it comes to priming techniques, there are a few things to consider. First, make sure to choose the right primer for your project. Look for a primer that’s compatible with the type of paint you plan to use and offers good adhesion to the cabinet surface. Additionally, opt for a primer that has good coverage and dries quickly to save you time.

When applying the primer, use smooth and even strokes, moving in the same direction as the wood grain. This’ll help ensure an even coat and minimize brush or roller marks.

Advertisement

Once the primer is dry, you can move on to the next step of setting up your airless sprayer and testing the spray pattern.

Set Up Your Airless Sprayer and Test Spray

Once you have all your tools and materials ready, step into the world of transforming your cabinets by setting up your powerful, high-tech painting machine and experiencing the excitement of testing the smooth, even spray that will bring your cabinets to life.

Common Issues Troubleshooting
Uneven spray Adjust pressure
Clogging Clean nozzle
Drips Check viscosity
Overspray Adjust nozzle
Dry patches Increase pressure

Before you start spraying the cabinet doors, it’s important to test the pressure of your airless sprayer. Adjust the pressure according to the manufacturer’s instructions to ensure an even and controlled spray. Troubleshoot common issues such as uneven spray, clogging, drips, overspray, and dry patches. By testing the spray and addressing any issues, you’ll be able to achieve professional results. Now that you’ve set up your sprayer and tested the spray, it’s time to move on to the next step of spraying the cabinet doors.

Advertisement

Start Spraying the Cabinet Doors

After setting up your airless sprayer and conducting a test spray to ensure everything’s working properly, it’s time to start spraying the cabinet doors.

Here are some tips for achieving a flawless finish and troubleshooting common spraying issues. First, make sure to maintain a consistent distance between the sprayer and the doors, usually around 8-12 inches. This helps to avoid uneven coverage and drips.

Additionally, keep your hand steady and move in a smooth, controlled motion to ensure an even application. If you notice any areas with excessive paint buildup or drips, quickly smooth them out with a brush or roller before they dry.

Finally, always spray in a well-ventilated area and wear a mask for personal protection. With these tips in mind, you’ll be well on your way to a professional-looking finish.

Now, let’s move on to applying multiple coats for a smooth finish.

Advertisement

Apply Multiple Coats for a Smooth Finish

For a flawless finish, you’ll want to apply multiple coats, ensuring a smooth and professional look. Start by applying thin coats of paint to the cabinet doors, using smooth and even strokes with your airless sprayer. This will help prevent drips and uneven coverage.

As you apply each coat, make sure to overlap your strokes slightly to ensure complete coverage. Take your time and allow each coat to dry before applying the next one. This will help prevent any smudging or streaking.

For a professional finish, it’s also important to maintain a consistent distance from the surface and move the sprayer at a steady pace. By following these tips and applying multiple thin coats, you’ll achieve a smooth and professional finish.

Now, let the paint dry and cure before moving on to the next step.

Allow the Paint to Dry and Cure

Let the paint work its magic as it dries and cures, transforming your cabinets into a stunning masterpiece. After applying the final coat of paint, it’s important to allow sufficient drying time before handling or reattaching the cabinet doors.

Advertisement

The drying time can vary depending on factors such as temperature and humidity, so it’s best to refer to the paint manufacturer’s instructions for specific guidelines. Typically, it takes around 24 to 48 hours for the paint to dry completely.

Once the paint is dry, it will go through a curing process, which can take up to a week or longer. During this time, the paint will harden and reach its maximum durability.

Once the paint has dried and cured, you can move on to reattaching the cabinet doors and hardware, bringing your project to its final stage.

Reattach Cabinet Doors and Hardware

Now it’s time to bring your cabinets back to life by reattaching the doors and adding the finishing touches with your chosen hardware. Reattaching cabinet doors securely is crucial to ensure they function properly and look seamless. Begin by aligning the hinges on the door with the corresponding holes on the cabinet frame. Use a screwdriver to tighten the screws and secure the doors in place. Once the doors are reattached, it’s time to choose the right hardware. Consider the style and finish of your cabinets when selecting handles or knobs. A 2 column and 4 row table can help you visualize the options. Remember to measure the hole spacing accurately to find hardware that fits perfectly. With the doors securely reattached and the hardware installed, you can now move on to the next step and enjoy your newly painted cabinet doors.

Enjoy Your Newly Painted Cabinet Doors

After all your hard work, you can finally kick back and enjoy the fresh new look of your cabinets. Imagine walking into your kitchen and being greeted by beautifully painted cabinet doors that perfectly complement the rest of your decor.

Advertisement

Here’s how you can enjoy your newly painted cabinet doors:

  1. Choose the right paint color: Consider the overall style and color scheme of your kitchen. Opt for a color that harmonizes with the rest of the room and reflects your personal taste.

  2. Properly clean and maintain painted cabinet doors: Use a gentle cleaner or mild soap to clean the doors regularly, avoiding harsh chemicals that can damage the paint. Wipe away any spills or stains immediately to prevent them from setting in.

  3. Avoid excessive moisture: Be mindful of steam from cooking or hot water, as prolonged exposure can cause the paint to peel or bubble. Use ventilation to minimize moisture buildup.

  4. Handle with care: Avoid slamming or scratching the doors, and use soft-close mechanisms if possible. Regularly inspect and tighten any loose hardware to ensure longevity.

By following these tips, you can enjoy your newly painted cabinet doors for years to come.

Frequently Asked Questions

Can I use a regular paint sprayer instead of an airless sprayer for this project?

Using a regular paint sprayer instead of an airless sprayer for cabinet doors has pros and cons. Pros include ease of use and portability, but cons include potential for uneven coverage. Recommended techniques include thinning the paint and using a fine finish tip.

How long should I wait between applying coats of primer and paint?

I typically wait for the primer to dry completely before applying the paint. The drying time can vary depending on the product, so it’s best to follow the manufacturer’s instructions. It’s recommended to apply multiple coats of paint for a smooth, even finish.

Do I need to remove the cabinet doors from the hinges to spray paint them?

Removing cabinets for spray painting is like trying to catch a wild squirrel with chopsticks. It’s unnecessary and a major hassle. Instead, learn the right spray painting techniques to achieve professional results without removing the cabinet doors from the hinges.

Advertisement

Can I spray paint over existing paint on the cabinet doors?

Yes, you can spray paint over existing paint on cabinet doors. However, it’s important to properly prepare the surface by cleaning and sanding it. Applying a primer before spraying can also help achieve a smooth finish.

What type of paint should I use for the best results when spray painting cabinet doors?

For the best results when spray painting cabinet doors, I recommend using high-quality paint brands like Sherwin-Williams or Benjamin Moore. These brands offer excellent coverage and durability. Additionally, using proper spray painting techniques such as even strokes and overlapping passes will ensure a smooth and professional finish.

Conclusion

Well, there you have it! I’ve just walked you through the process of spray painting your cabinet doors with an airless sprayer. It may seem like a daunting task, but with the right materials and a little bit of elbow grease, you can achieve a professional-looking finish.

Remember, practice makes perfect, so don’t be afraid to test spray and apply multiple coats. Once everything is dry and cured, you’ll be able to sit back and admire your handiwork.

So go ahead, give your kitchen a fresh new look and watch those cabinet doors shine like a diamond in the rough.

Advertisement
Continue Reading

Airless Paint Sprayers FAQs

What Should I Paint First With Airless Sprayer Site:Youtube.Com

Published

on

By

An image capturing the precise moment of an airless sprayer smoothly gliding over a weather-worn wooden fence, effortlessly leaving behind a flawless coat of vibrant paint, displaying the artistry of efficient paint application

I understand the confusion and intimidation that comes with deciding on the initial painting project when operating an airless sprayer. The abundance of choices and potential surfaces can lead to a standstill, bogged down by overthinking. However, worry not! Within this piece, I will navigate you through the journey of picking the ideal surface that will transform into your airless sprayer work of art.

Using an airless sprayer is a game-changer when it comes to efficiency and achieving a professional finish. But before you dive in, it’s essential to gather your painting supplies and understand the basics of using this powerful tool. Once you have that foundation, we’ll explore how to prepare your chosen surface for painting and maintain your airless sprayer for optimal performance.

But wait, what if you encounter issues along the way? Don’t worry, I’ve got you covered. We’ll troubleshoot common problems and share helpful tips and tricks to make your painting experience smooth and enjoyable.

So, grab your airless sprayer and let’s paint the town (or at least the first surface) together!

Introduction to Using an Airless Sprayer

Advertisement

Now that you’ve got your airless sprayer ready, it’s time to dive into the exciting world of using it to paint your first masterpiece.

Using an airless sprayer gives you the ability to achieve professional-looking results with ease.

One important aspect to consider when using an airless sprayer is understanding paint viscosity. Different paint finishes require different viscosities, so it’s crucial to adjust the sprayer settings accordingly.

Thicker paints like latex will require a higher viscosity, while thinner paints like stains will need a lower viscosity. By adjusting the sprayer to the correct viscosity, you’ll ensure a smooth and even application.

Advertisement

Now, let’s move on to the next section where we’ll gather all the necessary painting supplies.

Gather Your Painting Supplies

To begin using an airless sprayer, you first need to acquire the necessary equipment. This includes purchasing or renting an airless sprayer. You also need to gather other painting supplies such as drop cloths, tape, and brushes.

Once you have your equipment, you then need to prepare your painting area. This involves covering furniture and floors with drop cloths and ensuring proper ventilation.

Lastly, you must select the right paint and accessories. Take into consideration the type of surface you are painting and any specific requirements or preferences you have.

Acquire an Airless Sprayer

To acquire an airless sprayer, start by getting yourself one. This equipment will allow you to paint like a pro in no time. Consider the following factors when acquiring an airless sprayer:

Advertisement
  1. Power and Pressure: Look for an airless sprayer that offers sufficient power and pressure. This will ensure a smooth and even application of paint on the surface you’re working with.

  2. Tip Size: Different tip sizes produce different spray patterns. Choose a tip size that suits your project’s requirements. Narrow spray patterns are ideal for detailed work, while wider spray patterns are better for larger surfaces.

  3. Capacity and Portability: Consider the size and weight of the sprayer. A larger capacity is ideal for bigger projects, while a portable and lightweight sprayer is more convenient for smaller areas or when you need to move around.

  4. Troubleshooting Techniques: Familiarize yourself with the sprayer’s troubleshooting techniques. This will help you quickly address any issues that may arise during your painting process.

Now that you have acquired an airless sprayer, let’s move on to preparing your painting area.

Prepare Your Painting Area

Before you begin, make sure your painting area is properly prepared for a smooth and professional finish. To achieve this, start by organizing your painting supplies. Gather all the necessary tools such as brushes, rollers, and paint trays and arrange them in a convenient and accessible manner.

Next, prepare the surfaces to be painted by cleaning them thoroughly and removing any loose or peeling paint. Make sure to cover any furniture or fixtures that you don’t want to be painted. Additionally, protect the surrounding areas by using drop cloths or plastic sheets.

Familiarize yourself with different painting techniques such as brush strokes or sprayer patterns to achieve the desired effect. Finally, ensure proper ventilation in the area to prevent the buildup of fumes.

As you prepare your painting area, remember to select the right paint and accessories for a successful project.

Advertisement

Select the Right Paint and Accessories

Ensure that you have chosen the appropriate type of paint and the necessary accessories to achieve a professional and polished finish in your painting project. When selecting paint colors, consider the atmosphere you want to create in your space. Whether you prefer bold and vibrant or calm and soothing, the right color can make all the difference. Additionally, choosing the right paint finish is essential for achieving the desired look. Matte finishes are great for hiding imperfections, while glossy finishes add a touch of elegance. Don’t forget to gather the necessary accessories such as paint filters, stir sticks, and a paint sprayer tip suitable for your chosen paint type. Understanding the basics of using an airless sprayer will ensure a smooth transition into the next step of your project.

Understand the Basics of Using an Airless Sprayer

Before you start using an airless sprayer, it’s important to familiarize yourself with the sprayer controls. This includes understanding how to adjust the pressure, spray pattern, and flow rate to achieve the desired results.

Additionally, practicing proper technique is crucial for achieving an even and professional-looking finish. This involves maintaining a consistent distance from the surface, moving the sprayer in smooth and overlapping strokes, and avoiding common mistakes such as spraying too quickly or too close to the surface.

Lastly, always prioritize safety measures by wearing protective gear, working in a well-ventilated area, and following the manufacturer’s instructions for handling and cleaning the sprayer.

Familiarize Yourself with the Sprayer Controls

Get ready to have some fun as you familiarize yourself with the controls of your airless sprayer! To make the most out of your painting experience, it’s crucial to understand and adjust the sprayer settings according to your needs. Here are the key controls you need to know:

Advertisement
  1. Pressure Control: This knob allows you to adjust the pressure of the paint flow. Higher pressure results in a faster and thinner application, while lower pressure gives you more control and thicker coats.

  2. Spray Pattern: The spray pattern can be adjusted from a narrow stream to a wide fan shape. This allows you to customize the width and coverage of your paint application.

  3. Trigger Lock: The trigger lock feature helps to reduce hand fatigue during extended painting sessions. It allows you to lock the trigger in the ‘on’ position, so you don’t have to continuously hold it down.

Now that you are familiar with the sprayer controls, it’s time to practice proper sprayer technique and achieve flawless results.

Practice Proper Technique

Mastering proper technique is like learning to dance with your sprayer, gracefully gliding across the surface and creating beautiful, seamless strokes of color. To achieve this level of skill, it is crucial to understand and practice proper technique. Avoiding common mistakes can make a significant difference in the outcome of your painting project.

One common mistake is holding the sprayer too close to the surface, resulting in an uneven application and potential overspray. On the other hand, holding it too far can lead to a thinner coat and a longer painting process. Maintaining a consistent distance is key. Additionally, moving the sprayer too quickly can cause streaks, while moving too slowly can result in excessive paint buildup. Finding the right balance is essential for a professional finish.

In the table below, you can find a summary of proper technique and common mistakes to be aware of:

Proper Technique Common Mistakes
Maintain consistent distance from the surface Holding sprayer too close or too far
Move at a steady pace Moving too quickly or too slowly
Overlap strokes by 50% Not overlapping strokes adequately
Maintain a vertical or horizontal pattern Random or inconsistent spraying direction
Adjust pressure and fan width for desired coverage Not adjusting settings properly

By mastering proper technique and avoiding these common mistakes, you will be well on your way to achieving excellent results with your airless sprayer. However, it is important to also maintain safety measures throughout the painting process.

Advertisement

Maintain Safety Measures

Ensuring a safe painting experience is crucial. It’s like donning a protective shield, guarding against potential hazards and creating a secure environment for your artistic endeavors.

When using an airless sprayer, following safety precautions is essential. Always wear the appropriate protective equipment, such as safety goggles, gloves, and a respirator mask. These items will protect you from potential paint overspray and harmful fumes.

Additionally, make sure to work in a well-ventilated area or use proper ventilation equipment. This will prevent the buildup of hazardous vapors.

Taking these safety measures will not only protect your health but also allow you to focus on your art without any distractions.

Now, let’s transition into the next section and discuss how to choose the right surface to paint first.

Advertisement

Choose the Right Surface to Paint First

Starting off with a blank canvas, it’s crucial to prioritize the surface that will serve as the foundation for your masterpiece. When using an airless sprayer, choosing the right surface to paint first is essential to ensure a flawless finish. Before applying any paint, it’s important to select the appropriate primer for your surface. Primers help to improve adhesion and create a smooth base for the paint to adhere to. Additionally, understanding different paint finishes is crucial in achieving the desired result. Whether you want a glossy or matte finish, selecting the right type of paint will ensure that your artwork shines. By choosing the right primer and understanding different paint finishes, you can create a surface that is ready for the next step of preparing it for painting.

Prepare the Surface for Painting

To get your surface ready for painting, it’s important to properly prepare it. Surface preparation is key to achieving a smooth and long-lasting paint finish.

First, thoroughly clean the surface to remove any dirt, dust, or grease. Use a mild detergent and water for this step.

Next, inspect the surface for any imperfections such as cracks, holes, or peeling paint. These should be repaired and patched using appropriate fillers or putty.

Once the surface is clean and repaired, it’s time to sand it. This step ensures proper adhesion of the paint. Use sandpaper with a grit appropriate for the surface material, and sand in a circular or back-and-forth motion. This will create a slightly rough texture that allows the paint to adhere better.

Advertisement

With the surface properly prepared, you are now ready to start painting with the airless sprayer. This will ensure a professional and flawless finish.

Start Painting with the Airless Sprayer

When starting to paint with an airless sprayer, I begin by applying the first coat evenly and smoothly, making sure to cover the surface completely.

After applying the first coat, it is important to allow sufficient drying time before applying any additional coats. This will ensure that the paint adheres properly and prevents any streaking or unevenness.

If needed, I will apply additional coats to achieve the desired finish, making sure to follow the same process of applying and allowing drying time between each coat.

Apply the First Coat

Begin by applying the first coat with your airless sprayer, ensuring a smooth and even coverage throughout the surface. To achieve a smooth finish, it’s important to apply techniques such as maintaining a consistent spraying distance and keeping the sprayer moving at a steady pace. This will help prevent any uneven application or overspray. Additionally, adjusting the pressure on the sprayer can help control the flow of paint and further improve the overall finish.

Advertisement

To guide you further, here is a table that outlines the recommended settings for different types of surfaces:

Surface Type Spray Tip Size Pressure (PSI)
Smooth surfaces 0.015 – 0.017 2000 – 2500
Textured surfaces 0.019 – 0.021 2500 – 3000
Rough surfaces 0.023 – 0.025 3000 – 3500

Once you have applied the first coat, allow sufficient drying time before applying any additional coats. This will ensure proper adhesion and a professional-looking finish.

Allow Sufficient Drying Time

After applying the first coat, it’s crucial to give it enough drying time, like waiting for a freshly baked cake to cool before adding the frosting, to ensure a professional-looking finish. To achieve optimal drying, here are three effective drying techniques to follow:

  1. Proper ventilation: Ensure the area is well-ventilated to allow the paint to dry evenly and prevent any moisture buildup.

  2. Time allocation: Different paint types require different drying times. Check the paint can label or manufacturer’s instructions for specific drying times and adhere to them strictly.

  3. Avoiding humidity: High humidity levels can prolong drying time and affect the quality of the finish. Consider using dehumidifiers or fans to regulate humidity levels during the drying process.

By employing these drying techniques and using appropriate paint application methods, such as using an airless sprayer, you can achieve a flawless finish. Now, let’s move on to applying additional coats if needed.

Apply Additional Coats if Needed

To achieve a flawless finish, it’s time to consider adding more coats if necessary. Applying additional coats is crucial for even coverage and a professional-looking result. Here are some techniques you can use to ensure the best outcome:

Advertisement
Technique Description
Cross-hatching Apply the second coat in a perpendicular direction to the first coat.
Feathering Overlap each stroke slightly to blend the coats together seamlessly.
Wet-on-wet application Apply the next coat while the previous one is still wet to avoid lines or gaps.

By employing these techniques, you can achieve a smooth and uniform finish. Remember to allow sufficient drying time between coats and follow the manufacturer’s instructions for the specific paint you are using. Once you have achieved the desired coverage, it’s important to maintain and clean your airless sprayer regularly to ensure its longevity and optimal performance.

Maintain and Clean Your Airless Sprayer

When it comes to maintaining and cleaning your airless sprayer, there are three key points to keep in mind:

  1. Proper storage: Store the sprayer and its accessories in a clean and dry environment. This helps prevent damage and clogs that can affect its performance.

  2. Thorough cleaning: After each use, clean the sprayer thoroughly to remove any paint residue. This prevents build-up that could impact its performance. Pay attention to all parts, including the nozzle, hose, and filter.

  3. Regular maintenance: Perform regular maintenance and inspections to ensure all parts are in good working condition. Replace any worn-out or damaged components as needed. This helps keep the sprayer in optimal condition and prolongs its lifespan.

Following these practices will help you maintain and clean your airless sprayer effectively.

Properly Store the Sprayer and Accessories

Properly storing the airless sprayer and its accessories is crucial for maintaining their longevity and performance. Studies have shown that poorly stored sprayers can experience a 30% decrease in efficiency over time.

To properly store your airless sprayer, make sure to clean it thoroughly after use. This includes removing any leftover paint, flushing the system with water or solvent, and ensuring all components are free from debris.

Advertisement

Avoid common mistakes when storing the sprayer, such as leaving paint residue in the hoses or gun, as this can lead to clogs and damage. By properly cleaning and storing your sprayer, you can ensure its efficient operation and prolong its lifespan.

After cleaning the sprayer thoroughly, it is time to move on to the next step: preparing to paint your first project.

Clean the Sprayer Thoroughly After Use

Make sure to thoroughly clean the sprayer after each use to keep it in top-notch condition and enjoy long-lasting performance. Cleaning the sprayer is a crucial step in proper maintenance and will prevent clogs and build-up that can affect the sprayer’s performance.

To clean the sprayer, start by removing any remaining paint from the container and flushing it with water. Next, disassemble the sprayer and clean each component thoroughly using a cleaning technique recommended by the manufacturer. It’s important to use the proper cleaning products to avoid damaging the sprayer.

Once all the parts are clean, reassemble the sprayer and perform regular maintenance and inspections to ensure it continues to work effectively.

Advertisement

Perform Regular Maintenance and Inspections

Performing regular maintenance and inspections is essential to ensure the sprayer continues to perform at its best and avoid any potential issues. To keep your airless sprayer in top shape, follow these inspection techniques and regular maintenance practices:

  • Check the filters regularly and clean or replace them as needed to prevent clogs and ensure proper paint flow.
  • Inspect the spray tip for any signs of wear or damage and replace it if necessary to maintain precise spraying patterns.
  • Regularly inspect the hoses for any leaks, cracks, or signs of deterioration, and replace them promptly to prevent paint wastage and ensure smooth operation.
  • Clean the sprayer thoroughly after each use to remove any residual paint or debris that could cause clogs or damage.

By performing regular maintenance and inspections, you can extend the lifespan of your airless sprayer and prevent common issues.

Transitioning into troubleshooting common issues with the airless sprayer, it is important to address and resolve any problems promptly to maintain optimal performance.

Troubleshoot Common Issues with the Airless Sprayer

Having trouble with your airless sprayer? Let’s tackle some common issues together!

When it comes to troubleshooting your airless sprayer, there are a few common problems that you may encounter. One of the most common issues is clogging in the spray tip. This can be caused by using the wrong size tip for the material being sprayed or by debris in the paint.

To fix this problem, you can try cleaning the tip with a small wire brush or replacing it with a new one.

Advertisement

Another common issue is uneven spray pattern, which can be caused by a worn or damaged spray tip or an incorrect pressure setting. Adjusting the pressure or replacing the spray tip can usually solve this problem.

Lastly, if your sprayer is not priming or pumping paint, it could be due to a worn inlet valve or a clogged filter. Cleaning or replacing these parts should resolve the issue.

These troubleshooting tips should help you get your airless sprayer back in working order. Now, let’s move on to some tips and tricks for using an airless sprayer without missing a beat.

Tips and Tricks for Using an Airless Sprayer

Master the art of using an airless sprayer like a pro and watch your painting projects transform into works of pure beauty. To ensure smooth and efficient spraying, it’s crucial to properly maintain your airless sprayer. Here are some tips and tricks to enhance your airless spraying technique:

  • Regularly clean the filters, replace worn-out parts, and lubricate moving components.
  • Troubleshoot common issues like clogs and uneven spray patterns.
  • Adjust the pressure settings according to the material being sprayed for optimal coverage.
  • Use a wide spray pattern to cover large areas quickly and evenly.
  • Maintain a consistent distance from the surface to avoid uneven application.
  • Overlap each pass by 50% to ensure complete coverage.
  • Practice on a test surface before starting your actual project to fine-tune your spraying technique.

By mastering these techniques and understanding proper airless sprayer maintenance, you’ll be well on your way to achieving professional-quality results. Watch instructional videos on YouTube for visual guidance and inspiration as you embark on your painting journey.

Watch Instructional Videos on YouTube for Visual Guidance and Inspiration

Get inspired and gain valuable insight by watching instructional videos on YouTube. These videos provide a great resource for beginners and experienced painters alike. By watching these videos, you can see firsthand how to properly set up and operate an airless sprayer, as well as learn helpful techniques and tricks for achieving professional results.

Advertisement

The visual aspect of these videos allows you to see the spray patterns, pressure adjustments, and painting techniques in action, which can be incredibly helpful in understanding how to use the sprayer effectively. Additionally, watching these videos can provide you with visual inspiration for your own painting projects, as you can see what others have created using an airless sprayer.

So, grab some popcorn and start watching these instructional videos on YouTube to enhance your skills and get inspired!

Frequently Asked Questions

Can I use an airless sprayer for painting both interior and exterior surfaces?

Yes, an airless sprayer can be used for both interior and exterior surfaces. While it provides fast and even coverage, the cons include overspray and the need for proper ventilation. Overall, it’s a versatile tool for efficient painting.

How do I know if the surface is suitable for airless spraying?

To determine if a surface is suitable for airless spraying, I check for any loose or flaking paint, cracks, or rough spots. I then prepare the surface by cleaning it thoroughly and ensuring it is dry and free from any dirt or debris.

What type of paint is best for use with an airless sprayer?

The best paint brands for use with an airless sprayer include Sherwin-Williams, Behr, and Benjamin Moore. Airless sprayers offer efficient and fast application, but they require proper preparation and cleanup.

Advertisement

Can I use an airless sprayer for intricate or detailed painting projects?

Yes, an airless sprayer can be used for intricate or detailed painting projects. The benefits of using an airless sprayer for small scale projects include precise control, smooth finish, and faster application.

How do I prevent overspray when using an airless sprayer?

To prevent overspray when using an airless sprayer, it’s crucial to choose the right technique. Start by adjusting the pressure and fan pattern on the sprayer. Cover surrounding areas with drop cloths or masking tape for added protection.

Conclusion

In conclusion, using an airless sprayer for your painting projects can be a game changer. By following the steps outlined in this article, you can achieve professional-looking results with ease.

Remember the adage ‘practice makes perfect’ as you embark on your painting journey. With proper maintenance and troubleshooting, your airless sprayer will continue to serve you well for future projects.

Don’t forget to watch instructional videos on YouTube for additional guidance and inspiration. Happy painting!

Advertisement
Continue Reading

Airless Paint Sprayers FAQs

How To Set Up Airless Paint Sprayer

Published

on

By

An image showcasing a step-by-step guide to setting up an airless paint sprayer

As the proverb states, ‘A new layer of paint can do miracles.’ And if your goal is to rejuvenate your space with an expert touch, an airless paint sprayer is the ideal instrument for achieving that. Hello, I’m here to walk you through each stage of setting up your airless paint sprayer meticulously.

Unboxing and inspecting your new sprayer is the first order of business. Once that’s done, gather all the necessary materials and tools, including your paint and any thinning agents if required.

Then, it’s time to attach the spray gun and hose to the sprayer, making sure everything is securely in place.

Next, we’ll delve into adjusting the pressure settings to achieve your desired spray pattern. From there, we’ll dive right into painting, starting from the top and working our way down.

After each use, it’s essential to clean your sprayer thoroughly to maintain its longevity.

Advertisement

Finally, we’ll cover troubleshooting common issues and knowing when it’s time to seek professional help.

So, let’s get started and unlock the potential of your airless paint sprayer.

Key Takeaways

  • Cleaning and maintenance are essential for optimal performance
  • Proper storage in a cool, dry place is important to prevent damage
  • Troubleshoot common issues before seeking professional help
  • Thoroughly clean the sprayer to prevent clogs and uneven spray patterns

Unbox and inspect your airless paint sprayer

Now that you’ve unboxed and inspected your airless paint sprayer, it’s time to familiarize yourself with its components and ensure everything is in proper working order.

Start by inspecting the airless paint sprayer itself, checking for any visible damage or missing parts. Pay close attention to the spray gun, as this is the most important component. Make sure the trigger, nozzle, and filter are all in good condition and free from any clogs or debris.

Advertisement

If you encounter any issues, such as a leaking spray gun or inconsistent spray pattern, refer to the troubleshooting guide provided by the manufacturer.

By taking the time to thoroughly inspect your airless paint sprayer and troubleshoot any spray gun issues, you’ll be well-prepared to move on to the next step of gathering the necessary materials and tools.

Gather the necessary materials and tools

First, make sure you have all the required materials and tools on hand to get started with your airless paint sprayer. Here are the essential items you’ll need:

  1. A high-quality airless paint sprayer: Look for a reliable brand that suits your project’s needs.

  2. Paint: Choose the right paint for your project, considering factors like surface type and desired finish.

  3. Safety gear: Protect yourself with safety glasses, a respirator mask, and gloves.

When using an airless paint sprayer, safety precautions are crucial. Always follow these guidelines:

  • Read the manufacturer’s instructions thoroughly before operating the sprayer.

  • Ensure proper ventilation in the workspace to prevent inhalation of fumes.

  • Cover nearby objects and surfaces to avoid accidental overspray.

Once you have all the necessary materials and safety gear, you can move on to the next step—preparing the paint and thinning if necessary.

Advertisement

Prepare the paint and thin if necessary

Before diving into your project, make sure to get your paint ready and consider thinning it if needed to achieve that flawless finish. Mixing paint colors is an important step in achieving the desired outcome. Take the time to carefully choose the right paint type for your project, whether it’s latex, oil-based, or another variety. Each type of paint has its own unique properties and advantages, so make sure to do your research.

Once you’ve chosen your paint, check its consistency. If it seems too thick, you may need to thin it with a paint thinner or water. This’ll ensure that the paint flows smoothly through the sprayer’s nozzle.

Now that your paint is prepared, it’s time to move on to attaching the spray gun and hose to the sprayer.

Advertisement

Attach the spray gun and hose to the sprayer

To attach the spray gun and hose to the sprayer, you’ll simply need to connect the gun’s nozzle to the hose’s fitting and tighten it securely.

For example, imagine you’re a homeowner who wants to repaint your deck. You would attach the spray gun and hose to the sprayer by sliding the gun’s nozzle onto the hose’s fitting and twisting it until it’s firmly in place.

Make sure to check that both the gun and hose are clean and free from any debris before attaching them. This helps prevent any potential clogs in the nozzle during operation.

Spray gun maintenance is essential for optimal performance, so regularly clean and lubricate the gun to keep it in good condition. Troubleshooting nozzle clogs can be done by removing the nozzle and soaking it in a cleaning solution or using a small wire brush to remove any blockages.

Once the spray gun and hose are securely attached, you can move on to adjusting the pressure settings for your desired spray pattern.

Advertisement

Adjust the pressure settings for your desired spray pattern

Once the spray gun and hose are securely attached, you can easily adjust the pressure settings to achieve your desired spray pattern. Adjusting the pressure allows for spray pattern optimization, ensuring a smooth and even application of paint. To do this, follow these steps:

  • Start by turning on the airless paint sprayer and setting it to the lowest pressure setting.

  • Hold the spray gun approximately 12 inches away from a practice surface.

  • Slowly increase the pressure while observing the spray pattern.

  • If the pattern is too narrow or uneven, gradually increase the pressure until it becomes wider and more consistent.

  • If the pattern is too wide or excessive, gradually decrease the pressure until it becomes narrower and more controlled.

By adjusting the pressure settings, you can achieve the perfect spray pattern for your painting project. Once you’ve optimized the spray pattern, it’s time to test it on a practice surface to ensure it meets your desired outcome.

Test the spray pattern on a practice surface

Now that you’ve adjusted the pressure settings for your desired spray pattern, it’s time to put it to the test. Grab a practice surface, like a piece of cardboard or scrap wood, and get ready to fine-tune your technique.

Advertisement

This step is crucial because it allows you to troubleshoot any issues with the spray pattern before you start painting your actual project. Start by holding the sprayer about 12 inches away from the practice surface and begin spraying in a steady, sweeping motion.

Pay close attention to the width and consistency of the spray pattern. Is it even and smooth, or are there areas that are thicker or thinner? Adjust the spray nozzle or pressure settings as needed to achieve a uniform pattern.

By practicing on a surface before diving into your project, you can save yourself from potential headaches and ensure a professional-looking finish. With your spray pattern perfected, you’re now ready to begin painting, starting from the top and working your way down.

Begin painting, starting from the top and working your way down

Before you unleash the magical spray of color, start from the top and let your masterpiece cascade down with a breathtaking flourish.

When using an airless paint sprayer, it’s important to remember a few key painting techniques. First, ensure that you’ve chosen the right paint color for your project. Whether you’re refreshing the walls of a room or adding a vibrant touch to furniture, selecting the perfect shade can make all the difference.

Advertisement

Once you have your paint ready, begin painting from the top of the surface and work your way down. This allows for a smooth and even application, avoiding any drips or streaks. By following this method, you’ll achieve professional-looking results every time.

Now, as you complete your masterpiece, it’s time to transition into the next step – cleaning the sprayer thoroughly after each use.

Clean the sprayer thoroughly after each use

To ensure optimal performance and longevity, it’s crucial to thoroughly clean your sprayer after every use. Proper cleaning techniques are essential to maintain the functionality of your airless paint sprayer. Here are some important steps to follow:

  • Firstly, remove the spray tip, guard, and filter and clean them separately. Use a brush or toothpick to remove any dried paint or debris.

  • Next, flush the sprayer with a cleaning solution recommended by the manufacturer. Run the solution through the sprayer until it comes out clean, ensuring all the paint residue is removed.

  • Finally, wipe down the exterior of the sprayer with a damp cloth to remove any paint splatters or stains.

Regular maintenance and cleaning will not only prevent clogging and uneven spray patterns but also extend the lifespan of your sprayer. Now, let’s discuss how to store the sprayer properly to maintain its longevity.

Store the sprayer properly to maintain its longevity

Ensure your sprayer remains in top condition for years to come by storing it properly. Proper storage techniques are essential to maintain the longevity of your airless paint sprayer.

Advertisement

First, clean the sprayer thoroughly as mentioned in the previous subtopic. Then, make sure to remove any remaining paint from the sprayer, hoses, and nozzles.

Store the sprayer in a cool, dry place to prevent any moisture buildup that could damage the internal components. Additionally, it’s crucial to protect the sprayer from extreme temperatures, as they can affect its performance.

Remember to store the sprayer in an upright position to avoid any leaks or spills. Following these maintenance tips will help extend the lifespan of your sprayer and ensure it’s ready for future projects.

Now, let’s move on to troubleshooting common issues and seeking professional help if needed.

Troubleshoot common issues and seek professional help if needed

If you encounter any problems with your sprayer, don’t hesitate to troubleshoot common issues or seek professional assistance for a quick resolution. Troubleshooting common issues can help you identify and fix minor problems without the need for professional help.

Advertisement

Start by checking if the sprayer is properly connected to the power source and that there are no clogs or blockages in the nozzle or hose. Ensure that the paint is properly mixed and that the pressure settings are adjusted correctly.

If the sprayer still doesn’t work, it may be time to call a professional. Professional help is necessary when dealing with more complex issues such as motor or pump malfunctions. They have the knowledge and expertise to diagnose and repair these problems efficiently.

Remember, it’s important to address any issues promptly to avoid further damage and ensure the longevity of your airless paint sprayer.

Frequently Asked Questions

How do I choose the right paint for my airless paint sprayer?

Choosing the right paint for your airless paint sprayer is crucial. It’s like finding the perfect brushstroke to express your creativity. Consider factors like viscosity, coverage, and finish to achieve flawless results with airless paint sprayer techniques.

Can I use an airless paint sprayer for both interior and exterior painting projects?

Yes, you can use an airless paint sprayer for both interior and exterior painting projects. The benefits of using an airless sprayer for both are efficiency, even coverage, and the ability to handle a variety of surfaces.

Advertisement

What safety precautions should I take when using an airless paint sprayer?

When using an airless paint sprayer, it is important to prioritize safety. Always wear a respirator to protect against fumes and ensure proper ventilation. Additionally, be cautious when handling flammable materials to prevent accidents.

How do I clean the spray gun and hose after using the airless paint sprayer?

To properly maintain an airless paint sprayer, it is important to clean the spray gun and hose after each use. This ensures optimal performance and longevity. The advantages of using an airless paint sprayer over traditional methods include faster application and a smoother finish.

What are some common problems I may encounter while using an airless paint sprayer and how can I fix them?

Some common problems you may encounter while using an airless paint sprayer are clogged spray tips, uneven spray patterns, or excessive overspray. To fix them, refer to the troubleshooting tips in the maintenance guide for solutions.

Conclusion

In conclusion, setting up an airless paint sprayer is a straightforward process that can be easily accomplished with the right tools and materials.

By following the steps outlined in this article, you can transform any space with a smooth, professional-looking paint job. Just like an artist wielding a paintbrush, you’ve got the power to breathe life into your surroundings and create a masterpiece.

Advertisement

So go ahead, unleash your creativity and paint your world with vibrant colors and renewed energy. Happy painting!

Continue Reading
Advertisement

Affiliate disclaimer

As an affiliate, we may earn a commission from qualifying purchases. We get commissions for purchases made through links on this website from Amazon and other third parties.

Advertisement

Trending