I am excited to share my thoughts and perspective on the InoKraft MaXpray M1 Airless Paint Sprayer today. As someone who enjoys DIY projects, I am always looking for tools that can help me achieve professional results without breaking the bank. This paint sprayer has exceeded my expectations. It has simplified my painting projects, making them more efficient and faster than I thought possible.
Pros and Cons
What We Liked
- Transform Your Home Efficiently: With the MaXpray M1, painting medium to large-scale projects becomes a breeze. It is 5x faster than rolling and 12x faster than brushing, saving you valuable time and effort.
- Thinning-Free Application: Say goodbye to the hassle of thinning paint. The MaXpray M1 allows you to dive right into your DIY projects without compromising on quality.
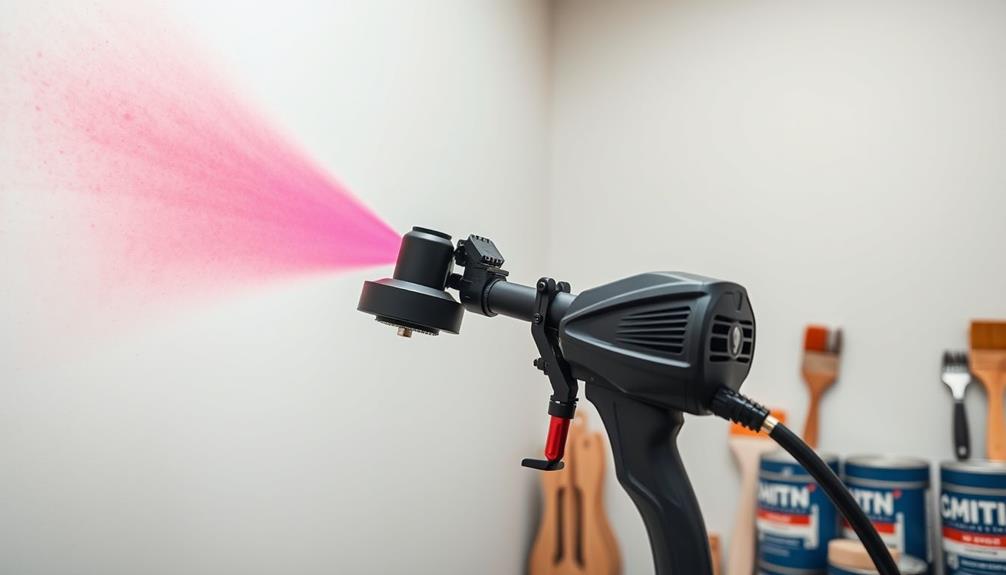
- Excellent Precision and Minimal Overspray: The AtoMax airless spray tip provides fine atomization, resulting in smooth and even finishes. The minimal overspray ensures professional-looking results.
- Versatile and Convenient: Whether you need to paint house exteriors, home interiors, ceilings, fences, decks, or furniture, this sprayer has got you covered. It lets you spray directly from 1 or 5-gallon paint containers, offering ultimate convenience.
- Easy Cleanup and Accessories: The Flush-Ease valve allows for a quick and hassle-free cleaning process, connecting directly to your garden hose. The included accessories, such as tip extension, anti-fog goggles, cleaning kit, and wrench set, enhance your painting experience.
What Can Be Improved
- Learning Curve: While the MaXpray M1 is user-friendly overall, it may take a few practice sprays to get the hang of controlling the pressure and achieving the desired results. However, this is a common learning curve with most paint sprayers.
- Durability: Some users have reported that certain components of the sprayer, such as the o-ring gasket inside the tip, may be prone to damage. However, replacement parts are readily available at an affordable price.

InoKraft MaXpray M3 Plus Airless Paint Sprayer Pro, Advanced Productivity & Efficiency, Robust Design with Convenient Cart, for Extensive Home Interior & Exterior Painting Projects
- Professional-Quality Paint Results: Effortless interior and exterior projects
- Superior Control and Minimal Overspray: AtoMax 515 spray tip for precision
- Thinning-Free, Easy Operation: Spray directly from 1 or 5-gallon buckets
As an affiliate, we earn on qualifying purchases.
Quick Verdict
The InoKraft MaXpray M1 Airless Paint Sprayer has truly transformed my painting experience. It provides professional-level results at a reasonable price. The efficiency, ease of use, and versatile applications make it a must-have tool for any DIYer. While there may be a slight learning curve and durability concerns with certain parts, the overall performance and convenience far outweigh any minor drawbacks.
If you’re looking to upgrade your painting skills and tackle medium to large-scale projects with ease, I highly recommend the InoKraft MaXpray M1 Airless Paint Sprayer. It will save you time and effort while delivering stunning results. You can find more information and purchase the product here.
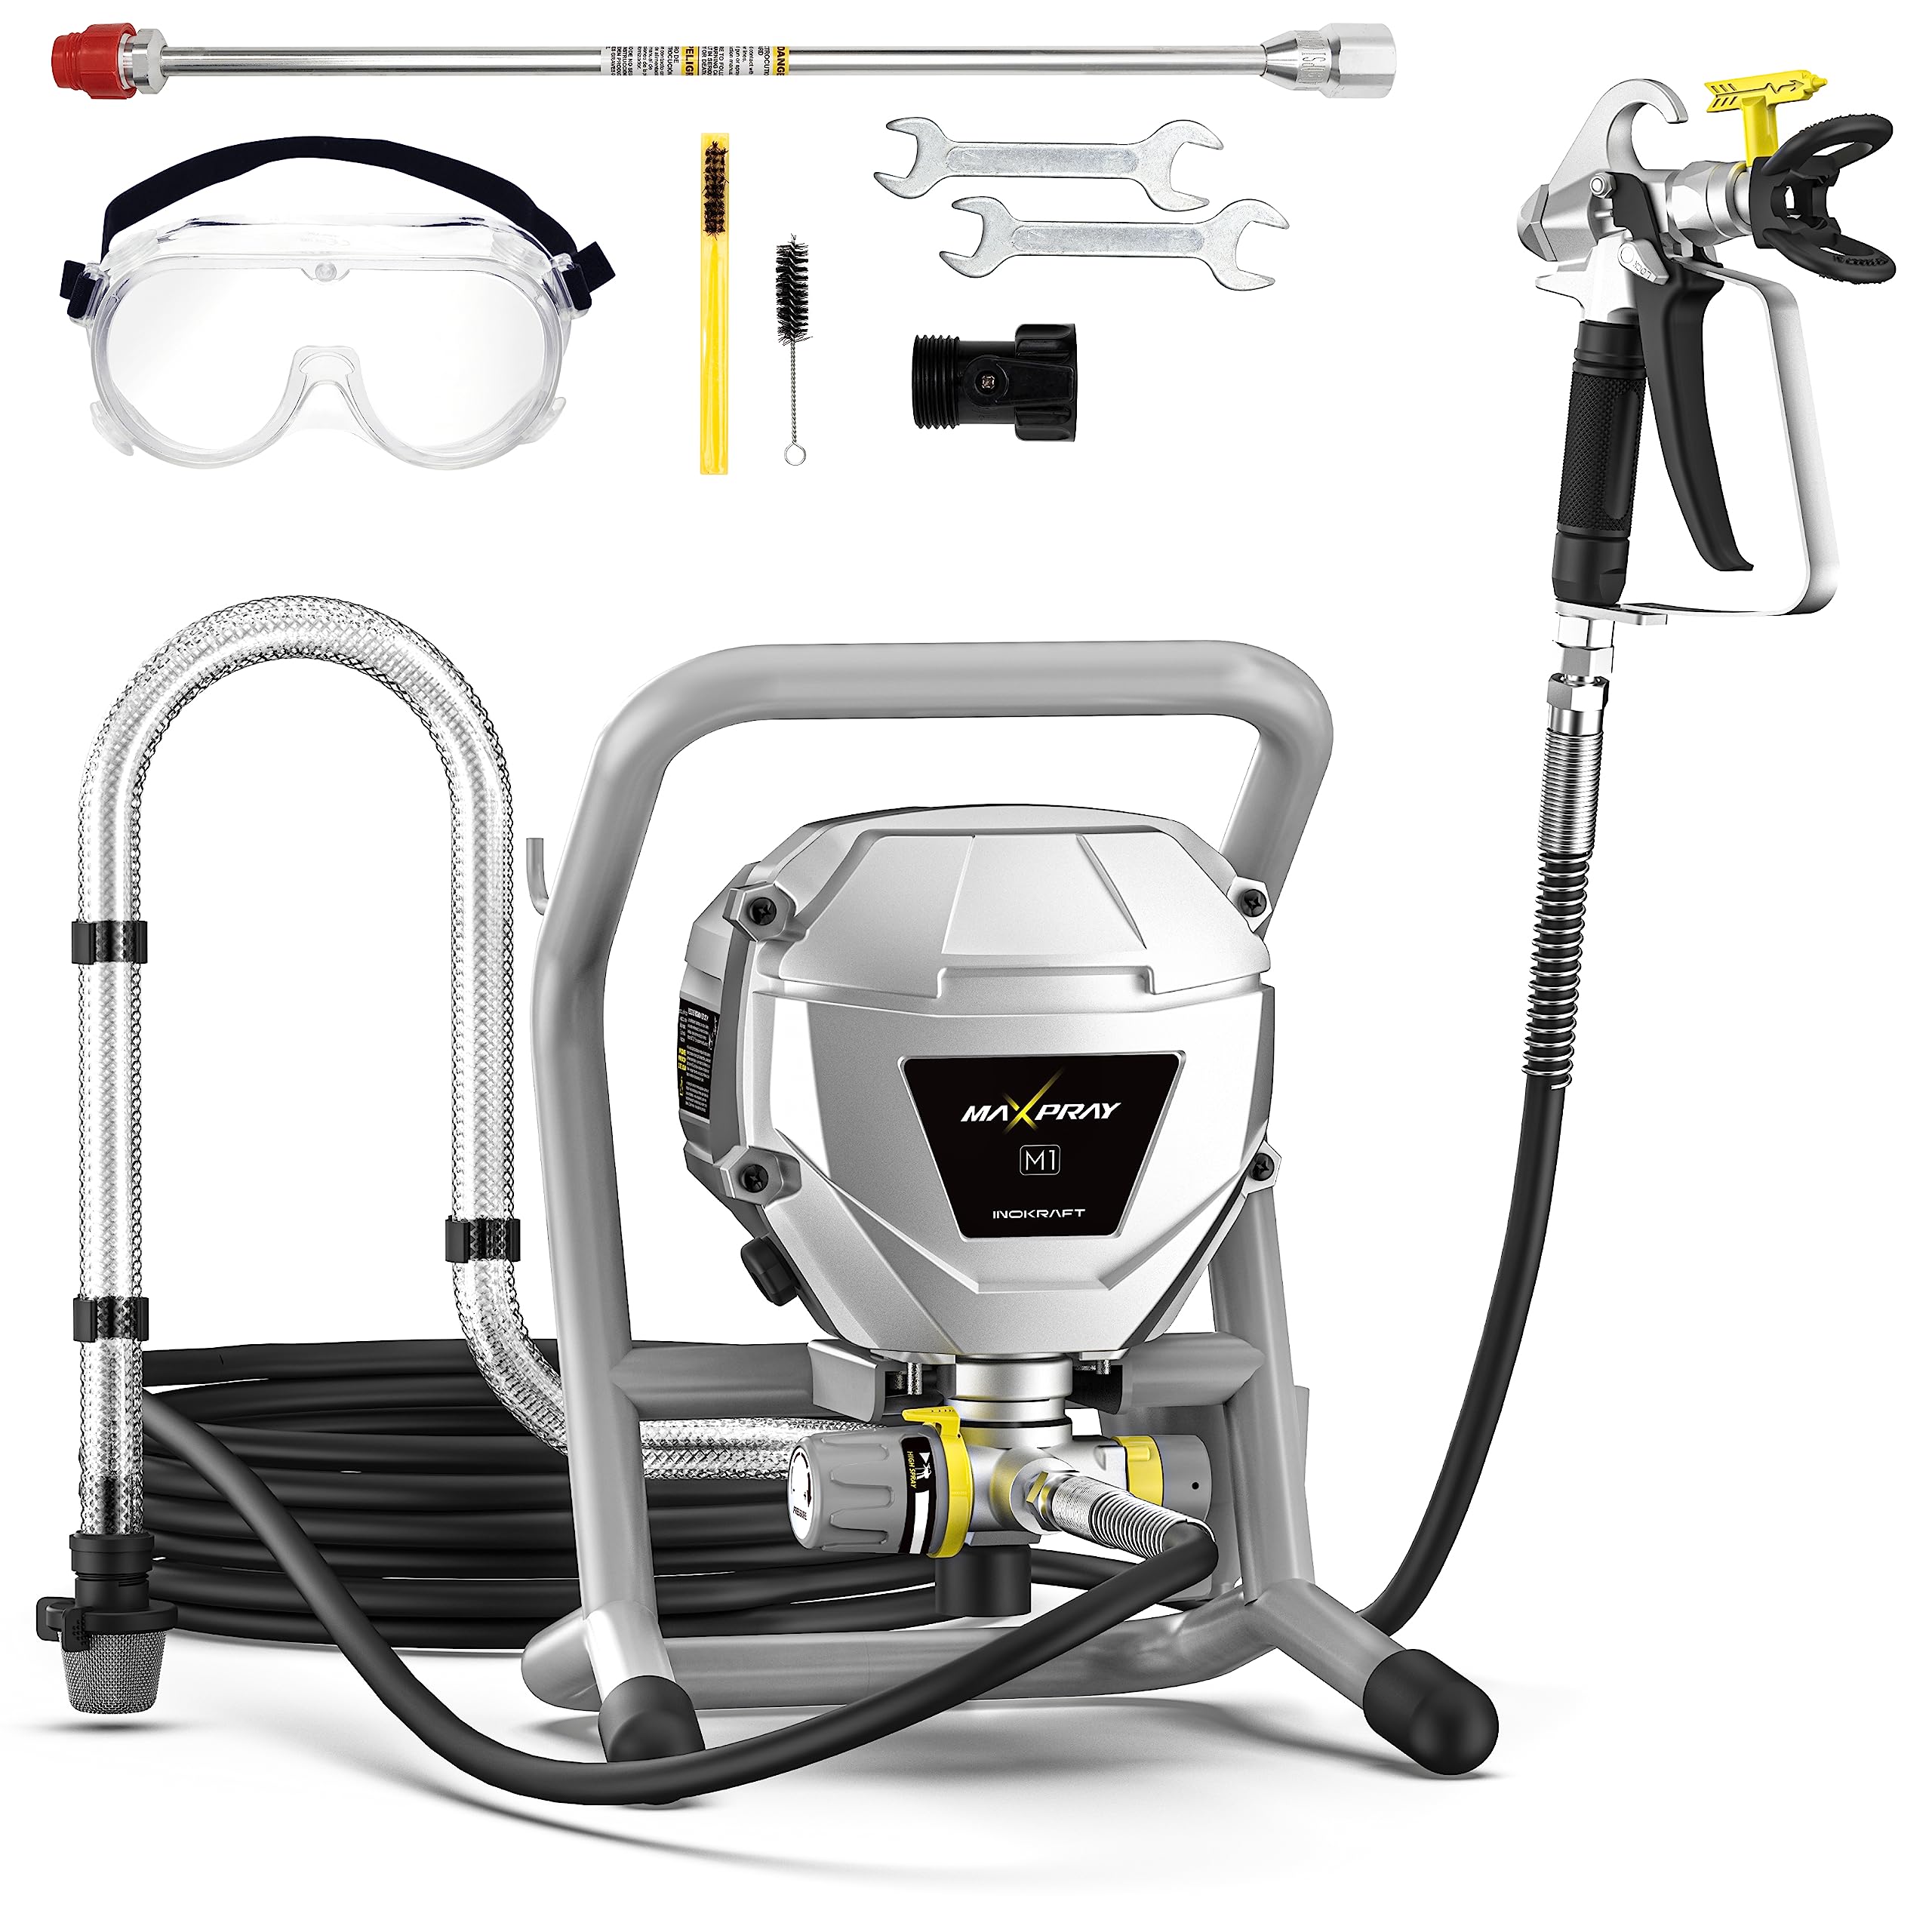
Unboxing – What’s Inside?
I recently purchased the InoKraft MaXpray M1 Airless Paint Sprayer on Amazon. Living in the USA, I needed a paint sprayer for some home exterior and house interior DIY painting projects. I was happy with the fast delivery, as it arrived within a week of ordering.
Inside the box, I found:
- InoFlex Spray Gun*1: This is the main spray gun used for painting.
- AtoMax 515 Spray Tip*1: The spray tip determines the size and pattern of the paint spray.
- 25-Feet Premium Paint Hose*1: The hose connects the spray gun to the paint container.
- Anti-Fog Safety Goggle*1: This goggle ensures protection for the eyes while painting.
- 12 Tip Extension*1: The extension allows for easier reach while painting in high or difficult-to-reach areas.
- Flush-Ease Valve*1: This valve helps clean the paint sprayer after use.
- Cleaning Kit*1: The cleaning kit includes tools and materials for maintaining and cleaning the paint sprayer.
- Wrench*2: The wrenches are used for tightening or adjusting various parts of the paint sprayer.
- Laminated Quick Start-Up Guide*1: This guide provides step-by-step instructions for setting up and using the paint sprayer.
- Trouble Shooting Guide and Instructions*1: The troubleshooting guide helps identify and solve any issues that may arise while using the paint sprayer.
- User Manual Brochure*1: The user manual provides detailed information about the paint sprayer and its features.
Specifications
Here are some key specifications of the InoKraft MaXpray M1 Airless Paint Sprayer:
- Manufacturer: InoKraft
- Item Weight: 22.5 pounds
- Product Dimensions: 15.55 x 12.52 x 11.61 inches
- Hose Length: 25 Feet
- Maximum Pressure: 3300 Pound per Square Inch
- Model Name: MaXpray M1 Airless Paint Sprayer
- Special Feature: airless, Portable
- Power Source: AC
- Style: airless paint sprayer gun
- Material: Stainless Steel
- Recommended Uses For Product: Painting
- Color: Gray
- Tank Volume: 5 Gallons
- Brand: InoKraft
Documentation/ User Guide
The documentation that came with the InoKraft MaXpray M1 Airless Paint Sprayer was incredibly helpful. The user guide provided clear instructions on how to assemble, operate, and maintain the paint sprayer. It also included tips and recommendations for achieving optimal painting results. I found the guide easy to follow, and it greatly assisted me in using the paint sprayer effectively. You can access the user guide here.
Features – What We Found
Efficiency and Time-Saving Painting
The InoKraft MaXpray M1 Airless Paint Sprayer is designed to transform your home painting projects with stunning and time-saving results. It is 5 times faster than rolling and 12 times faster than brushing, allowing you to tackle medium to large-scale painting projects effortlessly. With this sprayer, you can achieve professional-quality, smooth, and even finishes comparable to expert contractors.
A key feature of the MaXpray M1 is the AtoMax airless spray tip, which provides fine atomization and minimal overspray. This ensures that you can achieve precise and even coverage without wasting paint or creating a messy workspace. The sprayer is capable of delivering professional results for both home exterior and house interior DIY painting projects.
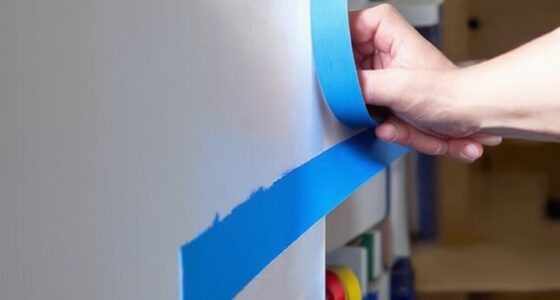
Pro-tip: Before starting your painting project, make sure to prepare the surfaces properly by cleaning and sanding them. This will help ensure a smooth and long-lasting finish.
Thinning-Free and Versatile Applications
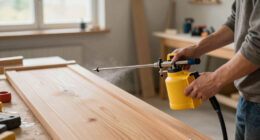
The MaXpray M1 airless paint sprayer eliminates the need for thinning your paint, allowing you to jump straight into your painting projects. This feature saves you time and effort, as you can use the sprayer with various painting applications, including house exteriors, home interiors, ceilings, fences, decks, garages, and furniture. You can easily spray directly from 1 or 5-gallon paint containers, providing ultimate convenience and versatility.
If you’re looking to purchase the InoKraft MaXpray M1 Airless Paint Sprayer, you can find it on Amazon by following this product link.
Precision Control and Easy Cleanup
The InoKraft MaXpray M1 is designed for effortless precision and stress-free cleanup. The swivel joint design of the Inoflex spray gun provides enhanced control and agility, allowing you to spray unthinned paints or stains with precision. This ensures that you can achieve the desired coverage and finish for your painting projects.
After you’re done with your painting project, the MaXpray M1 makes cleanup a breeze. It features a Flush-Ease valve that can connect directly to your home’s garden hose, allowing for a 10-minute hassle-free cleaning process. This saves you time and effort, ensuring that the sprayer is ready for future use.
Comfortable and Safe Painting Experience
Included with the MaXpray M1 Airless Paint Sprayer are accessories that enhance your painting experience. The tip extension allows you to easily reach high areas without straining your back, reducing the risk of discomfort or injury. Anti-fog goggles are also provided to protect your eyes from atomized paint, ensuring safety during your painting projects. Additionally, the sprayer comes with a cleaning kit, making it easy to clean the spray gun after each use.
To ensure a leak-free experience, the wrench set is included, enabling you to tighten joints securely. This feature provides peace of mind, knowing that you can use the sprayer without worrying about leaks or issues that may affect the quality of your painting results.
Clear Instructions and Warranty
The InoKraft MaXpray M1 airless paint sprayer comes with clear instructions to help you quickly get started on your painting projects. The user manual provides step-by-step guidance, ensuring that you can use the sprayer effectively and achieve the best results.
Additionally, the MaXpray M1 comes with a 1-year limited warranty. To extend the warranty to 2 years, you can simply send an email with the subject I’m a kraftsman to the provided support email address. This warranty extension opportunity offers added peace of mind and demonstrates the manufacturer’s confidence in the product’s durability and performance.
Our Review and More
Our Score: 99.0
I recently purchased the InoKraft MaXpray M1 Airless Paint Sprayer and I have to say it has exceeded my expectations. As someone who loves to take on DIY home projects, this sprayer has made a world of difference in my painting process. The setup was incredibly easy and the instructions were clear and user-friendly. Within minutes, I was ready to start painting.
One of the standout features of this paint sprayer is its versatility. You can use it for a wide range of projects, from painting the exterior of your home to tackling interior walls, ceilings, fences, decks, and even furniture. The best part is that you don’t have to worry about thinning your paint. You can spray directly from 1 or 5-gallon containers, saving you time and effort.
Cleanup is often the most dreaded part of any painting project, but with the InoKraft MaXpray M1, it’s a breeze. The Flush-Ease valve allows for quick and hassle-free cleaning. Just connect it to your garden hose and you’re done in no time. The sprayer also comes with helpful accessories like anti-fog goggles, a tip extension, and a cleaning kit, making the painting process even more enjoyable.
I highly recommend the InoKraft MaXpray M1 Airless Paint Sprayer to anyone looking to elevate their DIY painting projects. It delivers professional-quality results, saves time and effort, and is backed by a 1-year limited warranty. Don’t miss out on this fantastic sprayer. Check it out here.
Still not sold? Checkout These Alternatives
When it comes to painting projects, having the right tools can make all the difference. While the InoKraft MaXpray M1 Airless Paint Sprayer is a great choice, there are several other alternatives that offer similar benefits and can meet your painting needs.
- InoKraft MaXpray M3 Plus Cart Airless Paint Sprayer: If you’re looking for an effortless painting experience both for your home’s interior and exterior, the MaXpray M3 Plus Cart Airless Paint Sprayer is a fantastic option. With high efficiency and minimal overspray, this sprayer ensures a smooth and professional finish. Plus, its thinning-free feature saves you time and effort, making it an excellent alternative to the main product. You can find more information and purchase it here.
- Wagner Spraytech 0580678 Control Pro 130 Power Tank Paint Sprayer: Another alternative worth considering is the Wagner Spraytech 0580678 Control Pro 130 Power Tank Paint Sprayer. With high efficiency and low overspray, it ensures a precise and professional painting experience. Whether you’re tackling interior or exterior painting projects, this sprayer delivers excellent results. Find out more and purchase it here.
- Graco Magnum 257025 Project Painter Plus Paint Sprayer: If you’re after convenience and versatility, the Graco Magnum 257025 Project Painter Plus Paint Sprayer is a fantastic choice. Its ease of use and ability to handle various painting tasks, including interior and exterior walls, ceiling, fence, and cabinets, make it a reliable alternative. You can learn more and purchase it here.
- PHALANX Airless Paint Sprayer: For those seeking a powerful and efficient option, the PHALANX Airless Paint Sprayer is worth considering. With its high horsepower and impressive 3000PSI, it ensures a quick and quality finish for your painting projects. Whether you’re working on walls, ceilings, fences, or cabinets, this sprayer can get the job done. Find out more and purchase it here.
These alternatives provide a range of options to suit different painting needs. Whether you’re looking for effortless painting, precise control, versatility, or power, these products have got you covered. Don’t limit yourself to just one option—explore these alternatives and find the perfect paint sprayer for your DIY projects!