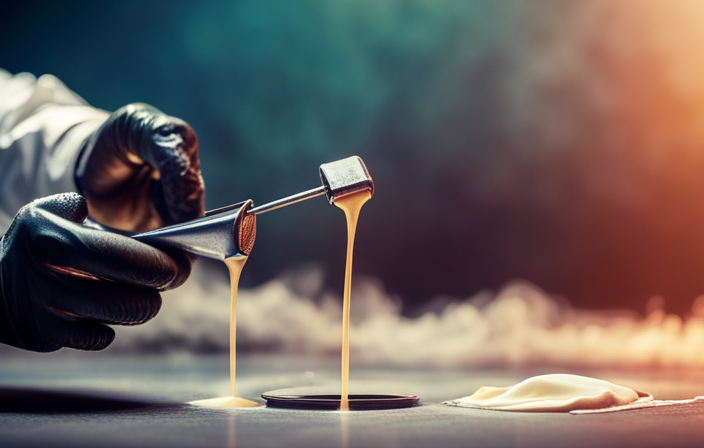
I’ve been using the Champbleairless Airless Paint Sprayer for some time now, and I have to admit, it has completely transformed how I approach my painting projects. This effective tool has streamlined my painting process, delivering smooth and professional results every time.
However, like any mechanical device, it occasionally needs some maintenance. One crucial component that may need replacing is the diaphragm.
In this article, I’ll walk you through the step-by-step process of changing the diaphragm on your Champbleairless Airless Paint Sprayer, ensuring that it continues to perform at its best. We’ll start by gathering the necessary tools and materials, then move on to preparing the paint sprayer for diaphragm replacement.
Trust me, with a little bit of know-how and some handy tips, you’ll be back to spraying paint like a pro in no time. So, let’s dive in and get your Champbleairless Airless Paint Sprayer in top-notch shape!
Key Takeaways
- Regularly clean and inspect the diaphragm to remove paint and debris and check for wear or damage.
- Immediately replace a torn or cracked diaphragm to ensure proper functionality.
- Regularly lubricate the diaphragm with a silicone-based lubricant to maintain optimal condition.
- The Champbleairless Airless Paint Sprayer is designed for longevity and performs well with proper maintenance.

Airless Paint Spray Gun Kit 9 Pieces with 2PCS 517 Tips and Nozzle Guard, 5PCS Airless Paint Sprayer Gun Filter for All Airless Paint Spraying Machines, Swivel Joint & High Pressure 3600 PSI
NO Leakage: The airless paint spray gun is made of high-quality steel and hard metal, durable and non-corrosive....
As an affiliate, we earn on qualifying purchases.
Introduction to the Champbleairless Airless Paint Sprayer
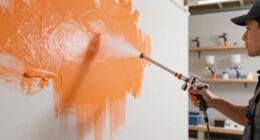
The Champbleairless Airless Paint Sprayer is a versatile tool that simplifies the painting process with its innovative features. This airless paint sprayer is designed to provide efficient and even coverage, making it an ideal choice for both professionals and DIY enthusiasts.
One of the key features of the Champbleairless Airless Paint Sprayer is its ability to deliver paint at high pressure, which ensures a smooth and professional finish. Additionally, using an airless paint sprayer eliminates the need for brushes and rollers, saving both time and effort.
The benefits of using an airless paint sprayer include reduced overspray, increased speed, and the ability to cover large areas quickly.
Now, let’s move on to the next section and gather the necessary tools and materials.

18Pcs 3600PSI Airless Paint Sprayer Gun Kit, with 25Ft High Pressure Hose, Extension Rod & Spray Tips & Filters & Tip Guard & Storage Case & Oxford Bag
Package Includes:You will receive 1 pcs airless paint spray gun, 1 pcs 25ft high pressure hose, 5 pcs...
As an affiliate, we earn on qualifying purchases.
Gather the Necessary Tools and Materials
To get started, you’ll need to gather all the tools and materials necessary for this task. First, you will need a screwdriver, preferably a Phillips head, as well as an adjustable wrench.
Additionally, make sure you have a replacement diaphragm specific to the Champbleairless Airless Paint Sprayer model you own. It’s important to have a clean work area and protective gloves to ensure safety during the process.
Once you have all the tools and materials ready, you can proceed to the next section on how to prepare the paint sprayer for diaphragm replacement. This involves disconnecting the power source and removing any paint or debris from the sprayer’s surface.

Baotree Airless Paint Sprayer, High-Pressure Electric Paint Spray Gun with Extension Rod, Thinning-Free Professional Painting Tool for Interior/Exterior Walls, Fences, Ceilings, Cabinets
1. High efficiency and time saving, the spraying speed is 5 times faster than traditional brushing ✅ High...
As an affiliate, we earn on qualifying purchases.
Prepare the Paint Sprayer for Diaphragm Replacement
Get your work area ready and make sure you’ve got your safety gloves on because it’s about to get real in here with this diaphragm replacement! Here are some troubleshooting tips to prepare your paint sprayer for the diaphragm replacement:
-
Inspect the sprayer: Check for any visible damage or signs of wear on the diaphragm. Make sure the sprayer is disconnected from the power source before proceeding.
-
Empty the paint reservoir: Pour out any remaining paint and clean the reservoir thoroughly. This will prevent any contamination during the diaphragm replacement process.
-
Gather the necessary tools: Get a wrench or pliers, a new diaphragm, and any other replacement parts you may need.
Now that you have prepared the paint sprayer, it’s time to disconnect and remove the old diaphragm. This step will ensure a smooth transition to the subsequent section.

JWGJW Airless Spray Gun Guide Accessory Tool w/ 517 Tip 10 Inch Airless Extension Pole,Spray Guide Painting Tool for Graco Titan Airless Paint Sprayer Gun.
One ✅【 Universal Spray Guide】: JWGJW professional-grade airless spray gun guide,7/8-inch inlet fitting,Compatible with many brands of airless...
As an affiliate, we earn on qualifying purchases.
Disconnect and Remove the Old Diaphragm
Now it’s time to disconnect and remove that old diaphragm, so you can keep your painting project running smoothly!
To remove the diaphragm, first, ensure that the paint sprayer is turned off and the pressure is released.
Locate the diaphragm housing, which is usually found near the inlet valve.
Using a wrench, carefully unscrew the bolts or screws that secure the diaphragm housing in place.
Once the housing is removed, gently disconnect the old diaphragm from the air motor.
Be cautious not to damage any other components during this process.
Now that the old diaphragm is removed, you can proceed to clean and inspect the diaphragm housing for any signs of wear or damage.
Clean and Inspect the Diaphragm Housing
After disconnecting and removing the old diaphragm, it’s crucial to thoroughly clean and inspect the diaphragm housing to ensure optimal performance. Did you know that a well-maintained diaphragm housing can extend the lifespan of your paint sprayer by up to 30%?
To inspect the diaphragm, carefully examine its surface for any signs of damage or wear. Look for cracks, tears, or discoloration that may indicate a faulty diaphragm. If you notice any issues, it’s important to troubleshoot them before installing the new diaphragm.
Cleaning the diaphragm housing is simple but essential. Use a mild detergent and water solution to gently scrub away any paint residue or debris. Rinse thoroughly and allow it to dry completely before proceeding.
By inspecting and cleaning the diaphragm housing, you can ensure a smooth and trouble-free paint spraying experience. Now, let’s move on to the next step of installing the new diaphragm.
Install the New Diaphragm
To begin the process, it’s time to install the new diaphragm, ensuring a secure and efficient fit for optimal performance. Properly installing the diaphragm is crucial to prevent any paint leakage or pressure loss during operation. Here is a step-by-step guide on how to install the diaphragm:
| Step | Procedure |
|---|---|
| 1 | Remove the old diaphragm from the sprayer by unscrewing the diaphragm cover. |
| 2 | Inspect the diaphragm housing for any signs of damage or wear. Clean it thoroughly if necessary. |
| 3 | Place the new diaphragm into the housing, ensuring it is centered and aligned properly. |
| 4 | Carefully screw the diaphragm cover back into place, making sure it is tight and secure. |
| 5 | Test the sprayer to ensure the diaphragm is functioning correctly. |
By following these steps, you can successfully install the new diaphragm and troubleshoot any diaphragm issues. Now, let’s move on to reconnecting and securing the diaphragm housing for the next crucial step in the process.
Reconnect and Secure the Diaphragm Housing
Let’s move on to reconnecting and ensuring a secure fit for the diaphragm housing, so your sprayer can function at its best. Here are some techniques and methods to help you reconnect and secure the diaphragm housing properly:
- Align the diaphragm housing with the corresponding slots on the sprayer body.
- Gently press the housing down until you hear a click, indicating that it’s securely in place.
- Use a screwdriver to tighten the screws or bolts that hold the housing in place.
- Double-check that the housing is firmly attached and there are no loose parts.
With the diaphragm housing securely in place, you can now move on to testing the paint sprayer for proper functioning.
Test the Paint Sprayer for Proper Functioning
Now it’s time to put your sprayer to the test and ensure it’s working properly. When troubleshooting a paint sprayer, it’s important to check for common diaphragm issues. To do this, follow these steps:
| Issue | Possible Cause | Solution |
|---|---|---|
| Low pressure | Clogged nozzle | Clean or replace the nozzle |
| Uneven spray | Damaged diaphragm | Replace the diaphragm |
| No spray | Faulty inlet valve | Repair or replace the inlet valve |
| Paint leaks | Worn-out diaphragm seal | Replace the diaphragm seal and ensure proper alignment |
By systematically troubleshooting these common problems, you can identify and fix any issues with your paint sprayer. Once you’ve resolved any problems, move on to the next section for maintenance tips that will help prolong the life of your diaphragm.
Maintenance Tips for Longevity of the Diaphragm
If you want to ensure your equipment lasts longer, take note of these maintenance tips for keeping the diaphragm in top shape. The diaphragm is a critical component of the champbleairless airless paint sprayer, and proper maintenance is essential for its longevity.
First, always clean the diaphragm after each use to remove any residual paint or debris. Use a soft brush or cloth to gently wipe away any buildup.
Additionally, regularly inspect the diaphragm for any signs of wear or damage. If you notice any tears or cracks, it’s important to replace the diaphragm immediately to prevent further damage to the sprayer.
Lastly, lubricate the diaphragm regularly with a silicone-based lubricant to ensure smooth operation.
By following these tips and maintenance techniques, you can extend the lifespan of the diaphragm and optimize the performance of your champbleairless airless paint sprayer.
In conclusion, proper maintenance of the diaphragm is crucial for the overall functionality and longevity of the champbleairless airless paint sprayer.
Conclusion and Final Thoughts on the Champbleairless Airless Paint Sprayer
To wrap things up, you’ll be pleased with the overall performance and durability of the Champbleairless Airless Paint Sprayer. After discussing the maintenance tips for longevity of the diaphragm, it’s clear that this paint sprayer is built to last. The diaphragm, an essential component of the sprayer, plays a crucial role in delivering a smooth and consistent paint flow. By following the maintenance tips provided, such as regular cleaning and lubrication, you can ensure that the diaphragm remains in optimal condition for extended use.
The Champbleairless Airless Paint Sprayer is designed with longevity in mind, allowing you to complete your painting projects efficiently and effectively. In conclusion, this sprayer offers a reliable and durable solution for all your painting needs.
Frequently Asked Questions
Can the diaphragm on the Champbleairless Airless Paint Sprayer be repaired instead of replaced?
No, the diaphragm on the champbleairless airless paint sprayer cannot be repaired. However, there are alternative solutions available such as replacing the diaphragm or seeking professional assistance for further troubleshooting and repair options.
How often should the diaphragm on the Champbleairless Airless Paint Sprayer be replaced?
Proper maintenance is key to extending the lifespan of the diaphragm on the champbleairless airless paint sprayer. Look out for signs like decreased pressure and paint leakage to determine when replacement is necessary.
What is the average cost of a replacement diaphragm for the Champbleairless Airless Paint Sprayer?
The average cost of a replacement diaphragm for the champbleairless airless paint sprayer depends on the specific model and brand. It is usually more cost-effective to replace the diaphragm rather than repair it.
Are there any recommended cleaning solutions for the diaphragm housing of the Champbleairless Airless Paint Sprayer?
I recommend using a mild detergent solution or a specialized cleaning solution for the diaphragm housing of the champbleairless airless paint sprayer. Regular cleaning and proper maintenance will help prolong the lifespan of the diaphragm.
Can the diaphragm replacement process be done by a novice or is it recommended to seek professional assistance?
The diaphragm replacement process can be challenging for a novice due to its complexity and the need for specific tools. Seeking professional assistance is recommended as they have experience and can ensure a proper and efficient replacement.
Conclusion
In conclusion, replacing the diaphragm on the Champbleairless Airless Paint Sprayer is a straightforward process that can be done with the right tools and materials. By following the steps outlined in this article, you can ensure that your paint sprayer continues to function properly and deliver high-quality results.
Remember to regularly inspect and clean the diaphragm housing to prevent any clogs or blockages. With proper maintenance, your Champbleairless Airless Paint Sprayer will be a reliable tool for all your painting needs.
So, don’t delay, get painting and make your walls shine like a brand new penny!