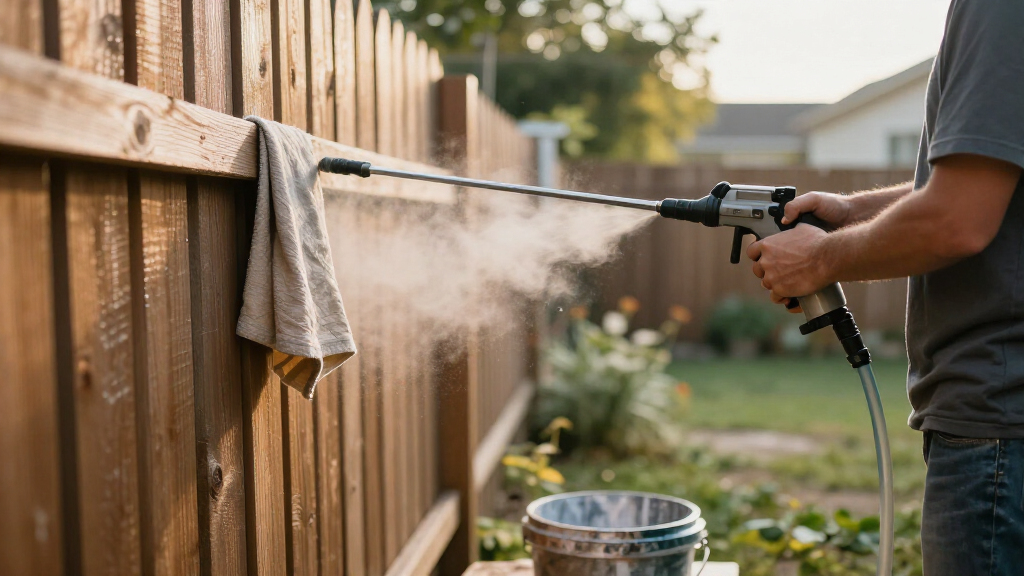
Use this guide to prepare a DIY surface, set up an airless paint sprayer, apply paint evenly, and clean the machine when the job is done. It is written for homeowners with basic painting skills who are new to airless spraying. Allow 2-4 hours for a small project, including setup and cleanup; larger areas take longer, and drying time depends on the paint label and conditions. Airless sprayers can apply paint quickly, but their high-pressure spray can cause serious injection injuries, so follow the equipment manual and the safety instructions below.

Get business pricing on tools and workshop supplies
- Business-only prices and quantity discounts
- Tax-exempt purchasing
- Multiple users, one account, clear invoices

Graco Magnum X5 Airless Paint Sprayer
- ✔ Maximum project size: Up to 10 gallons
- ✔ Maximum hose length: 75 ft
- ✔ Bucket compatibility: 1- or 5-gallon buckets

Graco Magnum 257025 Project Painter Plus Paint Sprayer
- ✔ Capacity: Up to 5 gallons
- ✔ Pressure control: Fully adjustable
- ✔ Suction tube compatibility: 1- or 5-gallon paint buckets

InoKraft NEO Airless Paint Sprayer Kit
- ✔ Maximum pressure: 3000 PSI
- ✔ Maximum paint output: 0.26 GPM
- ✔ Weight: 10 lb
Difficulty: Intermediate | Time: 2-4 hours, plus drying time
What You’ll Need
Tools & Materials:
- Airless paint sprayer with its manual, spray gun, hose, and a suitable tip
- Paint compatible with the sprayer and selected tip
- Stir stick, paint strainer, and clean bucket if needed
- Drop cloths, masking paper or plastic, and painter’s tape
- Cleaning materials specified by the paint label and sprayer manual
- Protective eyewear, gloves, suitable work clothing, and a respirator appropriate for the product and ventilation conditions
Knowledge:
- Basic surface cleaning, scraping, and masking
- Ability to follow the sprayer manual and the coating label
- Understanding that airless paint can penetrate skin and requires strict pressure-relief procedures
Check the manual for the sprayer’s pressure rating, tip compatibility, setup, and cleaning method. Check the coating label for thinning instructions, application conditions, ventilation, and cleanup liquid. Do not thin paint unless its label or the sprayer manufacturer calls for it. Work outdoors or in a well-ventilated area as directed by the product label, and keep people and pets away from the work zone.
Graco Magnum X5 Airless Paint Sprayer
The Graco Magnum X5 is our top pick when a home project is big enough that reach and capacity outweigh compactness. Its stated limit of up to 10 gallons is twice the Project Painter Plus’s listed project size, and its 75-foot maximum hose is longer than either competitor’s. That combination gives us more flexibility for painting across a larger home or reaching higher areas without moving the sprayer as often.Like the Project Painter Plus, the X5 has fully adjustable pressure and a flexible suction tube for drawing from a one- or five-gallon bucket. The distinction is scale: the Project Painter Plus is the more measured fit for jobs up to five gallons, while the X5 leaves more headroom for remodels and multi-room work. Its stated ability to spray unthinned paints or stains also contrasts with the NEO, whose compatible coatings may need thinning depending on the material.That extra capacity is not free of practical downsides. The X5 may feel like too much equipment for a small touch-up or single compact job, and airless cleanup takes care regardless of the machine’s reach. We would choose it for planned, substantial work—not simply because a larger sprayer sounds more capable.
Pros:
- Designed for projects up to 10 gallons
- Up to 75 feet of hose for extended reach
- Adjustable pressure and direct suction from one- or five-gallon buckets
- Designed to spray unthinned paints or stains
Cons:
- May be excessive for small touch-up jobs
- Thorough cleaning is part of using an airless sprayer
Best for: DIY homeowners or remodelers tackling multi-room, larger exterior, or other projects that may approach 10 gallons and benefit from extended hose reach.
Not ideal for: People handling only a small room, occasional touch-ups, or compact jobs where a smaller, lighter kit would be easier to manage.
Bottom line: We recommend the X5 when a DIY project needs more capacity and reach than the five-gallon alternatives provide.
“We recommend the X5 when a DIY project needs more capacity and reach than the five-gallon alternatives provide.”
Graco Magnum 257025 Project Painter Plus Paint Sprayer
For a homeowner who wants bucket-fed spraying without sizing up to the X5, the Graco Magnum Project Painter Plus is the more proportionate choice. It is designed for projects up to five gallons, with a 50-foot hose and fully adjustable pressure. That is enough reach to make high walls or second-story areas more accessible, while its stated project scope keeps it better matched to a defined home job than the X5’s larger capacity.Its flexible suction tube draws directly from a one- or five-gallon bucket, so we do not have to treat the listed capacity as a small onboard supply. Compared with the InoKraft NEO, the Project Painter Plus offers twice the stated hose length and is described for unthinned paints. The NEO, by contrast, is lighter and includes masking and touch-up supplies, making it more appealing when portability and starter accessories are priorities.The key limitation is material versatility: the supplied description says this model is designed for unthinned paints only. That narrows the choice if we want to use coatings that call for thinning or fall outside that guidance. Its five-gallon ceiling also makes it less suitable than the X5 for larger jobs. We see it as a practical middle pick, not a scaled-down substitute for every kind of project.
Pros:
- Designed for DIY projects up to five gallons
- Fully adjustable pressure control
- Flexible suction tube works with one- or five-gallon buckets
- 50-foot hose supports reach to high walls and second stories
Cons:
- Designed for unthinned paints only, limiting material versatility
- Less project capacity and hose reach than the Magnum X5
Best for: DIY painters handling a defined project of up to five gallons who value adjustable pressure, direct bucket suction, and more hose reach than a compact kit offers.
Not ideal for: Buyers needing the X5’s larger project capacity, or those who need flexibility for coatings that may require thinning.
Bottom line: The Project Painter Plus is a sensible middle-ground pick for five-gallon jobs where reach matters but X5-level capacity is unnecessary.
“The Project Painter Plus is a sensible middle-ground pick for five-gallon jobs where reach matters but X5-level capacity is unnecessary.”
InoKraft NEO Airless Paint Sprayer Kit
The InoKraft NEO takes a different approach from the Graco models: it is a lightweight, accessory-rich option for compact DIY jobs, rather than a long-reach sprayer for larger projects. At 10 pounds, it is the easiest listed model to prioritize when carrying and handling the unit matters. The kit also includes masking supplies, touch-up tools, cleaning accessories, and a 12-inch tip extension, giving a newer DIY painter more of the supporting equipment in one package.Its specifications include up to 3000 PSI and 0.26 GPM, with a 25-foot hose and a 515 tip. A 360-degree swivel and extension can help with reach and control in tighter areas, but those features do not erase the hose-length gap: the Project Painter Plus reaches up to 50 feet, and the X5 up to 75. The NEO is also recommended for projects of about five gallons, while the X5 is the clear choice when a job may grow beyond that scale.Material guidance deserves attention before we choose it. The NEO lists latex, acrylic, stain, and primer when compatible, but coatings may need thinning depending on compatibility. That is less straightforward than the Graco descriptions for unthinned paints, though it offers a broader set of named coating types. We would pick this kit for manageable jobs and convenience, not for maximum reach or the simplest possible material decision.
Pros:
- Lightweight 10-pound design with built-in storage
- Starter kit includes masking supplies, touch-up tools, and cleaning accessories
- 12-inch tip extension and 360-degree swivel aid reach and control
- Lists compatible latex, acrylic, stain, and primer coatings
Cons:
- 25-foot hose is shorter than either Graco option
- Coatings may require thinning depending on compatibility
- Designed for compact DIY projects rather than larger jobs
Best for: DIY beginners or occasional painters who want a lightweight sprayer kit with included masking, touch-up, and cleaning accessories for compact projects.
Not ideal for: Those painting large homes or multi-story exteriors who need a longer hose, or buyers seeking a clearly stated unthinned-coating setup.
Bottom line: The NEO is the most approachable compact kit here, provided we accept shorter reach and check coating requirements before spraying.
“The NEO is the most approachable compact kit here, provided we accept shorter reach and check coating requirements before spraying.”
As an Amazon Associate we earn from qualifying purchases.
Before You Start
High-pressure warning: Never point the gun at yourself or another person, and never put a hand or finger in front of the tip. A high-pressure injection injury may look minor but needs immediate emergency medical care. Before clearing a blockage, changing a tip, or touching the gun or hose, follow the manual’s pressure-relief procedure. Keep the trigger lock engaged whenever you are not actively spraying.
Do not spray near flames, pilot lights, sparks, or other ignition sources. Follow the coating label and equipment manual for electrical, ventilation, and respiratory precautions. If you cannot contain overspray or provide the required ventilation, choose a brush or roller instead.
Step-by-Step Instructions
Step 1: Confirm the coating and sprayer are compatible
Read the sprayer manual and paint label before opening the container. Check that the machine can handle the coating’s type and thickness, and that the selected tip is approved for both the sprayer and paint. Confirm the manufacturer’s limits for hose length, pressure, and tip size. Use the paint as supplied unless the label or manual specifically permits thinning.
Tip: Do not rely on an old tip or an online tip chart without checking compatibility. A wrong or worn tip can cause poor coverage, excessive overspray, or clogs.
Check: The coating, tip, and sprayer specifications match the instructions supplied by their manufacturers.
Step 2: Prepare and protect the work area
Move furniture and objects out of the spray zone. Cover floors, nearby surfaces, windows, fixtures, and anything that should not receive paint. Mask edges carefully, and extend protection beyond the immediate work surface because airborne paint can travel farther than expected. Provide the ventilation required by the product label, and keep bystanders and pets outside the area.
Tip: Test masking materials in a small area if you are unsure whether tape could damage the surface. Keep the sprayer and hose where they will not trip anyone or drag across wet paint.
Check: The target surface is accessible, nearby items are protected, and the work area meets the product’s ventilation and safety requirements.
Step 3: Prepare the surface
Clean the surface and let it dry. Remove loose or peeling paint, repair holes or cracks, and sand rough areas as appropriate for the material. Remove dust before spraying. Apply primer if the paint label or surface condition calls for it, then allow it to dry for the stated time. Do not spray over damp, dirty, or poorly bonded material.
Tip: Use the coating label to check temperature and humidity limits. Conditions outside those limits can affect drying and adhesion.
Check: The surface is dry, clean, sound, and ready for the coating specified for the project.
Step 4: Strain and stage the paint
Stir the paint thoroughly without whipping air into it. Strain it into the sprayer’s container or a clean bucket if the product or machine instructions recommend straining. Set the paint near the machine so the pickup tube can sit securely in it without being stretched or kinked. Keep the container covered when practical to reduce dust and debris.
Tip: Do not pour leftover paint back into the original container if it may contain debris or cleaning liquid.
Check: The paint is evenly mixed, free of visible lumps, and ready for the sprayer’s pickup system.
Step 5: Assemble the sprayer and prime it
Set the machine on a stable, protected surface. Connect the hose and gun as instructed, check that connections are secure, and keep the tip off the gun during priming if the manual directs. Place the intake and drain tubes in the correct containers. Follow the exact manual procedure to prime the pump and fill the hose with paint. Keep the gun pointed into a waste container and the trigger lock engaged except when the manual requires controlled triggering.
Tip: Priming procedures differ between models. Do not use a generic valve or lever sequence in place of the instructions for your machine.
Check: The sprayer primes without leaks, and the paint flows steadily into the designated waste container as described in the manual.
Step 6: Test the spray pattern
Install the correct tip and guard according to the manual, then follow its pressure-relief and startup instructions. On scrap material or a protected test surface, unlock the gun only when ready and spray a short pass. Hold the gun perpendicular to the surface at the distance recommended by the manufacturer. Increase pressure gradually only enough to produce an even fan without heavy tails at the edges.
Tip: Never try to stop a leak or clear a tip while the system is pressurized. Lock the trigger and relieve pressure as instructed before handling the tip or guard.
Check: The test produces a consistent fan-shaped pattern without obvious heavy streaks along its edges.
Step 7: Apply paint in steady, overlapping passes
Start moving your arm before pulling the trigger, and release the trigger before stopping your movement. Keep the gun perpendicular to the surface and at a consistent distance. Overlap each pass by about half the fan width, following the sprayer manual’s guidance. Use long, controlled strokes and maintain a steady pace. Work systematically across the surface, and inspect the wet coat from different angles without touching it.
Tip: Avoid swinging your wrist in an arc; that changes the gun’s distance and can leave thick paint in the middle of each pass. Apply a second coat only when the coating label permits it and the first coat has reached the stated recoat condition.
Check: The surface has an even wet coat without missed bands, runs, or concentrated heavy patches.
Step 8: Pause safely or relieve pressure before adjustments
For a short pause, engage the trigger lock and follow the manual’s standby instructions. For a longer break, finish the prescribed shutdown and pressure-relief steps. Before turning the tip, clearing a clog, disconnecting the hose, or cleaning the gun, relieve pressure exactly as the manufacturer directs. Keep the tip pointed away from people while doing so.
Tip: Do not leave paint sitting in the sprayer longer than the manual or coating instructions allow. Dried coating can block the machine.
Check: The trigger is locked during pauses, and the system is depressurized before you handle spray components.
Step 9: Clean the sprayer and dispose of waste
Clean the machine promptly using the method and liquid specified by the coating label and sprayer manual. Relieve pressure first. Flush the pump, hose, gun, and tip as directed until the discharge is clean; collect waste rather than releasing paint or wash water into a drain or onto the ground. Clean filters and the tip only as the manual permits. Store the equipment dry and protected, following the manufacturer’s storage instructions.
Tip: Water-based and solvent-based coatings may require different cleaning products. Never mix cleaning liquids or use a solvent that the sprayer manufacturer does not approve.
Check: The flush runs clear as specified, removable parts are clean, and all waste is collected for disposal under local rules.
Common Mistakes to Avoid
- Skipping masking because the sprayer seems aimed at the target. — Mask adjacent surfaces and cover the area beyond the workpiece; fine overspray can travel and settle on nearby objects.
- Holding the gun too close, moving too slowly, or pausing while the trigger is pulled. — Practice on scrap, keep a consistent distance and pace, and start and stop each pass beyond the edge when possible.
- Raising pressure too much to fix an uneven pattern. — Check tip condition, paint compatibility, and technique first. Raise pressure only in small increments within the machine’s limits.
- Handling a clogged tip or fitting before relieving pressure. — Lock the trigger and perform the machine’s full pressure-relief procedure before any inspection, adjustment, or cleaning.
Troubleshooting
Problem: The spray pattern has heavy tails or uneven edges.
Solution: Stop spraying, lock the trigger, and relieve pressure as the manual directs. Check whether the tip is clogged, worn, or incorrectly installed. Clean or replace it as instructed, then retest on scrap. If the pattern remains poor, check paint compatibility and follow the manual’s pressure adjustment guidance.
Problem: The sprayer does not draw paint or the flow pulses.
Solution: Stop and use the manual’s safe shutdown procedure. Check that the pickup tube is submerged, the intake is seated, and the paint is within the machine’s limits. Inspect for loose connections or a clogged filter only after relieving pressure. Re-prime using the model-specific procedure.
Problem: Paint runs or sags on the surface.
Solution: Stop adding paint to the affected area. The coat may be too heavy, the gun may be too close, or movement may be too slow. Let the paint reach the condition specified on its label, correct the surface as appropriate, and apply lighter, steady passes after testing your technique.
Problem: Paint dries or accumulates at the tip during a pause.
Solution: Lock the trigger and follow the manual’s pressure-relief instructions before handling the tip. Clean it with the approved method, reinstall it correctly, and test the pattern. For future pauses, use the manufacturer’s standby procedure and do not exceed its stated pause time.
What Success Looks Like
The finished surface has consistent coverage with no obvious missed stripes, heavy runs, or large uneven patches. The sprayer has been flushed and stored according to its manual, and paint and cleaning waste have been collected for proper disposal. You should also be able to confirm that no fittings leak and that the tip, guard, and gun are clean. Let the coating dry and cure for the time stated on its label before judging the final finish or putting the surface back into service.
Next Steps
Allow the coating to dry for the label’s stated time before removing masking or applying another coat; remove tape carefully so it does not pull the finish. Record the paint, tip size, and settings that produced a good test pattern. Check the tip and filters before the next job, and replace worn parts when the manual recommends. If the sprayer leaks, the hose is damaged, or you are unsure how to relieve pressure, stop using it and contact the manufacturer or a qualified service technician.
Frequently Asked Questions
Do I need to thin paint before using an airless sprayer?
Not by default. Many coatings are designed for airless application as supplied, while others have limits or specific thinning directions. Follow the paint label and sprayer manual; thinning without approval can affect coverage and coating performance.
Can I use an airless sprayer indoors?
Only if the coating label, sprayer manual, ventilation, and required protective equipment allow it. Mask extensively because overspray can settle well beyond the target. Do not spray near flames or ignition sources, and keep other people out of the work area.
How far should I hold the spray gun from the surface?
Use the distance specified in the sprayer manual or coating guidance. Keep that distance consistent and hold the gun perpendicular to the surface; changing distance can cause uneven coverage and excess overspray.
What should I do if the tip clogs?
Stop spraying, lock the trigger, and follow the manual’s pressure-relief procedure before touching the tip. Clear or reverse the tip only as its instructions allow, then reinstall it and test on scrap. Never clear a clog with a finger or while the system remains pressurized.
Can I leave paint in the sprayer overnight?
Do not assume that is safe for the machine. Follow the sprayer manual and coating label for maximum pause and storage times. If they do not permit leaving paint in the system, flush and store the sprayer before the break.
Fall yard work Picks
leaf blowers
As an affiliate, we earn on qualifying purchases.