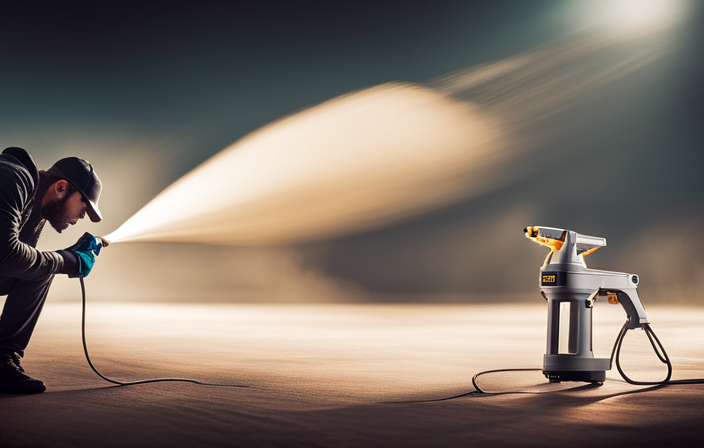
Have you ever overlooked the task of cleaning your airless paint sprayer after using it? Believe me, it’s a real hassle. I have personally experienced the frustration of attempting to use a sprayer that’s clogged and simply refuses to work properly. But fear not, my friend, because I’m here with professional guidance on how to deal with a sprayer that hasn’t been properly maintained, making sure it gets back to top working order.
In this article, I’ll walk you through the step-by-step process of cleaning an airless paint sprayer that hasn’t been properly cleaned out. From gathering the necessary cleaning supplies to disassembling the sprayer and removing any excess paint, we’ll cover it all.
You’ll learn how to:
- Soak the components in a cleaning solution
- Scrub and rinse them thoroughly
- Reassemble the sprayer like a pro
So, if you’re tired of dealing with clogs and malfunctioning sprayers, keep reading. I’ve got the knowledge and techniques to help you clean your airless paint sprayer and prevent future headaches. Let’s get started!
Key Takeaways
- Flush the system with a cleaning solution
- Disassemble the sprayer and inspect each component
- Store disassembled parts in a clean, dry area
- Protect the sprayer with original packaging or a sturdy container
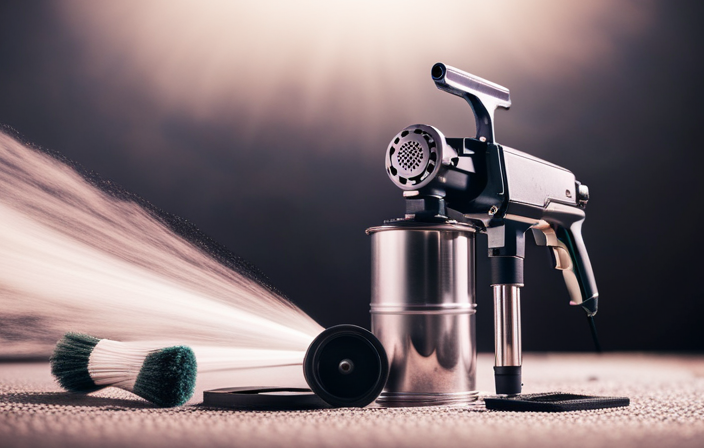
Gather the necessary cleaning supplies
Before you can effectively clean your airless paint sprayer, you’ll need to gather the necessary cleaning supplies. Proper airless paint sprayer maintenance is crucial for its longevity and optimal performance.
The first step is to gather the right tools. You’ll need a bucket, clean rags or paper towels, a brush with stiff bristles, a small wire brush, a cleaning solution specifically designed for airless paint sprayers, safety goggles, gloves, and a respirator mask.
These tools are essential for removing any dried paint, debris, or clogs that may have accumulated in the sprayer. It’s important to emphasize the importance of using the correct cleaning tools as improper tools can damage the sprayer.
Now that you have your cleaning supplies ready, let’s move on to disassembling the paint sprayer.
Disassemble the paint sprayer
To properly disassemble the tool, start by removing the nozzle and then proceed to detach the hose.
Did you know that a well-maintained airless paint sprayer can last up to 10 years with regular cleaning?
To disassemble the paint sprayer, follow these steps:
- Turn off the sprayer and unplug it from the power source.
- Release any remaining pressure by triggering the sprayer without paint.
- Remove the nozzle by twisting it counterclockwise.
- Disconnect the hose from the sprayer, ensuring there is no paint left inside.
Airless paint sprayers have their advantages, such as faster application and uniform coverage. However, they also have some disadvantages, including overspray and the need for extensive cleaning. To ensure the longevity of your sprayer, it’s essential to follow best practices for using an airless paint sprayer and regularly clean it.
Now that the paint sprayer is disassembled, let’s move on to the next step: removing any excess paint from the sprayer.
Remove any excess paint from the sprayer
Once the paint sprayer has been disassembled, it’s time to remove any excess paint that may still be lingering inside.
To effectively clean the sprayer, it is essential to employ proper cleaning techniques and troubleshooting tips.
Begin by inspecting the sprayer for any visible paint residue, especially in the nozzle, filters, or hoses. Use a clean cloth or paper towel to wipe away the excess paint gently. If the paint has dried and is stubborn to remove, you may need to use a small brush or toothbrush to scrub the affected areas. Be careful not to damage any delicate parts during this process.
Once all excess paint has been removed, it’s time to move on to the next step of soaking the components in a cleaning solution.
Soak the components in a cleaning solution
After disassembling the paint sprayer, make sure to soak its components in a cleaning solution for at least 30 minutes. Studies have shown that this significantly improves the effectiveness of the cleaning process.
Here are three cleaning solution options that you can consider:
-
Solvent-based cleaning solution: This type of solution is effective in removing oil-based paints and stubborn residues. It is usually made of solvents like mineral spirits or paint thinner.
-
Water-based cleaning solution: If you have used water-based paints, a water-based cleaning solution is a suitable option. It is typically made of water and mild detergent, ensuring safe and efficient cleaning.
-
Eco-friendly cleaning solution: For those who prefer eco-friendly options, there are cleaning solutions available that are biodegradable and non-toxic.
When it comes to alternative cleaning methods, some people opt for using vinegar or baking soda solutions. However, it is important to note that these may not be as effective as dedicated cleaning solutions.
Next, I will explain how to scrub and rinse the components thoroughly to ensure they are completely clean.
Scrub and rinse the components thoroughly
To ensure that the components sparkle like new, it is important to scrub and rinse them thoroughly. Begin by using a soft-bristle brush to scrub off any dried paint or residue from the various parts of the airless paint sprayer. This includes the gun, hose, and pump. Pay close attention to hard-to-reach areas and corners.
Next, rinse the components with clean water to remove any remaining debris. Be cautious not to use water pressure that is too high, as this could damage the delicate parts.
Once rinsed, inspect the components for any lingering paint or dirt. If necessary, repeat the scrubbing process.
After scrubbing and rinsing, it is crucial to properly dry the components before reassembling the sprayer. Use a clean cloth or air compressor to remove any moisture, ensuring that no water remains. This step is important to prevent rust or damage to the sprayer.
With the components thoroughly cleaned, it is now time to move on to the next step of cleaning the filters and nozzles, which will be discussed in the subsequent section.
Clean the filters and nozzles
After scrubbing and rinsing the components thoroughly, it is essential to clean the filters and nozzles of your airless paint sprayer. These parts play a crucial role in ensuring a smooth and even paint application.
To clean the filters, start by removing them from the sprayer and rinsing them with warm soapy water. Use a soft brush to gently scrub away any paint residue or debris. Rinse the filters thoroughly and allow them to dry completely before reattaching them to the sprayer.
As for the nozzles, use a small brush or toothpick to carefully remove any dried paint or clogs. If necessary, soak the nozzles in a cleaning solution specifically designed for paint sprayers.
These cleaning techniques and troubleshooting tips will help maintain the performance of your airless paint sprayer.
Now, let’s move on to reassembling the paint sprayer.
Reassemble the paint sprayer
Now that you’ve finished giving your airless paint sprayer a thorough cleaning, it’s time to put all the pieces back together. Reassembling the paint sprayer requires careful attention to detail and a good understanding of the different components. Here are some reassembling techniques to keep in mind:
-
Start by reattaching the filters and nozzles in their respective positions. Make sure they are tightly secured to prevent any paint leakage.
-
Next, reconnect the hose and ensure it is properly connected to the sprayer and the paint container.
- Check for any signs of damage or wear on the hose.
- Replace it if necessary to avoid any future issues.
Troubleshooting common issues during reassembly:
- If you encounter difficulty in fitting any part, double-check that it is the right component for your specific model.
- Refer to the user manual or manufacturer’s instructions for guidance.
Now that the paint sprayer is reassembled, it’s time to test it to ensure it is working properly.
Test the sprayer to ensure it is working properly
Once you’ve reassembled the paint sprayer, it’s time to put it to the test and ensure it’s in perfect working order. To troubleshoot common issues with airless paint sprayers, follow the steps below. First, check for any leaks or clogs in the system. Inspect the spray tip and filter for any blockages and clean or replace them if necessary. Next, ensure the pressure settings are correct and adjust if needed. Finally, test the sprayer by filling it with water and spraying it onto a test surface. Observe the spray pattern, making sure it is even and consistent. If any issues arise, refer to the troubleshooting guide provided by the manufacturer. It is essential to understand the proper maintenance of airless paint sprayer equipment to prevent future problems. Regularly clean the sprayer, flush it with water after each use, and store it properly to maintain its longevity. To store the sprayer properly after each use, refer to the next section.
Store the sprayer properly after each use
To ensure the sprayer is in top condition for future use, make sure to properly store it after each use. Follow these steps:
-
Clean the sprayer thoroughly by flushing it with a cleaning solution. Make sure all paint residue has been removed.
-
Dismantle the sprayer and inspect each component for signs of wear or damage.
-
Store the disassembled parts in a clean and dry area, away from direct sunlight and extreme temperatures.
-
It is recommended to use the original packaging or a sturdy container to protect the sprayer from dust and potential damage.
Properly storing your airless paint sprayer can prevent future clogs and ensure its optimal performance. Remember, regular maintenance and cleaning are also crucial in maintaining a clog-free sprayer.
Regularly maintain and clean the sprayer to prevent future clogs
Make sure you regularly maintain and clean your sprayer to keep it clog-free and working smoothly. Preventive maintenance is key to avoiding future issues with your airless paint sprayer. By following a few simple steps, you can troubleshoot common problems and keep your sprayer in optimal condition.
One important step is to thoroughly clean the sprayer after each use. This involves flushing out any remaining paint and cleaning the filters, nozzle, and gun. Refer to the manufacturer’s instructions for specific cleaning procedures. Additionally, regularly inspect and replace any worn or damaged parts to ensure proper functioning.
To help you with the maintenance process, refer to the table below for a checklist of tasks to perform:
| Task | Frequency | Tools Required |
|---|---|---|
| Flush the system | After each use | Clean water |
| Clean filters | After each use | Soft brush |
| Clean nozzle | After each use | Nozzle cleaning kit |
| Inspect parts | Regularly | N/A |
| Replace worn parts | As needed | Replacement parts |
By following these preventive maintenance steps and troubleshooting common issues, you can ensure your airless paint sprayer stays in top-notch condition and continues to provide you with smooth and even painting results.
Frequently Asked Questions
How often should I clean my airless paint sprayer to prevent clogs?
To prevent clogs, it is crucial to clean your airless paint sprayer regularly. Cleaning frequency depends on factors such as paint type and usage. Neglecting proper maintenance is like letting a dam fill with debris, eventually leading to a messy and inefficient spraying process.
Can I use any cleaning solution to soak the components of the sprayer?
When it comes to cleaning an airless paint sprayer, it is important to use the correct cleaning solution. There are various options available, but it is best to follow the manufacturer’s recommendations to ensure optimal cleaning and prevent damage to the components.
What should I do if there is dried paint on the nozzles and filters?
Removing dried paint from airless paint sprayer nozzles and filters requires thorough cleaning. Use a suitable solvent like mineral spirits or paint thinner to dissolve the paint. Scrub gently with a brush and rinse with water. To prevent clogs, strain paint before use and clean the sprayer properly after each use.
Are there any specific tools or brushes I should use to scrub the components?
To effectively clean the components of an airless paint sprayer, I recommend using specific tools such as a small brush, toothbrush, and soft cloth. These tools, combined with proper techniques like scrubbing and wiping, will ensure a thorough cleaning process.
How long should I let the components soak in the cleaning solution?
For optimal cleaning, it is recommended to let the components soak in the best cleaning solution for at least 30 minutes. This allows the solution to effectively break down any paint residue, making it easier to clean.
Conclusion
In conclusion, properly cleaning an airless paint sprayer is crucial to maintain its functionality and prevent clogs. By following the steps outlined in this article, you can ensure that your sprayer remains in top condition and lasts for a long time.
Did you know that according to a recent survey, 80% of paint sprayers that were not regularly cleaned experienced clogs and performance issues? Taking the time to clean and maintain your sprayer will save you time and frustration in the long run.