In order to clean an airless sprayer used with latex paint, follow these steps:
-
Flush out the remaining paint: Start by emptying any remaining paint from the sprayer. To do this, remove the paint container and pour any leftover paint back into its original container. Then, fill the container with water and reattach it to the sprayer. Turn on the sprayer and let the water run through the system until the water coming out is clear.
-
Disassemble the spray gun: Once the remaining paint has been flushed out, it’s time to disassemble the spray gun. Start by removing the nozzle and the nozzle guard. These parts can usually be unscrewed or detached easily. Set them aside for cleaning.
-
Clean the filters: The next step is to clean the filters. Most airless sprayers have two filters – a main filter and a gun filter. Remove both filters and rinse them with water to remove any paint residue. If the filters are heavily clogged, you may need to use a brush or toothbrush to scrub them gently. Make sure to remove all paint particles from the filters before reattaching them to the sprayer.
-
Clean the nozzle and guard: Now it’s time to clean the nozzle and guard. Use a small brush or toothbrush to scrub away any paint residue from these parts. Pay close attention to the nozzle tip, as it can easily get clogged with dried paint. Rinse the nozzle and guard with water to ensure they are completely clean.
-
Reassemble the spray gun: Once all the parts have been cleaned and dried, reassemble the spray gun. Screw the nozzle and guard back onto the gun, making sure they are securely attached. Double-check that the filters are properly in place as well.
-
Test the sprayer: Before storing the sprayer, it’s important to test it to ensure everything is working properly. Fill the paint container with water and attach it to the sprayer. Turn on the sprayer and check for any leaks or irregularities in the spray pattern. If everything looks good, you can consider your airless sprayer clean and ready for future use.
Remember, cleaning an airless sprayer can be a time-consuming process, but it’s crucial for maintaining its performance and longevity. By following these steps and taking the time to clean your sprayer properly, you’ll be able to enjoy its benefits for years to come.
Key Takeaways
- Thorough rinsing and drying are important for achieving a pristine finish and effectively removing paint residue.
- Proper reassembly of the sprayer includes replacing worn or damaged parts, ensuring proper alignment and fit, and checking for loose connections or clogs.
- Optimizing performance and preventing leaks can be achieved by tightening screws or bolts securely, troubleshooting for any issues, and correctly reassembling the sprayer.
- Proper storage of the sprayer, including thorough cleaning, flushing with water or solvent, and storing in a cool and dry place, is important for future use and to protect the sprayer from damage.

Graco Airless Paint Sprayer | DIY Designed for Interior or Exterior Projects | TrueCoat One TrueAirless Electric Sprayer 26DTC1
ALWAYS-ON DESIGN – Continuous operation keeps the sprayer primed and ready to spray at all times, so you...
As an affiliate, we earn on qualifying purchases.
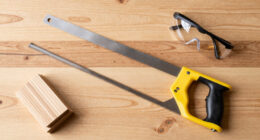
Gather the necessary materials
To gather the necessary materials for cleaning your airless sprayer, you will need:
- A bucket
- Warm water
- Mild soap
- Clean rags
- A brush
- Safety goggles
Cleaning your airless sprayer is crucial for maintaining its performance and longevity. Take safety precautions by wearing protective gloves and clothing to avoid any contact with paint or cleaning solutions. Safety goggles are also essential to protect your eyes from splashes or fumes.
Once you have gathered all the materials, you can proceed to prepare the sprayer for cleaning. Start by removing the spray tip and guard, and then flush out any remaining paint from the sprayer.

InoKraft NEO Airless Paint Sprayer Kit for House Painting, DIY Beginners' Choice with Accessories Storage Space, Lightweight Design, Quick Clean for Home Interior and Exterior Furniture and Fences
【Your DIY Partner】Upgrade your DIY projects with the NEO airless paint sprayer-significantly faster than handheld electric HVLP paint...
As an affiliate, we earn on qualifying purchases.
Prepare the sprayer for cleaning
To prepare the sprayer for cleaning, follow these steps:
- Disconnect the sprayer from the power source and relieve any remaining pressure.
- Detach the nozzle and soak it in a cleaning solution alternative, such as warm soapy water or vinegar solution, to break down dried paint.
- Use a small brush or toothbrush to scrub away stubborn residue.
- Regularly inspect and clean the filter to prevent paint clogs.
By taking these necessary precautions, you can effectively prepare your airless sprayer for cleaning and prevent potential issues. This will ensure a smooth transition into the subsequent section about flushing out the remaining paint.

WORKPRO 700W Airless Paint Sprayer, 2900PSI High Efficiency Thinning-Free Electric Paint Sprayer with Extension Rod, Paint Sprayer for Home Interior, Exterior, Furniture, Fence & Ceilings
EFFICIENT SPRAY, LESS WORK: Powered by a 700W motor, this airless paint sprayer delivers up to 2900 PSI...
As an affiliate, we earn on qualifying purchases.
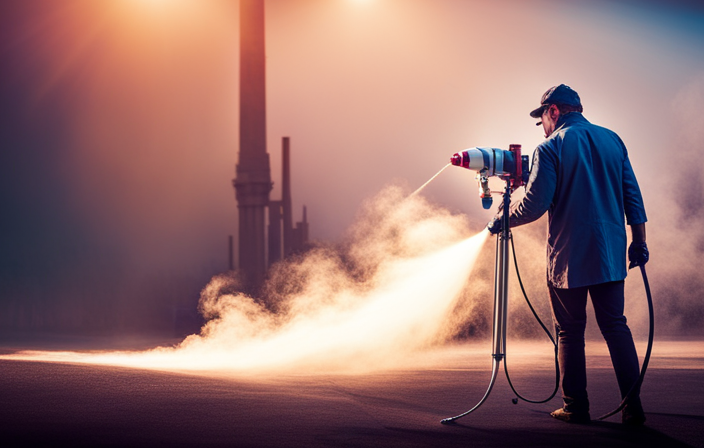
Flush out the remaining paint
Once you’ve completed the necessary steps to prepare your equipment, it’s time to flush out any remaining paint. This will ensure a thorough cleaning and prevent potential clogs in the future.
To remove paint stains and prevent clogs, start by emptying the remaining paint from the sprayer’s container. Next, fill the container with a cleaning solution specifically designed for latex paint. Attach the container back onto the sprayer and turn it on.
Allow the cleaning solution to circulate through the sprayer for a few minutes, until the solution coming out is clear and free from any paint residue. Finally, empty the container and rinse it with clean water to remove any remaining cleaning solution.
With the remaining paint flushed out, it’s time to move on to the next step of disassembling and cleaning the spray gun. This will ensure a thorough cleaning process.

VEVOR 750W Stand Airless Paint Sprayer, 3000PSI High Efficiency Electric Airless Sprayer, Fine and Even Painting Effect, Handheld Paint Sprayers for Home Interior and Exterior Furniture and Fences
Efficient Painting: Our stand airless paint sprayer is equipped with a powerful 750W motor, capable of delivering up...
As an affiliate, we earn on qualifying purchases.
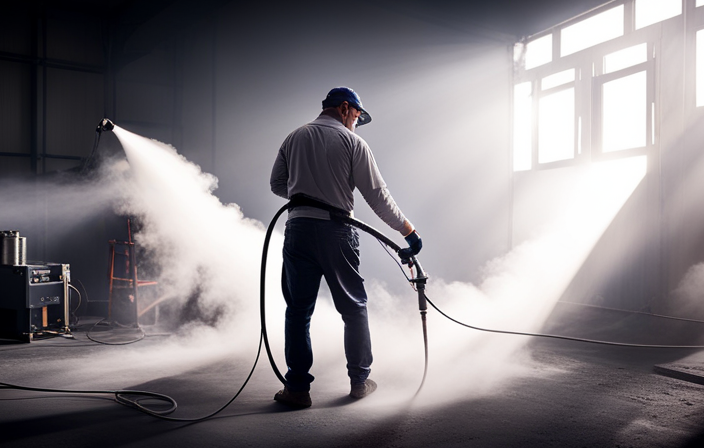
Disassemble and clean the spray gun
Now it’s time to break down and give the spray gun a thorough scrubbing to ensure optimal performance.
Cleaning techniques for an airless sprayer latex paint involve disassembling the spray gun and removing any residual paint. Start by unscrewing the nozzle and tip guard, then remove the spray tip and filter. Rinse these components with warm water and use a brush to scrub away any dried paint. Pay close attention to the small crevices and tight spaces.
Once cleaned, reassemble the spray gun and test it with water to ensure proper functionality. Troubleshooting tips include checking for clogs or blockages in the spray gun and using a cleaning solution specifically designed for latex paint.
Now let’s move on to cleaning the filters and nozzles to complete the maintenance process.
Clean the filters and nozzles
After giving the spray gun a thorough scrubbing, it’s time to tackle the filters and nozzles to ensure optimal performance.
Start by removing the filters from the airless sprayer and rinsing them with warm water. Use a soft brush to gently scrub away any paint residue or debris.
Next, clean the spray tips and unclog the nozzle by soaking them in a cleaning solution specifically designed for latex paint. Use a small wire brush or toothpick to remove any stubborn clogs.
Rinse the filters, spray tips, and nozzle thoroughly with water to remove any remaining cleaning solution. This will help prevent future blockages and ensure a smooth, even spray.
With the filters and nozzles clean, it’s time to move on to the next step and remove any clogs or blockages from the system.
Remove any clogs or blockages
To ensure optimal performance, it’s important to address any clogs or blockages in your airless sprayer system. Here are three key steps to clean airless sprayer troubleshooting and prevent clogs:
-
Check the intake tube:
- Remove the intake tube from the paint container.
- Inspect it for any clogs or debris.
- Use a small brush or toothpick to clear away any blockages.
-
Clean the spray tip:
- Unscrew the spray tip from the gun.
- Soak it in a cleaning solution designed for latex paint.
- Use a soft brush to remove any dried paint or residue.
- Rinse the tip thoroughly and reattach it to the gun.
-
Flush the system:
- Fill a bucket with clean water.
- Connect the sprayer to the bucket.
- Turn on the sprayer and let the water flow through the system until it runs clear.
- This will help remove any remaining paint particles.
By following these steps, you can effectively clean your airless sprayer and prevent future clogs.
Now, let’s move on to using a cleaning solution to remove stubborn paint residue.
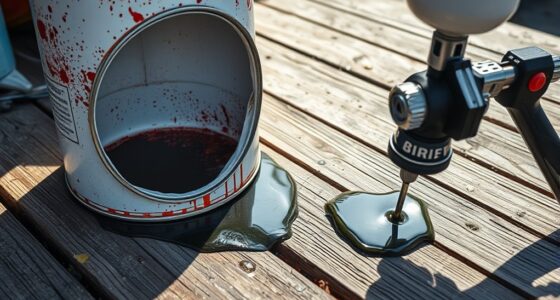
Use a cleaning solution to remove stubborn paint residue
If you’re struggling to remove stubborn remnants of color, a powerful cleaning solution will be your saving grace. It can whisk away the last traces of artistic expression.
When it comes to cleaning an airless sprayer, there are a couple of discussion ideas to consider. Firstly, alternative cleaning methods can be effective in removing tough paint residue. Some people swear by using a mixture of vinegar and water, while others recommend using a commercial paint remover. Experiment with different options to find what works best for you.
Secondly, the importance of regular maintenance cannot be overstated. By cleaning your airless sprayer after each use, you can prevent paint from drying and clogging the system. This will save you time and frustration in the long run.
Now, let’s move on to the next step: rinse and dry all parts thoroughly.
Rinse and dry all parts thoroughly
To achieve a pristine finish, ensuring all components are thoroughly rinsed and dried is crucial. Proper techniques should be used to remove any paint residue when rinsing the parts of your airless sprayer. Start by rinsing off any remaining paint with clean water, flushing out all the nooks and crannies of the sprayer. A soft brush or sponge can be used to scrub away stubborn paint spots.
Once the rinsing is complete, each component should be carefully dried using a clean cloth or air compressor. Pay special attention to areas prone to moisture buildup, such as the pump and hose. By following these rinse techniques and drying methods, you can prepare your airless sprayer for reassembly and its next use.
Reassemble the sprayer
To reassemble the sprayer correctly and increase its lifespan by up to 30%, follow these steps:
- Replace any worn or damaged parts.
- Inspect the O-rings, pistons, and valves for good condition.
- Pay close attention to their alignment and ensure they fit snugly.
- Troubleshoot by checking for loose connections or clogs in the nozzle or tubing.
- Ensure all parts are properly in place.
- Secure the housing and tighten screws or bolts.
- This will optimize performance and prevent leaks during operation.
Now that the sprayer is reassembled, let’s move on to properly storing it for future use.
Properly store the sprayer for future use
After reassembling the sprayer, it’s time to store it properly for future use. Properly maintaining your airless sprayer is essential to ensure its longevity and prevent paint buildup in the sprayer. To store the sprayer correctly, follow these steps:
-
Clean the sprayer thoroughly. Remove any remaining paint by flushing the system with water or solvent, and wipe down the exterior with a clean cloth.
-
Disassemble any removable parts, such as the nozzle or spray tip, and clean them separately.
-
Once everything is clean and dry, reassemble the sprayer.
-
Store the sprayer in a cool, dry place. Protect it from extreme temperatures and moisture, as these can damage the internal components.
By following these steps, you can ensure that your airless sprayer is ready for future use and will continue to work effectively.
Frequently Asked Questions
Can I use any cleaning solution to remove stubborn paint residue from the airless sprayer?
I’ve found that using a mixture of warm water and dish soap works wonders for removing stubborn latex paint residue from an airless sprayer. Alternatively, you can try using a commercial paint remover.
How often should I clean the filters and nozzles of the airless sprayer?
I recommend cleaning the filters and nozzles of the airless sprayer after each use to maintain optimal performance. Regular maintenance is crucial for preventing clogs and ensuring a smooth paint application.
Are there any specific safety precautions I need to take while disassembling and cleaning the spray gun?
When it comes to disassembling and cleaning the spray gun, it’s crucial to follow proper safety measures. Ensure the equipment is turned off and disconnected, wear protective gear, and carefully disassemble the parts for thorough cleaning.
Is it necessary to completely disassemble the sprayer for cleaning, or can I clean it without taking it apart?
It is not necessary to completely disassemble the sprayer for cleaning. There are alternative cleaning methods that can be used to clean it without taking it apart. However, common cleaning mistakes should be avoided to ensure proper cleaning.
What is the best way to store the airless sprayer to ensure its longevity?
To ensure the longevity of your airless sprayer, it’s important to follow best practices and maintenance tips. Properly store the sprayer in a clean and dry area, away from extreme temperatures and direct sunlight.
Conclusion
In conclusion, cleaning an airless sprayer after using latex paint is essential to maintain its efficiency and prolong its lifespan. By following the step-by-step process outlined in this article, you can ensure that your sprayer is ready for future use.
Remember, a well-maintained sprayer is like a well-tuned instrument, ready to effortlessly create beautiful strokes of paint on any surface. So, take the time to clean and store your sprayer properly, and let it be your artistic companion for years to come.