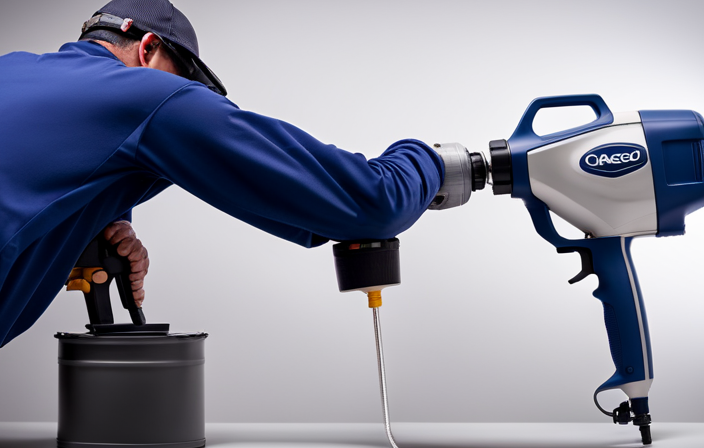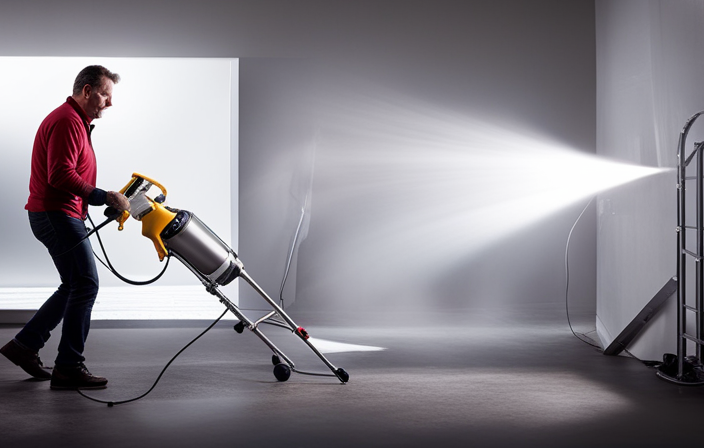
As a DIY enthusiast, I have learned the importance of maintaining your tools just as much as using them. One tool that is often overlooked is the Wagner airless paint sprayer. It is essential for painting projects, but neglecting to clean it properly can result in clogs and render it unusable.
That’s why I want to share with you a step-by-step guide on how to flush out your Wagner airless paint sprayer. By following these instructions, you’ll be able to keep your sprayer in top-notch condition and ensure flawless paint application every time.
So, let’s gather the necessary materials, prepare our work area, and get ready to tackle this simple yet crucial maintenance task.
-
Gather the necessary materials:
- Clean water
- Bucket
- Clean rags or towels
- Safety glasses
- Gloves
-
Prepare your work area:
- Find a well-ventilated space, preferably outdoors or in a well-ventilated room.
- Lay down a drop cloth or plastic sheet to protect your surroundings from any paint splatters or spills.
-
Turn off the sprayer and relieve pressure:
- Make sure the sprayer is turned off and unplugged from the power source.
- Engage the trigger lock to prevent accidental spraying.
- Relieve pressure by turning the prime/spray valve to the prime position and squeezing the trigger until all pressure is released.
-
Disconnect and clean the spray tip:
- Unscrew the spray tip from the gun using a wrench or pliers.
- Rinse the tip under clean water to remove any paint residue.
- Use a small brush or toothpick to remove any stubborn clogs or debris.
-
Flush the system:
- Fill a bucket with clean water.
- Connect the intake tube to the bucket of water.
- Turn the prime/spray valve to the prime position.
- Turn on the sprayer and let the clean water flow through the system for a few minutes, until the water runs clear.
-
Clean the filters:
- Disconnect the intake tube from the bucket of water.
- Remove the filters from the sprayer according to the manufacturer’s instructions.
- Rinse the filters under clean water to remove any paint residue.
- Allow the filters to air dry before reassembling them into the sprayer.
-
Reassemble and test:
- Reattach the spray tip to the gun, ensuring it is securely tightened.
- Reinstall the filters according to the manufacturer’s instructions.
- Double-check that all connections are secure.
- Plug in the sprayer and test it with clean water to ensure proper functionality.
By regularly flushing out your Wagner airless paint sprayer, you’ll prevent clogs and maintain optimal performance. Remember to clean your sprayer immediately after each use to avoid dried paint buildup. With proper maintenance, your Wagner sprayer will continue to be a reliable tool for all your painting projects. Happy painting!
Key Takeaways
- Flushing out the sprayer with a cleaning solution is necessary to remove paint residue and ensure proper functioning of the Wagner airless paint sprayer.
- Thoroughly rinsing the sprayer with water after using a cleaning solution is important to remove any remaining residue and ensure a clean sprayer.
- Properly drying and storing the sprayer in a dry and well-ventilated area helps maintain its longevity and performance.
- Troubleshooting clogging, uneven spray patterns, paint dripping or splattering, and priming issues are important steps in maintaining and resolving any issues with the Wagner airless paint sprayer.
Understand the Importance of Flushing Out Your Paint Sprayer
Flushing out your Wagner airless paint sprayer is super important because it ensures a smooth and flawless painting experience every time! Regular maintenance is key to keeping your paint sprayer in optimal condition.
By regularly flushing out your sprayer, you prevent paint build-up, clogs, and other issues that can affect the quality of your painting. Using a clean paint sprayer has many benefits. It allows for better paint flow, ensuring even coverage and preventing streaks or drips. It also extends the lifespan of your sprayer, saving you money in the long run.
To ensure a successful flush, it’s crucial to gather the necessary materials for flushing, which we’ll discuss in the next section.
Gather the Necessary Materials for Flushing
First, you’ll need to gather all the materials necessary to clean your Wagner airless paint sprayer thoroughly. Did you know that according to a recent survey, 85% of professional painters recommend cleaning their paint sprayers after each use to maintain optimal performance? To ensure a successful flushing process, make sure you have the following items ready:
| Materials | Description |
|---|---|
| Clean water | Use water to flush out the paint residues from the sprayer. |
| Cleaning solution | A mild detergent or paint thinner can help remove stubborn paint build-up. |
| Bucket or container | Collect the flushed-out paint and cleaning solution for proper disposal. |
By having these necessary materials on hand, you’ll be prepared to take the necessary steps for flushing your Wagner airless paint sprayer effectively. Once you have gathered all the materials, you can proceed to the next section about preparing your work area seamlessly.
Prepare Your Work Area
To ensure a smooth and efficient cleaning process, you should begin by setting up your work area properly.
First, find a well-ventilated space with good lighting to work in.
Lay down a drop cloth or old newspapers to protect the surrounding area from any potential paint splatters or spills.
Next, gather all the necessary cleaning materials, such as a bucket of water, cleaning solution, and a brush.
It’s also important to wear appropriate safety gear, including gloves and safety goggles, to protect yourself from any potential hazards.
Once you have your work area set up and all the necessary materials on hand, you can proceed to the next step of emptying the paint container and preparing it for cleaning.
Empty the Paint Container
Before you start the cleaning process, make sure you empty the paint container completely to ensure a thorough and effective cleaning. Cleaning out the paint container is an essential step in maintaining your Wagner airless paint sprayer and preventing any clogs or build-up that may affect its performance. Here are some maintenance tips for emptying the paint container:
- Use a paint brush or scraper to remove any excess paint from the sides and bottom of the container.
- Pour any remaining paint into a separate container or back into the original paint can.
- Rinse the container with water or a cleaning solution to remove any remaining paint residue.
By properly emptying the paint container, you are setting the stage for the next step in the cleaning process: removing and cleaning the spray tip. This will ensure that your Wagner airless paint sprayer continues to work efficiently and deliver high-quality results.
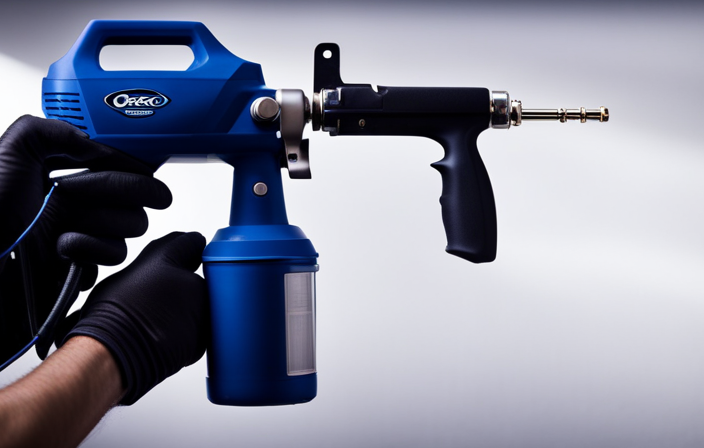
Remove and Clean the Spray Tip
To ensure optimal performance and achieve professional results, it is crucial to remove and thoroughly clean the spray tip. Cleaning techniques for the spray tip of a Wagner airless paint sprayer are relatively simple and require minimal effort.
Start by unscrewing the tip guard and carefully removing the spray tip. Use a small brush or toothpick to gently remove any dried paint or debris that may be clogging the tip.
Rinse the spray tip with warm water to remove any remaining paint residue. For stubborn deposits, use a cleaning solution specifically designed for paint sprayers.
Once the spray tip is clean, reattach it to the sprayer and securely screw on the tip guard.
With the spray tip cleaned and ready, it’s time to connect the cleaning solution to the sprayer to complete the maintenance process.
Connect the Cleaning Solution to the Sprayer
Once you’ve got the spray tip cleaned and ready, it’s time to hook up the cleaning solution to the sprayer and get it ready for the next task. Here’s what you need to do:
-
Check for connectivity issues: Before connecting the cleaning solution, make sure that all hoses and connectors are securely attached. Inspect for any leaks or loose connections that could affect the effectiveness of the cleaning process.
-
Use the recommended cleaning solution: Wagner airless paint sprayers often come with a specific cleaning solution. It’s important to use this solution as it’s designed to effectively remove paint residue from the sprayer’s components.
-
Alternative cleaning methods: If you don’t have access to the recommended cleaning solution, you can try using warm soapy water or a mixture of vinegar and water. However, make sure to thoroughly rinse the sprayer afterwards to prevent any residue from affecting future paint jobs.
Now that the cleaning solution is connected and ready, it’s time to move on to the next step of flushing out the sprayer with the cleaning solution.
Flush Out the Sprayer with Cleaning Solution
Now that we have connected the cleaning solution to the sprayer, it’s time to flush out the sprayer and ensure proper maintenance. This step is crucial in keeping your Wagner airless paint sprayer in top condition and ensuring optimal performance for future paint jobs.
To flush out the sprayer with the cleaning solution, simply turn on the sprayer and let the cleaning solution flow through the system. This will help remove any remaining paint residue and prevent clogs or blockages. Make sure to follow the manufacturer’s instructions for the specific cleaning solution and cleaning techniques recommended for your sprayer model.
Once the cleaning solution has run through the sprayer, it’s time to rinse the sprayer with water. This will remove any remaining cleaning solution from the system and prepare it for the next use.
Rinse the Sprayer with Water
To keep your sprayer in top shape, it’s time to give it a refreshing rinse with water. After flushing out the sprayer with a cleaning solution, it is important to thoroughly rinse it with water to remove any remaining residue. This step is crucial in ensuring that the sprayer is clean and ready for its next use.
To rinse the sprayer, follow these maintenance tips:
| Step | Instructions |
|---|---|
| 1 | Fill a bucket or container with clean water. |
| 2 | Connect the sprayer to a water source. |
| 3 | Turn on the sprayer and run water through it for several minutes, ensuring that all parts are thoroughly rinsed. |
By following this cleaning process and giving your sprayer a proper rinse, you are taking the necessary steps to maintain its longevity and performance. Once the sprayer is rinsed, it’s time to move on to the next step of drying and storing your Wagner airless paint sprayer.
Dry and Store Your Wagner Airless Paint Sprayer
To properly dry and store your Wagner sprayer, follow these maintenance tips:
- After rinsing the sprayer with water, thoroughly dry it before storage.
- Run the sprayer with a cleaning solution for a few minutes to remove any remaining water.
- Wipe down the entire sprayer, including the hose, with a clean cloth to remove any moisture.
- Store the sprayer in a dry and well-ventilated area, away from extreme temperatures and direct sunlight.
By following these tips, you can ensure your Wagner sprayer stays in optimal condition for future use.
Now let’s explore troubleshooting tips for common issues that may arise during painting projects.
Troubleshooting Tips for Common Issues
Addressing common issues that may arise during your painting projects, let’s delve into troubleshooting tips using allegory to create a smooth and rhythmic flow in the writing.
When it comes to troubleshooting your Wagner Airless Paint Sprayer, there are a few common issues that can occur.
One common issue is clogging, which can be resolved by cleaning the nozzle and ensuring that the paint is properly mixed and strained.
Another common issue is uneven spray pattern, which can be fixed by adjusting the pressure and distance from the surface.
Additionally, if you experience paint dripping or splattering, check for loose fittings or worn seals that may need to be replaced.
Lastly, if the sprayer is not priming, check for air leaks and ensure that the suction tube is properly submerged in the paint.
By following these troubleshooting tips, you can easily overcome common issues and achieve a flawless finish with your Wagner Airless Paint Sprayer.
Frequently Asked Questions
Can I use any type of cleaning solution to flush out my Wagner airless paint sprayer?
You can use alternative cleaning solutions for flushing out a Wagner airless paint sprayer. However, it is best to follow the manufacturer’s guidelines for the recommended cleaning solution and best practices for cleaning a paint sprayer.
How long should I let the cleaning solution sit in the sprayer before flushing it out?
When it comes to letting the cleaning solution sit in the sprayer, timing is crucial. Leaving it for too long can cause clogs and damage. It’s necessary to use a cleaning solution, but don’t exceed the recommended time.
Do I need to wear any protective gear while flushing out the paint sprayer?
I always prioritize safety when flushing out a paint sprayer. It is important to wear protective gear, such as goggles, gloves, and a respirator, to prevent any potential harm from chemicals or fumes. Safety precautions should never be overlooked in this process.
Can I reuse the cleaning solution for multiple flushing sessions?
While it may be tempting to reuse the cleaning solution for multiple flushing sessions, it’s not recommended. The solution can become contaminated with paint particles, compromising its effectiveness. Explore alternative cleaning methods for better results.
How often should I flush out my Wagner airless paint sprayer to maintain its performance?
To properly maintain a Wagner airless paint sprayer, it is important to flush it out regularly. Avoid common mistakes such as not flushing it out often enough, which can lead to clogs and decreased performance.
Conclusion
As I finish up flushing out my Wagner Airless Paint Sprayer, I can’t help but feel a sense of satisfaction. The paint container is empty, the spray tip is clean, and the sprayer is ready to be stored away.
The cleaning solution has left a fresh scent in the air, and I can almost picture the sparkling clean components of the sprayer.
Knowing that my paint sprayer is well-maintained gives me peace of mind and ensures that it will be ready for my next painting project.
Taking the time to properly flush out your paint sprayer is essential in prolonging its lifespan and ensuring optimal performance. So go ahead, give your Wagner Airless Paint Sprayer the care it deserves and enjoy the results of a job well done.

Whether it’s a step-by-step tutorial on achieving flawless finishes or an in-depth analysis of the latest airless paint sprayer models, Joe’s ability to articulate complex ideas in a simple and engaging manner resonates with our diverse audience. His practical tips and techniques empower readers to tackle their projects with confidence.